Getting Started with Creating Memberships
A membership can protect and sell or provide access to a combination of courses, pages, and posts – mix and match what you would like included in your membership as you please.
Selling a course on its own doesn’t need a membership. But, memberships come with extra benefits. You can bundle several courses together and offer them at a discounted rate, giving users more value and encouraging broader engagement.
Memberships give you flexible payment options. You can customize how users pay for individual courses or selected collections, making it more accessible and appealing.
Memberships go beyond course delivery, offering a dynamic approach to content bundling, flexible pricing, and audience segmentation. Adding memberships makes your educational platform more flexible in terms of content packaging, user experience, and customizability.
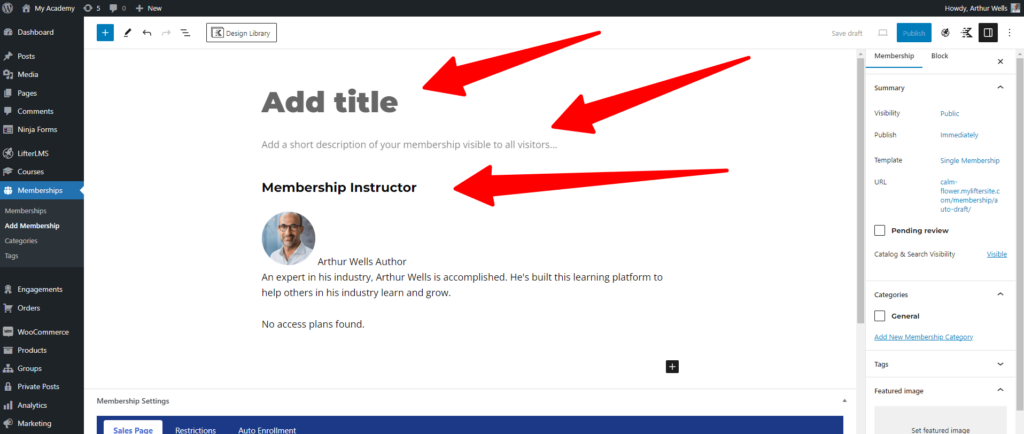
In your WordPress Admin, navigate to Memberships and select “Add Membership”.
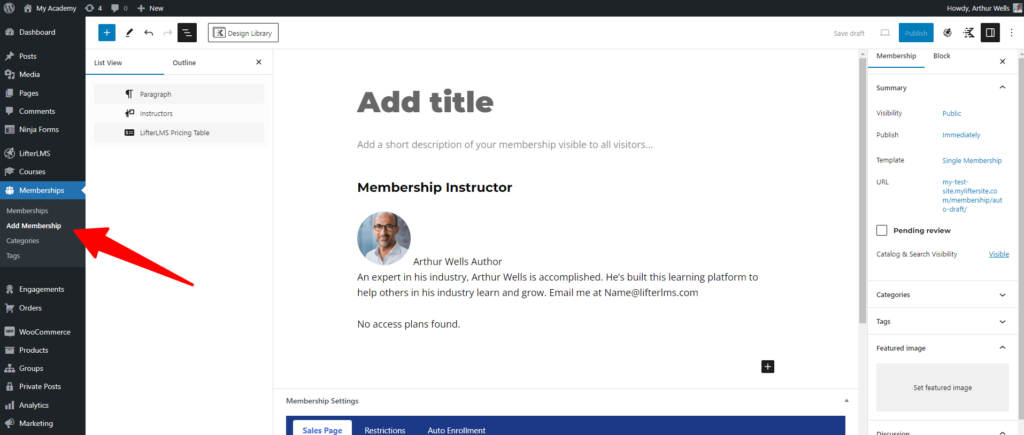
On this page, the initial settings include titling your membership and adding relevant content describing the included access.
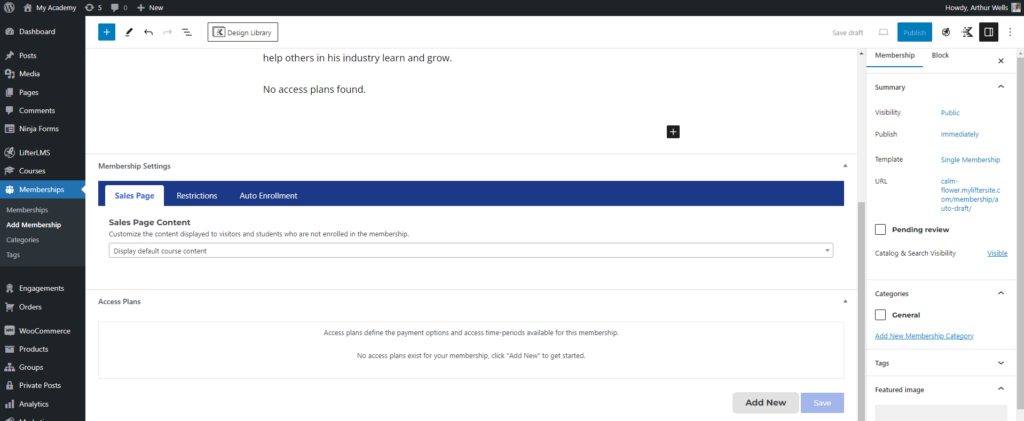
The second setting is Memberships Settings, which include options such as Sales Page, Restrictions, Auto Enrollment, and any integrations you might be using with LifterLMS.
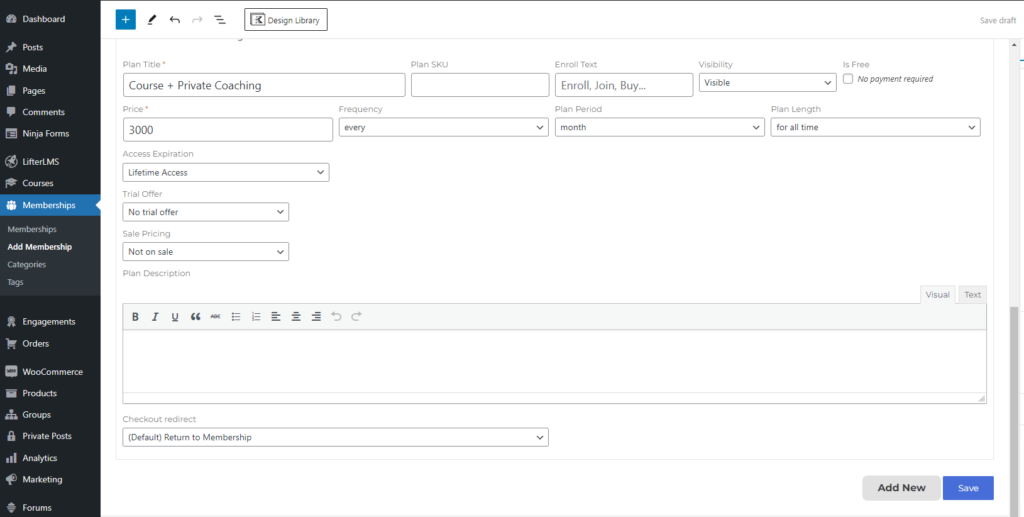
The third setting, Access Plans, lets you configure pricing options and access time periods tailored to your membership.
The fourth setting is Student Management. Note that this option becomes available only after you publish the membership. Once published, you can view a list of enrolled students and manage their enrollment status. This includes manual enrollment, unenrollment, or locating the trigger for enrollment.
Lastly, the Memberships setting offers choices for content restriction, disabling restriction, and creating custom plans for accessibility.
In the Membership Settings, you can customize the sales page content visible to unenrolled users and visitors. You have the option to establish a redirect for restricted access, display messages, and define notices for restricted content.
Through auto-enrollment you can also designate the courses that students automatically enroll in upon purchasing the membership.
Sales Page Custom Content
By default, the Sales Page custom content mirrors the initial information you provided for your membership, serving as the default option.
You have the flexibility to switch this to “Show custom content,” revealing a text input box. Here, you can input content specific to the membership, visible to visitors and individuals who haven’t enrolled.
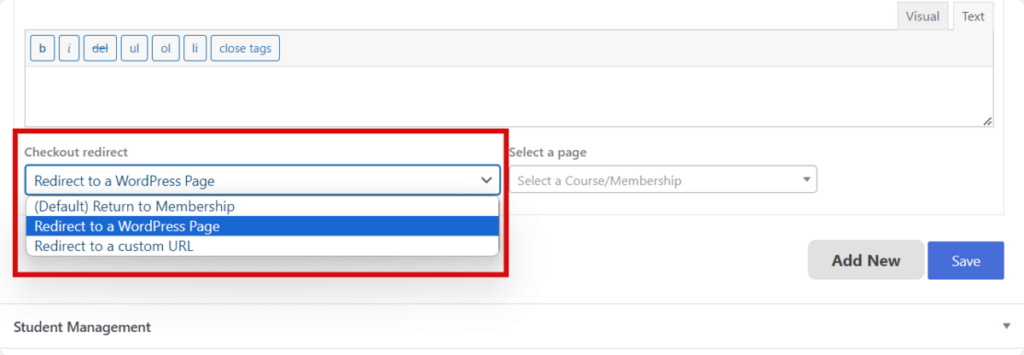
If you’ve configured a sales page, you can opt for the sales page to redirect either to that specific page on your website using “Redirect to WordPress Page,” or alternatively, redirect to a custom URL of your choice.
All these choices ensure that the sales content is displayed for users not enrolled in your membership and for visitors to the site.
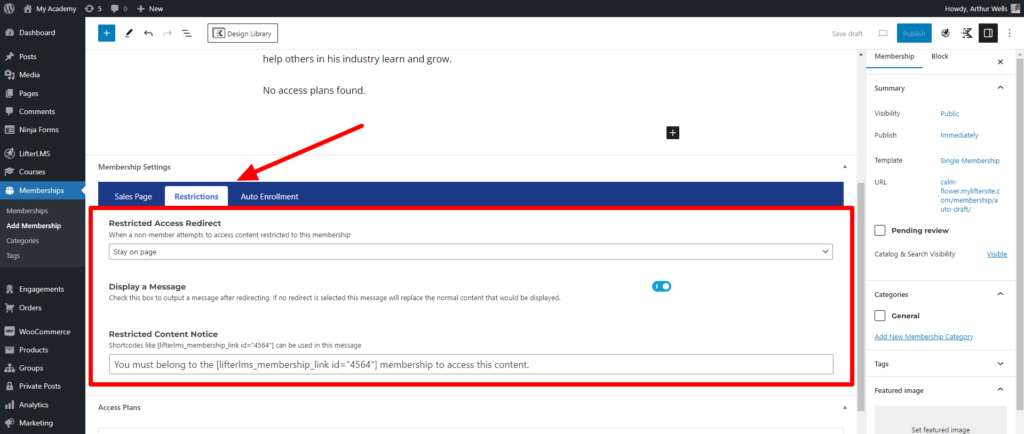
Restrictions
The second option, Restrictions, allows you to establish redirect preferences for content restricted by your membership. The default setting is to stay on the page, display a message, and show a standard restricted content notice.
Customizing Access Restrictions
You have the ability to modify these settings, adjusting what happens when someone tries to access content restricted to this membership.
Options include redirecting them to the membership sales page, guiding them to a custom WordPress Page, or directing them to a custom URL.
You also have control over toggling the display of a message on and off, and you can personalize the restricted content notice.
Auto Enrollment
The third option is the membership Auto Enrollment setting. This is the space where you can manage the courses that students automatically gain access to upon purchasing the membership.
Demo of Auto Enrollment
Displayed below is a list of courses set for auto-enrollment.
Beneath that, you’ll find the option to add courses using a dropdown menu.
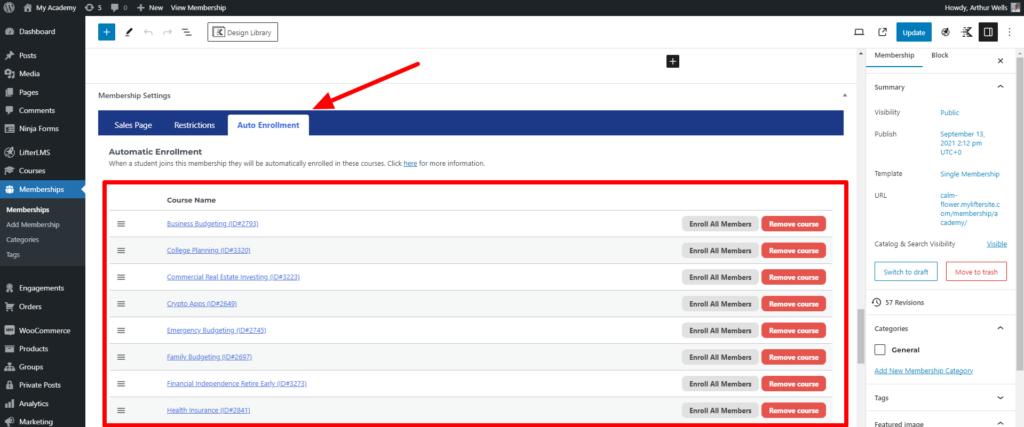
After adding a course for Auto Enrollment, you’ll notice it listed among the courses that students will enroll automatically in upon purchasing the membership.
It’s important to understand that enrollment doesn’t operate retroactively. If you add a new course to the membership, students who purchased the membership before the new course’s addition won’t be automatically enrolled in it.
However, a convenient solution is built-in. Next to the course on the list, you’ll find the option to “Enroll All Members.” This feature ensures that any students who joined the membership before you added the new course through membership auto-enrollment will now also be enrolled.
Now that the membership is prepared for launch, it’s time to add the pricing options. If you are using LifterLMS with Stripe, PayPal, or Authorize.Net, follow these instructions to set up your access plans.
Alternatively, you also have the option to create a checkout experience using the manual payment gateway integrated into the core free LifterLMS plugin.
For those utilizing WooCommerce to sell their course, here are the steps to follow. This guide will assist you in deciding between the LifterLMS native ecommerce system or WooCommerce.
Once your access plan is configured, you can further set up a Checkout Redirect, directing the membership customer to a personalized thank-you page after completing the purchase.
In addition to the Auto Enrollment settings, you gain additional control over student enrollment through the Student Management section. This empowers you to manually enroll students into memberships and also unenroll them.
Within this section, you will find insights into the triggers that initiated student enrollment, along with links to relevant order information for each student.

When setting up your membership page, it’s important to distinguish between using it for sales and making it an info hub for students.
To keep your sales info separate from general member resources, you can either create a dedicated sales page or turn on the sales info setting in Membership Settings. This ensures a clean presentation for both visitors and enrolled students.
For a more personalized Membership page, use blocks or shortcodes to customize the visitor and members-only views.


