How to Create a Course with LifterLMS
Building an online course takes time and planning, but LifterLMS makes the setup process simple for beginners. In this guide, we will teach you how to build your first course and cover all essential steps.
Understanding the LifterLMS hierarchy makes it easier to follow the setup process. Let’s take a look at the key building blocks you will use to organize your educational content:
- Course: The highest level of organization that contains all your learning materials and settings.
- Sections: A section is a module or chapter that groups related lessons.
- Lessons: The specific pages where your students interact with text, video, and audio content.
- Quizzes: Assessments attached to lessons to check understanding or assess student progress.
- Assignments: Optional practical tasks that students submit for review or feedback. (Assignments require the LifterLMS Assignments add-on.)
- Access Plans: The pricing and enrollment rules that determine how students gain entry to your course.
To begin, create a new course, add the main course details, and build the lesson structure students will follow.
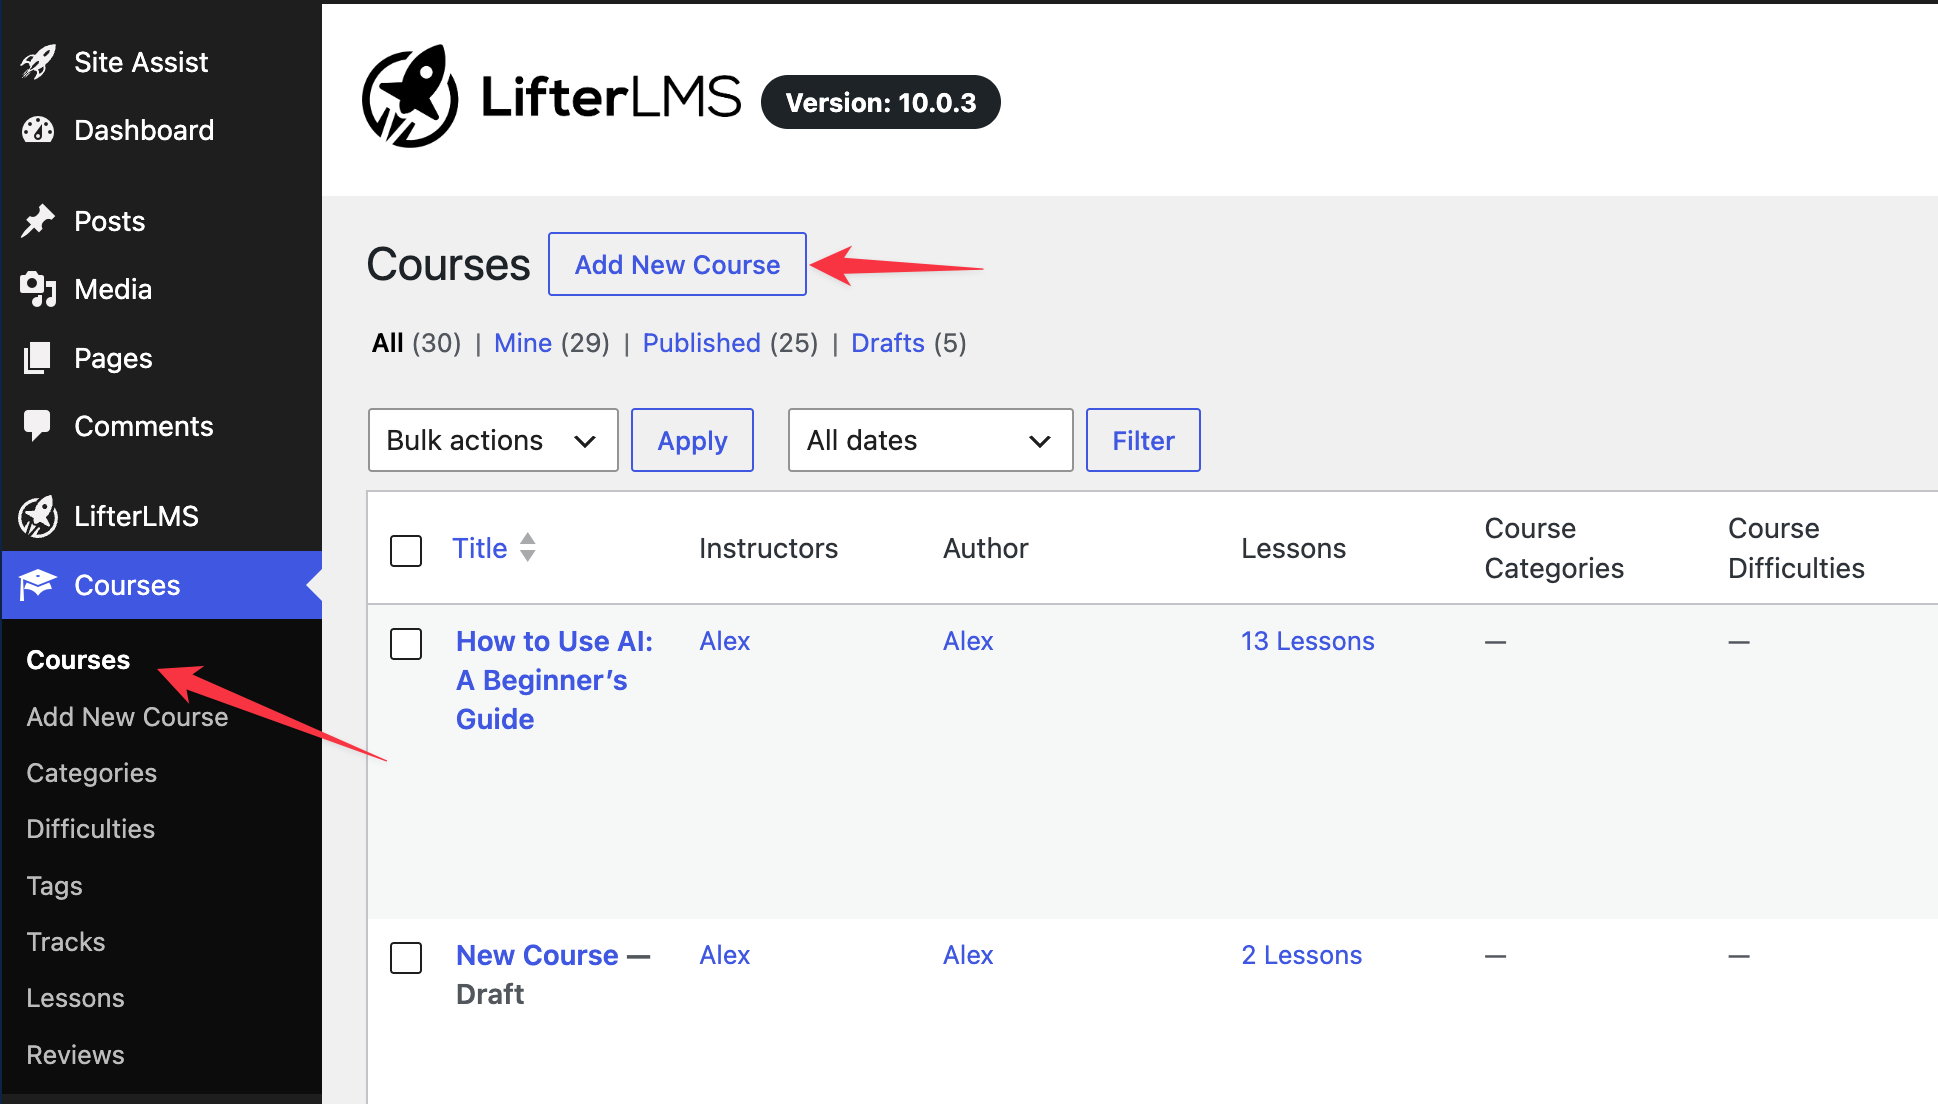
- Navigate to the Courses tab in your WordPress dashboard and click the Add New Course button at the top of the screen to create a blank course.
- Enter the title of your course into the “Add title” field. You should pick a title that clearly describes the course’s outcome or topic. Next, type your course description in the text editor. Your description should explain who the course is for, what students will learn, and what they will be able to do by the end.
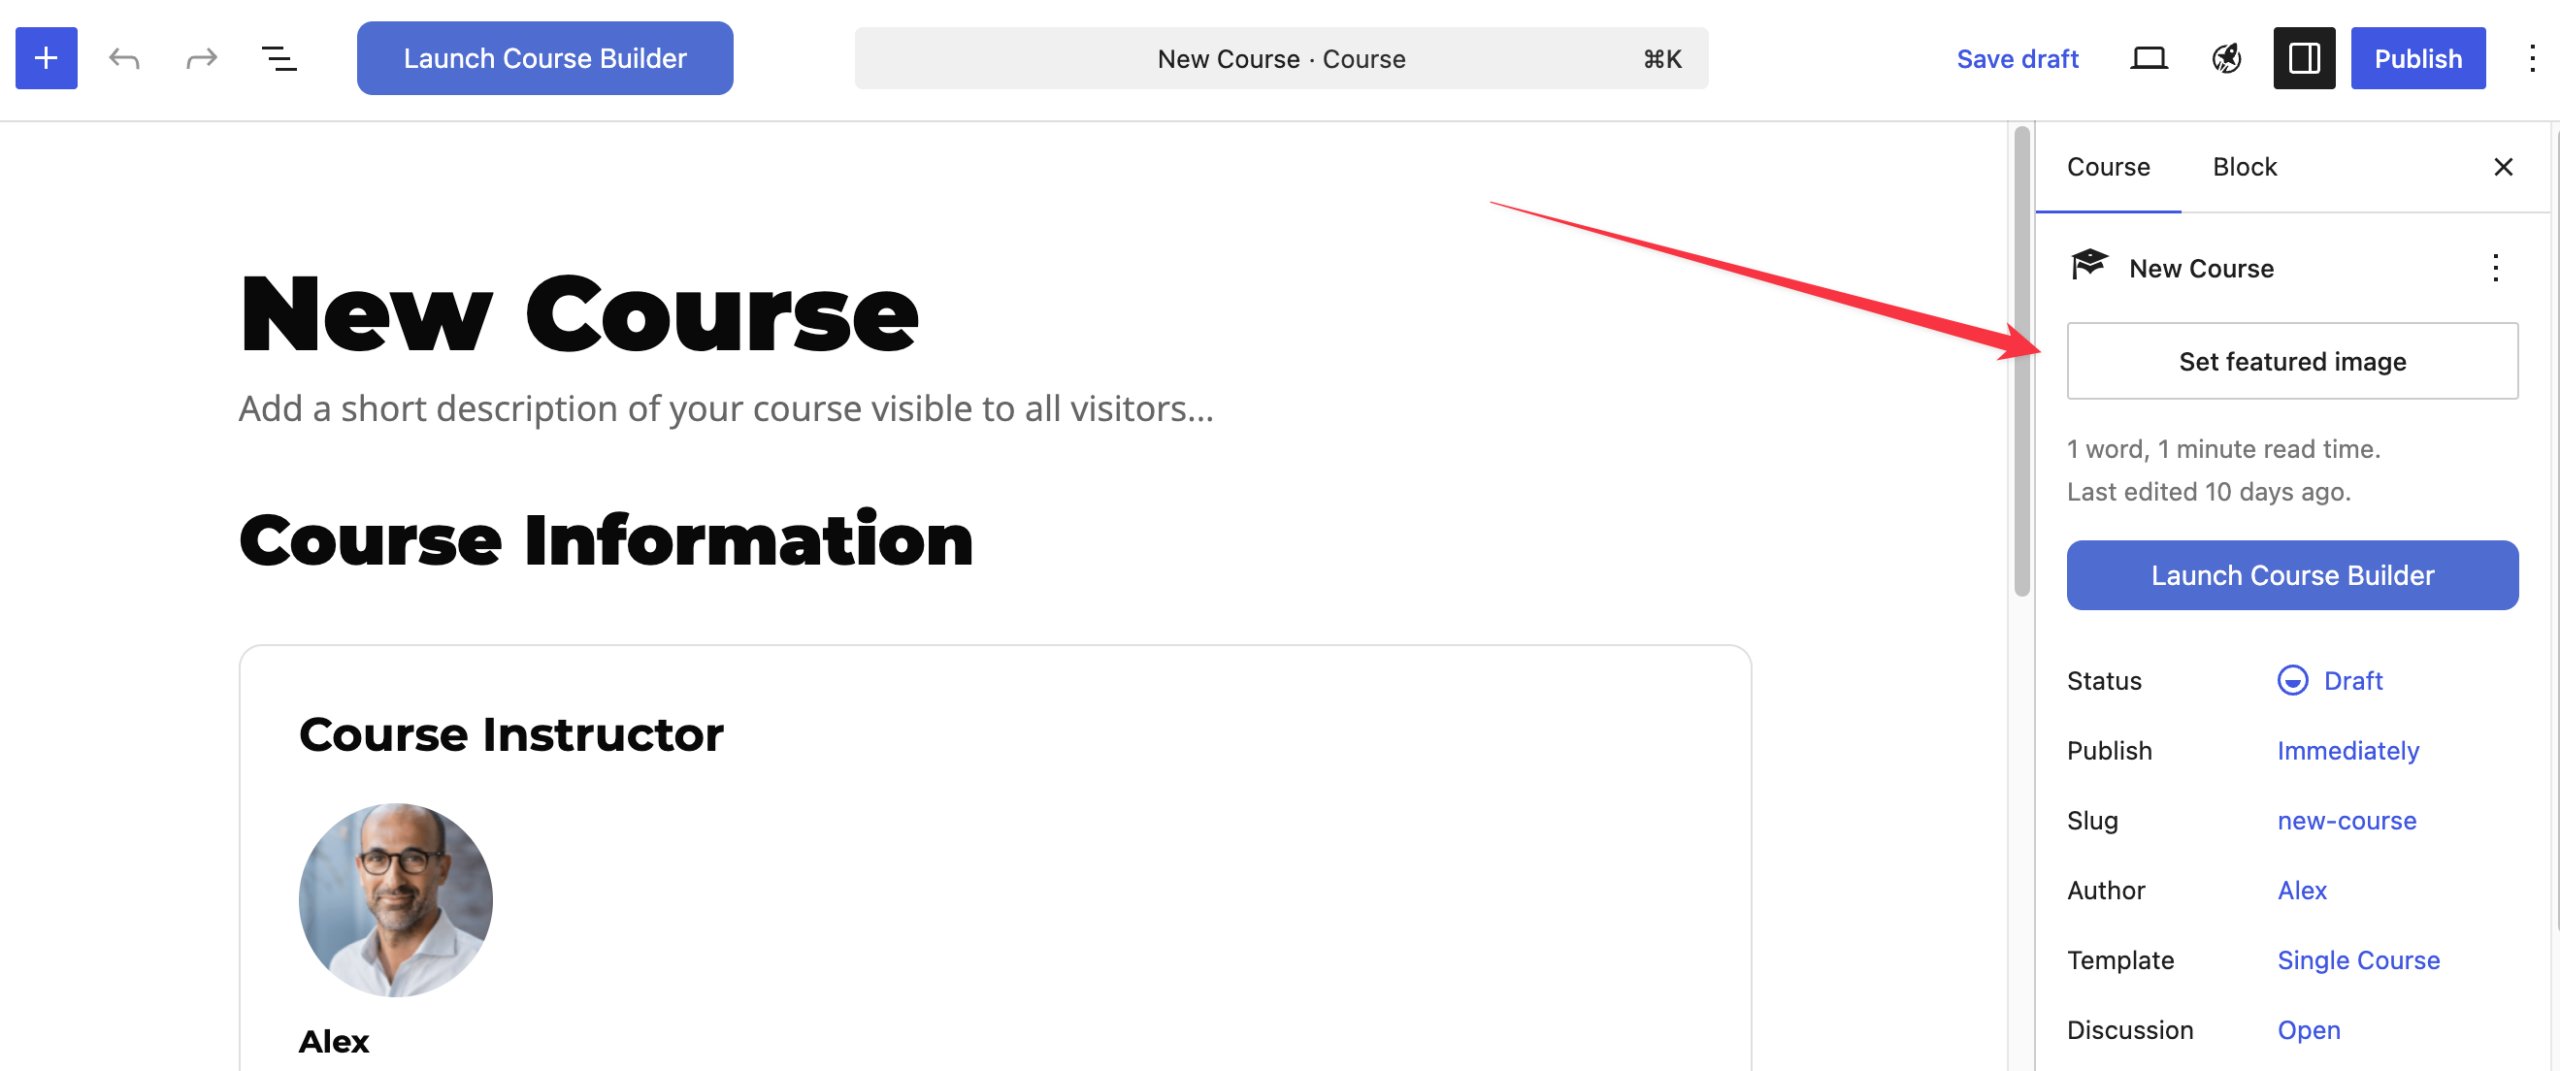
- Locate the “Featured image” section on the right side of your screen. Click the Set featured image button to add a visual representation of your course. This image appears on the course page and helps students identify the course in your catalog.
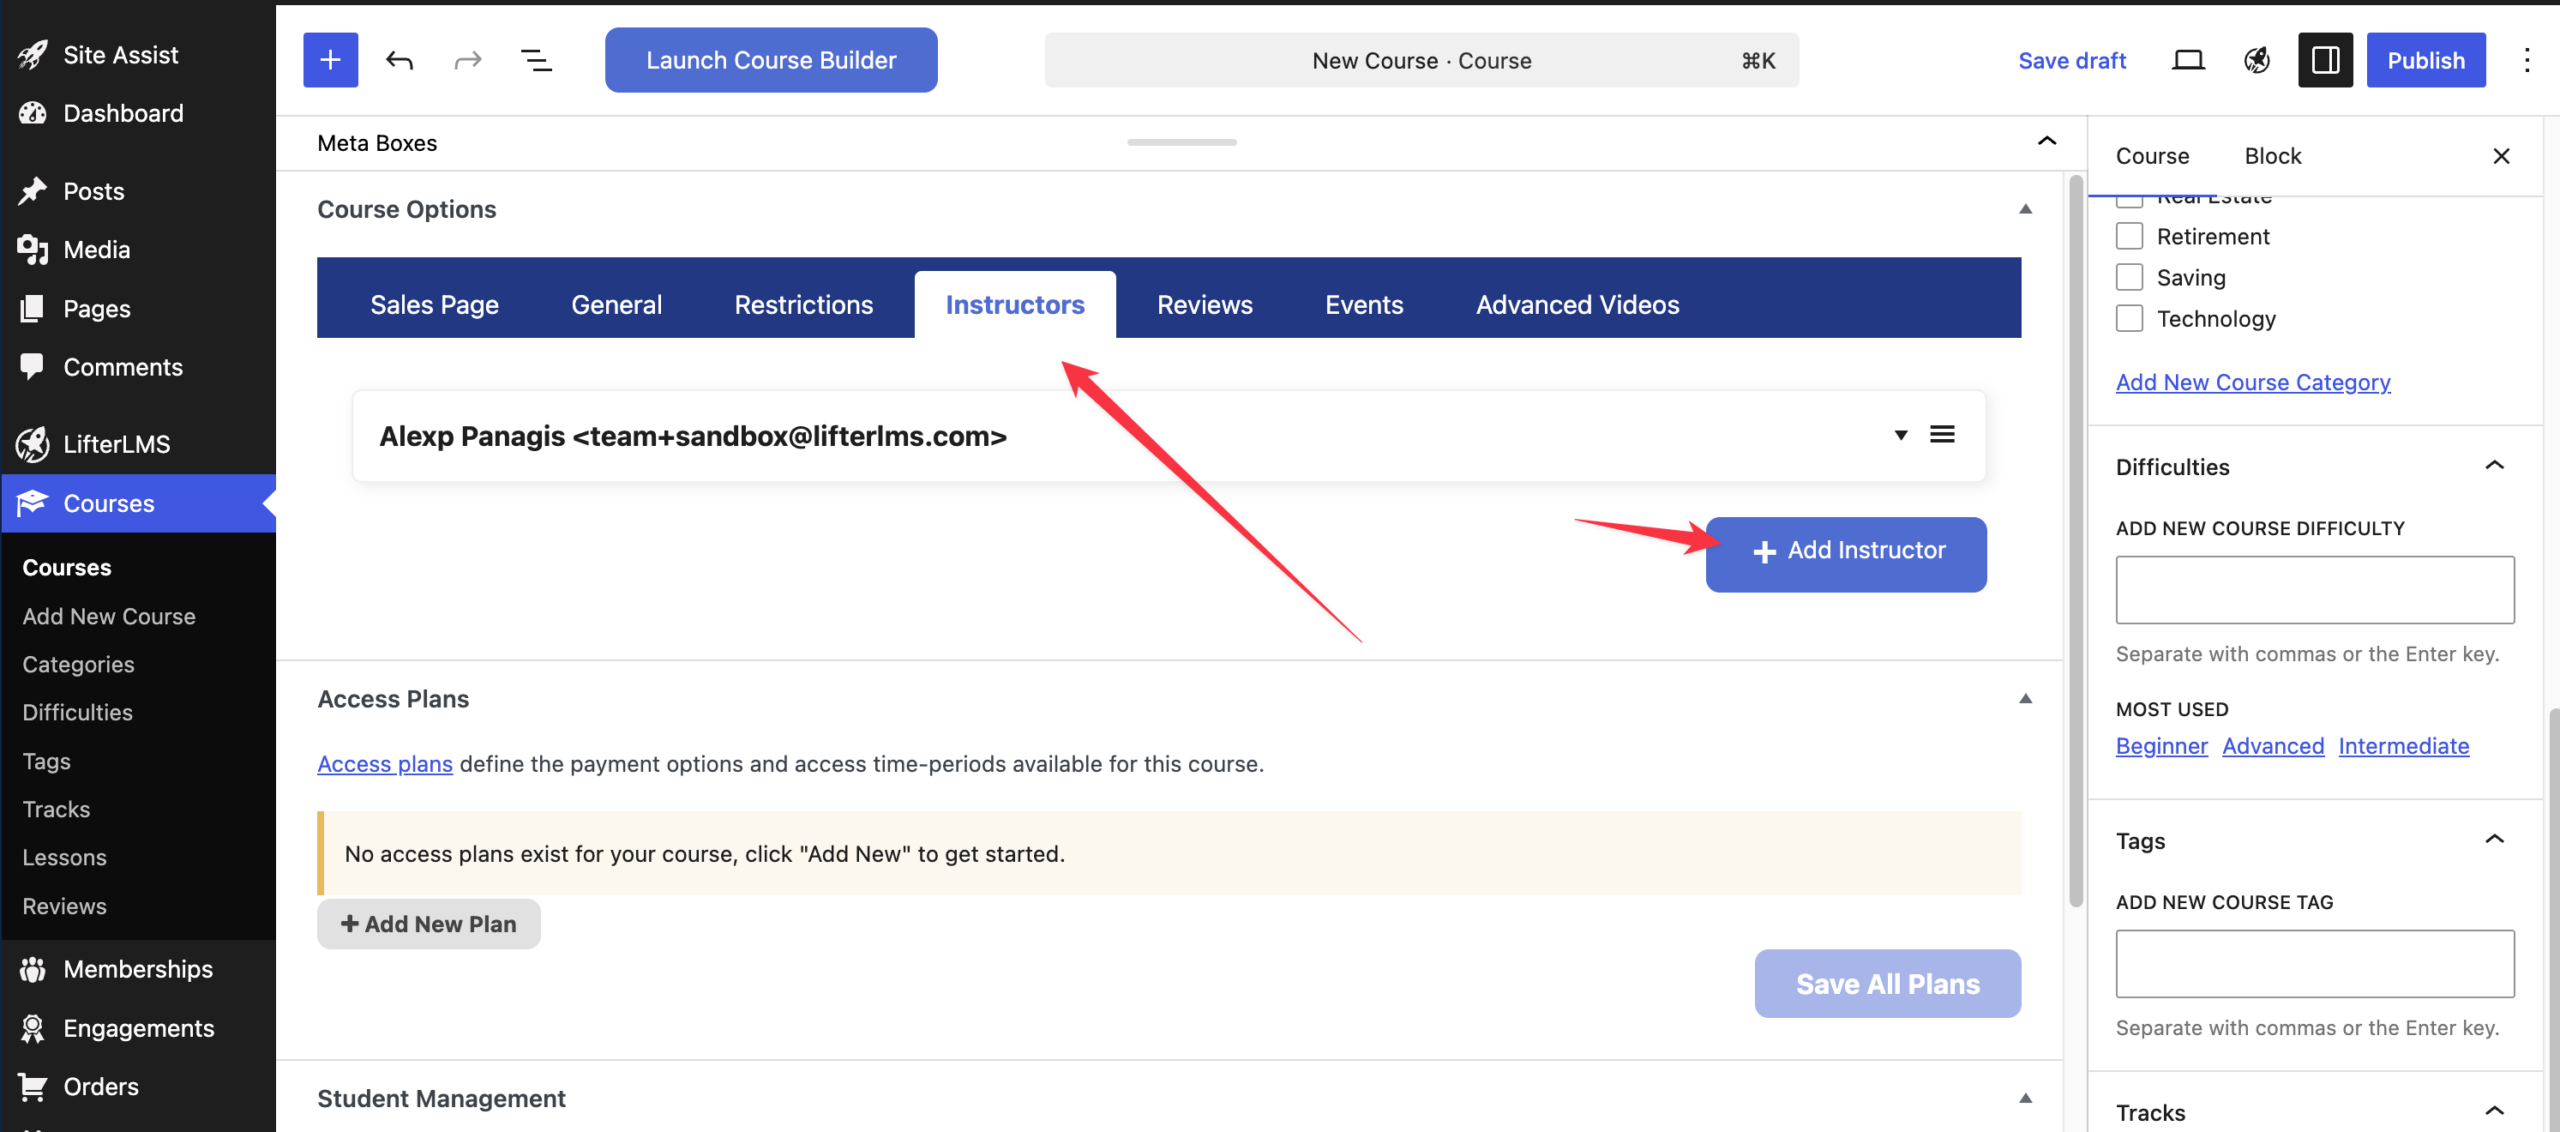
- Scroll down the page to find the “Instructors” section. By default, LifterLMS assigns the course creator as the instructor. You can use the options in the “Instructors” section to add multiple instructors, remove the default instructor, or adjust the title and label for each teacher. To learn more about instructor permissions, see the roles and capabilities documentation.
- After that, look for the “Course” settings panel on the right side of the screen.
- Click the Launch Course Builder button to open the visual layout tool and start creating your lessons. The Course Builder lets you create, arrange, and edit sections and lessons from one screen.
- Click Add Section to create a new section. Sections help you group related lessons together.
- Click the Add Lesson button to create a new lesson, or the Add Existing Lesson button to attach a lesson that already exists.

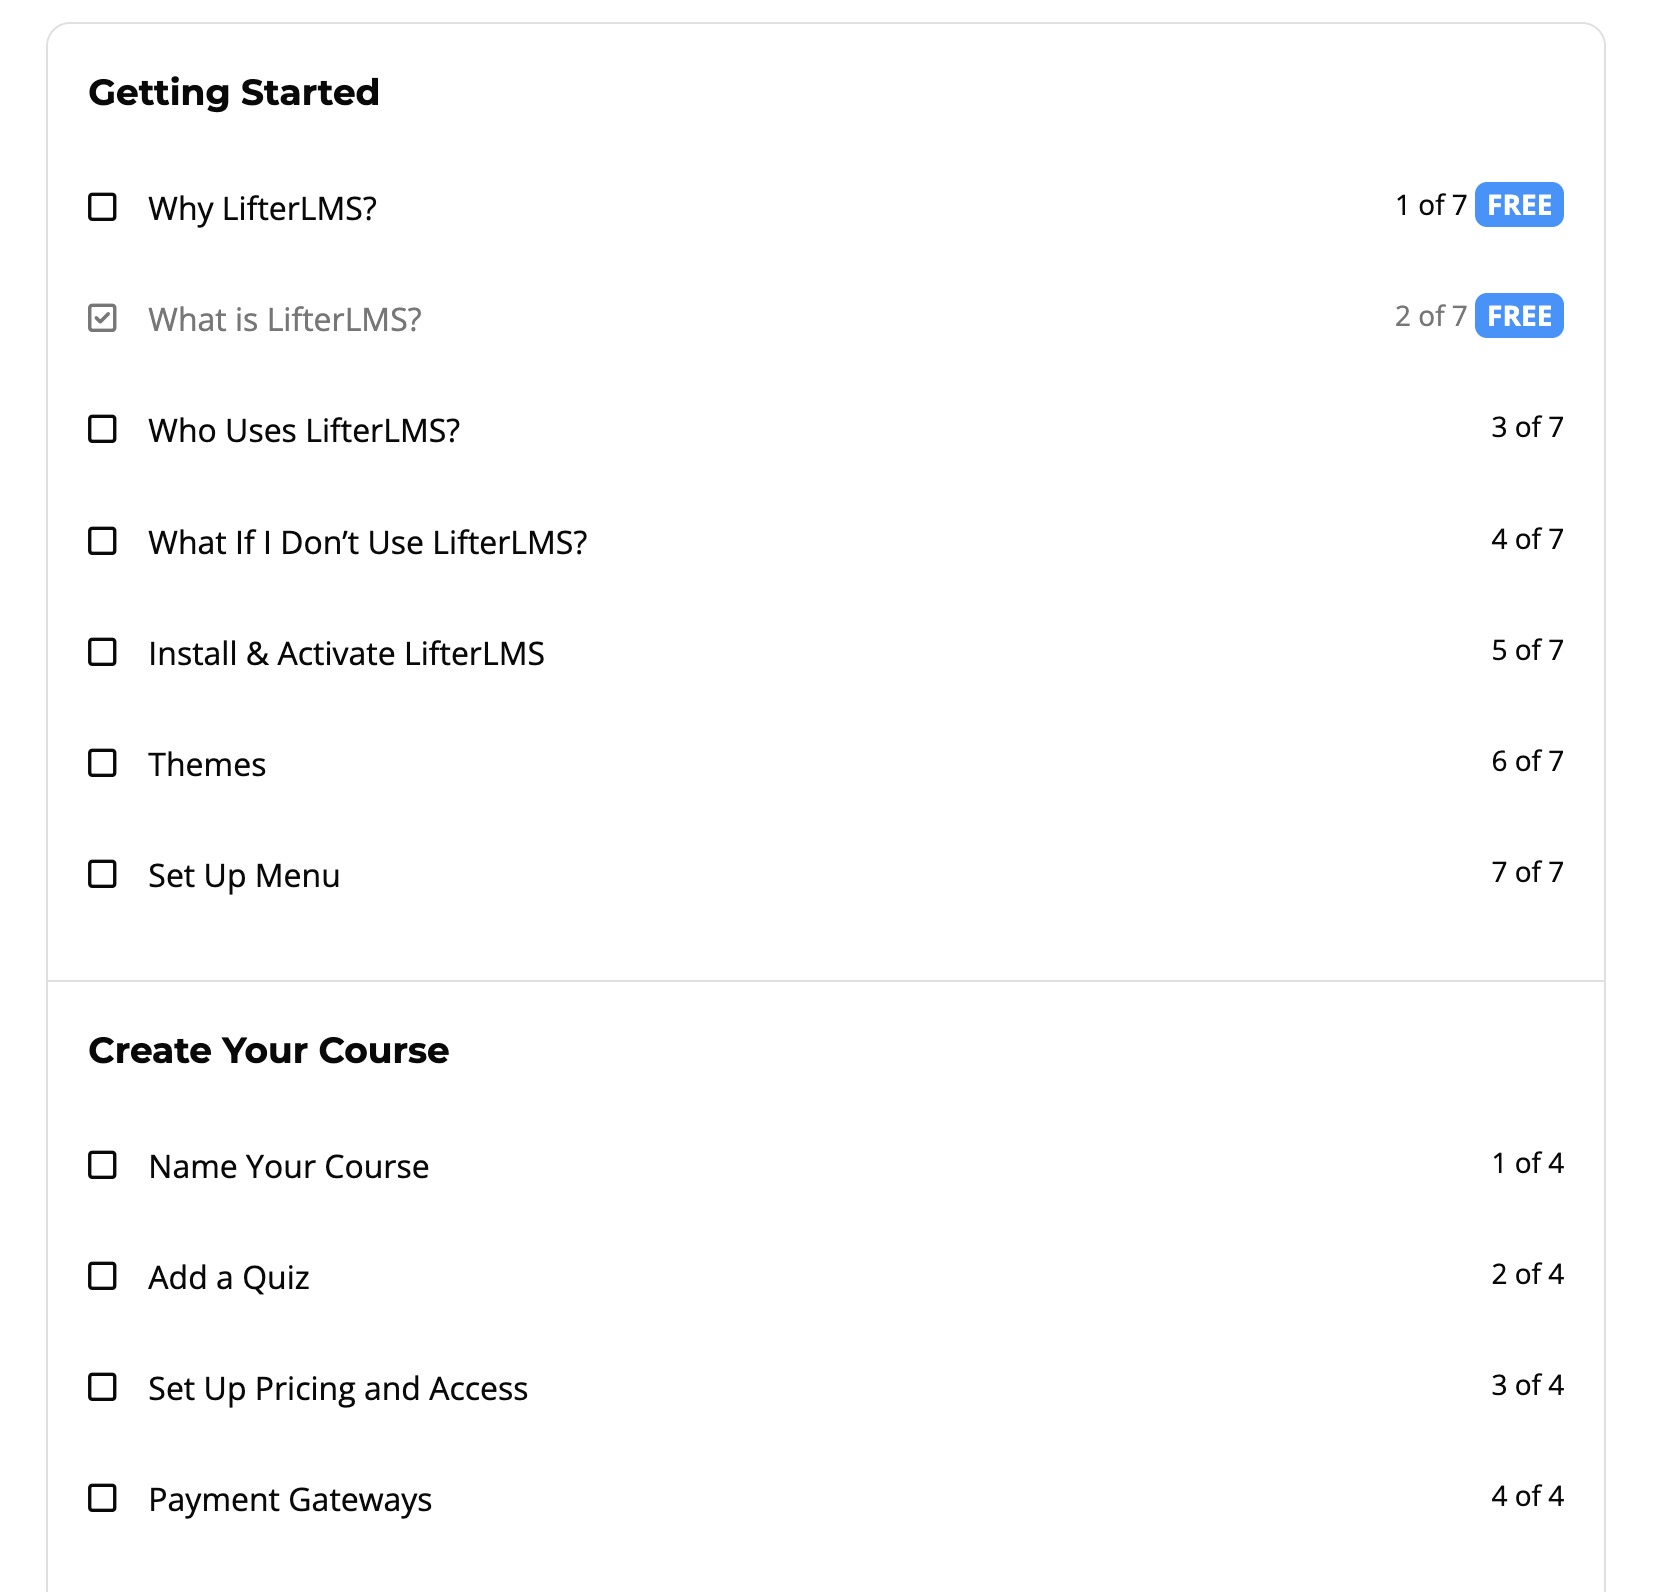
- You can click directly on the section titles and lesson titles to type custom names for them. For example, you might name a section “Getting Started” and create lessons titled “Welcome,” “Course Overview,” and “What You’ll Need” to help guide your students.
- Continue this process of clicking the Add Section button and the Add Lesson button as many times as required to structure your complete course syllabus. Take a look at the lesson outline of “LifterLMS Quickstart Course” below to get an overview of how it works.
Here are a few video demonstrations of the LifterLMS Course Builder:
After you build your course structure, you need to add the actual learning materials to each lesson. You can add text, images, videos, audio files, and downloadable resources like PDFs or worksheets.
During course creation, you can create empty lessons to outline your structure, and later add the content before the course is launched.
To add content, you have two primary options. Use the Course Builder for simple text and media updates. Use the WordPress editor when you need blocks, layouts, embeds, or more control.
Method 1: Adding Lesson Content Inside Course Builder
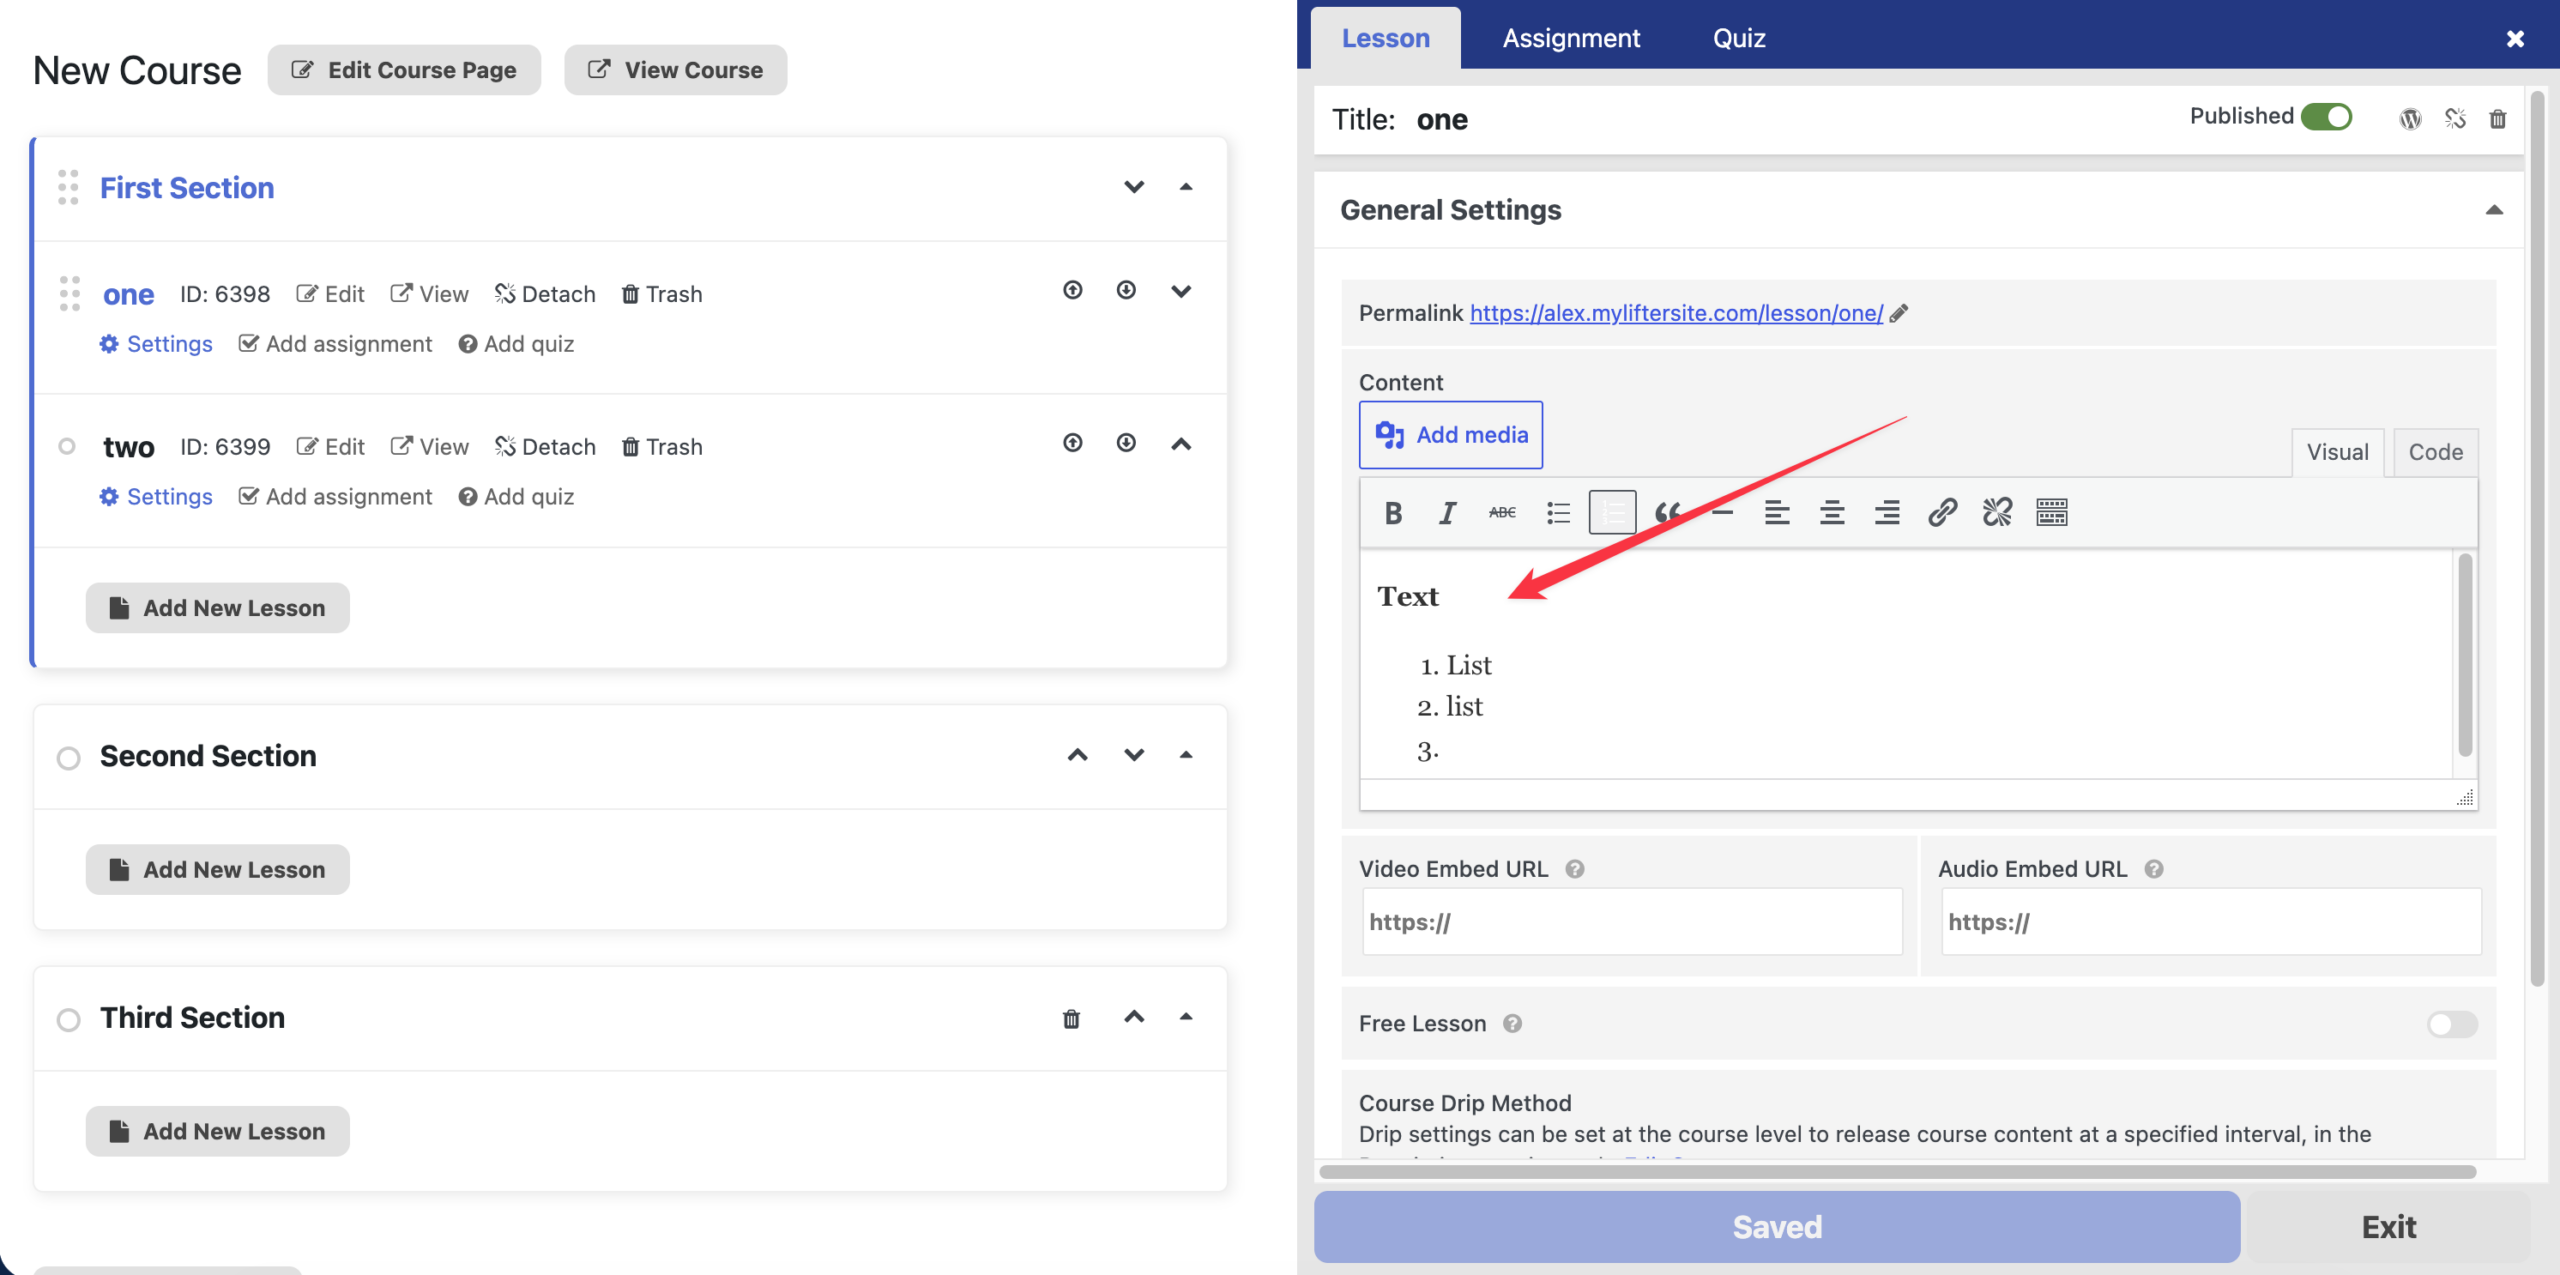
The Course Builder allows you to quickly add text and media directly to your lessons. This method is best for simple lesson pages that only need text, images, audio, or video. Follow these steps to add your lesson content:
- Click on the lesson you want to edit to open its settings panel.
- Type or paste your lesson text directly into the “Content” box.
- Use the formatting tools to adjust your text or click Add media to insert images.
- Click the Save changes button to save your work.
You can also watch this Feature Friday video to see how to create and add a course outline from one screen.
Method 2: Adding Lesson Content Using the WordPress Editor
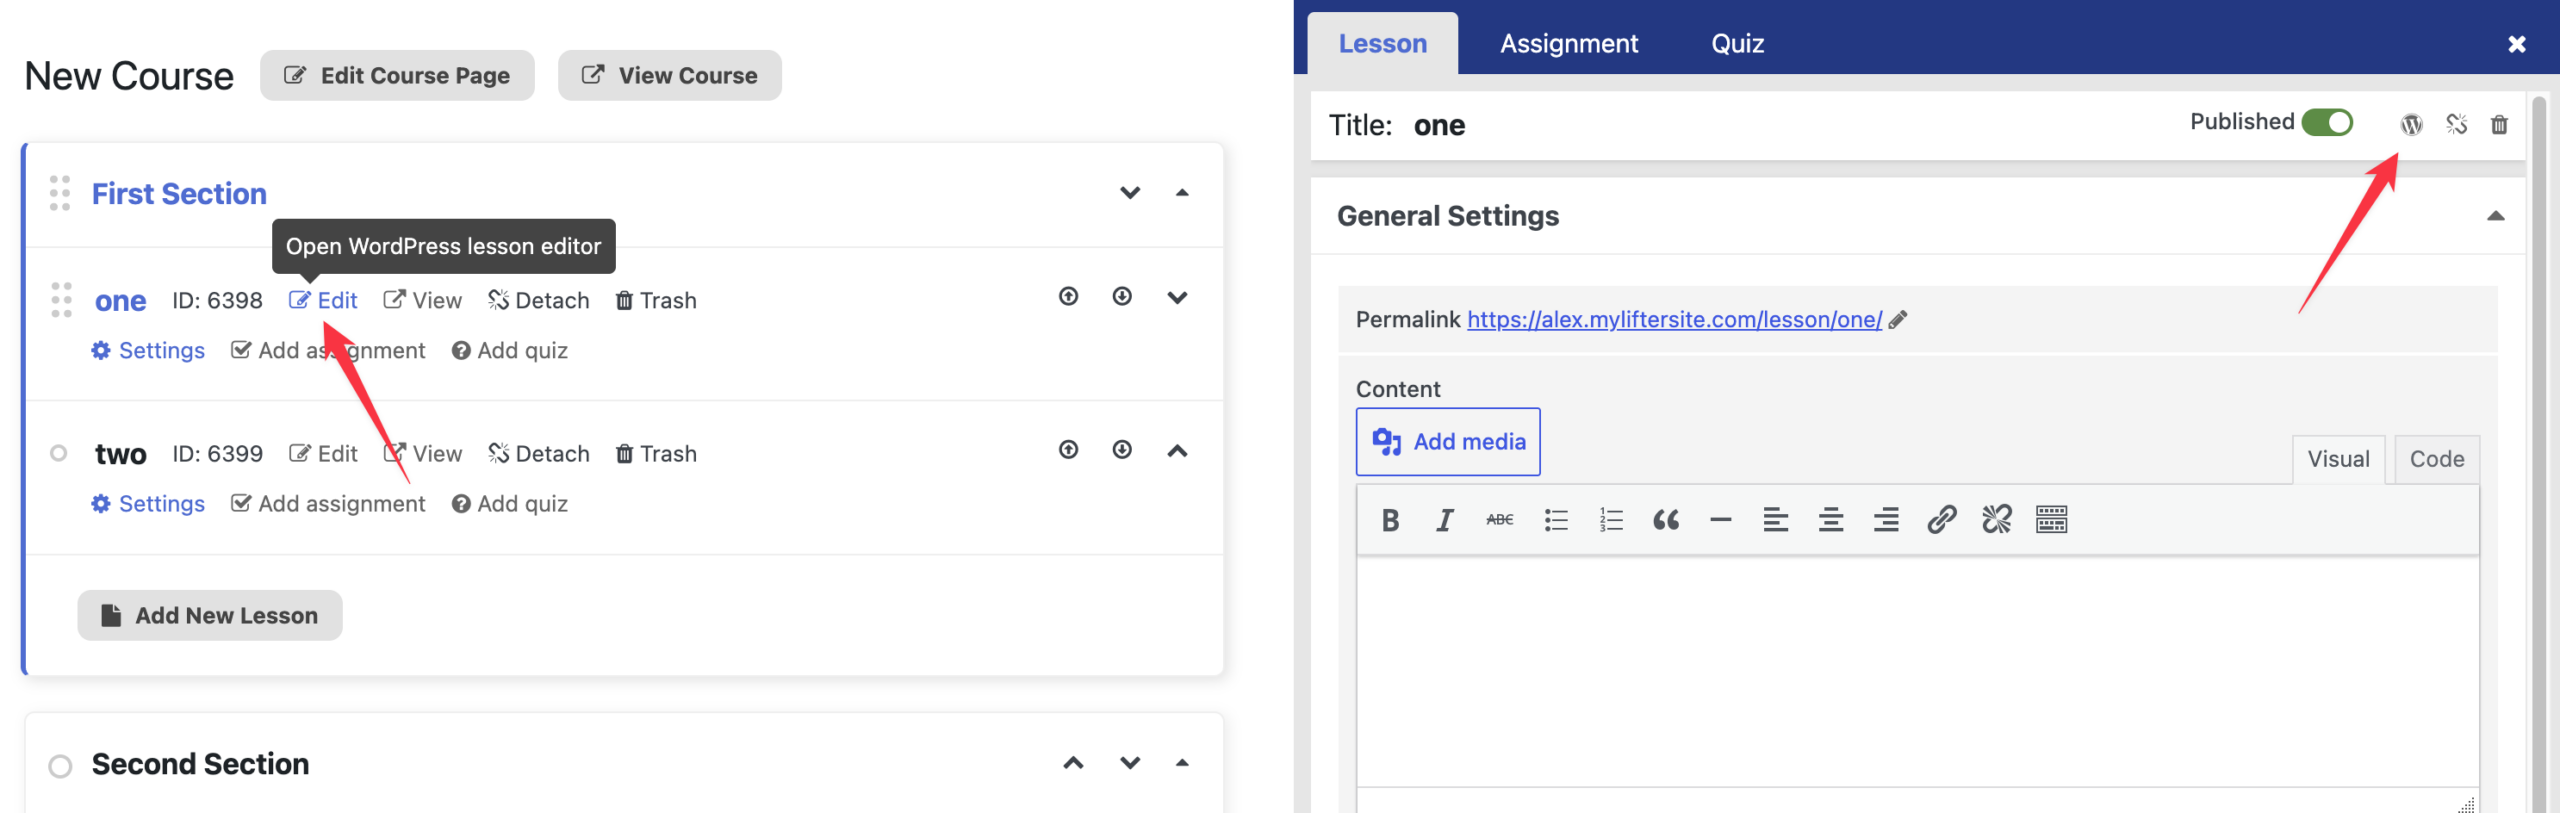
- Hover your mouse over the specific lesson you want to modify.
- Click the WordPress Editor button (which appears as a small WordPress logo icon on the lesson block) to open the lesson in the WordPress block editor, outside the Course Builder.
- Add your content to the page using standard WordPress blocks.
- Click the Update button in the top right corner to save your lesson content.
If you click the icon to open the WordPress lesson editor, you will leave the Course Builder and open the lesson in the WordPress block editor. This gives you access to WordPress blocks, embeds, layout options, and any blocks added by your theme or plugins.
When you build an online course, prospective students need to see what they will learn before enrolling. LifterLMS automatically displays the syllabus on your course page by default.
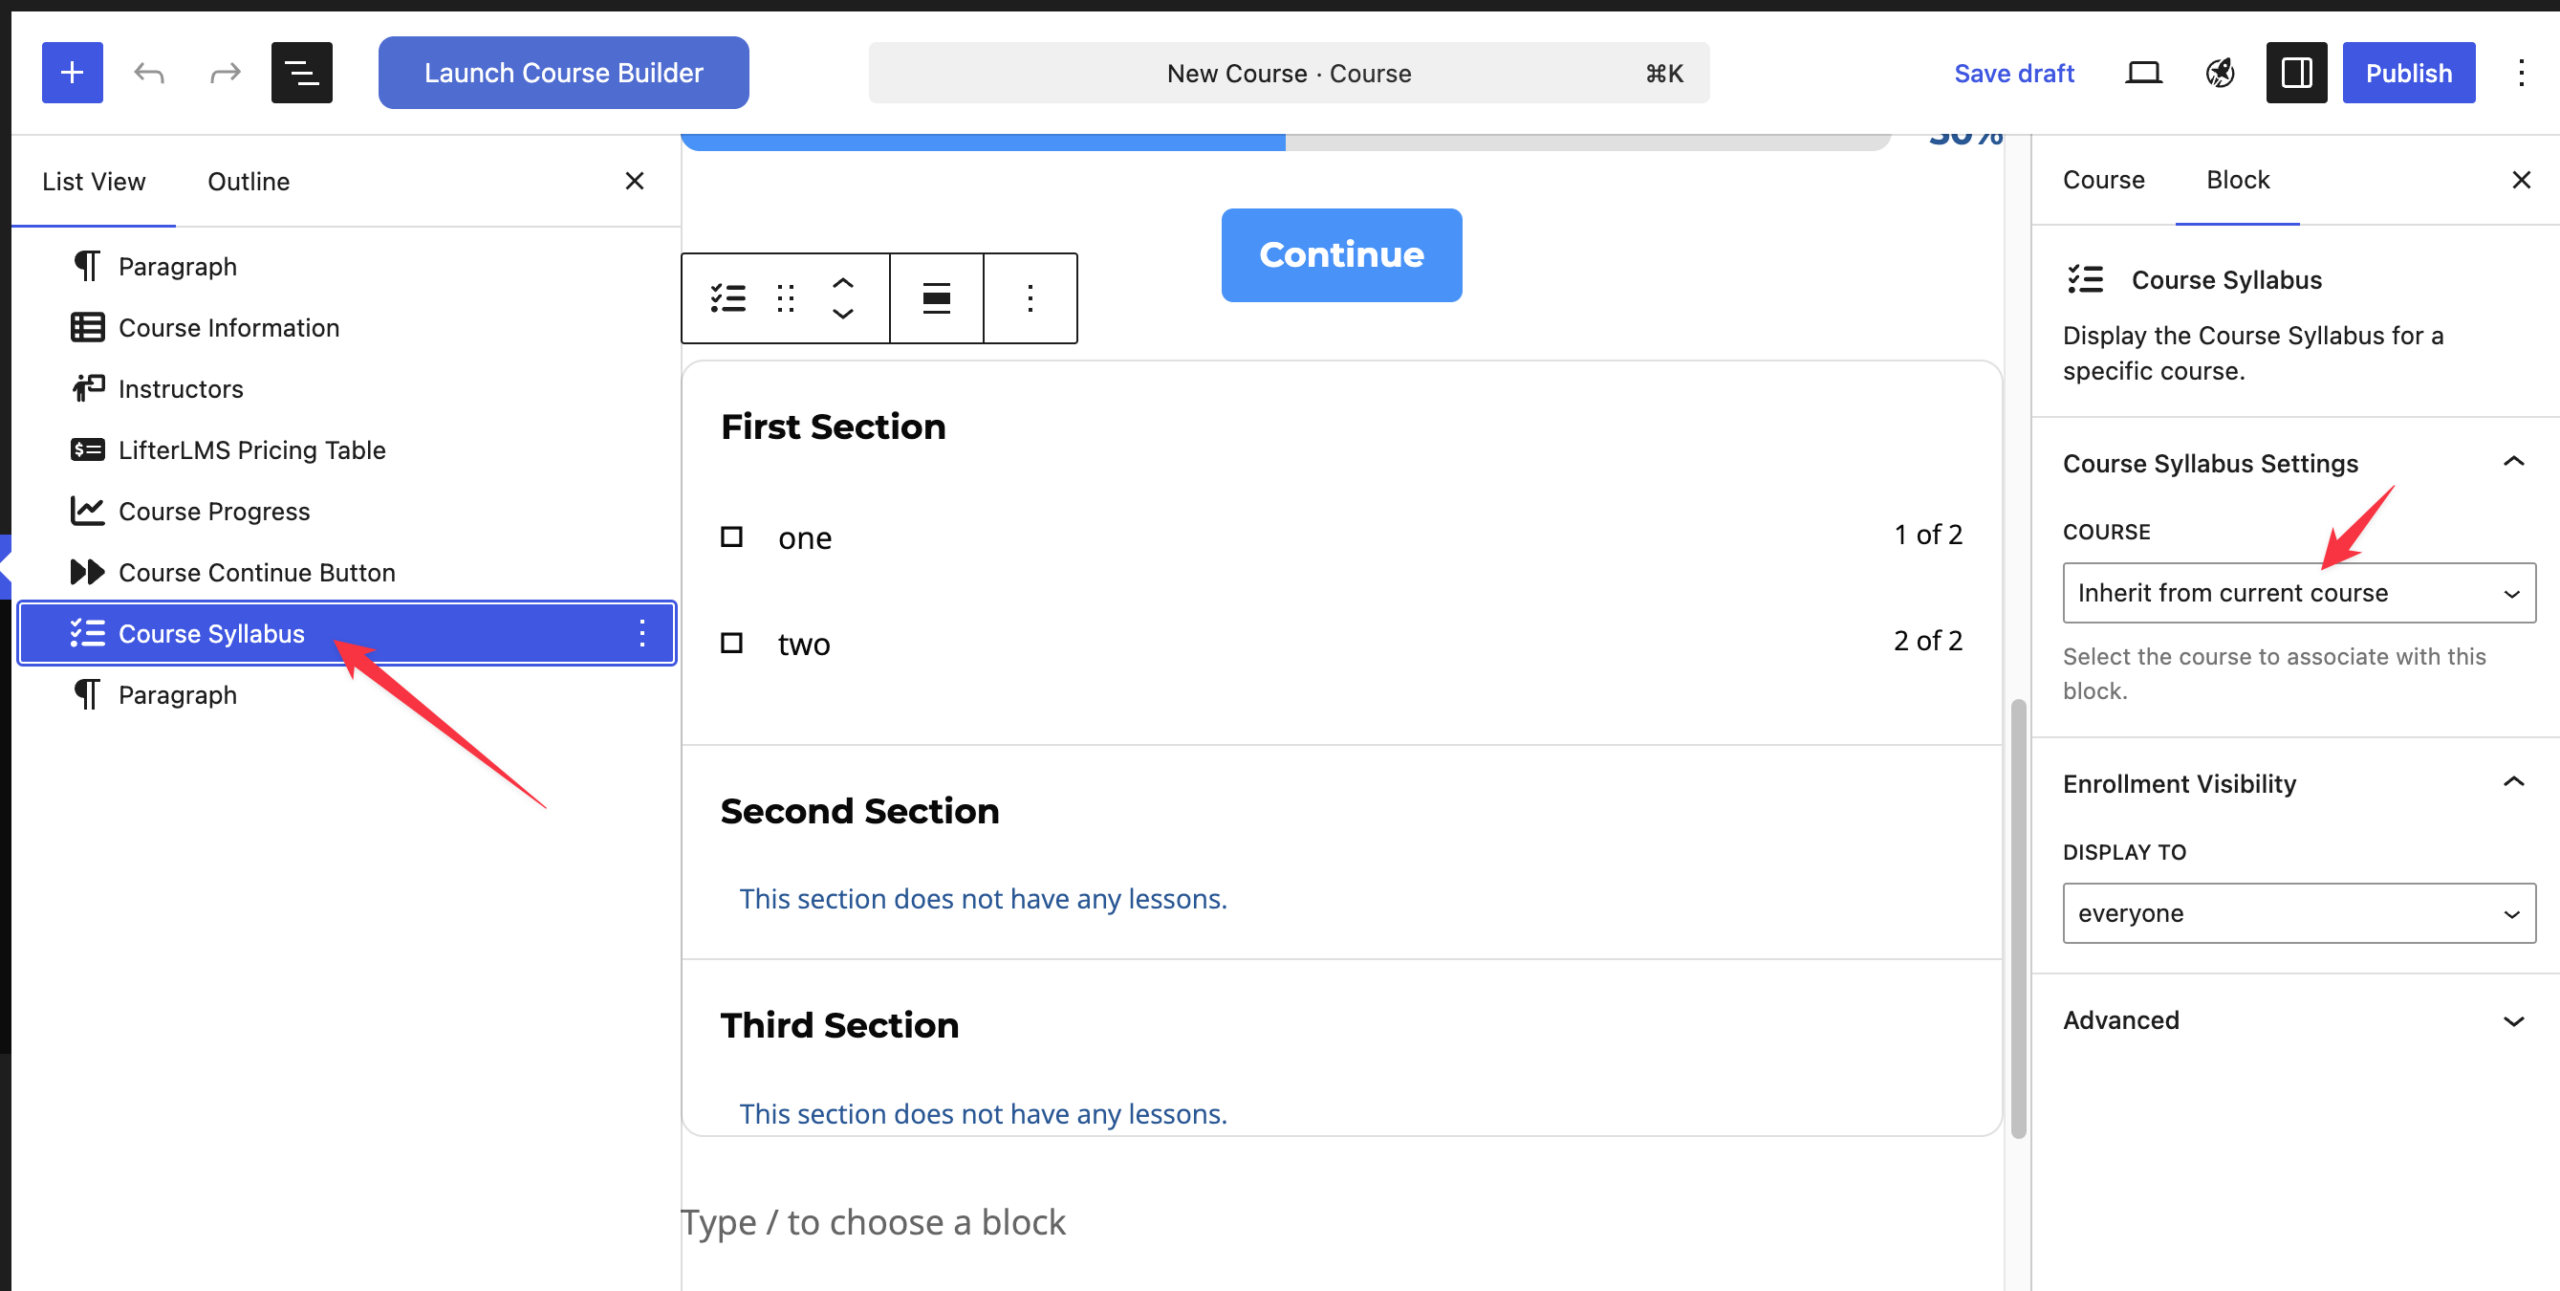
However, if you want to display the course curriculum on a different page of your website (such as a blog post, group deal page, or landing page), you can use the Course Syllabus block. This can be done using a standard WordPress page, separate from the course edit screen.
- Edit the specific WordPress page (e.g., a blog post or landing page) where you want the syllabus to appear.
- Click the block inserter (+ icon), search for ‘Course Syllabus’, then select the block to add it to your page.
- In the block settings (sidebar), search and select the name of the course you want to display.
- Save the WordPress page so the syllabus block displays to your visitors.
Before students can enroll, you need to configure how they will access the course. In LifterLMS, students enroll through access plans. An access plan controls whether a course is free, paid, recurring, or available through another enrollment setup.
A course can have more than one access plan; for example, you might offer a free trial, a one-time payment, a recurring payment, or exclusive member-only access.
Now that you have structured your course and added your content, you can configure your access plans inside the course editor.
To create and manage your pricing, please follow these steps:
- Navigate to LifterLMS > Courses from your WordPress dashboard.
- Hover your mouse over the course you want to price and click the Edit button.
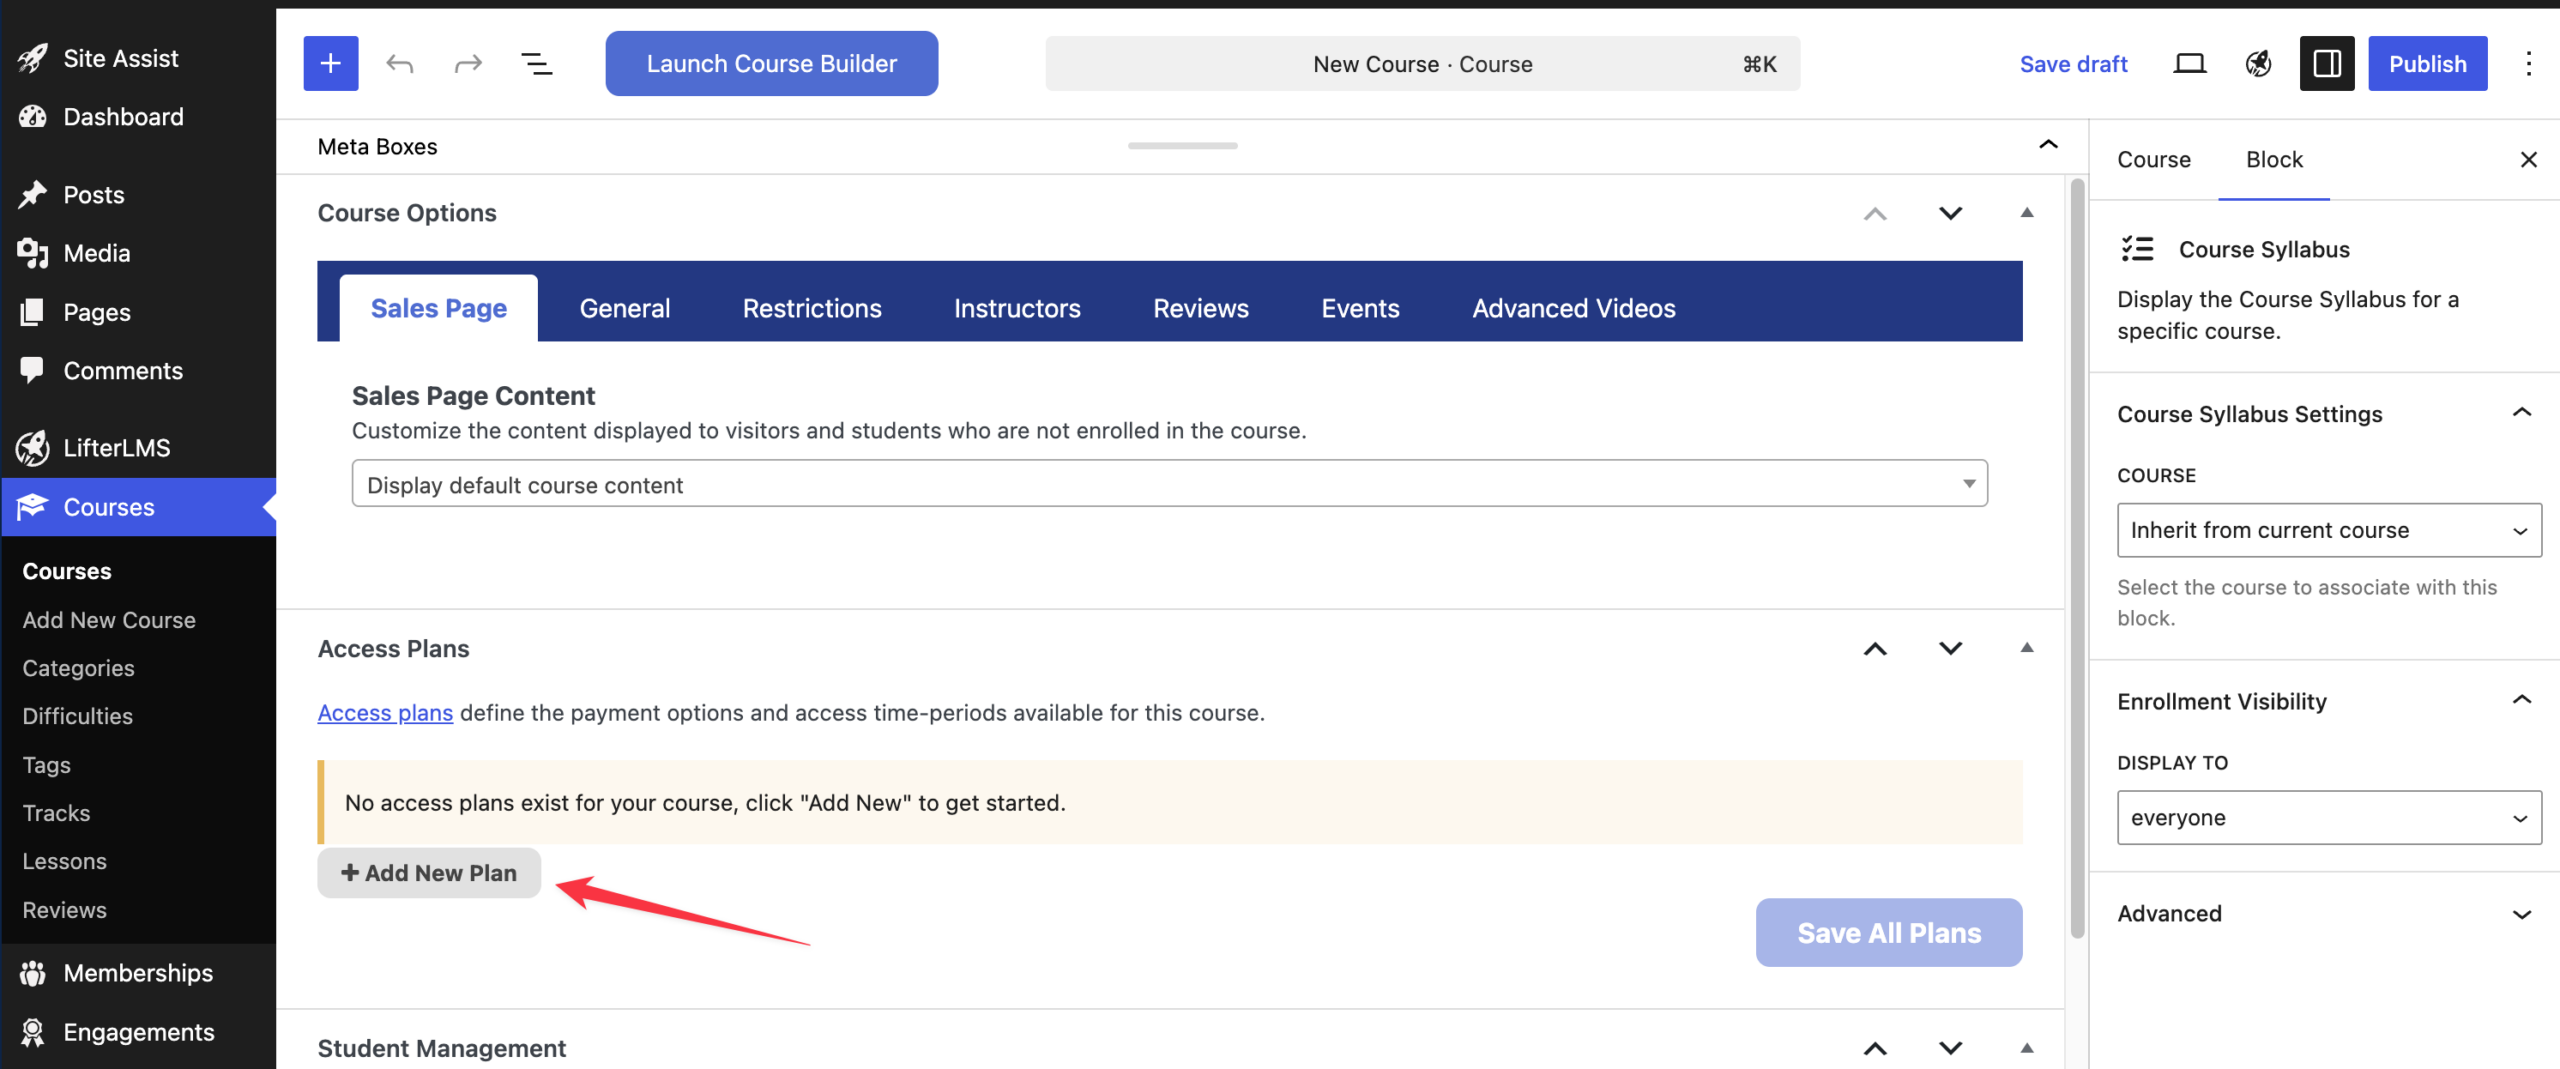
- Scroll down the page until you locate the “Access Plans” box.
- Click the Add New Plan button to create your first payment option.
- Fill in the required details, such as the plan title, billing frequency, and price. For the plan title, choose a name that clearly identifies the payment option to students, as this is what they will see during checkout. For example, you can pick something like “Single Payment,” “Monthly Plan,” or “Free Enrollment.”
- Click the Save All Plans button to apply the pricing.
To accept online payments, connect a payment gateway such as Stripe, PayPal, or Authorize.Net as an add-on. For a complete, step-by-step tutorial on building your payment options using these tools, please read the official documentation on allowing students to access courses and memberships with access plans.
You also have the option to process orders offline, use checks, or accept direct bank transfers. To do this, you can activate the default payment system built into the core LMS plugin. You can learn exactly how to configure this feature by reading the guide on using the LifterLMS manual payment gateway.
Some course creators prefer to manage their sales through the WooCommerce plugin rather than the native LMS checkout. If you want to use WooCommerce to sell your courses, you will need the LifterLMS WooCommerce integration add-on. Once you install the add-on, you can read the complete tutorial on getting started with LifterLMS and WooCommerce.
If you are unsure which checkout method is best for your business needs, read our guide to help you decide: Should I sell with the LifterLMS eCommerce system or WooCommerce?
LifterLMS offers several other settings to customize how your course functions. Scroll down the course edit page to locate the “Course Options” section. Depending on your installed add-ons, this area includes tabs such as Sales Page, General, Restrictions, Instructors, Reviews, Events, and Advanced Videos.
In addition to built-in features, there are dozens of other LifterLMS add-ons and integrations available to further customize the course, which may appear here if you have the necessary add-ons installed.
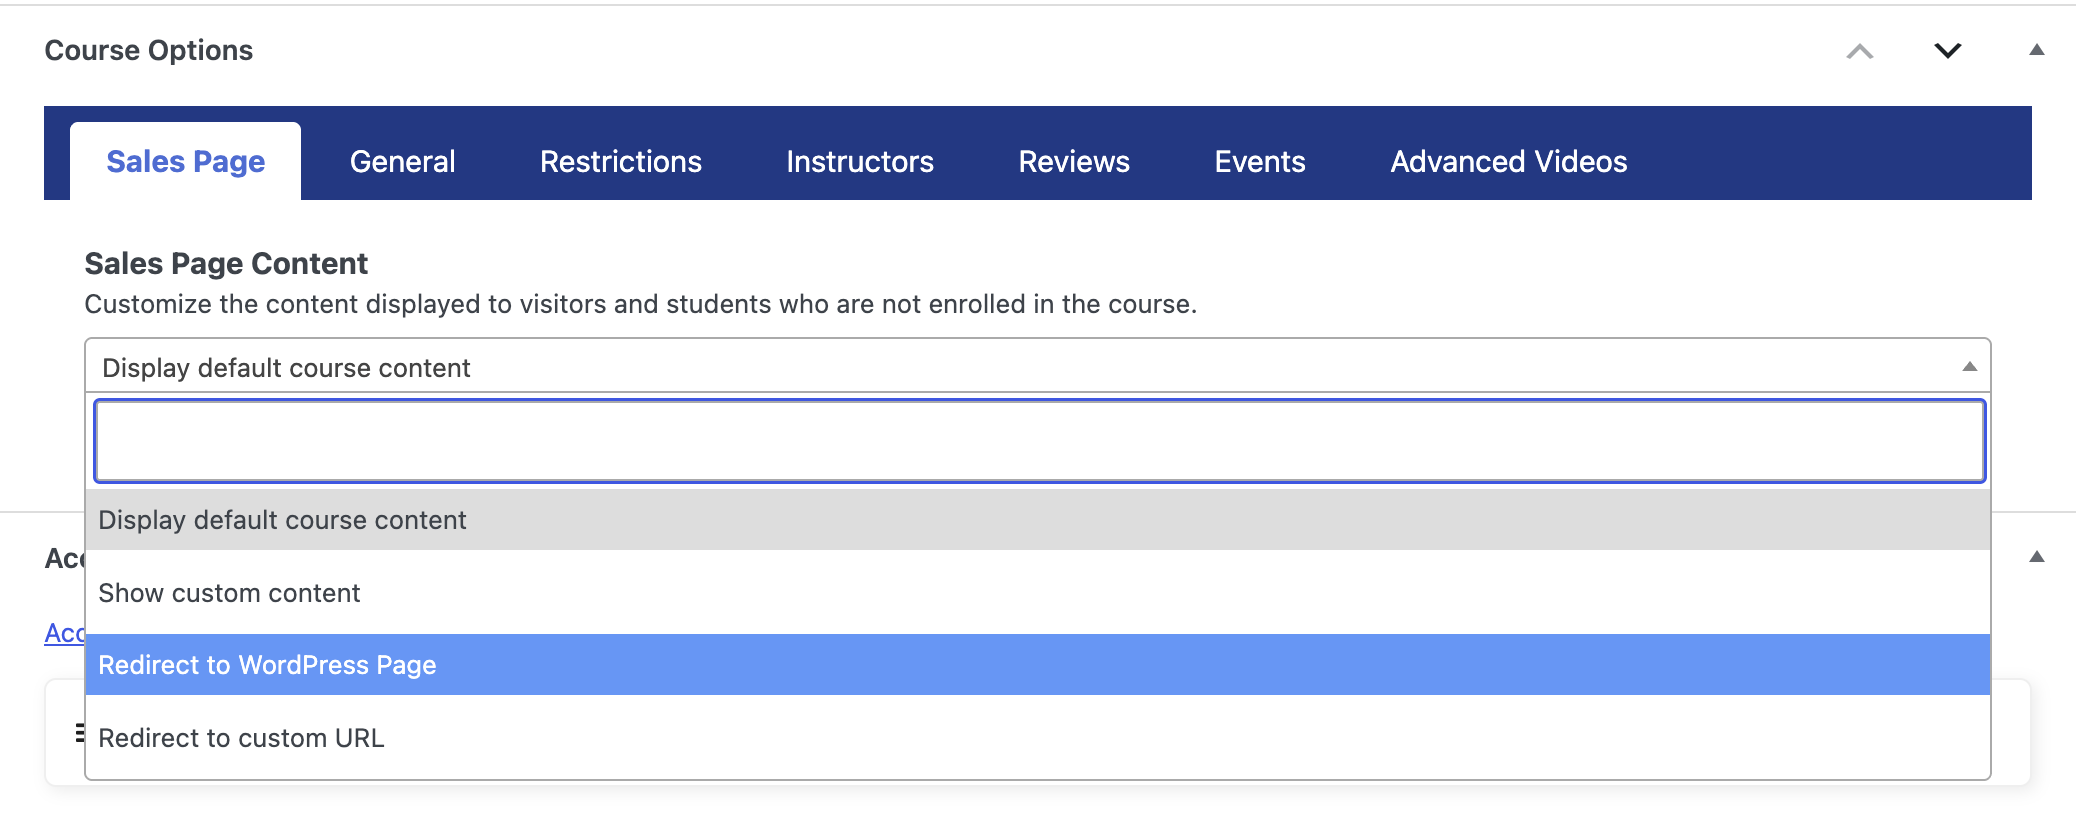
Customize the Sales Page
Click the Sales Page tab to choose what visitors who are not enrolled see on the course page. This allows you to redirect them to a custom landing page instead of the default course page.
Add Featured Video or Audio
Click the “General” tab to embed a featured video or a featured audio track. This media will appear at the top of your course page.
Enable Course Reviews
Click the “Reviews” tab to enable or disable course reviews.

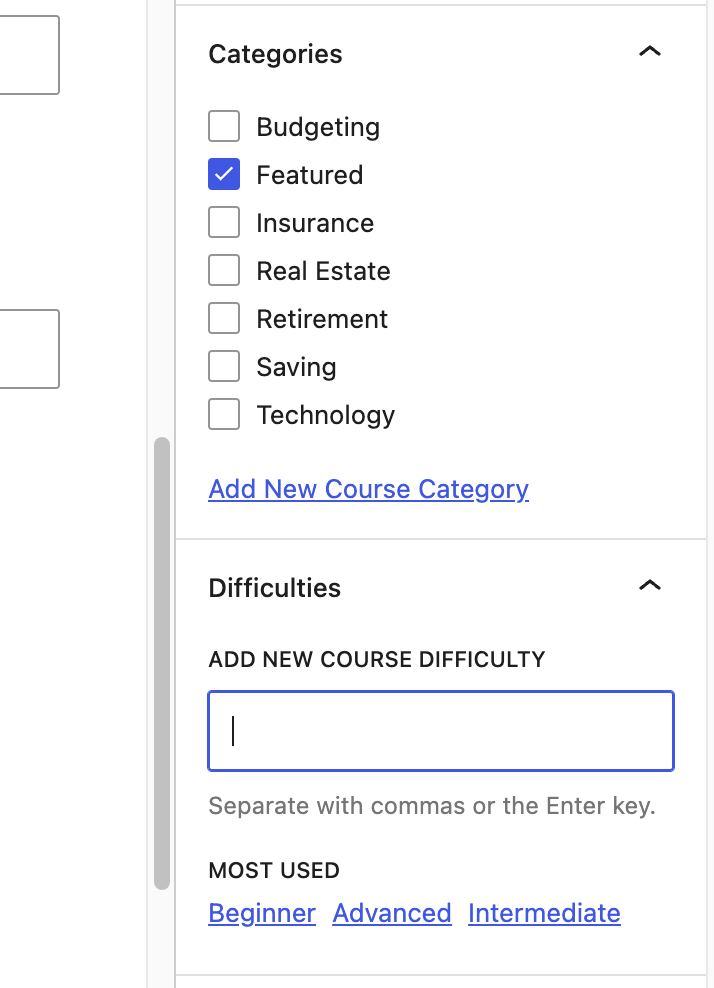
Organize Courses with Categories and Difficulty Levels
Categories are useful for course catalogs, filtering, and organizing multiple courses. You can add difficulty levels to help students identify courses that match their skill level. For example: Beginner, Intermediate, Advanced, or Level 1, Level 2, Level 3.
In the course editor sidebar, use the Categories panel to select or create a course category. Use the Difficulties panel to add or select a difficulty level.
Add Quizzes
You can attach quizzes to specific lessons to check understanding or assess student progress. Please note that quizzes are added to individual lessons rather than the course as a whole. LifterLMS includes a built-in quiz builder with basic question types, and you can add more complex evaluation features using the LifterLMS Advanced Quizzes add-on.
Add Assignments
You can incorporate assignments into your course using the Assignments add-on. This allows students to submit files or text for manual review, enabling you to provide personalized feedback and evaluate progress on practical tasks.
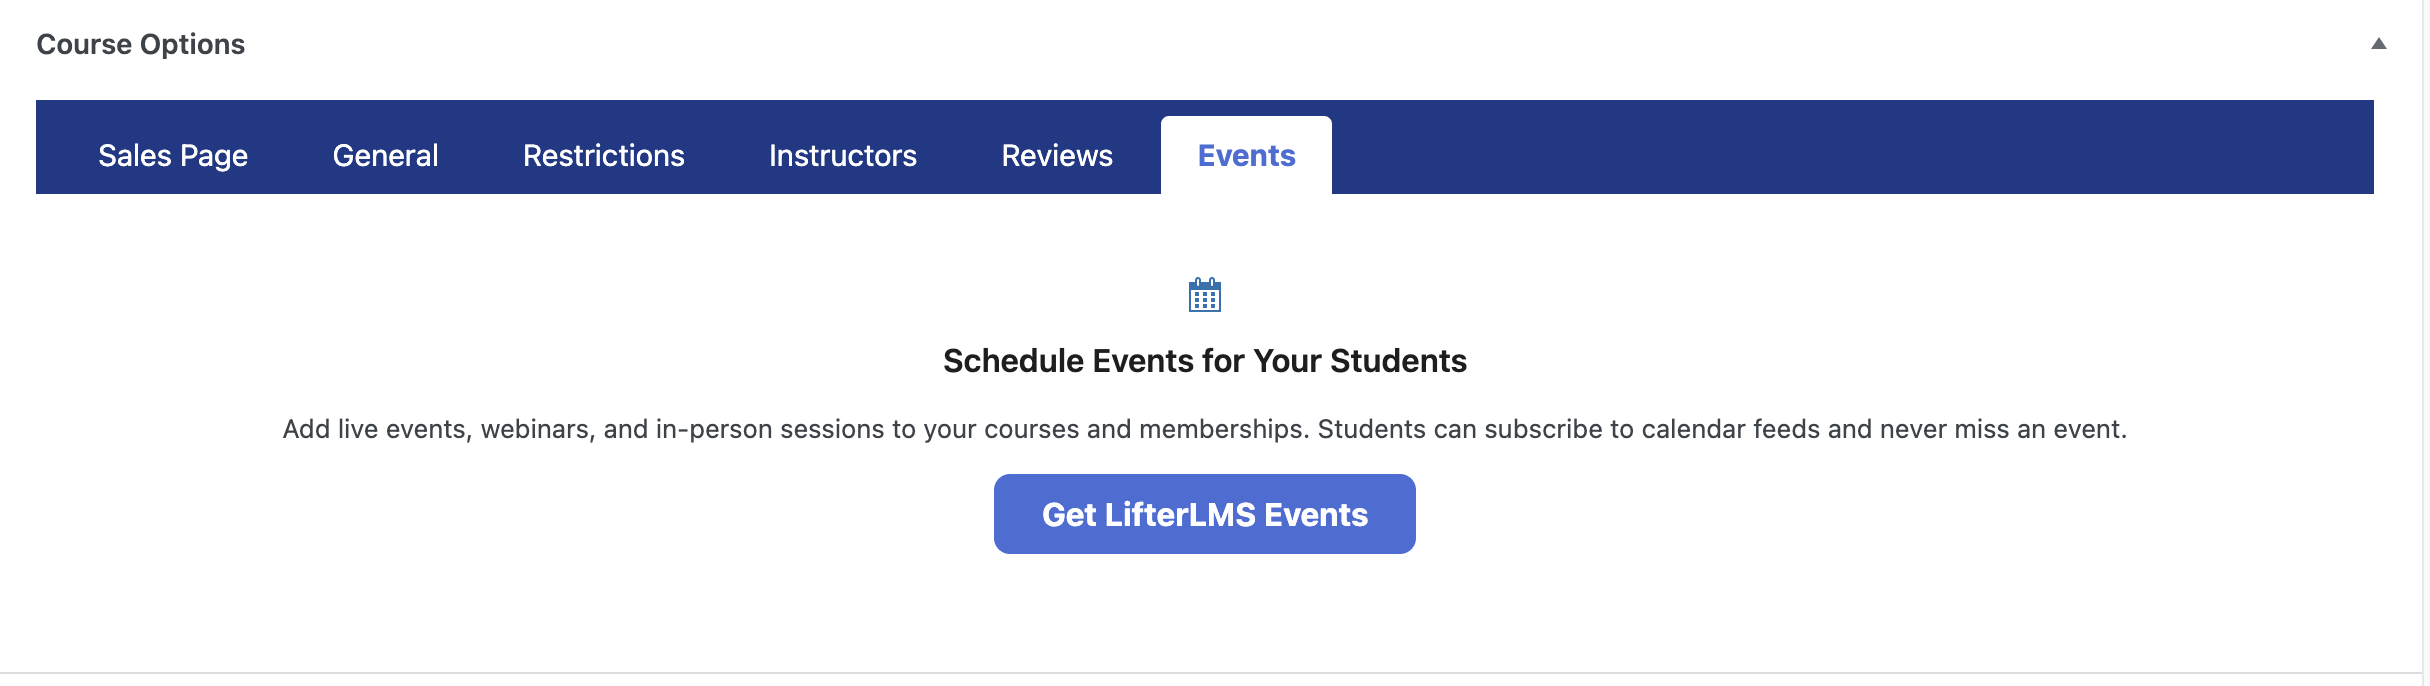
Host Events
The LifterLMS Events add-on allows you to connect both physical and virtual events directly to your course content. This feature helps you integrate live sessions into your students’ learning journey.
As a course creator, you can control how and when students access your course content. LifterLMS provides optional settings for managing student access. You can limit enrollment dates, require prerequisite courses, drip content over time, and restrict the total number of students.
This section explains where to find the course restriction settings and what each option does.
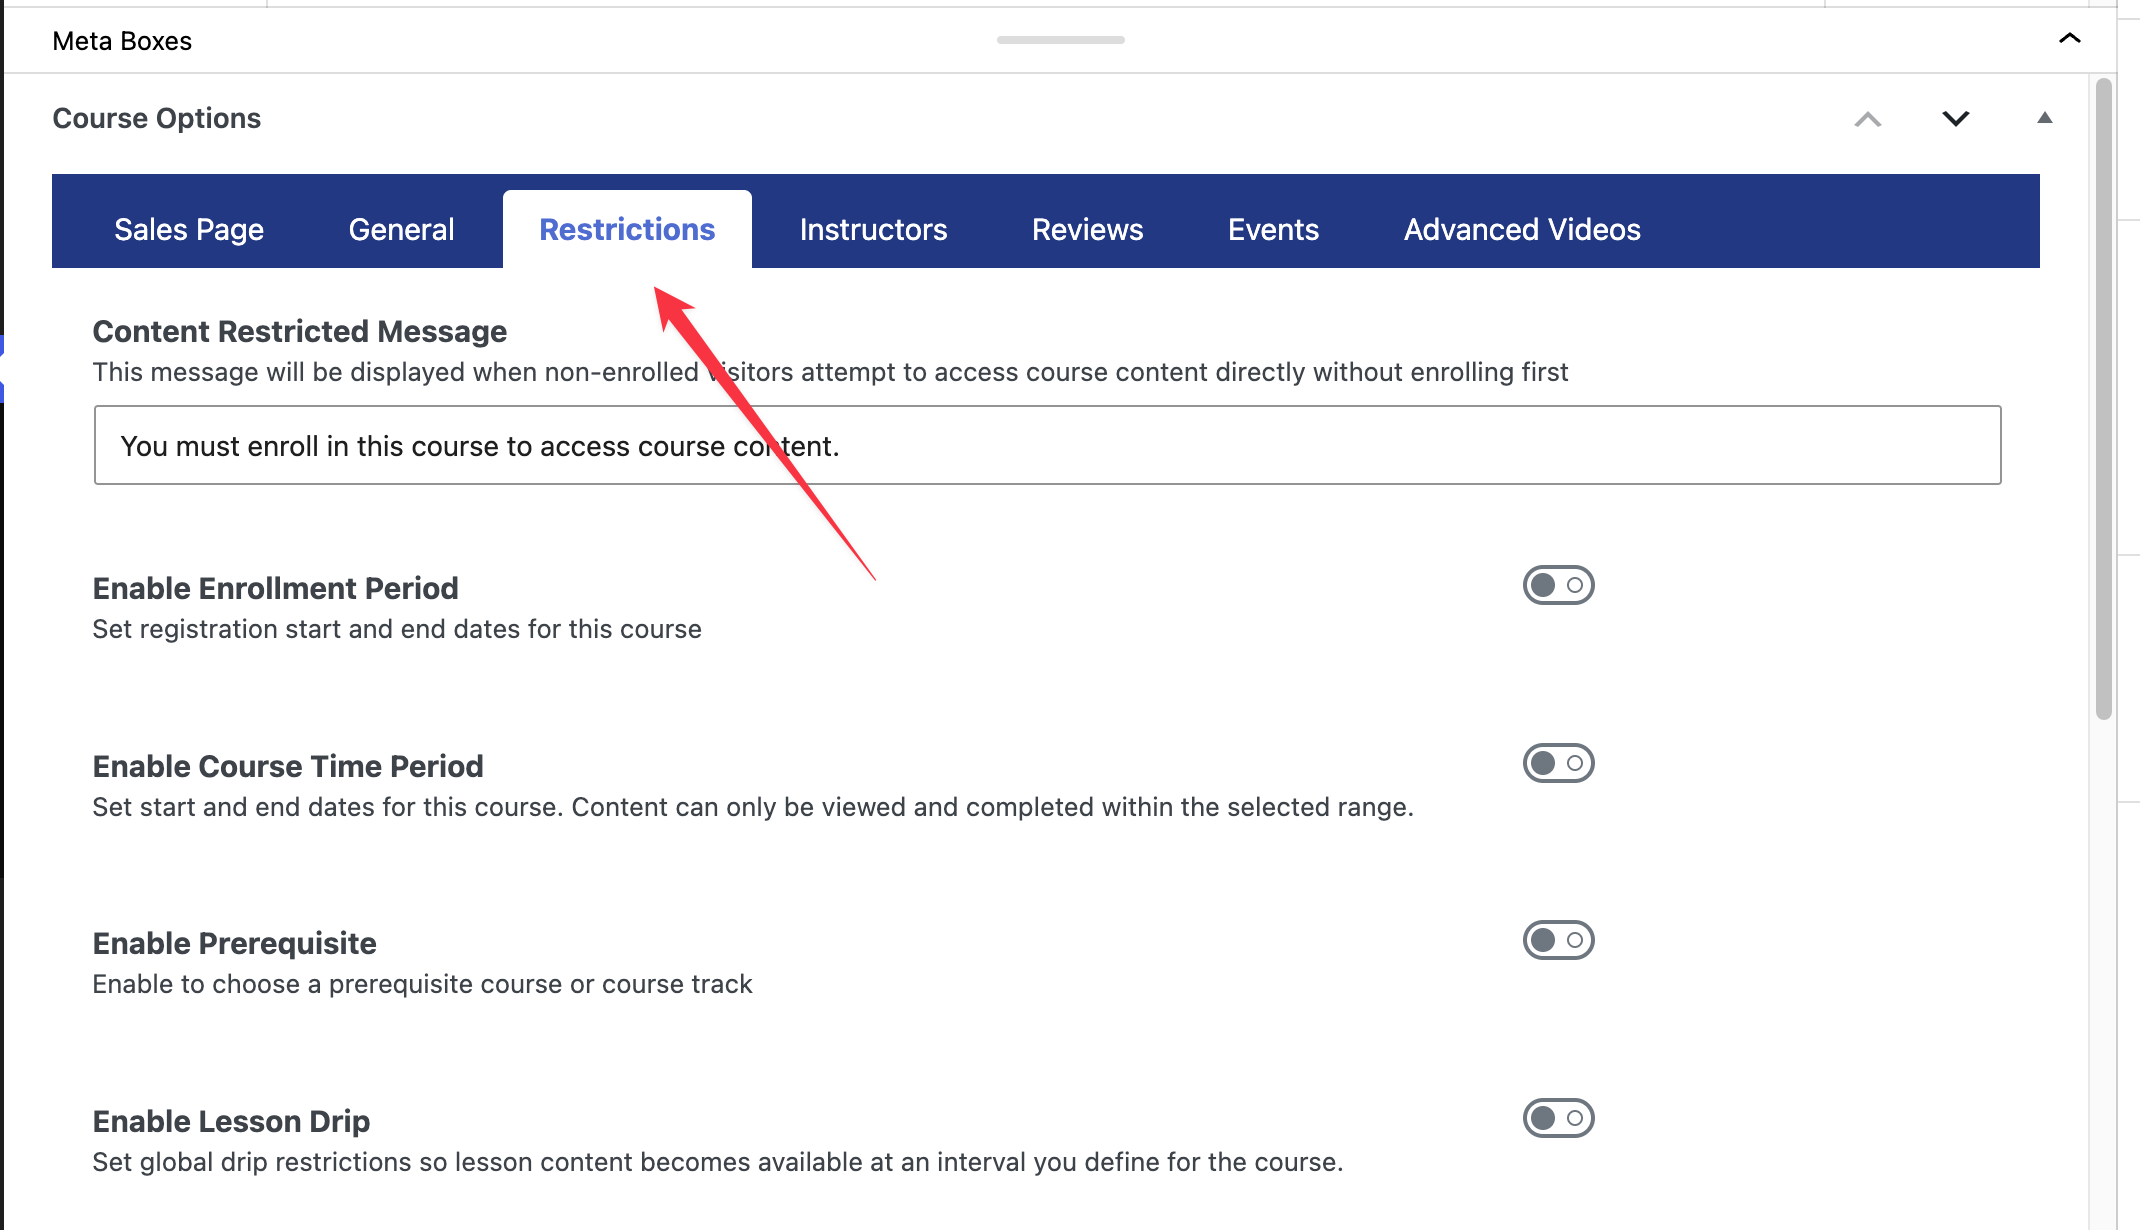
Edit the course you want to modify and scroll down the page past the main text editor until you locate the “Course Options” box. Click on the “Restrictions” tab to view all available access settings.
Course Restriction Settings Explained
Once you open the “Restrictions” tab, you will find several features that you can toggle on or off. Here is an explanation of what each setting does and how you can use it to improve your course.
Content Restricted Message
This field allows you to write a custom message for visitors who are not enrolled. When someone who is not enrolled in the course attempts to view a restricted lesson, the system displays this message. You should use this space to clearly explain that they must purchase or enroll in the course to view the material.
For example, you might write: “You need to enroll in this course before you can access this lesson” or “This lesson is only accessible by premium members”.
Enable Enrollment Period
You use this setting to define when students can register for your course. Activating this feature reveals fields for setting a start and end date. This can be useful for cohort-based courses, seasonal programs, or courses with fixed registration windows.
LifterLMS uses your WordPress site’s timezone when applying enrollment dates.
- Navigate to Settings > General in your WordPress dashboard to configure your site’s timezone.
- Select your correct local city or timezone in the “Timezone” dropdown menu.
- Click the Save Changes button. When you set an enrollment end date in LifterLMS, the system will automatically close registration at exactly 11:59 PM on that date, according to the timezone you just configured.
Enable Course Time Period
You use this setting to control when students can actually view and interact with the course content. This is different from the enrollment period. Enrollment controls when students can sign up; course time period controls when enrolled students can access the course. For example, you can allow students to purchase the course in November but restrict their access to the learning materials until the course officially begins in January.
Enable Prerequisite
This feature allows you to build structured learning paths. When you turn this setting on, you can select either a specific course or an entire track that the student must complete before the system allows them to enroll in the current course.
For example, students must complete “Beginner Photography” before enrolling in “Advanced Photography.”
Enable Lesson Drip
Lesson drip can help you pace your course by releasing content over time instead of giving students access to everything at once. Activating this setting lets you set global drip restrictions. The system will release lesson content according to the drip schedule you configure, rather than giving them access to everything on the first day.
Enable Course Capacity
You use this feature to limit the total number of students who can join your course. When you activate this setting, you can type a maximum number of enrollments. Once the course reaches its capacity, LifterLMS prevents further enrollments through the course’s standard enrollment flow. This can be useful for small group coaching programs, cohort-based courses, or courses with limited seats.
After you configure your restriction settings, you must save your work.
- Scroll back up to the top of the page.
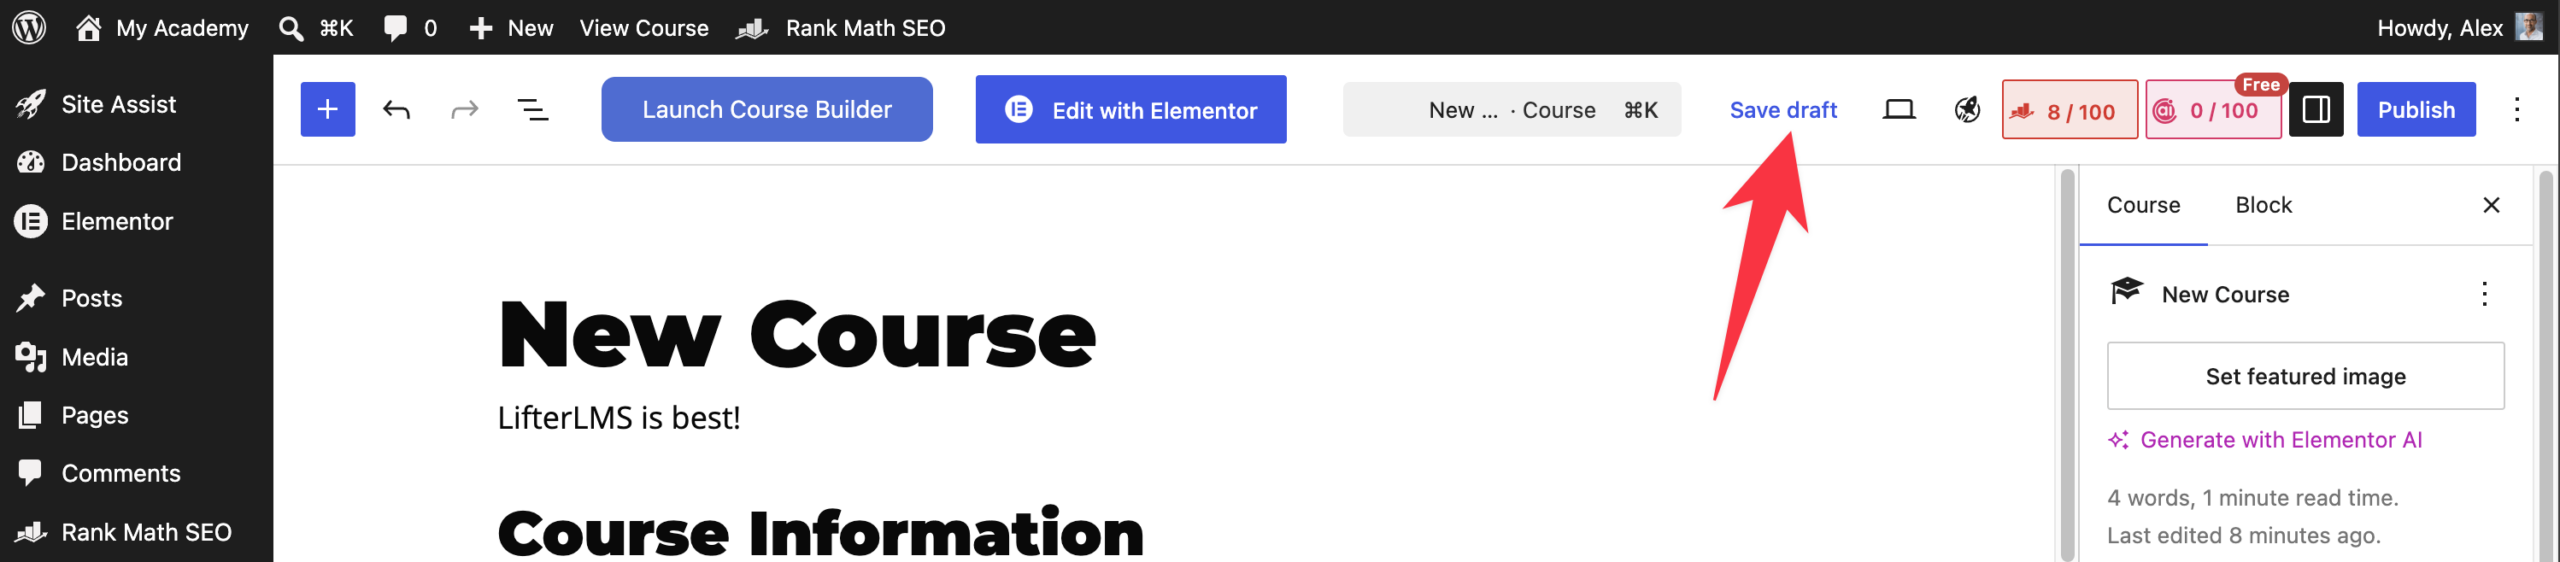
- Click “Save Draft” to save your changes without making the course live.
Before you share your course with students, you should review how it looks to the public. Follow these steps to preview and publish your work.
Previewing Your Course
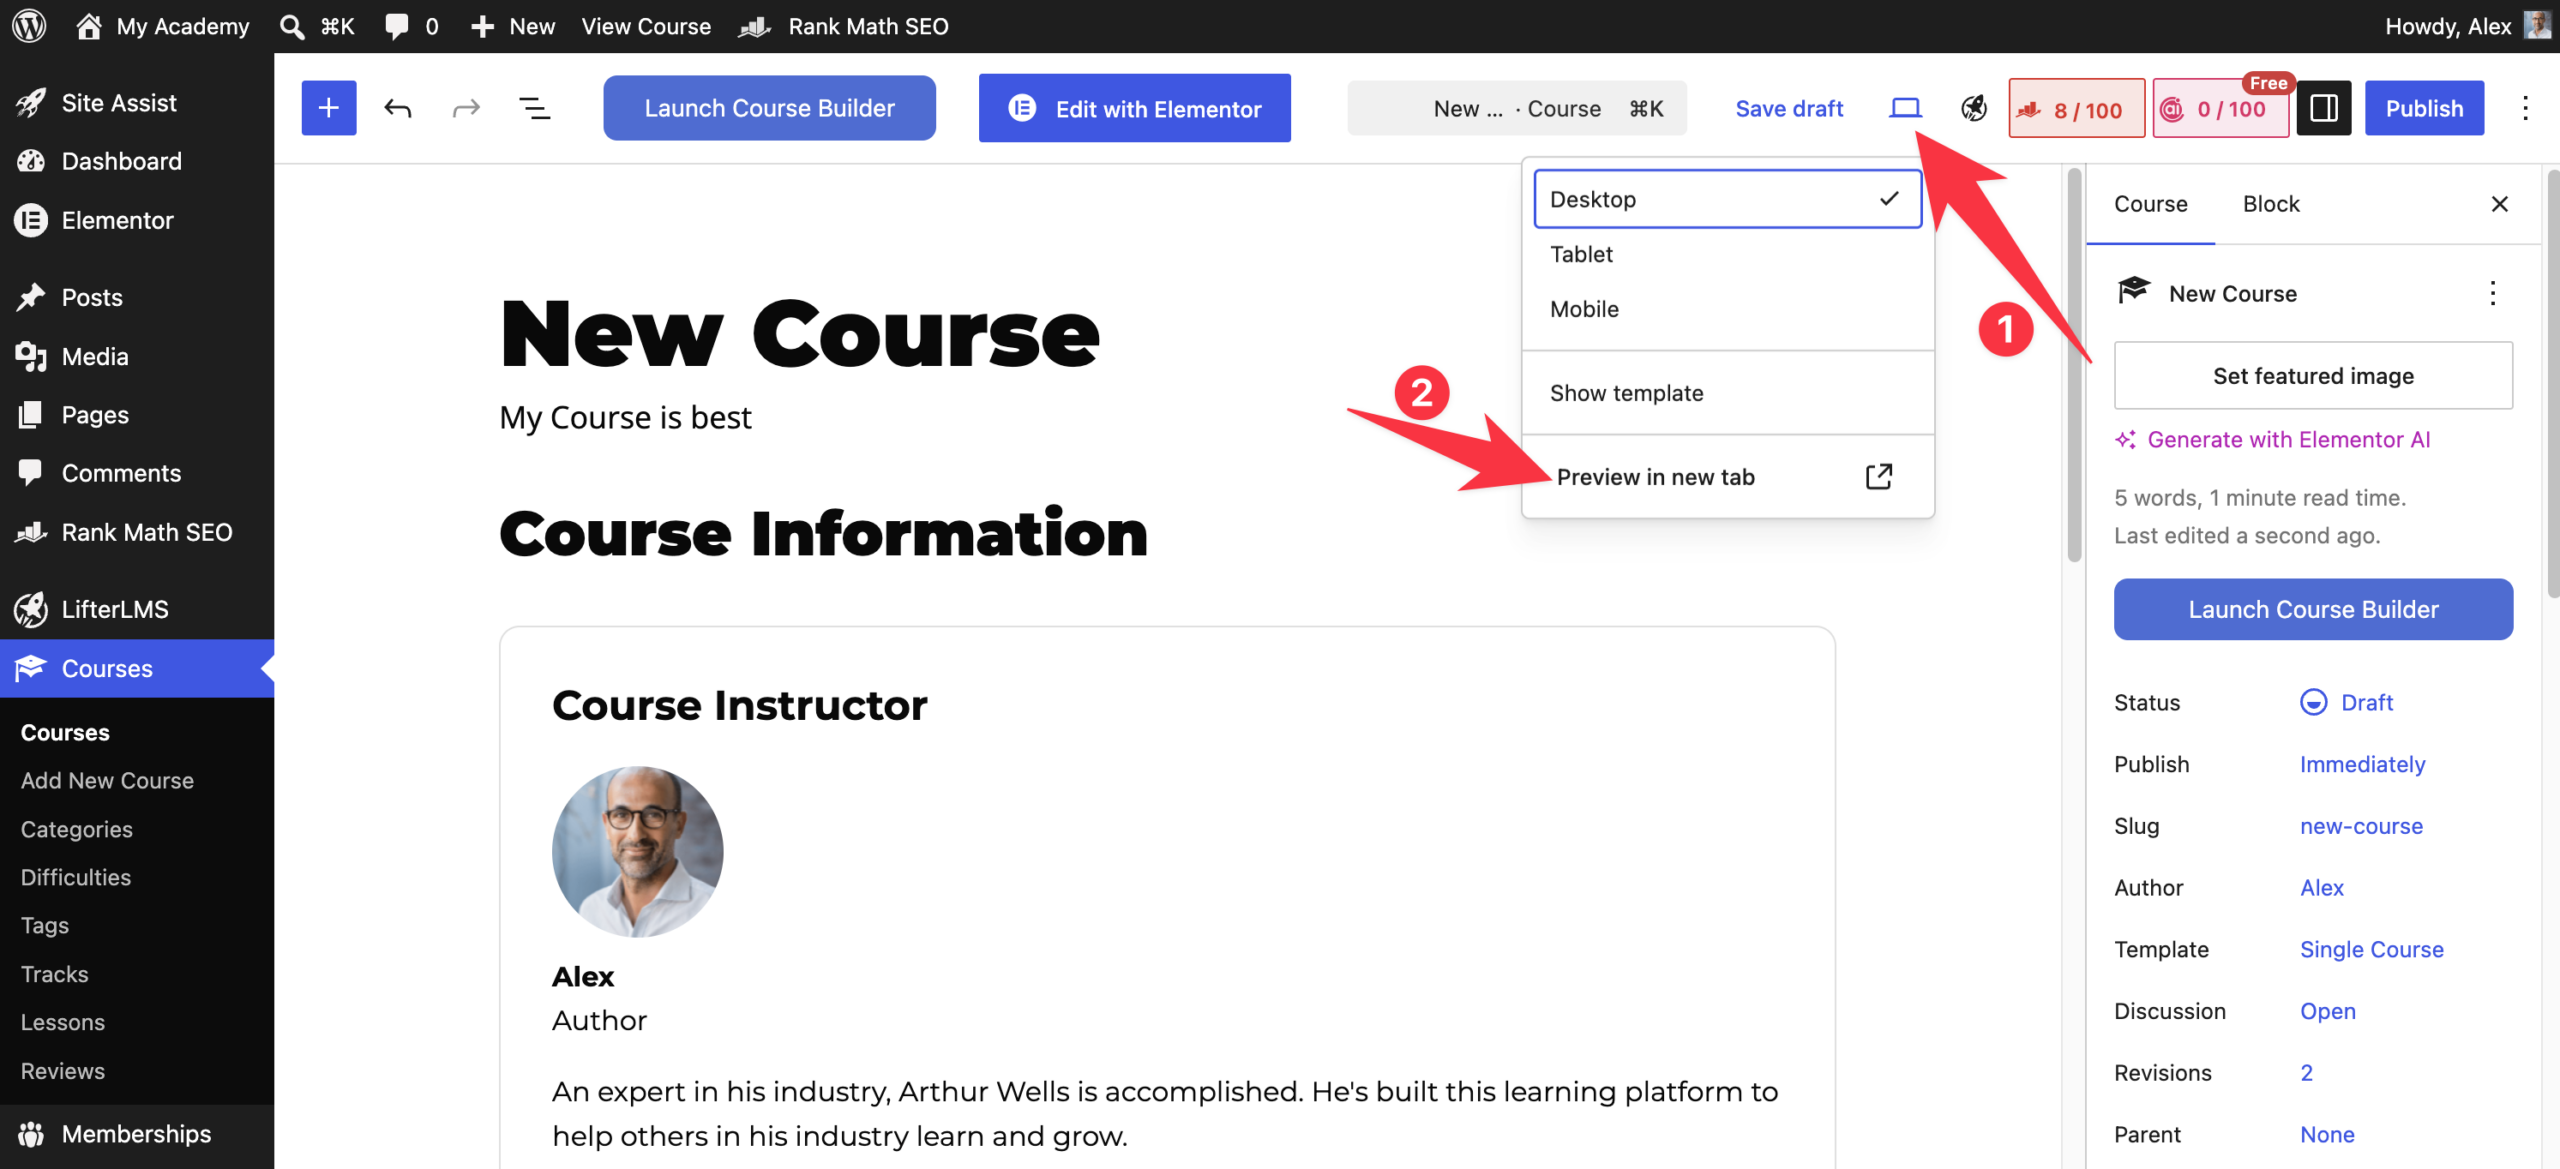
- After saving your changes, stay in the course editor. You can click the View icon located in the top toolbar.
- Select “Preview in new tab” from the dropdown menu to open the course page.
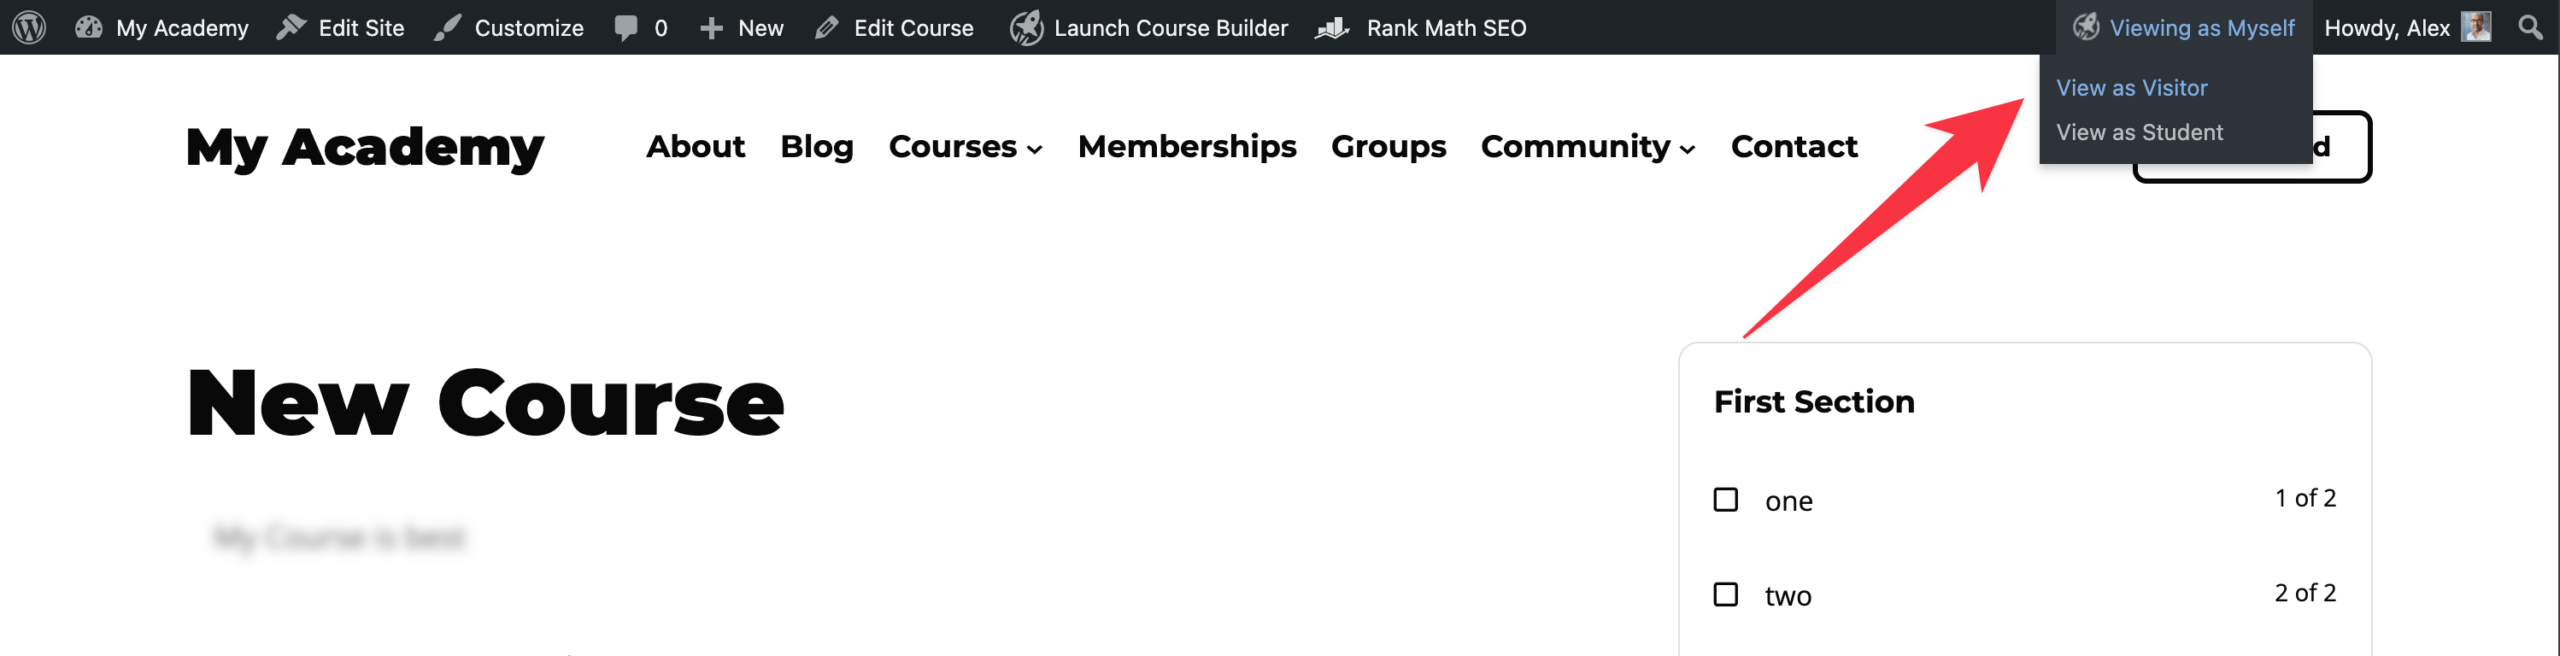
- This action will open your course page in a new browser tab. You can use the user role switcher in the toolbar to see how the page looks to different people. There are three options to choose from:
- View as Myself (admin)
- View as a student
- View as visitor
- Inspect the page to ensure the title, description, featured image, instructor information, syllabus, and access plans display exactly as you intended. Where possible, test the enrollment process using a separate student account. Confirm that the access plan works, the student can enter the course, and restricted lessons behave as expected.
Publishing Your Course
When you are ready for students to start enrolling, follow these steps to make your course live:
- Ensure all your content, lessons, and access plans are configured correctly.
- Confirm that every lesson students should access is published.
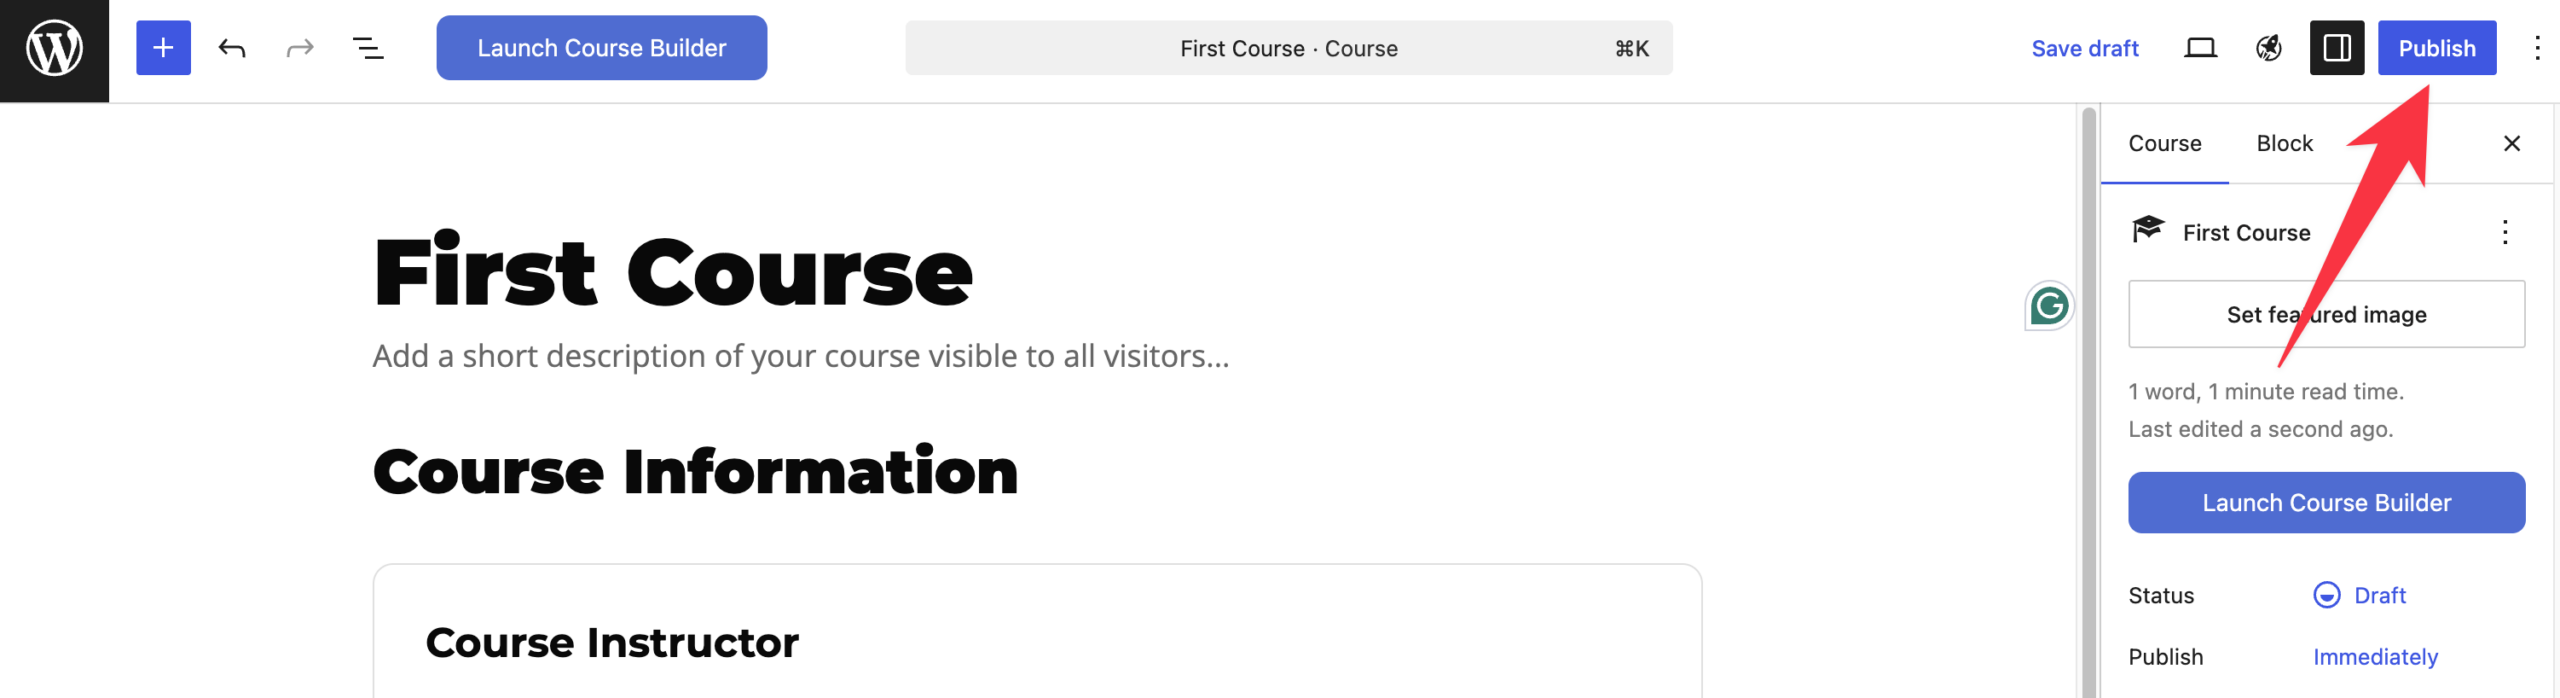
- Click the Publish button located in the top right corner of the editor.
- If you have already published the course and want to apply new changes, click the Update button instead.
Your course is now live and ready for your students to access.
Before publishing your course, confirm that you have:
- Added a clear course title.
- Written a course description.
- Added a featured image.
- Confirmed the instructor.
- Created sections and lessons.
- Added lesson content.
- Displayed or checked the course syllabus.
- Created a free or paid access plan.
- Checked any course restrictions.
- Previewed the course page.
Once your course is published, you may want to explore these related guides:
- Using The LifterLMS Course Builder
- Creating And Managing Access Plans
- Getting Started With Creating Memberships
- Using The LifterLMS Manual Payment Gateway
- Selling Courses With WooCommerce
- Grading in LifterLMS
- Assignment Types and Options (Task, Essay, Upload)
- How To Restrict Access To Certain Courses, Pages, And Blog Posts
- Dripping Lesson Content
- Creating Custom Course Sales Pages


