How do you allow students to gain access to courses and memberships with access plans?
LifterLMS Access Plans make it easy to add flexible pricing options to your courses. You can create multiple access plans for a single course, allowing for various enrollment scenarios. Both new and existing users can take advantage of these plans to enroll in paid courses.
Additionally, you can set up specialized access plans for members of your existing memberships, offering targeted pricing and benefits tailored to their needs. Access plans allow you to create diverse ways for students and members to access your courses and memberships.
Key Features of Access Plans
-
- One-time and recurring payment options: Tailor your payment structure to fit your business model.
- Expiration settings: Define when access plans expire, providing more control over course availability.
- Special pricing for specific memberships: Offer exclusive rates to users with certain membership levels.
- Trial Time: Provide a set period of access to your course.
Note: You can create up to 6 access plans for each course and membership.
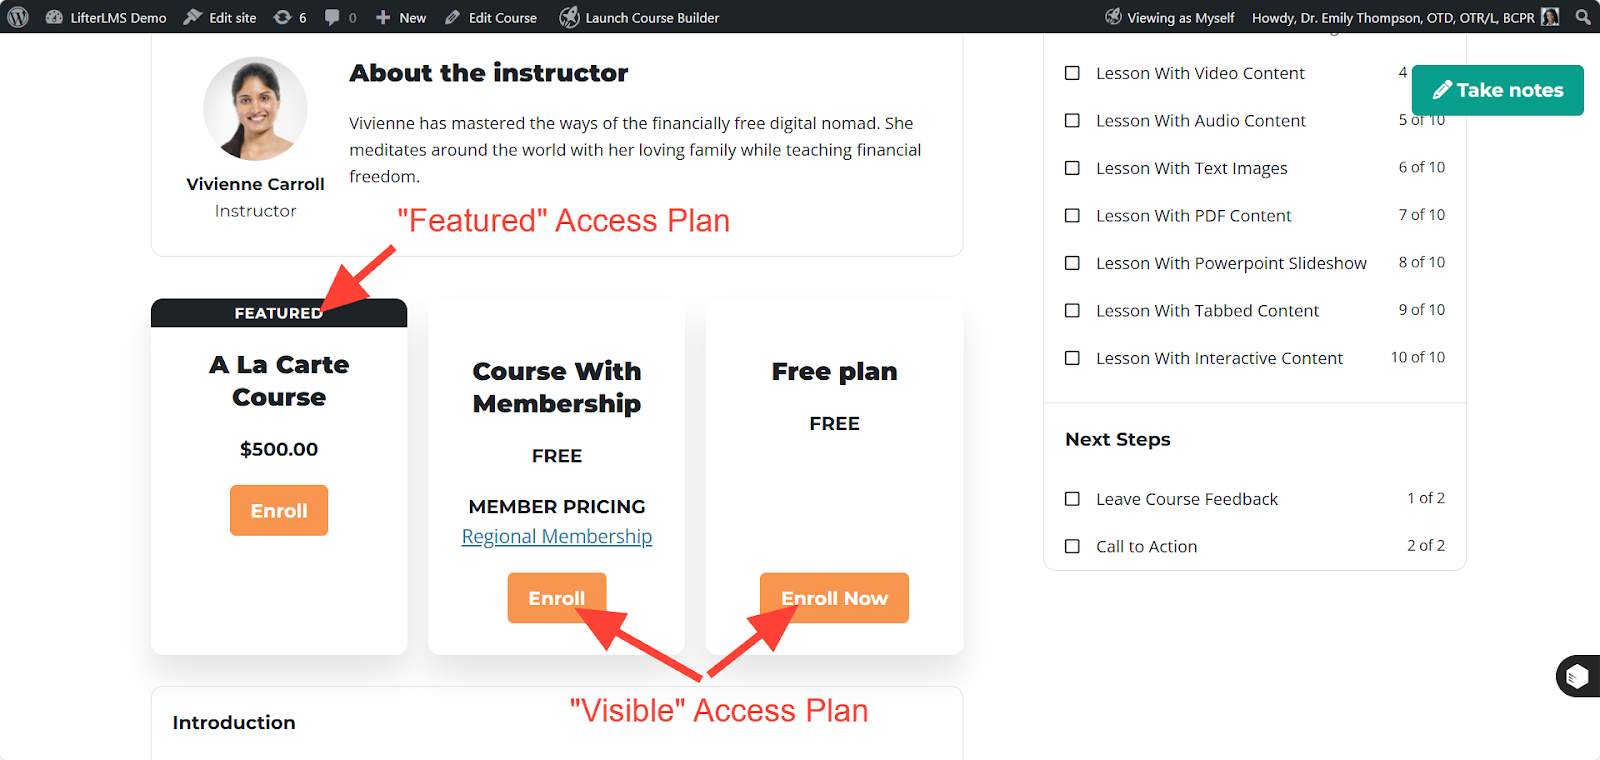
Access Plans have three visibility settings:
- Visible (default)
- The access plan will be displayed on pricing tables normally.
- Featured
- The access plan will be highlighted with a border and a “Featured” flag above the item.
- Hidden
- The access plan will not be visible on pricing tables, but can be accessed via a direct link.
- Hidden access plans are intended to allow you to create special pricing for targeted marketing efforts.
- If you plan to create hidden access plans, you may find the Access Plan Button shortcode or block useful.
When you edit a Course or a Membership in the WordPress block editor, you might not see your LifterLMS settings right away. The WordPress interface sometimes collapses the entire settings area at the bottom of the page, hiding your options.
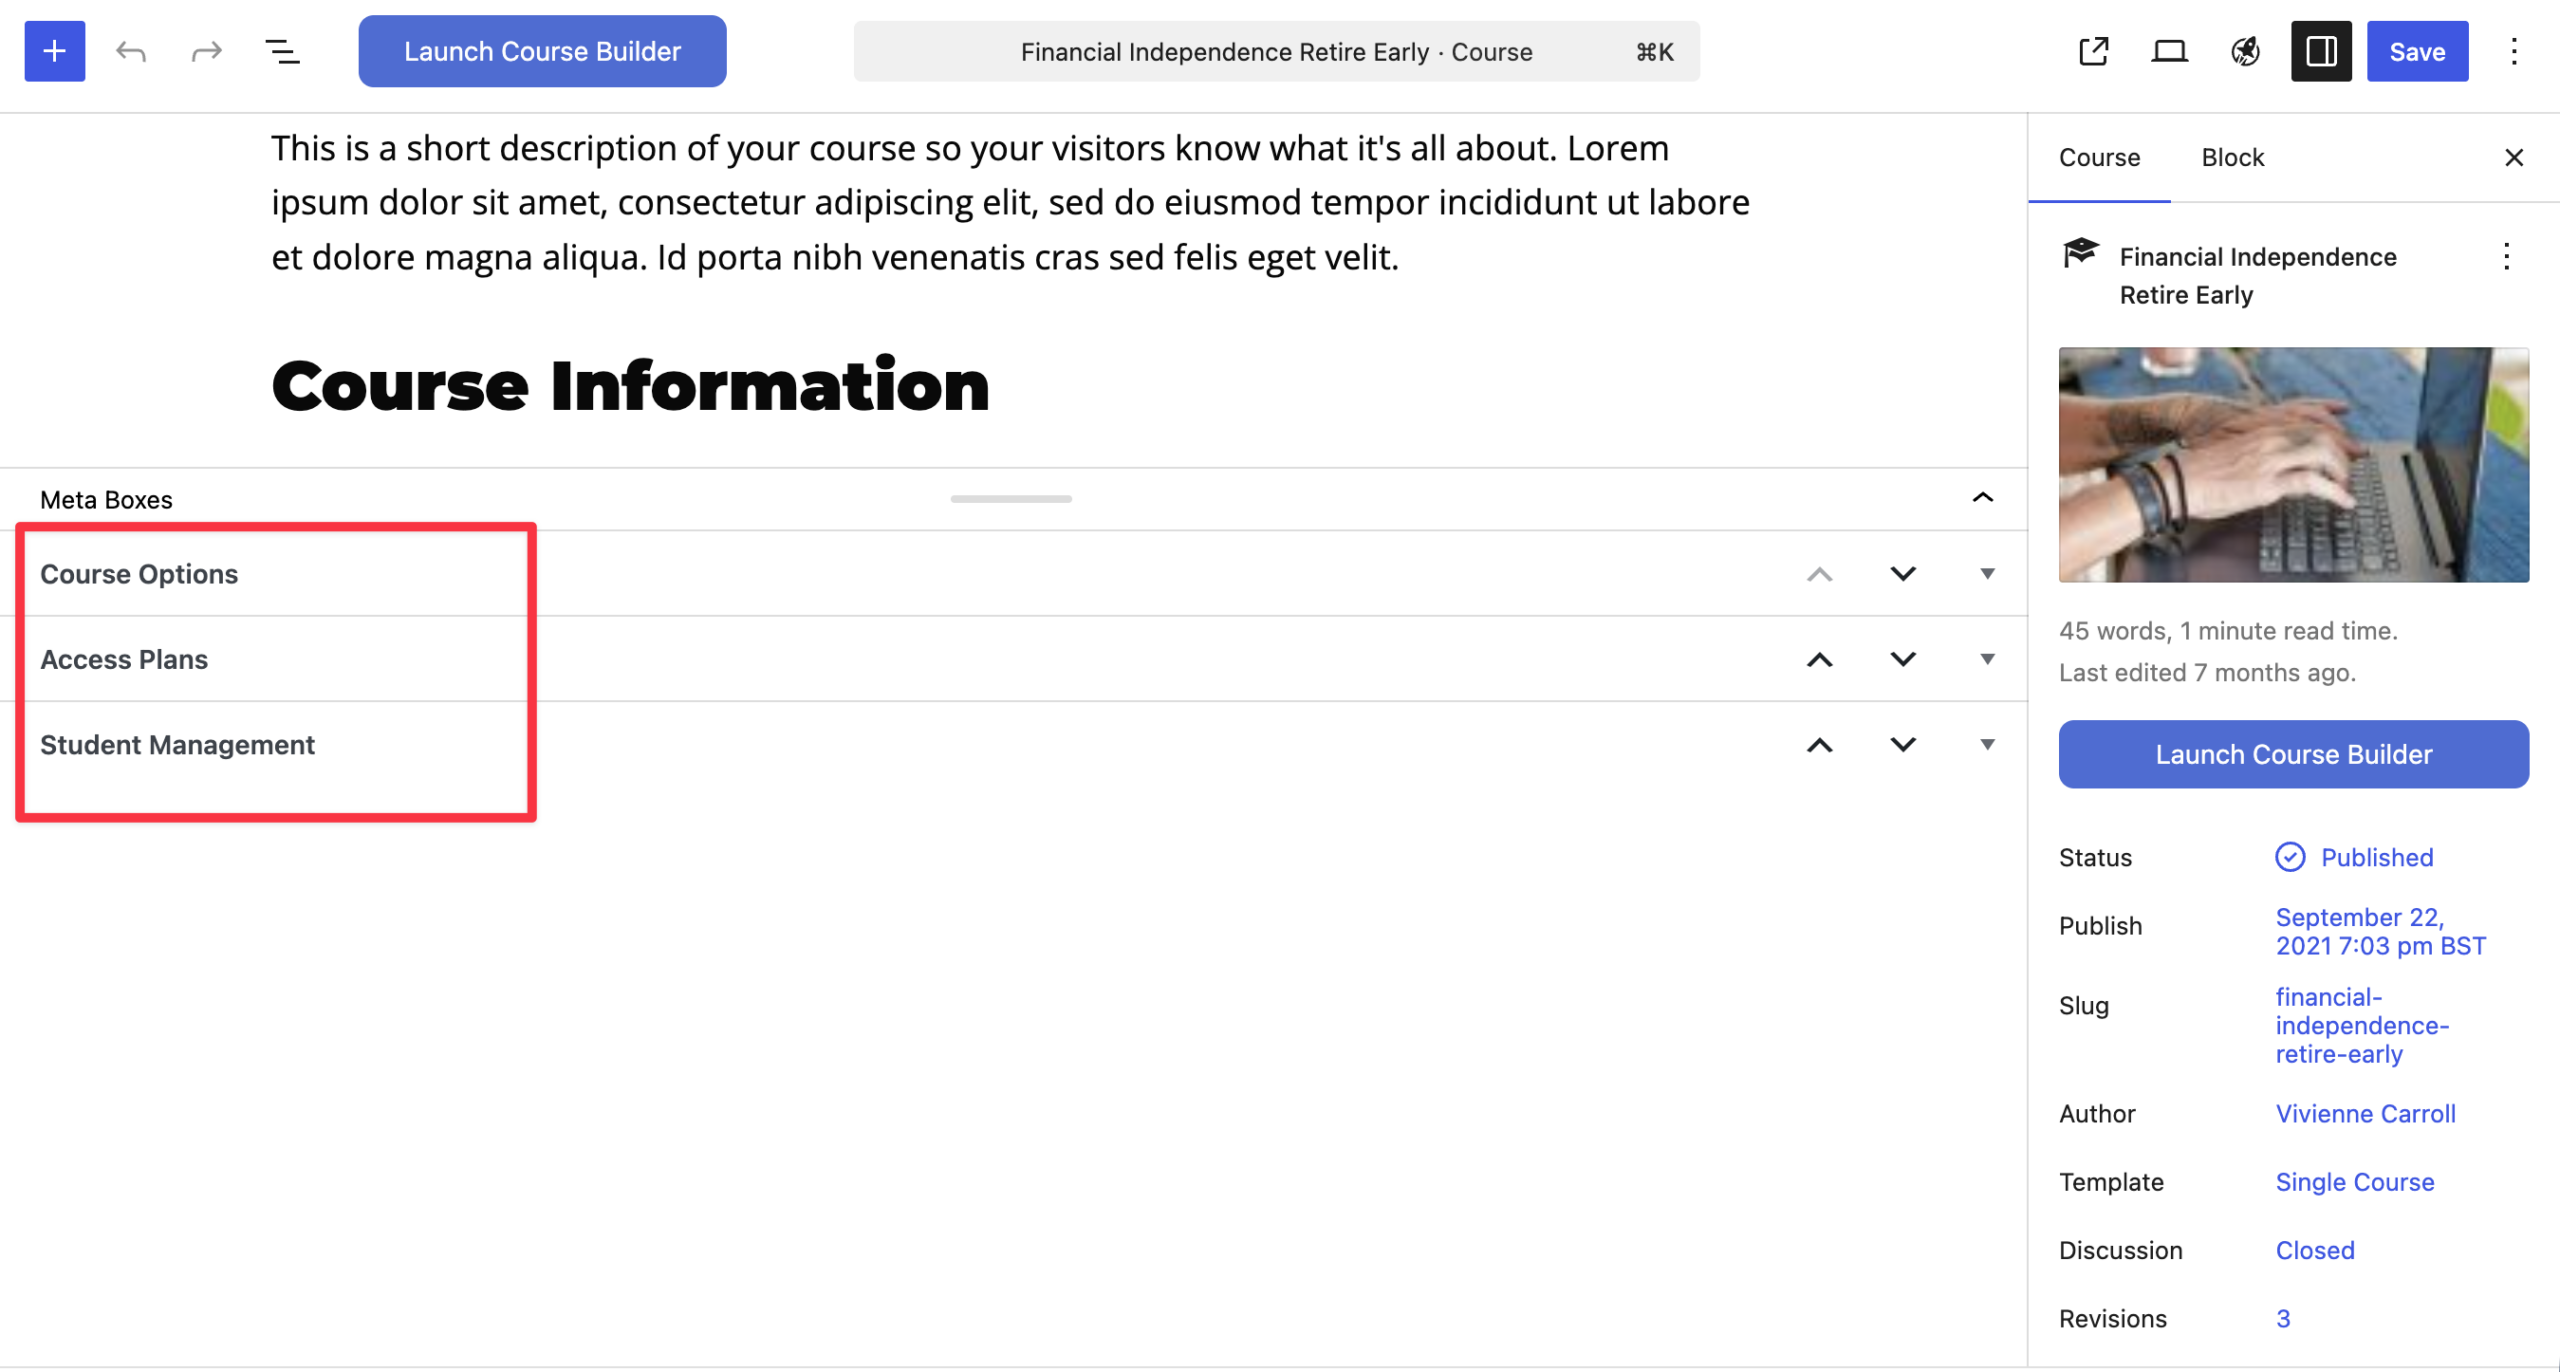
Always check the very bottom of your editor screen. If your “Access Plans”, “Course Options”, or “Student Management” tabs are missing, WordPress has collapsed the “Meta Boxes” panel. You will need to manually expand this panel to configure your course pricing and enrollment options.
Follow these steps to find and expand your LifterLMS settings:
- Navigate to your course editor by going to Dashboard > LifterLMS > Courses and clicking Edit on your course.
- Scroll to the absolute bottom of the page, below the course block layout.
- Look for a thin, horizontal white bar at the bottom of the screen that says “Meta Boxes” on the left side.
- Locate the small downward-pointing arrow button on the far right side of that “Meta Boxes” bar.
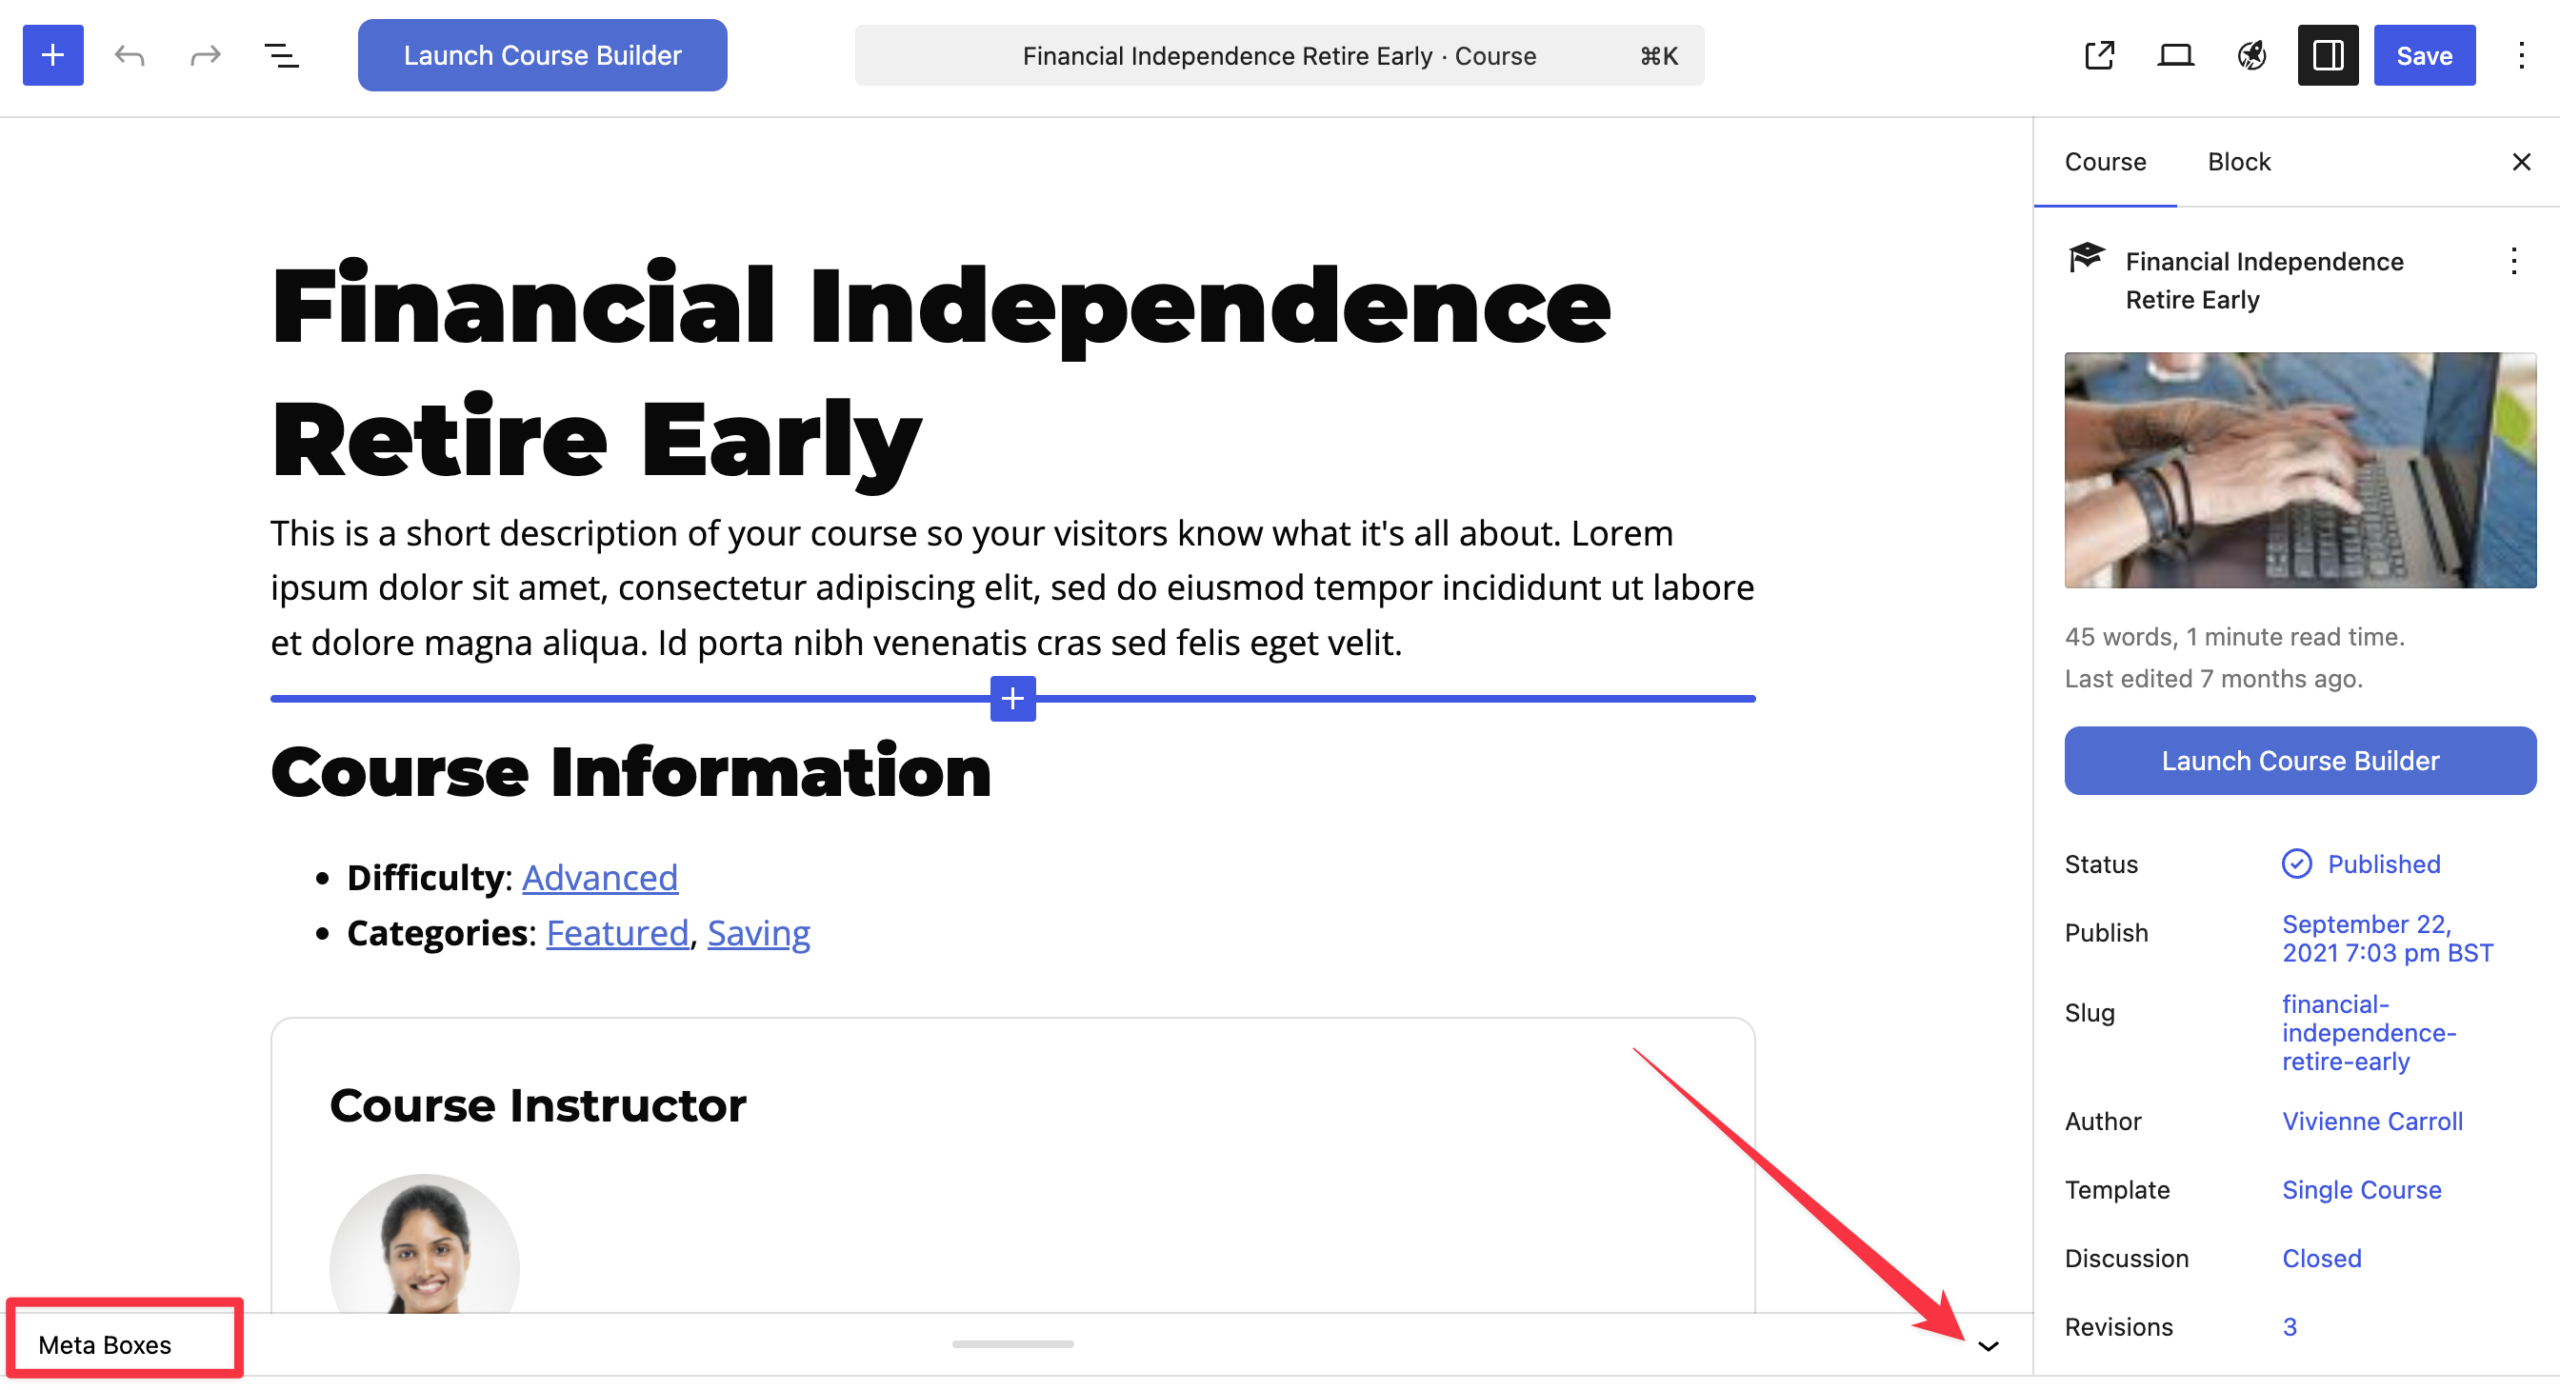
- Click the downward-pointing arrow button to expand the panel.
- Click on the “Access Plans” tab to set up your course pricing and access options.
Access Plans have three visibility settings:
With “members only” access plans, you can create special pricing structures for students belonging to memberships on your site.
To create a members-only access plan, select “Members only” from the “Availability” option on the access plan, then search for and add one or more memberships in the “Memberships” area.
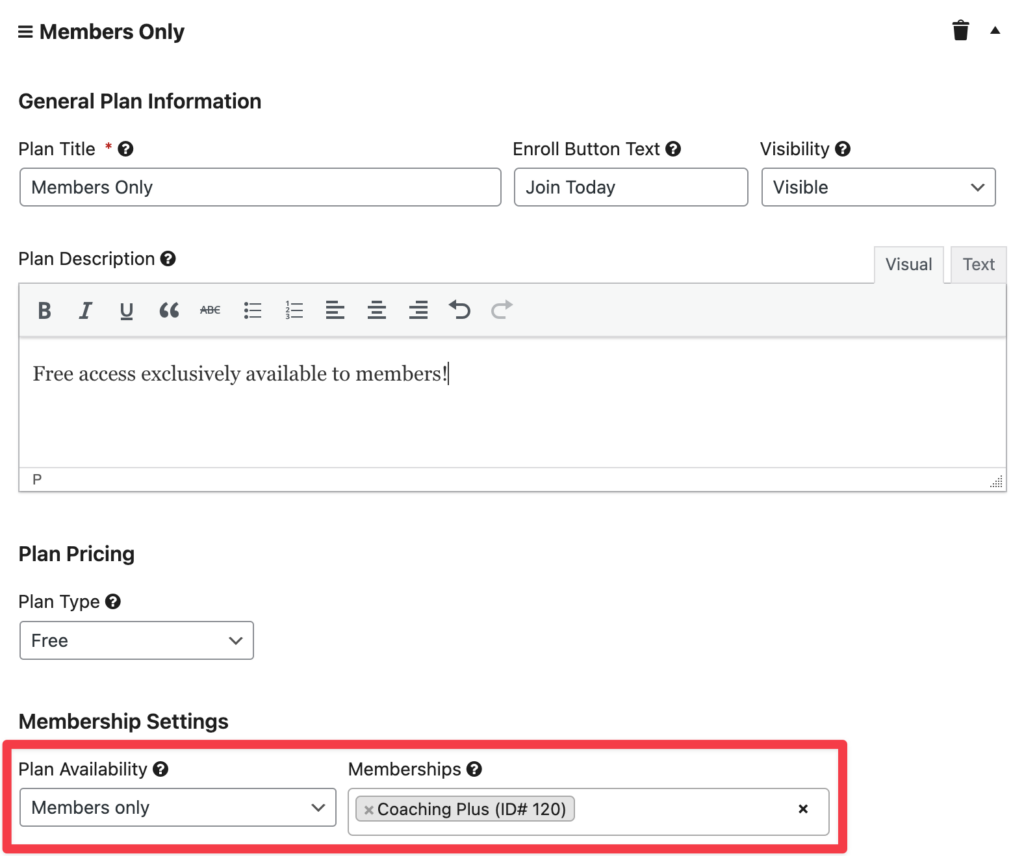
The members-only access plan is highlighted with a “Member Pricing” tag on the pricing table.
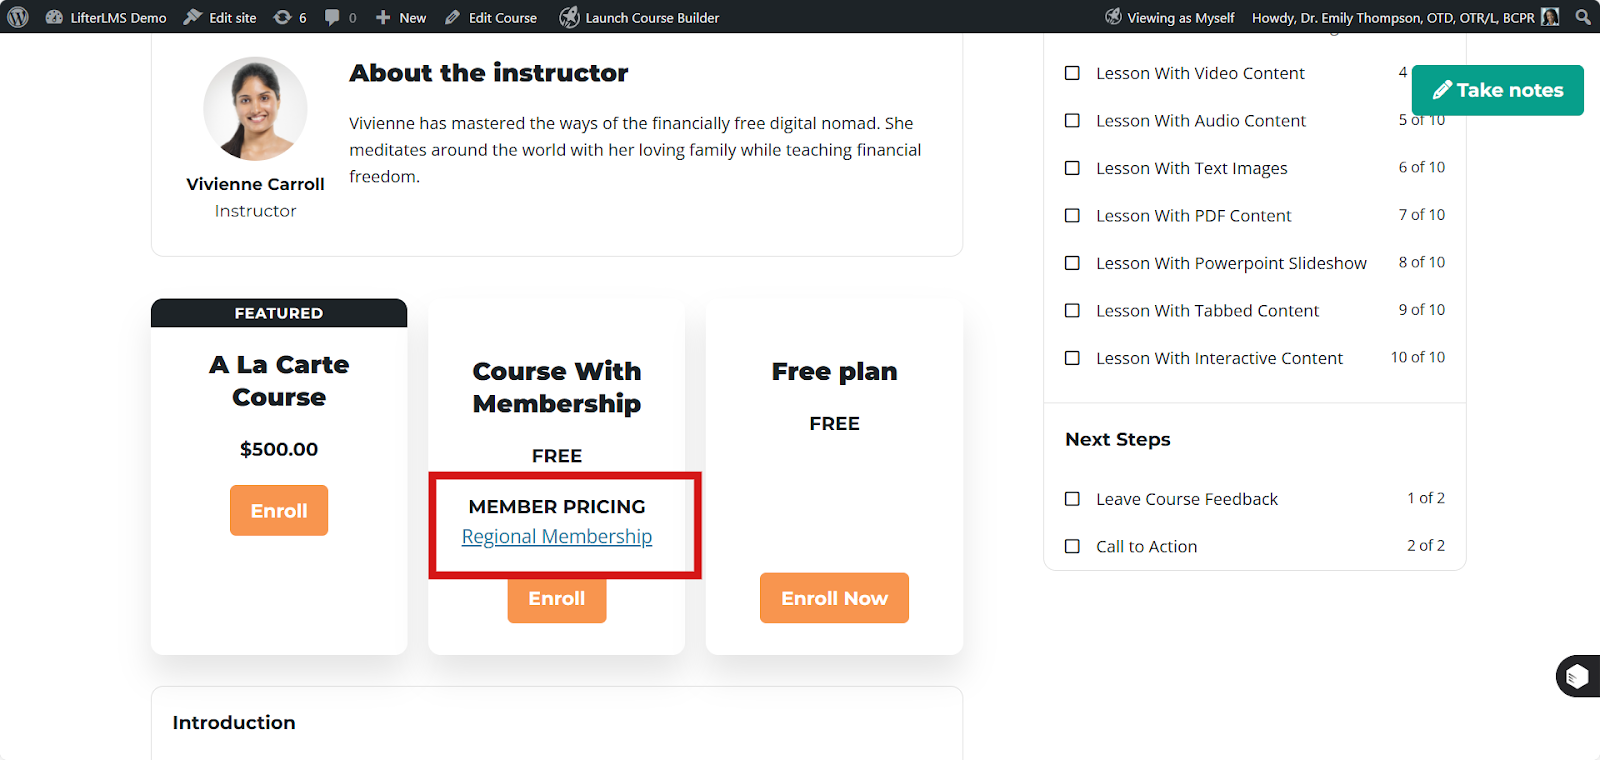
Any logged-in student with access to at least one of the selected memberships will be able to enroll in the course using the members-only access plan.
Other users will be displayed a popover that provides links to the memberships that they require to use the access plan.
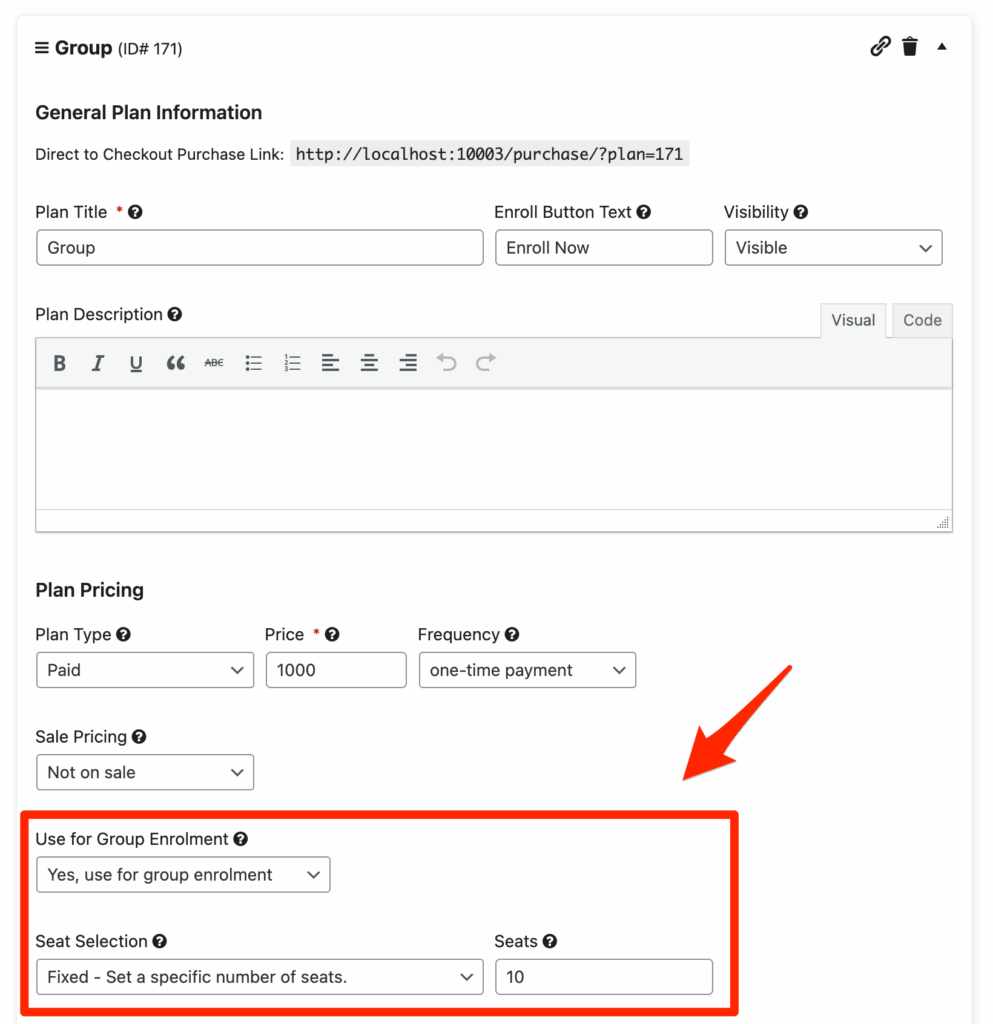
With the LifterLMS Groups add-on, you can enable the creation of a group after the access plan has been purchased. This allows you to sell to organizations in bulk, and your customers can manage their enrollments themselves.
Want to see examples of access plans and pricing models you can use for your courses and memberships? Click here to see 10 examples.
If you have created an access plan for a course, users will enroll in that course based on the pricing set in the plan. If you wish to update the pricing, follow these steps:
- Navigate to LifterLMS > Courses in your WordPress admin dashboard.
- Select the specific course you want to update.
- Click Edit on the selected course.
- Scroll to the “Access Plan” section.
- Locate the relevant access plan and update the price.
- Click Save to save your changes.
Notes:
-
- Updating the price will not affect users who are already enrolled in the course. Their renewal price will remain unchanged.
- The new pricing will only apply to new users who enroll after the changes are made. This ensures that current users are not affected by pricing updates, while providing you with flexibility for future enrollments.
LifterLMS will only display access plans that can be fully processed by an installed and activated payment gateway. If there are no gateways that can support the type of access plan, it simply will not display on the front end.
This is to prevent students from proceeding to checkout only to find that they can’t purchase the plan.
- Any free access plan can be “processed” without a payment gateway.
- Any one-time payment access plan can be processed by the Manual Gateway.
- Any access plan (recurring or one-time) can be processed by LifterLMS Stripe or LifterLMS PayPal (with reference transactions enabled)


