Sky Pilot Theme Getting Started Walkthrough
First, you’ll need to purchase a license to the Sky Pilot theme. It is available either as an individual purchase or as part of the Universe Bundle and the Infinity Bundle.
Once you have a license, there are three ways to install the Sky Pilot theme:
- By using the license key. To do this, first add your license key to your WordPress site. Once the license is added, navigate to LifterLMS > Add-ons & more > Themes > Sky Pilot from inside the WordPress admin, then click on the Install button. Once installed, click on the Activate button.
- By manually uploading the theme via the WordPress admin. To do this, first download for the Sky Pilot theme inside your LifterLMS account. The theme will be downloaded as a ZIP file. Once you have the ZIP file, navigate to Appearance > Themes > Add Theme from inside the WordPress administration area. On the page that loads, click on the Upload Theme button, followed by the Choose File button, to select the ZIP file. Once the ZIP file is selected, click on Install Now to install the Sky Pilot theme. Finally, once the Sky Pilot theme is installed, click on the Activate button.
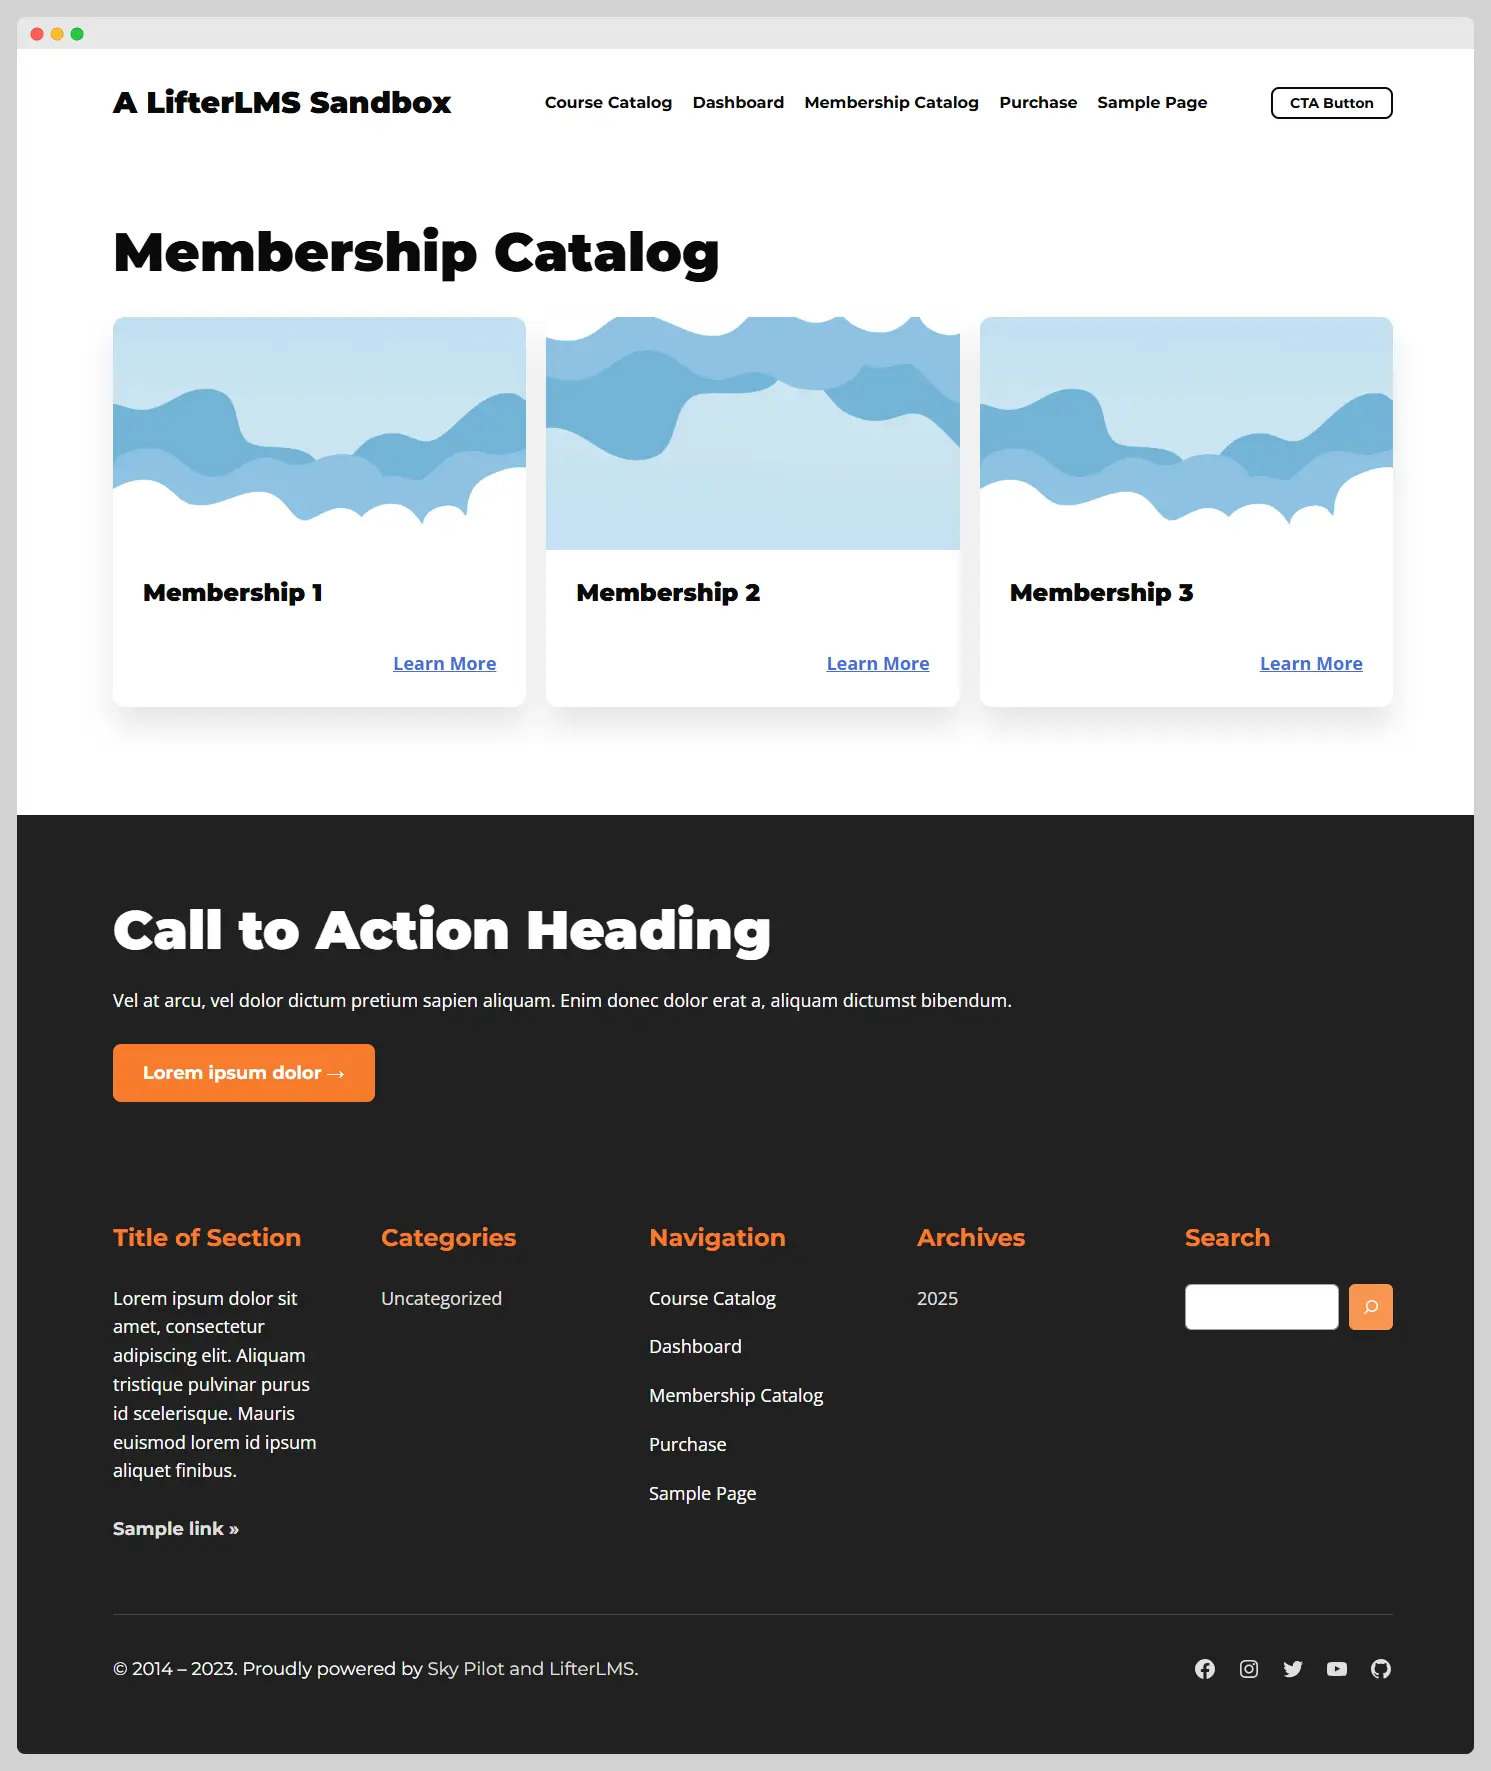
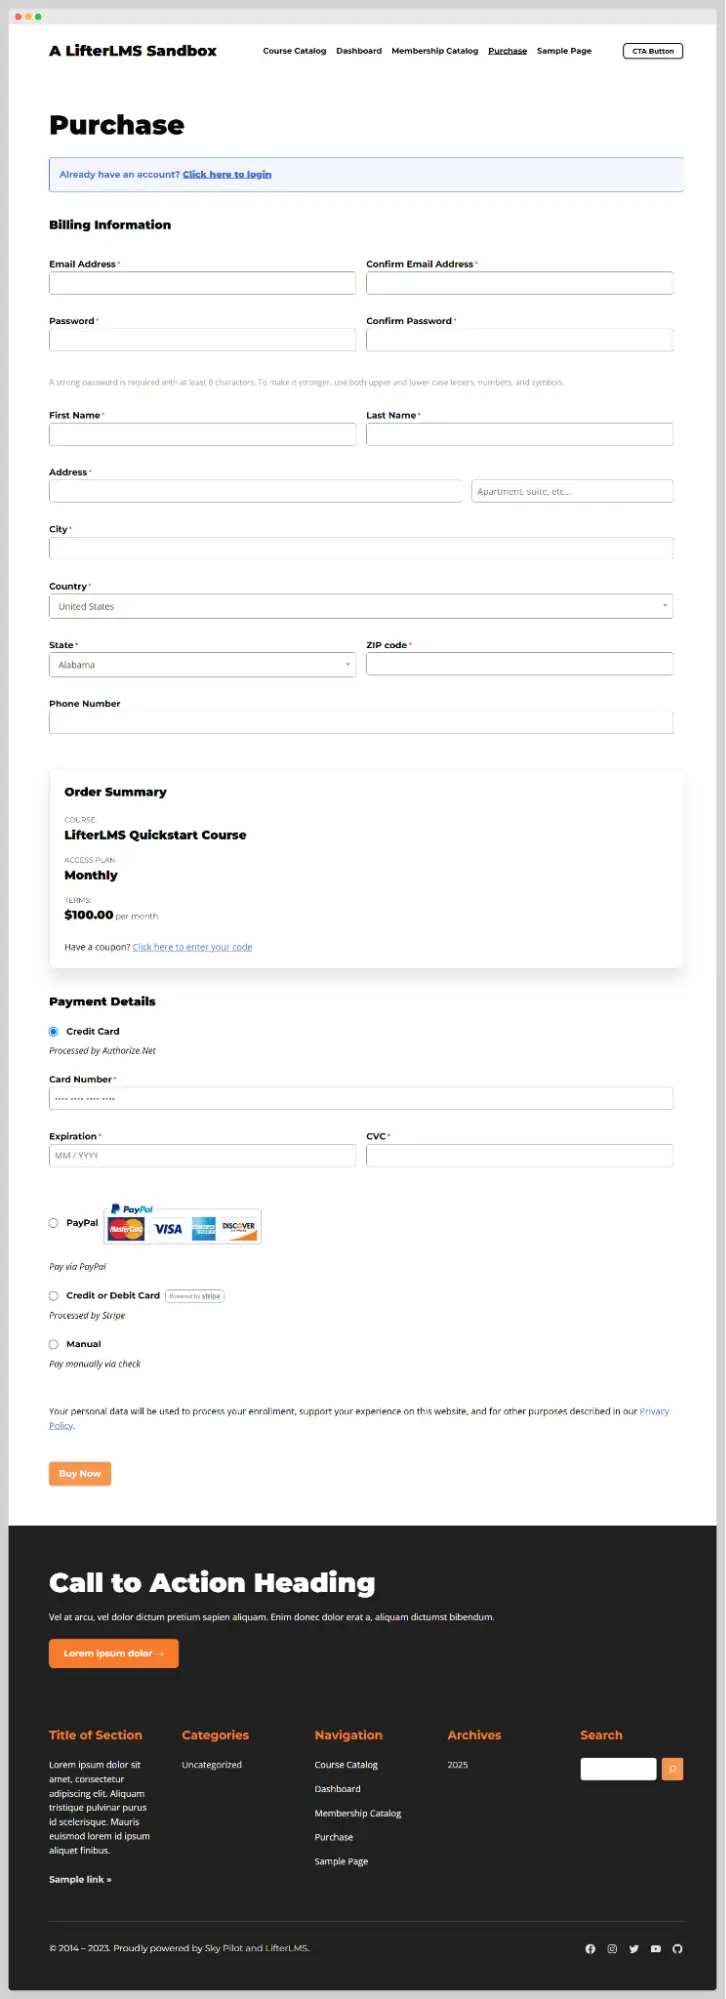
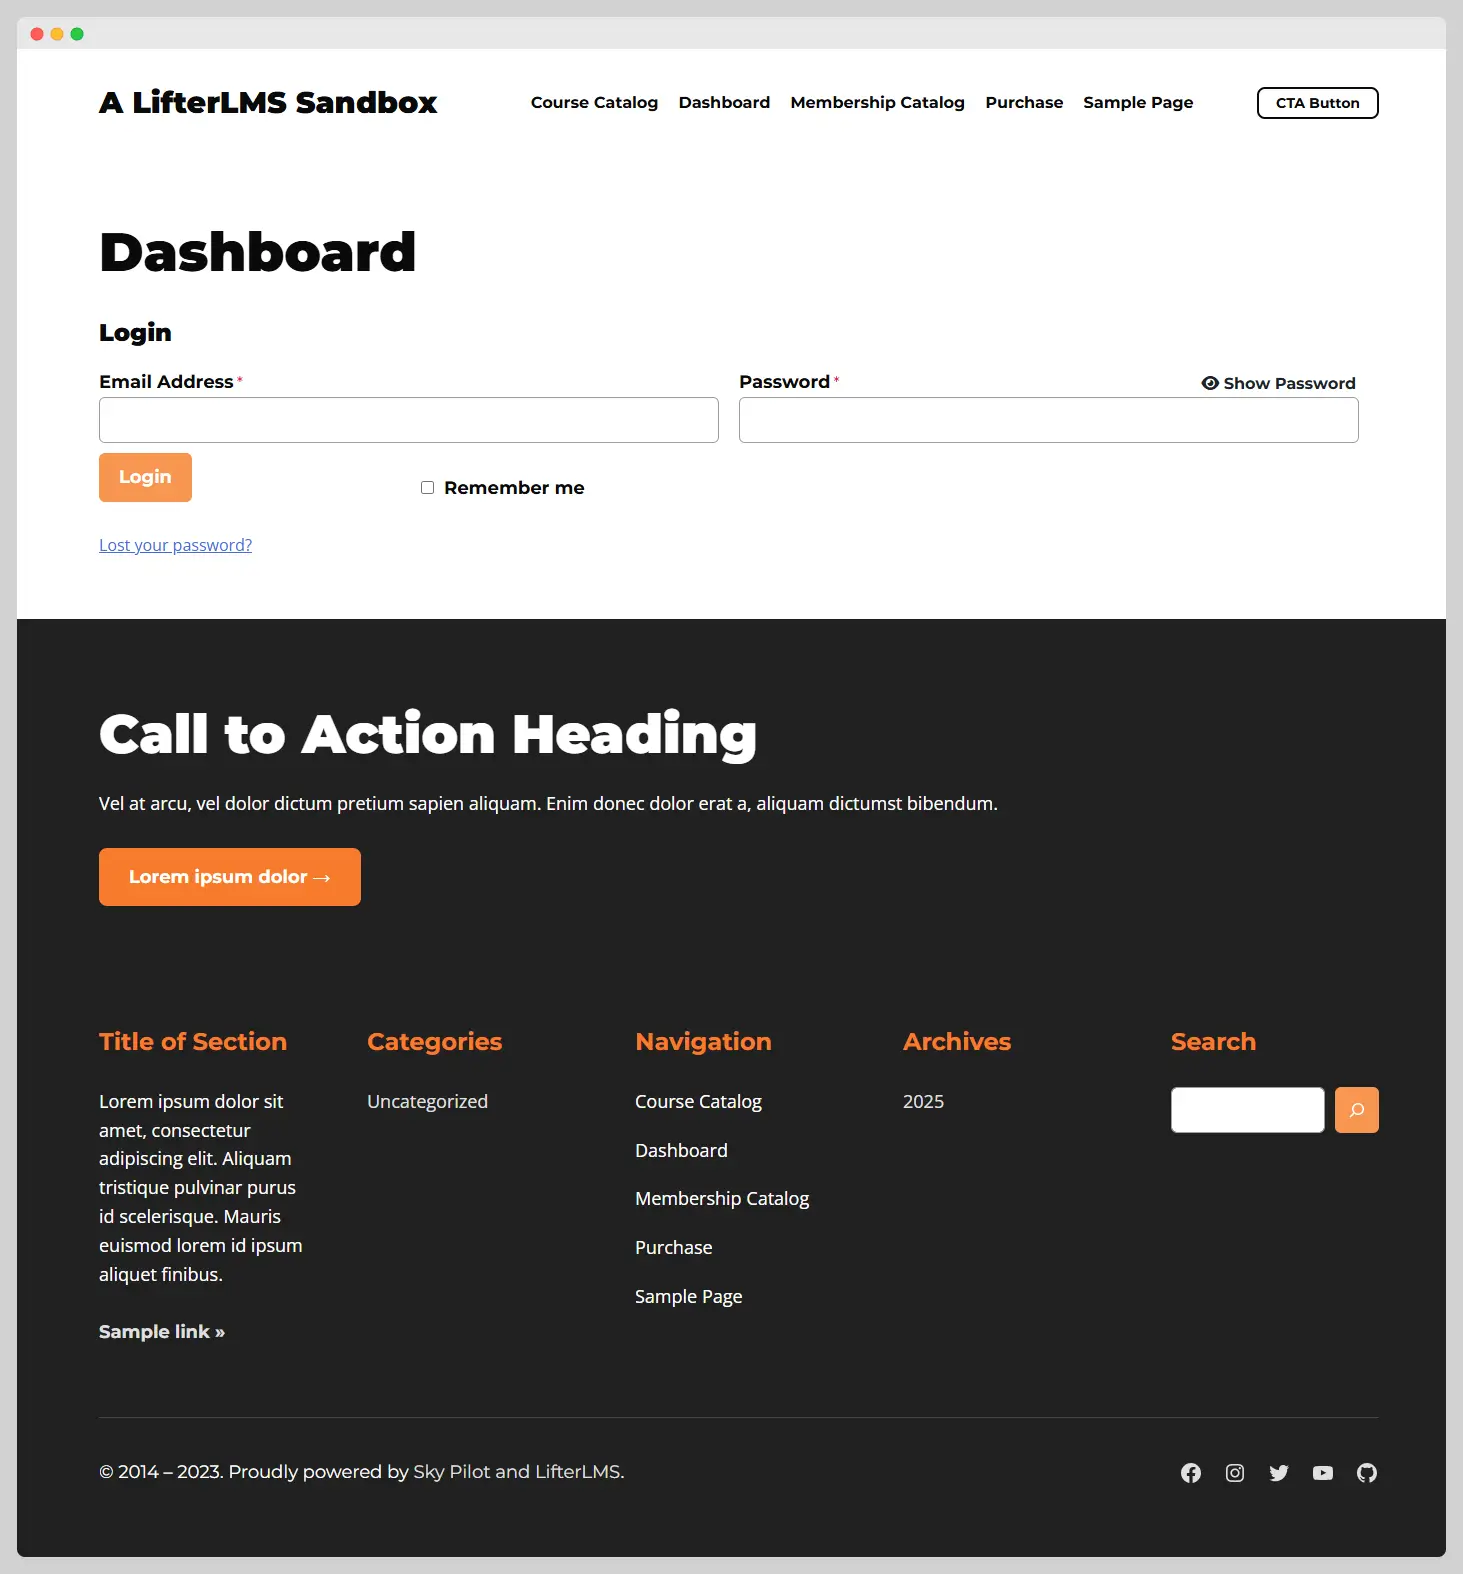
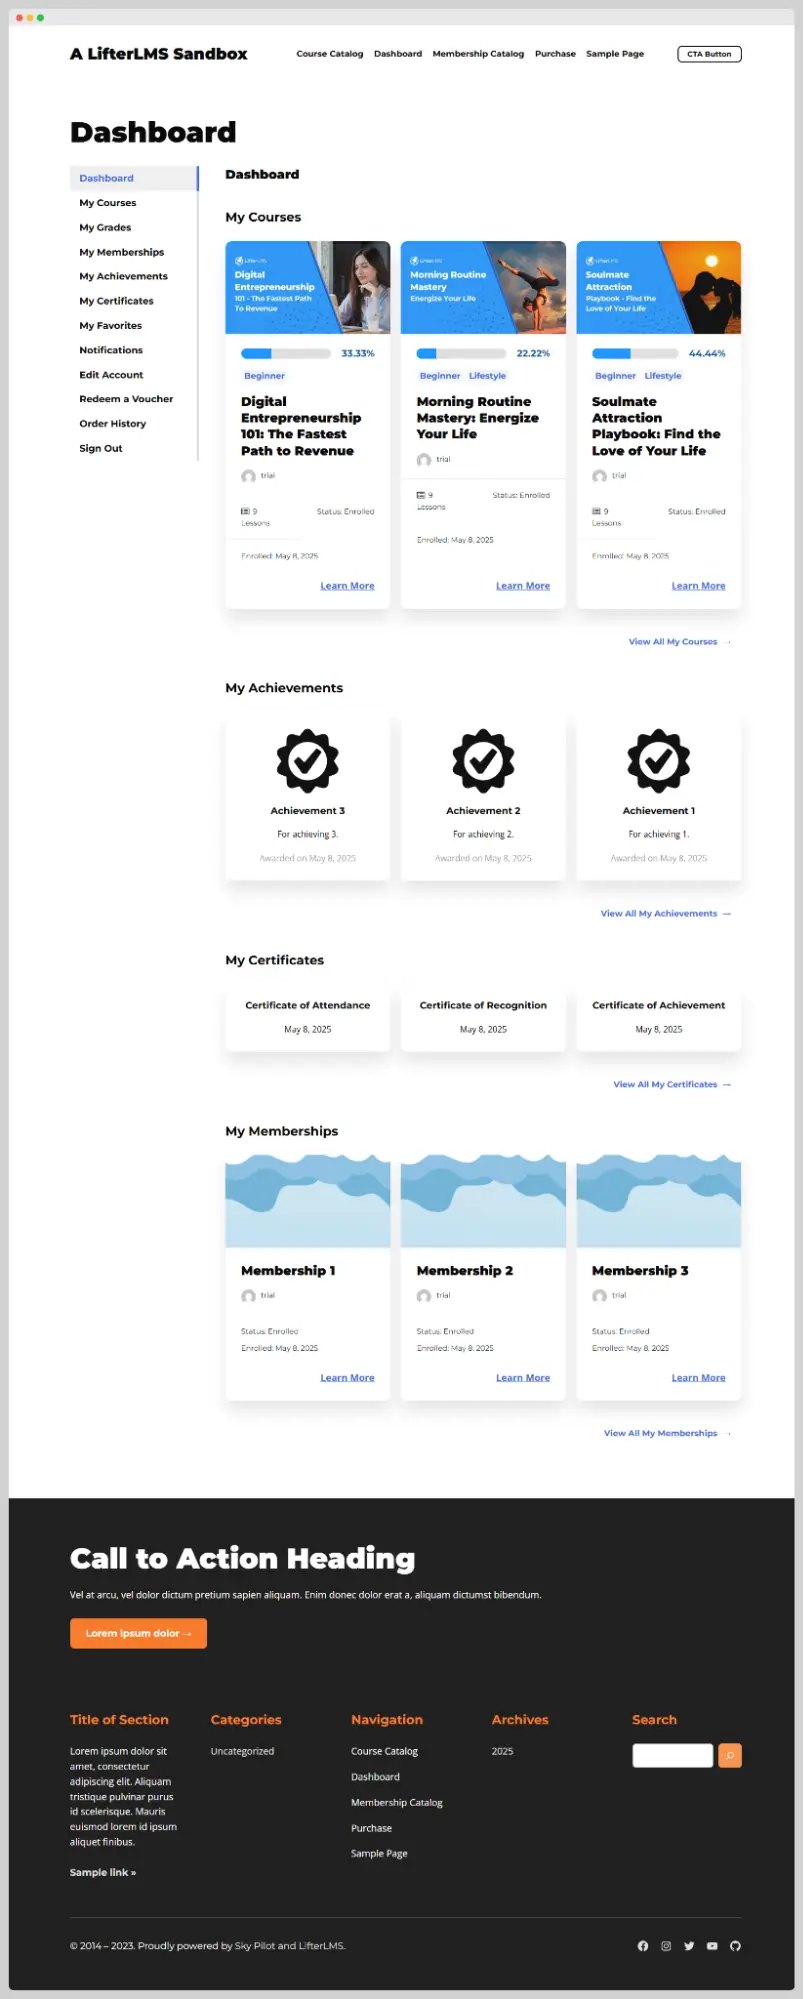
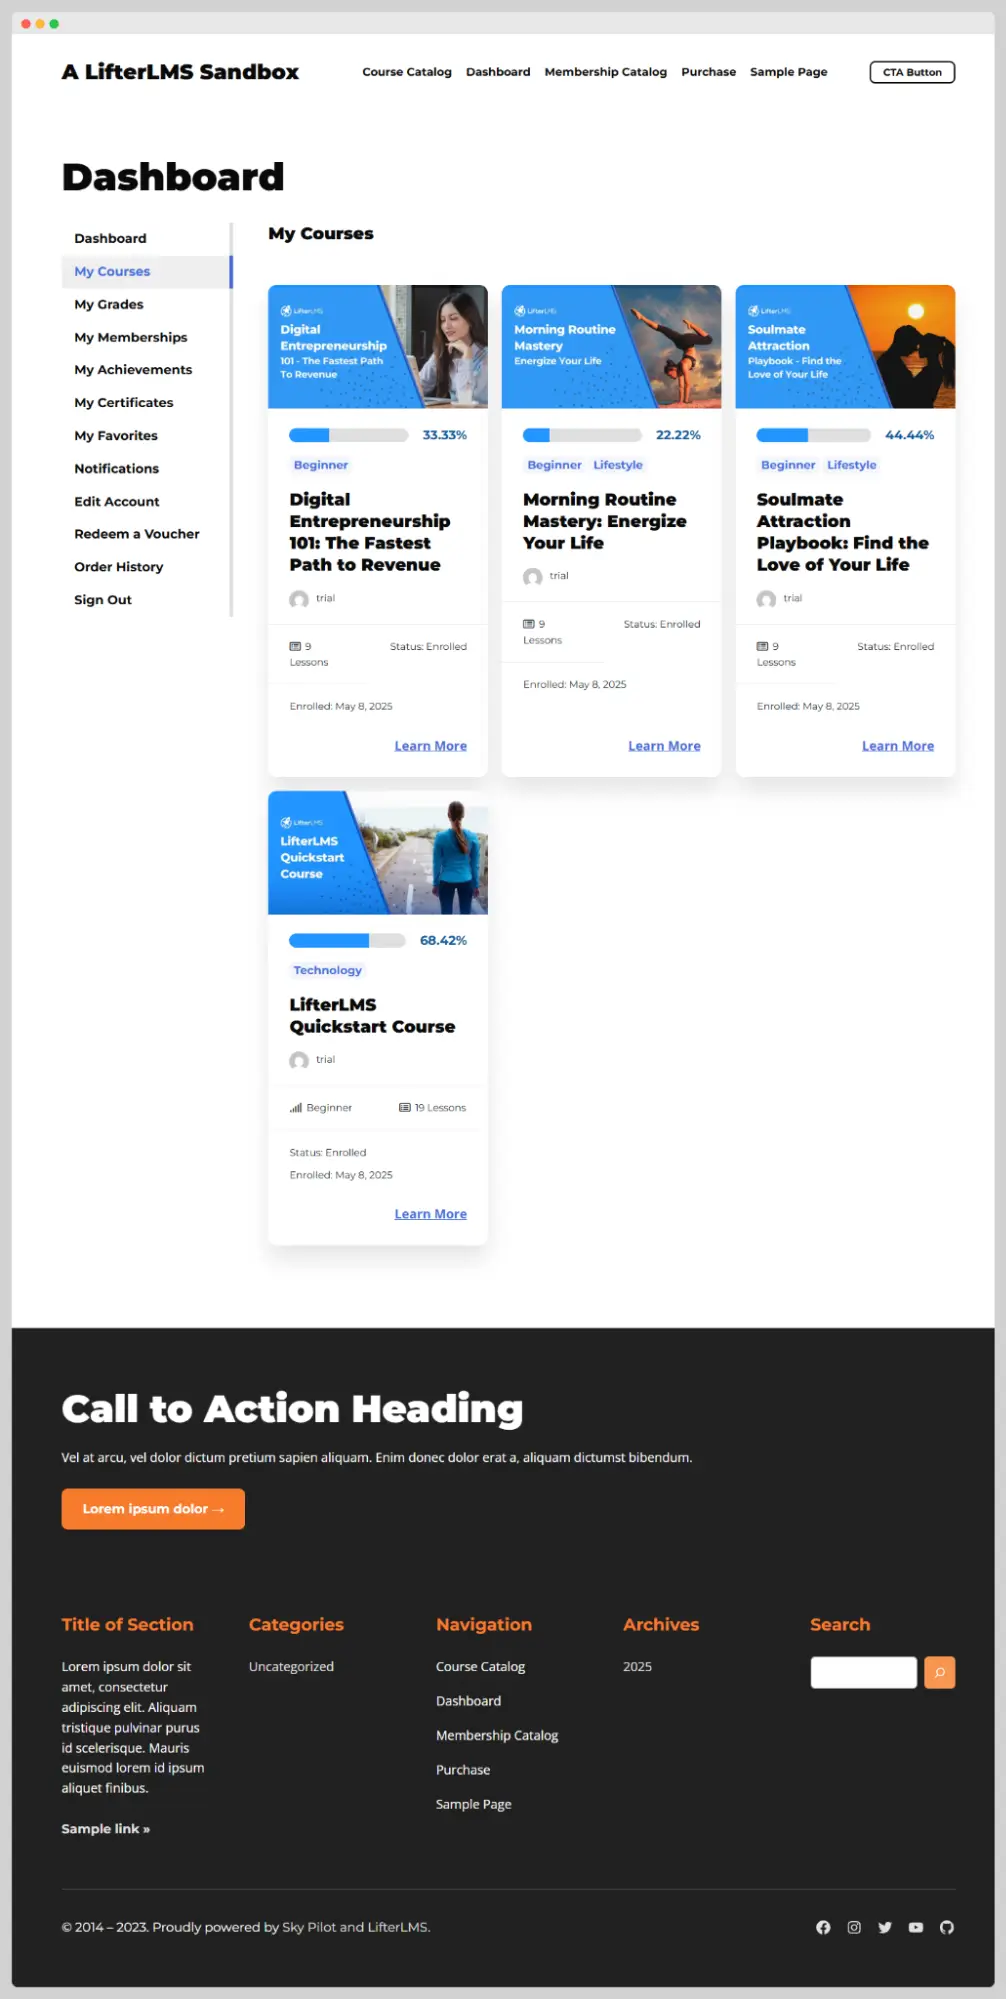
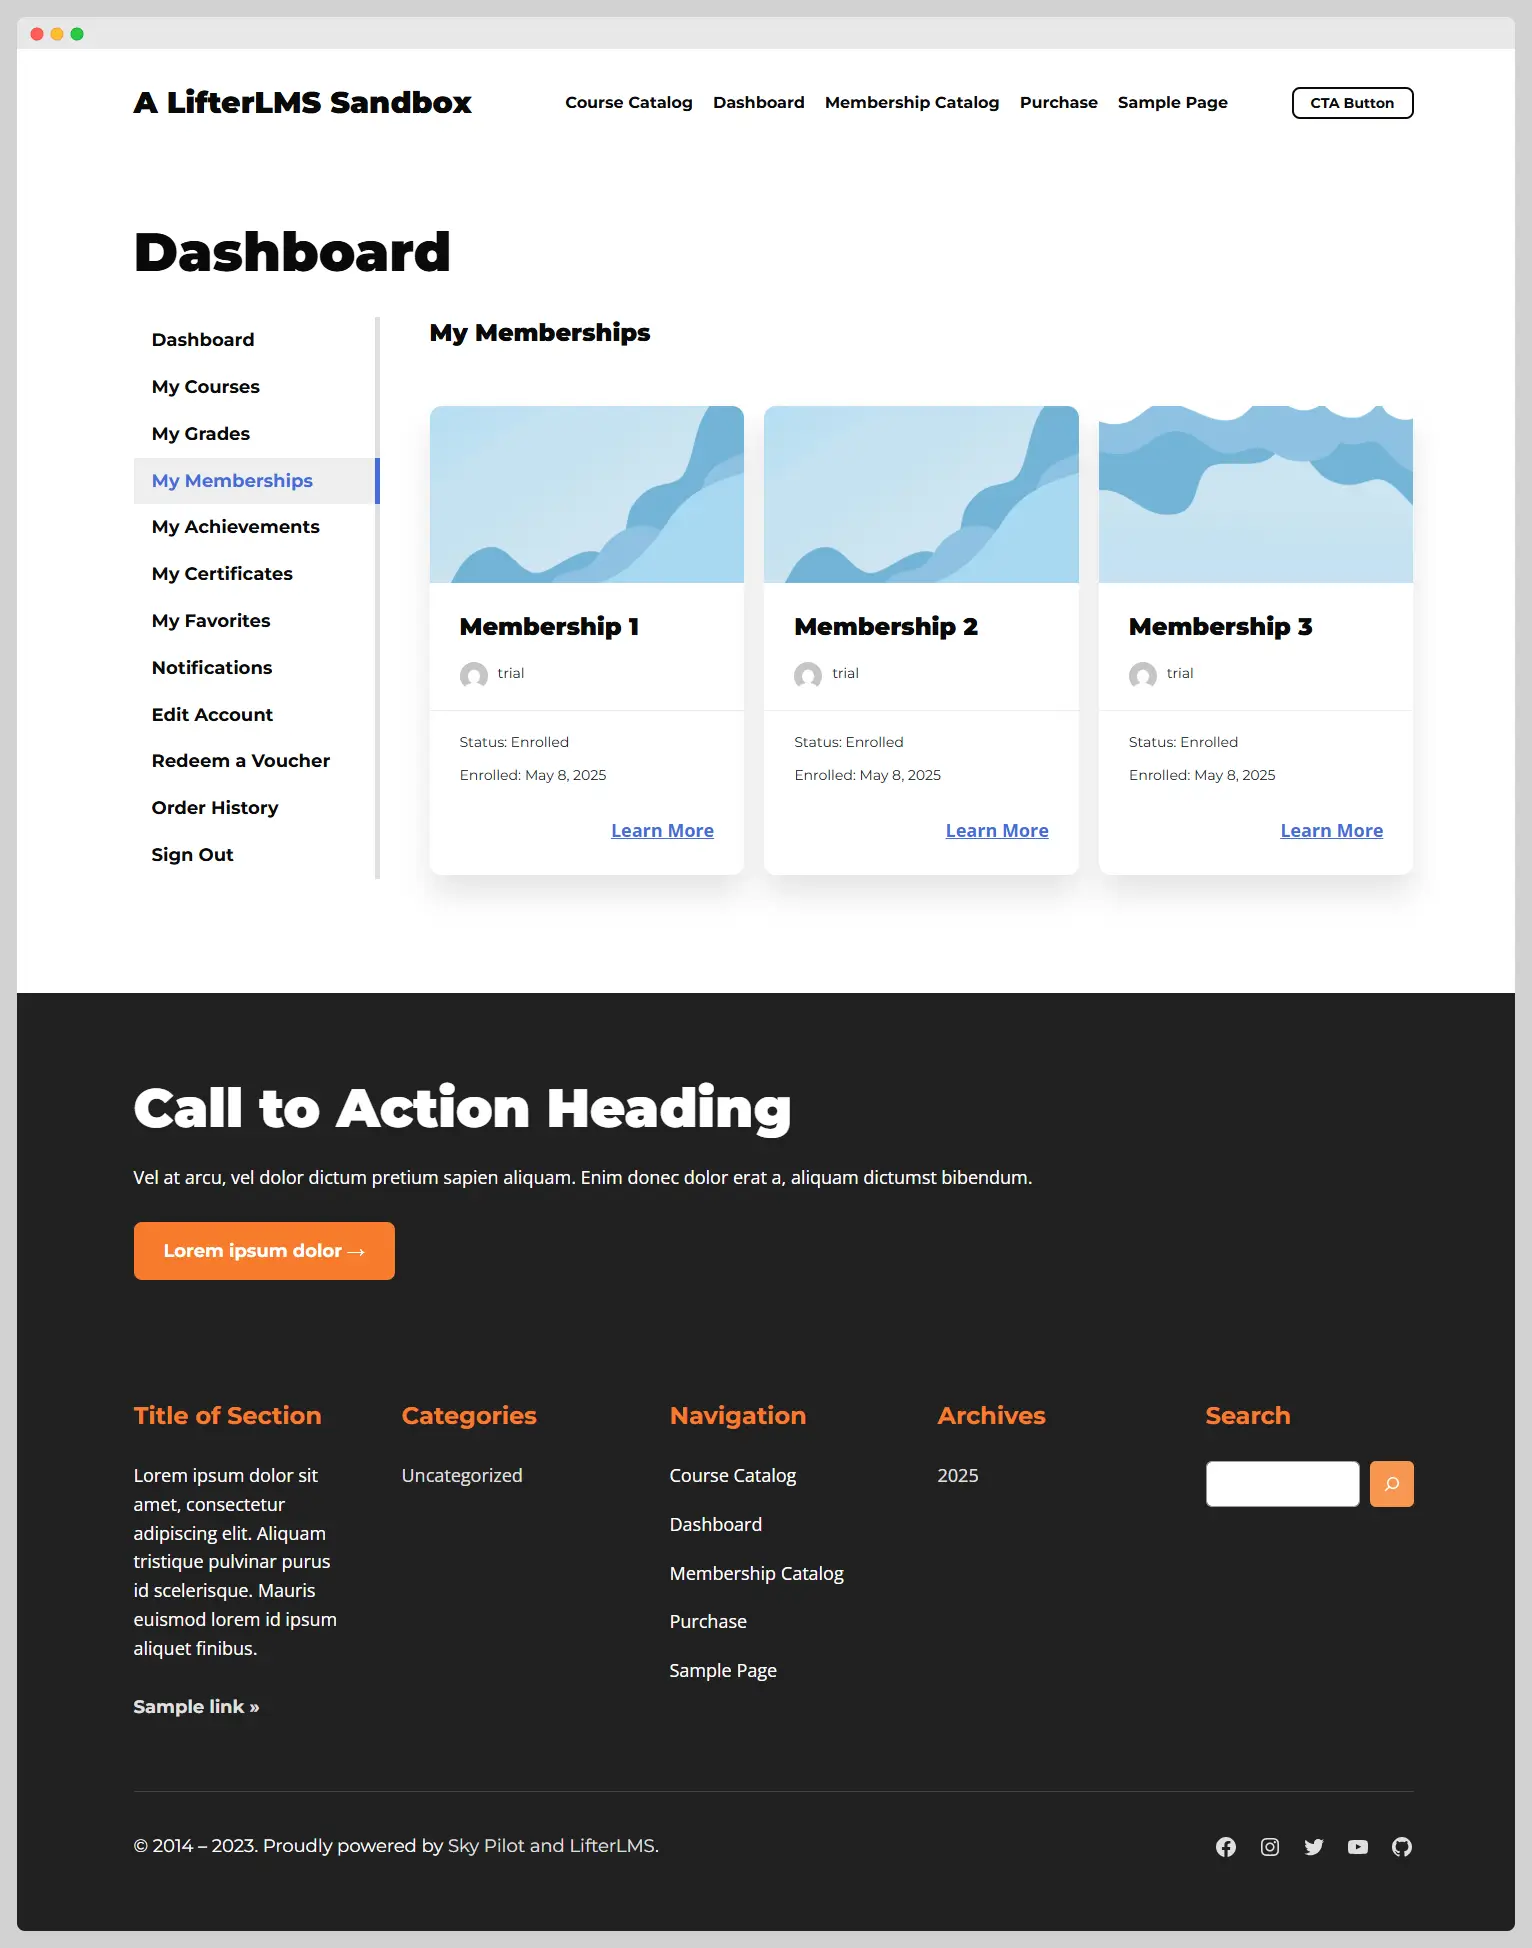
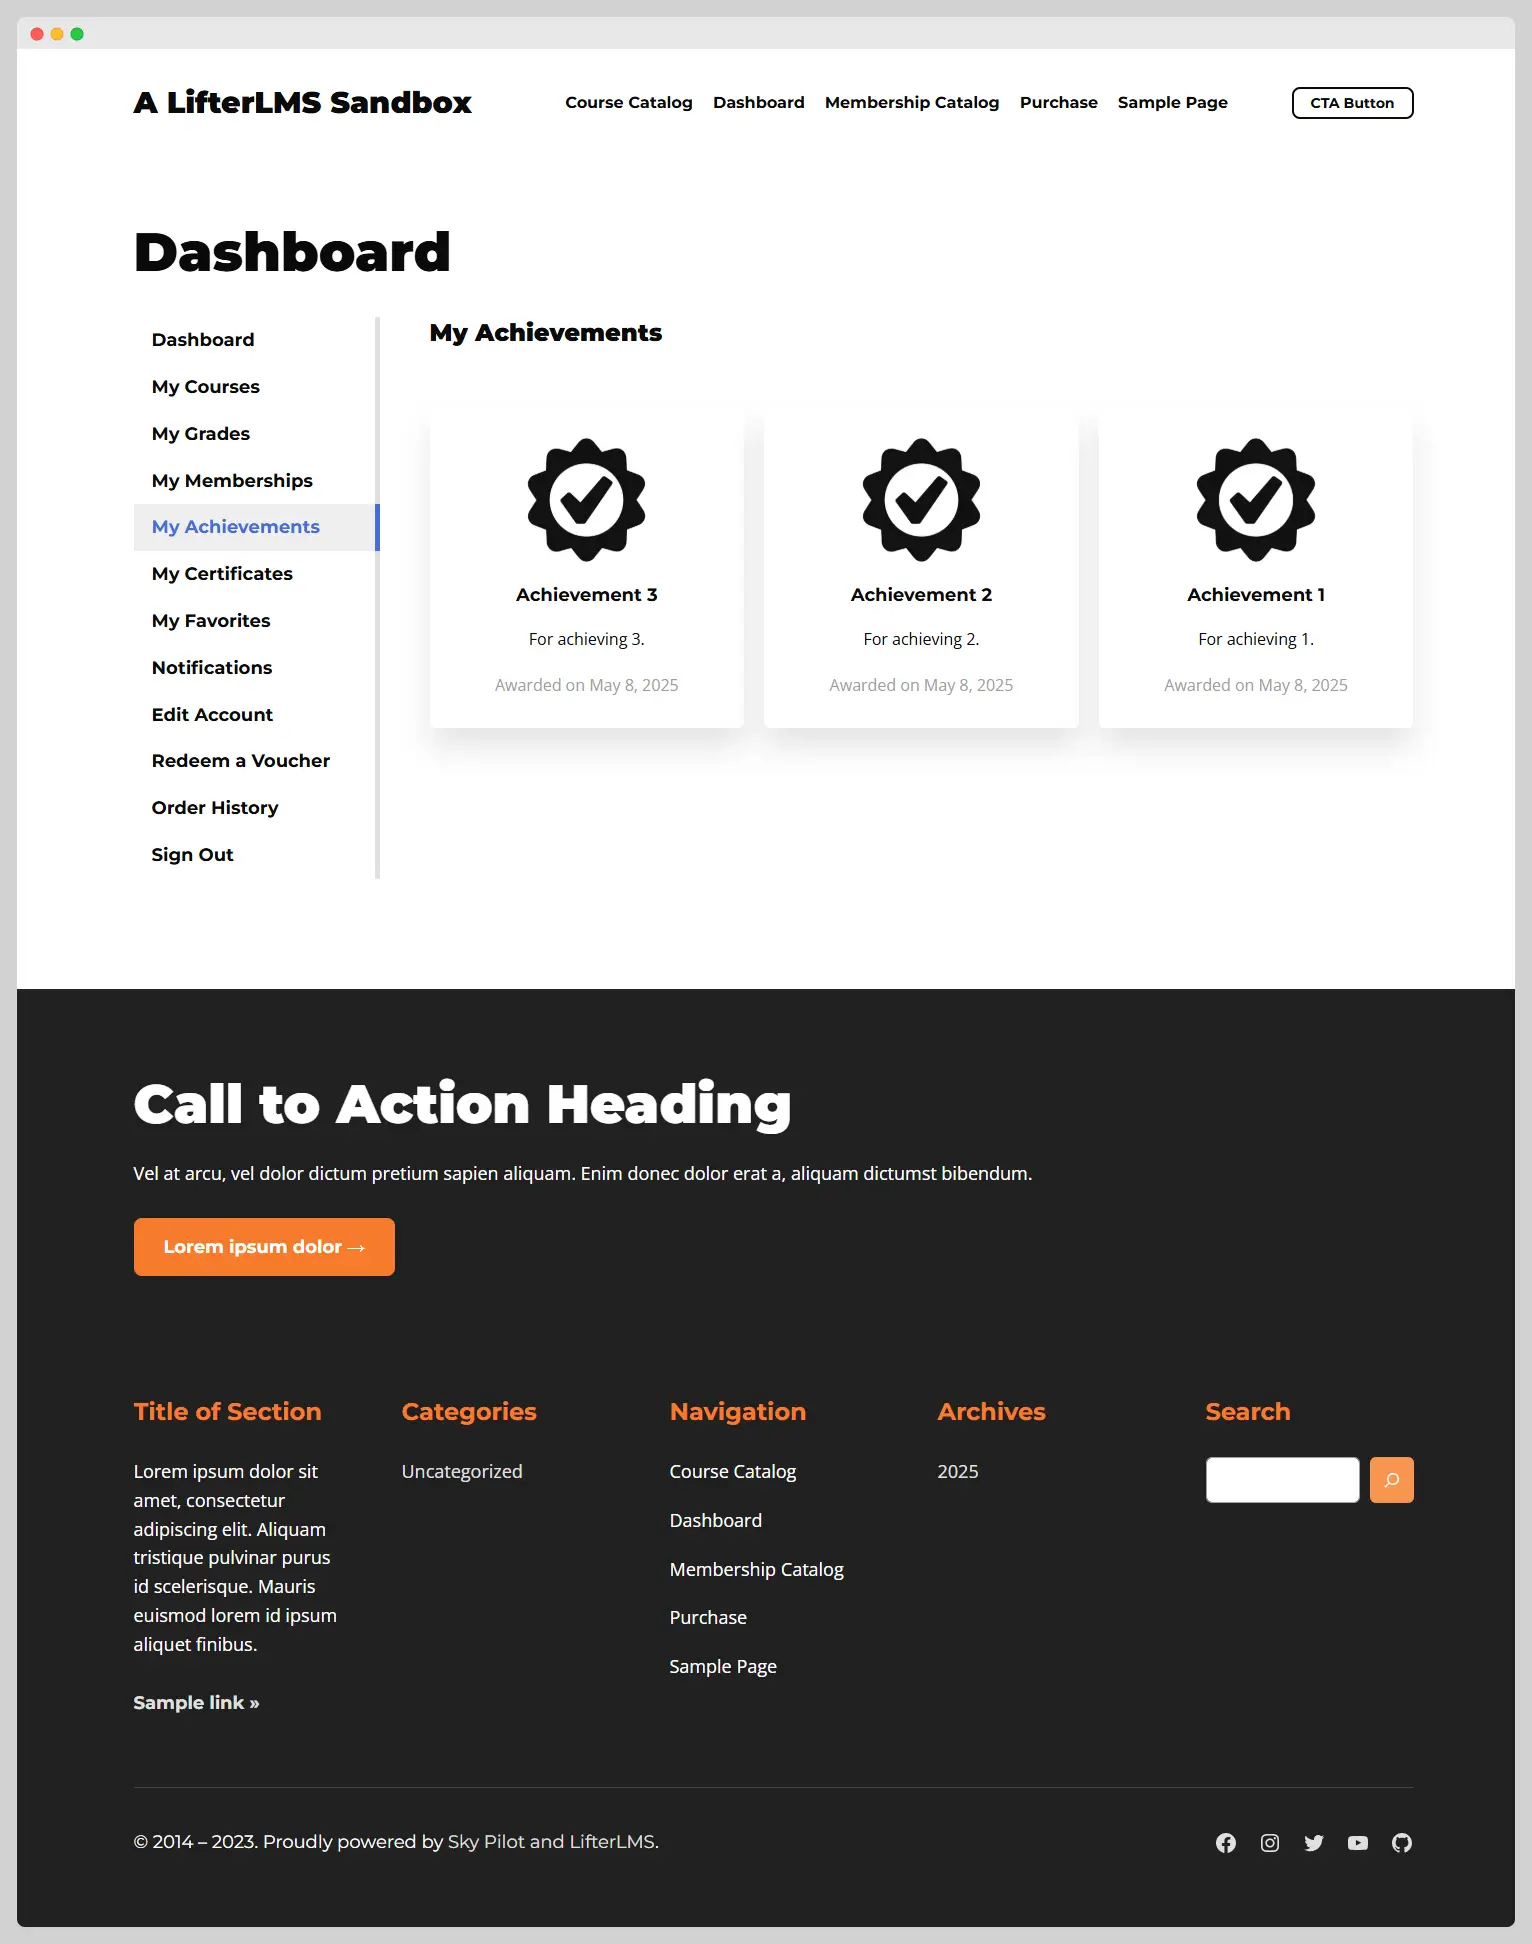
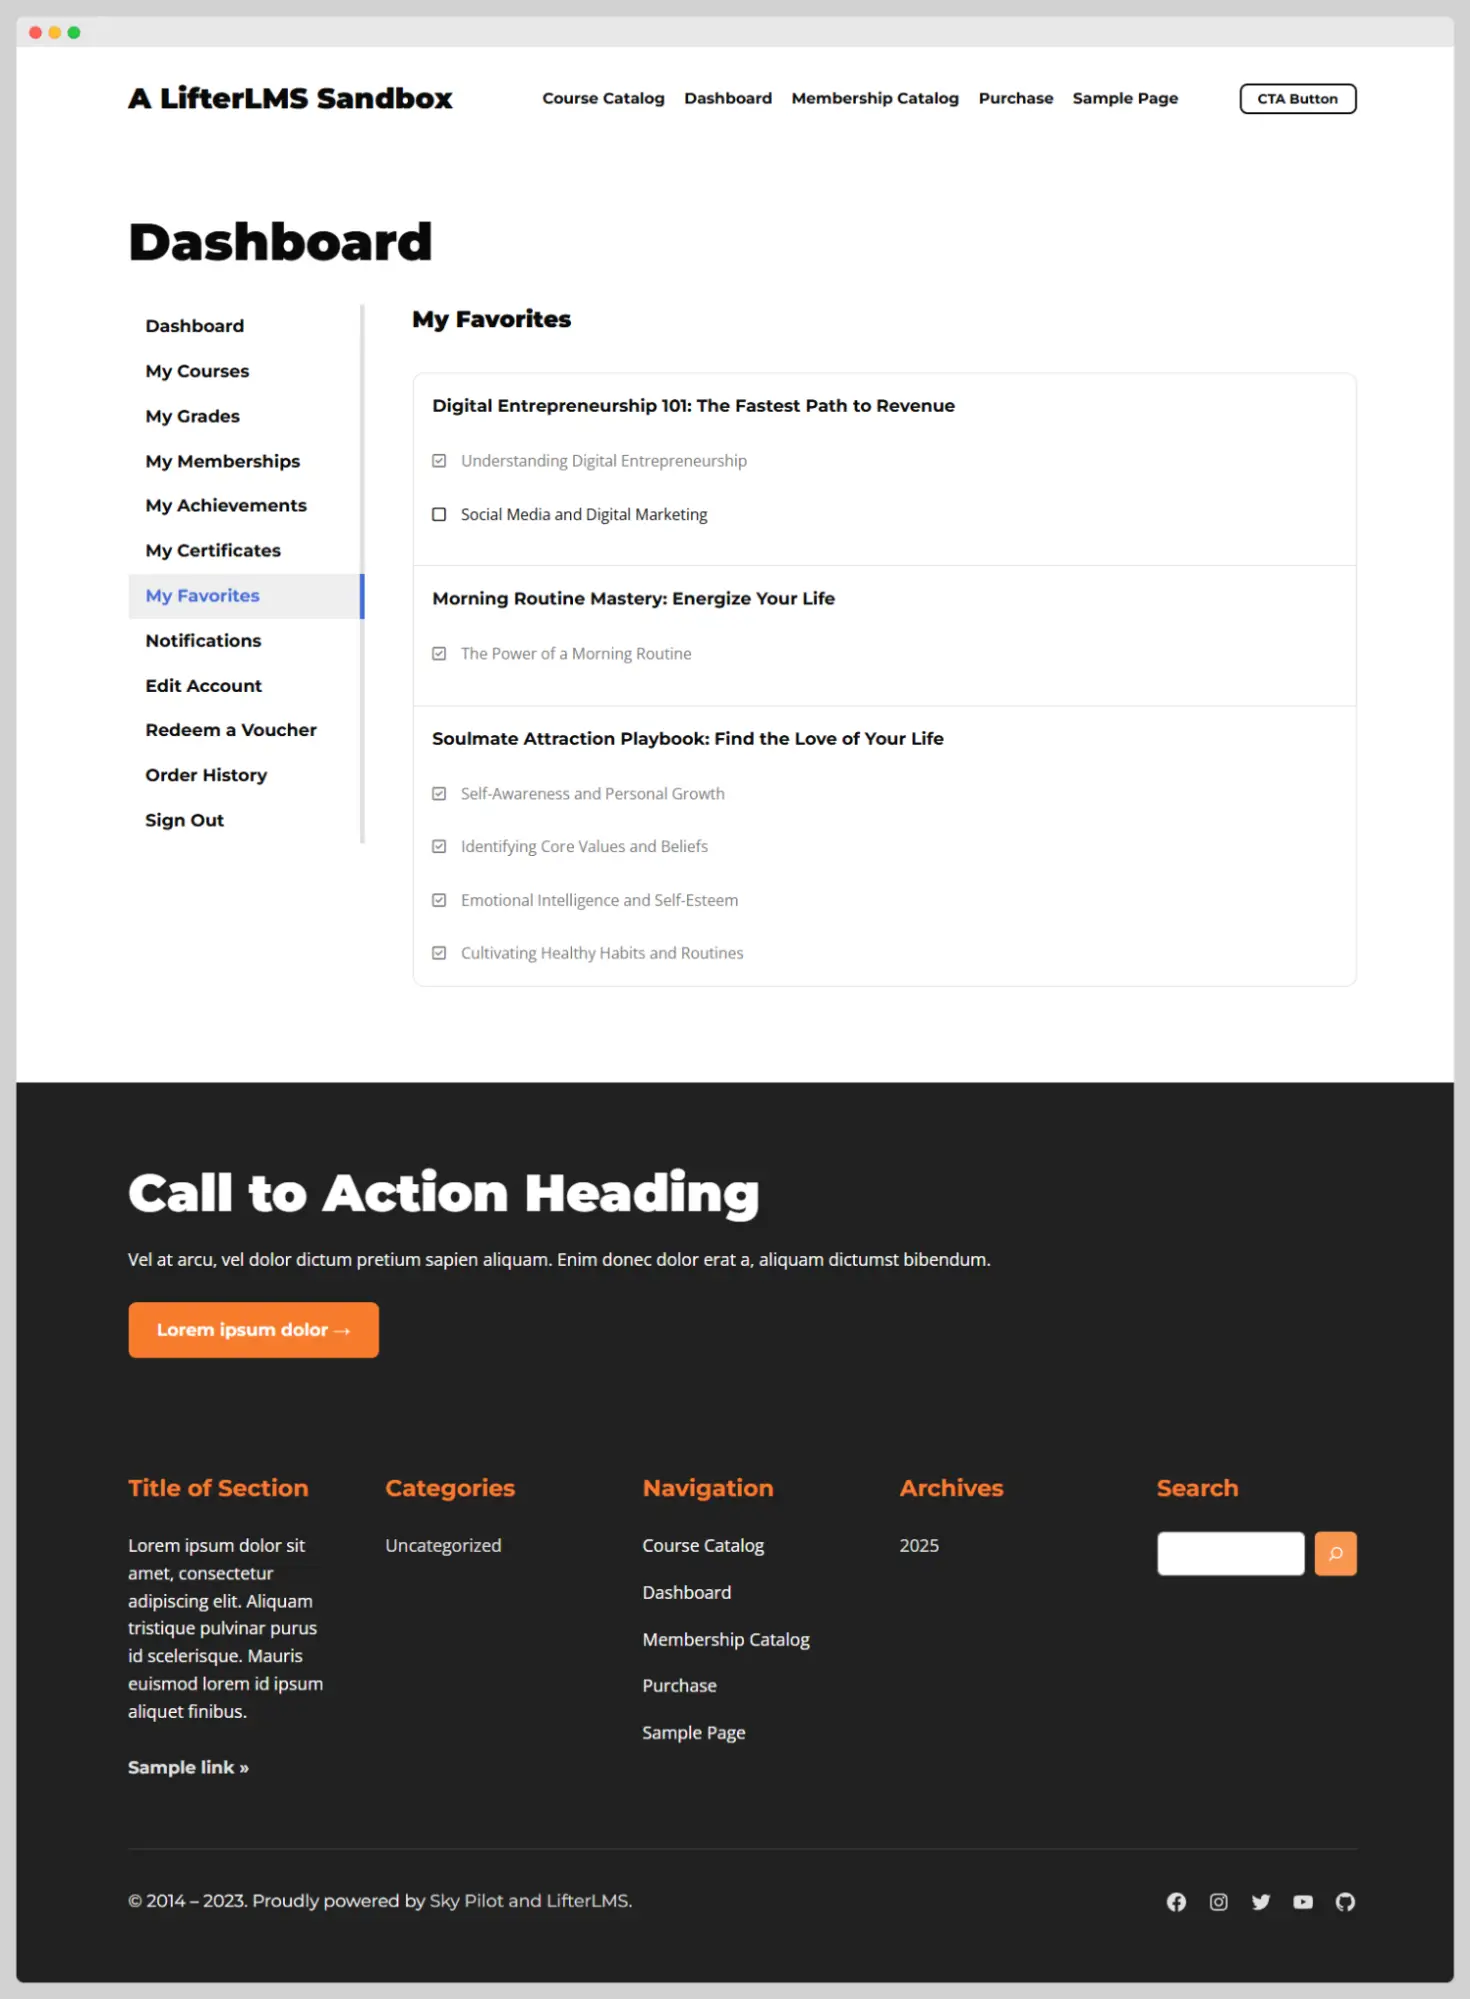
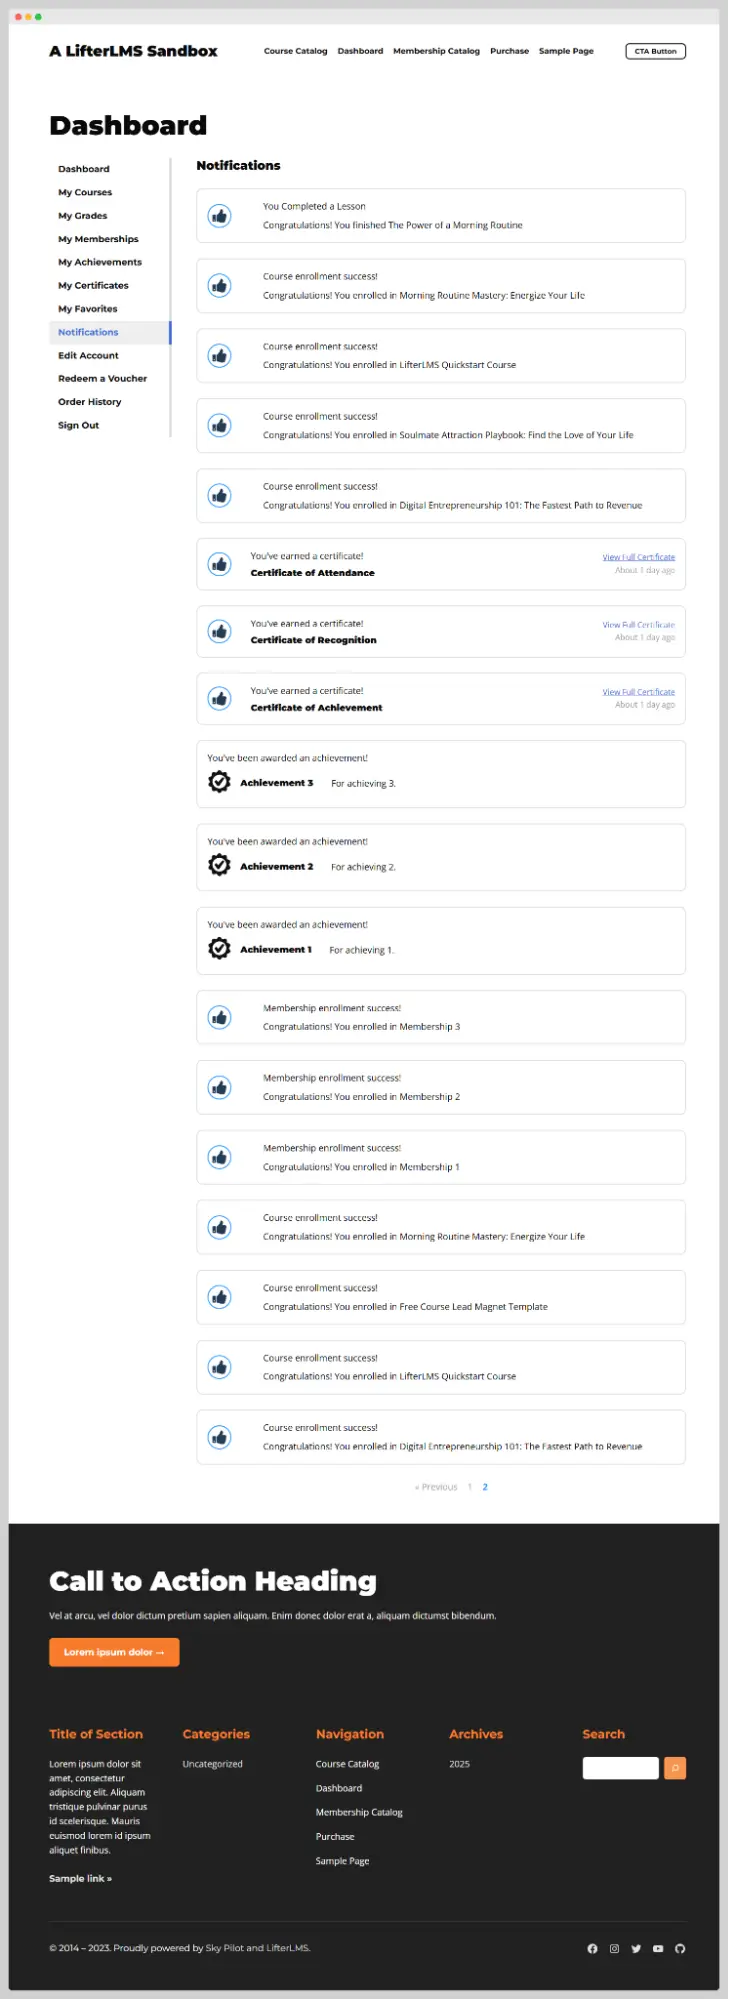
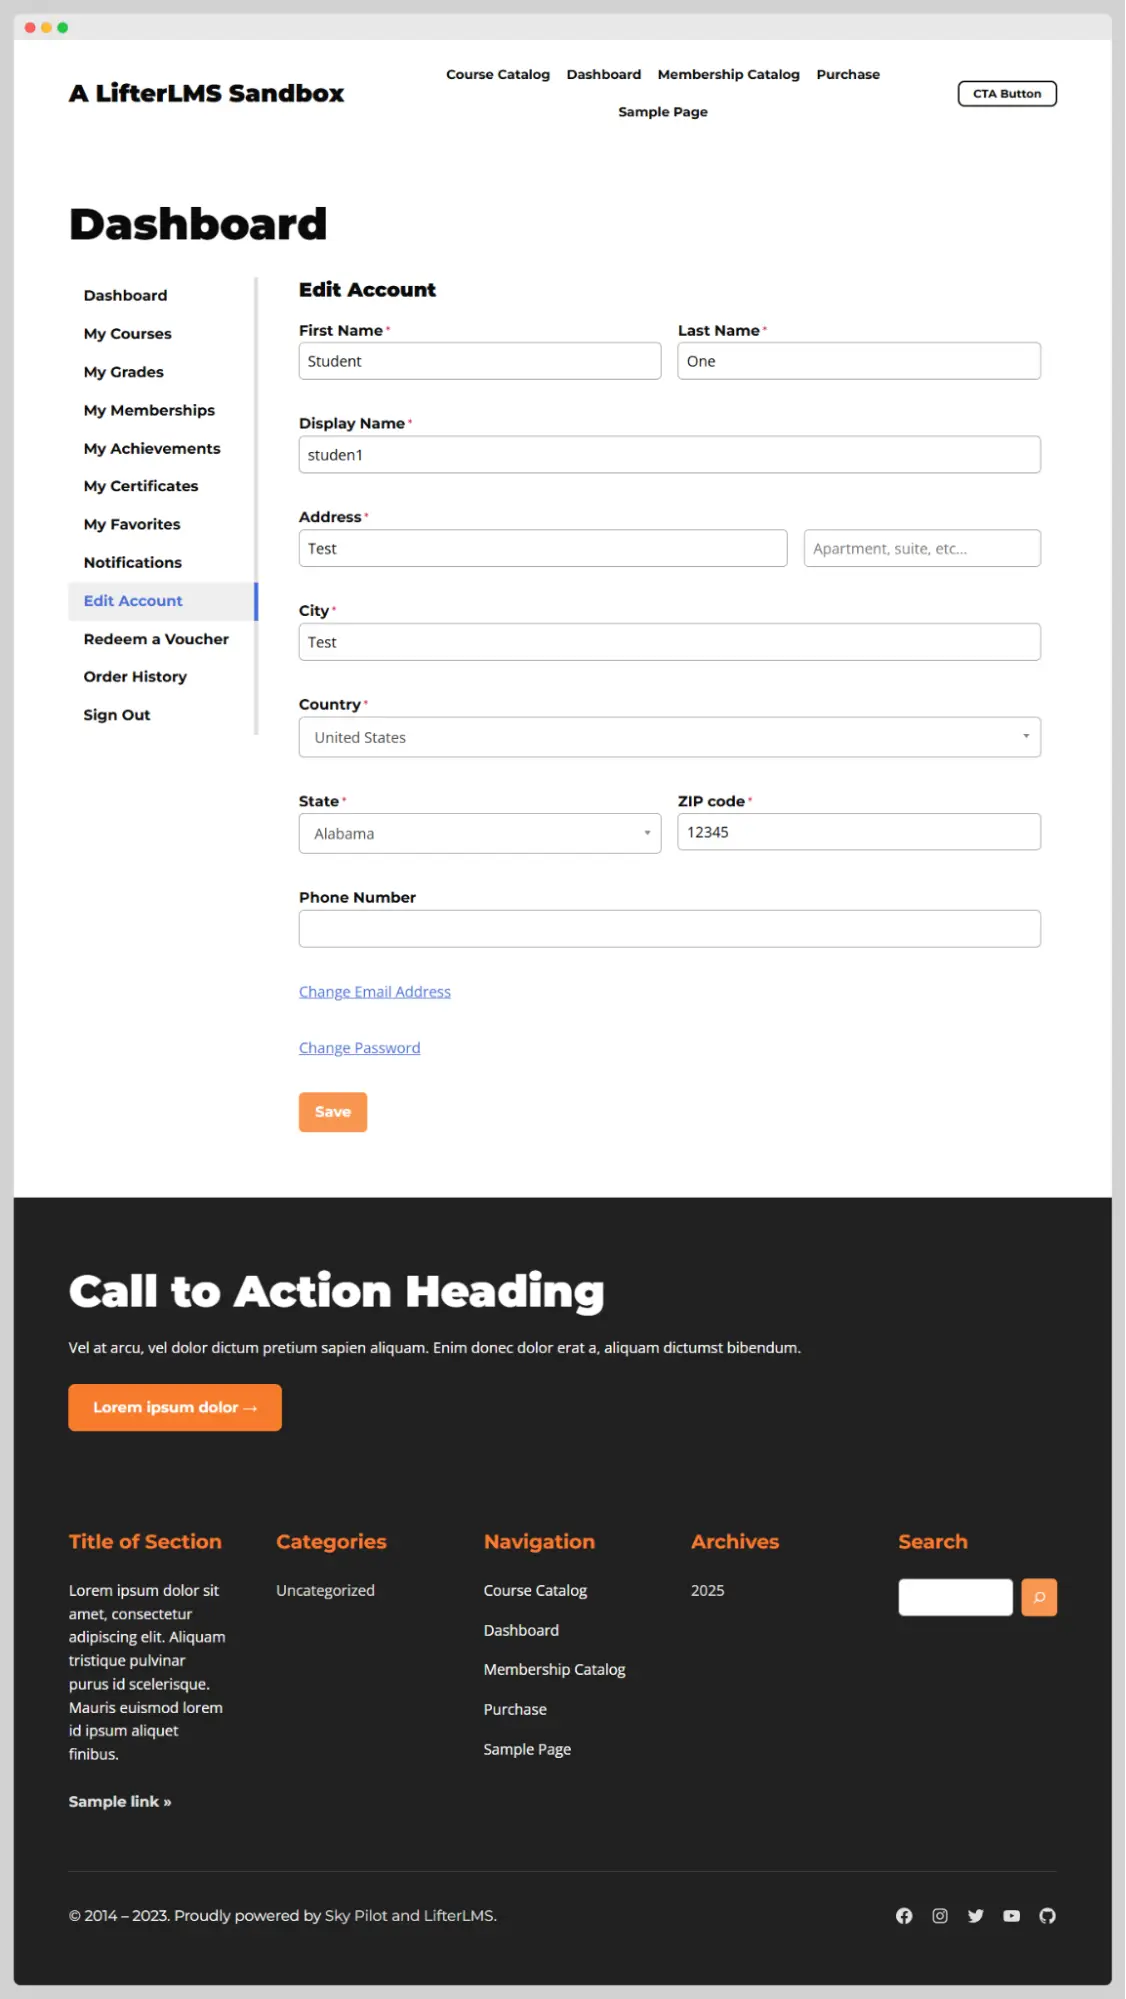
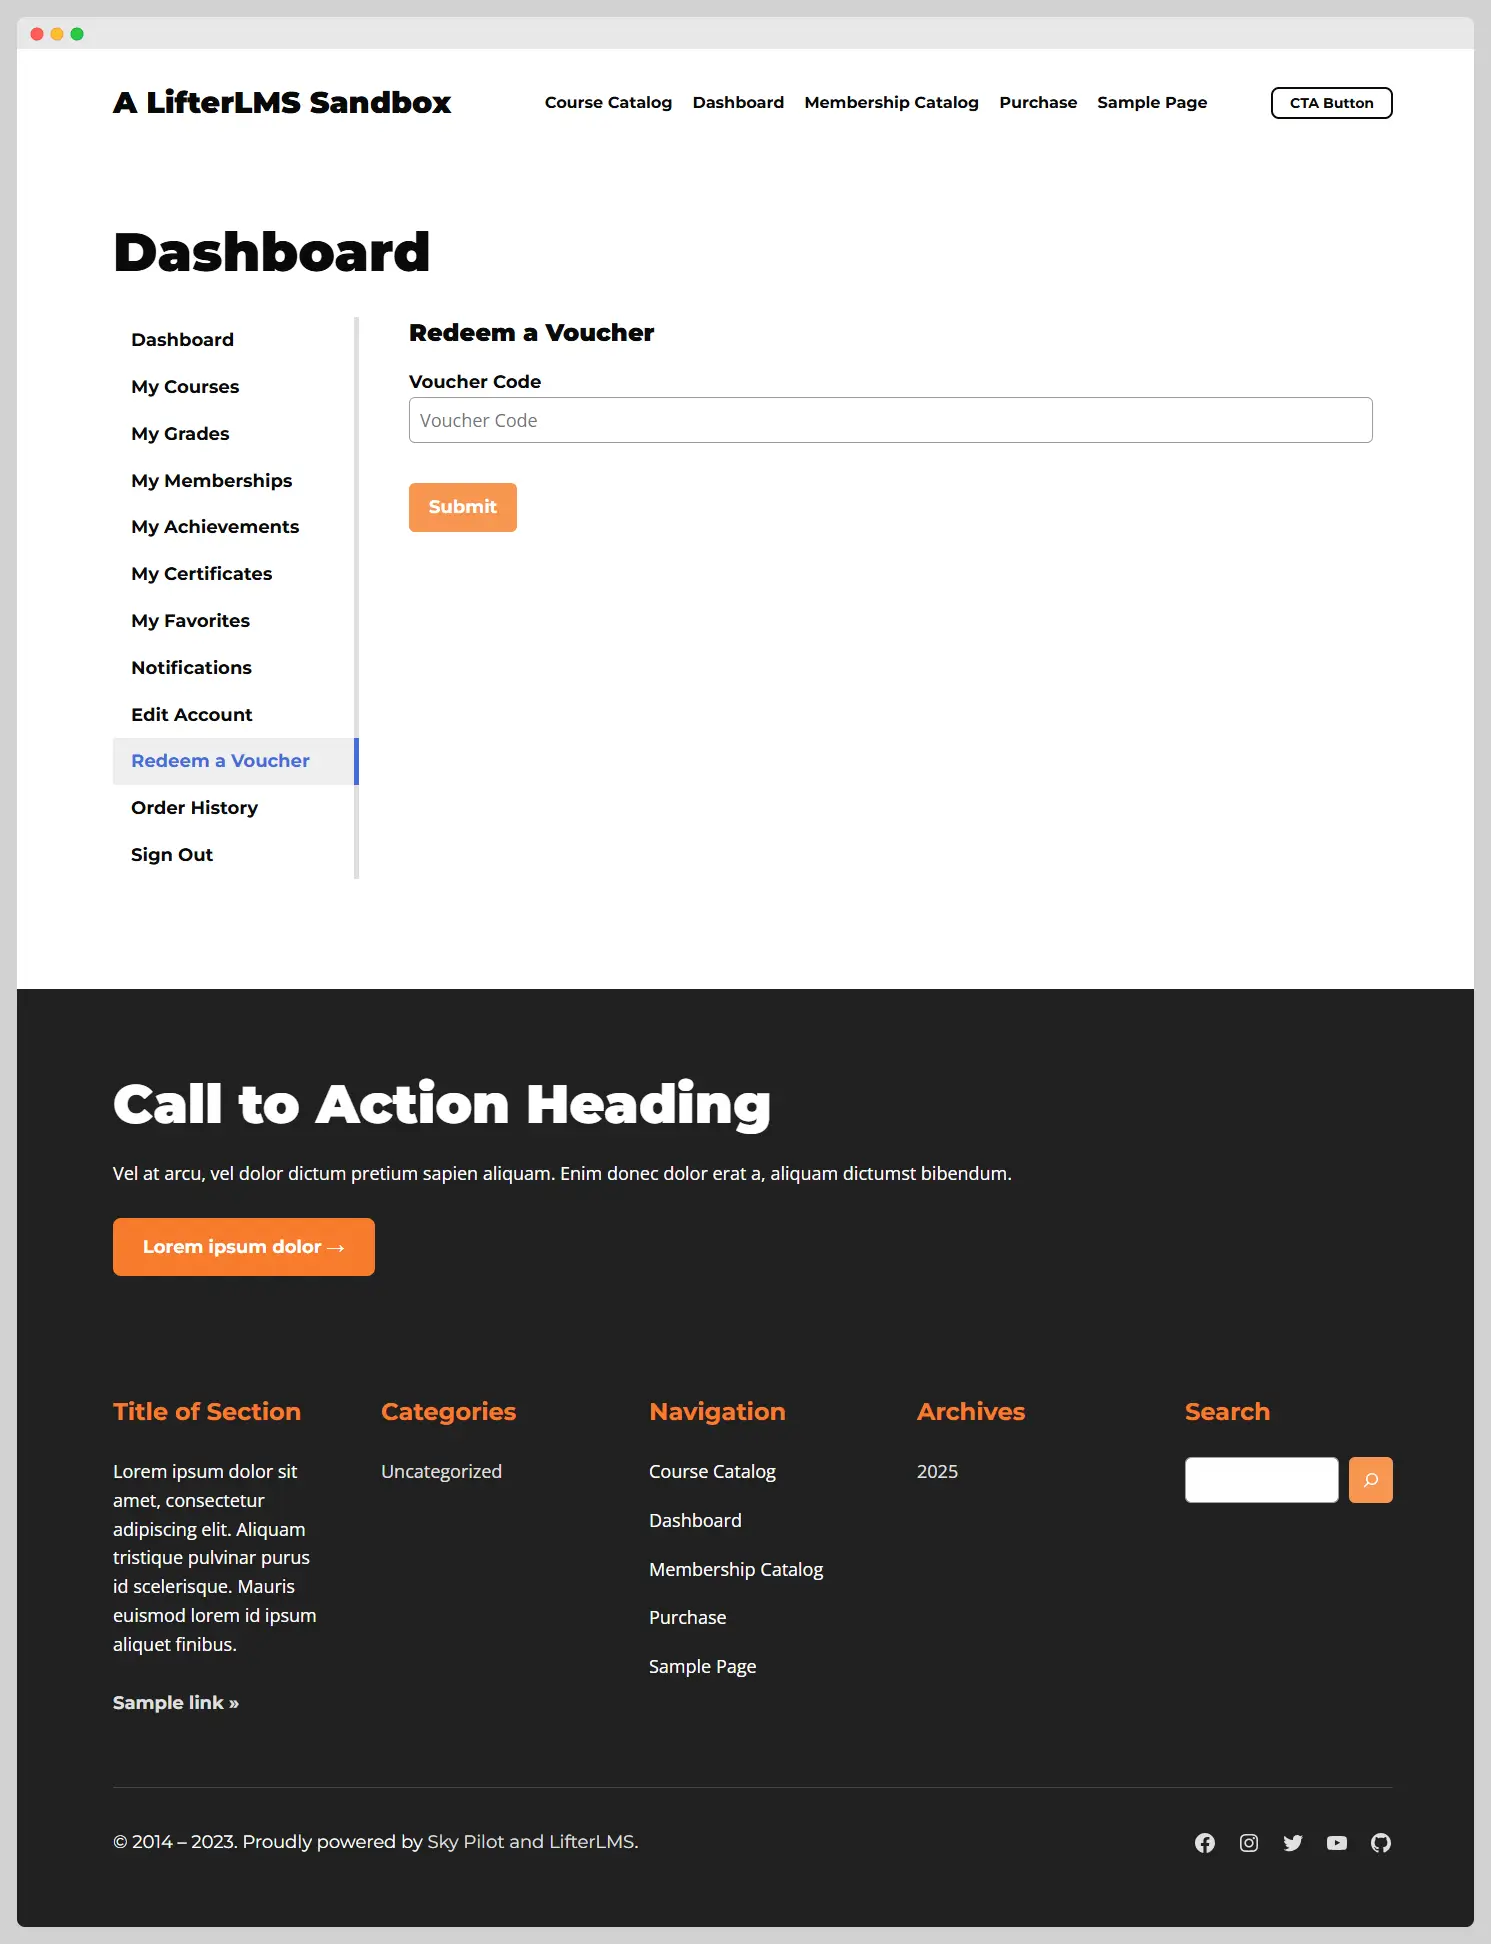
When switching from one theme to another, we recommend working with a staging website, so you can switch your theme on a copy of your live site without disturbing the users on your live website. Once you switch to using the Sky Pilot theme, the front end of your website would look similar to the screenshots of the theme provided below.
The Sky Pilot theme utilizes the functionality of the WordPress full site editor. Other examples of themes that make use of the WordPress full site editor include the free Twenty Twenty-Five theme and the Twenty Twenty-Four theme. In particular, the full-site editing features described below are present in all other full-site editing themes.
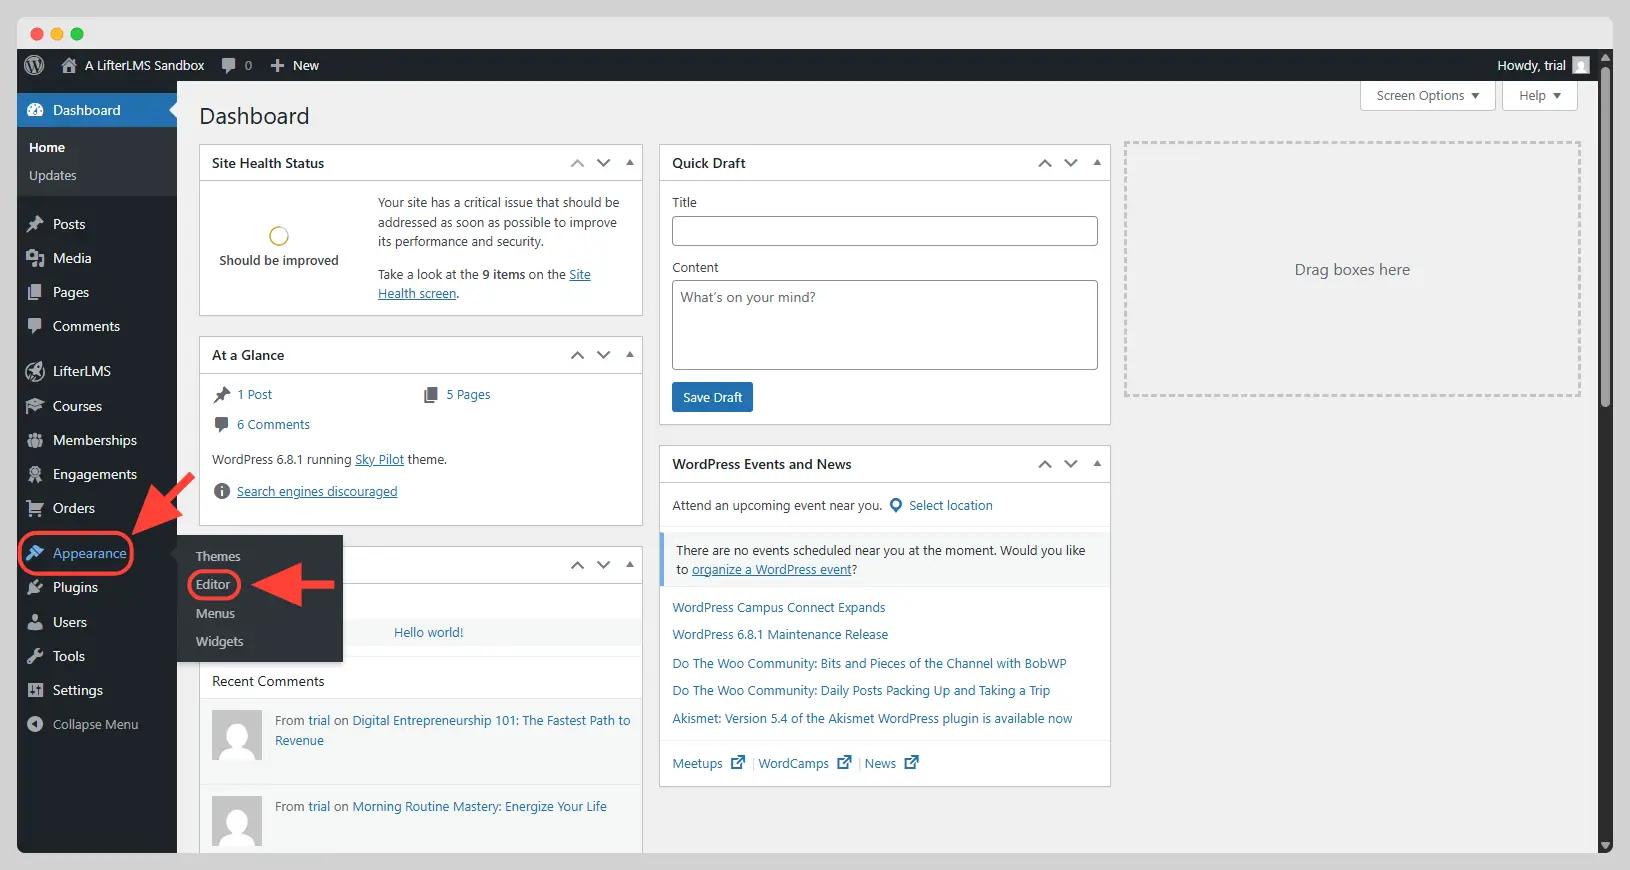
For any theme that uses the full site editor, you can access the full site editor by navigating to Appearance > Editor from the WordPress administration area.
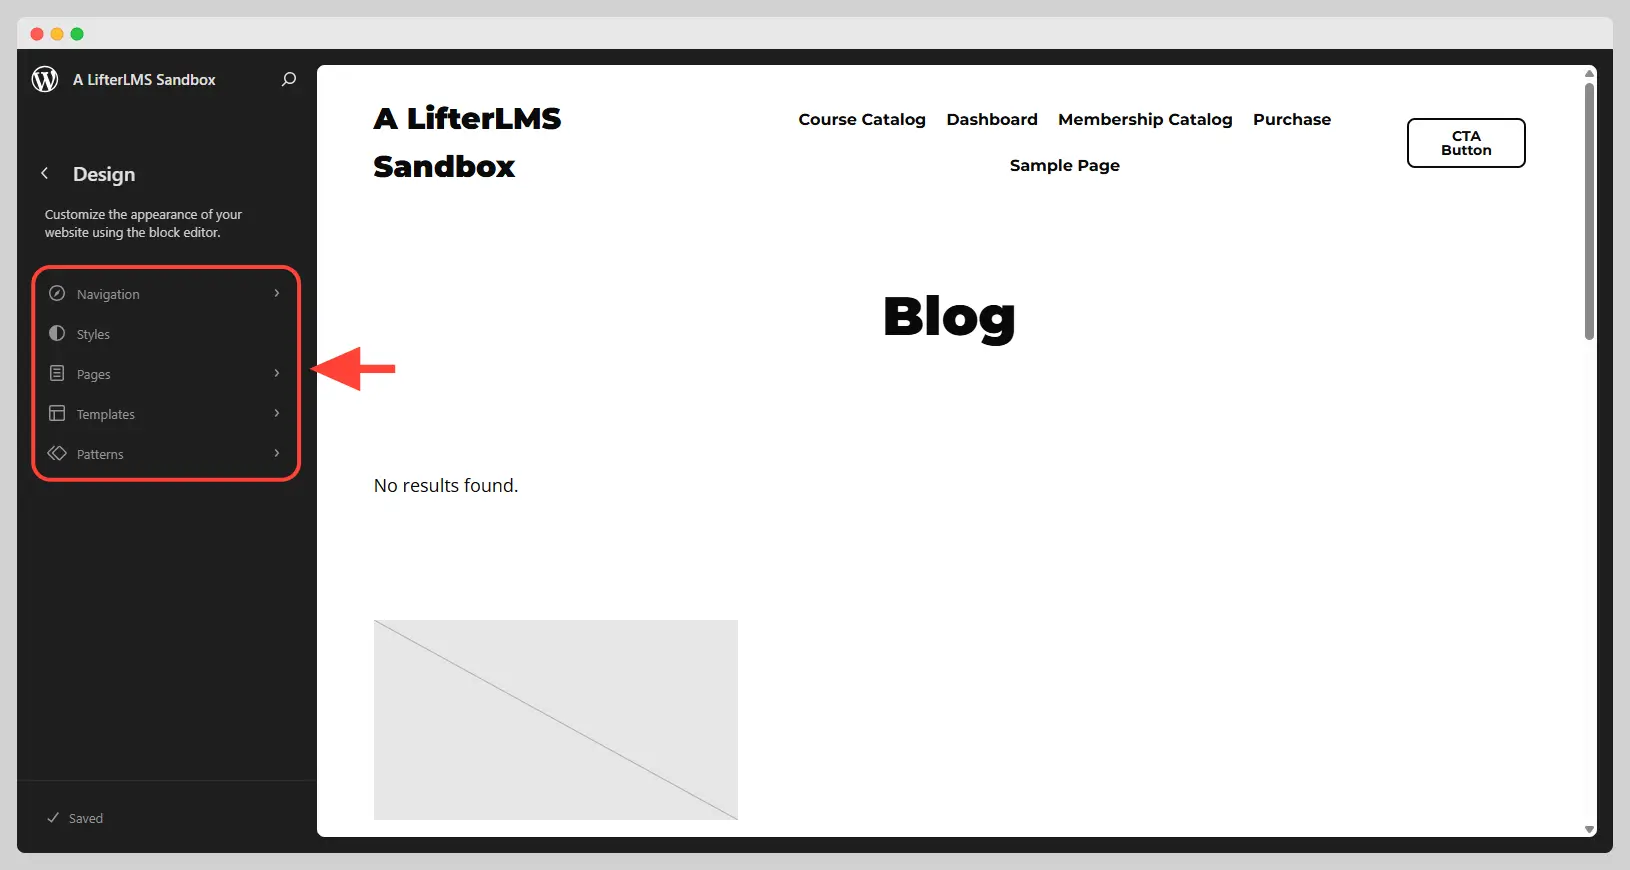
Inside the full-site editor, you will find five main sections, as can be seen in the screenshot above:
Of the five sections above, the most important sections are: Styles, Patterns, and Templates. In particular:
- Changes to make in Styles can reflect on patterns and templates.
- Changes you make in Patterns will be reflected in templates using those same patterns.
- Changes you make in Templates will affect pages using those templates.
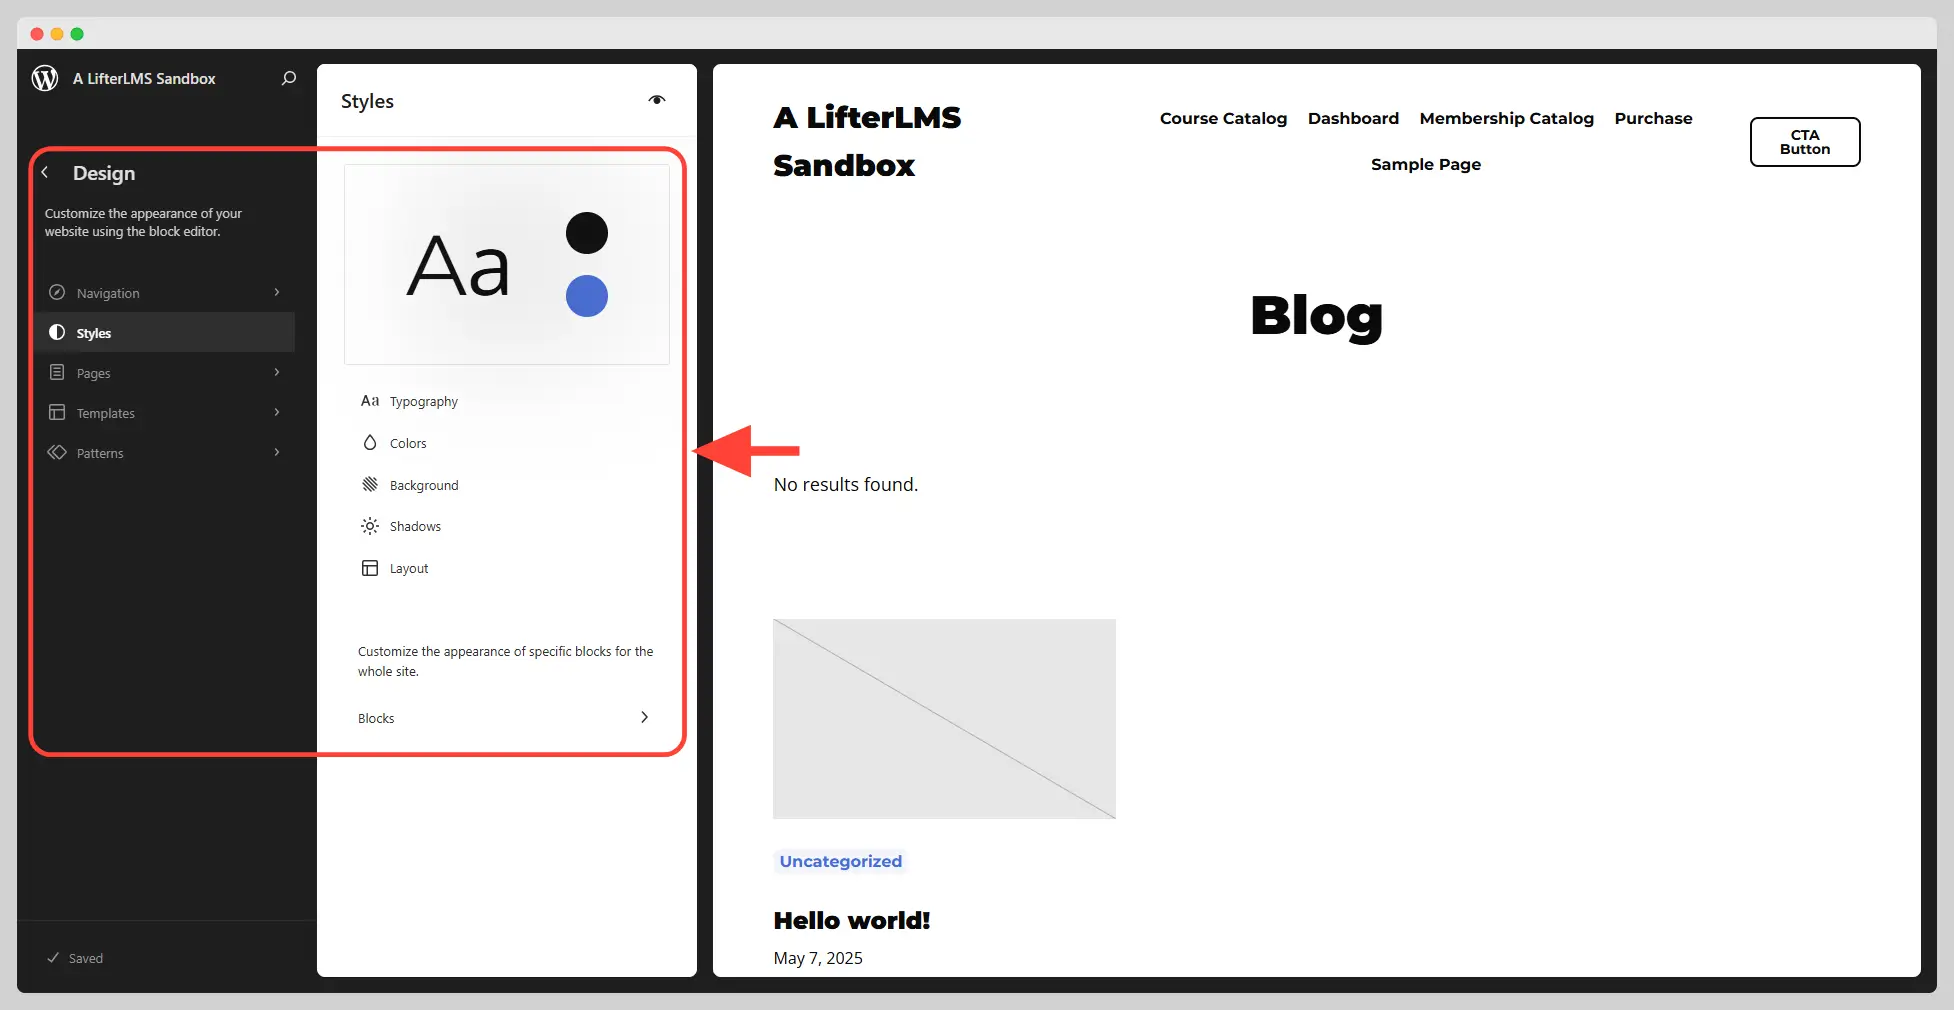
Styles. This section is where you edit the global styles as well as work with the style book. The style book is not specific to the Sky Pilot theme — every full-site editing theme (e.g., the Twenty Twenty-Five) will have an editable style book.
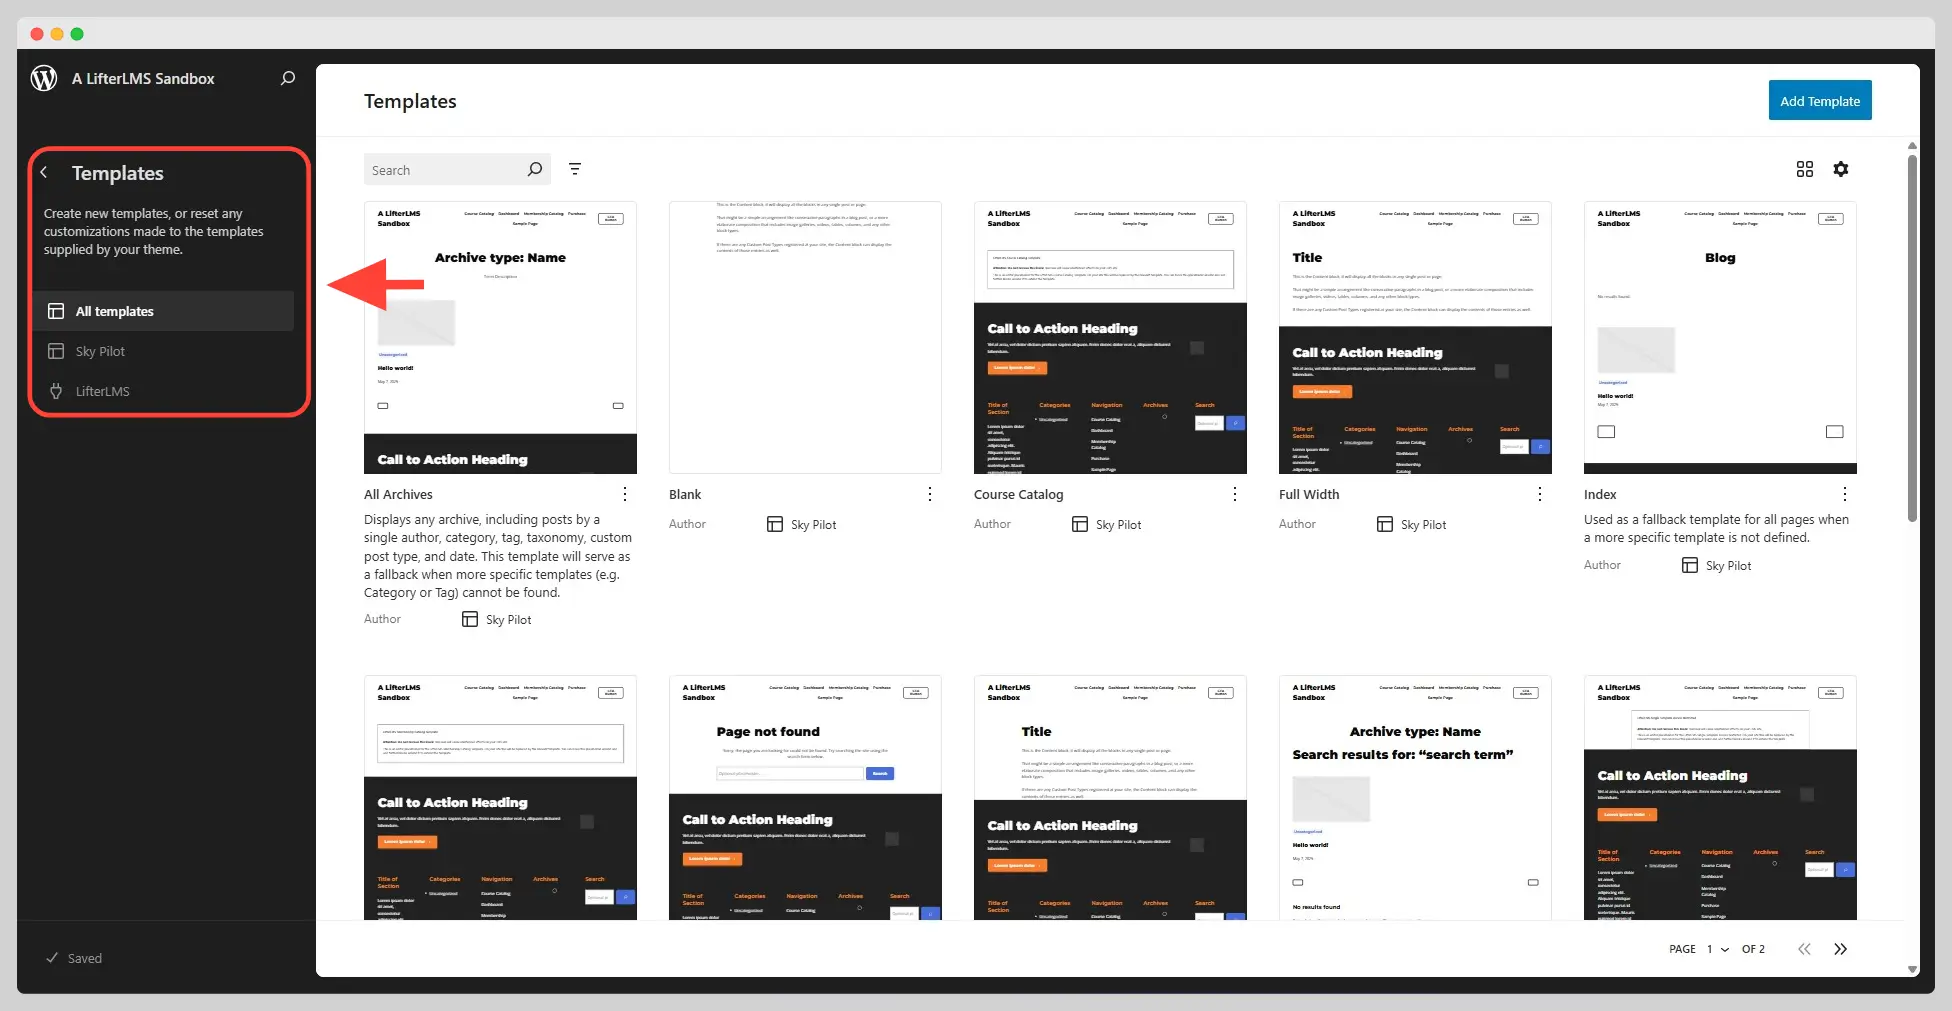
Templates. This is the section where you can create website templates, that can then be used to control the structure and appearance of your pages (i.e., your blog posts, your pages, any custom post types, and any archives).
Patterns. This is the section where you can create patterns. A pattern is any collection of blocks groups together in such a way that they can be used in your posts, pages, any custom post type that uses the block editor, and website templates.
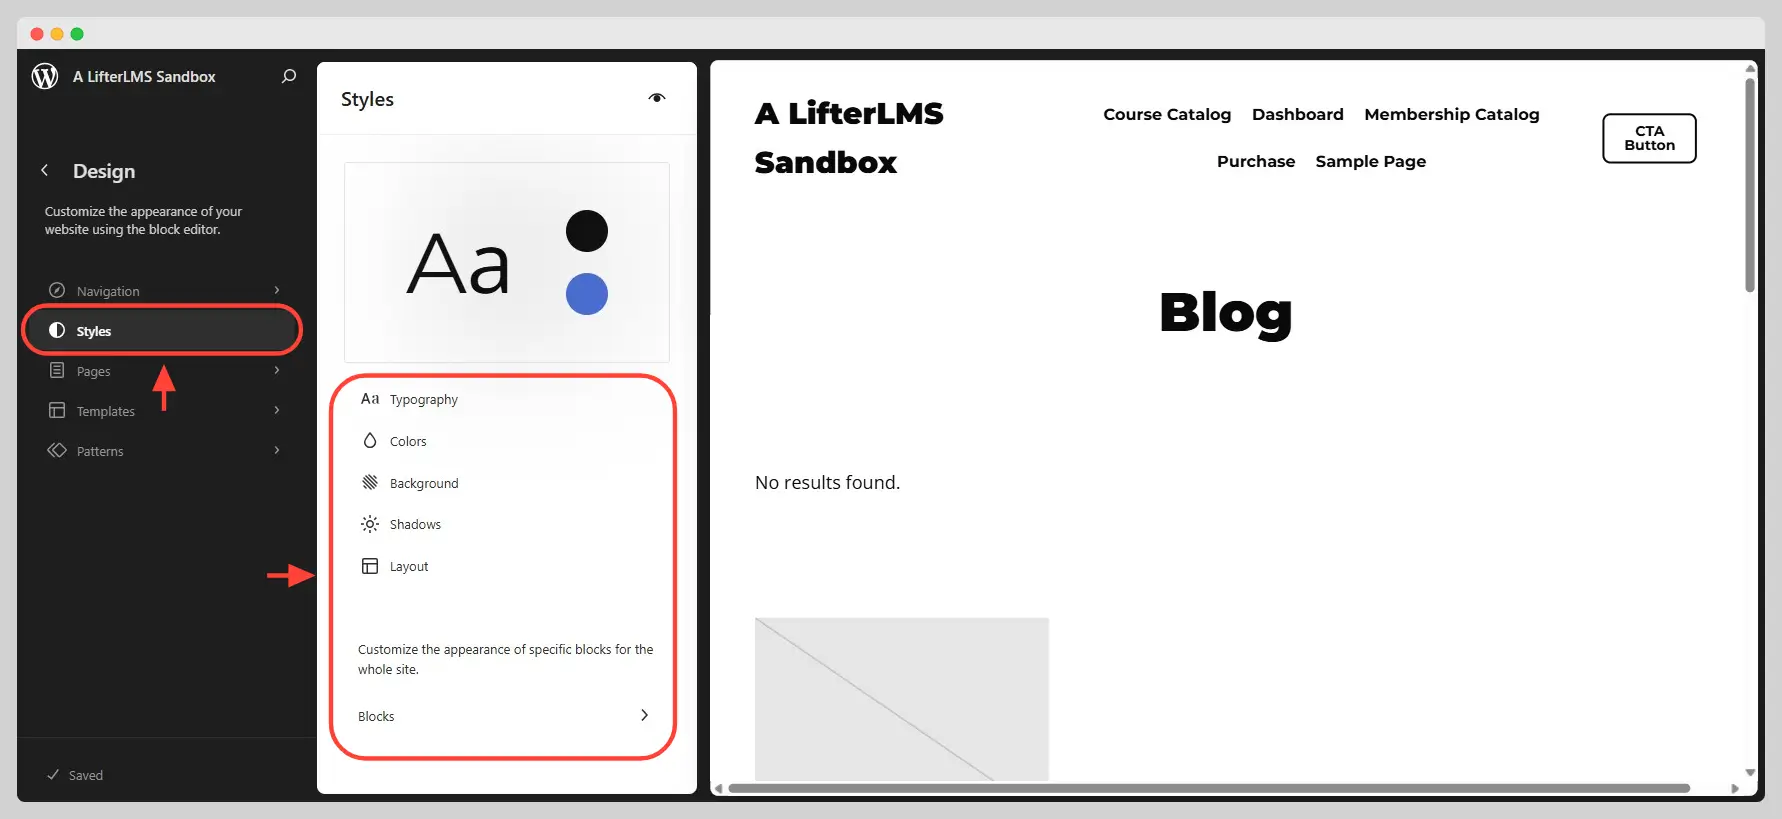
The Styles section allows you to control the following global aspects of your site:
- Typography
- Colors
- Background
- Shadows
- Layout
In addition, it also allows you to customize how specific blocks will look like on the whole site.
If you click on the eye icon, it also allows you to view and work with the style book. The style book provides a visual reference for block styles on WordPress. This visual reference allows users to see how their chosen styles will impact the overall site design.
![]()
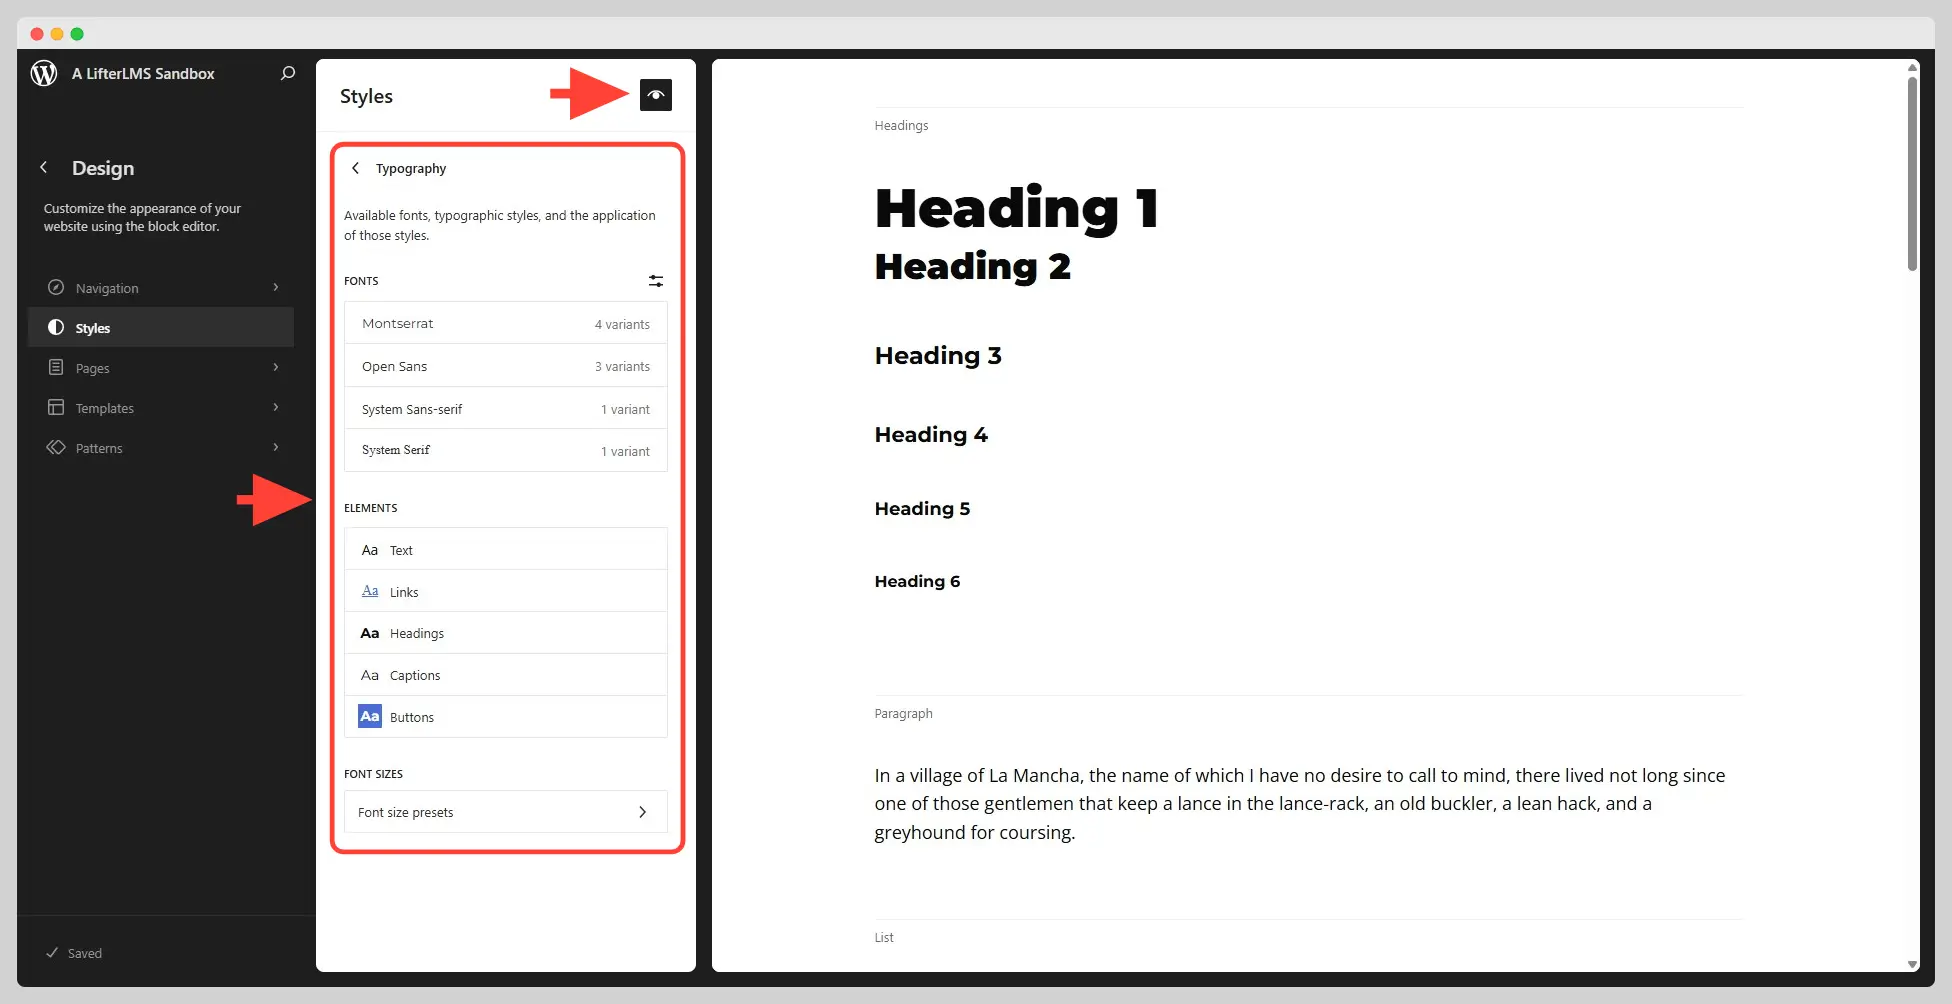
Typography. This section allows you to:
- Upload new fonts or install Google Fonts on your site.
- Control general typography settings (e.g., fonts, size, appearance, line height, decoration) for all text elements (e.g., paragraphs, links, headings, captions, buttons) on your site.
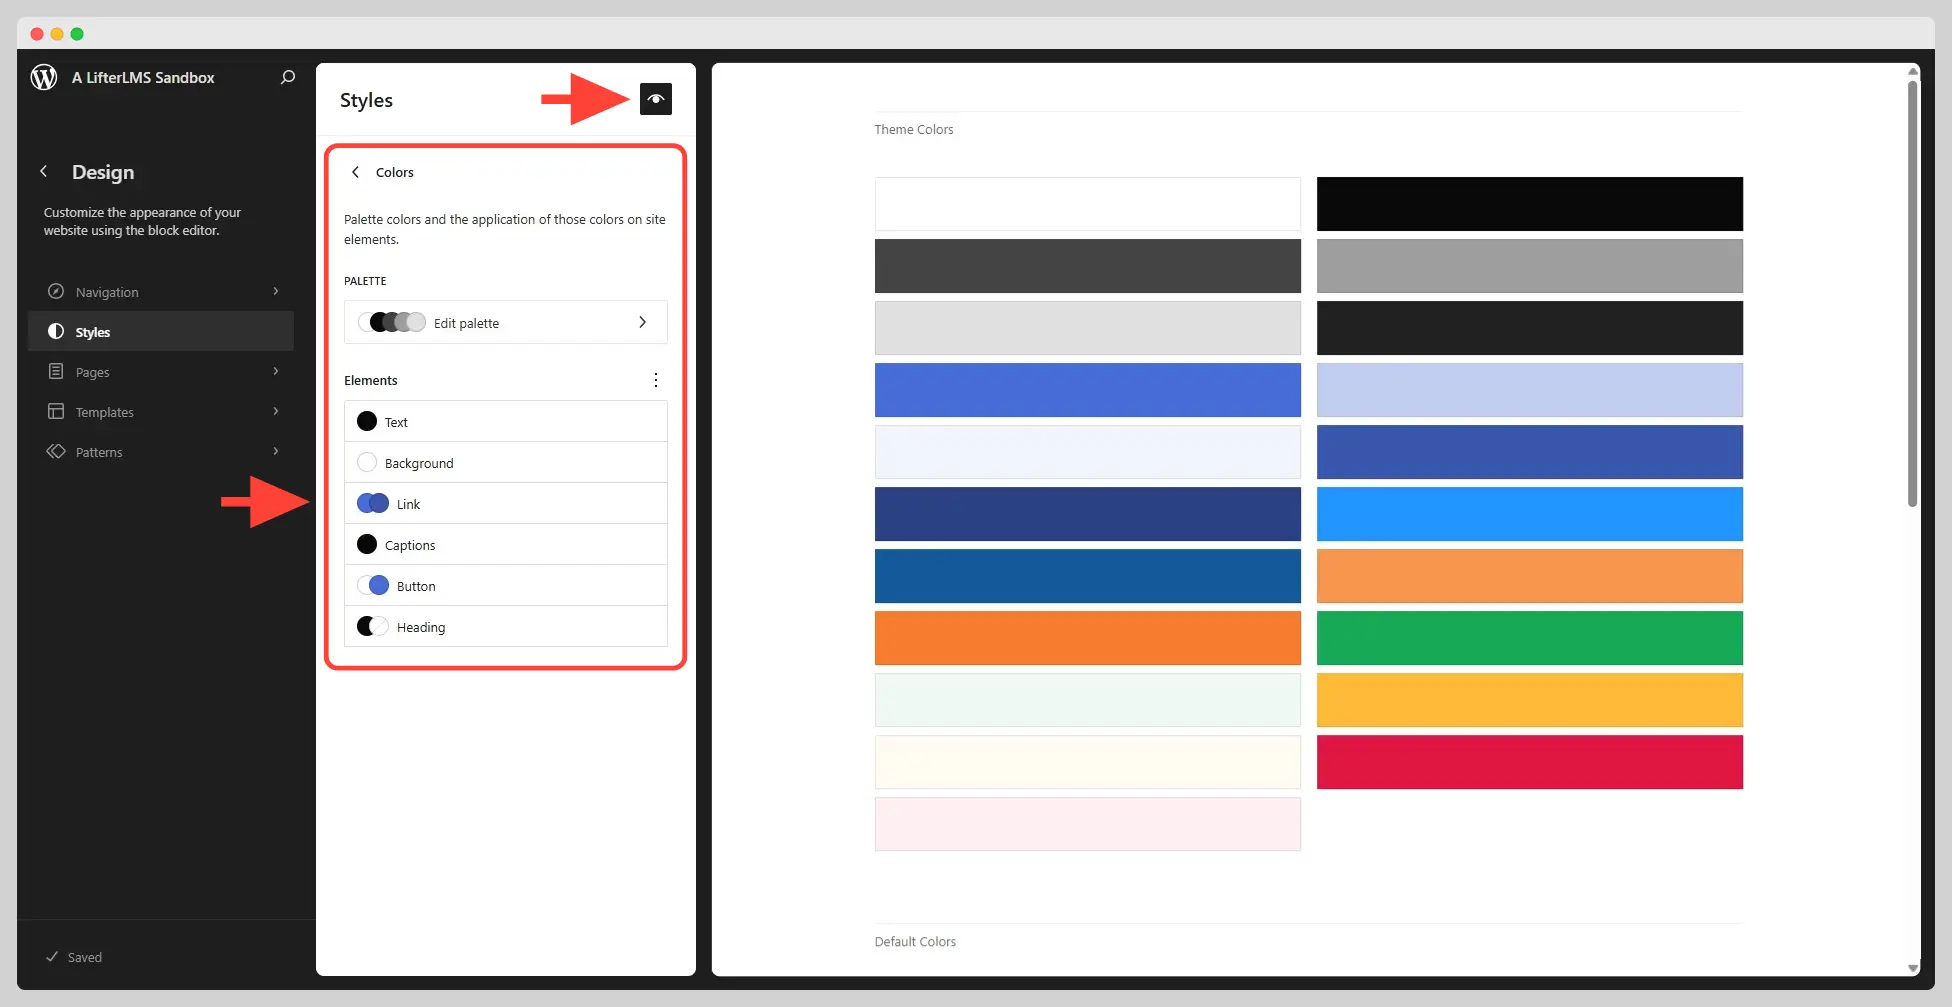
Colors. This section allows you to:
- Add and edit colors in your color palette.
- Set the background color for your entire website.
- Globally apply colors to headings, texts, links, captions, and buttons on your entire website.
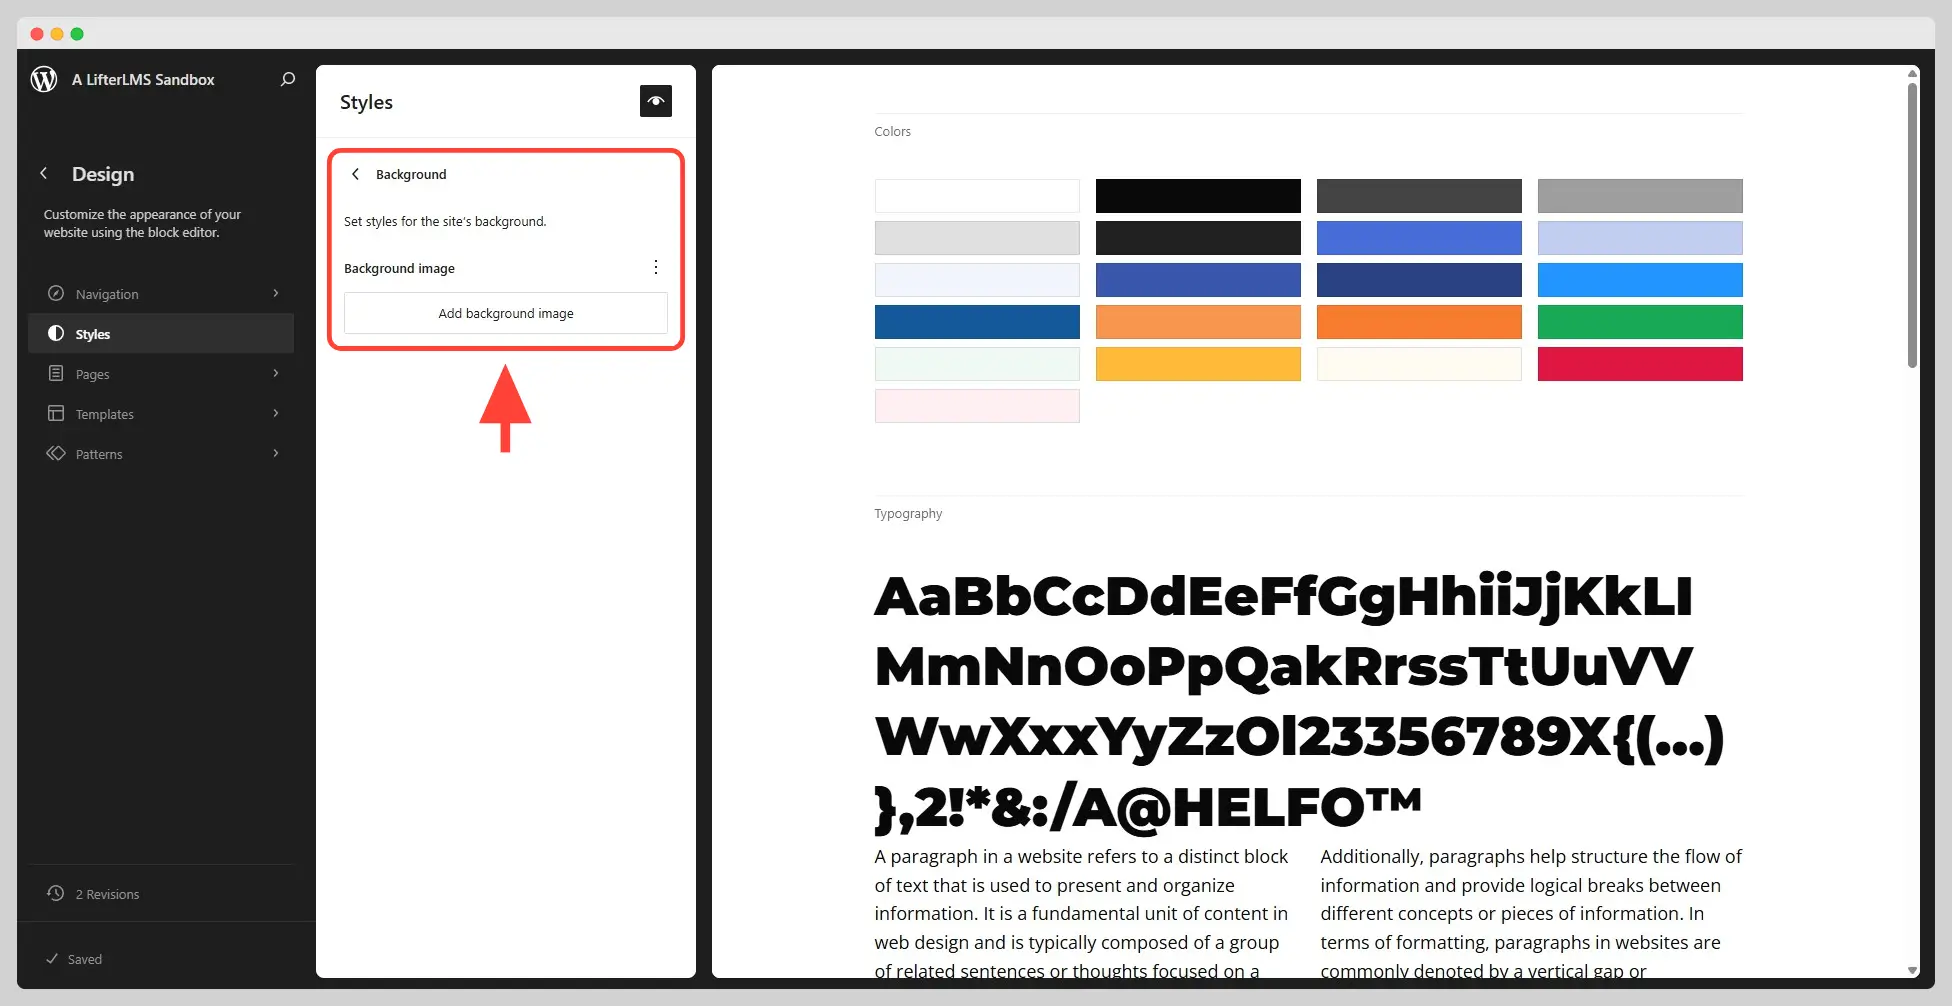
Background. This section allows you to set the background image for your entire website.
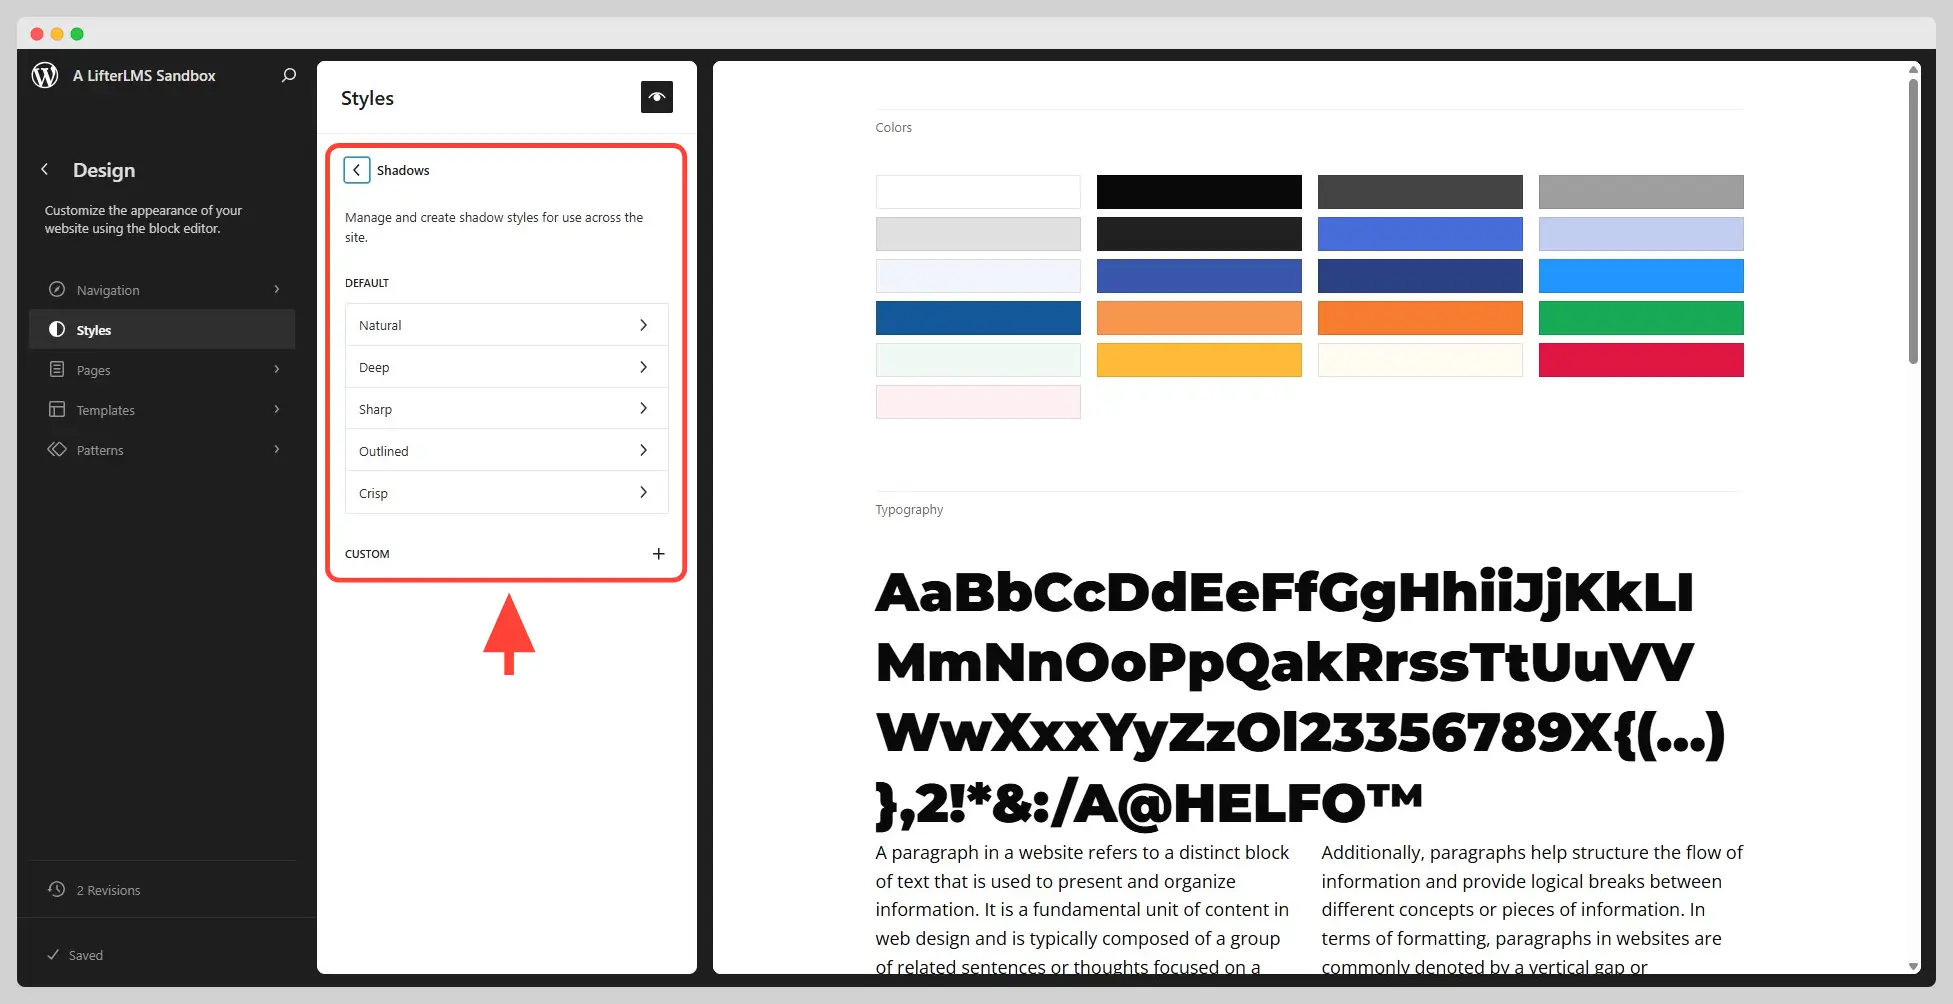
Shadows. This allows you to add predefined shadow styles. This will then appear in the block editor when you edit your blocks there, as you can see below.
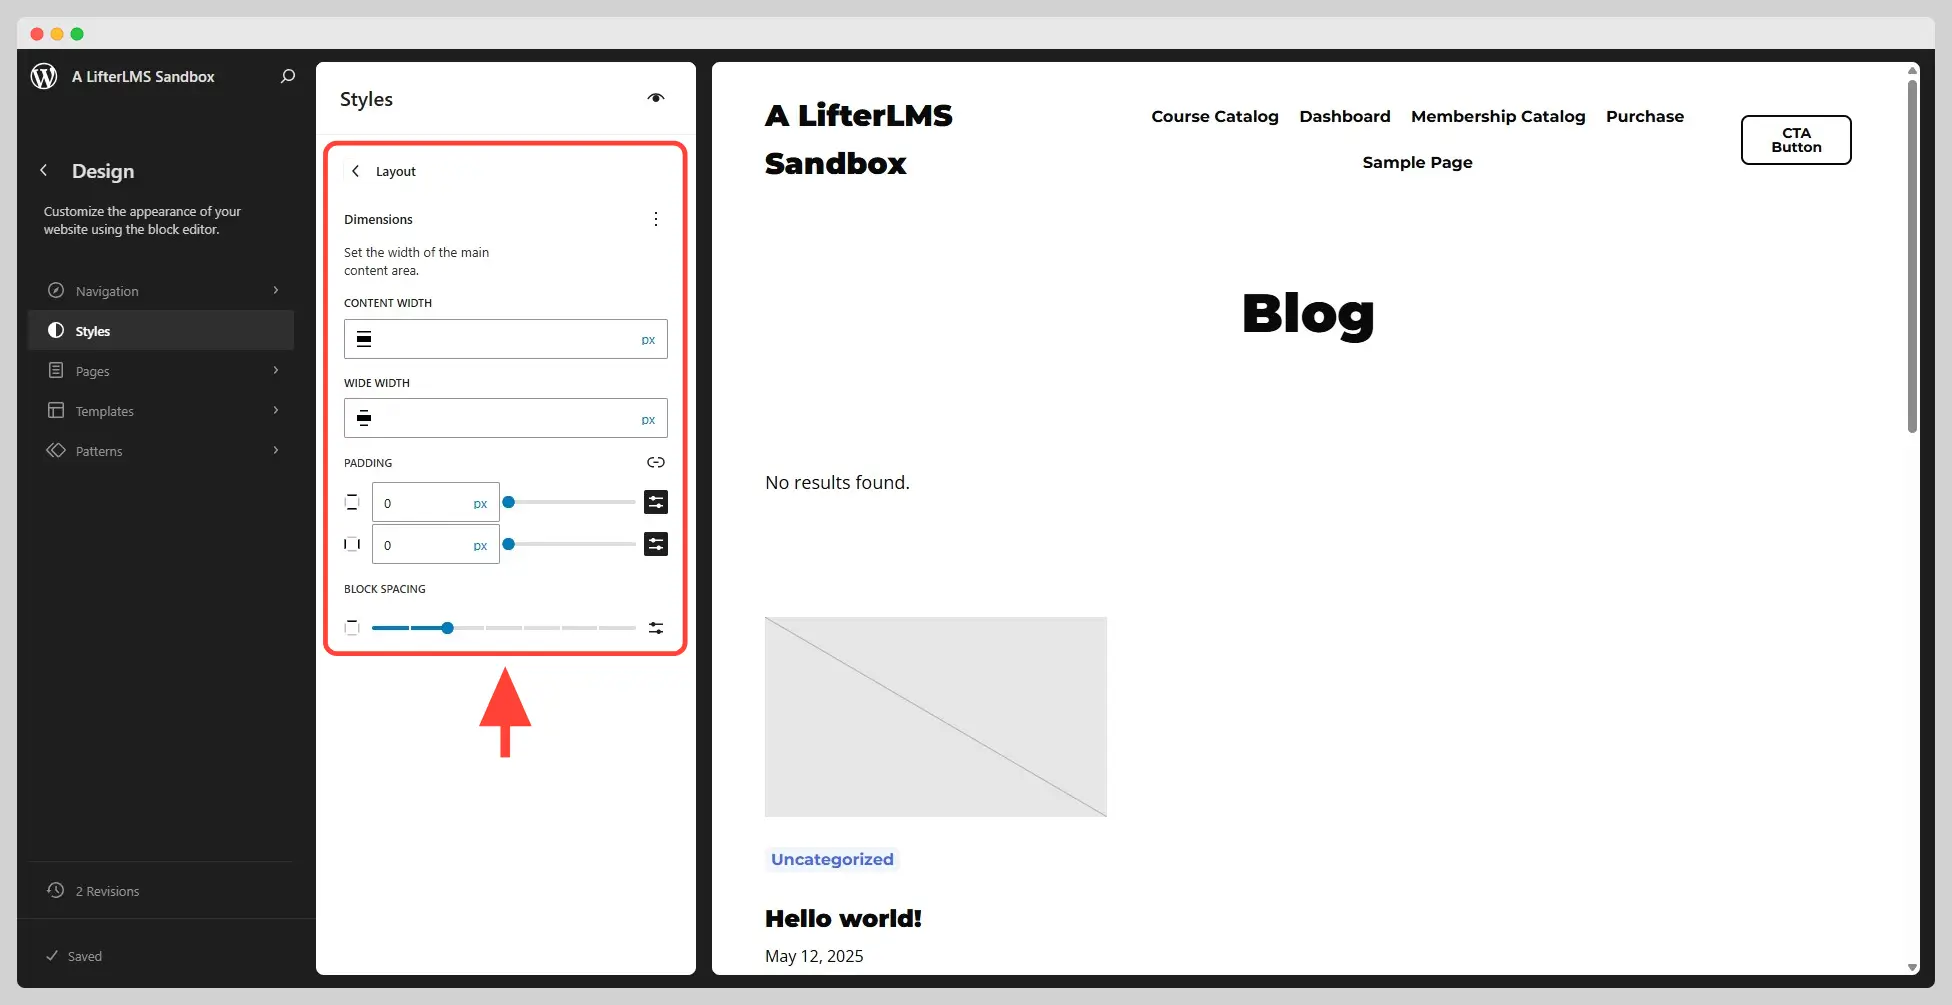
Layout. This section allows you to set the width of the main content area, as well as the padding for the whole site, and the spacing between the WordPress blocks in your site.
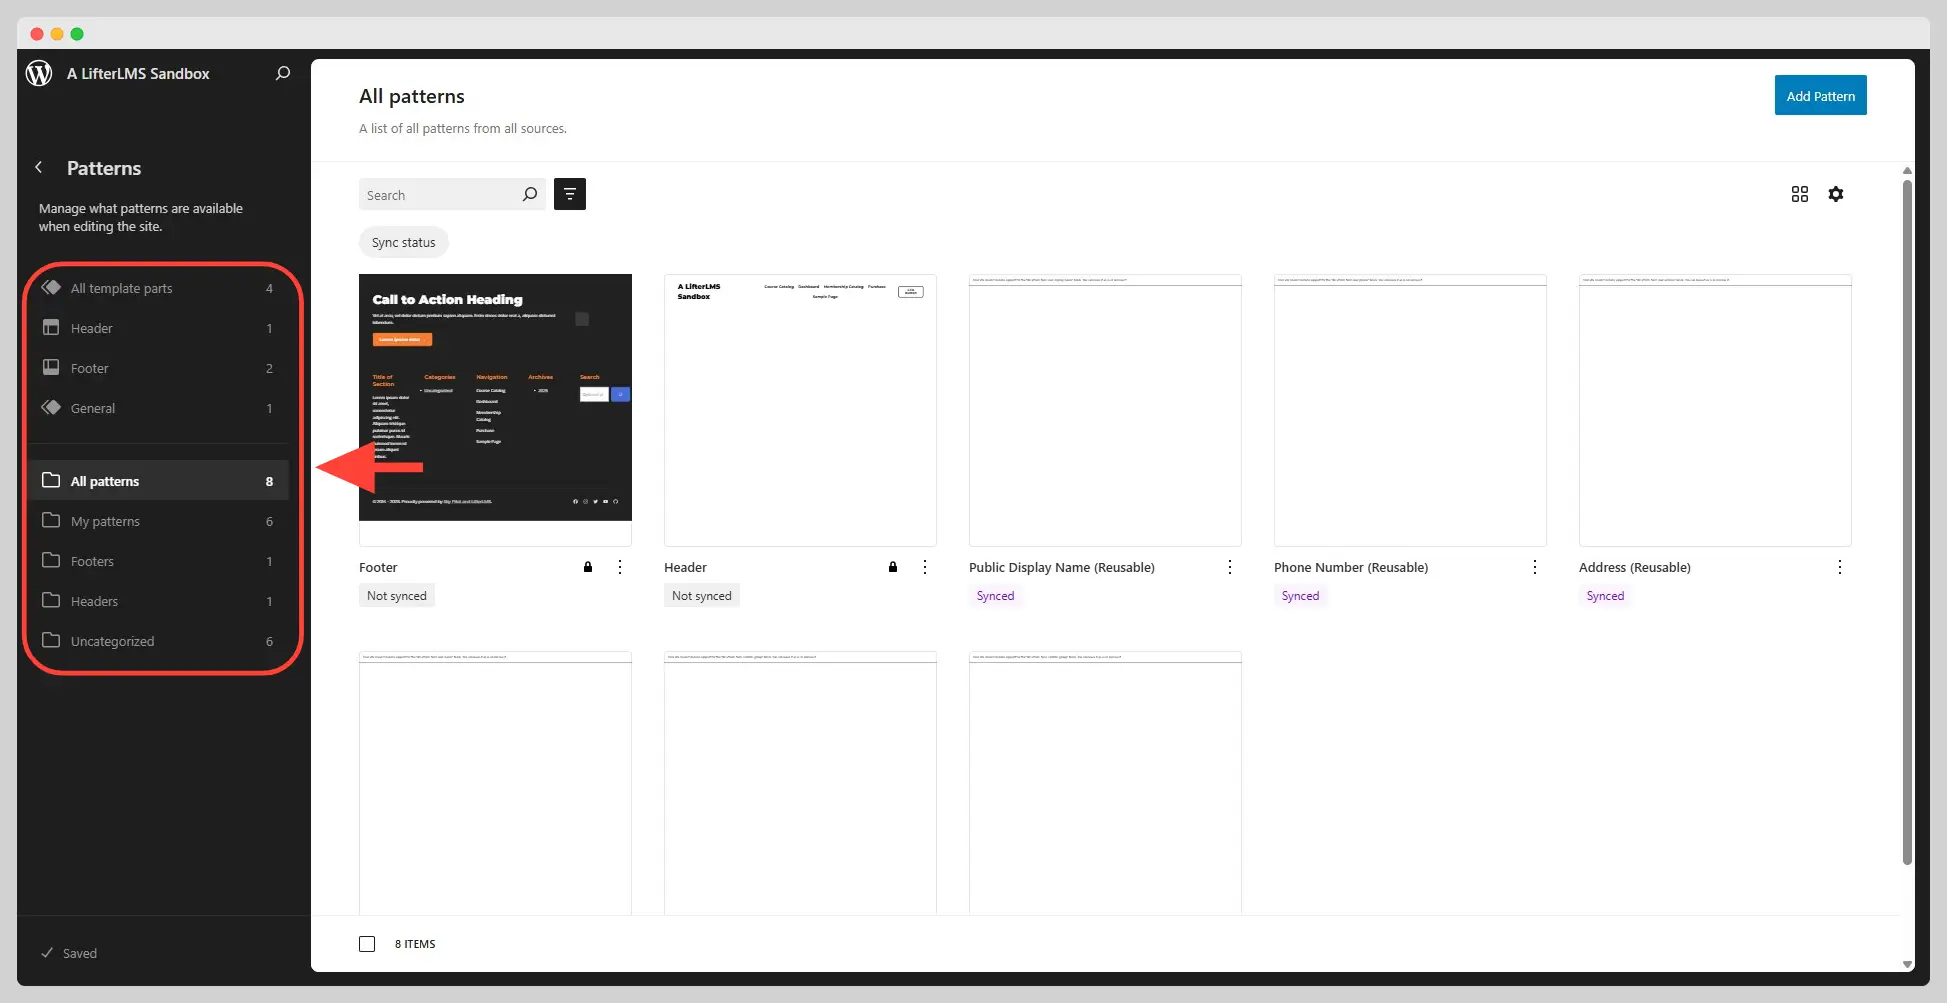
Patterns are pre-designed combinations of WordPress blocks that can be quickly inserted into your website’s content and templates. You can view all your patterns by navigating to Appearance > Editor > Patterns from the WordPress administration dashboard.
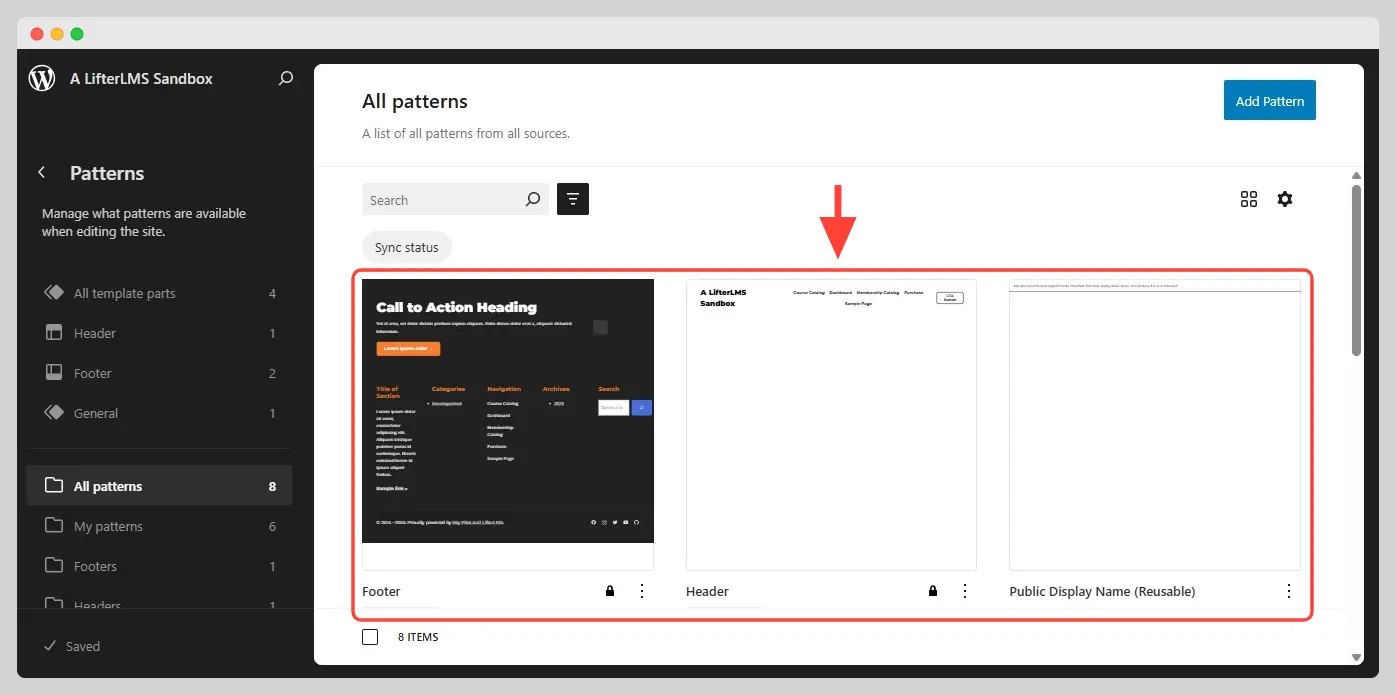
To create new patterns, navigate to Appearance > Editor > Patterns and click on the Add Pattern button.

Once you have finished designing your new pattern, the new pattern you create will also be listed here, as you can see below
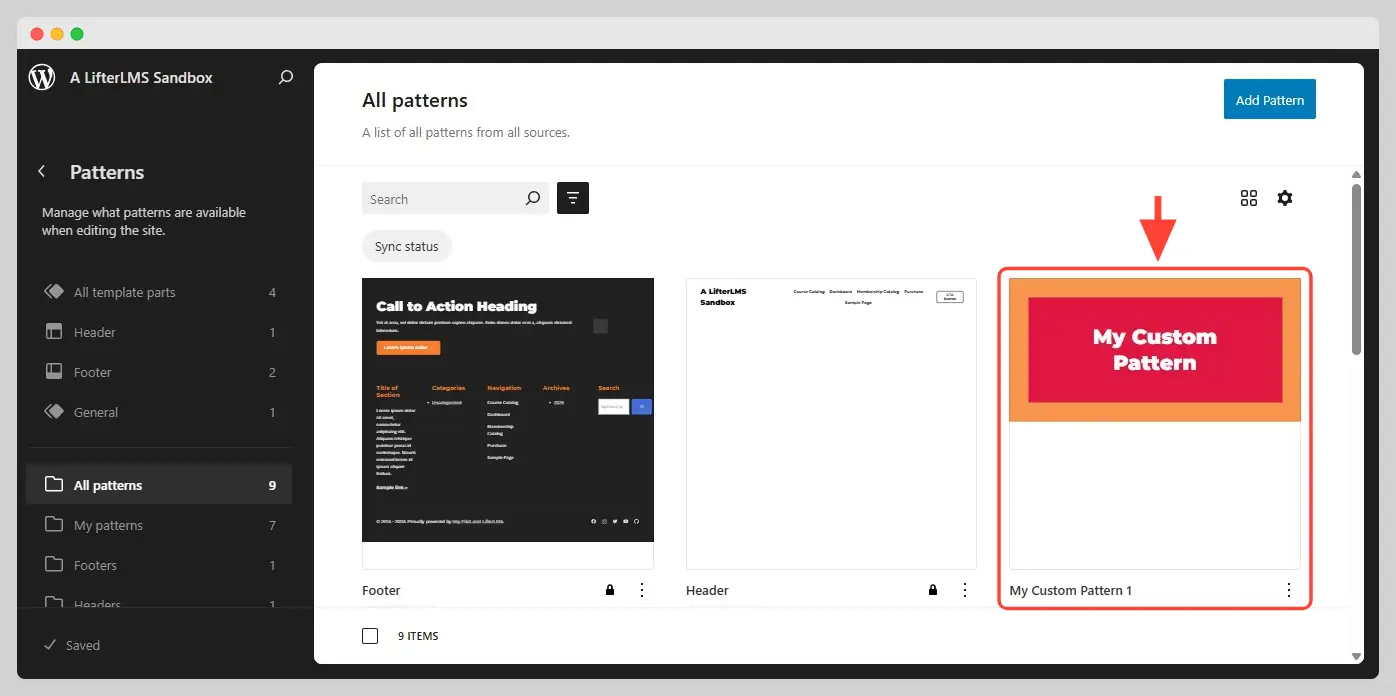
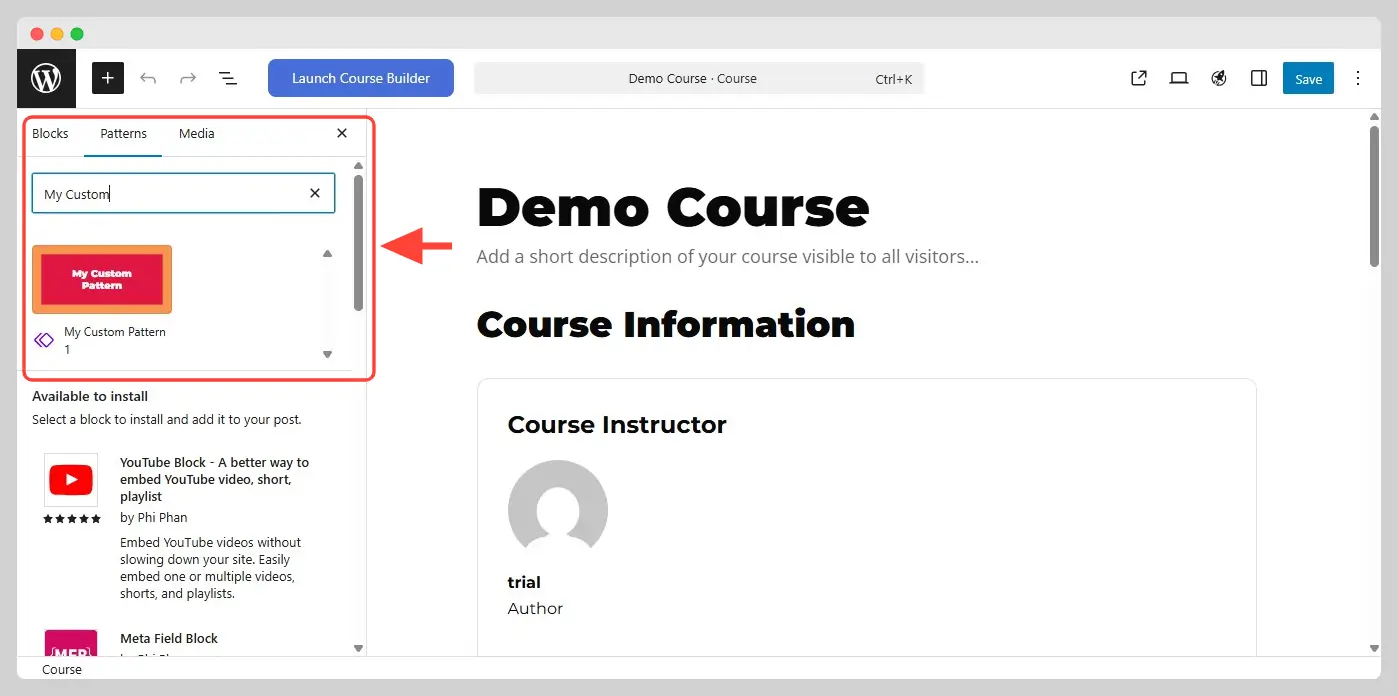
These saved patterns can be used anywhere on your site, including inside other patterns and templates.
In addition to that, saved patterns can also be added inside page content (e.g., regular pages, blog posts, lesson pages, LifterLMS course pages, LifterLMS membership pages) when the page content is being edited inside the block editor, as you can see below.
You might notice that the Sky Pilot theme only has a few built-in patterns: the header, the footer, and a few patterns used inside LifterLMS forms. If you need a more extensive library of ready-to use patterns for your Sky Pilot website, use the LifterLMS Aircraft add-on.
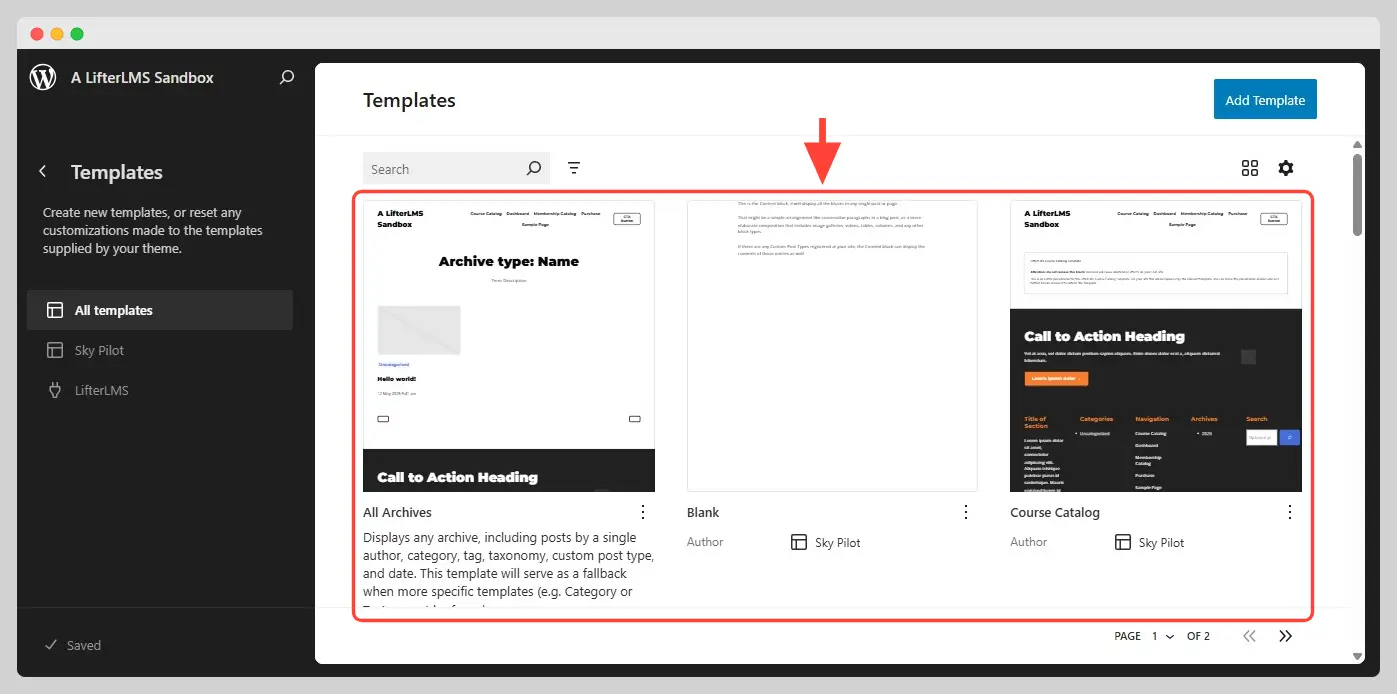
A template in the full-site editor controls the layout of your pages. In particular, a template affects the layout and appearance of an individual page or groups of pages. However, just like patterns, templates are also a group of WordPress blocks bundled together.
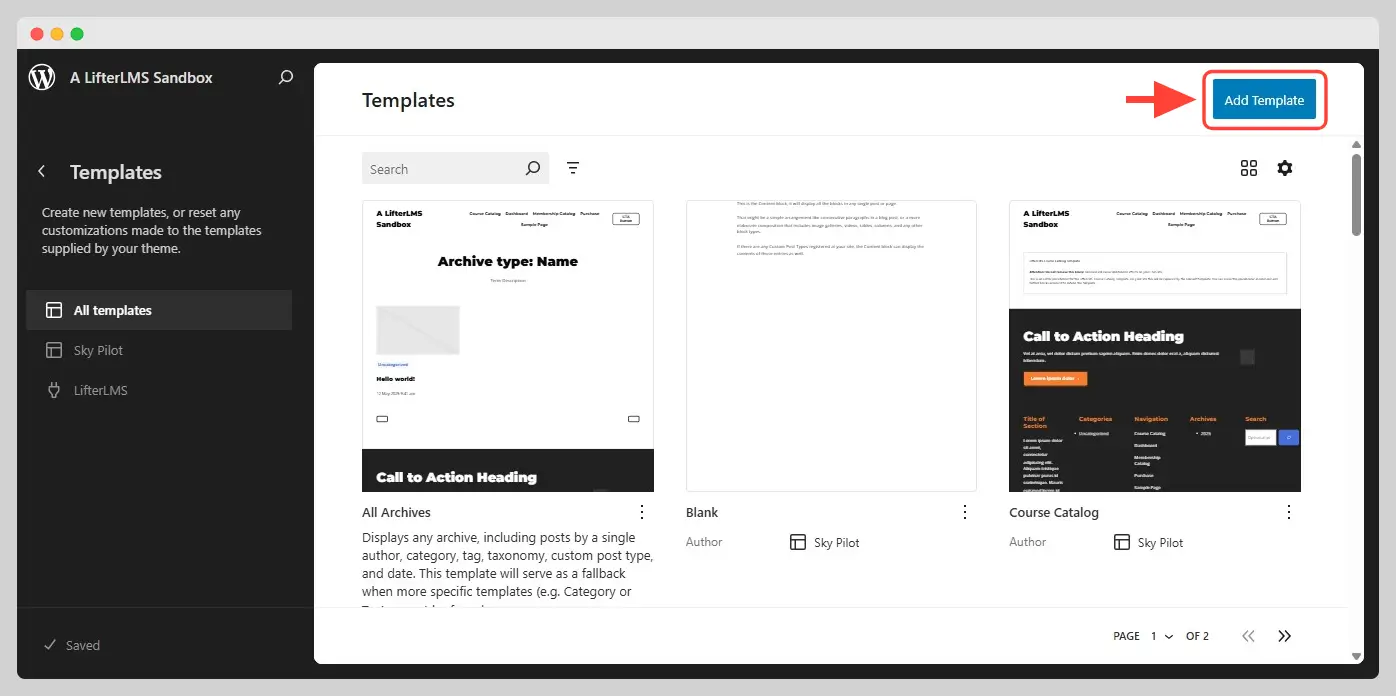
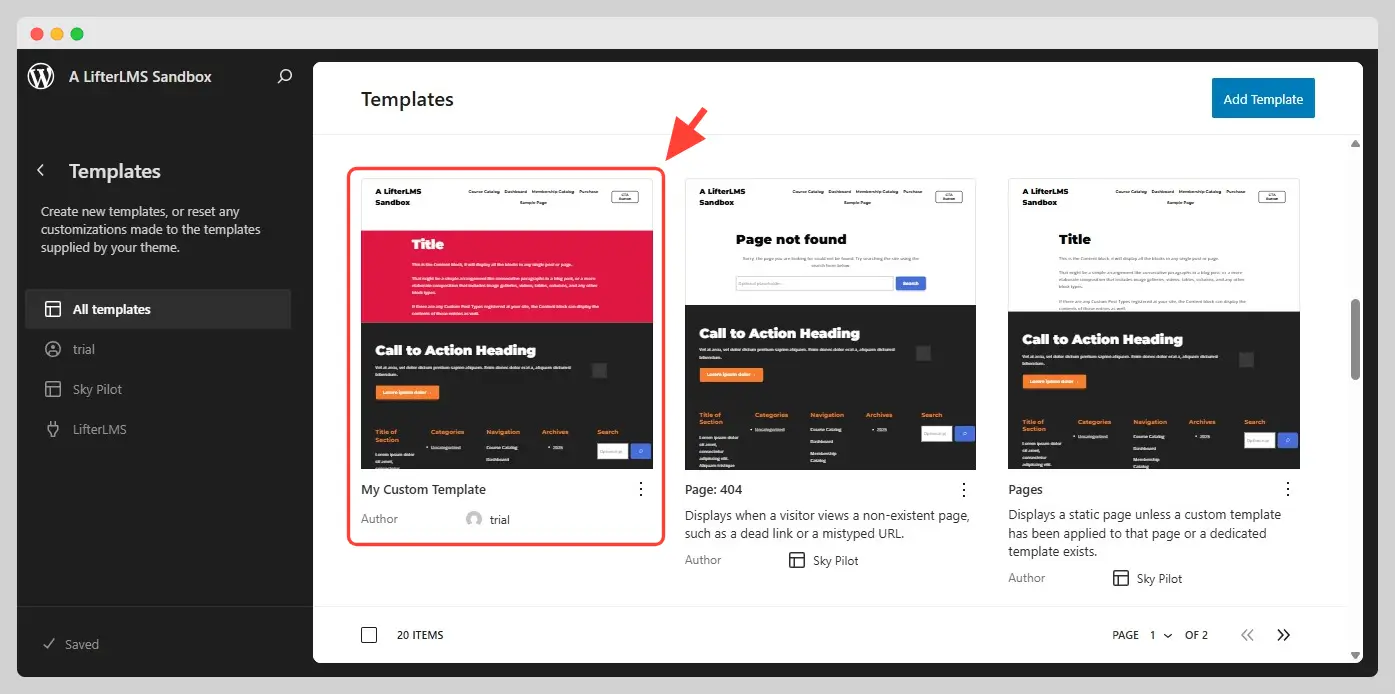
To create new patterns, navigate to Appearance > Editor > Templates and click on the Add Template button.
Once you have finished designing your new pattern, the new pattern you create will also be listed.
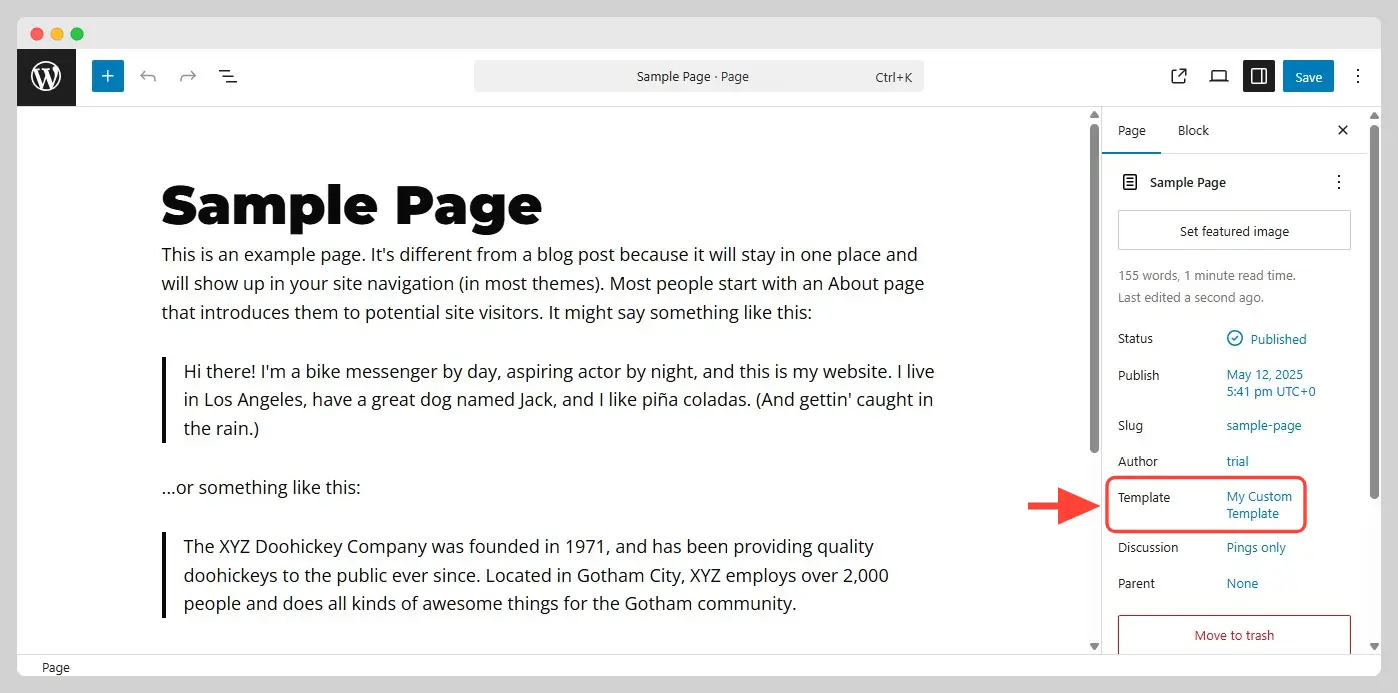
To make sure that an individual page of your site uses your custom template, open that page in the block editor. Then, under Templates, select your custom template.


- How to Install and Activate Sky Pilot
- How to Use Sky Pilot with a page builder like Elementor, Divi, or Beaver Builder
- How to Change Colors in the Sky Pilot Theme
- Full Site Build with Sky Pilot Theme, WooCommerce, and LifterLMS
- Create Beautiful Course Websites with Modern WordPress and the New Sky Pilot Theme


