How do I rerun the LifterLMS Setup Wizard?
The LifterLMS Setup Wizard is a helpful tool that automatically configures your basic settings and generates the essential pages your LMS needs to function. These four required pages are:
If you skipped the wizard during your initial installation, you can easily return to it at any time. Rerunning the wizard will not delete or change any of the courses or materials you have already created.
You can restart the setup process from your WordPress dashboard by following these steps:
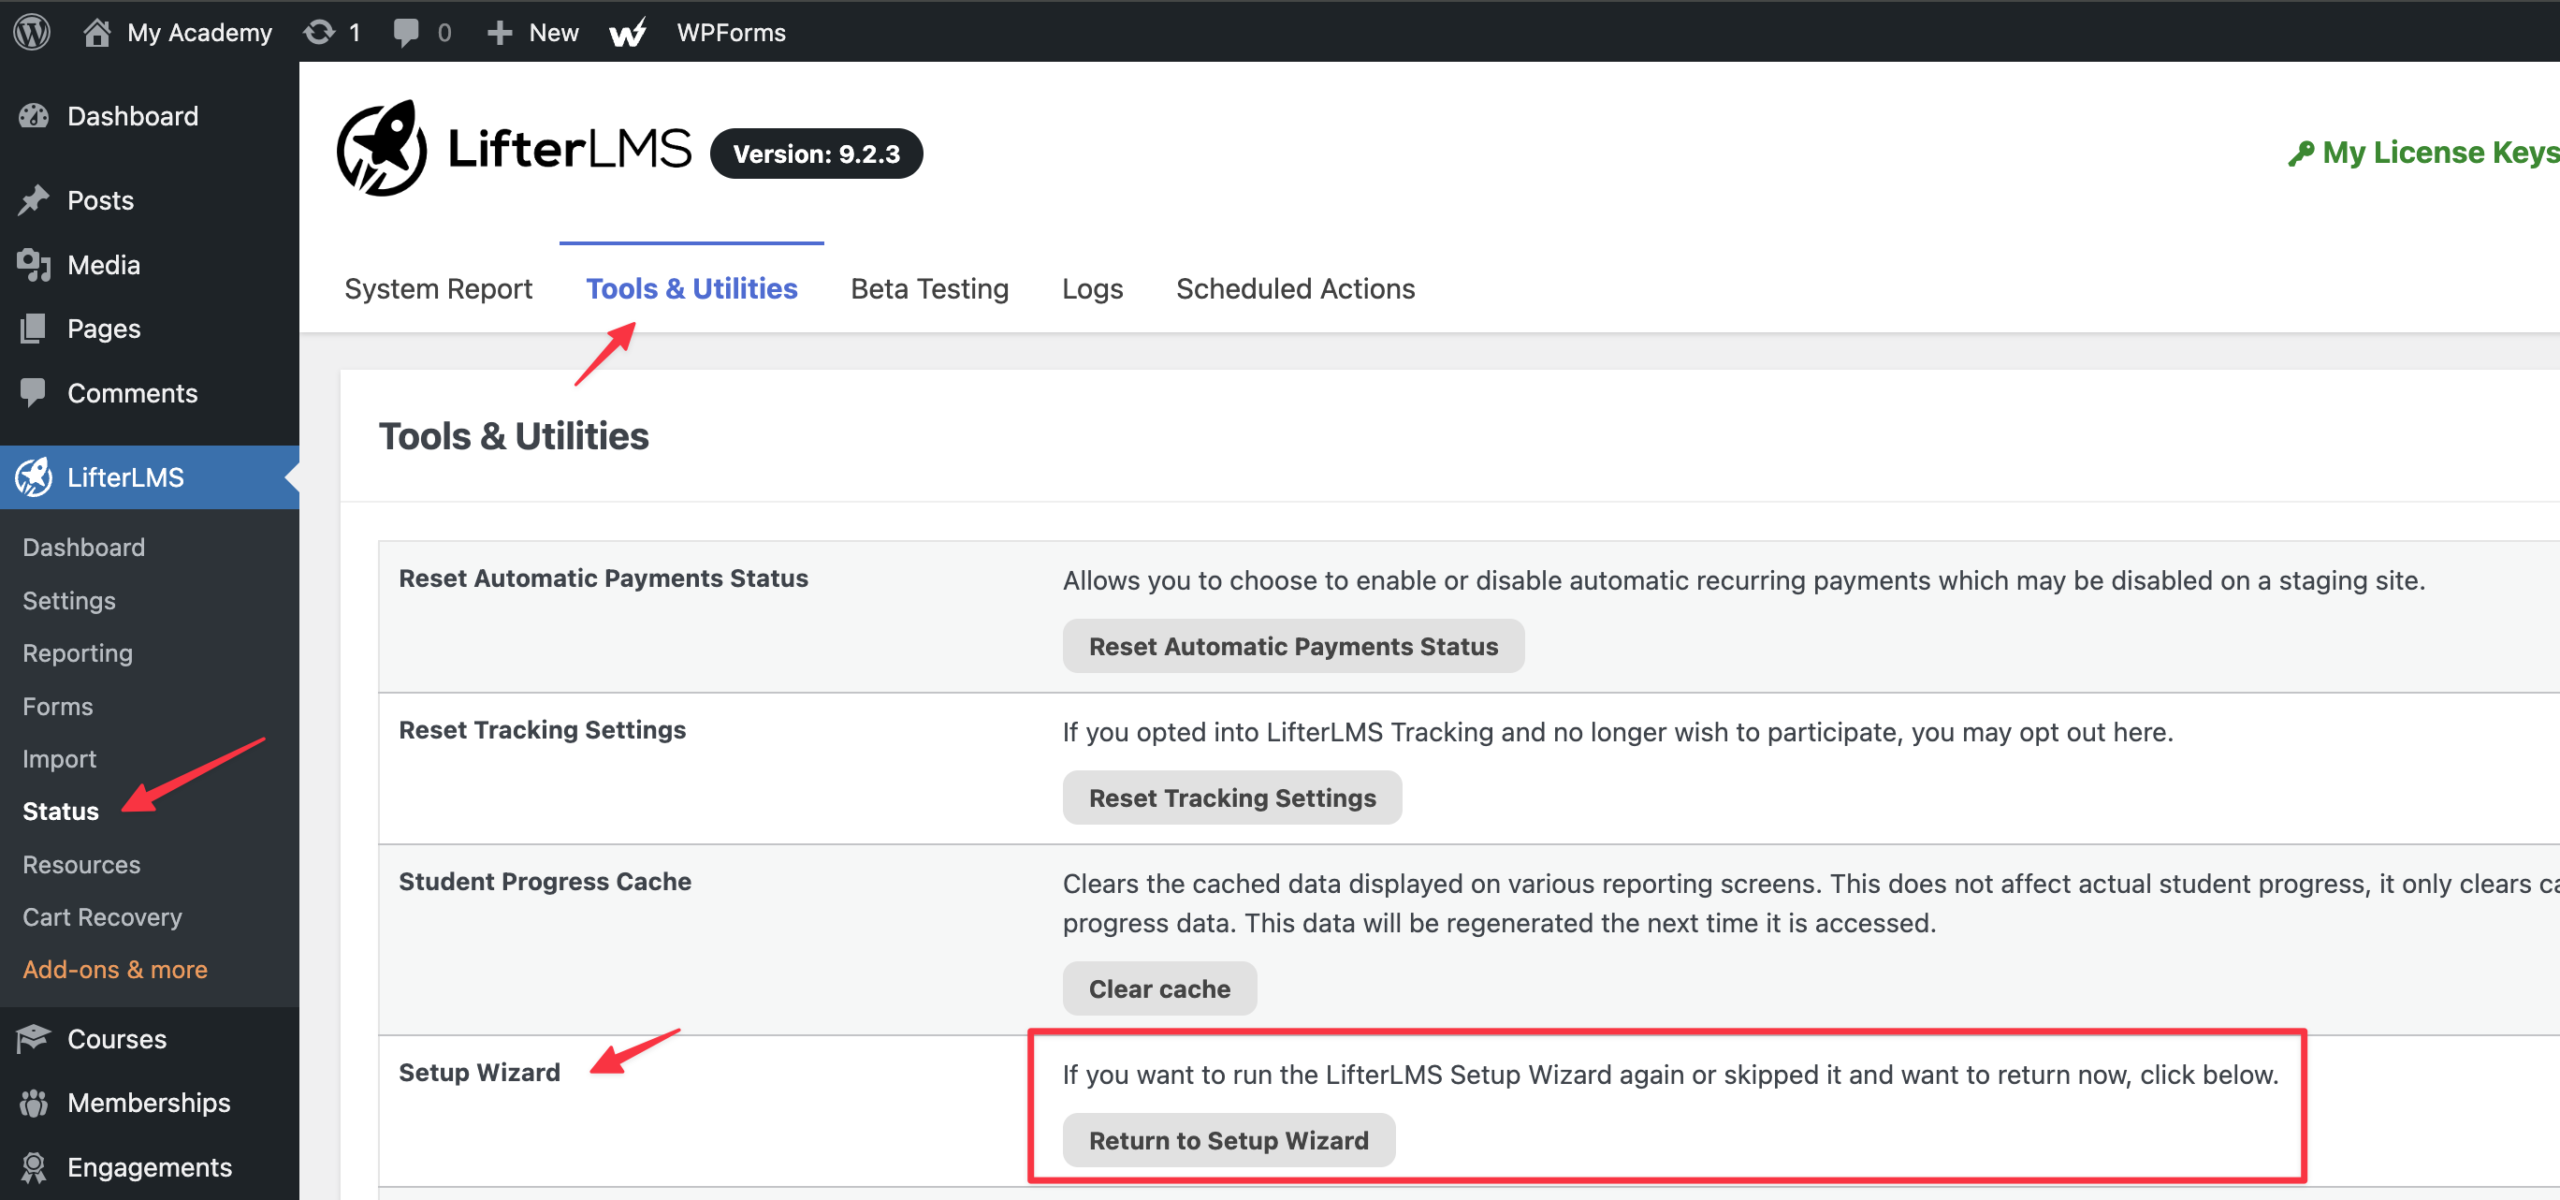
- Log in to your WordPress dashboard and navigate to LifterLMS > Status.
- Click on the “Tools & Utilities” tab at the top of the screen.
- Locate the “Setup Wizard” section.
- Click the Return to Setup Wizard button.
- Follow the instructions on your screen to complete the setup process.
In rare cases, the setup wizard might fail to generate the required pages due to server conflicts. If this happens, you can manually create these four pages and link them to your LMS settings.
Step 1: Create the Blank Pages
First, you need to create the core pages for your website.
- Navigate to Pages > Add New.
- Type “Course Catalog” into the page title area.
- Click the Publish button to save the page.
- Repeat these exact steps to create three more separate pages. You will name them “Membership Catalog”, “Checkout”, and “Student Dashboard”.
Step 2: Add Content to the Checkout and Dashboard Pages
Your Course Catalog and Membership Catalog pages will automatically display your content once you link them.
However, your Checkout and Student Dashboard pages require a specific shortcode so that LifterLMS knows where to display the payment forms and student information.
- Navigate to Dashboard > Pages.
- Hover your mouse over the “Checkout” page you just created and click Edit.
- Add a “Shortcode” block to the page editor.
- Type “[lifterlms_checkout]” exactly as shown inside the shortcode block.
- Click the Update button.
- Return to your pages list.
- Hover your mouse over the “Student Dashboard” page and click Edit.
- Add a “Shortcode” block to the page editor.
- Type “[lifterlms_my_account]” exactly as shown inside the shortcode block.
- Click the Update button.

Step 3: Link the Pages in Your LifterLMS Settings
Now that your pages are fully created, you must tell LifterLMS which page serves which purpose.
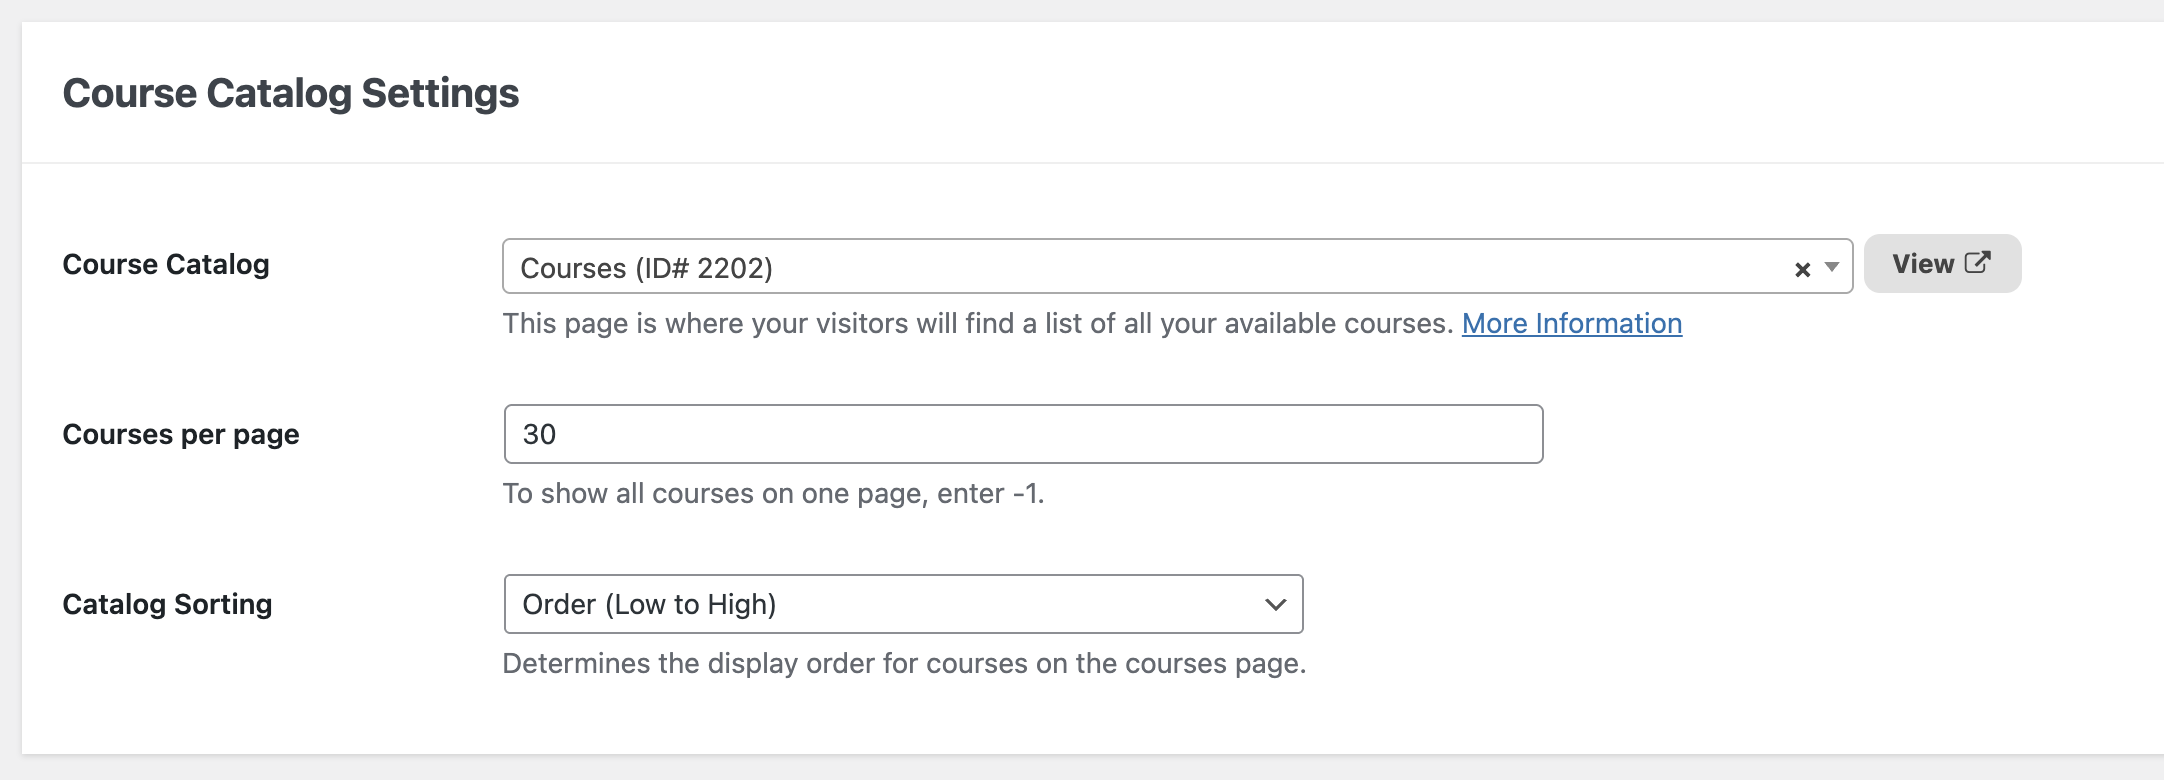
- Navigate to LifterLMS > Settings and click on the “Courses” tab.
- Look for the dropdown menu next to “Course Catalog”.
- Select the “Course Catalog” page you created.
- Click the Save Changes button.
- Click on the “Memberships” tab.
- Look for the dropdown menu next to “Memberships Page”.
- Select the “Membership” page you created.
- Click the Save Changes button.
- Click on the “Accounts” tab.
- Look for the dropdown menu next to “Dashboard Page”.
- Select the “Dashboard” page you created.
- Click the Save Changes button.
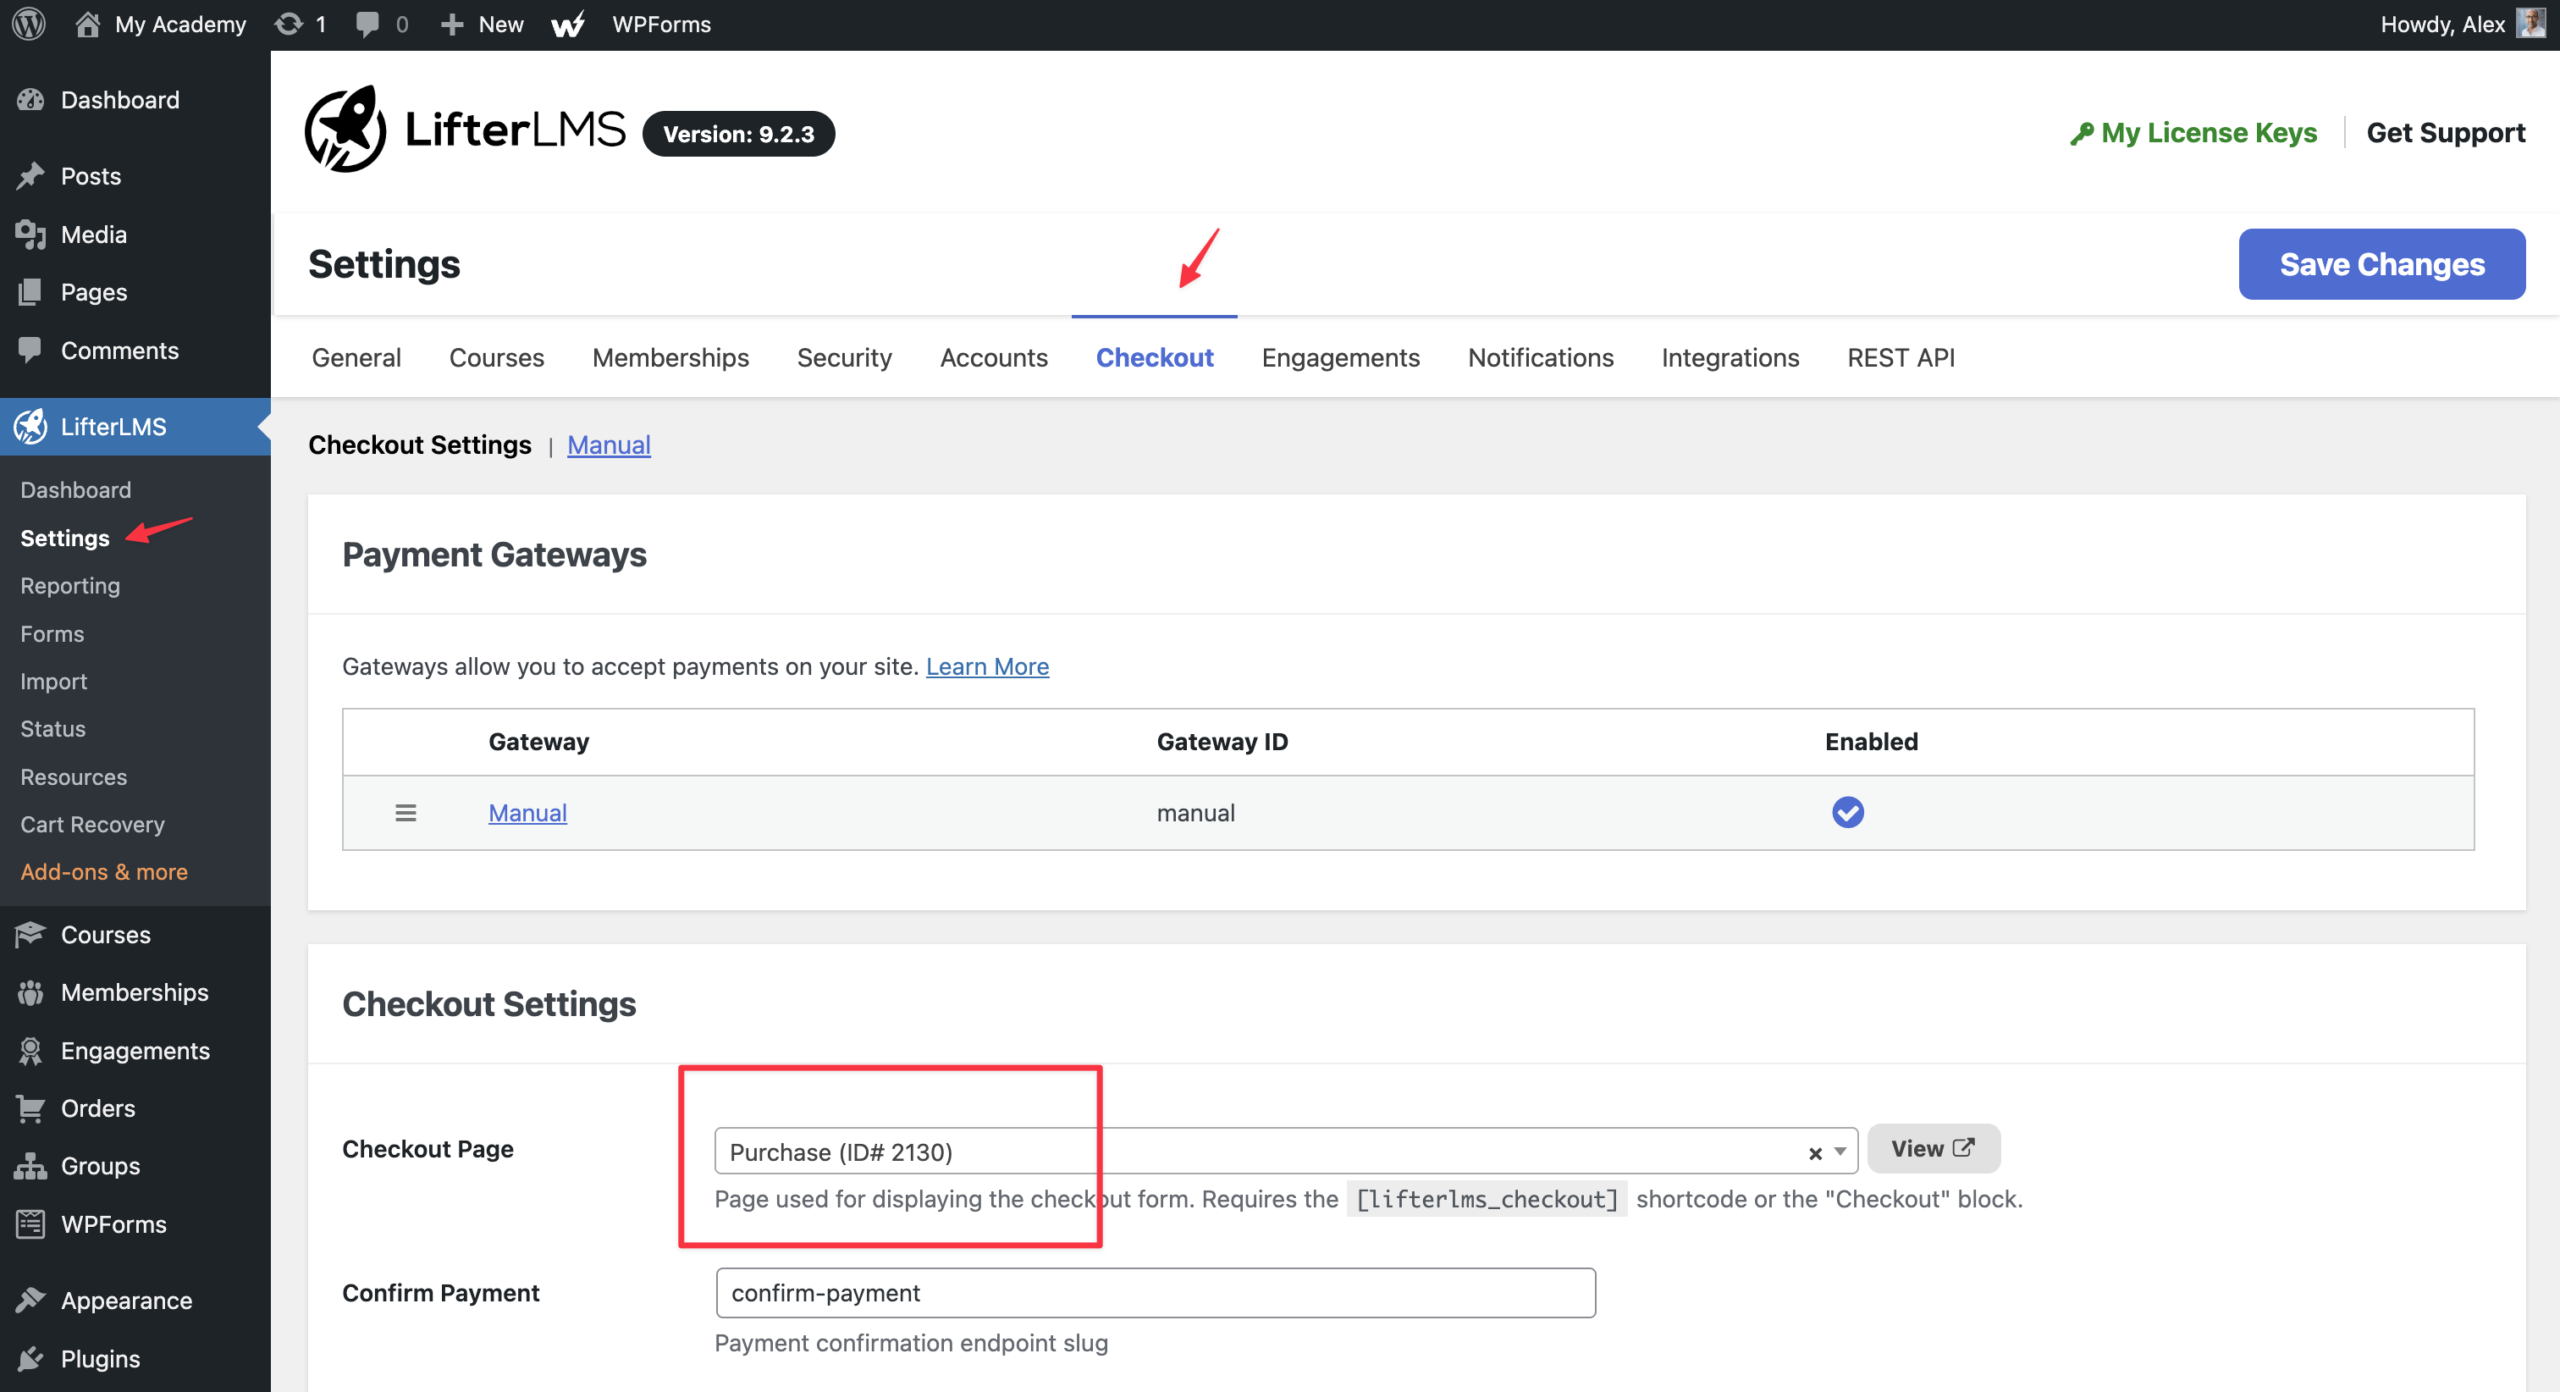
- Click on the “Checkout” tab.
- Look for the dropdown menu next to “Checkout Page”.
- Select the “Checkout” page you created.
- Click the Save Changes button.


