The Student Dashboard
The Student Dashboard gives your learners a single place to manage everything related to their learning. They log in, see the courses they’re working through, check progress, and review certificates they’ve earned along the way.
Think of this page as their home base once they start learning. They always know where to return when they want to continue a course or check results.
You can select any WordPress page to act as the Student Dashboard. However, this page should not be the same as the one used for the Course Catalog, Membership Catalog, or Checkout.
Before the page can show a working dashboard, you need to add a shortcode. Without it, the page won’t display anything useful to students.
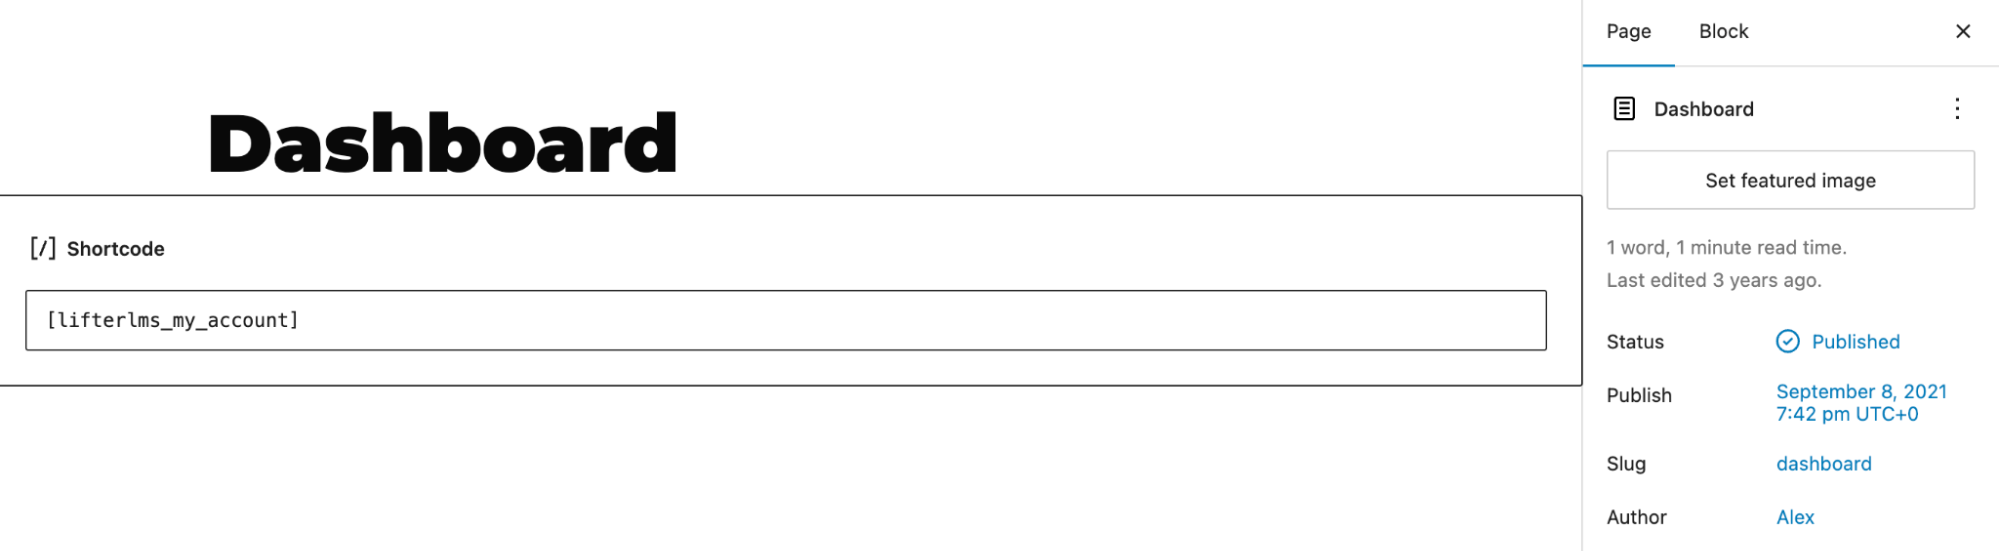
- Navigate to Pages > Add New (or edit an existing page).
- You can add the Student Dashboard using either the shortcode [lifterlms_my_account] or the My Account block. Place one of these in the main content area of the page.
- Publish or update the page.
Once the page is created, you must tell LifterLMS to use this page as the dashboard:
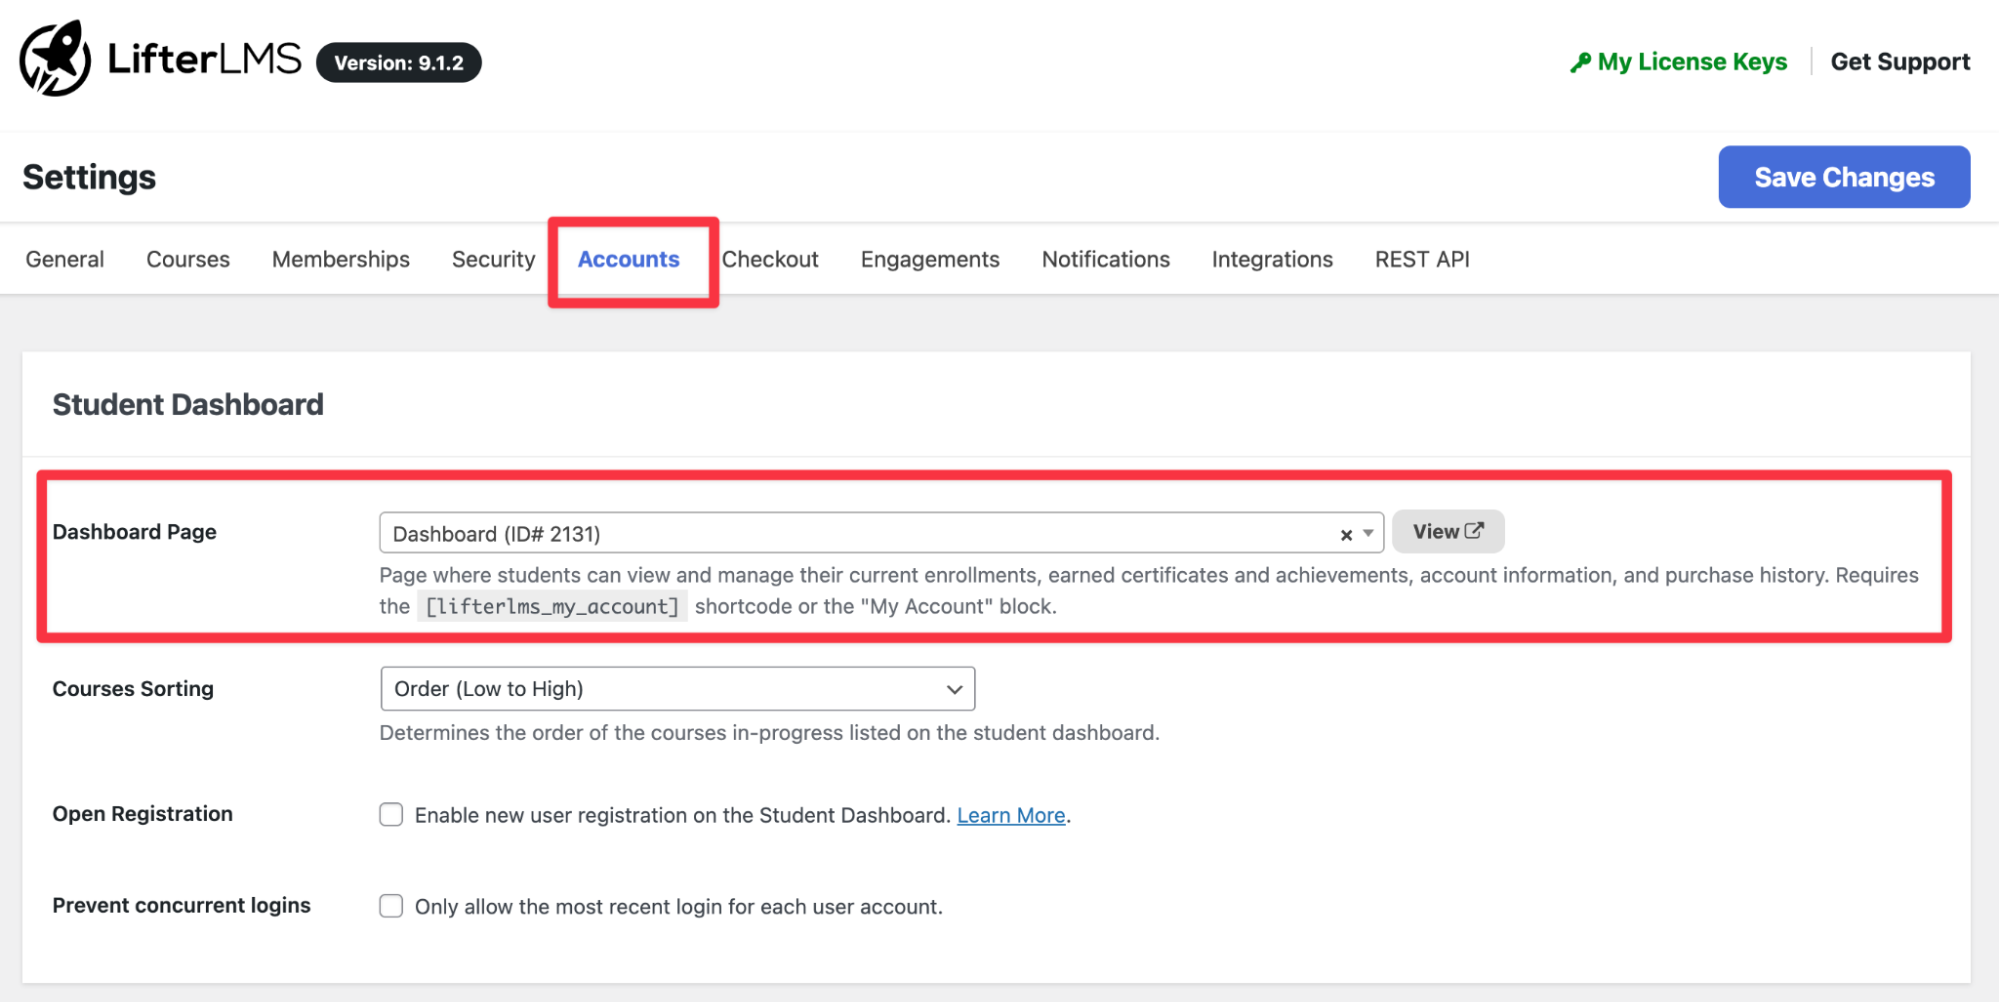
- Navigate to LifterLMS > Settings > Accounts.
- Locate the setting labeled “Dashboard Page” under the “Student Dashboard” section.
- Select your newly created page from the dropdown menu.
Click Save Changes at the top of the screen.
You can define the order in which courses are displayed on the student dashboard to help your students organize their learning experience.
To configure the sorting order:
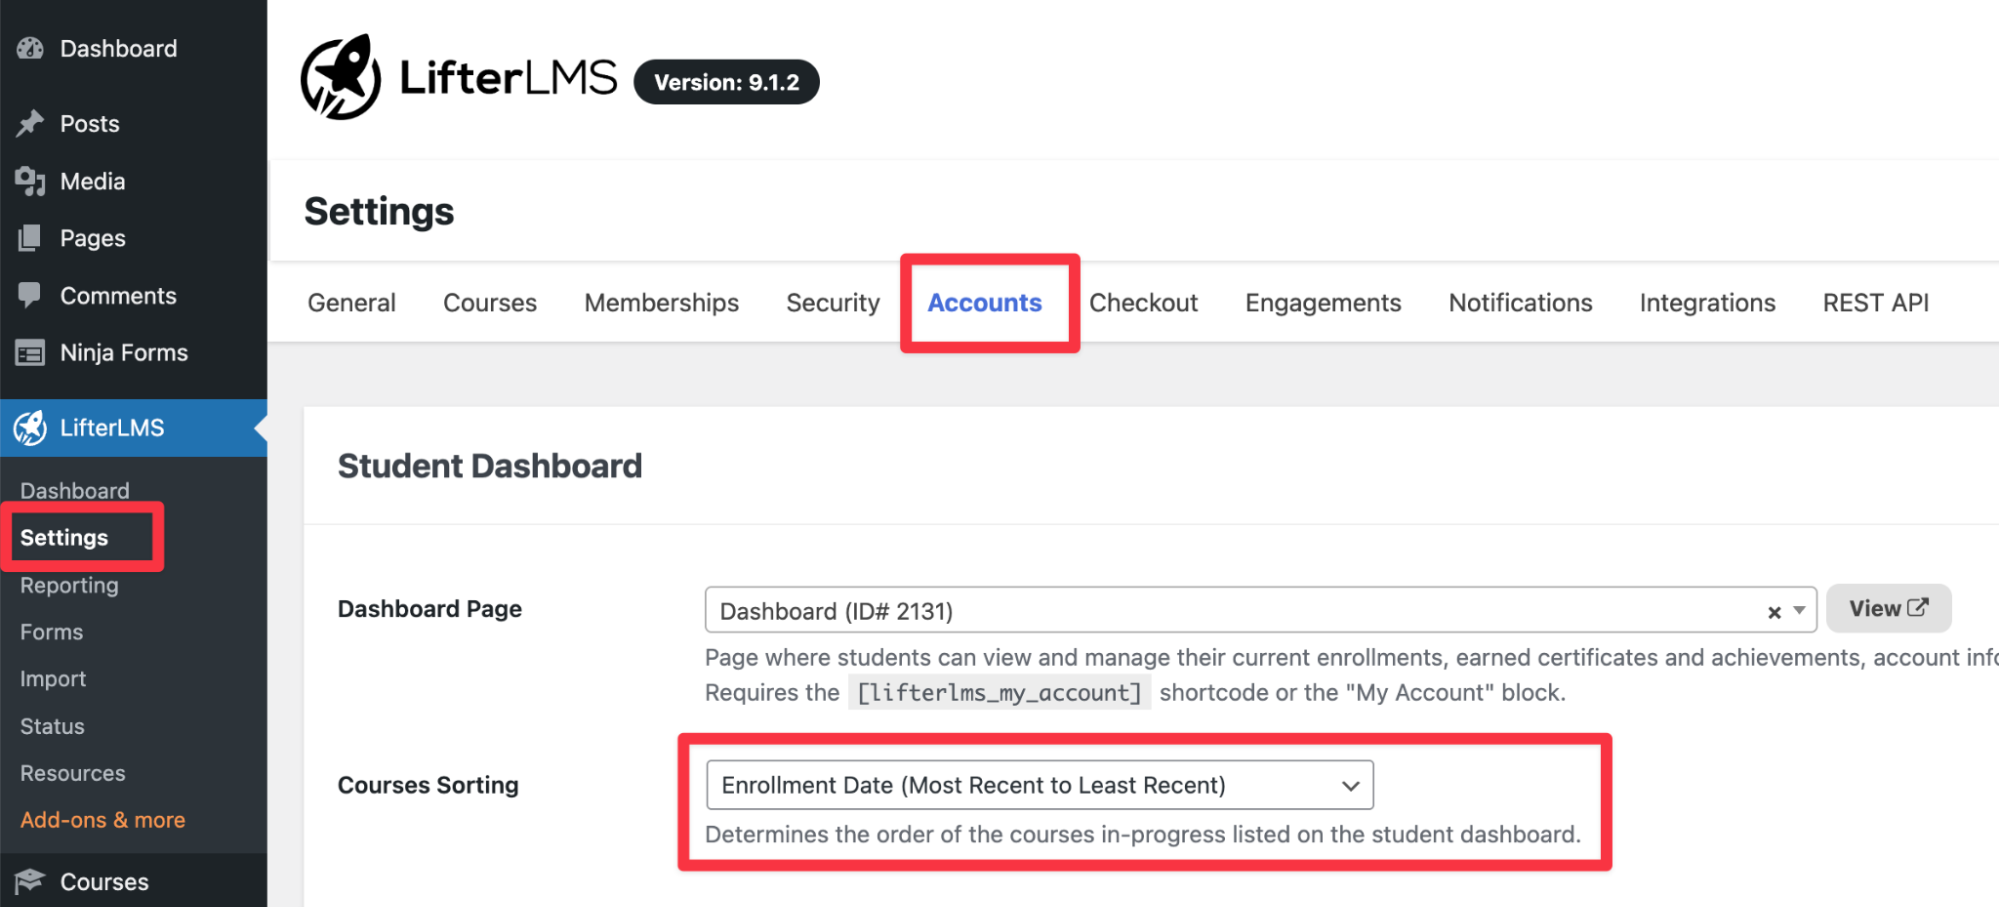
- Navigate to LifterLMS > Settings > Accounts.
- Locate the “Student Dashboard” section.
- Find the “Courses Sorting” dropdown menu.
- Select one of the following options:
- “Course Title (A to Z)”
- “Course Title (Z to A)”
- “Enrollment Date (Most Recent to Least Recent)”
- “Order (Low to High)”
- “Order (High to Low)”
- After making the necessary edits, click Save Changes in the top-right corner of the screen.
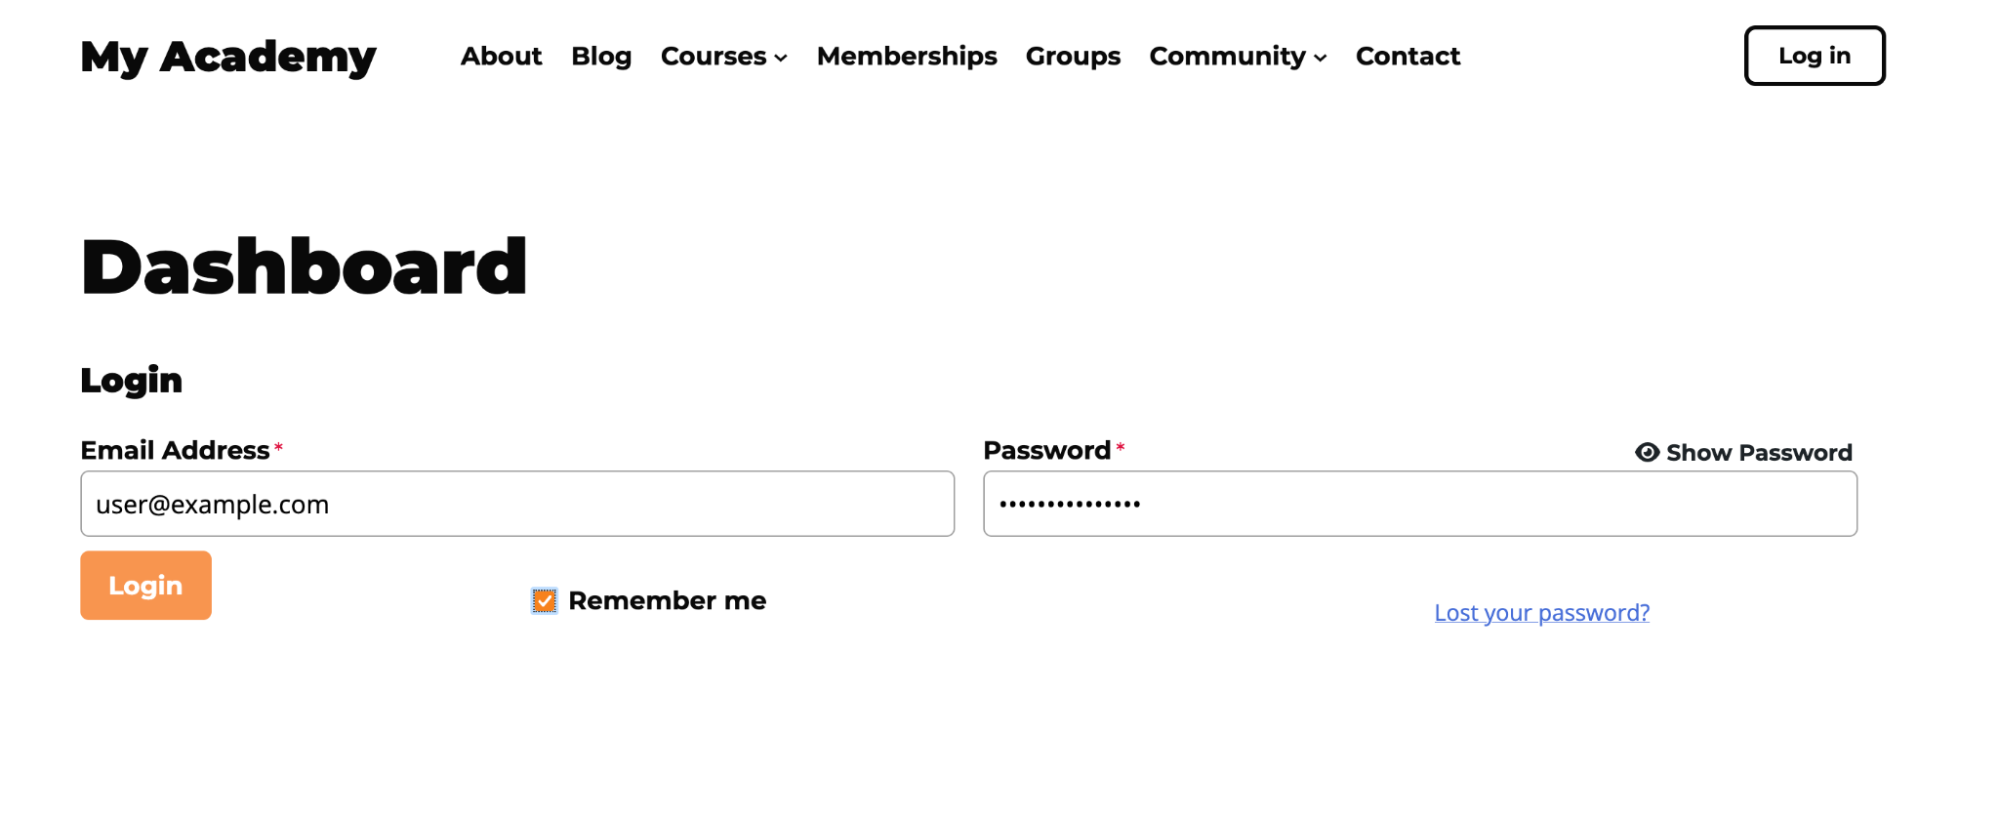
Logged Out View
If someone visits this page while logged out, they’ll see a login form. If you have enabled “Open Registration” in your settings, users will also see a registration form that allows them to create a new account.
Logged In View
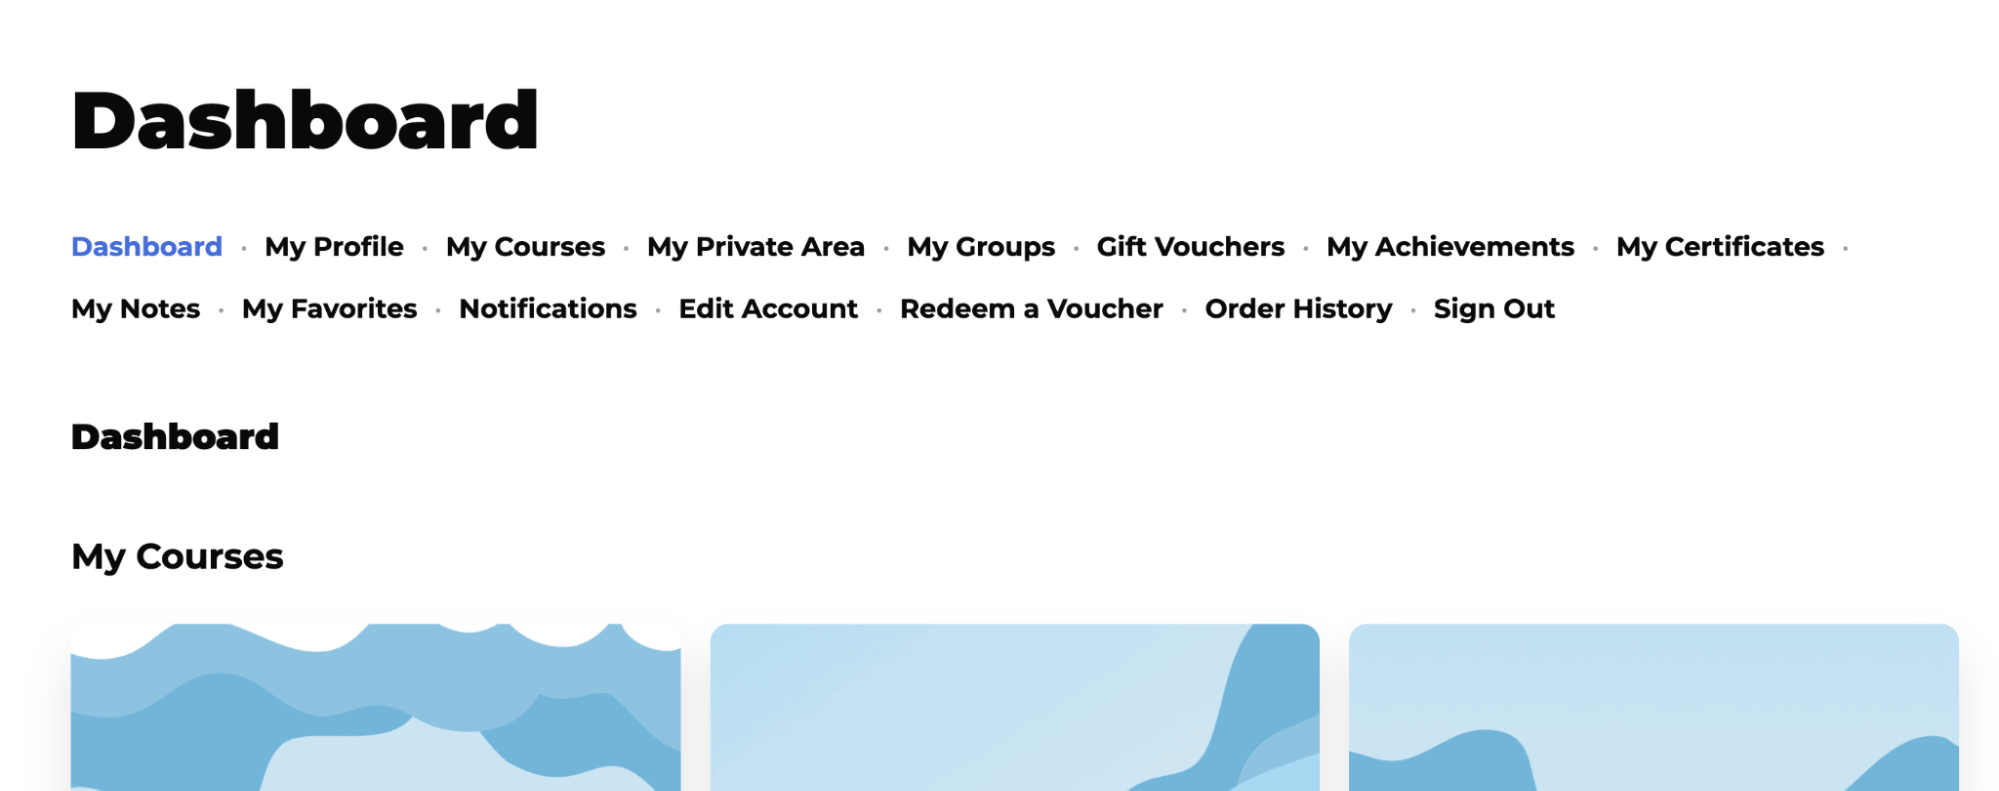
Once logged in, students land on a personalized dashboard showing their courses and progress. From here, every tab leads to a different part of their account. This area is divided into several sections that enable students to view their specific data.
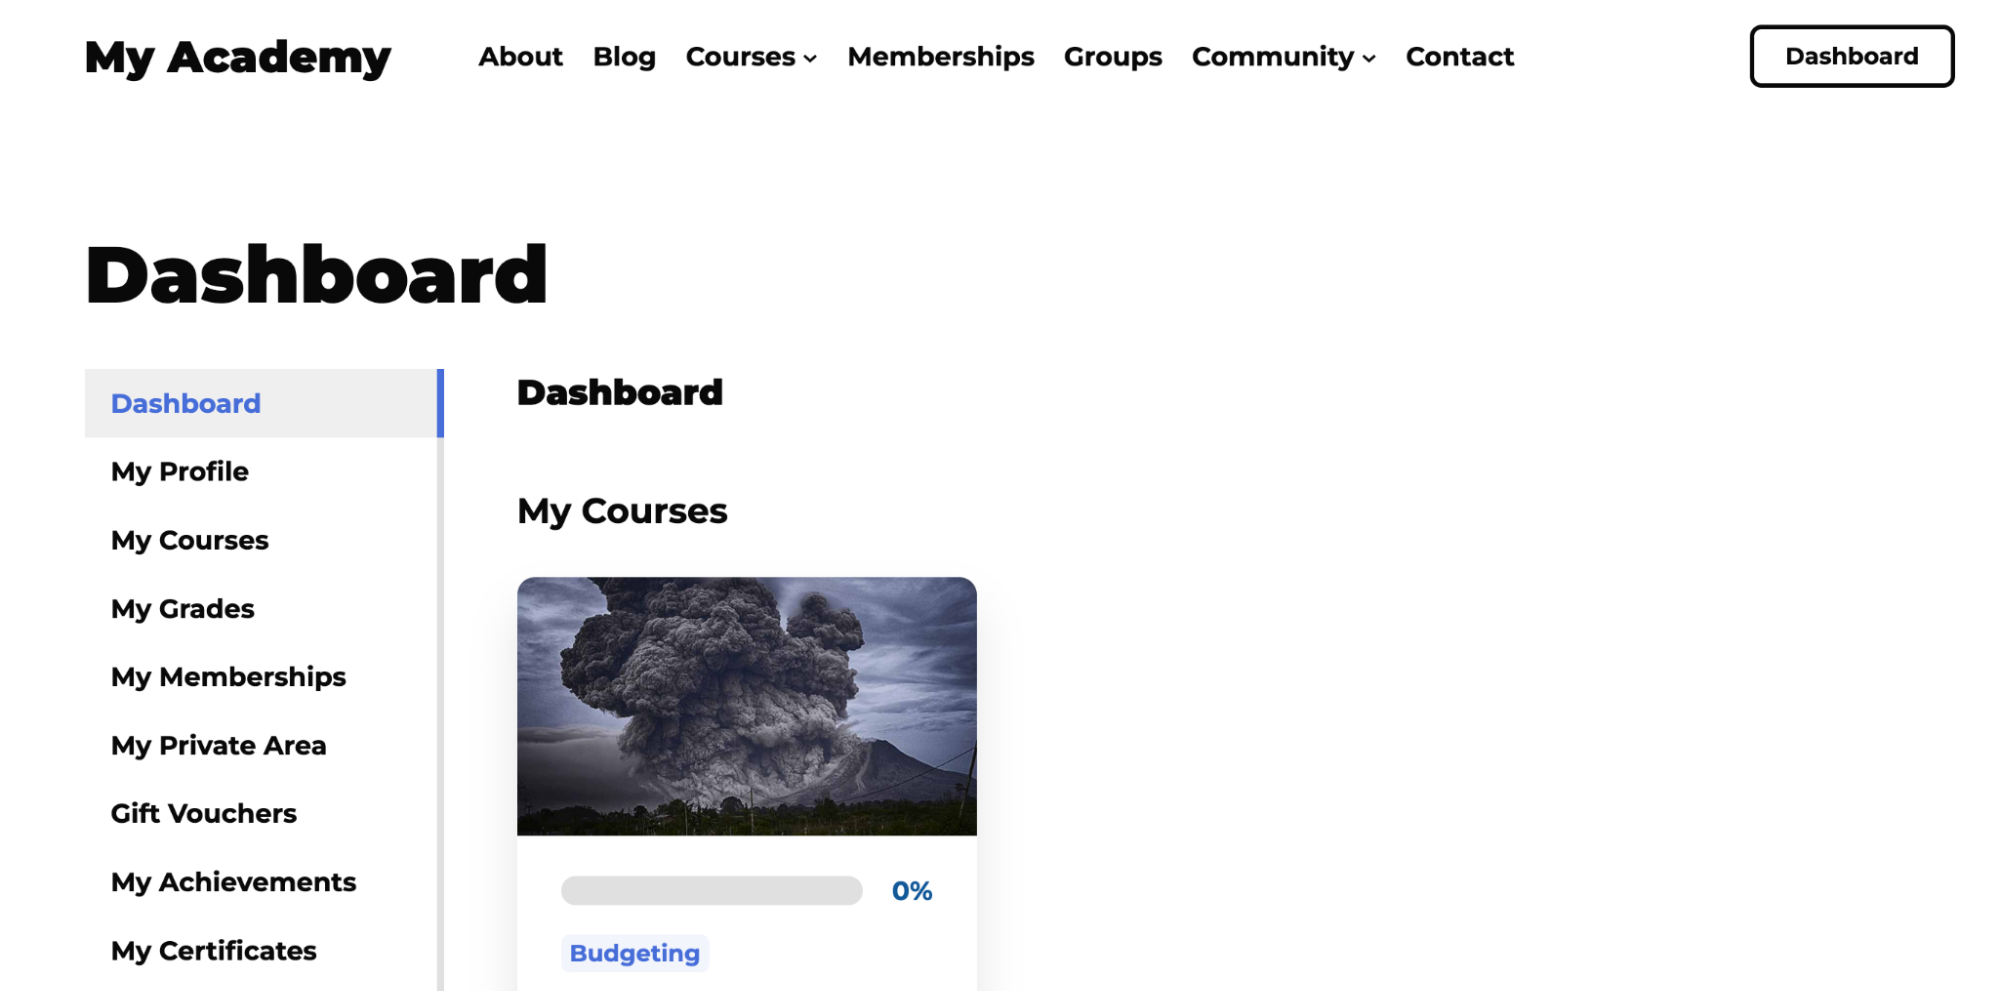
The Student Dashboard navigation uses what LifterLMS calls Endpoints. These are simply the menu items or tabs that students click to navigate the dashboard.
The endpoints you configure in the settings directly determine which tabs appear on the Student Dashboard navigation bar.
The following list details the specific endpoints available for the Student Dashboard:
- Dashboard: The main landing page where students view a summary of their recent activity and progress.
- My Profile: Links to the student’s public-facing profile page to view how others see their account.
- My Courses: Shows the student’s active courses with progress bars and pagination.
- My Grades: Provides a detailed report of grades earned on quizzes and assignments across all courses.
- My Memberships: Lists the active memberships to which the student is currently a member.
- My Private Area: Accesses personalized content and discussions specifically created for the student (requires the Private Areas add-on).
- Gift Vouchers: Allows the student to manage and view gift vouchers they have purchased to give to others.
- My Achievements: Showcases the gamification badges and achievements the student has earned.
- My Certificates: Provides a list of earned certificates with links to download them as PDF files.
- My Notes: Compiles a list of private notes the student has taken during lessons (requires the Notes add-on).
- My Favorites: Shows the lessons a student has marked as favorites for quick access. This tab only appears when the Favorites feature is enabled in LifterLMS › Settings › Courses.
- Notifications: specific alerts regarding course interactions, graded items, or system messages.
- Edit Account: Provides a form for the student to update their personal information, email address, and password.
- Redeem a Voucher: Displays an input field where students can enter valid voucher codes to enroll in courses or memberships.
- Order History: Shows a record of all past enrollments and transactions, including paid orders, invoices, and free registrations.
- Sign Out: Logs the student out of the website safely.
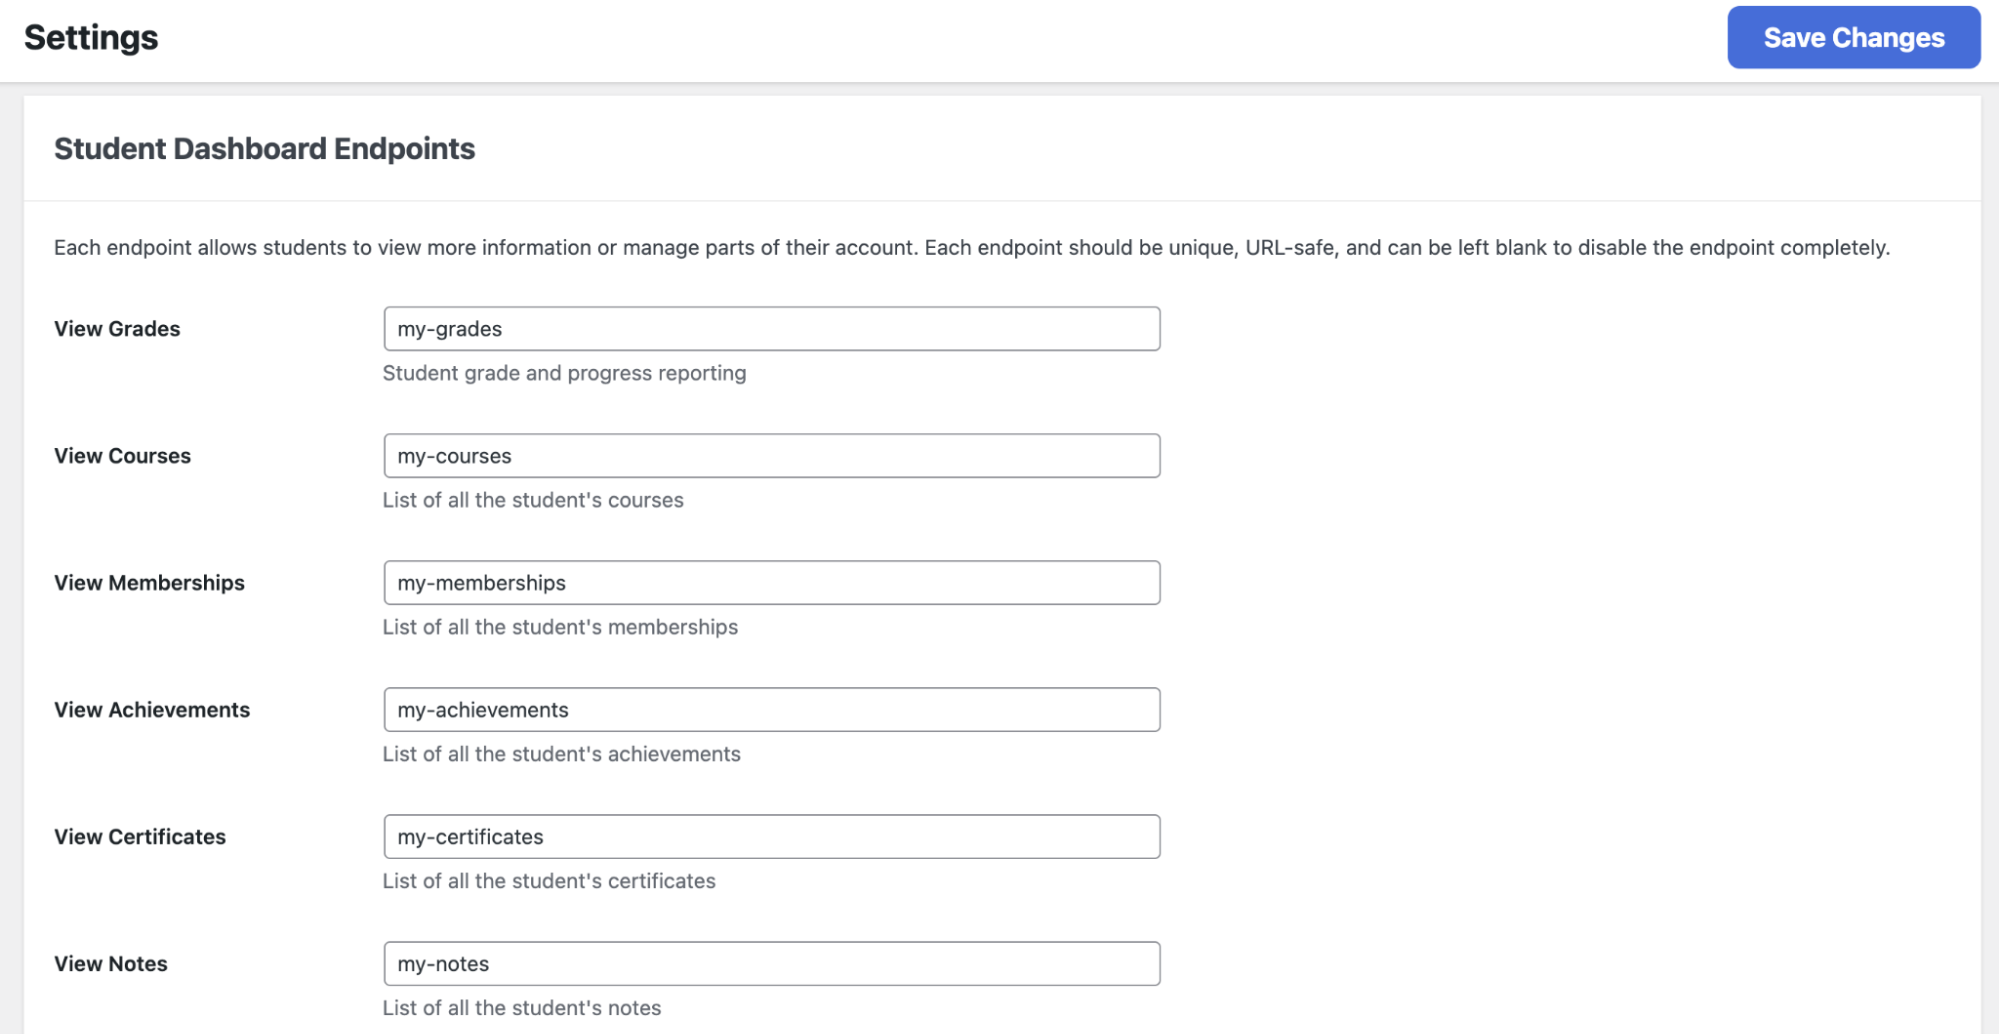
You can change the URL slugs for each endpoint and decide which ones students see in the dashboard menu.
Renaming an Endpoint URL
You may want to change the URL slug for SEO purposes or to match your brand language (e.g., changing “my-courses” to “my-classes”).
- Navigate to LifterLMS > Settings > Accounts.
- Scroll down to the Student Dashboard Endpoints section.
- Locate the text input field for the endpoint you wish to change.
- Type the new slug you wish to use (don’t use spaces or special characters).
- Click Save Changes at the bottom of the screen.
Hiding a Dashboard Menu Item (Removing an Endpoint)
If there’s a feature you aren’t using, you can hide the related tab, so students don’t see pages that don’t apply to them. For example, if you’re not using the “Grades” feature, you might want to hide the “My Grades” tab so students don’t see an empty page.
To remove a menu item:
- Navigate to LifterLMS > Settings > Accounts.
- Scroll down to the Student Dashboard Endpoints section.
- Locate the endpoint you wish to hide (e.g., “My Grades”).
- Delete all text from the input field, leaving it completely blank.
- Click Save Changes at the bottom of the screen.
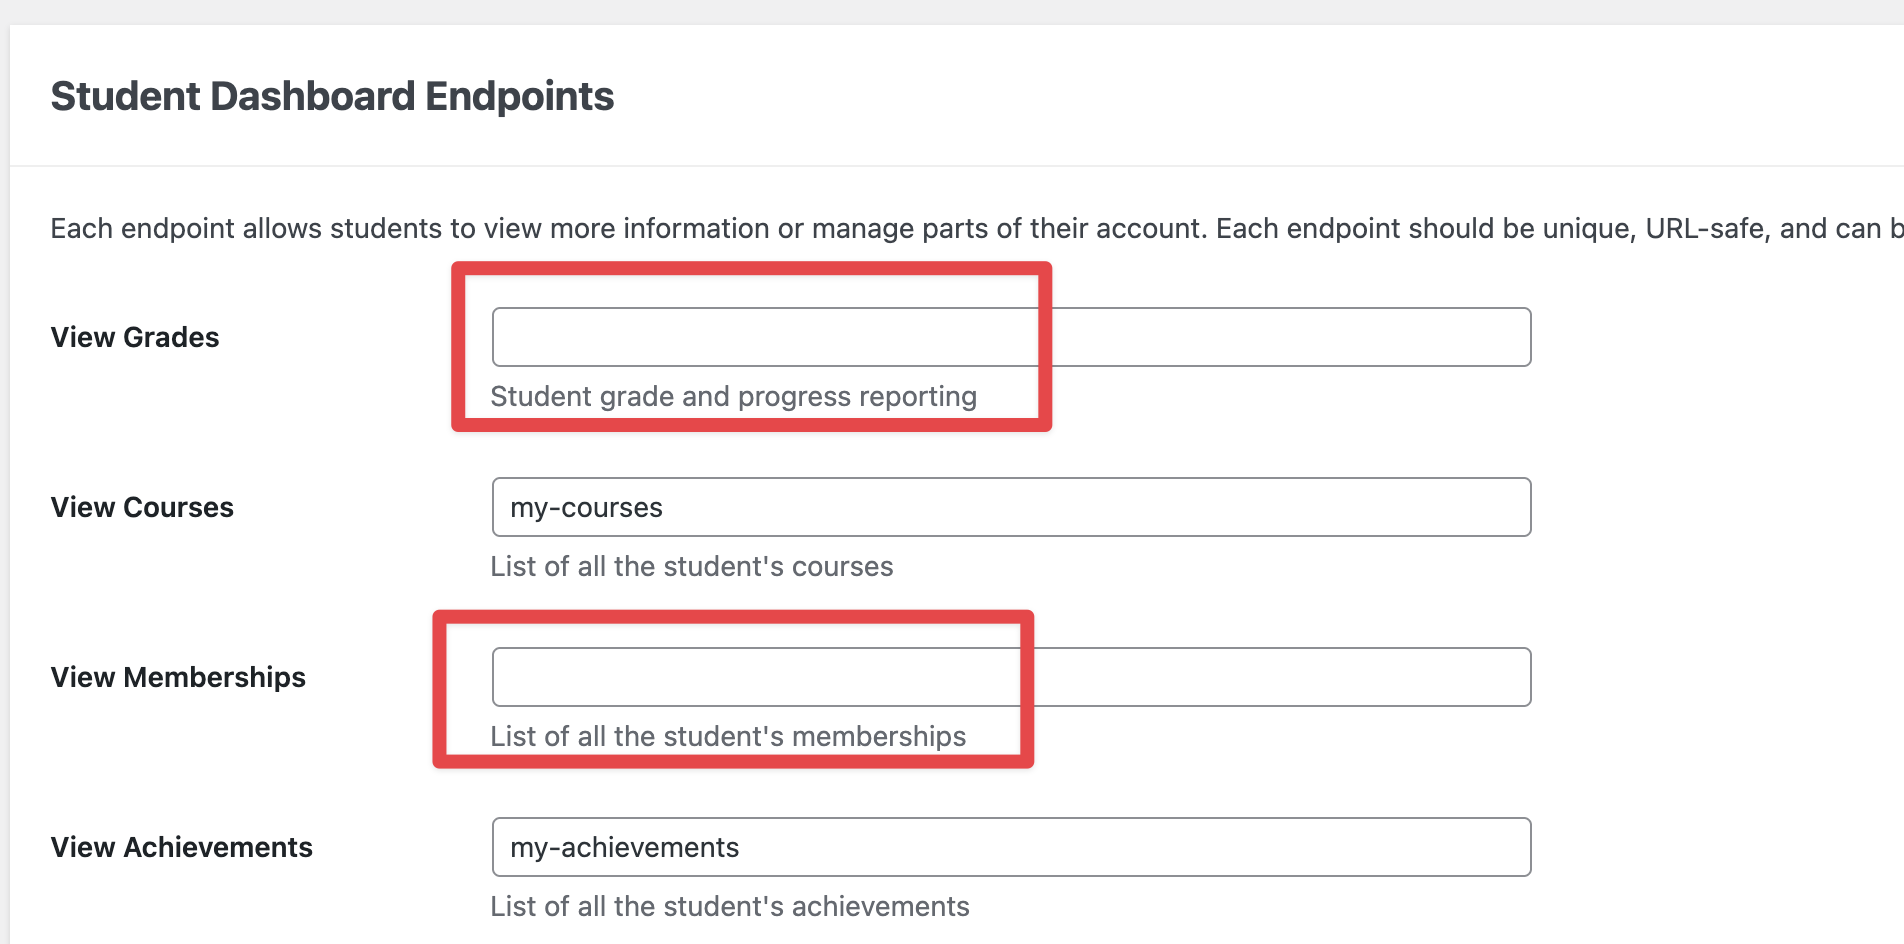
Once you save the settings with a blank field, that specific tab will immediately disappear from the Student Dashboard navigation menu.
Note: The “Dashboard” and “Sign Out” menu items are required by the system and cannot be deleted. All other custom menu items may be removed as needed.
Restoring a Missing Menu Item
If a tab is missing from your student dashboard and you wish to restore it:
- Navigate to LifterLMS > Settings > Accounts.
- Locate the blank endpoint field.
- Enter a default slug (e.g., enter “my-grades” into the My Grades field).
- Click Save Changes.
Adding Custom Content to the Dashboard
The Student Dashboard is generated automatically, so the shortcode controls what appears inside each tab. Any content you add in the WordPress page editor will appear above or below the dashboard, rather than in a specific tab. If you want content to appear within a tab, you can add it using WordPress actions and filters.
To inject custom content into specific areas within the dashboard (for example, adding a banner inside the “My Courses” tab or a message above the “Grades” list), you generally can’t use the standard page editor.
Instead, developers must use WordPress Actions and Filters. This method enables you to programmatically hook content into specific locations within the dashboard structure.
Changing the Student Dashboard Layout
From LifterLMS version 7.8 onwards, you can choose how the Student Dashboard layout looks. Administrators can now choose between two distinct layout options:
- Columns (Default): The navigation menu appears on the left (or right, depending on your theme) with the content displayed beside it.
- Stacked: The navigation menu appears horizontally at the top, with the content displayed directly underneath it.
If you prefer the “Stacked” view or need to revert to “Columns,” you can change the layout by editing the Student Dashboard page.
How to Switch Layouts
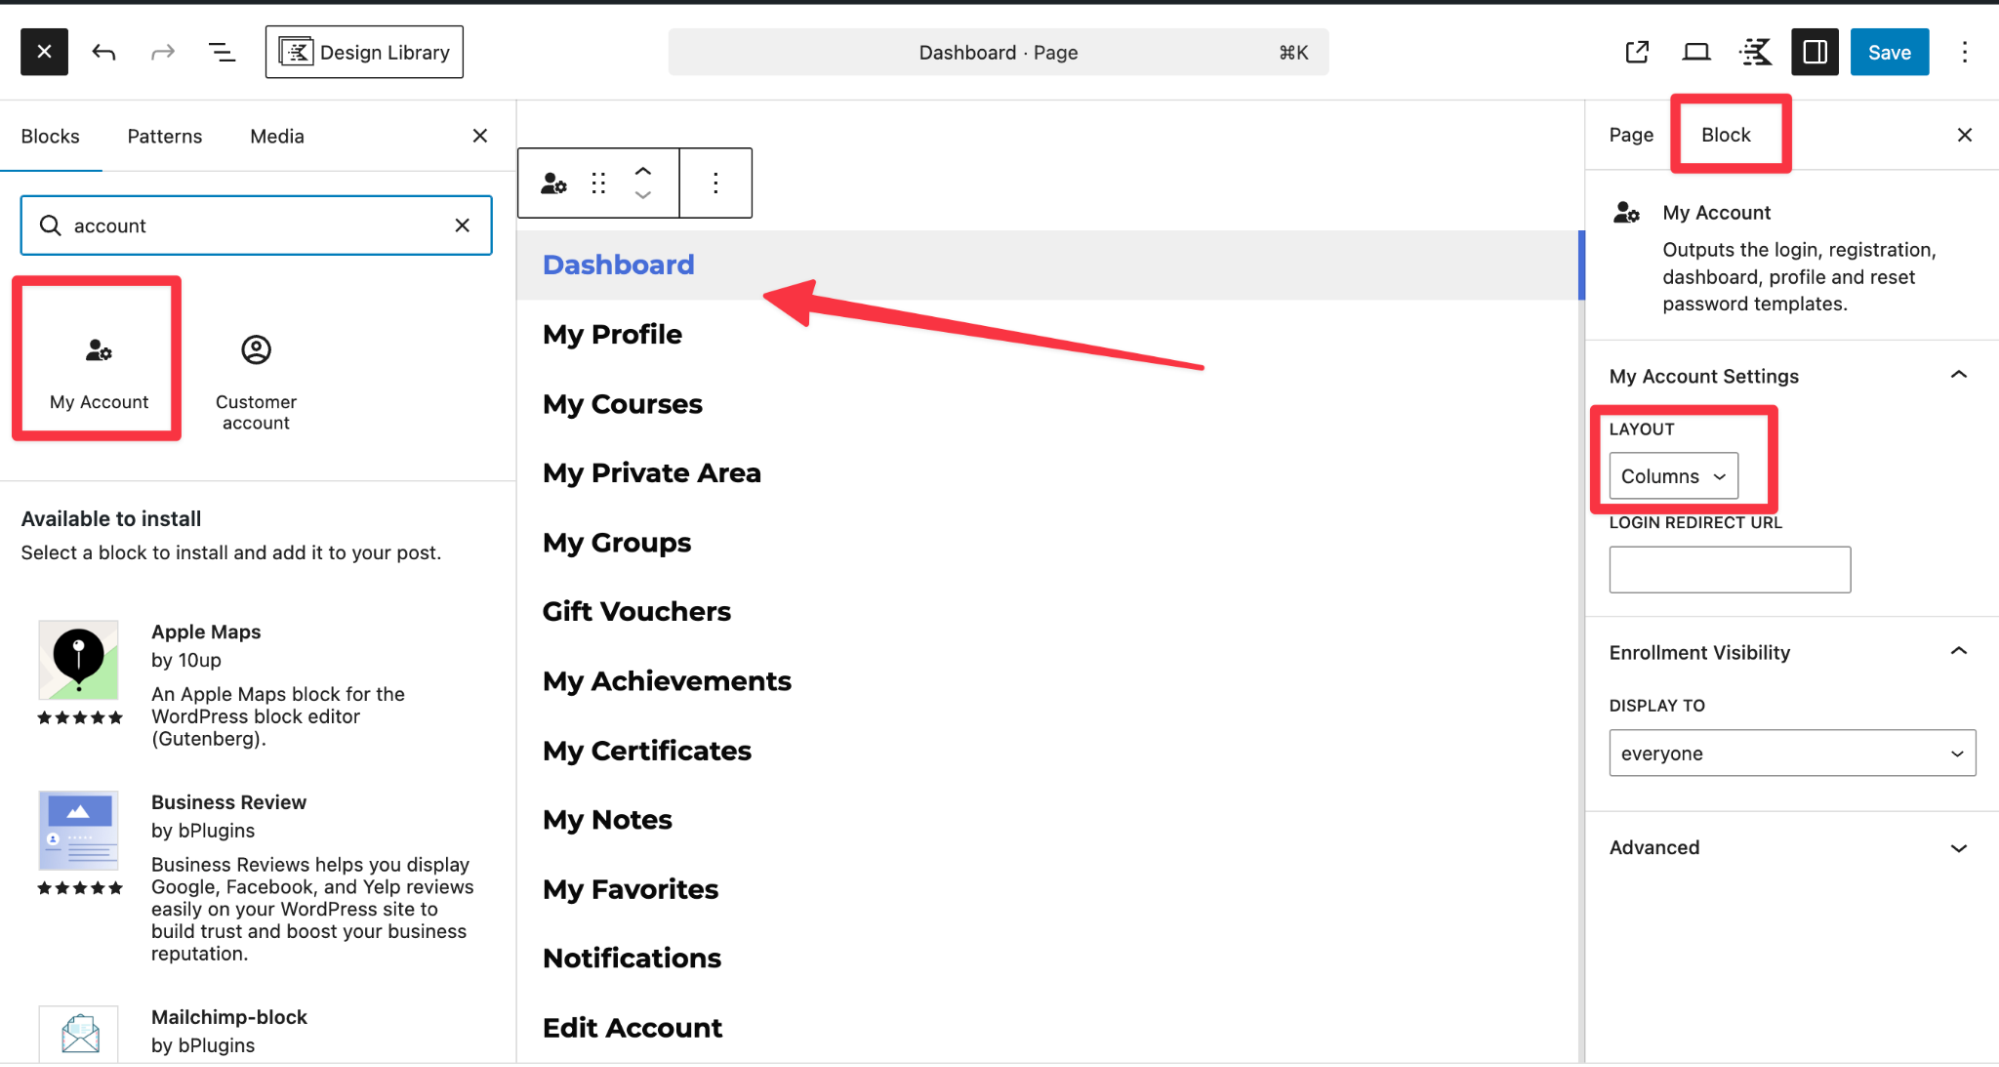
Using the WordPress Block Editor (Gutenberg):
- Navigate to Pages in your WordPress dashboard.
- Locate and edit the page marked as “LifterLMS Student Dashboard.”
- Click on the My Account block within the editor.
- In the Block Settings sidebar on the right, look for the “Layout” option.
- Select “Stacked” (or “Columns”) from the dropdown menu.
- Click Update to save the page.
Using the Classic Editor or Page Builders (Shortcode):
- Navigate to Pages in your WordPress dashboard.
- Locate and edit the page containing the dashboard shortcode.
- Modify the shortcode to include the layout parameter.
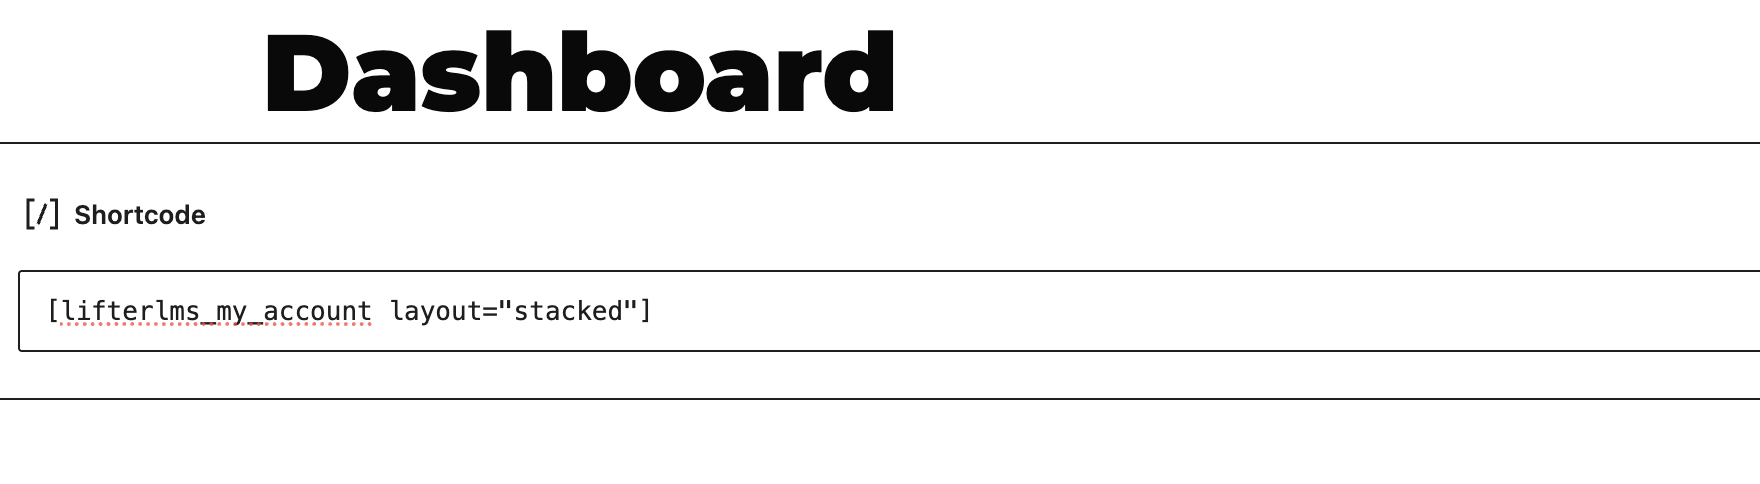
- To use the stacked layout, use: [lifterlms_my_account layout=”stacked”]
- To use the default columns layout, simply use: [lifterlms_my_account]
- Click Update to save the page.
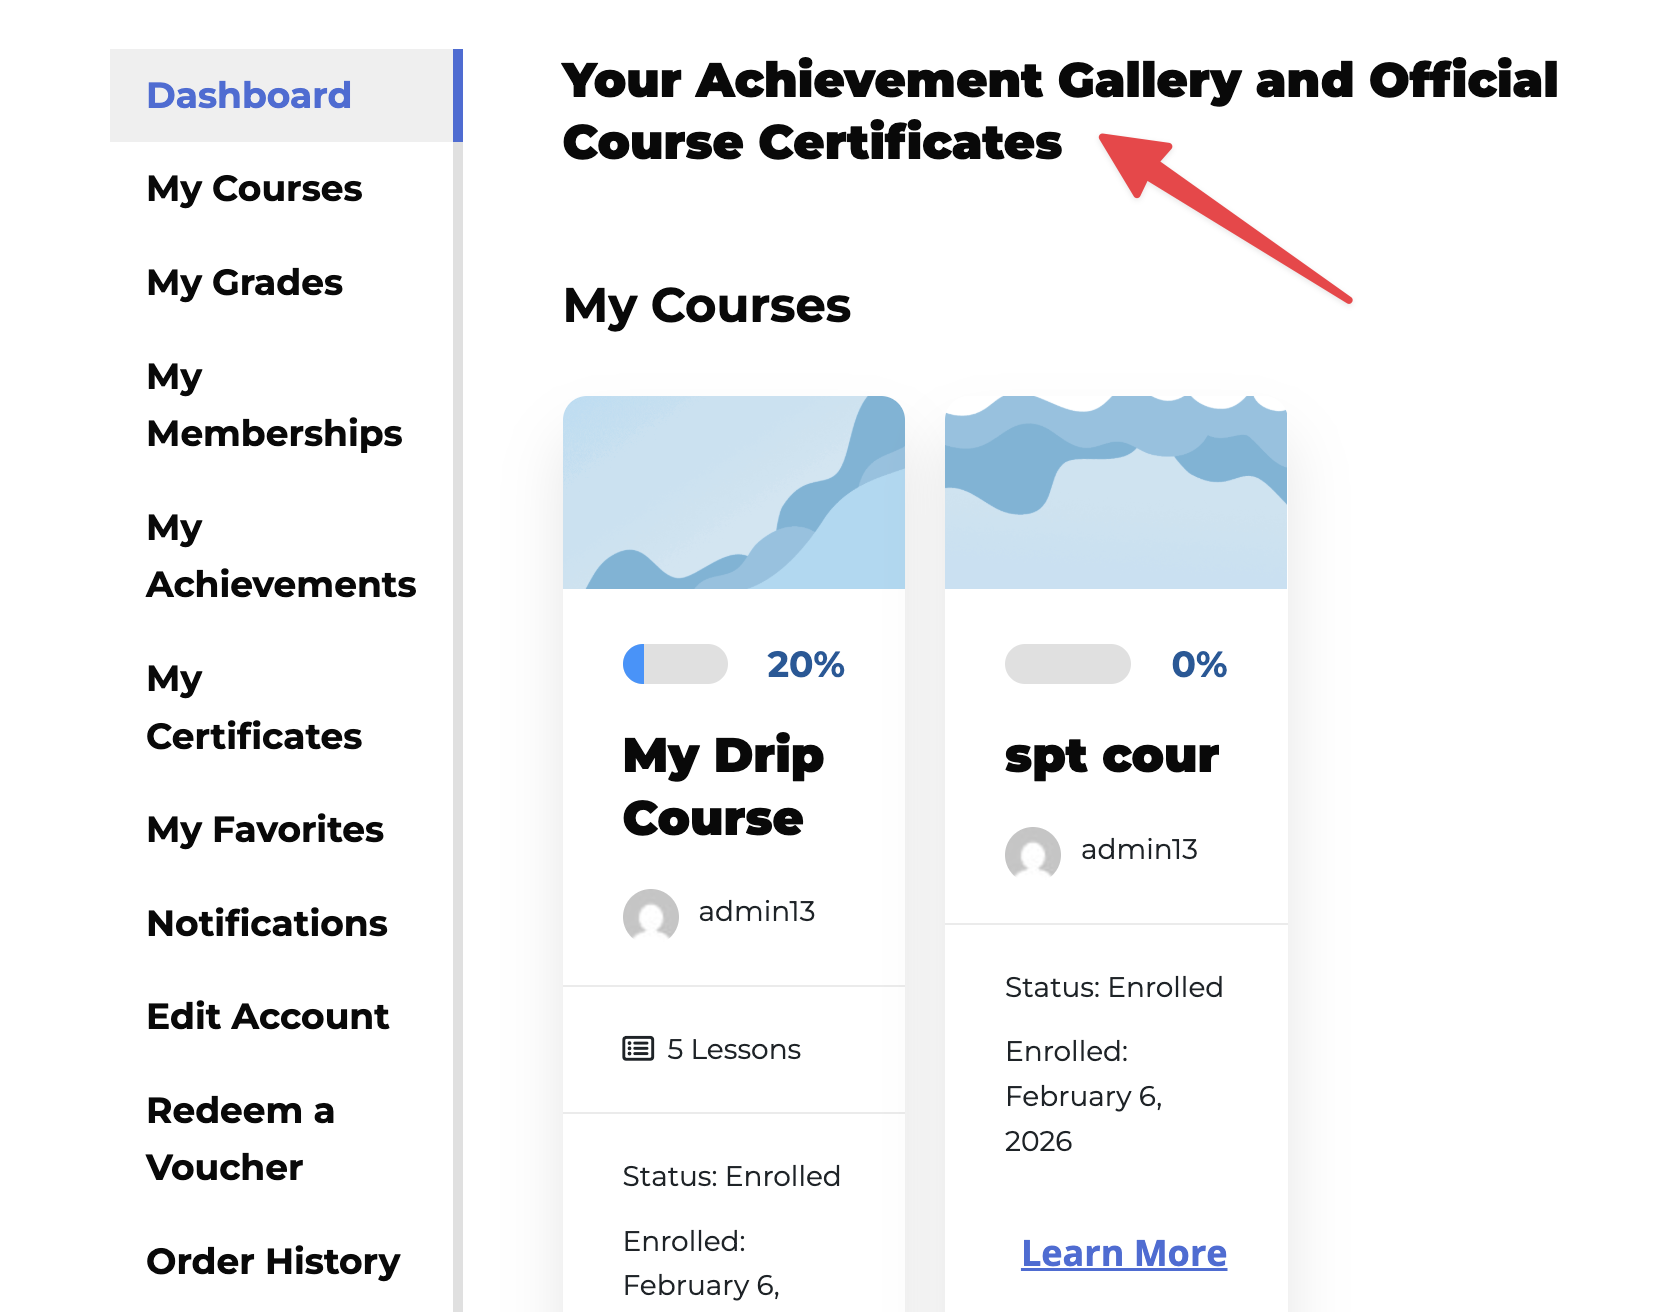
You can change the titles of the various sections of the Student Dashboard by using a PHP code snippet. This is useful if you want to simplify the language for your students, for example, by changing “My Groups” to just “Groups.”
To add this customization to your site, follow these steps:
- Install the “Code Snippets” plugin or open your child theme’s functions.php file.
- Navigate to Code Snippets > + Add Snippet in your WordPress dashboard.
- Select the “Add Your Custom Code (New Snippet)” option and click the Use snippet button.
- Set the “Code Type” to “PHP Snippet.”
- Paste the following code into the “Code Preview” box:
- Change the status toggle to “Active.”
- Click the Save Snippet button.
This code tells the LifterLMS plugin to look for the “my-groups” section and replace the standard title with “Your Achievement Gallery and Official Course Certificates”.
You can change the phrase “Your Achievement Gallery and Official Course Certificates” in the code above to any phrase you would like to display on your dashboard.
If you make changes and suddenly hit a 404 when clicking dashboard tabs, don’t panic. This usually means your WordPress permalinks need a quick refresh.
All you’ll need to do is to navigate to Settings > Permalinks in your WordPress dashboard.
You don’t need to actually change any settings on this page; simply visiting the settings page flushes the rewrite rules and usually resolves 404 errors related to endpoints.
If you face any difficulties when attempting to use the Student Dashboard Page as the WordPress Front Page, then you can refer to our dedicated documentation page on Using the LifterLMS My Courses (Student Dashboard) Page as the WordPress Front Page.


