The Checkout Page
The Checkout Page is where your students are redirected when they want to purchase a course or membership through a LifterLMS Access Plan.
Students can log in, sign up, pay, and use coupons on the checkout page.
Note: The checkout page is created automatically for you when you install the required pages during the LifterLMS setup wizard process. The setup wizard runs immediately after you activate the LifterLMS core plugin. You can also rerun the setup wizard at any time using these steps.
Below are the steps to manually setup your checkout page:
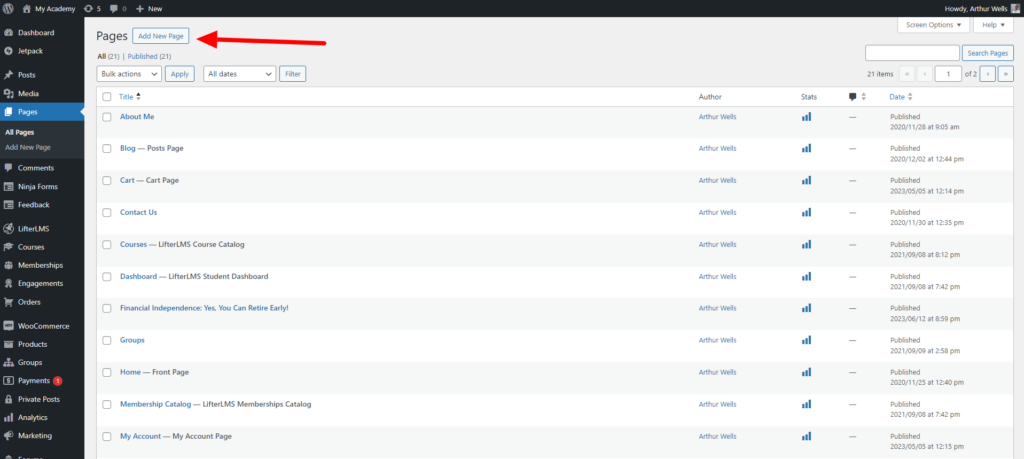
1) Visit “Pages” and click “Add New Page”
2) Add the title of the page, after that, add a shortcode block, then visit this link LifterLMS Shortcodes to get the LifterLMS checkout shortcode.
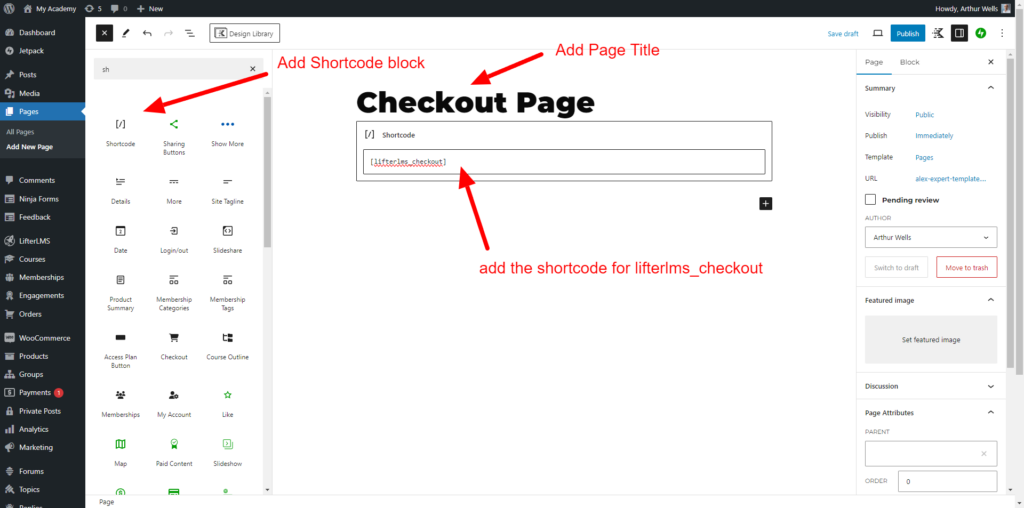
Copy and paste this shortcode: [lifterlms_checkout] and click publish button once done adding the shortcode.
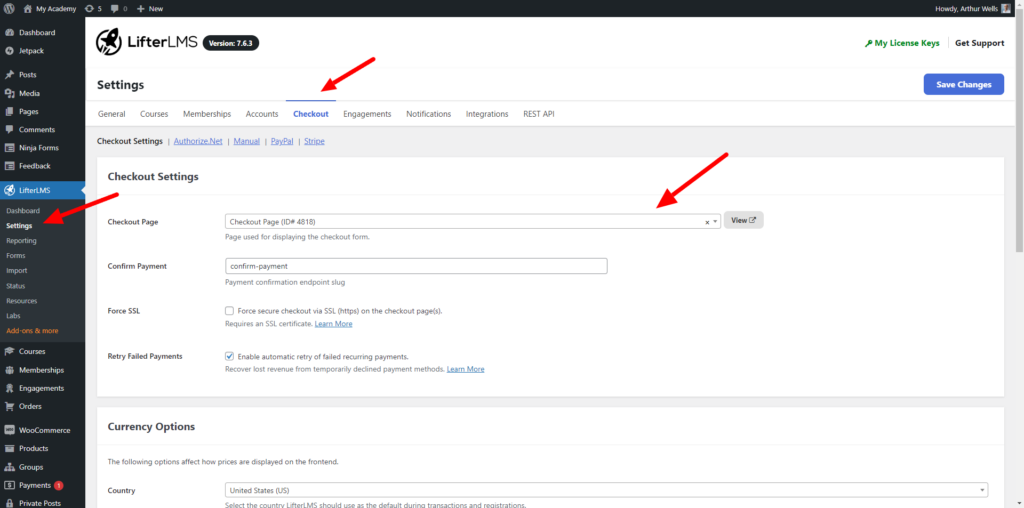
3) In the WordPress admin go to LifterLMS > Settings > Checkout, then under “Checkout Settings,” for the “Checkout Page” option, select the Checkout page you created. Click the Save Changes button.
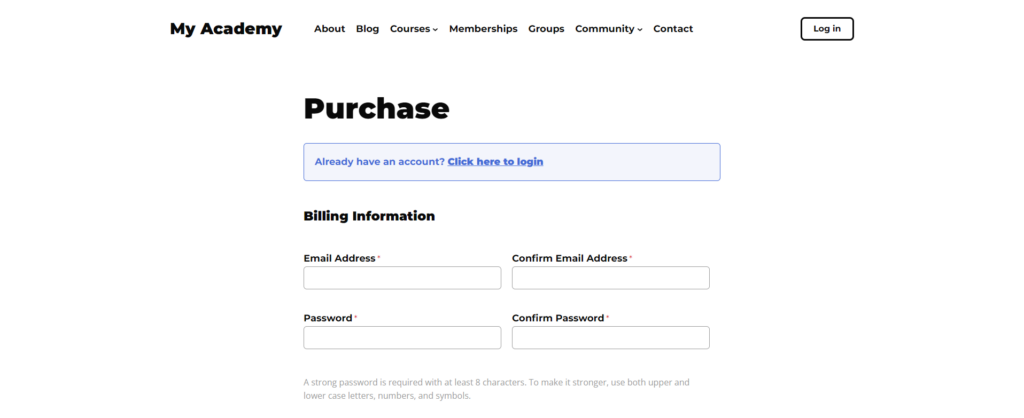
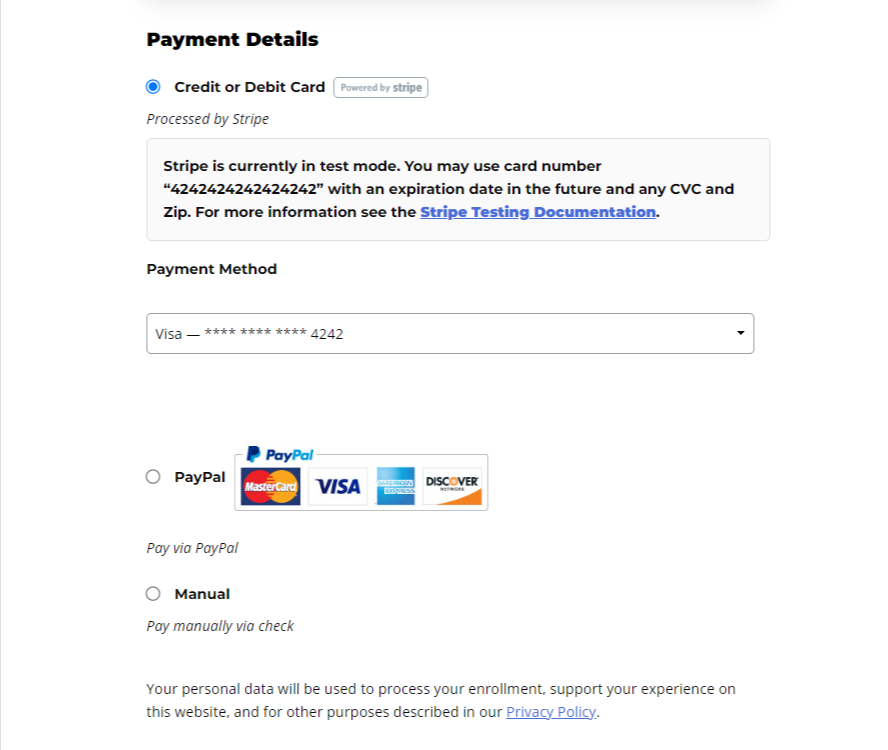
4) You can now test purchasing a course. When clicking on an Enroll button on a course or membership access plan, you should be able to see the checkout page which includes Billing Information, Order Summary, and Payment Details.

You have the flexibility to configure this page as any WordPress page, but it must not be the same page as the Course Catalog, Membership Catalog, or Student Dashboard Page.
To select a page, head to the Checkout tab within LifterLMS > Settings on your site’s WordPress admin panel.
You also have the option to modify the checkout page form fields.
In the WordPress admin go to LifterLMS > Forms > Billing Information
Detailed instructions on LifterLMS form fields are here.
For visual reference, watch this video tutorial on working with form fields:
You can use the WordPress editor to add additional content before and after the checkout form.
Additionally, if you want to add extra fields on the checkout page form, you can use the LifterLMS Custom Fields add-on.
To learn more about custom form fields, refer to the LifterLMS Custom Fields documentation.
Free access plans have a streamlined checkout process and layout since no payment is needed. This makes the user experience feel more like a free sign-up than a checkout.
For more details, see the Checkout for Free Access Plans documentation.
LifterLMS does not support guest checkout. Guest checkout is where a website visitor makes a purchase without creating a user on the website. To enroll in a course or membership, students need to have an account created during the checkout process.
For more details and making lessons viewable without having an account, please view the documentation: How can I create a free course that does not require registration?


