Getting Started with LifterLMS Custom Fields
With the new LifterLMS form editor in LifterLMS 5.0, there are options to modify the email, password, name, address, and phone number fields directly in the WordPress block editor as you would with a normal post or page.
The LifterLMS Custom Fields add-on allows you to add your own fields to the checkout, edit account, and registration forms.
We always recommend installing your license key to the backend of your site under LifterLMS < Add-ons & More.
(You can always download the .zip file for LifterLMS Custom Fields from your LifterLMS.com account and install it on your site under Plugins < Add New < Upload, but installing your License Key allows you more easily add LifterLMS add-on plugins to your site and it also makes the process of updates a lot easier.)
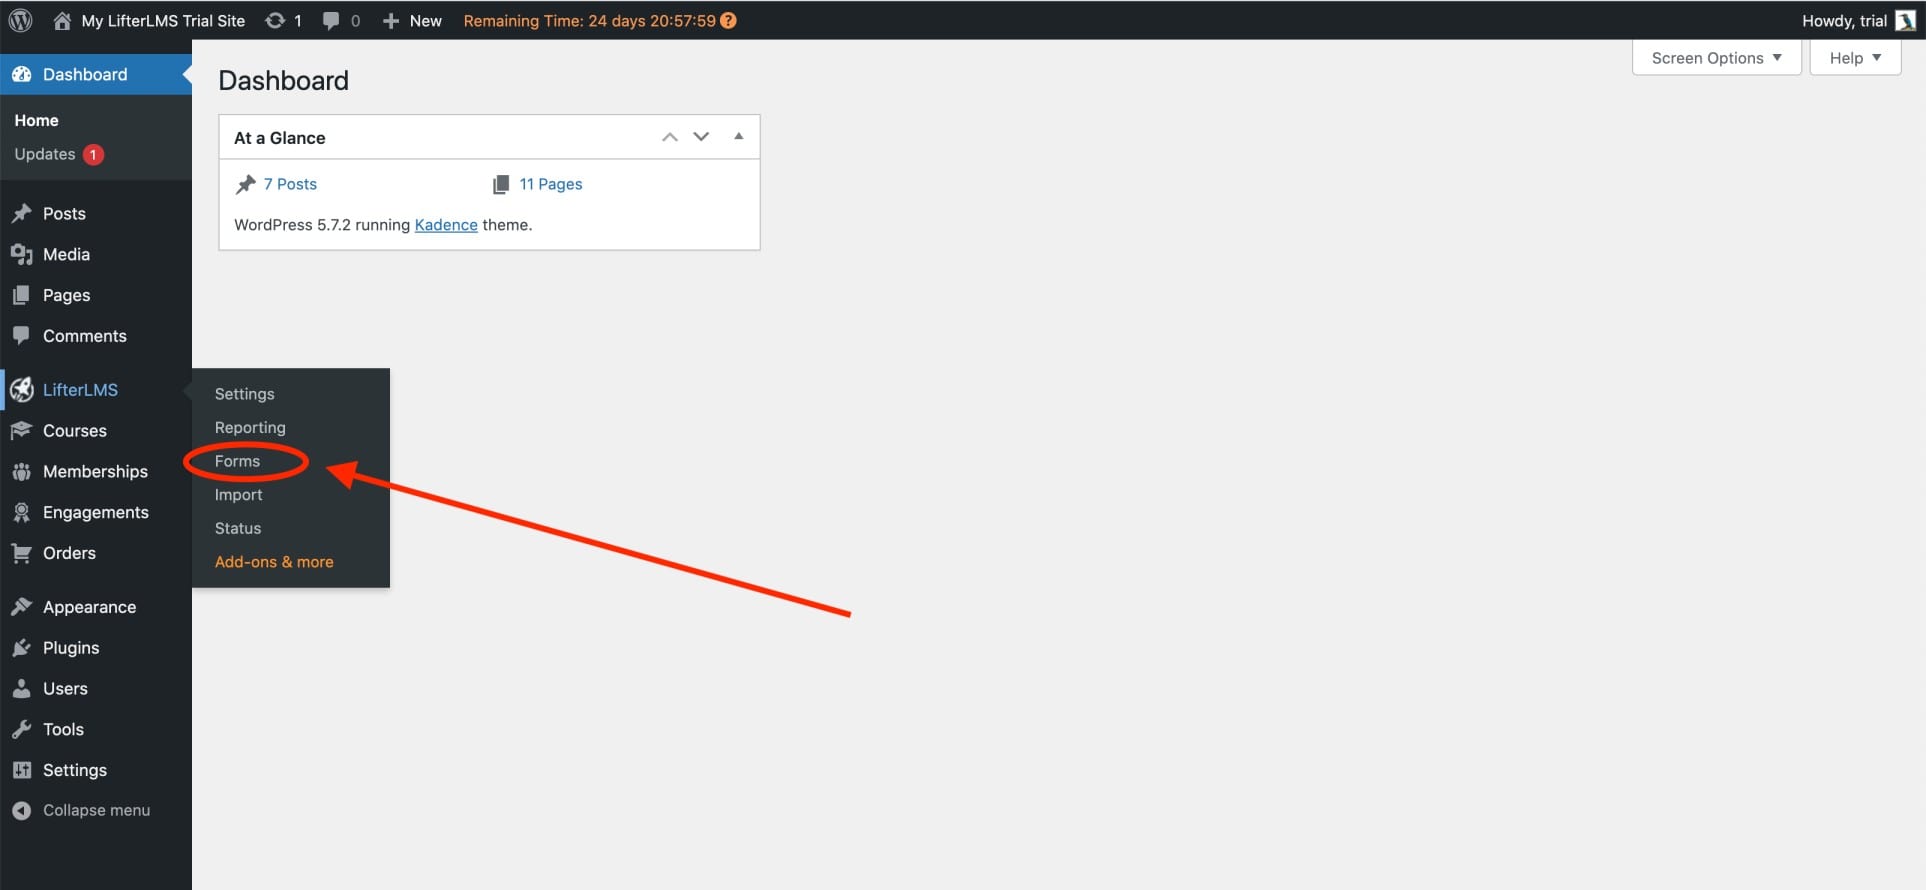
On the WordPress admin panel navigate to LifterLMS < Forms
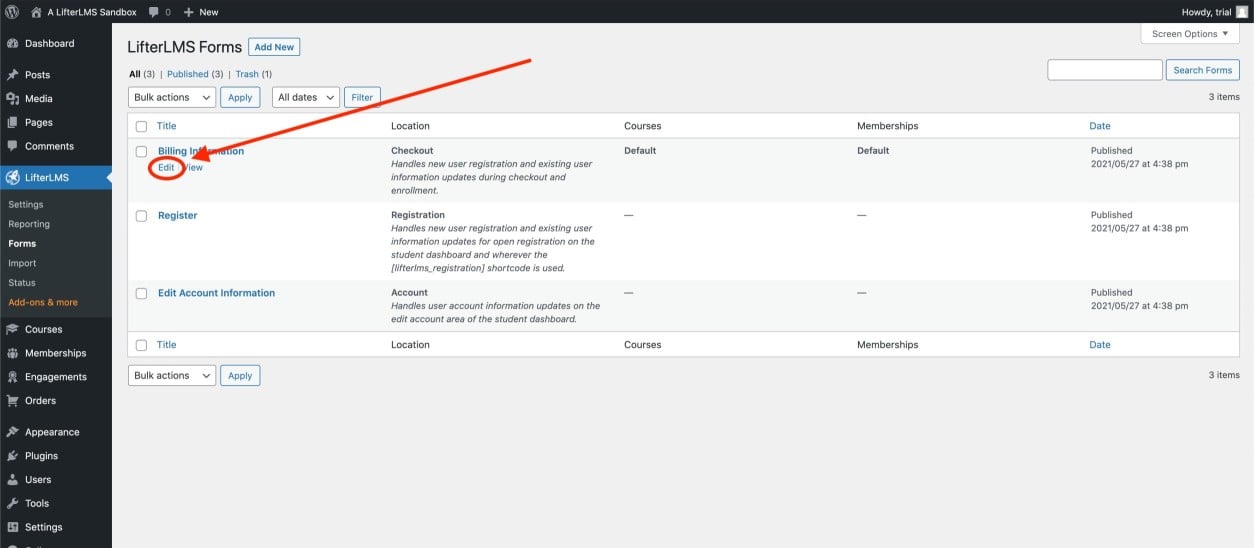
Select ‘Edit’ on the form you’d like to add a field to
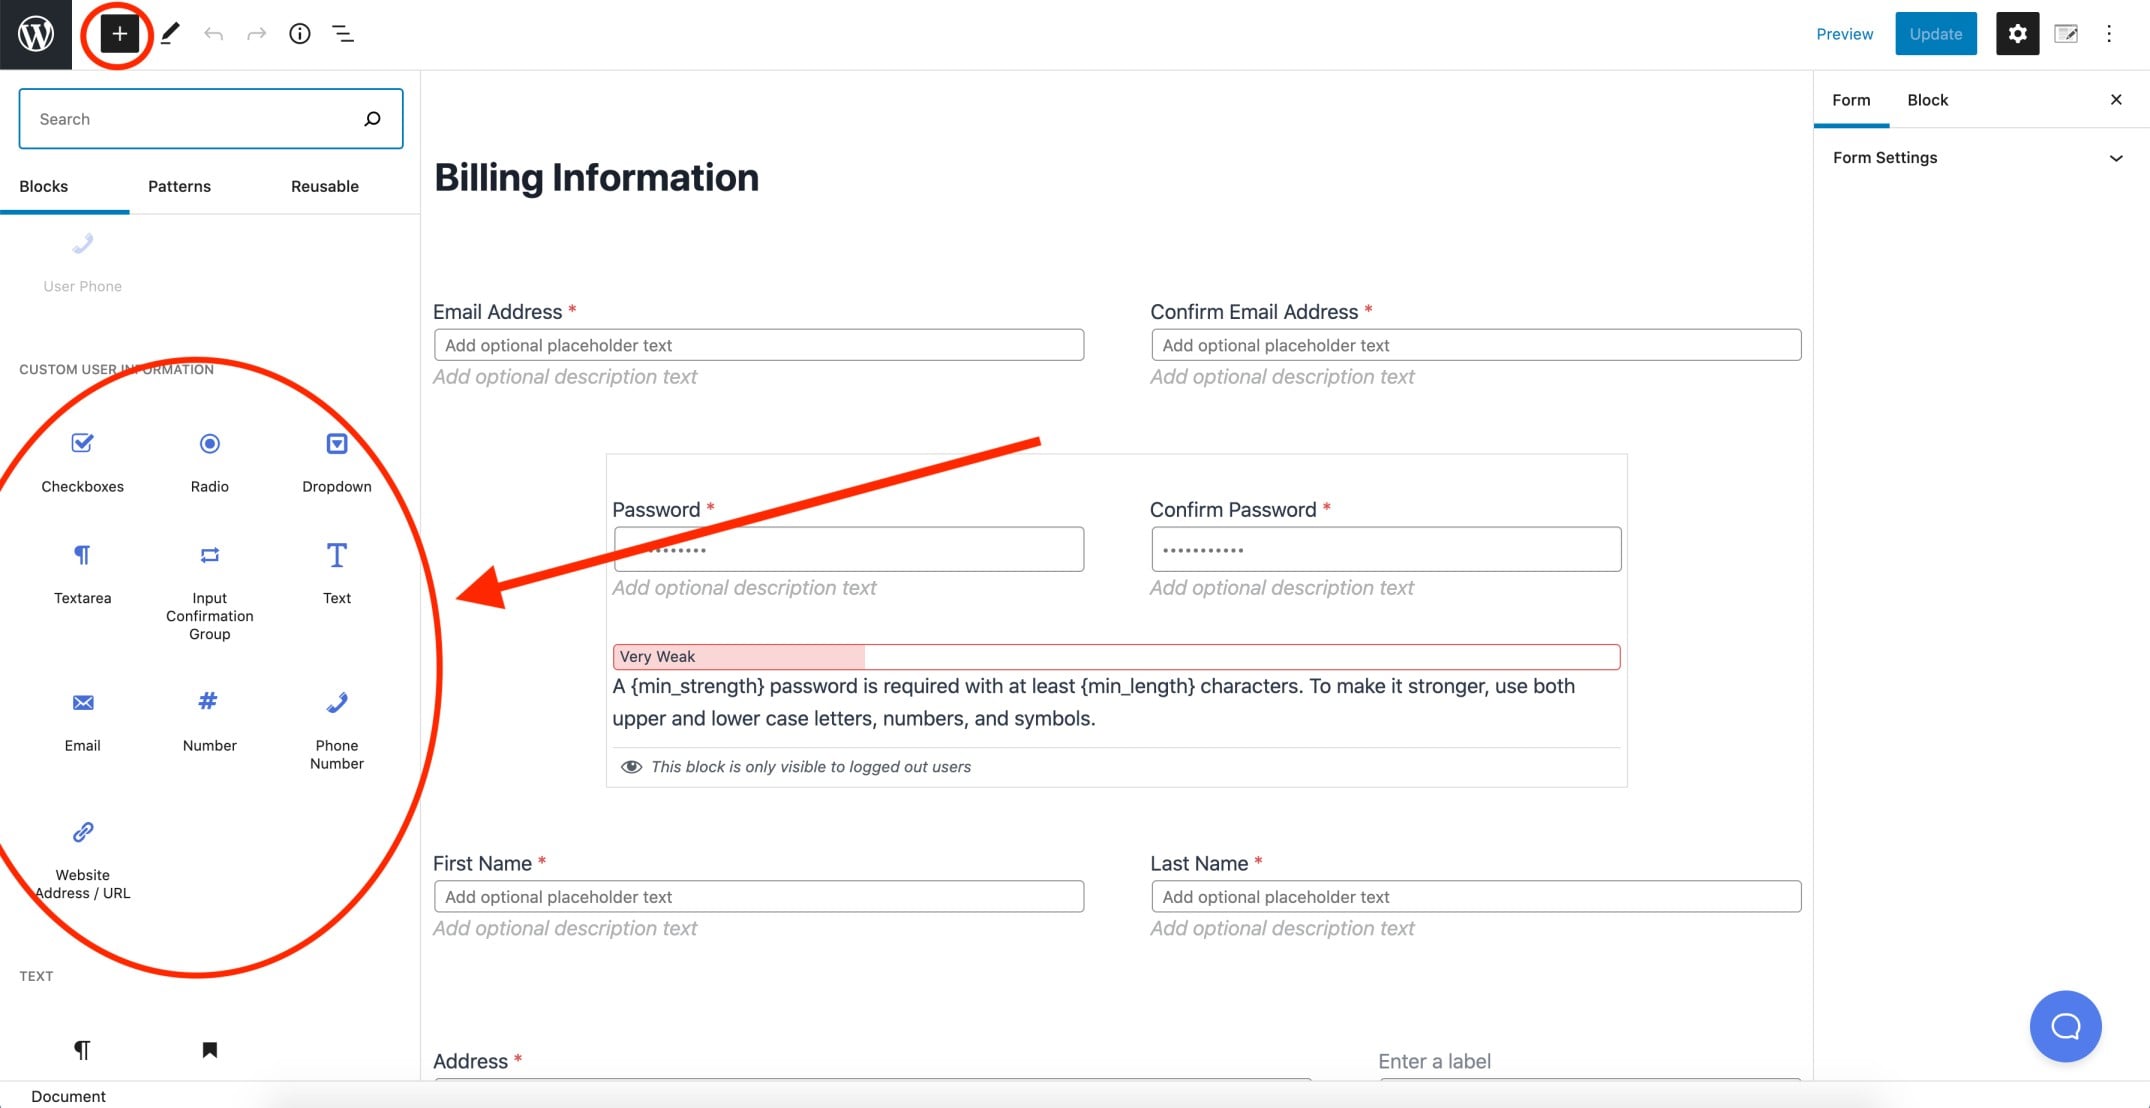
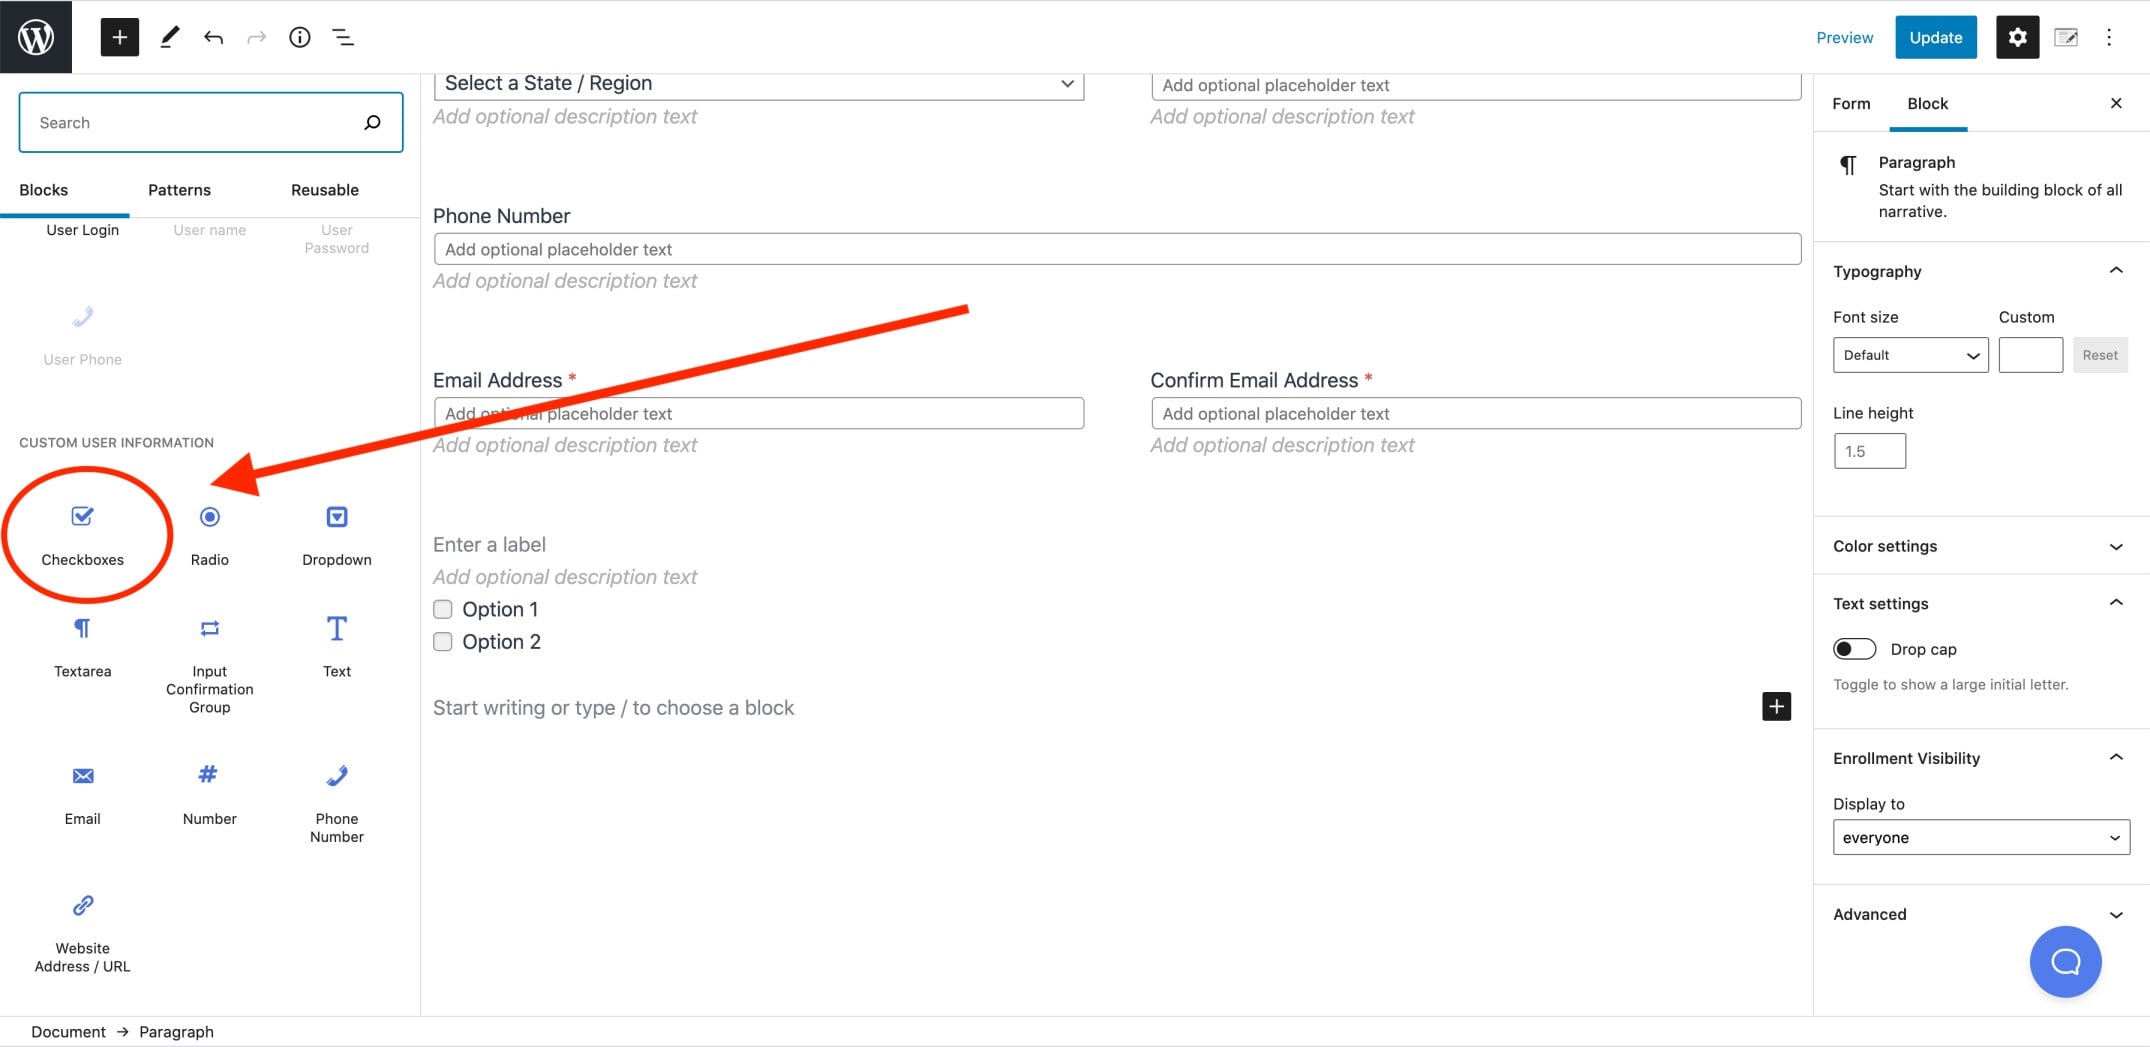
Click the ‘+’ icon in the upper left-hand corner, then with LifterLMS Custom Fields installed and activated on your site, you’ll have some additional options for fields to add to your form. (Checkboxes, Radio buttons, Dropdown, Textarea, etc.)
Each field is a bit different, you might use:
- The ‘Textarea’ field to ask: “How did you find out about us?”
- Or you might use the ‘Checkboxes’ field to ask: “What solutions have you already tried?”
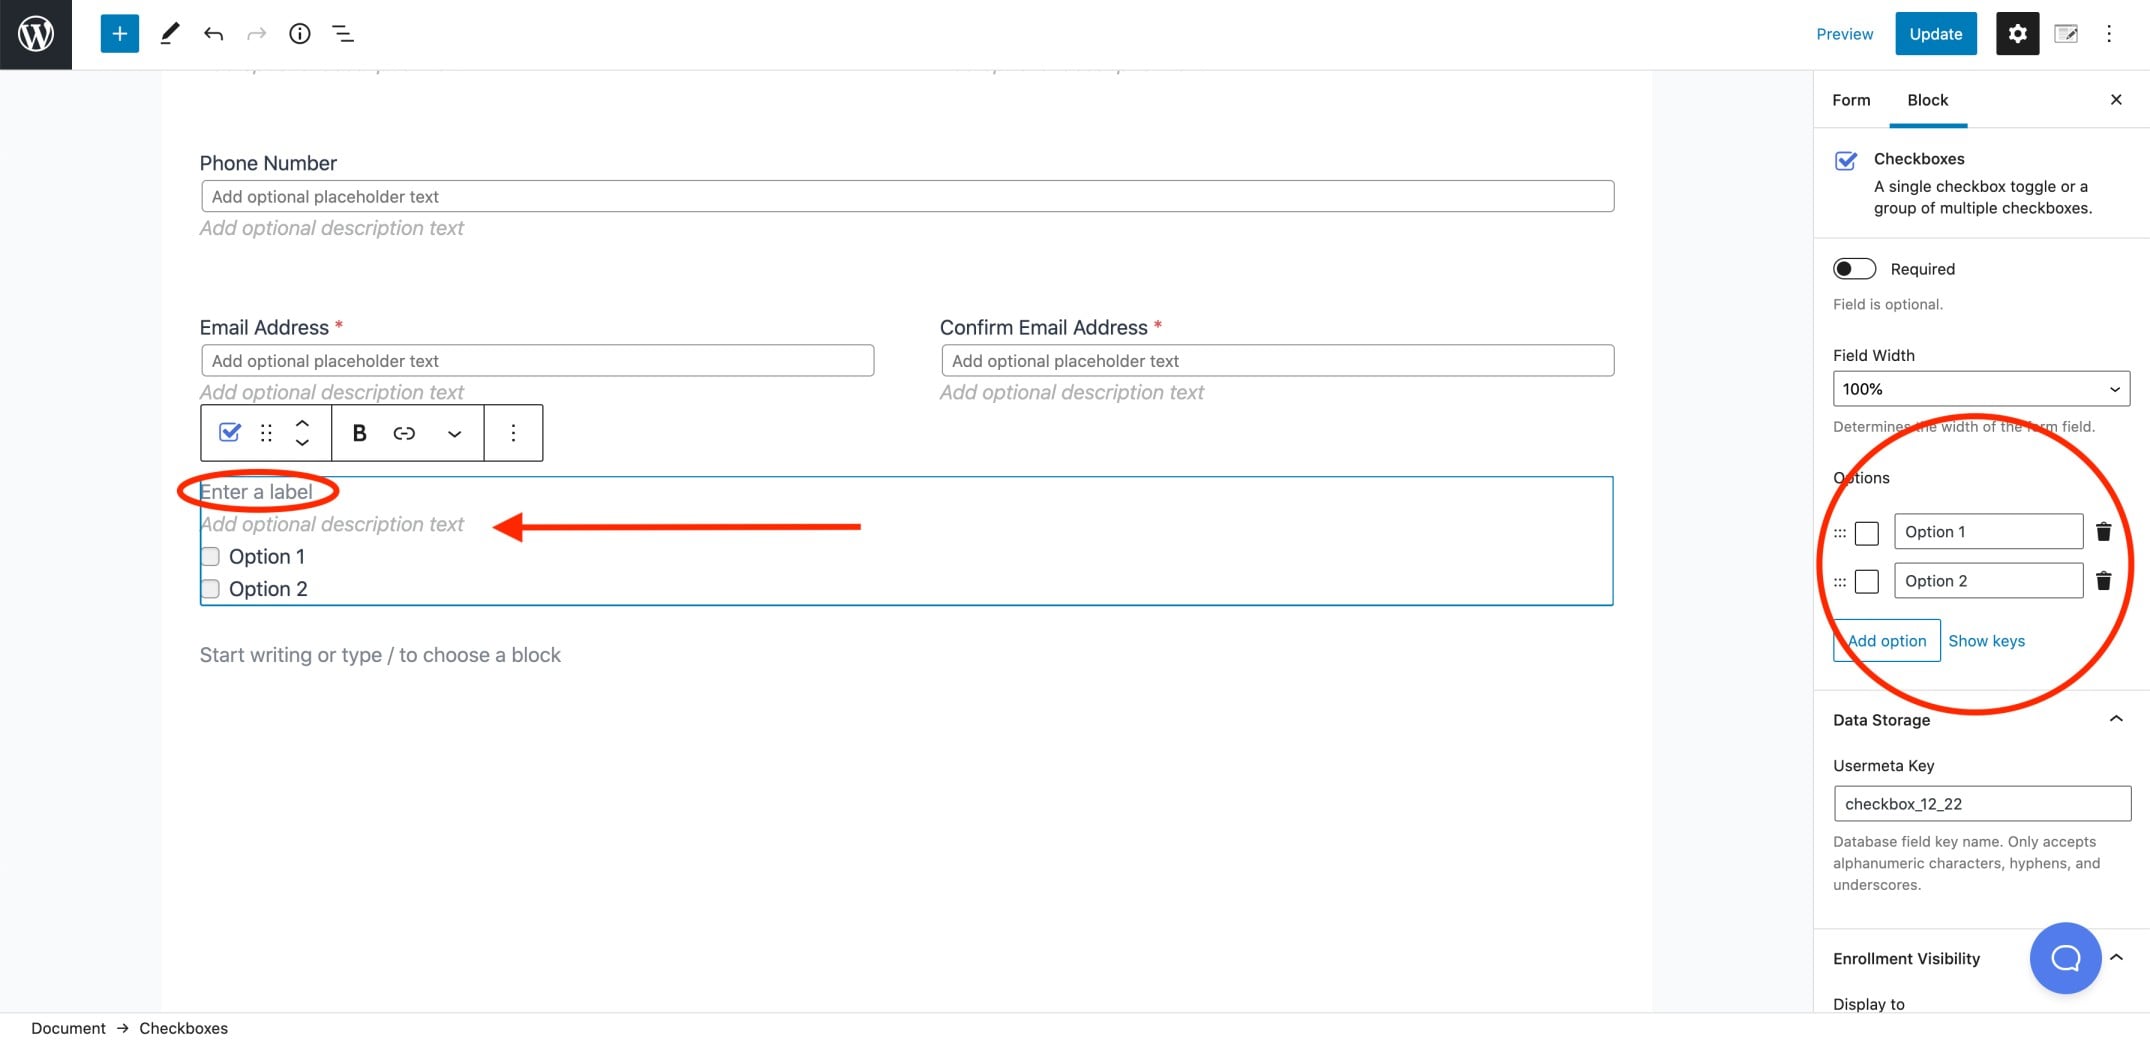
Once you click on the type of field you’d like to add to your form, it will be added in and you’ll see some options for that field.
You can click directly on the field label in order to enter the question or phrase the information you’re looking for. You can do the same for the optional description text.
On the right-hand sidebar, you’ll also find field-specific options. You can see the checkbox field has the option to add the labels for your checkboxes, add more, delete options, and re-order them.
LifterLMS Custom Fields adds these field types (soon to have documentation about each one):
- Checkboxes
- Radio buttons
- Dropdown
- Textarea (paragraph-style text)
- Input Confirmation Field (single-line text with requiring a confirmation field)
- Text (single-line text)
- Email (only accepts an email address. This is different from the email used for the WordPress account)
- Number (text field that only accepts numeric values)
- Phone Number (text field that only accepts phone numbers)
- Website URL (text field that only accepts a URL)
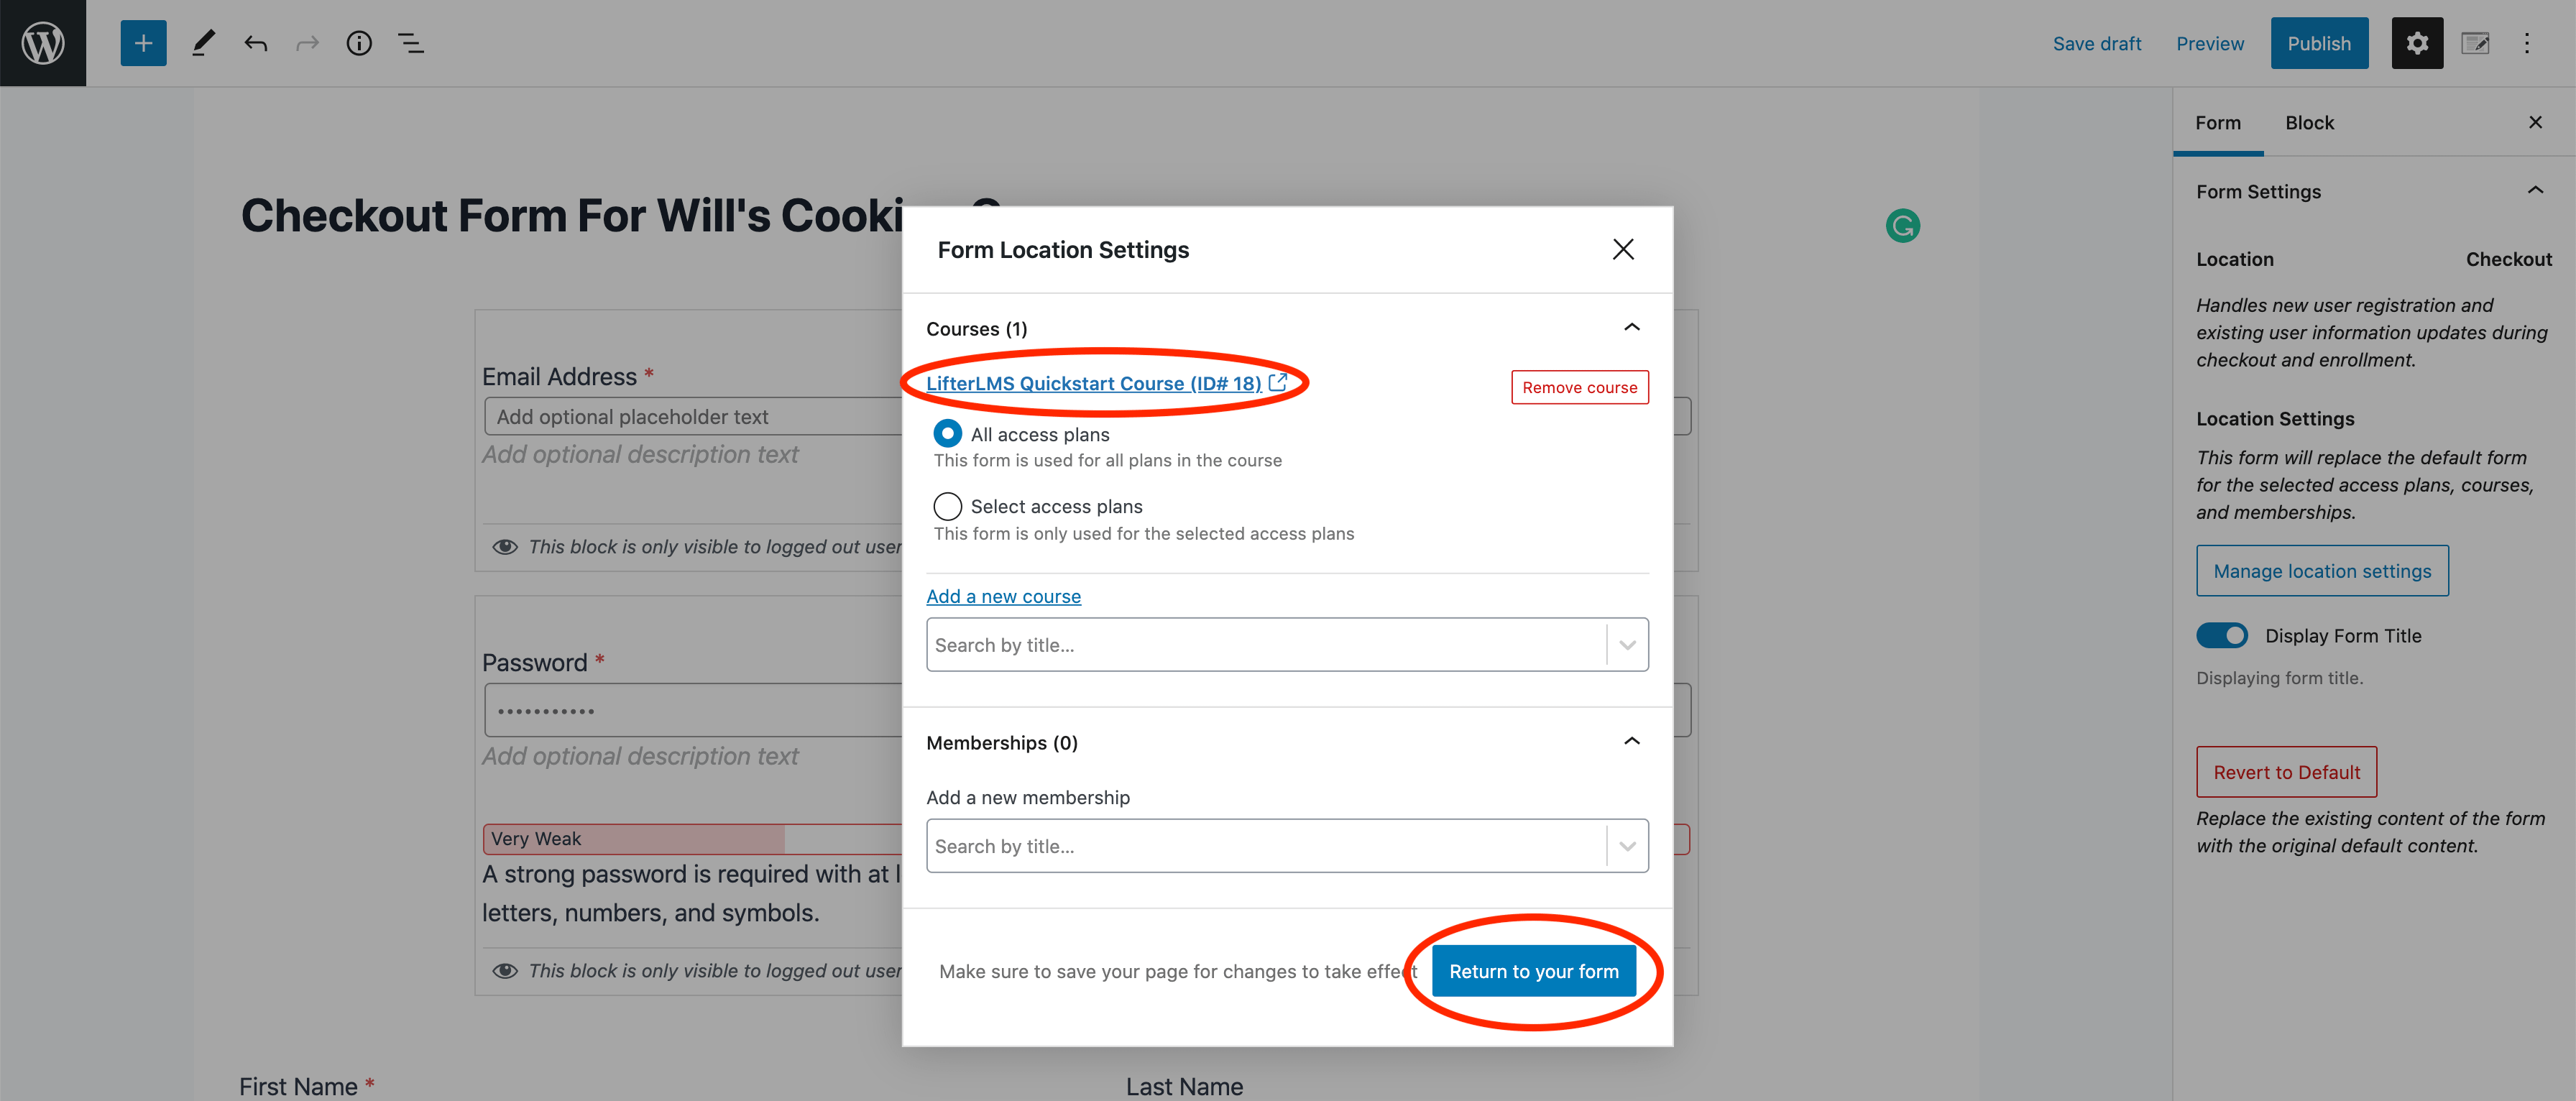
With LifterLMS Custom Fields, you can add specific checkout forms to specific courses or memberships. Meaning you can have a default checkout form for your access plans, but then a specific checkout form for a specific course or membership (you could even have a designated checkout form for each individual access plan in a course or membership).
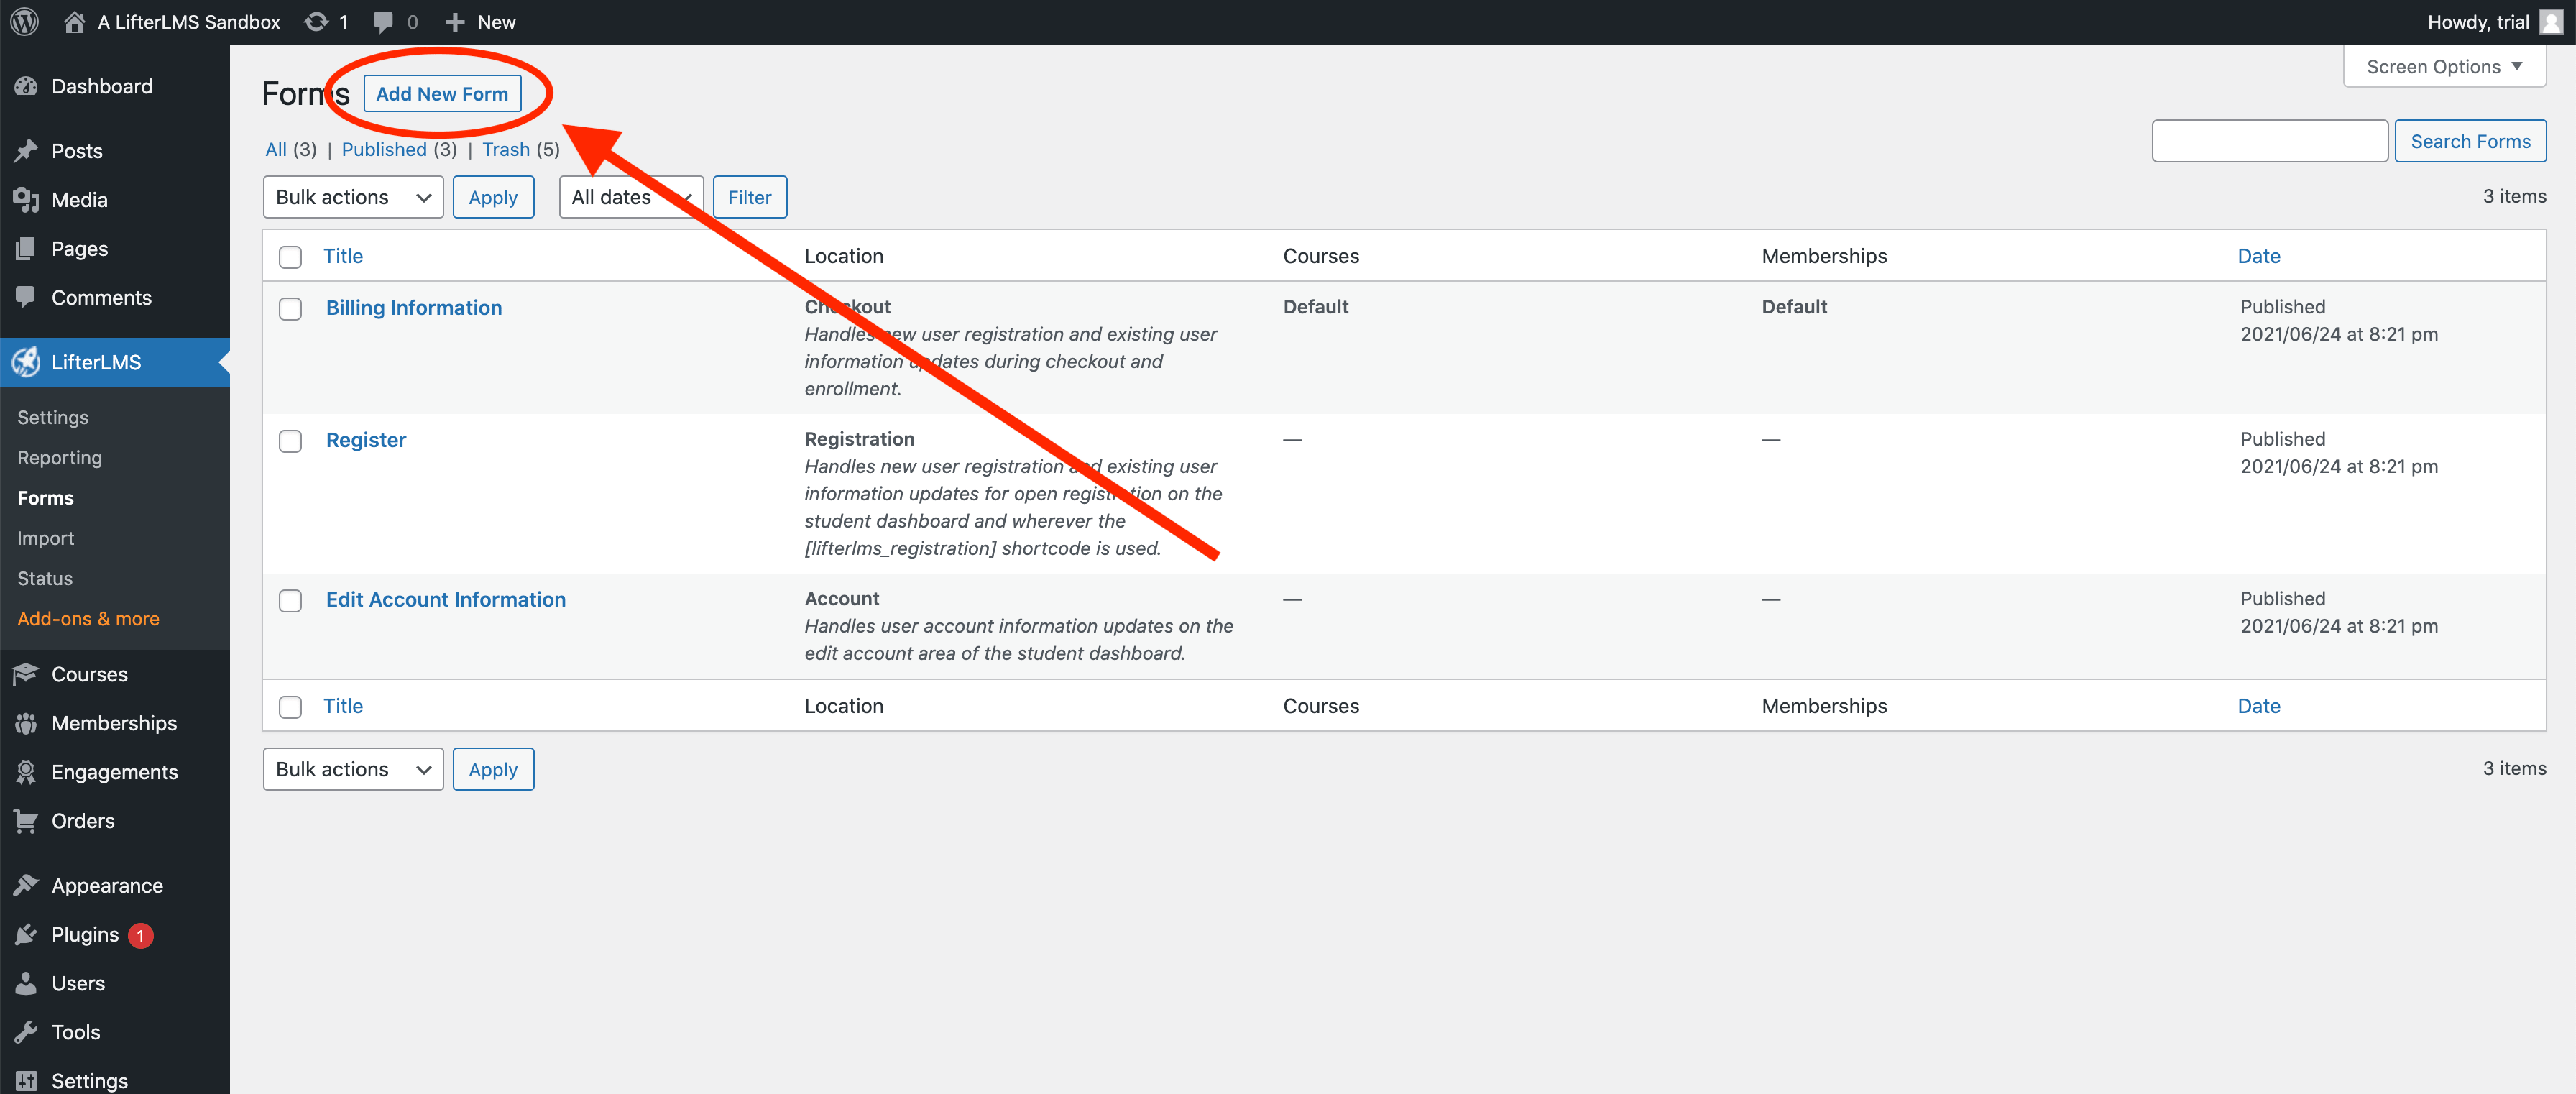
Under LifterLMS < Forms select ‘Add New Form’
Then you can give your form a title and add any customizations you’d like to the form itself. When you’re ready to designate which course or membership to associate that form with.
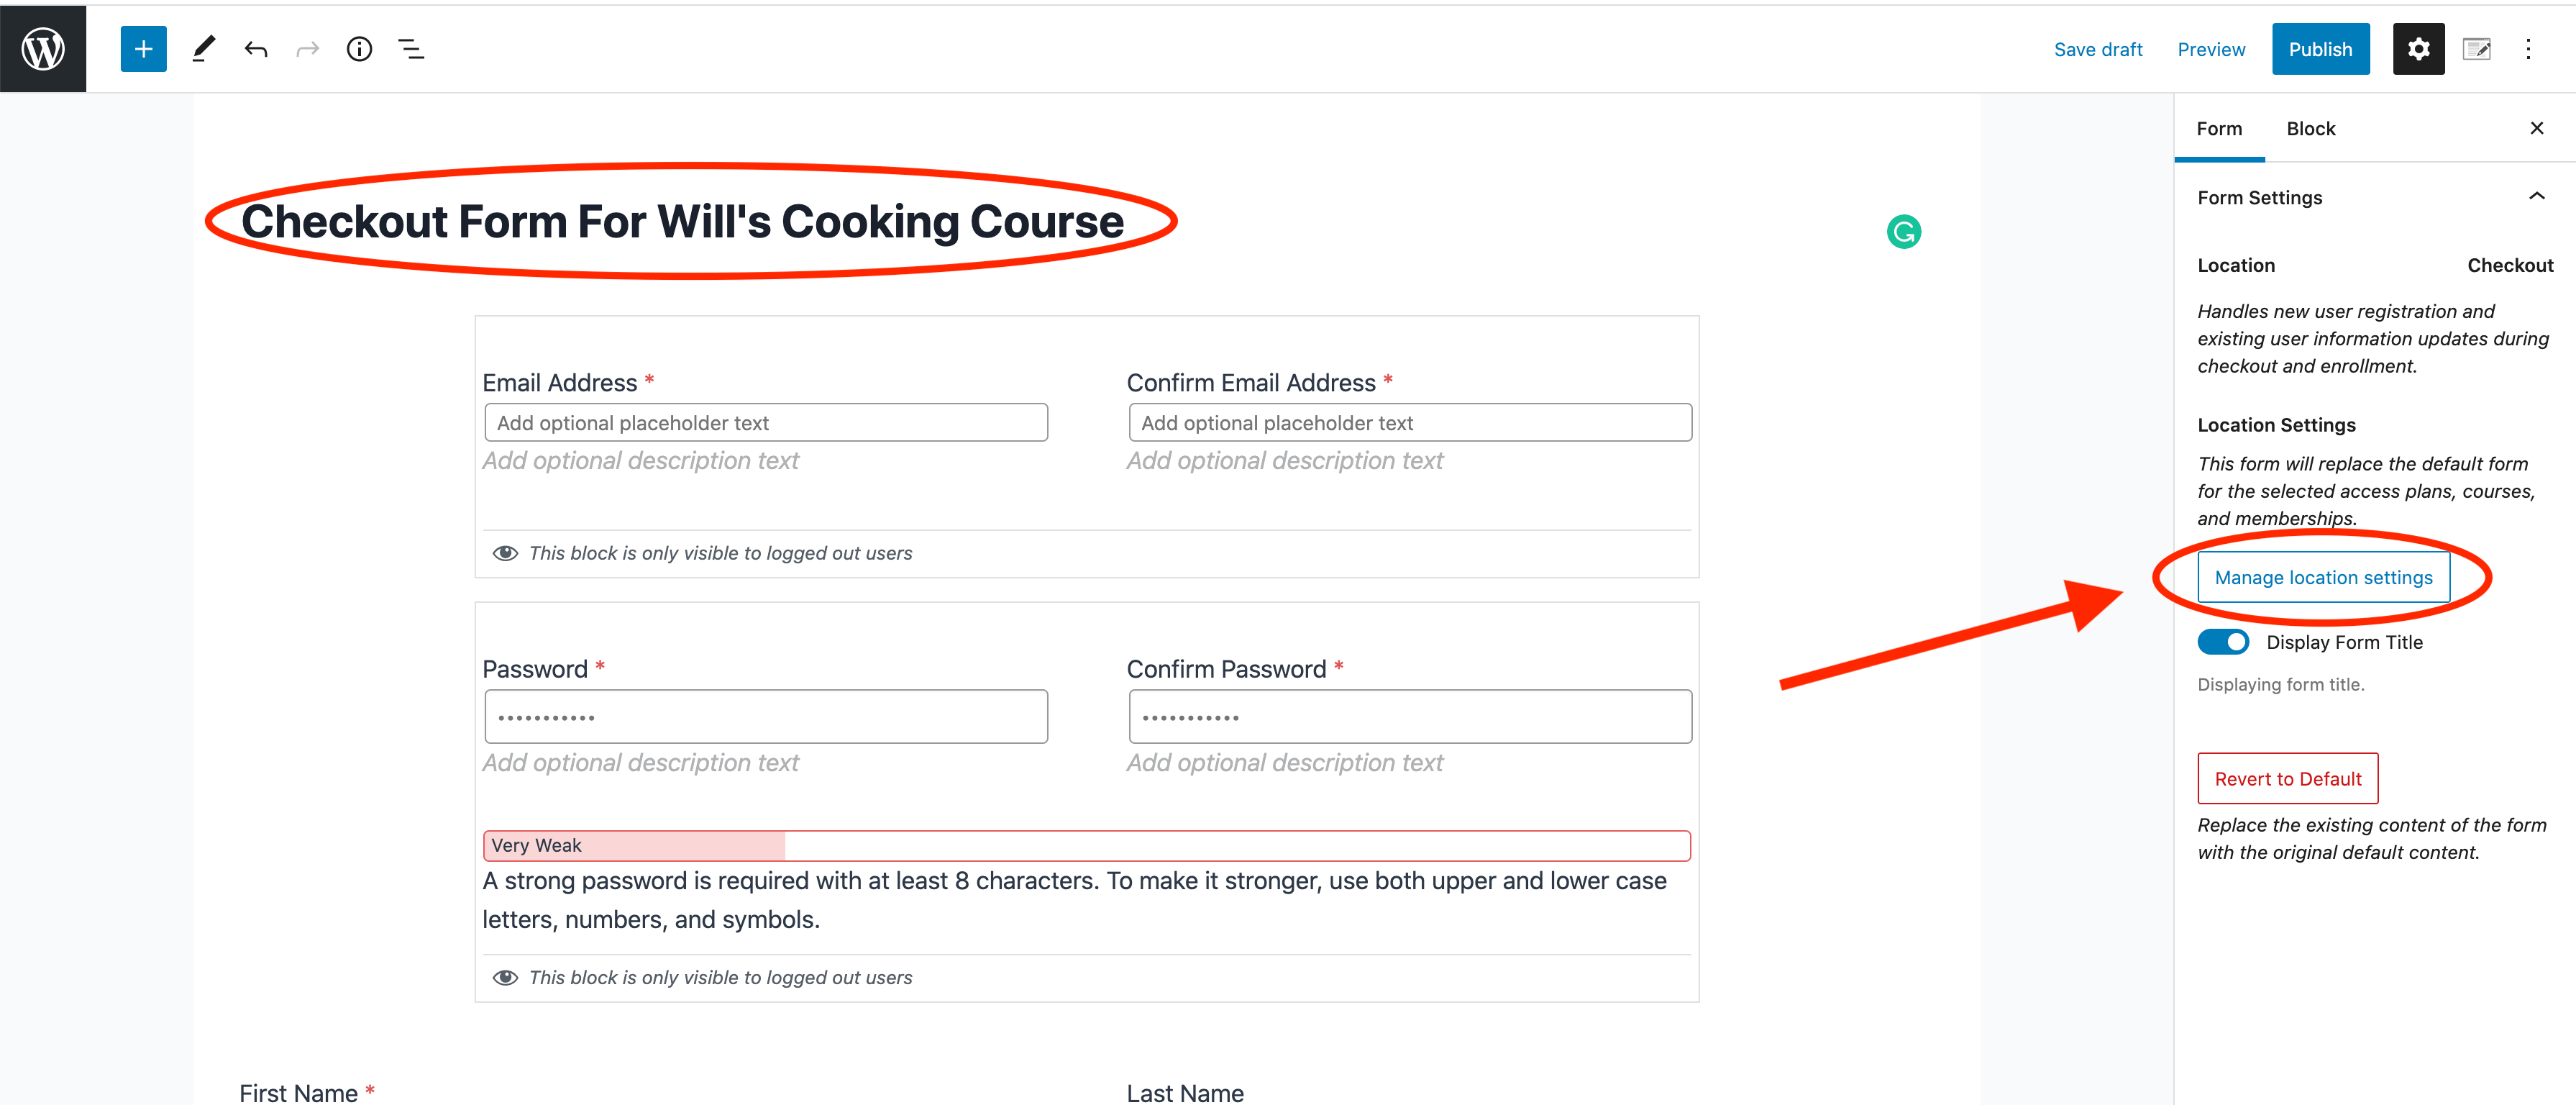
Once you select which courses and memberships to associate that form with, you’ll have options to select specific access plans on that course. When you’re done selecting courses, memberships, and access plans to apply your new checkout form to, click ‘Return to Form’ in the bottom right-hand corner.