Want to create an online community website for your courses, coaching program, or membership site?
A community can give your learners somewhere to ask questions, share progress, connect with other members, and stay engaged between lessons. Instead of delivering content once and hoping students keep going, you can create a space where learning feels active and supported.
The difficult part is choosing where that community should live.
A Facebook group may be quick to set up, but it puts your learners inside a distracting platform you don’t control. Tools like Discord, Slack, and Circle can work well for some communities, but they often mean extra logins, separate member management, and a gap between your courses and your conversations.
For course creators and education businesses, that gap matters.
If your community is part of the learning experience, it makes sense to build it into the same website where your courses, memberships, payments, and learner accounts already live.
That’s where WordPress, LifterLMS, and the LifterLMS Social Learning add-on fit together. You can create an online community website you own, shape the member experience around your courses, and give learners a branded space where they can connect without sending them to a separate platform.
What Is an Online Community Website?
An online community website is a dedicated space where people can create profiles, join discussions, ask questions, share updates, and connect around a shared interest, course, brand, or goal.
Unlike a social media group, an online community website lives on your own site. That gives you more control over the design, member experience, privacy settings, content, and access rules.
For an eLearning business, this can turn a standard course website into a more active learning environment. Students can introduce themselves, discuss lessons, celebrate progress, get help, and stay connected after they complete a course.
A strong online community website usually includes features such as member profiles, activity feeds, discussion areas, private or public access options, notifications, moderation tools, and a clear reason for members to return.
When you build this directly into your learning platform, your community becomes part of the course experience rather than a separate place your learners have to remember to visit.
Examples of Online Communities for Course Creators, Coaches, and Membership Site Owners
The right online community website depends on what you offer and how your members learn.
For a course creator, the community might sit alongside a paid course. Students can ask questions about lessons, share assignments, discuss challenges, and celebrate course milestones. This helps the course feel less isolated and gives students a reason to keep coming back between lessons.
For a coach, the community might support group coaching, accountability, or a cohort-based program. Members can post weekly updates, ask for feedback, share wins, and continue the conversation between live calls.
For a membership site owner, the community might be part of the membership’s ongoing value. Members can access discussions, resources, member-only updates, live event reminders, and peer support in one place.
In each case, the community works best when it has a clear purpose. It shouldn’t exist just because “community” sounds useful. It should help members do something specific, whether that’s completing a course, getting support, staying accountable, or connecting with people working toward the same goal.
Online Community Website vs. Social Media Group
A social media group can be a quick way to bring people together, but it also means building your community on someone else’s platform.
That can work for casual groups. But if your community is part of a course, coaching program, membership, or paid learning experience, you usually need more control.
An online community website gives you ownership over the member experience. You control the branding, access rules, privacy settings, course connections, payments, and the community’s long-term direction.
Here’s how the two options compare:
| Feature | Social Media Group | Online Community Website |
| Ownership | Hosted on a third-party platform | Built on a website you own |
| Branding | Limited control | Full control over design and experience |
| Distractions | Members see ads, feeds, and unrelated posts | Members stay focused on your content and community |
| Member access | Controlled by the social platform | Controlled through your own site, LMS, or membership setup |
| Course connection | Usually separate from your learning platform | Can sit directly alongside courses, lessons, and memberships |
| Privacy | Depends on the platform’s rules and settings | You set your own privacy and access rules |
| Monetization | Limited or indirect | Can connect directly to courses, memberships, coaching, and payments |
| Long-term control | Subject to platform changes | You control the platform and member experience |
For some creators, a social media group can still be useful for discovery or casual conversation. But for an eLearning business, your community often needs to do more than host discussions.
It needs to support learning, encourage progress, connect members, and fit naturally into the wider student experience.
That’s why many course creators choose to build an online community website rather than sending learners to a separate social platform.
Why Build an Online Community Website on WordPress
With WordPress as the foundation for your eLearning and online community, you get full freedom and control over your platform. You get to create an asset that you own and control.
In a WordPress-based platform, you get unlimited monetization and branding opportunities. You have full control over the payments and pricing that your students pay to join your online learning community. You can create a design and visual brand that matches your vision, instead of joining some expensive LMS or community platform where all the sites look the same.
WordPress is also different for LMS and community sites in that there are no limits on the number of students, instructors, courses, memberships, or community members. Put simply, unlike other platforms, LifterLMS does not charge you more as you get more enrollments and community members.
The strongest benefit of using WordPress to create an online community website is how integrated and customizable everything is in your one website. With LifterLMS, you can easily integrate online communities, courses, memberships, coaching… all in one place with one login for you and your members.
Smart education entrepreneurs find that a WordPress LMS is the most affordable and customizable learning management system solution, offering full ownership and control.
Using the best WordPress LMS plugin, LifterLMS, and the LifterLMS Social Learning plugin, you get a powerful, customizable LMS and online community all-in-one.
What Makes the LifterLMS Social Learning Add-On Unique to Create An Online Community Website?
When you bring learners together, you want the community experience to feel natural, engaging, and seamlessly connected to your courses.
The LifterLMS Social Learning add-on is designed to do exactly that by transforming your WordPress LMS into a full-featured social learning hub.
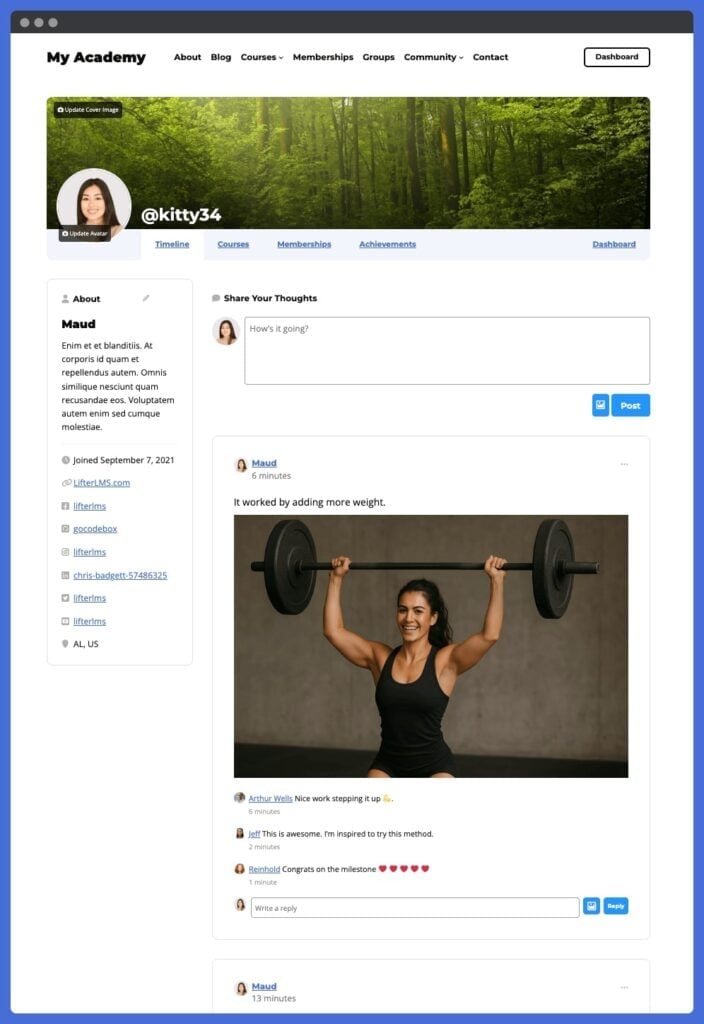
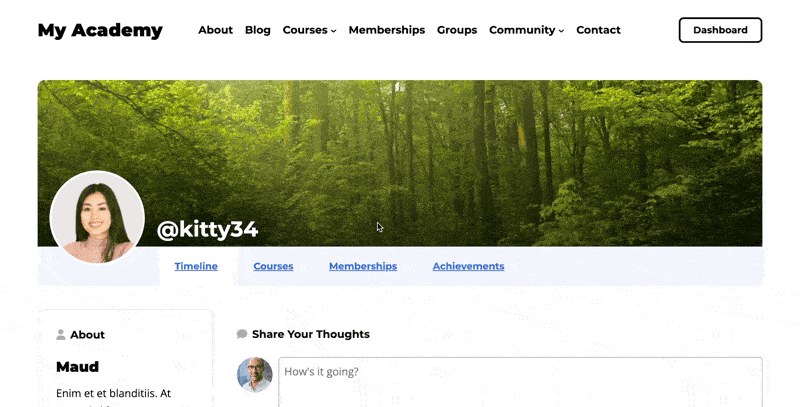
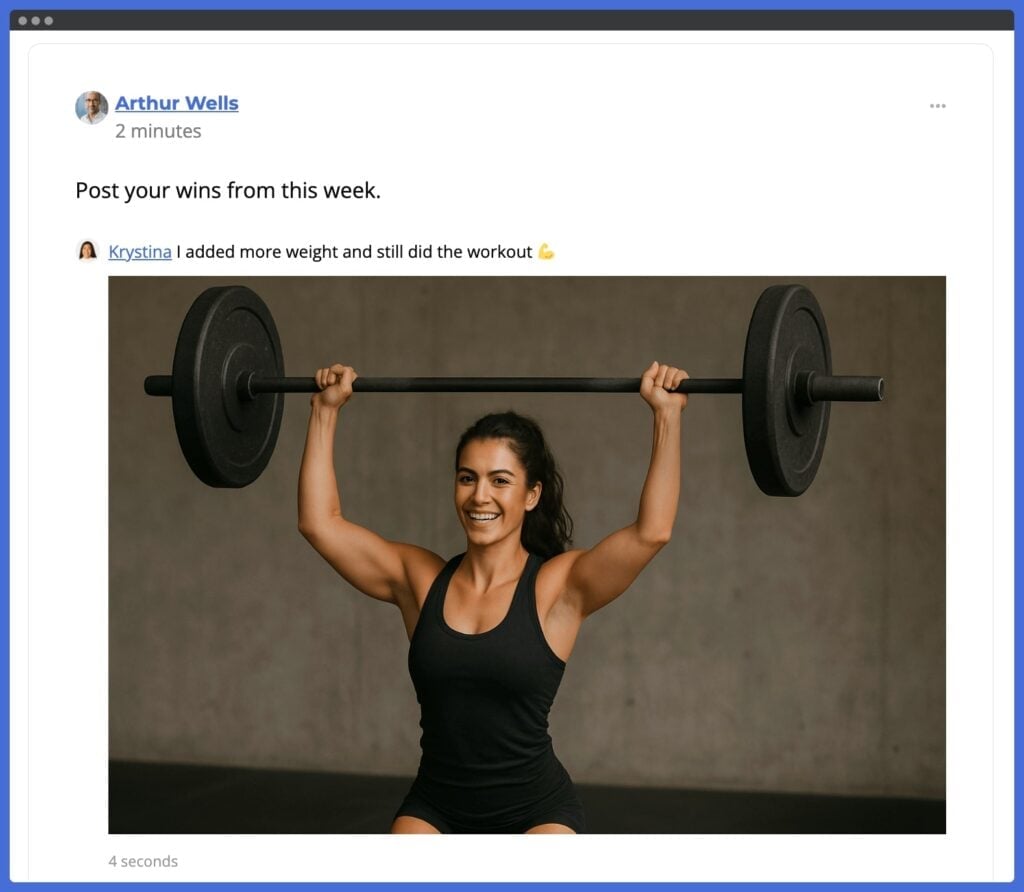
Real-Time Social LMS Activity Feeds
The activity feed functions like a private Facebook-style timeline built directly into your learning platform. Students can see updates from peers, interact with posts, and celebrate milestones in real time.
In addition to text-based comments, learners can even share images and videos alongside their posts, adding a richer, more visual layer to community interaction.
Unlike external platforms, you’re in full control of the environment with no distractions, no ads, just focused engagement.
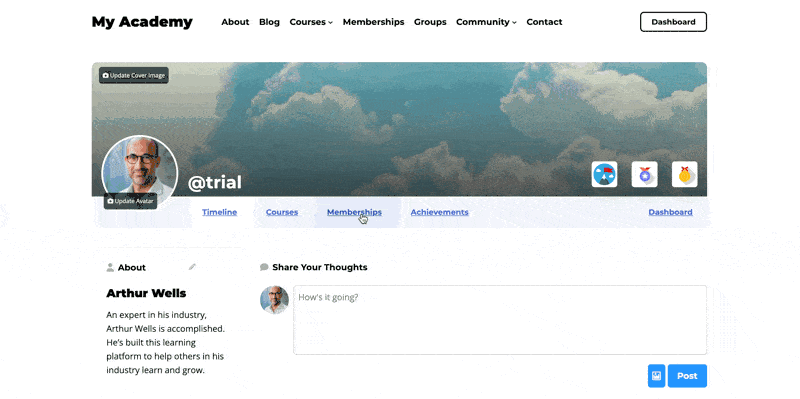
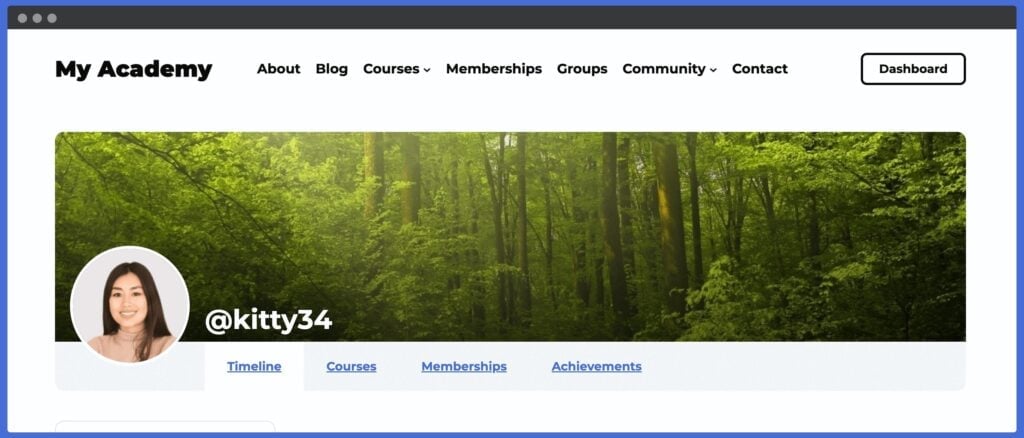
Customizable Learner Profiles in Your Social Learning Management System
Every learner gets their own profile page, which can be customized with avatars, cover photos, bios, and social links.
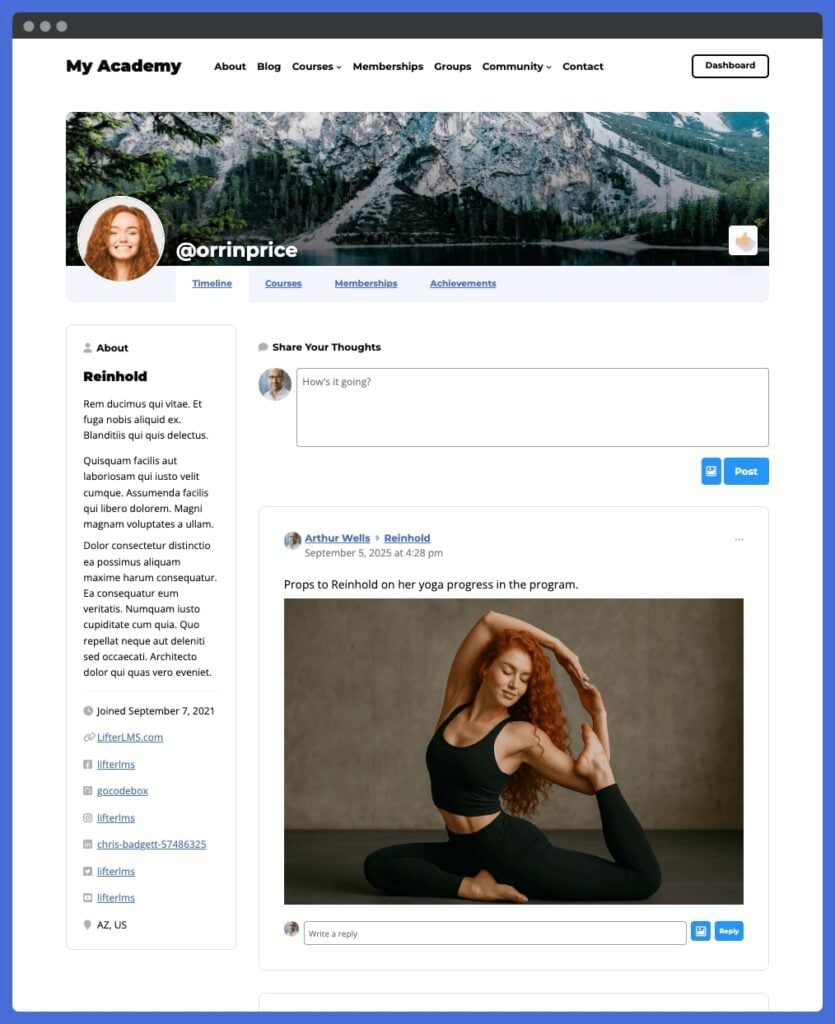
These profiles aren’t static. They evolve as students progress, displaying earned achievements and community activity.
Privacy settings let you decide whether profiles are public, private to registered users, or visible only to enrolled students, ensuring your community feels safe and secure.
Gamification and Engagement Tools
Keeping learners motivated is easier when their progress is recognized. With LifterLMS Social Learning, course completions and other key milestones automatically post to the activity feed.
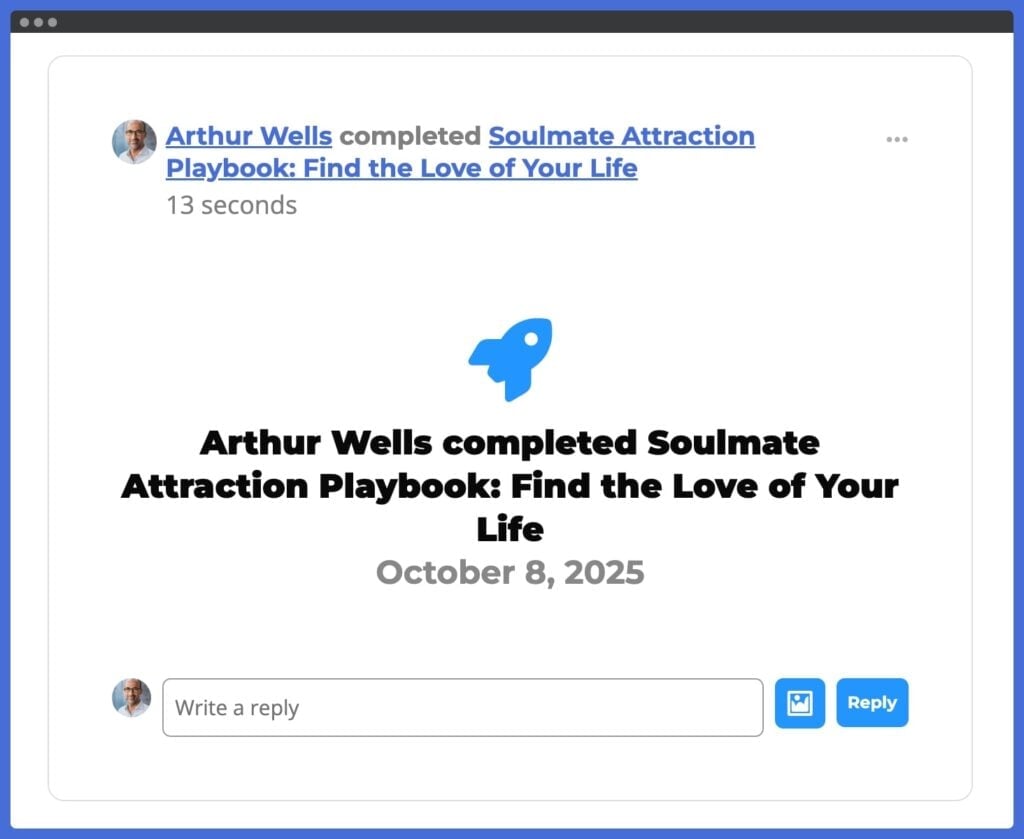
This creates a built-in recognition system that sparks conversation and keeps energy high. You can even fine-tune which events trigger posts, helping you design the exact engagement experience you want.
Community + Courses in One Platform
Most online learning communities are split across multiple tools: one for courses, another for discussions, and another for events.
With LifterLMS Social Learning, everything lives under one roof. Your learners sign in once and immediately access courses, memberships, coaching programs, and community interaction, all on your uniquely branded WordPress site.
This tight integration not only simplifies the user experience but also gives you complete control over monetization, design, and long-term growth.
How to Create an Online Community Website with WordPress
Create an online community website using the best WordPress social networking plugin, starting with a clear plan and building the right WordPress setup around it.
Step 1 – Define the Purpose of Your Community
Before you choose tools or settings, decide what your online community is there to do.
For an eLearning website, your community might help students ask questions, discuss lessons, share progress, get feedback, join coaching conversations, or stay connected after completing a course.
Try to make this purpose specific. “Build engagement” is a useful goal, but “help students get answers between live coaching calls” provides clearer direction.
Your purpose will shape the features you need, the rules you set, and the way you encourage members to take part.
Step 2 – Identify Who the Community Is For
Next, define who your members are and what they need from the community.
A community for beginners taking their first online course will need a different structure from a private coaching group, professional training network, mastermind, or alumni community.
Ask questions such as:
- Are members enrolled students, paying members, coaching clients, or a mix?
- Do they need peer support, instructor access, accountability, networking, or resources?
- Should the community be public, private, or only available to enrolled students?
- Will members join for a short course, an ongoing membership, or long-term support?
These decisions make the technical setup easier because you know what kind of member experience you are trying to create.
Step 3 – Choose Your Community Model
Once you know who the community is for, decide how people will access it.
For example, you might create:
- A private course community for enrolled students
- A paid membership community
- A coaching group with discussion and accountability
- A professional training community for teams or organizations
- An alumni community for students who have completed a course
- A free community that introduces people to your paid courses or programs
Your community model affects your pricing, access rules, content plan, moderation needs, and launch strategy.
For many eLearning websites, the strongest model is to connect community access directly to a course, membership, or coaching program. This keeps the community tied to a clear learning outcome rather than becoming a general discussion space with no clear purpose.
Step 4 – Set Up Your WordPress Website
If you already have a WordPress website set up, you’re ahead of the game.
If you don’t have a WordPress website yet, sign up for WordPress hosting from one of these recommended WordPress hosting companies that perform well for eLearning and online community websites.
Your website will become the home for your courses, community, member accounts, payments, and brand. That means you are not just creating a separate discussion area. You are building an owned platform where the learning experience and community experience can work together.
Step 5 – Install LifterLMS and the Social Learning Add-On
Install and activate the free core LifterLMS plugin on your WordPress website.
Then install and activate the LifterLMS Social Learning add-on. You can purchase the LifterLMS Social Learning add-on individually here or get it and 27 other premium add-ons via the LifterLMS Infinity Bundle plan.
This gives you the foundation for combining courses, memberships, learner accounts, profiles, activity feeds, and social interaction into a single WordPress-based LMS.
Step 6 – Set Your Access and Privacy Rules
Before inviting members in, decide who can see and use the community.
Ask:
- Should profiles be public, private, or only visible to registered members?
- Should the activity feed be available to all logged-in users or only enrolled students?
- Should community access be included with a course, membership, or coaching program?
- Should members be able to interact across the whole site, or only inside specific learning areas?
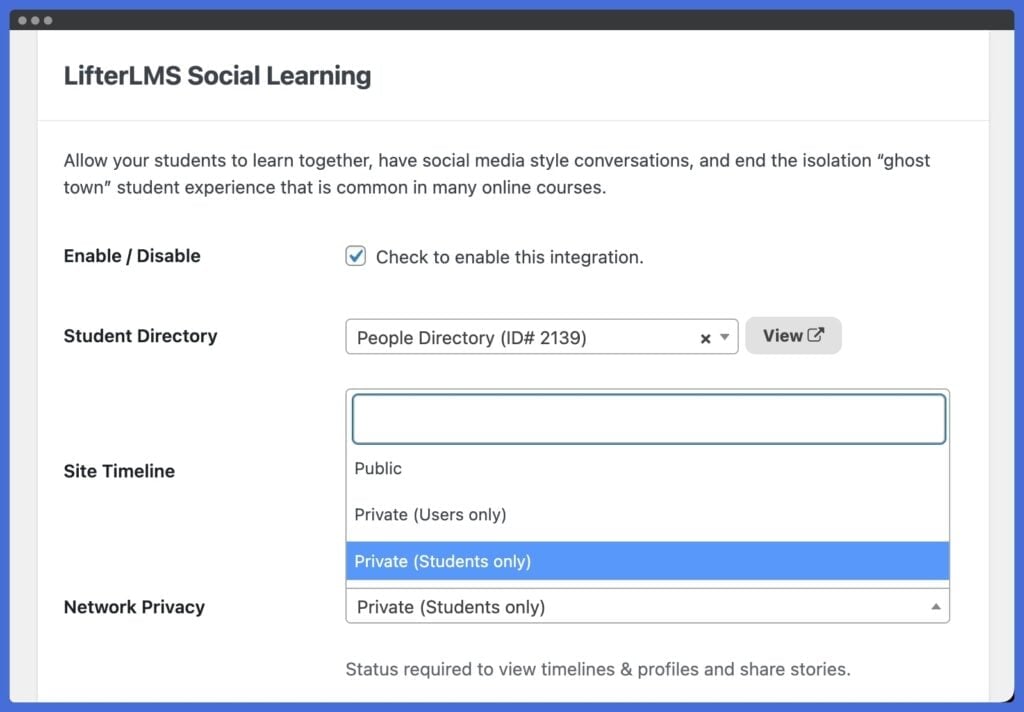
These settings help shape the culture of your online community. Open access can make the community feel more visible and active. Private access can create more trust, especially when members are asking questions, sharing progress, or discussing challenges.
Step 7 – Customize Learner Profiles and Navigation
Next, make the community easy to use.
Encourage learners to personalize their profiles by uploading an avatar, adding a banner image, and sharing a short bio. When students can put a face and story to a name, the community starts to feel more personal.
You should also add clear navigation links to the community directory, social learning timeline, and member profile areas. If people can’t find the community quickly, they’re less likely to use it.
Small navigation choices can make a major difference. Members should be able to move from a course to the community without feeling as though they have entered a separate platform.
Step 8 – Add Guidelines and Set the Tone
Before launch, give members clear expectations for how the community should work.
Your guidelines don’t need to be complicated. They should explain:
- What members can post
- How members should ask for help
- How members can support each other
- Whether self-promotion is allowed
- How quickly members can expect a response
- What kind of behavior is not acceptable
- What happens if someone ignores the rules
This is especially useful for paid learning communities, coaching groups, and professional training spaces. Clear guidelines help members feel safe, and they make moderation easier as the community grows.
Step 9 – Seed the First Posts and Discussions
Don’t launch with an empty feed.
Before inviting members in, add a few starter posts that model the kind of activity you want to see.
For example, you could add:
- A welcome post from the instructor or community leader
- A short video explaining how to use the community
- An introduction thread
- A question linked to the first course lesson
- A prompt asking members to share their goals
- A post celebrating a sample milestone or achievement
The first few posts show members how to take part. They also make the community feel active from day one.
Step 10 – Launch and Engage Your Members
Once the pieces are in place, it’s time to open the doors.
Start by welcoming your members personally. A kickoff message or video helps learners feel as if they are joining something purposeful, not just another forum.
From there, create prompts or starter discussions. Ask a simple question like, “What motivated you to join this course?” or invite learners to introduce themselves in an introduction post.
Engagement grows when you recognize milestones. Celebrate course completions, highlight learner wins, and use Social Learning’s automatic timeline posts to spotlight achievements.
Finally, remember that your online community needs consistent leadership. Log in regularly, reply to comments, and model the type of content and comments you want to see.
A community that feels active will keep members coming back. The more they engage, the stronger the learning outcomes and community member motivation become.
Step 11 – Review and Improve the Community Over Time
Your first version doesn’t need to be perfect.
After the first few weeks, look at how members are using the community.
Ask:
- Which posts get replies?
- Which questions come up repeatedly?
- Are members introducing themselves?
- Are learners helping each other?
- Are any areas confusing or inactive?
- Do your guidelines need to be clearer?
- Are members returning between lessons?
Use those answers to improve the experience. You might add clearer navigation, adjust privacy settings, post better prompts, run live sessions, or create a simple onboarding course that shows members how to get value from the community.
By taking a few intentional steps here, you are not just turning on an online community feature. You are shaping the culture of your online community.
Check out the complete Getting Started With LifterLMS Social Learning documentation.
Key Takeaways: Creating Your Online Community Website
- Start with a clear purpose before choosing tools.
- Define who the community is for and how members will use it.
- Choose a community model that supports your courses, memberships, or coaching offer.
- Use WordPress, LifterLMS, and Social Learning to keep courses and community in one place.
- Set access, privacy, and moderation rules before launch.
- Seed the first posts to help the community feel less empty.
- Stay active after launch and improve the experience based on real member behavior.
Once your online community website is live, the work shifts from setup to stewardship. The goal is no longer just to get members through the door, but to keep the space useful, safe, and active over time. That means moderating discussions, encouraging participation, responding to member needs, and improving the experience as the community grows.
First 30 Days: Online Community Launch Checklist
Your online community doesn’t need to be busy on day one. It needs to feel clear, welcoming, and worth returning to.
Use the first 30 days to set expectations, model good participation, and learn what your members need.
Before Launch
- Add a welcome post that explains who the community is for and how members should use it.
- Create a short introduction prompt so members know what to post first.
- Add clear community guidelines covering support, self-promotion, respectful discussion, and response expectations.
- Check that members can easily find the activity feed, profiles, course areas, and any private spaces.
- Seed a few discussion posts so the community doesn’t feel empty when members arrive.
Week 1
- Welcome new members personally.
- Reply quickly to early posts and questions.
- Ask one simple question connected to the course or membership.
- Encourage members to complete their profiles.
- Highlight one useful post, answer, or member contribution.
Week 2
- Start a discussion linked to a course lesson, coaching topic, or shared goal.
- Invite members to share a win, challenge, or progress update.
- Watch for repeated questions that could become new lessons, resources, or support content.
- Check whether any navigation, access, or privacy settings are confusing.
Week 3
- Introduce a small challenge, accountability prompt, or live session.
- Recognize members who are helping others.
- Review which posts are getting replies and which are being ignored.
- Ask members what would make the community more useful.
Week 4
- Review the first month of activity.
- Update your guidelines, prompts, or onboarding based on real member behavior.
- Remove or simplify anything members are not using.
- Plan a repeatable weekly rhythm, such as one discussion prompt, one member highlight, and one course-related question.
The goal is not to force activity, but to build habits.
When members understand what to do, where to go, and why the community matters, they’re more likely to come back and take part.
Advanced Tips for Scaling Your Social Learning Community
So far, we’ve covered getting started. This final section is about growing smart. Here are 3 strategies to take your community from launch to lasting impact.
Automate Onboarding When You Create An Online Community Website
Let your courses do the heavy lifting. With LifterLMS, you can deliver onboarding training courses that teach your community how to get the most value out of the community.
One of the best lessons you can teach in your onboarding course is how to ask for help, but also how to help other community members, so your community can become part of your support team.
This approach saves time while ensuring that every new member receives the same polished introduction to the community, the eLearning platform, and the community culture.
Integrate Marketing & CRM Tools to Scale Your Social LMS.
When you create an online community website, scale smarter with email marketing and automation.
LifterLMS integrates natively with MailChimp and Kit. You can also integrate with 54 other popular CRM and email marketing platforms using WP Fusion. And the popular WordPress CRM solutions FluentCRM and Groundhogg also integrate directly with LifterLMS.
By integrating your WordPress LMS with CRMs, you can send targeted emails to your community based on the courses and memberships they are enrolled in, encouraging community interaction.
LifterLMS also has its own email engagement and notification email system, which you can use to trigger personalized emails designed to foster community activity.
This type of automation keeps your community engaged and your marketing on autopilot.
Add Advanced Features Like Live Events
Want engagement that leaps off the screen?
LifterLMS can also be used with online event tools like Zoom and Jitsi Meet to embed live virtual meetings, webinars, or classroom sessions directly within courses or email engagements.
You can also use any online meeting software as a side tool to host virtual gatherings. Just post about upcoming or live virtual events to bring your online community into a real-time virtual event.
You can transform your social LMS community feed into a real-time gathering space.
Common Social LMS Mistakes to Avoid
Even with the right tools, building a social learning community can go off track. Here are three mistakes to steer clear of as you grow your social LMS online community platform:
Overcomplicating Your WordPress LMS Website with Too Many Plugins
It’s tempting to stack plugin after plugin to add features. But too many tools can slow down your site, confuse learners, and create unnecessary maintenance work.
WordPress offers a lot of plugins made by different software companies that offer:
- Forum software
- Community applications
- Advanced commenting tools
- Chat widgets
- Profile plugins
- And many more.
Start with what you truly need. LifterLMS and the Social Learning add-on already cover the core of community interaction.
Add extras only when they directly serve your learners.
Ignoring Member Engagement And Feedback In Your Social LMS
Your members will tell you, often subtly, what is working and what is not.
If posts go unanswered or activity drops, it’s a signal to adjust.
“The best online eLearning communities have a policy of ‘No social post is left unanswered.’ It’s a tragedy when someone asks for help in an online community and receives no response from the community or the website owner.”
~ Chris Badgett, LifterLMS, CEO
Ask for feedback, run short surveys, and observe how people interact.
Consistently responding to learner needs keeps the community relevant and valuable.
Failing to Foster a Sense of Safety and Belonging
Communities thrive when members feel safe and welcome. Without clear guidelines and a culture of respect, engagement will fade.
Set expectations, moderate with care, and lead by example. Celebrate wins, encourage introductions, and make every learner feel like they belong.
If someone is out of line in their interactions within your online learning community, you may need to remove them. Perhaps a warning is required before complete removal. But remember: you’re holding space and moderating an online community of real people.
It’s your job at a minimum to create a “safe space.” Or better yet, it’s your job, when you create an online community website, to maintain and enforce your company’s values.
By avoiding these common mistakes, you keep your social LMS simple, responsive, and supportive. Create a place where learners want to spend time and engage.
Ready to Build Your Social Learning Community & Create An Online Community Website?
Bring your learners together with a single powerful WordPress LMS plugin to create a social networking site.
Start today with LifterLMS + the Social Learning add-on and create a community you own and control.
Frequently Asked Questions About Creating an Online Community Website
An online community website is a dedicated site or section where members can create profiles, join discussions, ask questions, share updates, and connect around a shared topic, course, brand, or goal.
For eLearning websites, an online community can sit alongside your courses, allowing students to discuss lessons, get support, share progress, and stay connected between learning activities.
The best way to create an online community website is to start with the member experience you want to build, then choose tools that support that goal.
For course creators, coaches, and education businesses, that usually means choosing a platform that can connect courses, member accounts, payments, profiles, discussion, and community activity in one place.
WordPress with LifterLMS and the Social Learning add-on is a strong option because it lets you build the community on a website you own and control.
Yes. WordPress can be used to create an online community website, especially when paired with the right LMS, membership, or community tools.
With LifterLMS and the Social Learning add-on, you can add learner profiles, activity feeds, course-linked achievements, memberships, and social interaction directly to your WordPress website.
This means your community does not need to live on a separate social platform or third-party app.
An online community website gives you more control than a Facebook group.
With Facebook, your community exists on a platform you don’t own. Members may also be distracted by ads, unrelated posts, notifications, and algorithm-driven feeds.
With your own online community website, you control the design, access rules, privacy settings, member experience, and connection to your courses or memberships.
A Facebook group can still be useful for casual conversation or audience growth, but an owned community website is usually a better fit when the community is part of a paid course, coaching program, membership, or learning experience.
A strong online community website usually needs:
– Member profiles
– Activity feeds or discussion areas
– Clear privacy and access rules
– Notifications or email updates
– Moderation tools
– Community guidelines
– Easy navigation
– A reason for members to return
– A clear connection to your courses, memberships, coaching, or content
For eLearning websites, it also helps when the community connects directly to learner progress, course milestones, certificates, memberships, and student accounts.
The LifterLMS Social Learning add-on turns your WordPress LMS into a social learning community.
It adds learner profiles, activity feeds, social interaction, and automatic posts for course achievements and milestones. This helps students connect, celebrate progress, and stay more engaged in the learning experience.
Because it runs within LifterLMS, your courses and community can live on the same WordPress site.
The cost depends on your hosting, theme, plugins, and the features you need.
With LifterLMS, the core plugin is free. The Social Learning add-on is available as a paid add-on or as part of a LifterLMS bundle. You may also need WordPress hosting and any other paid tools you choose to add.
The main advantage is that you are building on your own website, rather than paying per member on a hosted community platform. That can make WordPress a more flexible option as your community grows.
Yes. With WordPress and LifterLMS, you can charge for access to your online community in several ways.
You can include community access with a course, bundle it into a membership, offer it as part of a coaching program, or use it as a bonus for paid students.
This works especially well when the community supports a clear learning outcome, such as accountability, feedback, group coaching, or peer support.
The best way to keep members engaged is to give them a clear reason to participate.
For an eLearning community, that could mean lesson discussions, weekly prompts, progress celebrations, live sessions, peer feedback, instructor replies, or accountability posts.
With LifterLMS Social Learning, learner milestones can automatically appear in the activity feed, helping spark conversation. You can also post discussion prompts, welcome new members, celebrate wins, and respond regularly to keep the community active.
Not necessarily.
With LifterLMS and the Social Learning add-on, your courses, memberships, coaching programs, learner profiles, and community activity can live on the same WordPress website.
This gives students a single login and a single place to access the learning experience. It also makes it easier for you to manage the relationship between courses, memberships, payments, and community access.
You can use LifterLMS to build many types of learning communities, including:
– Private course communities
– Coaching groups
– Paid membership communities
– Professional training communities
– Student support communities
– Alumni communities
– Mastermind-style groups
– Corporate or team-based training communities
The best structure depends on who your members are, what they are learning, and how the community supports their progress.
No coding is required to get started.
You can install LifterLMS and the Social Learning add-on through WordPress, then configure your community settings from your dashboard.
Developers can further extend and customize the experience, but you don’t need to write code to create an online community website with WordPress and LifterLMS.