Getting Started with LifterLMS and Social Learning
LifterLMS Social Learning is an add-on that brings a community experience directly to your LMS website. It provides your users with:
- Advanced profiles
- A timeline similar to a Facebook feed
- Automatic posts for learning milestones
- The ability to connect with other students
This last feature (the ability to connect with other students) helps prevent the isolation often felt in online learning and builds a strong community around your courses and memberships.
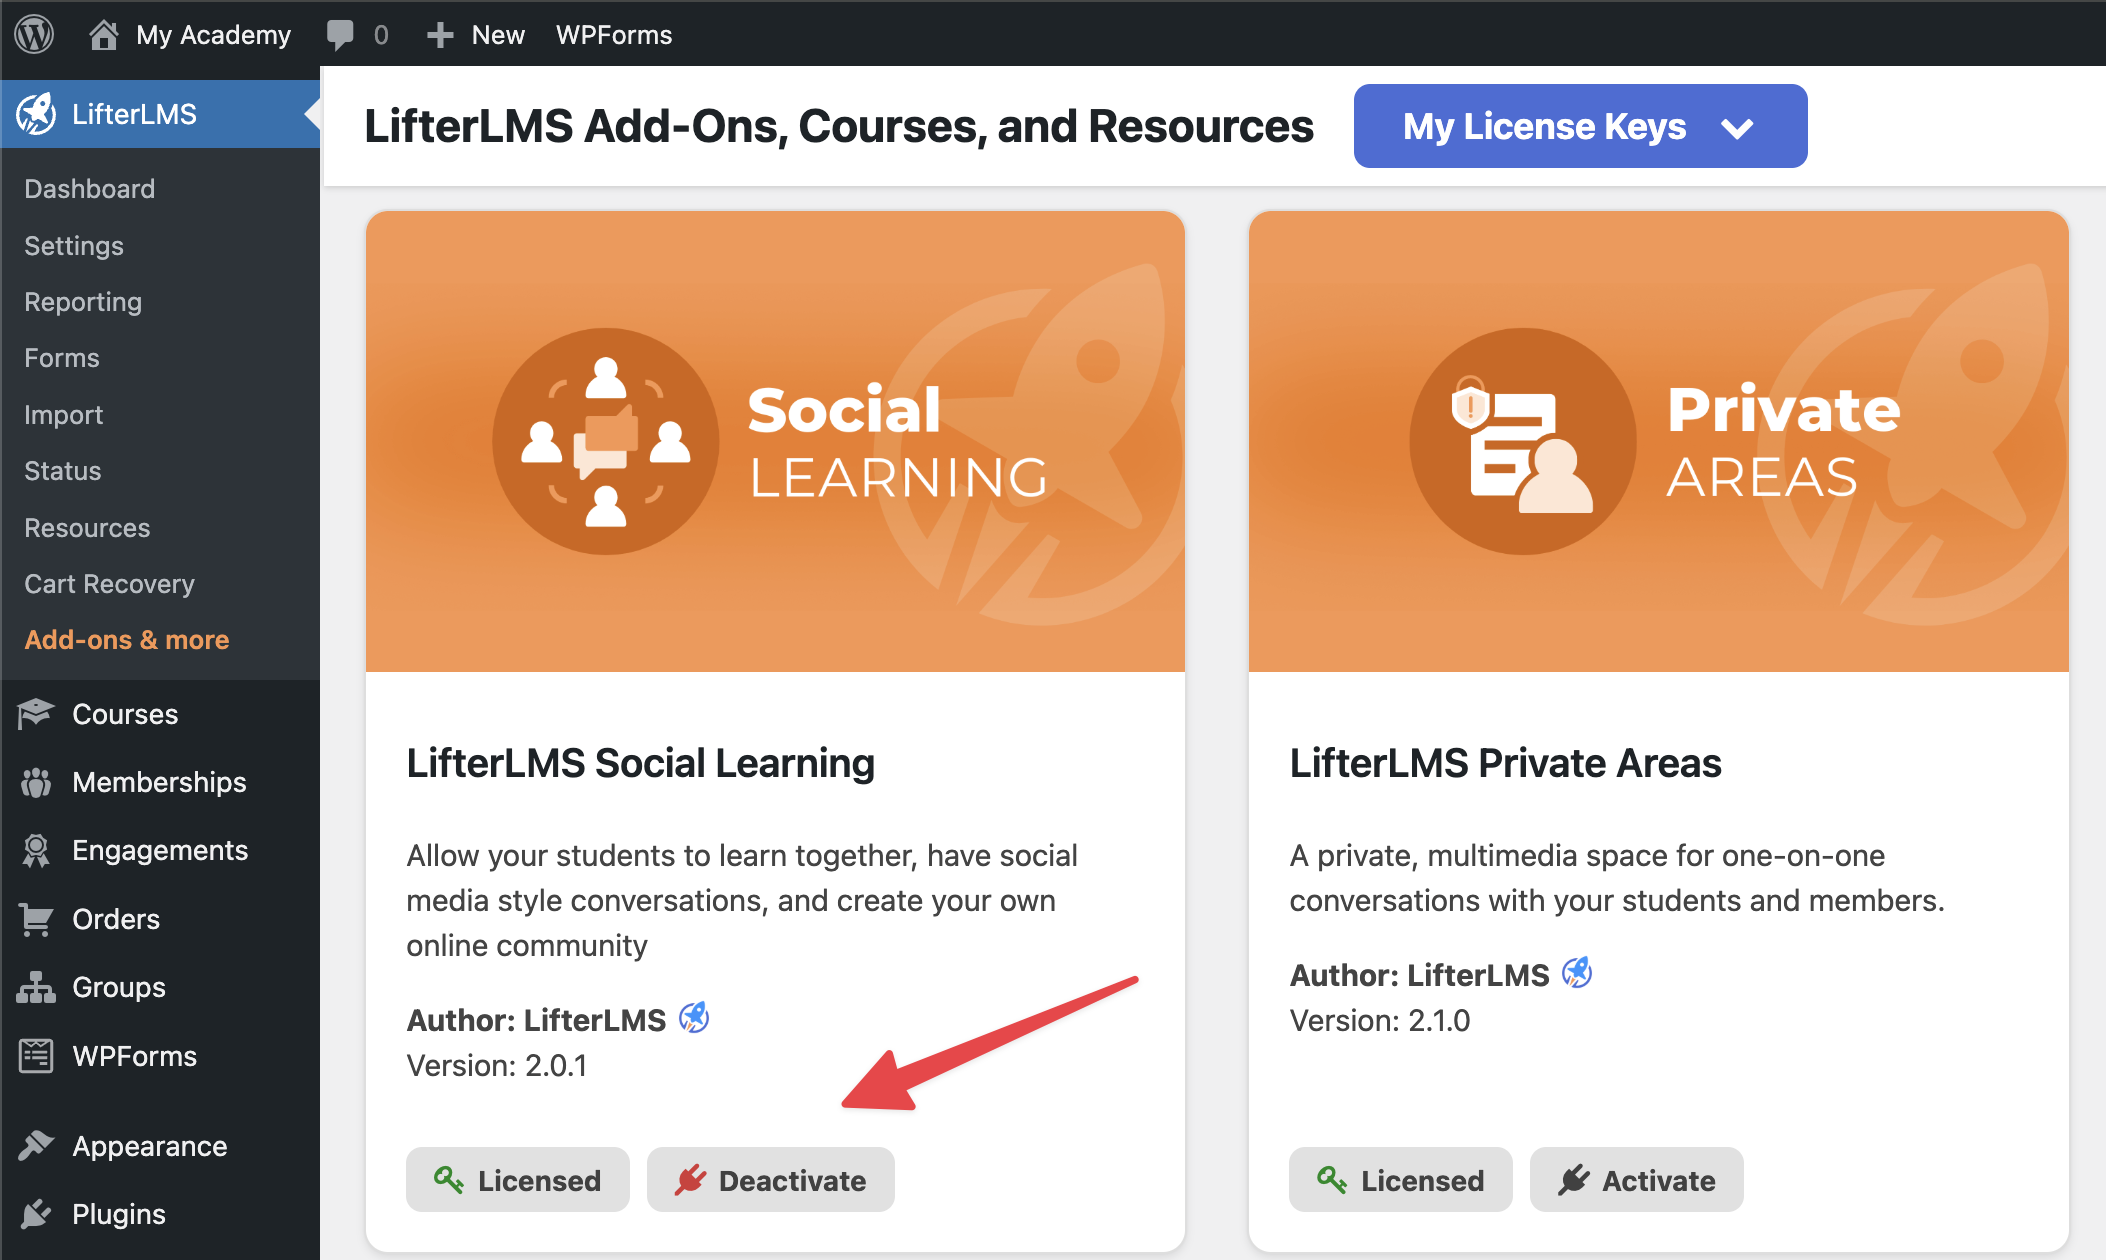
First, add the plugin to your website and enable the integration.
- Go to your WordPress dashboard and navigate to LifterLMS > Add-Ons.
- Find the “LifterLMS Social Learning” in the list of available integrations.
- Install the plugin and click Activate to enable it.
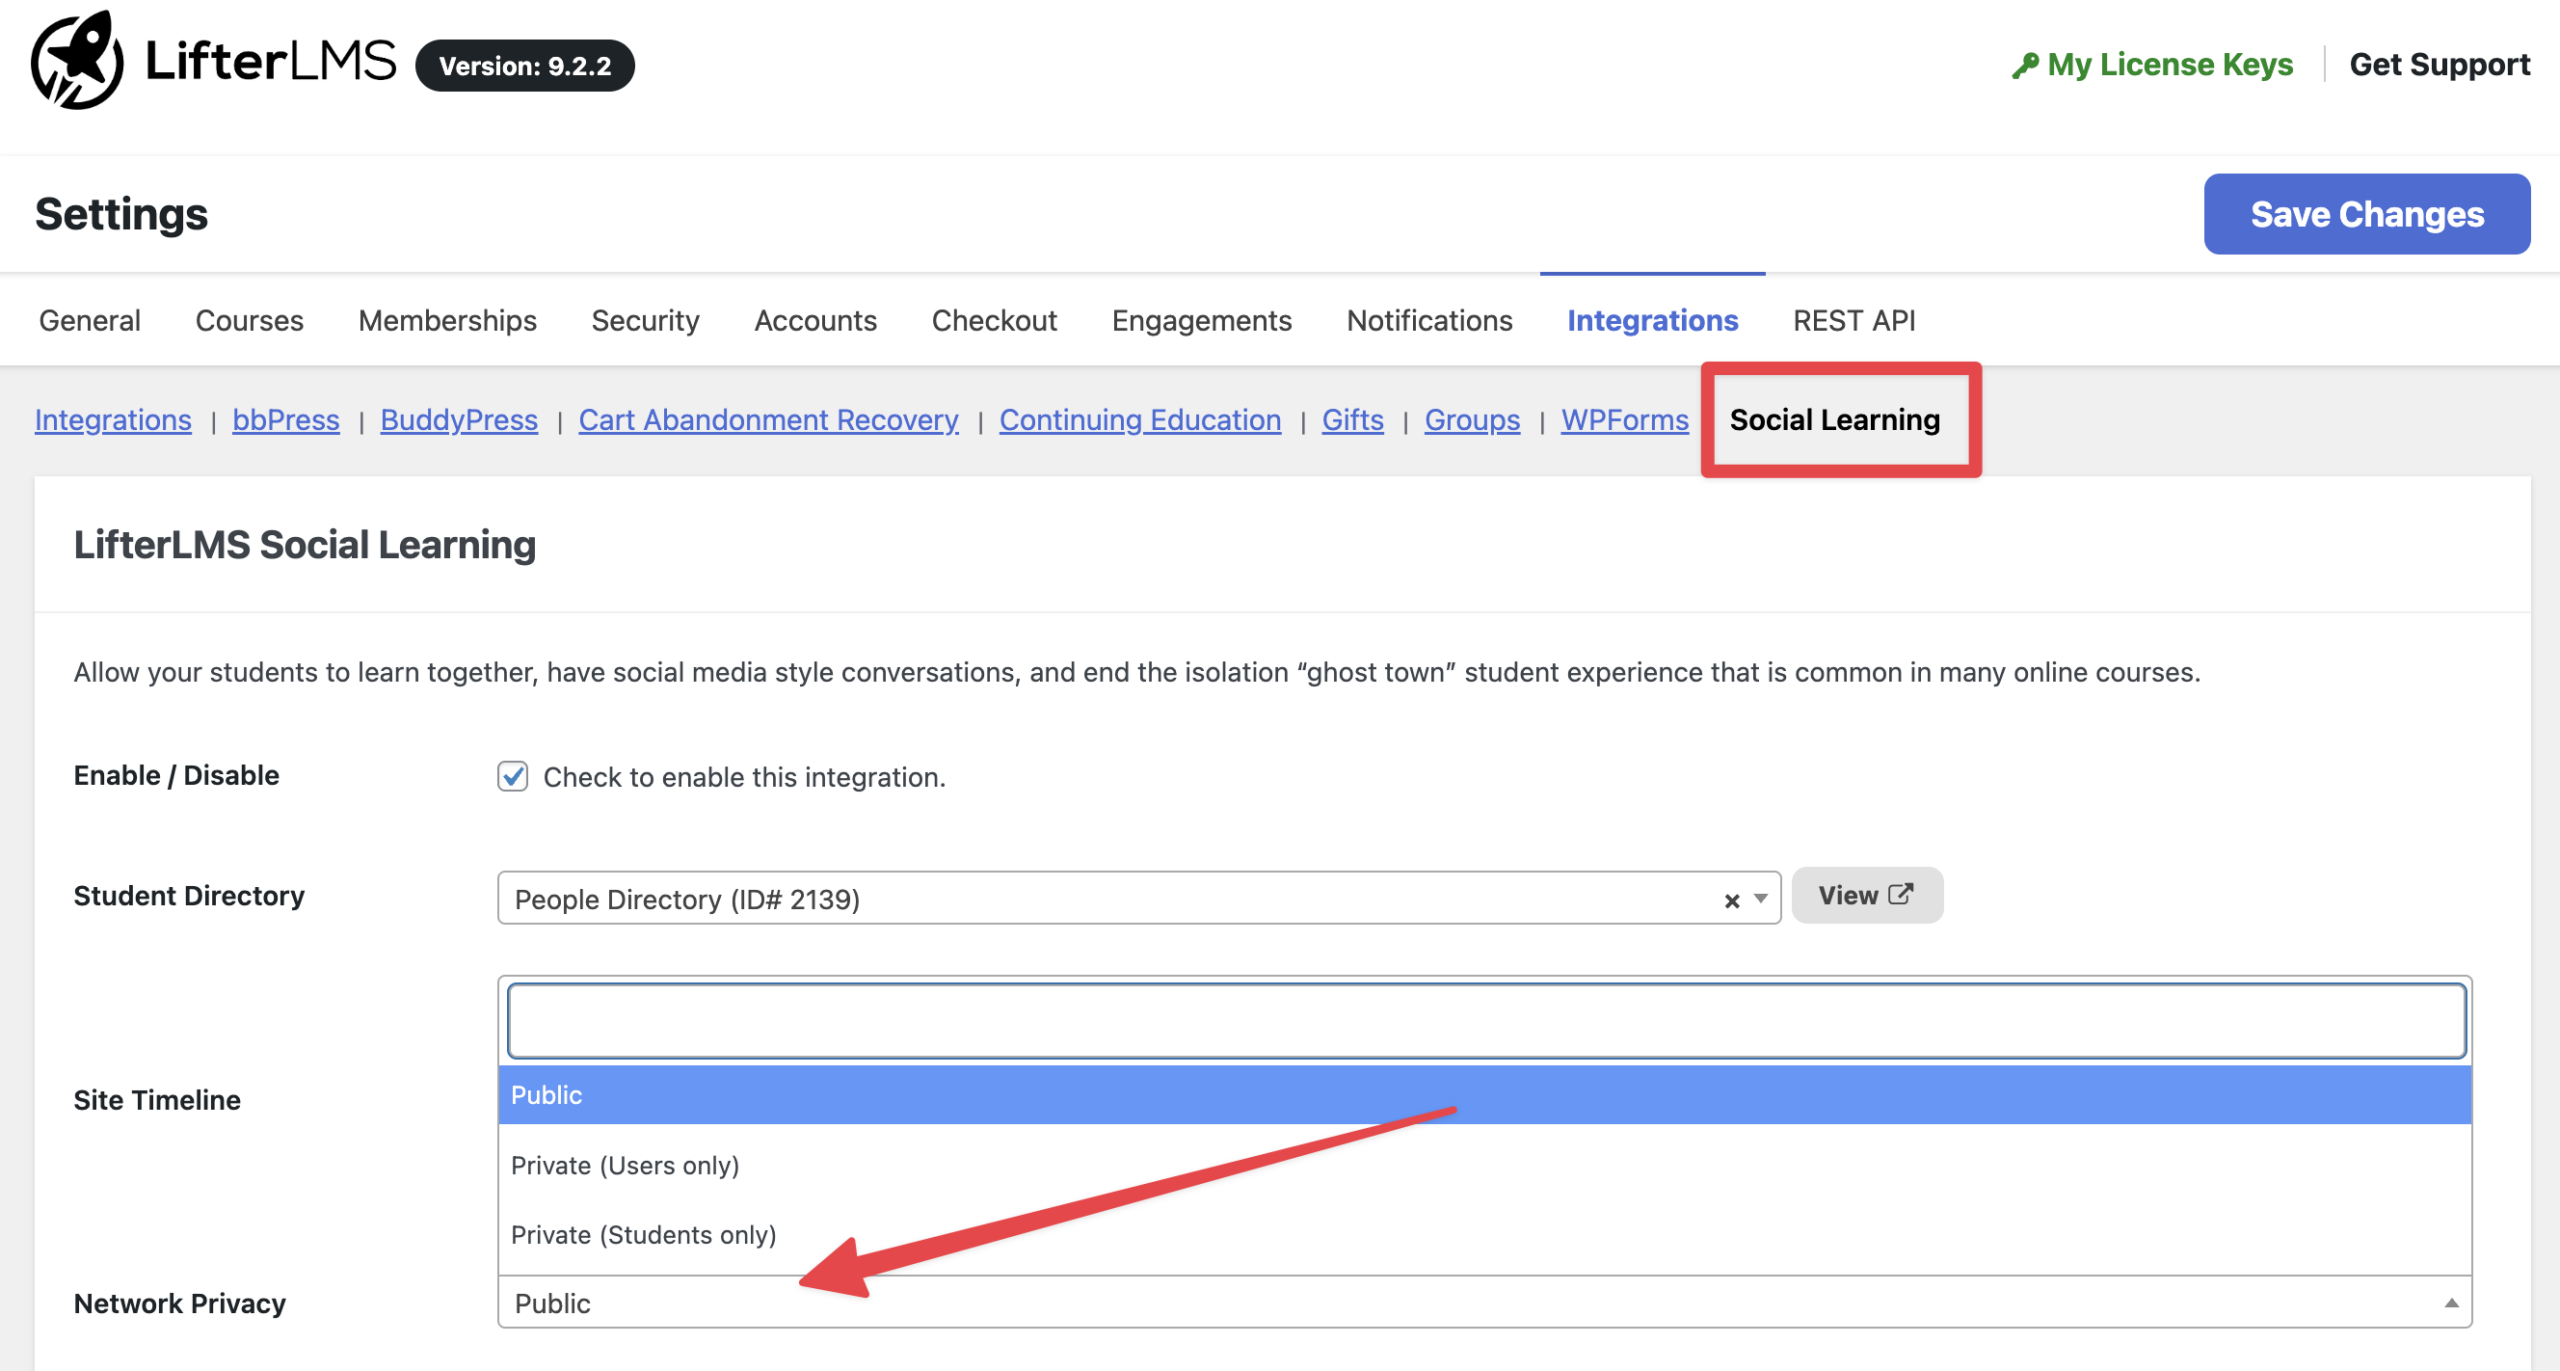
You can control exactly who can see the social profiles and timelines on your website.
- Navigate to LifterLMS > Settings.
- Click on the “Integrations” tab.
- Click on “Social Learning”.
- Locate the “Network Privacy” setting.
- Choose one of the three privacy options from the dropdown menu.
- Public: Profiles and timelines are visible to anyone on the public internet.
- Private (Users only): Restricts visibility so that only registered users on your website can view profiles and timelines.
- Private (Students only): Restricts visibility so only students who are actively enrolled in at least one course or membership can view profiles and timelines.
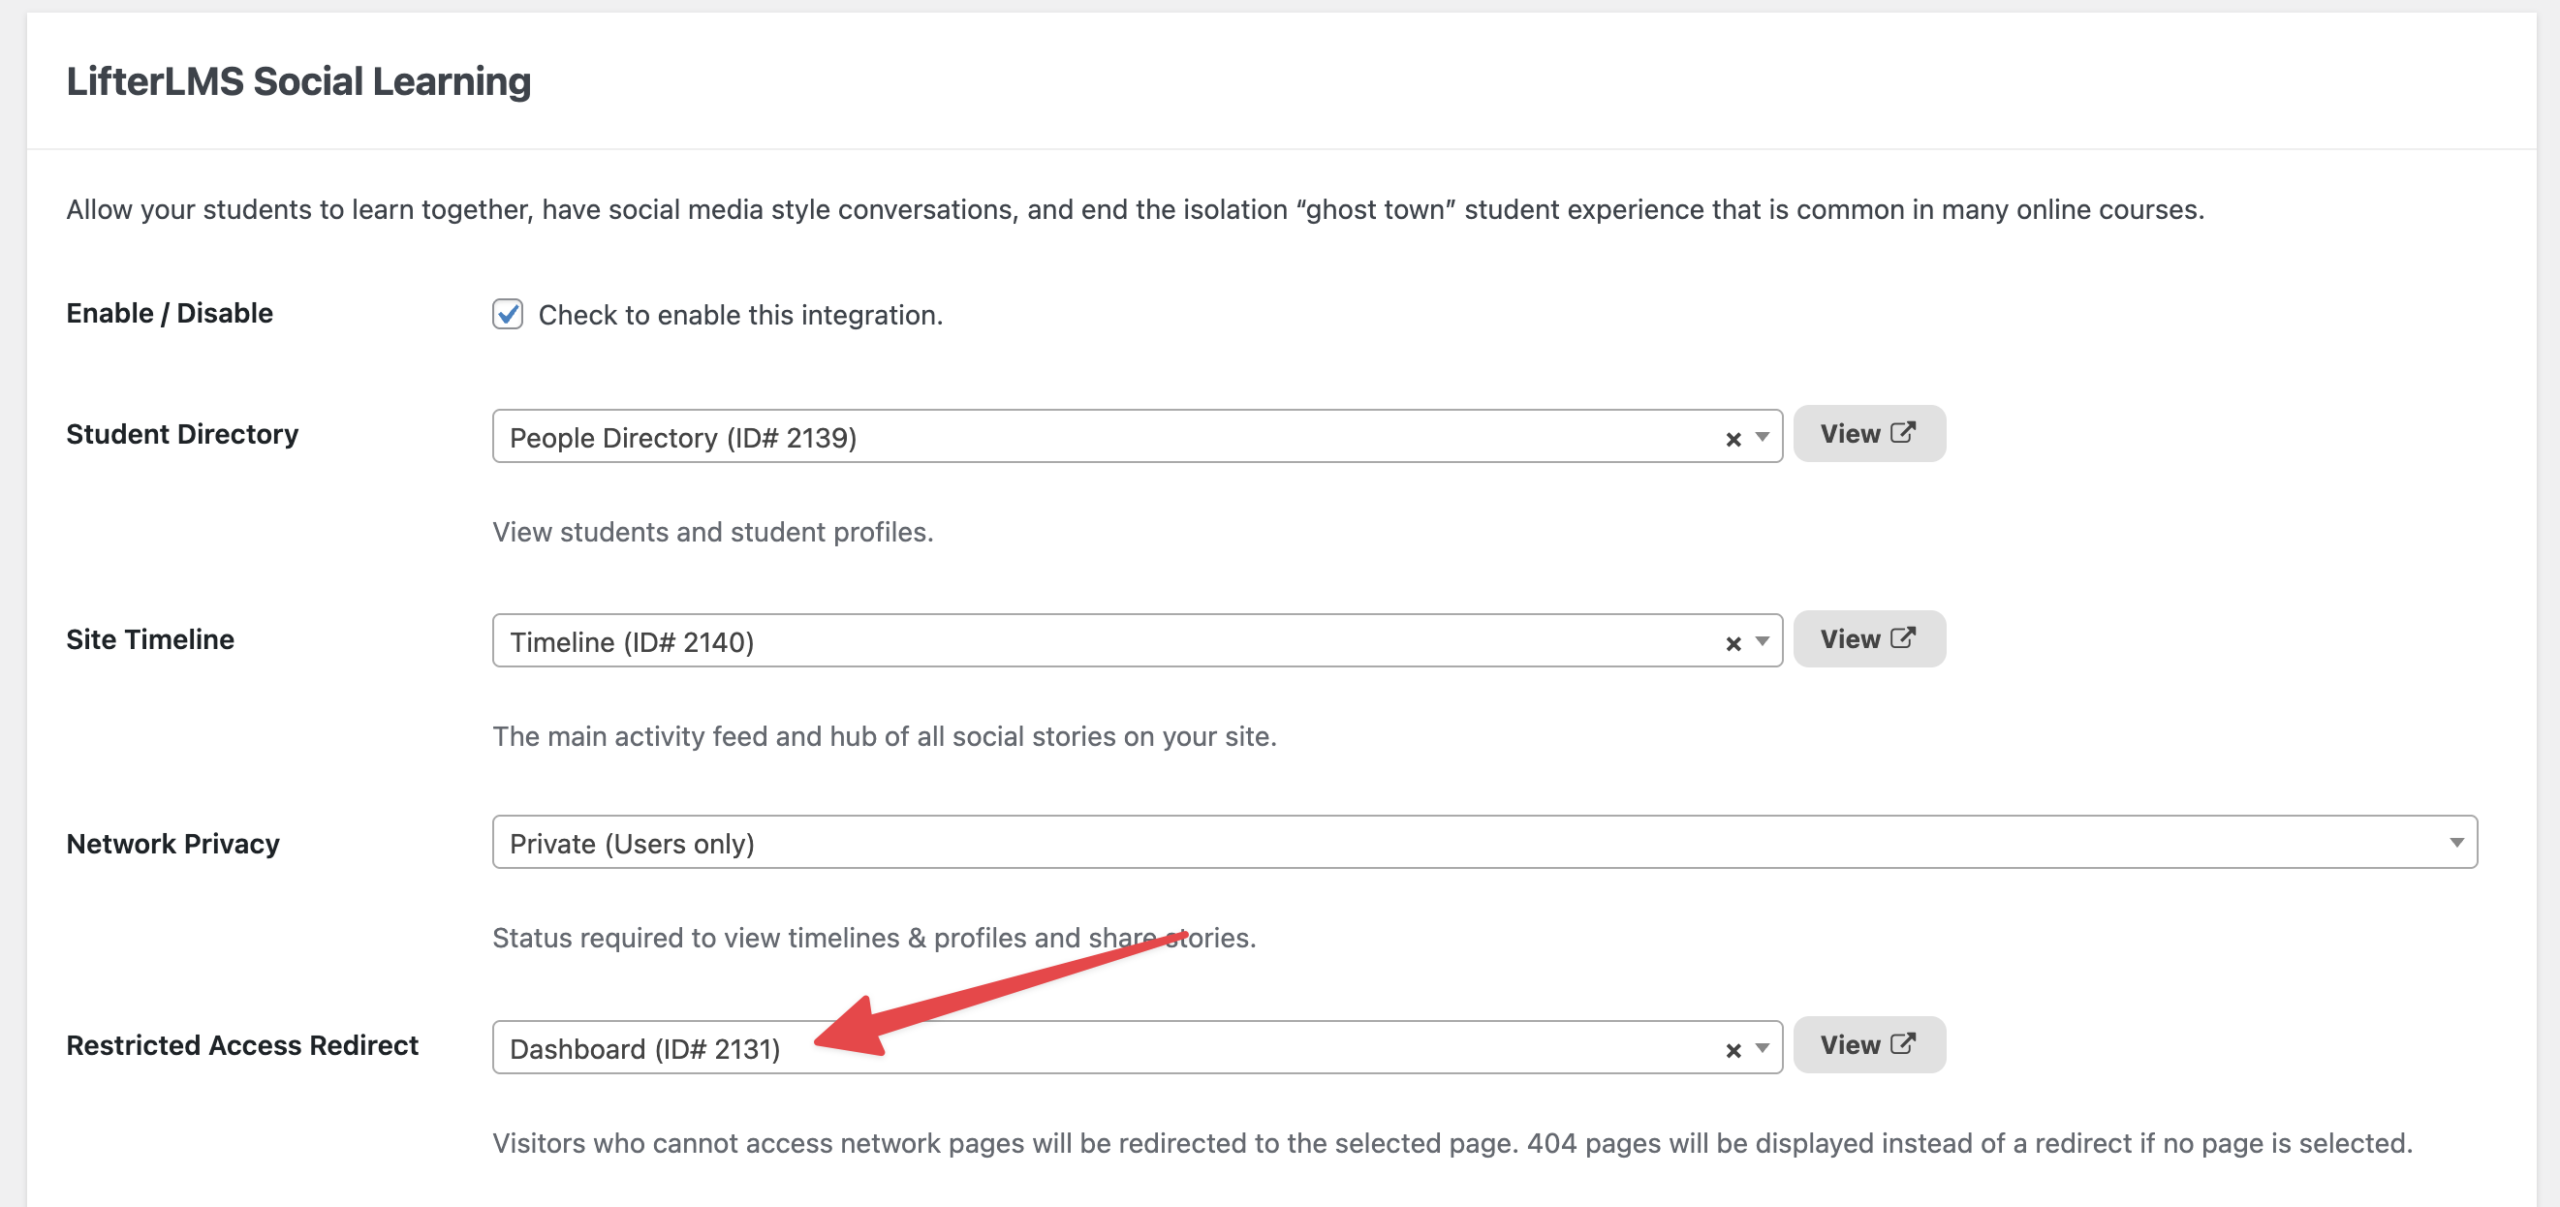
- Locate the “Restricted Access Redirect” setting if you selected a private option.
- Choose a page from the dropdown menu. Visitors who try to access a network page they do not have permission to view will be automatically redirected to this selected page.
- Click the Save Changes button.
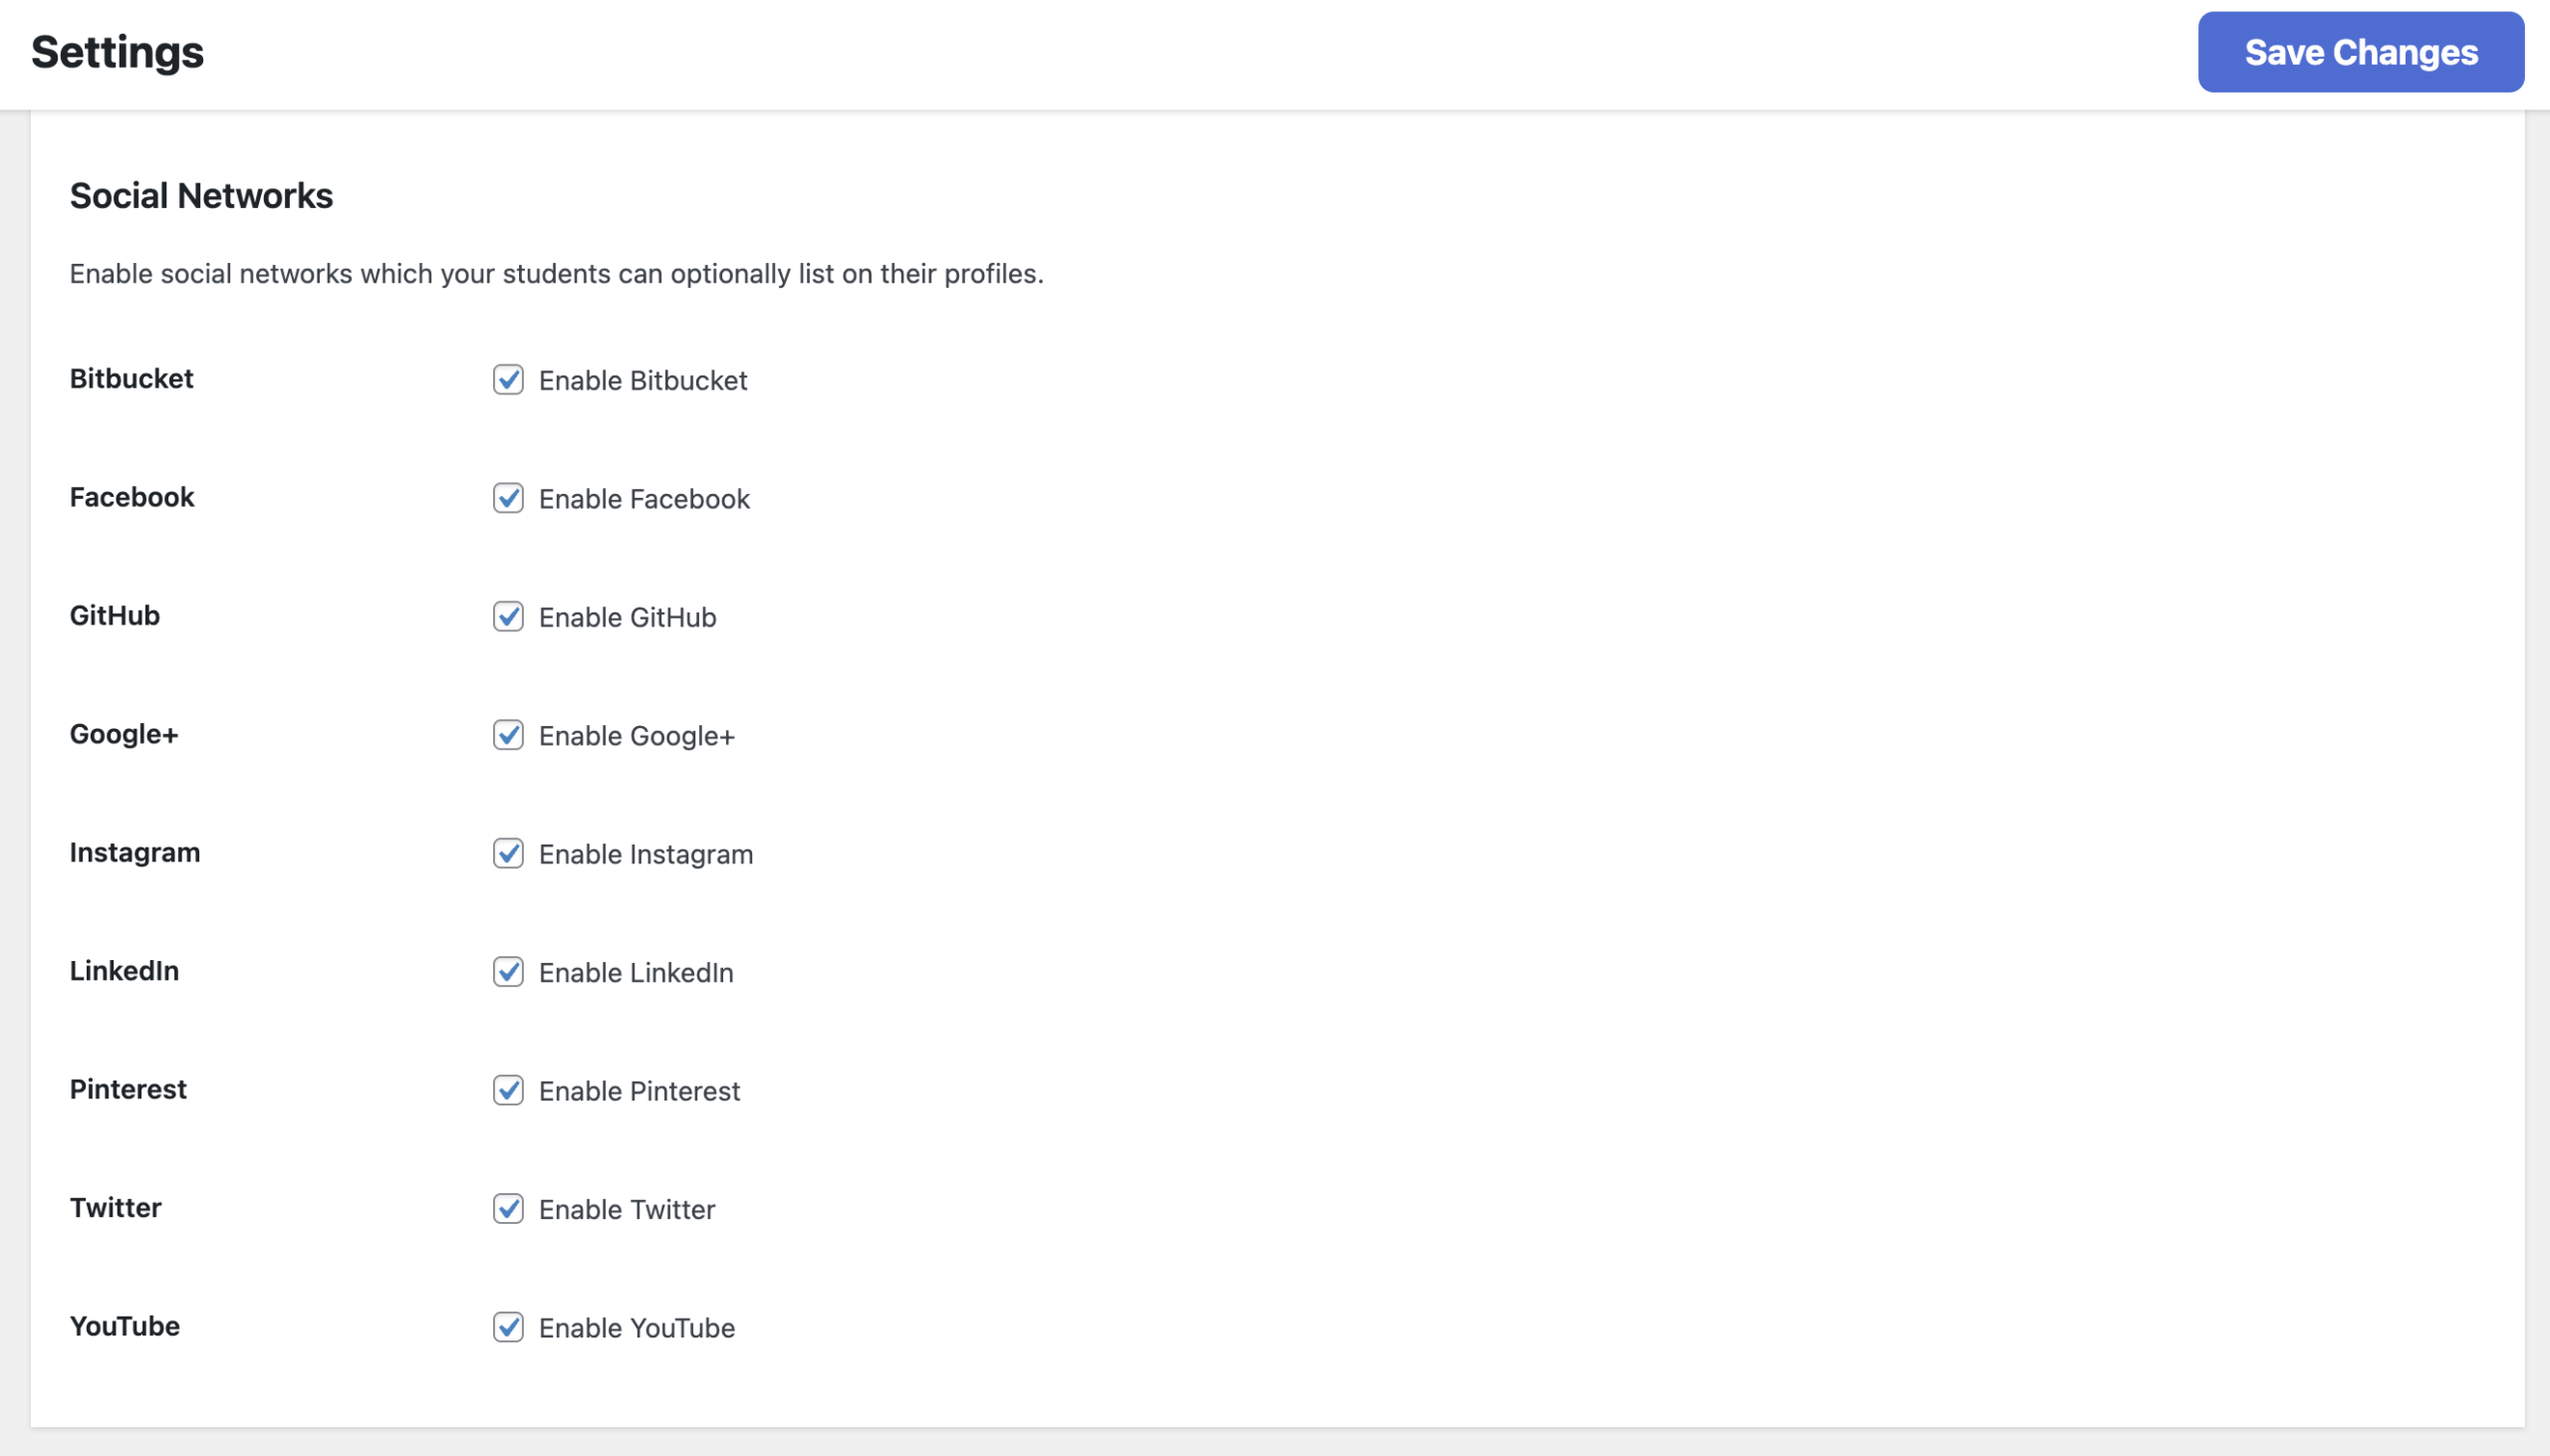
You can allow your students to display links to their personal social media accounts on their LMS profiles.
- Navigate to LifterLMS > Settings.
- Click on the “Integrations” tab.
- Click on “LifterLMS Social Learning”.
- Scroll down to the “Social Networks” section.
- Check the box next to each social network you want to make available for your students.
- Click the Save Changes button.
Once the add-on is active, users can personalize their own profiles with pictures, cover images, and biographies.
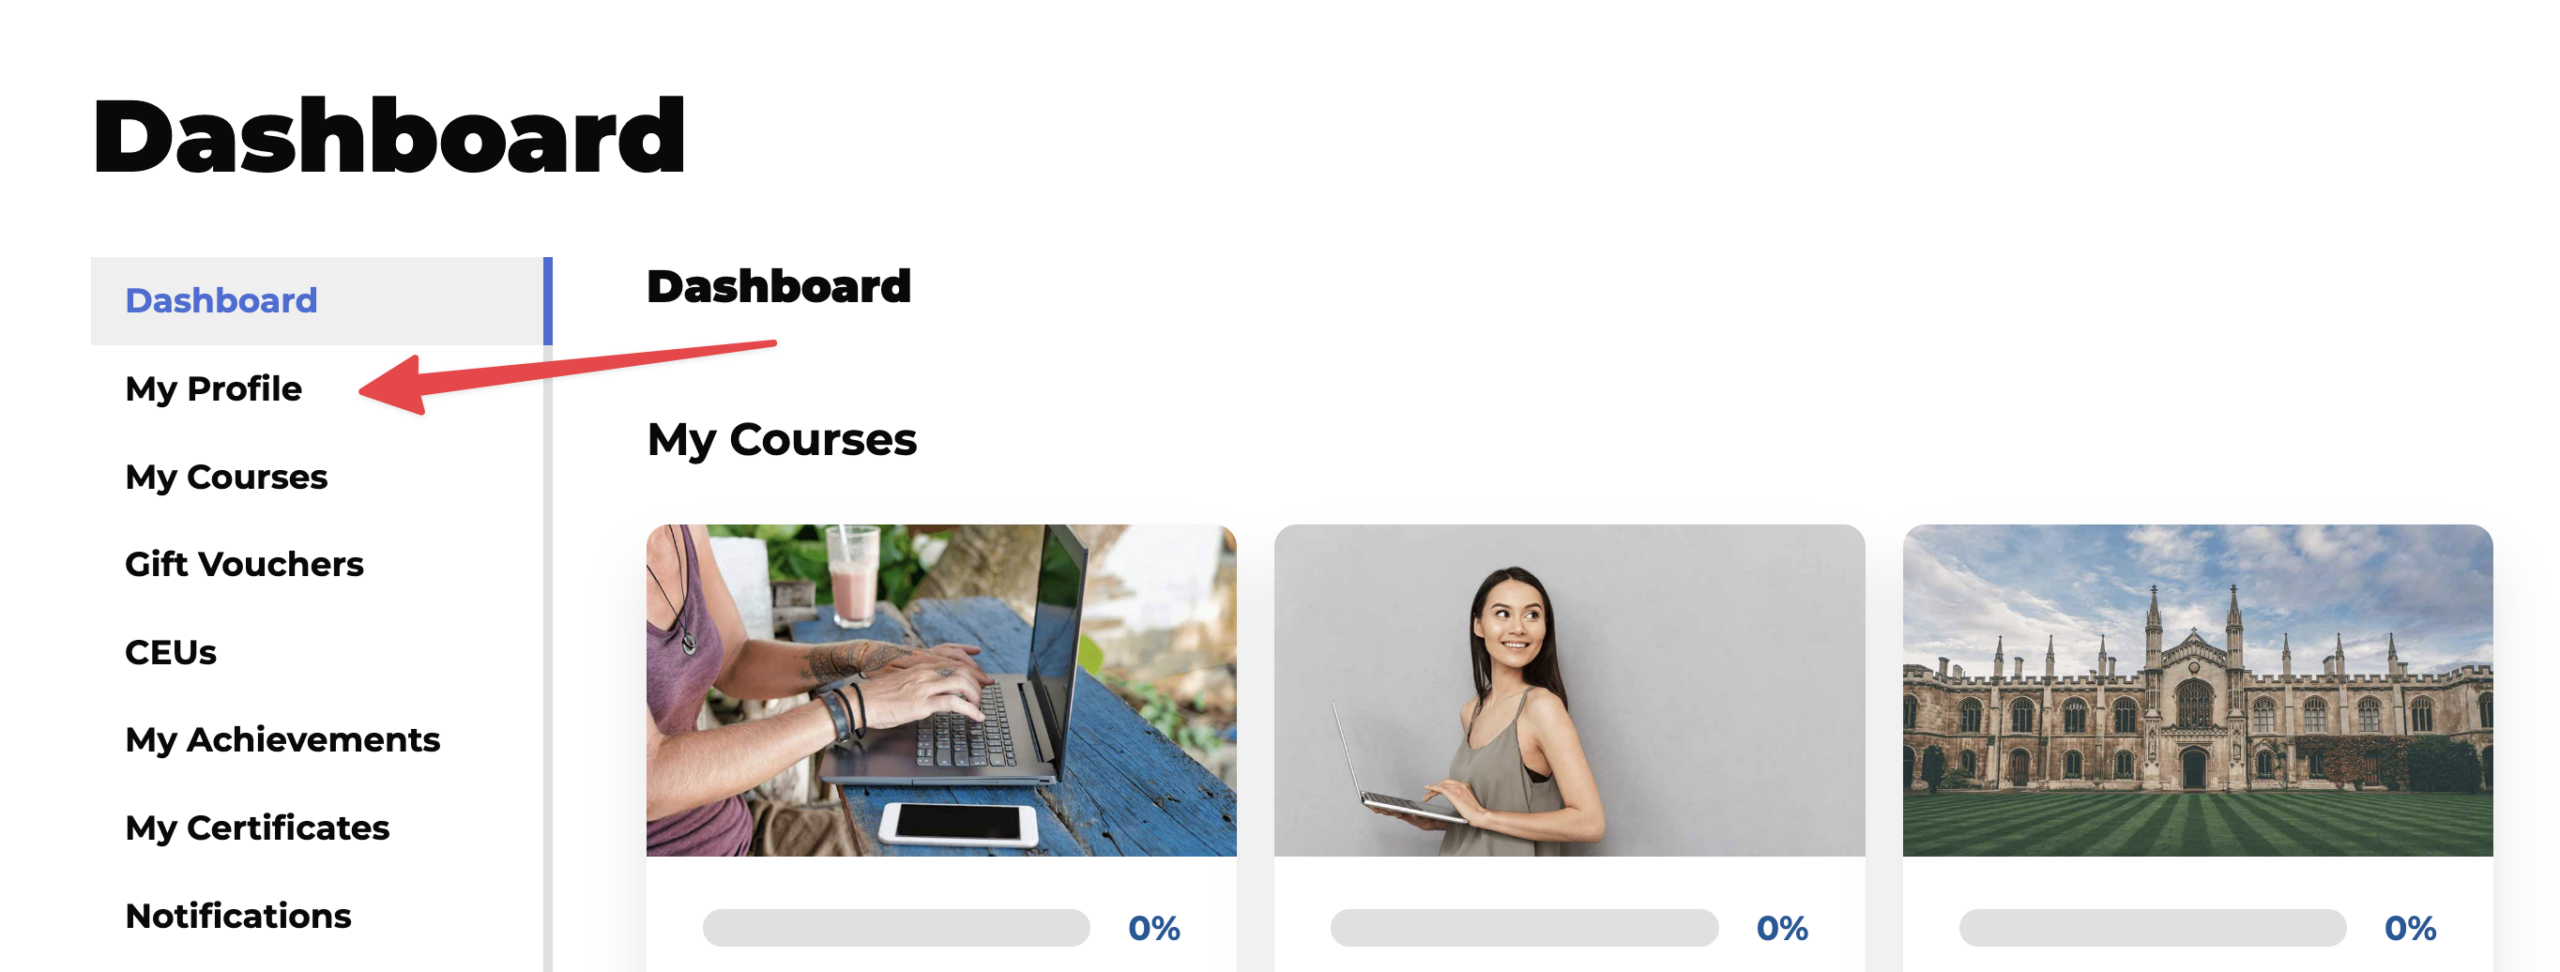
- Navigate to your student dashboard.
- Click on the “My Profile” link.
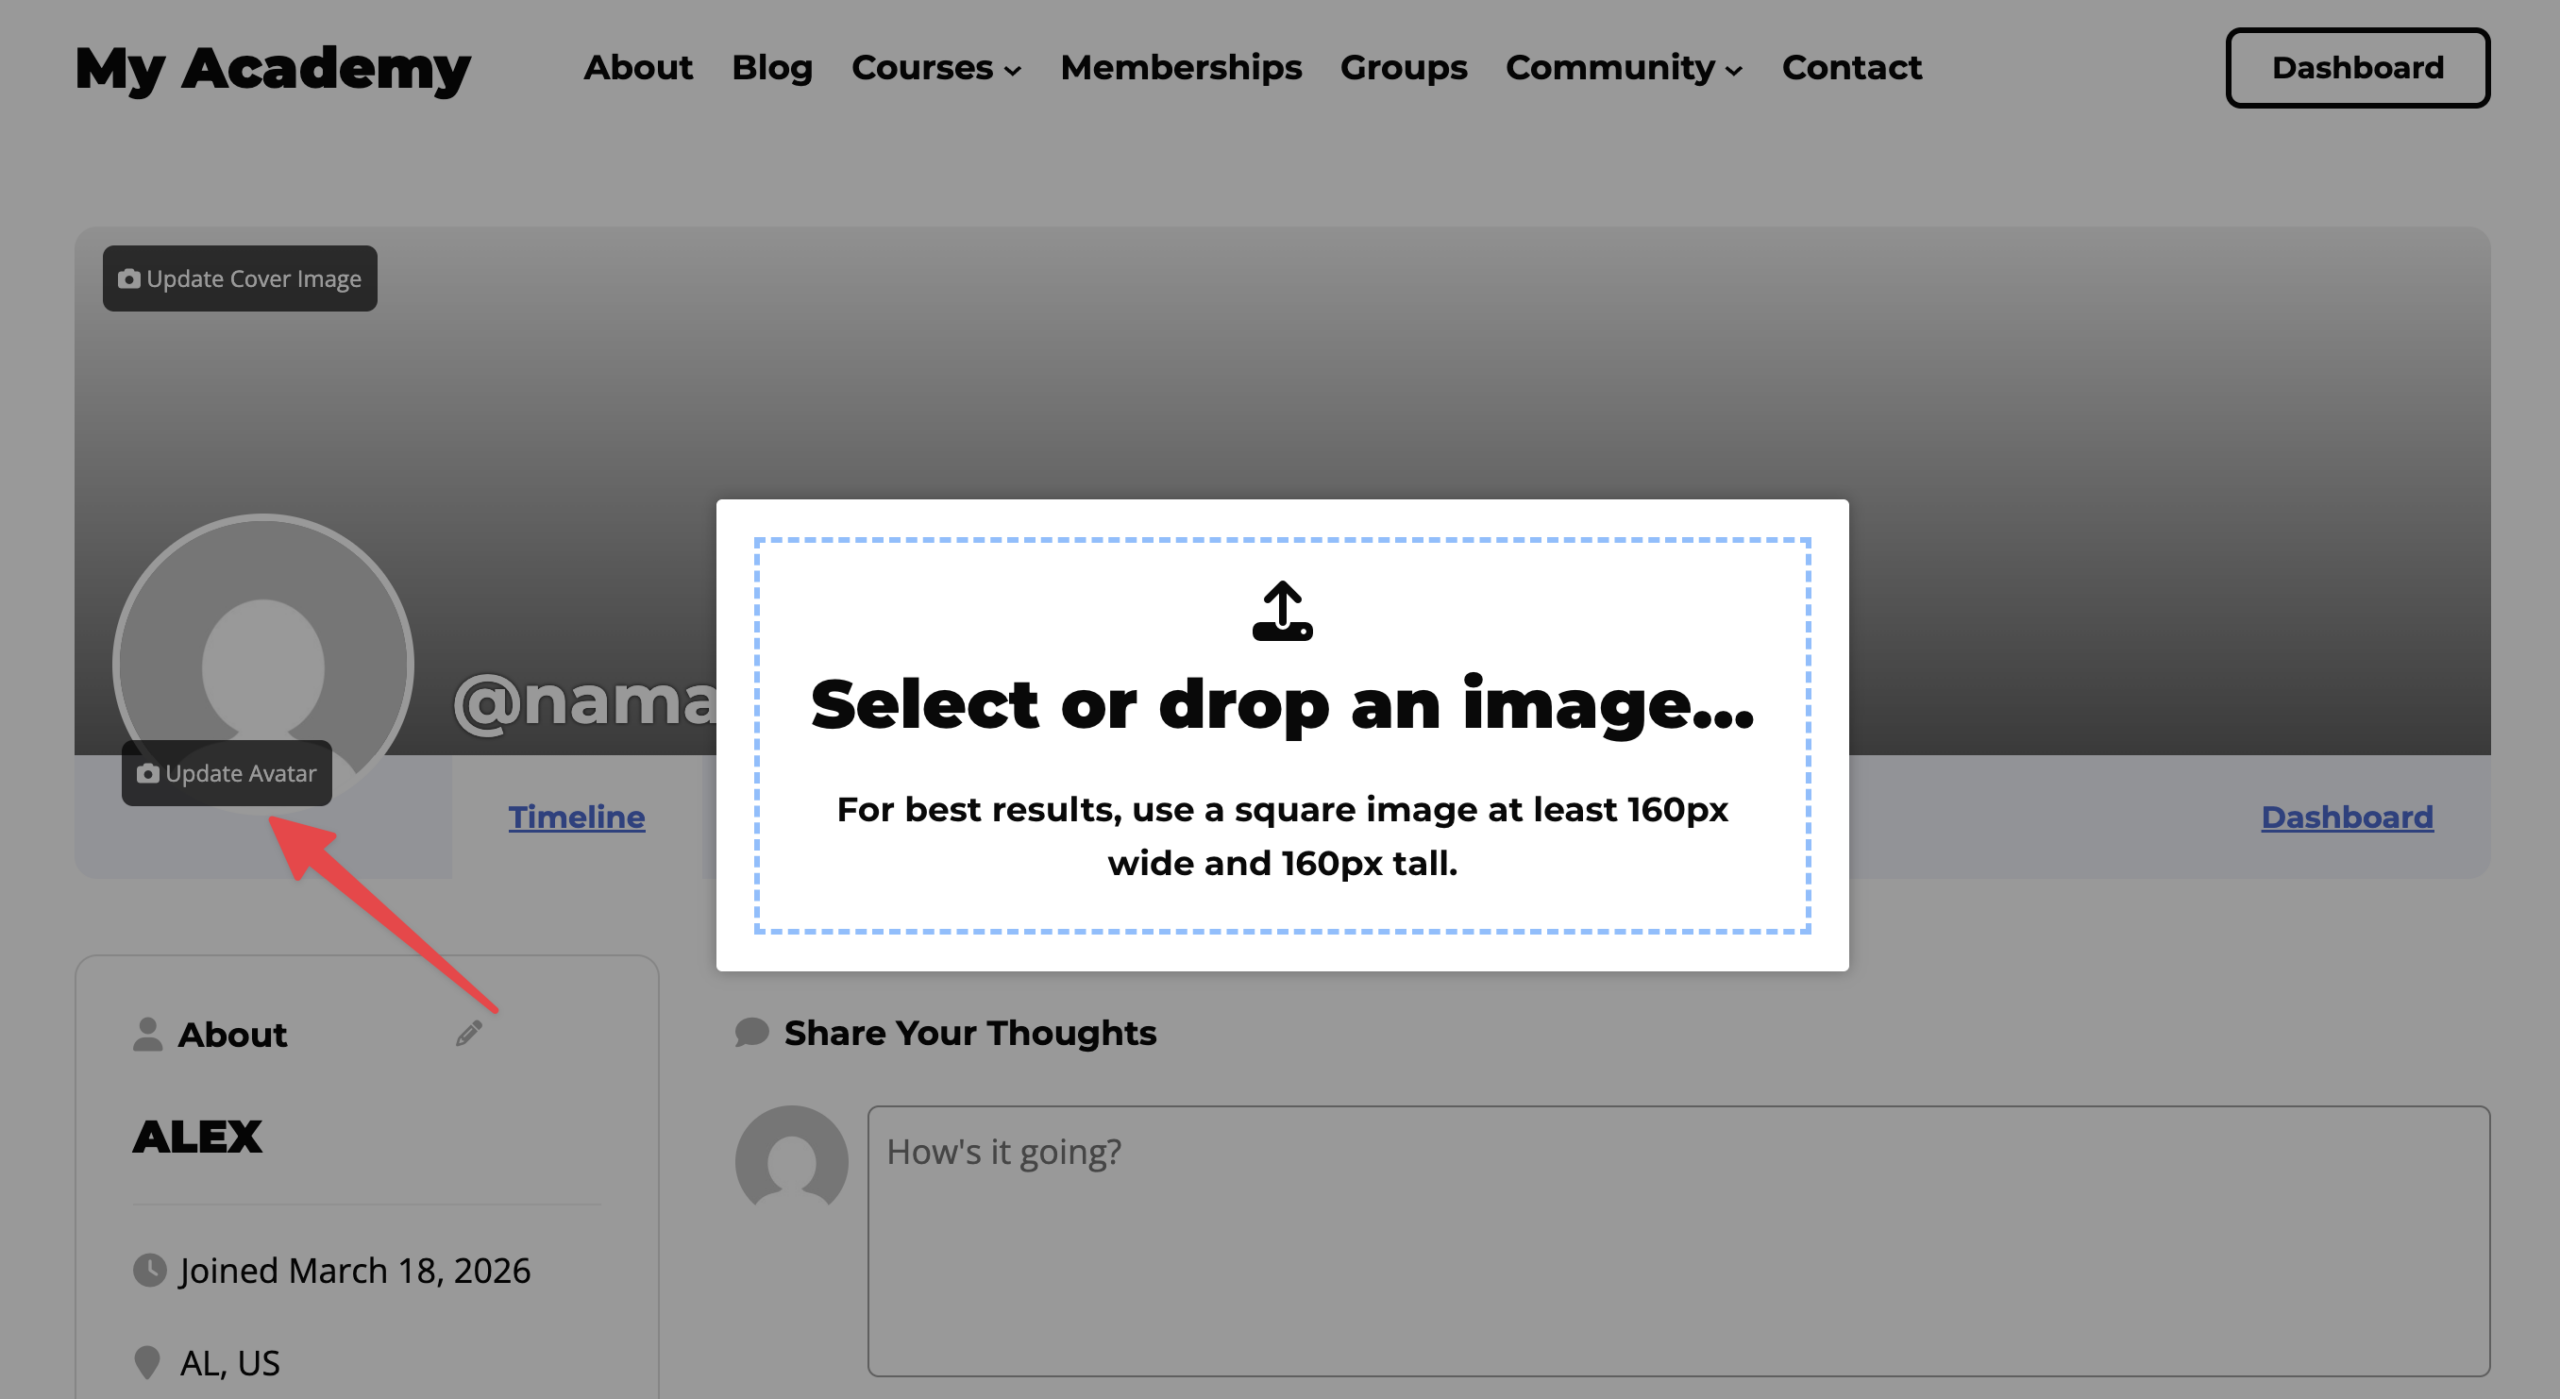
- Click the camera icon located on your profile banner to upload a custom cover image.
- Click the “Update Avatar” text or camera icon over your profile picture to upload a new photo of yourself.
- Click the edit icon next to your name to change your biography and other account details.
- Type your new biography in the text box provided.
- Enter your social media links in the fields for each social network.
- Click the Save button.
You should make it easy for your students to find the community features. The Social Learning add-on automatically creates a “People Directory” page to display all users, and a “Timeline” page to display community activity.
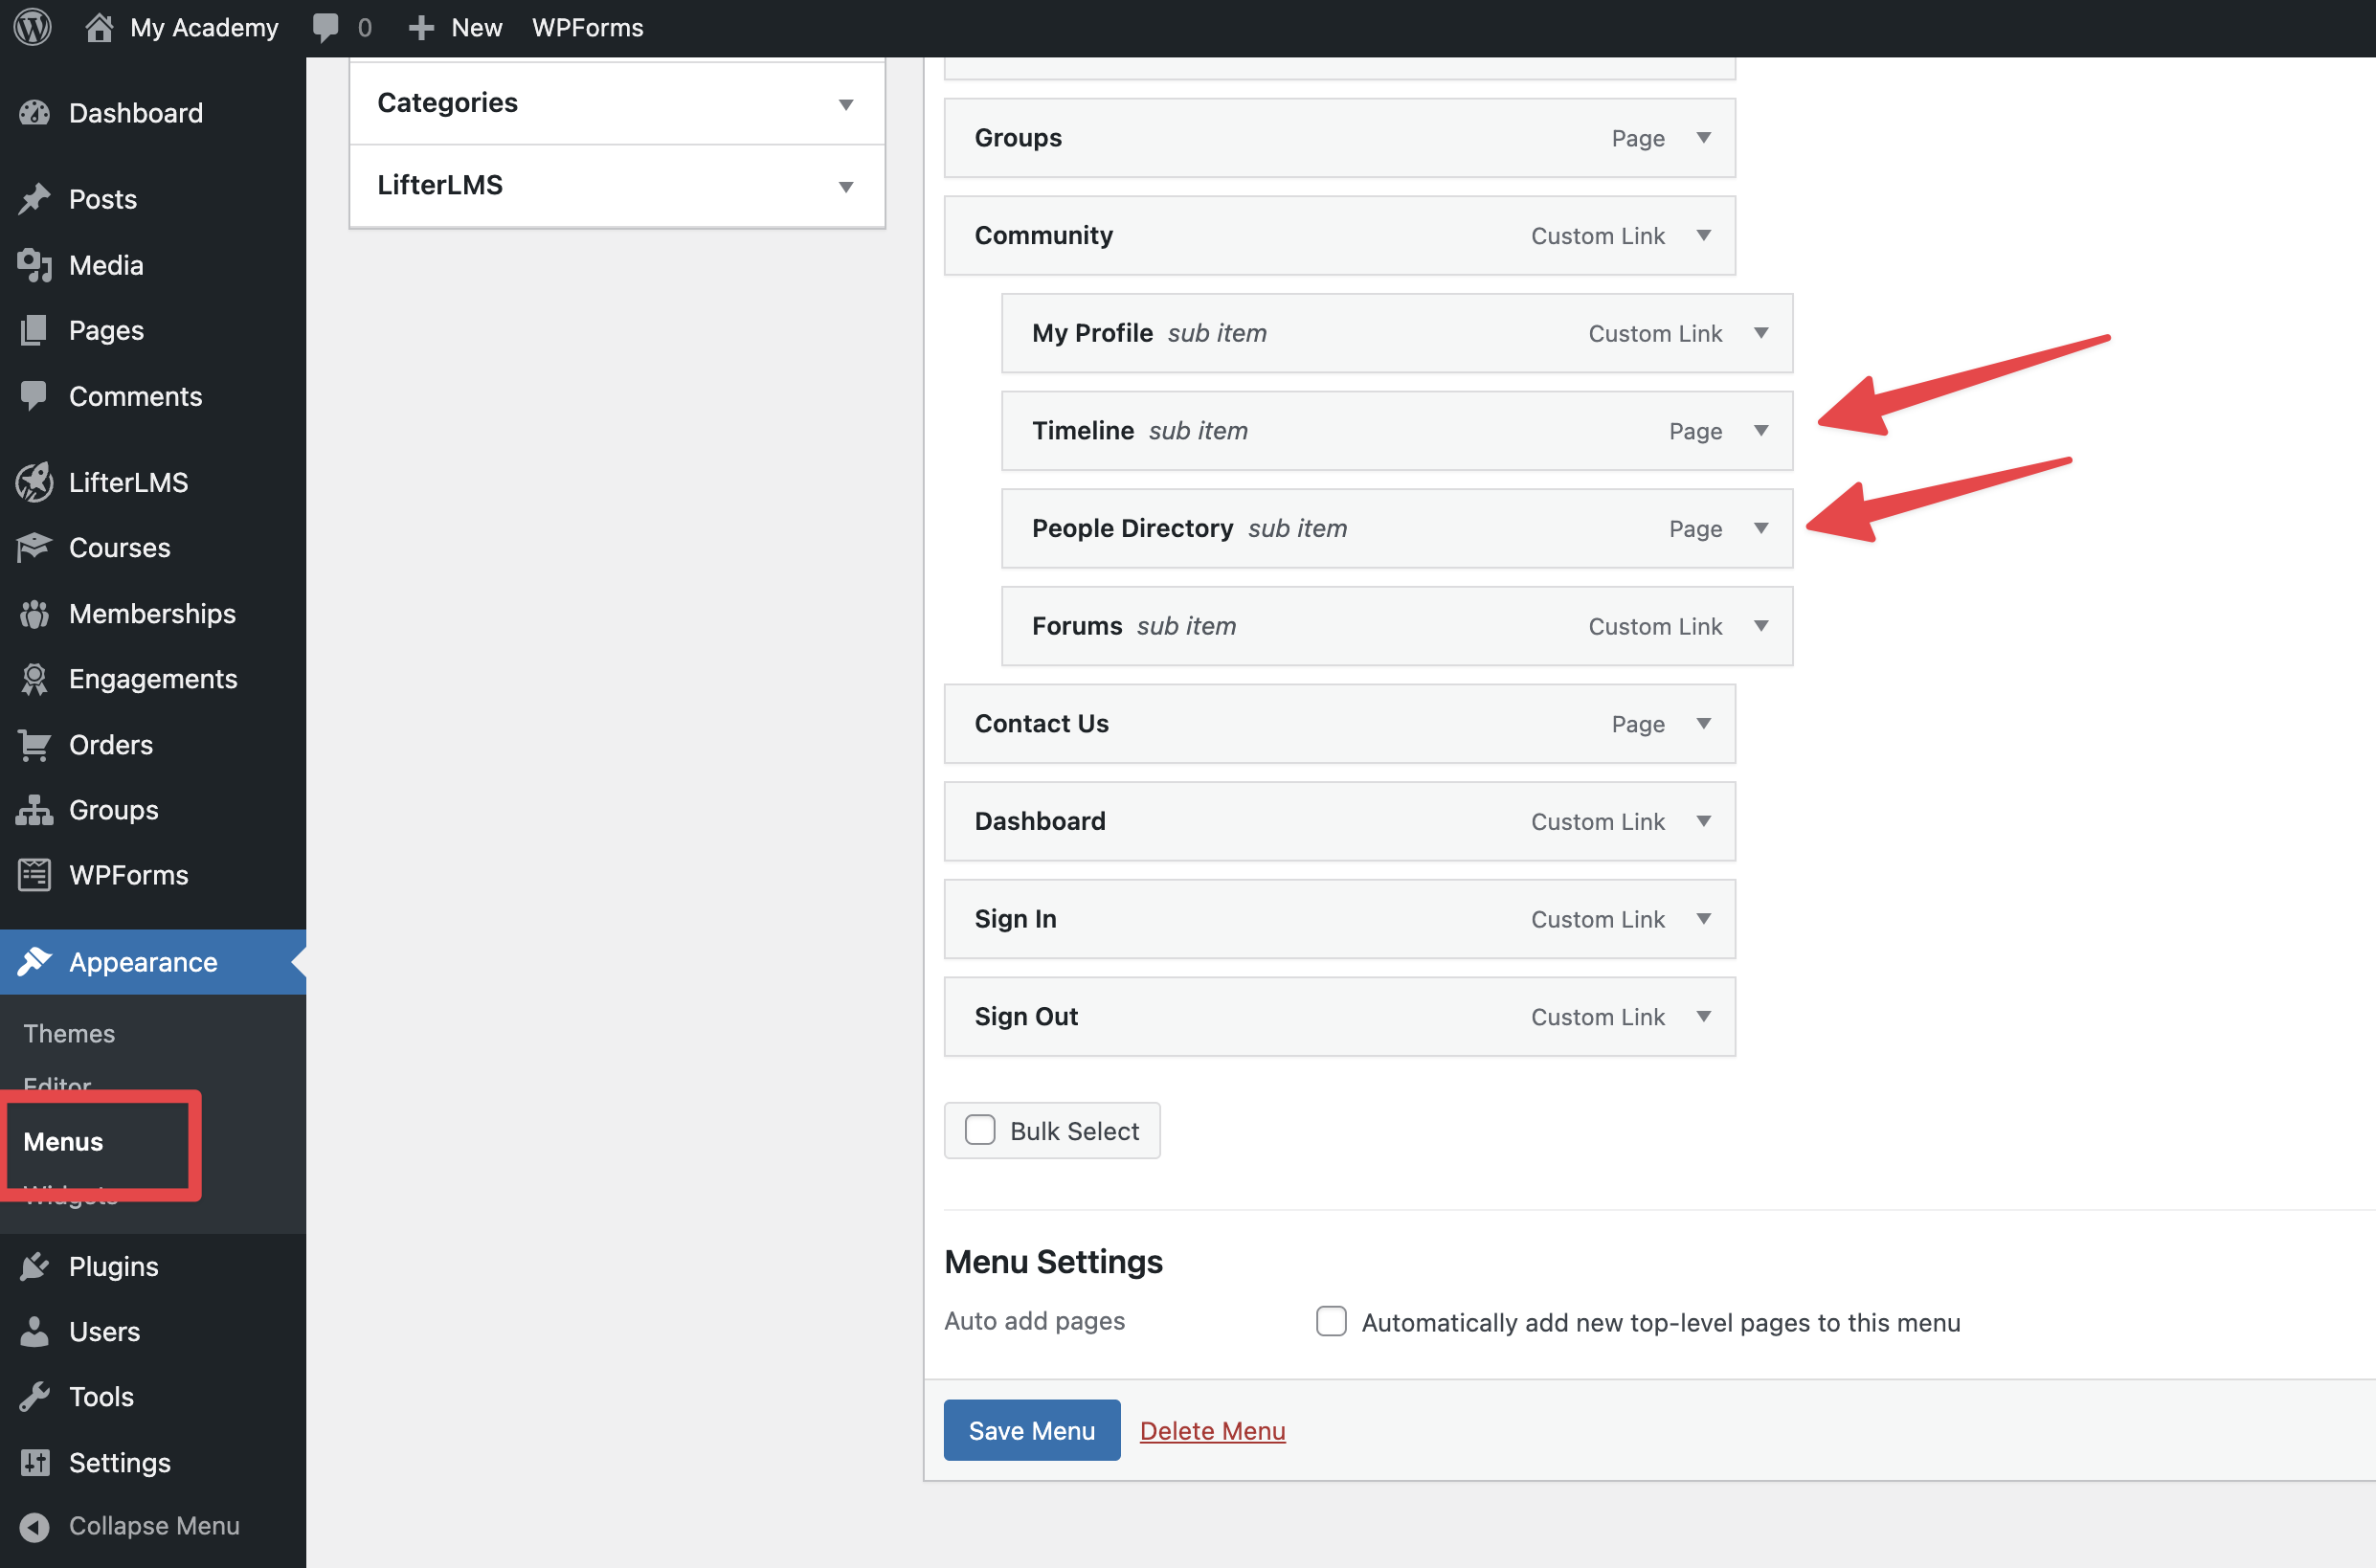
- Navigate to Appearance > Menus.
- Select your main menu from the dropdown list.
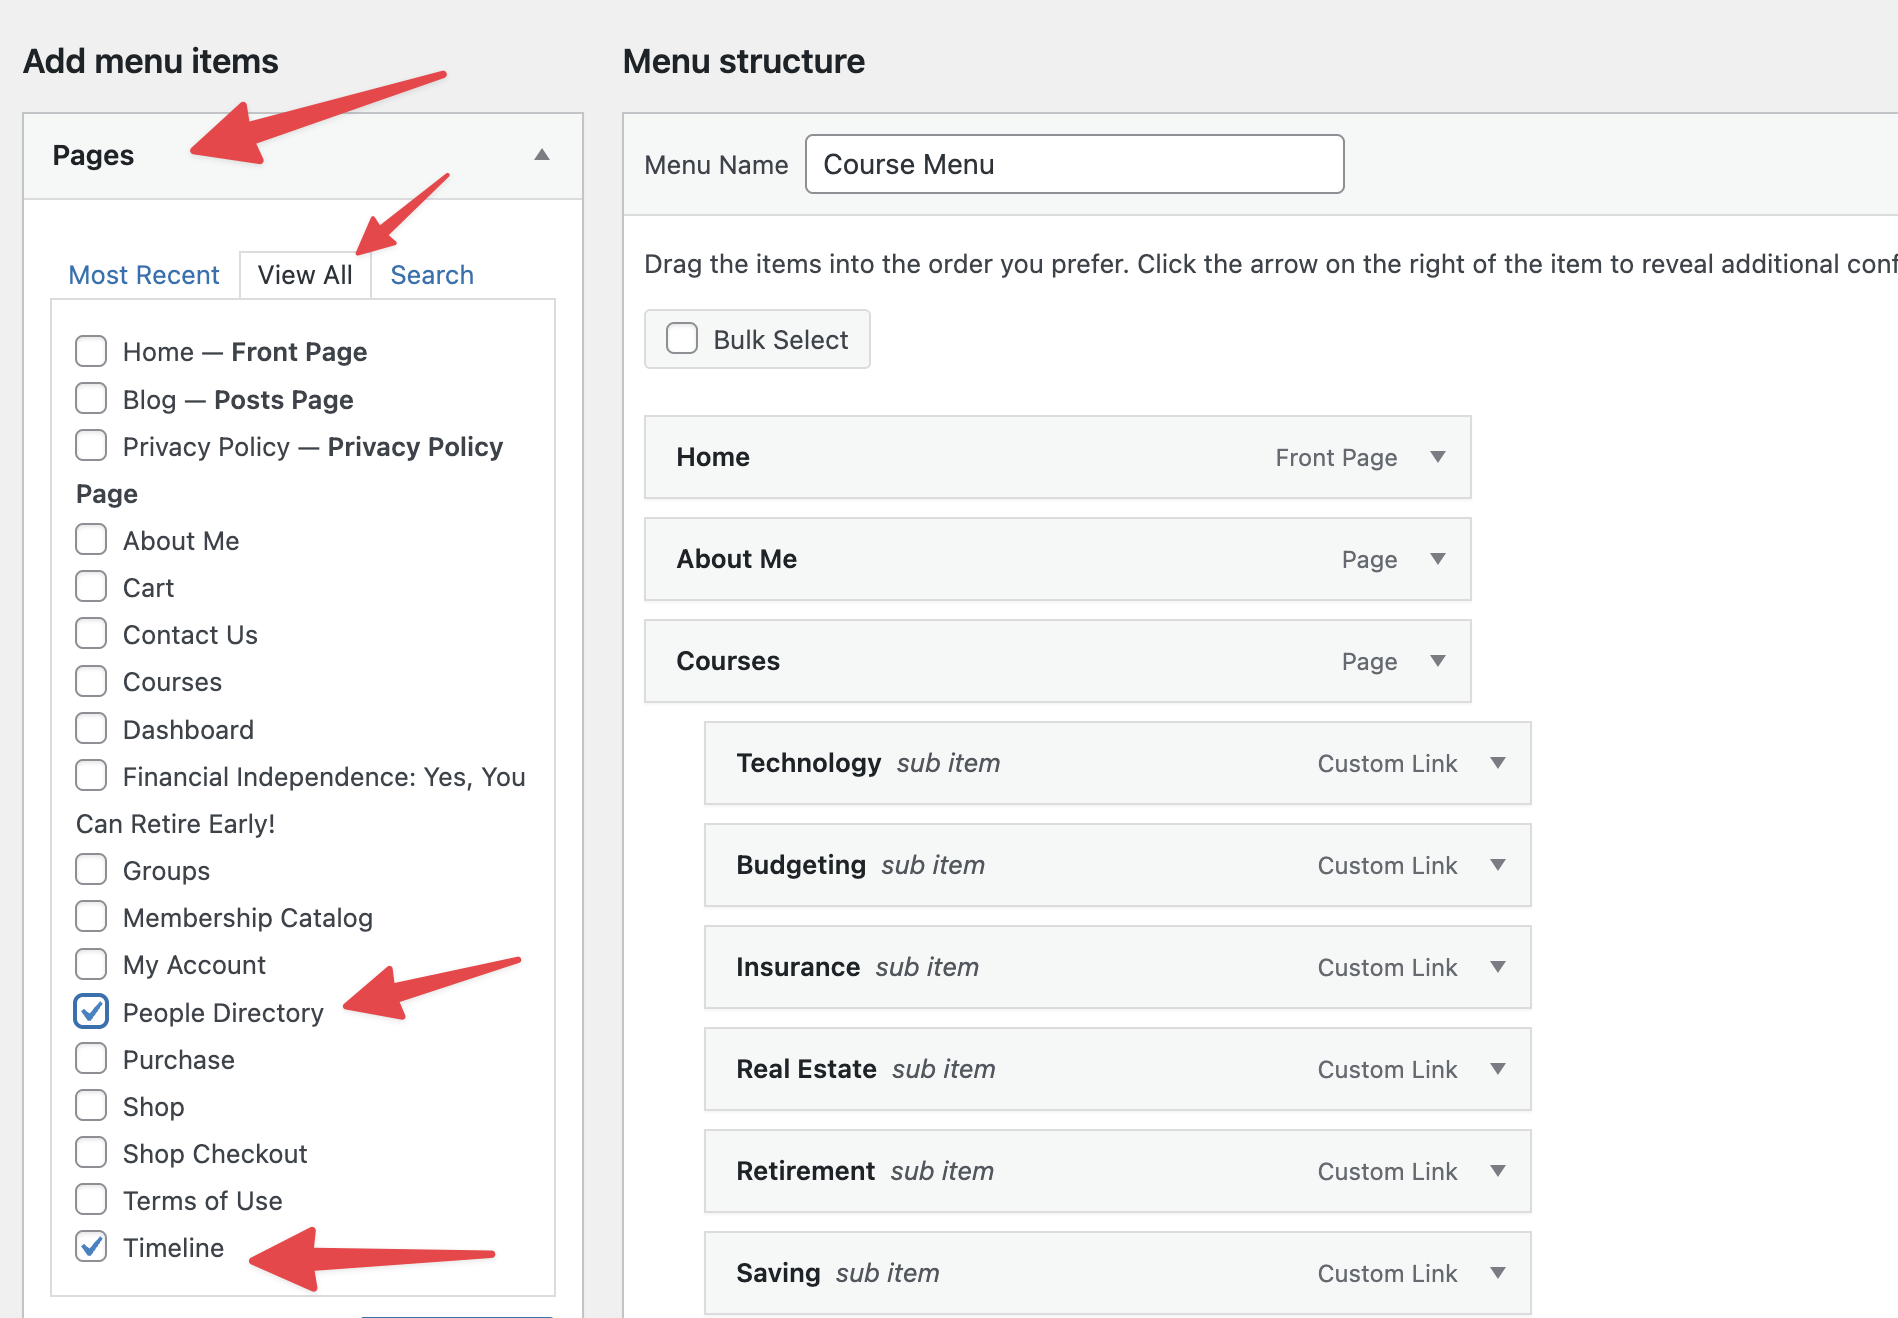
- Check the boxes next to “People Directory” and “Timeline” in the “Pages” panel on the left.
- Click the Add to Menu button.
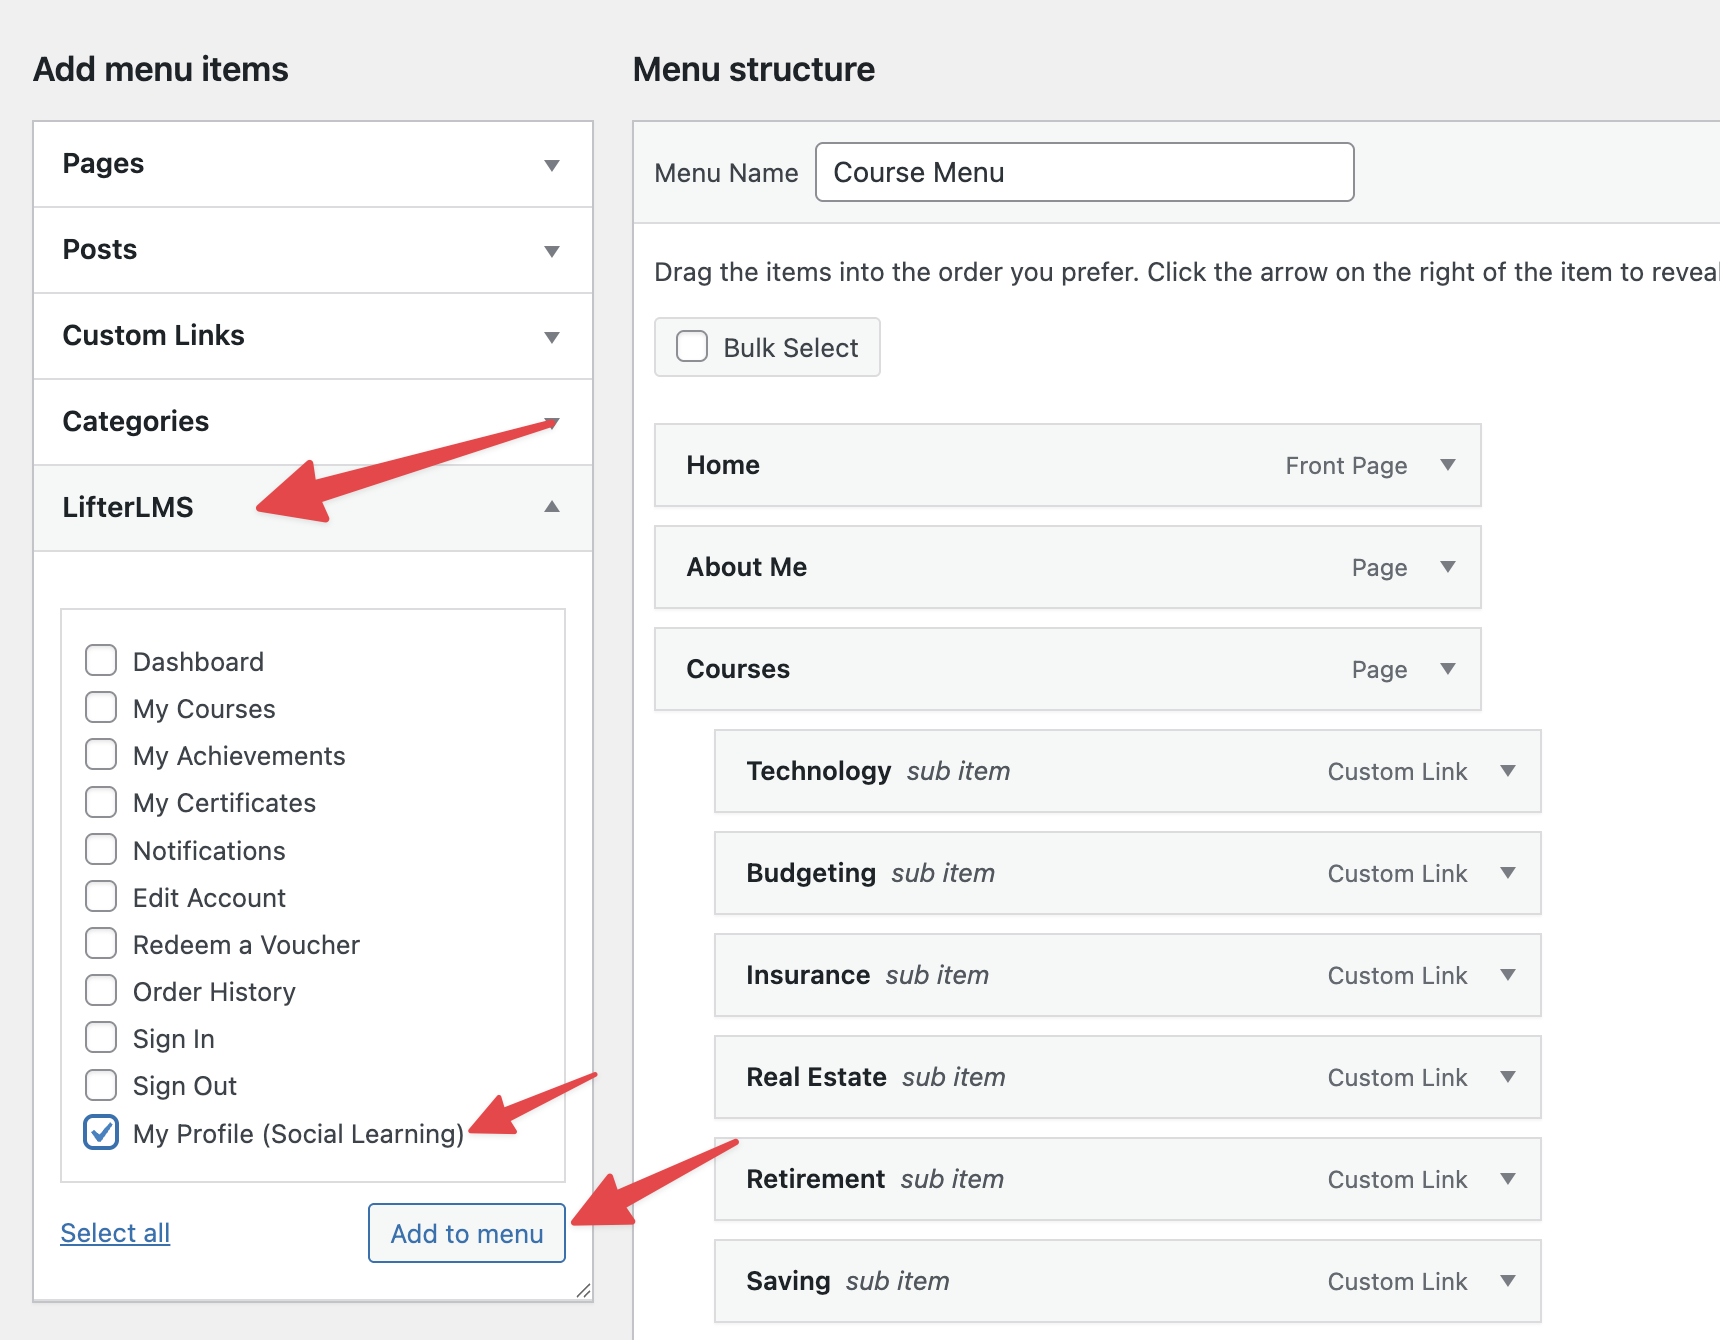
- Expand the “LifterLMS” panel on the left side to add a dynamic profile link.
- Check the box next to “My Profile”. This creates a link that automatically takes the logged-in student to their own personal profile. This link remains completely hidden from logged-out visitors. Please note that the URL for this item is #llms-sl-profile, and you must leave it exactly as it is.
- Click the Add to Menu button.
- After adding all the necessary menu items, you can rearrange them in your desired hierarchy by dragging and rearranging the menu items.
- Click the Save Menu button.
Now your community is ready to connect and communicate.
- Navigate to your new timeline page on the front end of your website.
- Type a message in the text box that says “Share Your Thoughts”.
- Click the Post button to share your message with the whole community.
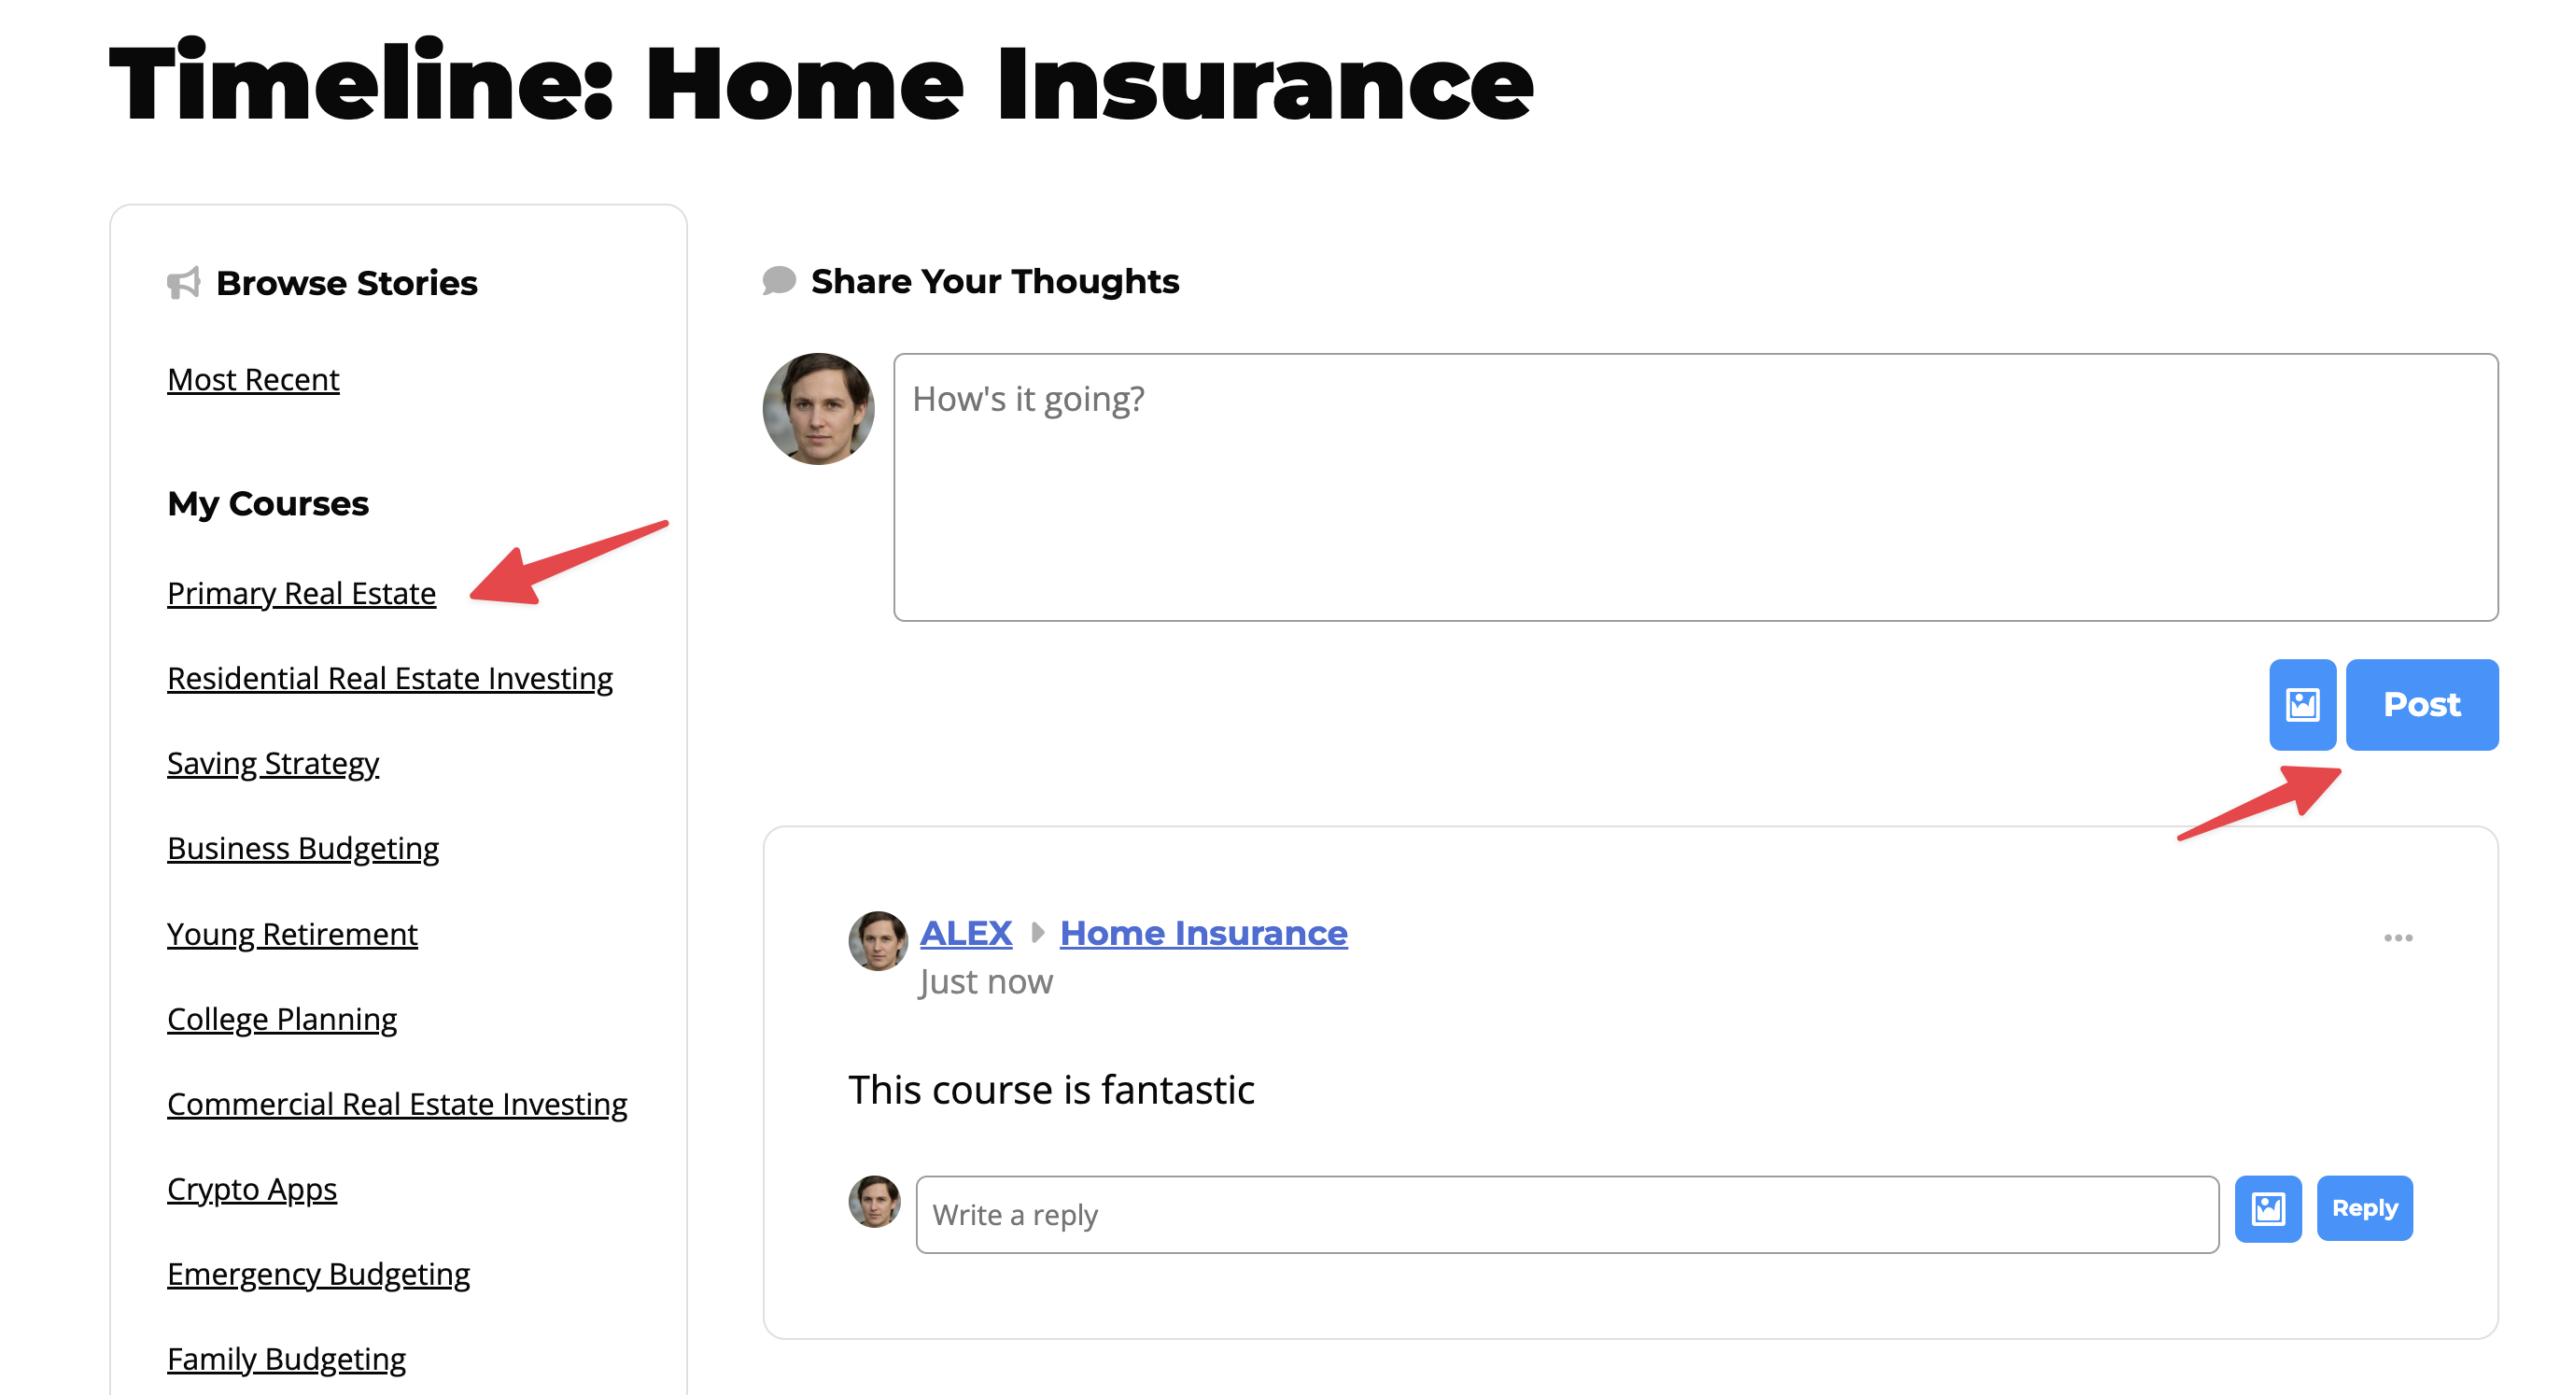
Alternatively, you can share your thoughts with a focused community by posting directly on the timeline of a specific course or membership. Just like most popular social media platforms, you can actively participate in ongoing conversations by typing a response in the “Write a reply” box under other people’s posts.
You can also make your messages more engaging by uploading images to share with your peers. These familiar social features make it easy to connect, ask questions, and learn together with your fellow students.


