Getting Started with LifterLMS Groups
Note: This video references the LifterLMS Helper plugin, which is no longer required. The written steps below reflect the current and recommended setup for LifterLMS Groups.
The LifterLMS Groups add-on allows you to sell your courses or memberships to organizations, companies, schools, or families. A group leader can manage their own members and track their progress through a dedicated dashboard.
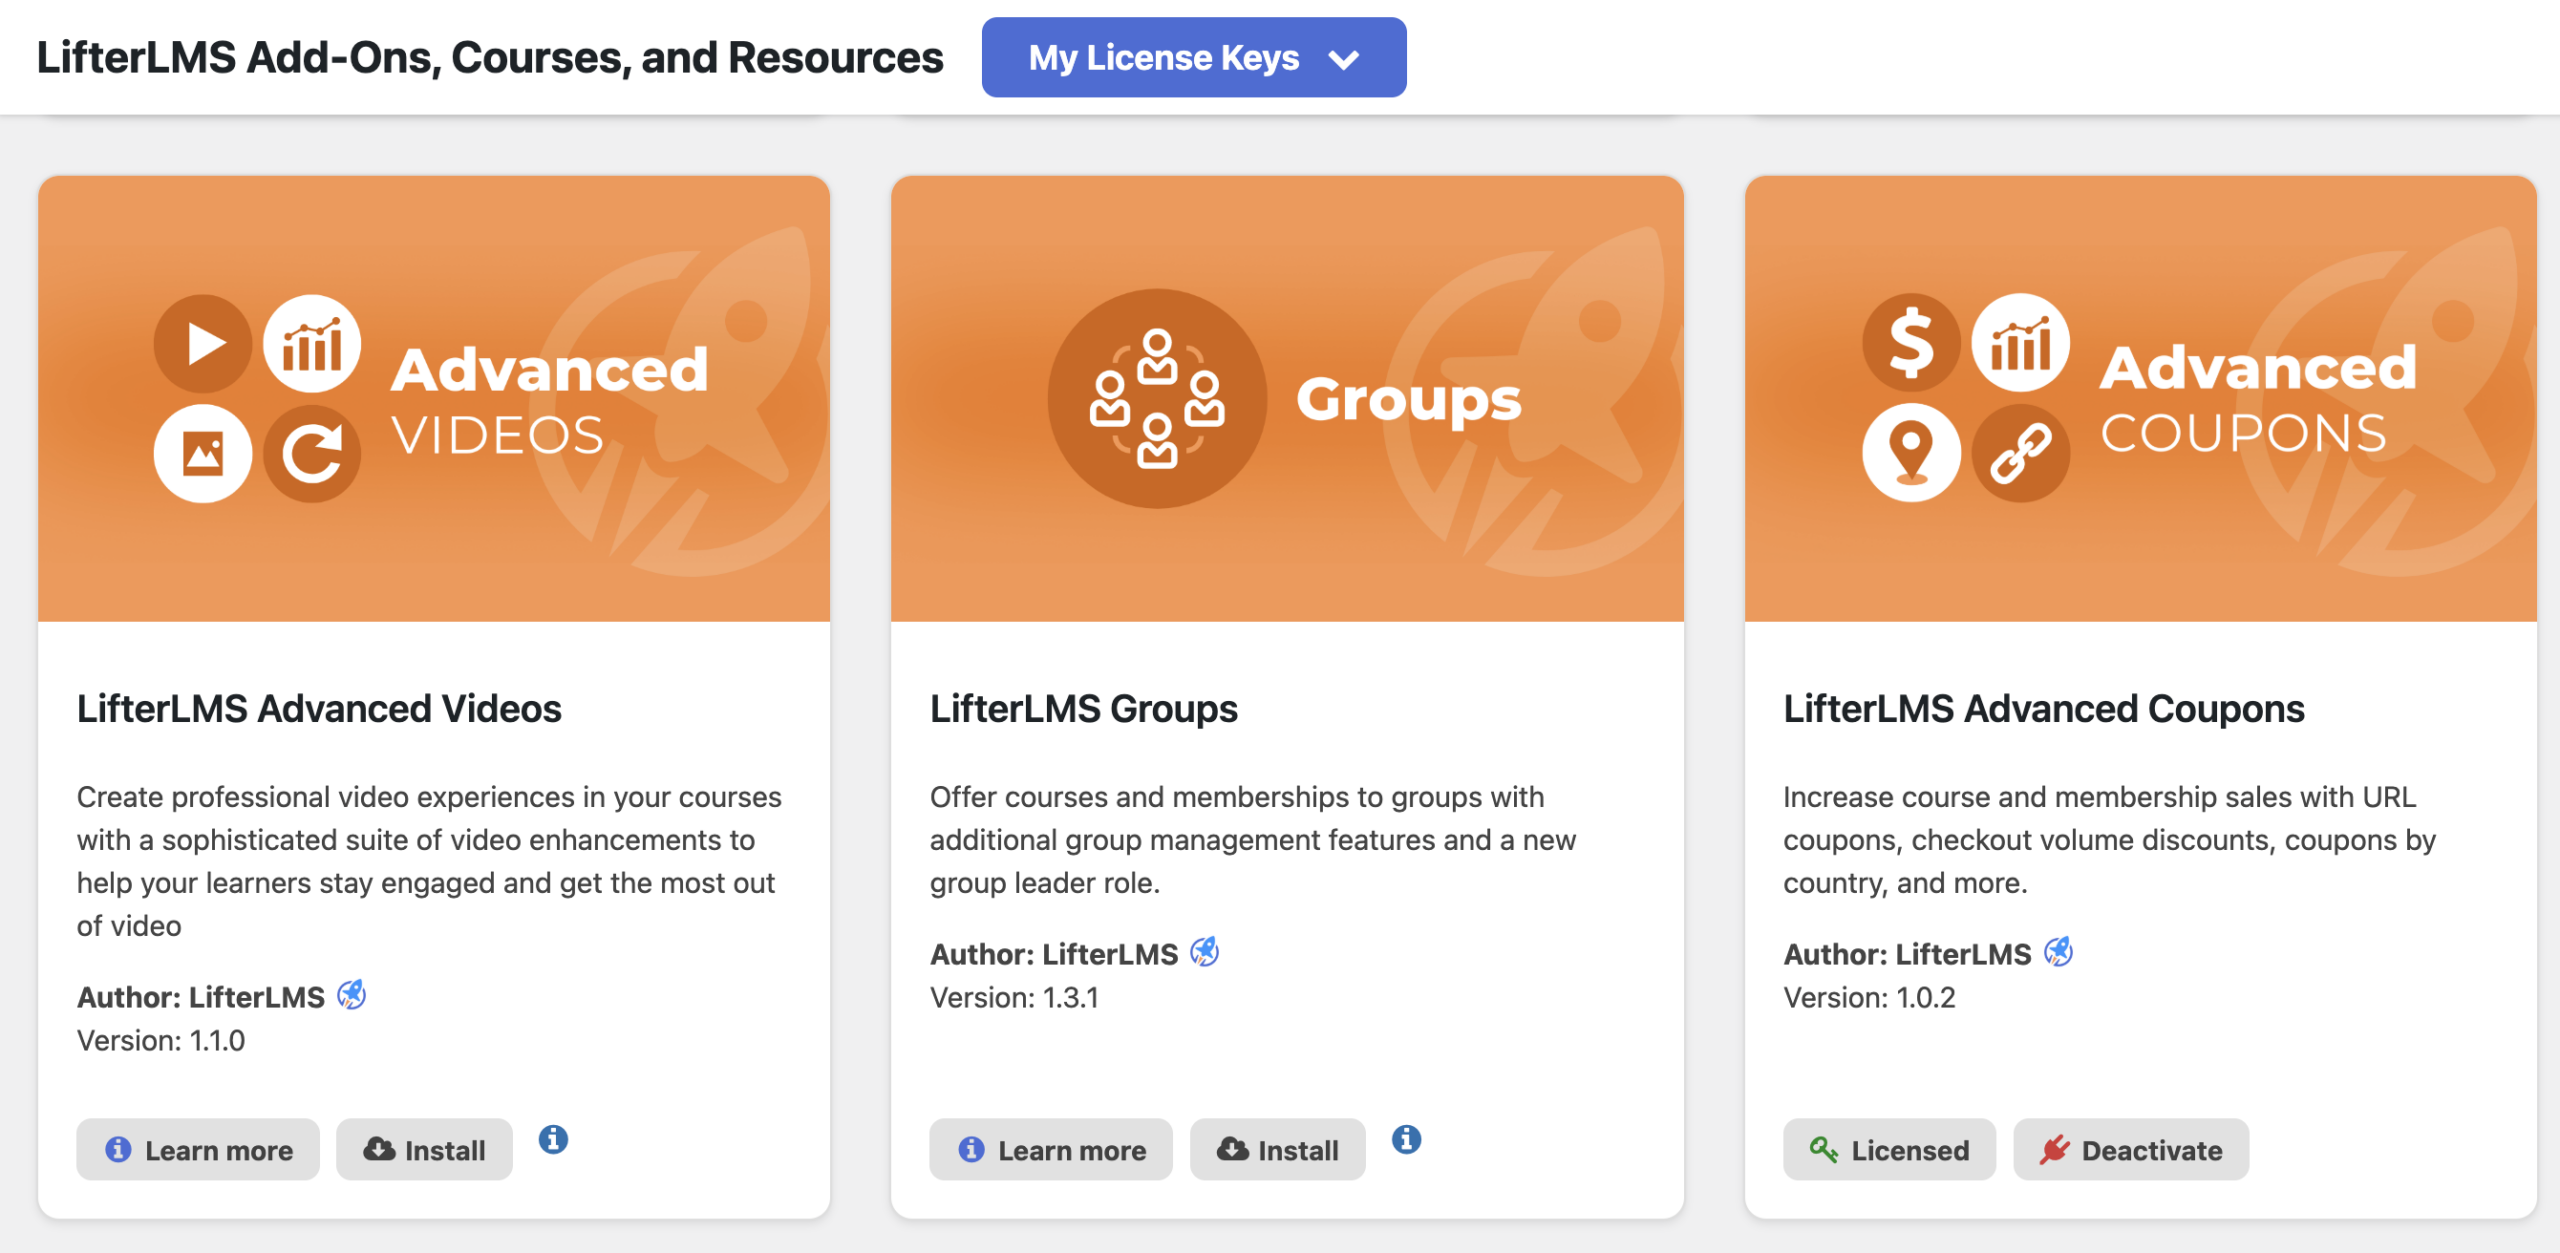
You can install the Groups add-on directly through your WordPress dashboard if you have an active license.
- Log in to your WordPress admin dashboard.
- Navigate to LifterLMS > Add-ons.
- Click on the “All” tab to see the list of available products.
- Locate “Groups” in the list or use the search bar to find it.
- Click the Install button.
- Click the Activate button once the installation finishes.
Once the add-on is active, you can begin creating groups for your clients or organizations.
- Navigate to the Groups menu in the WordPress dashboard.
- Click the Add New Group button.
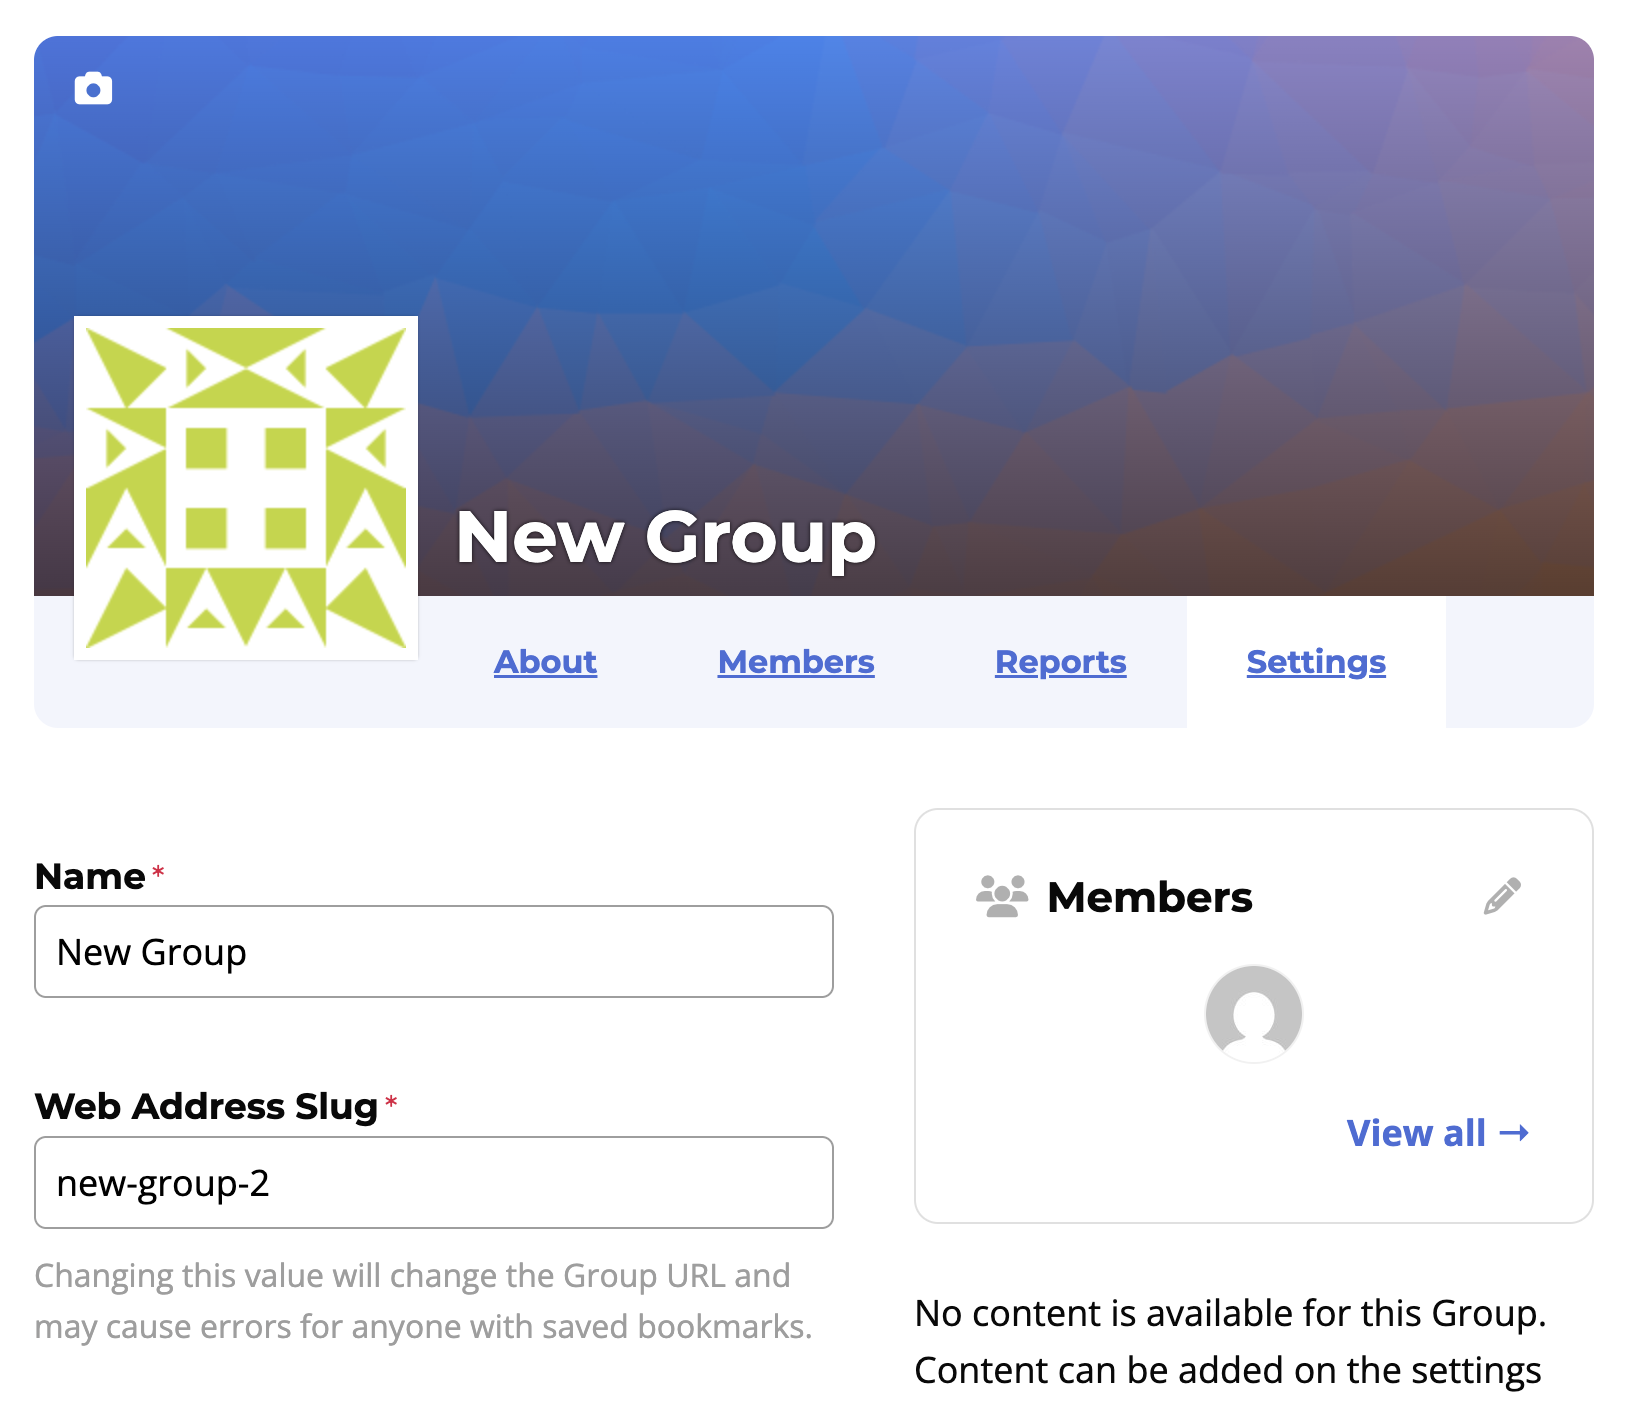
- Type a name for the group in the “Add Title” field.
- Locate the “Web Address Slug” field and enter a unique name for the group URL.
- Choose a “Visibility” setting to determine whether the group is private or public.
- Look for the “Course or Membership” field to select which content the group members will access.
- Click the Save or Publish button to create the group.
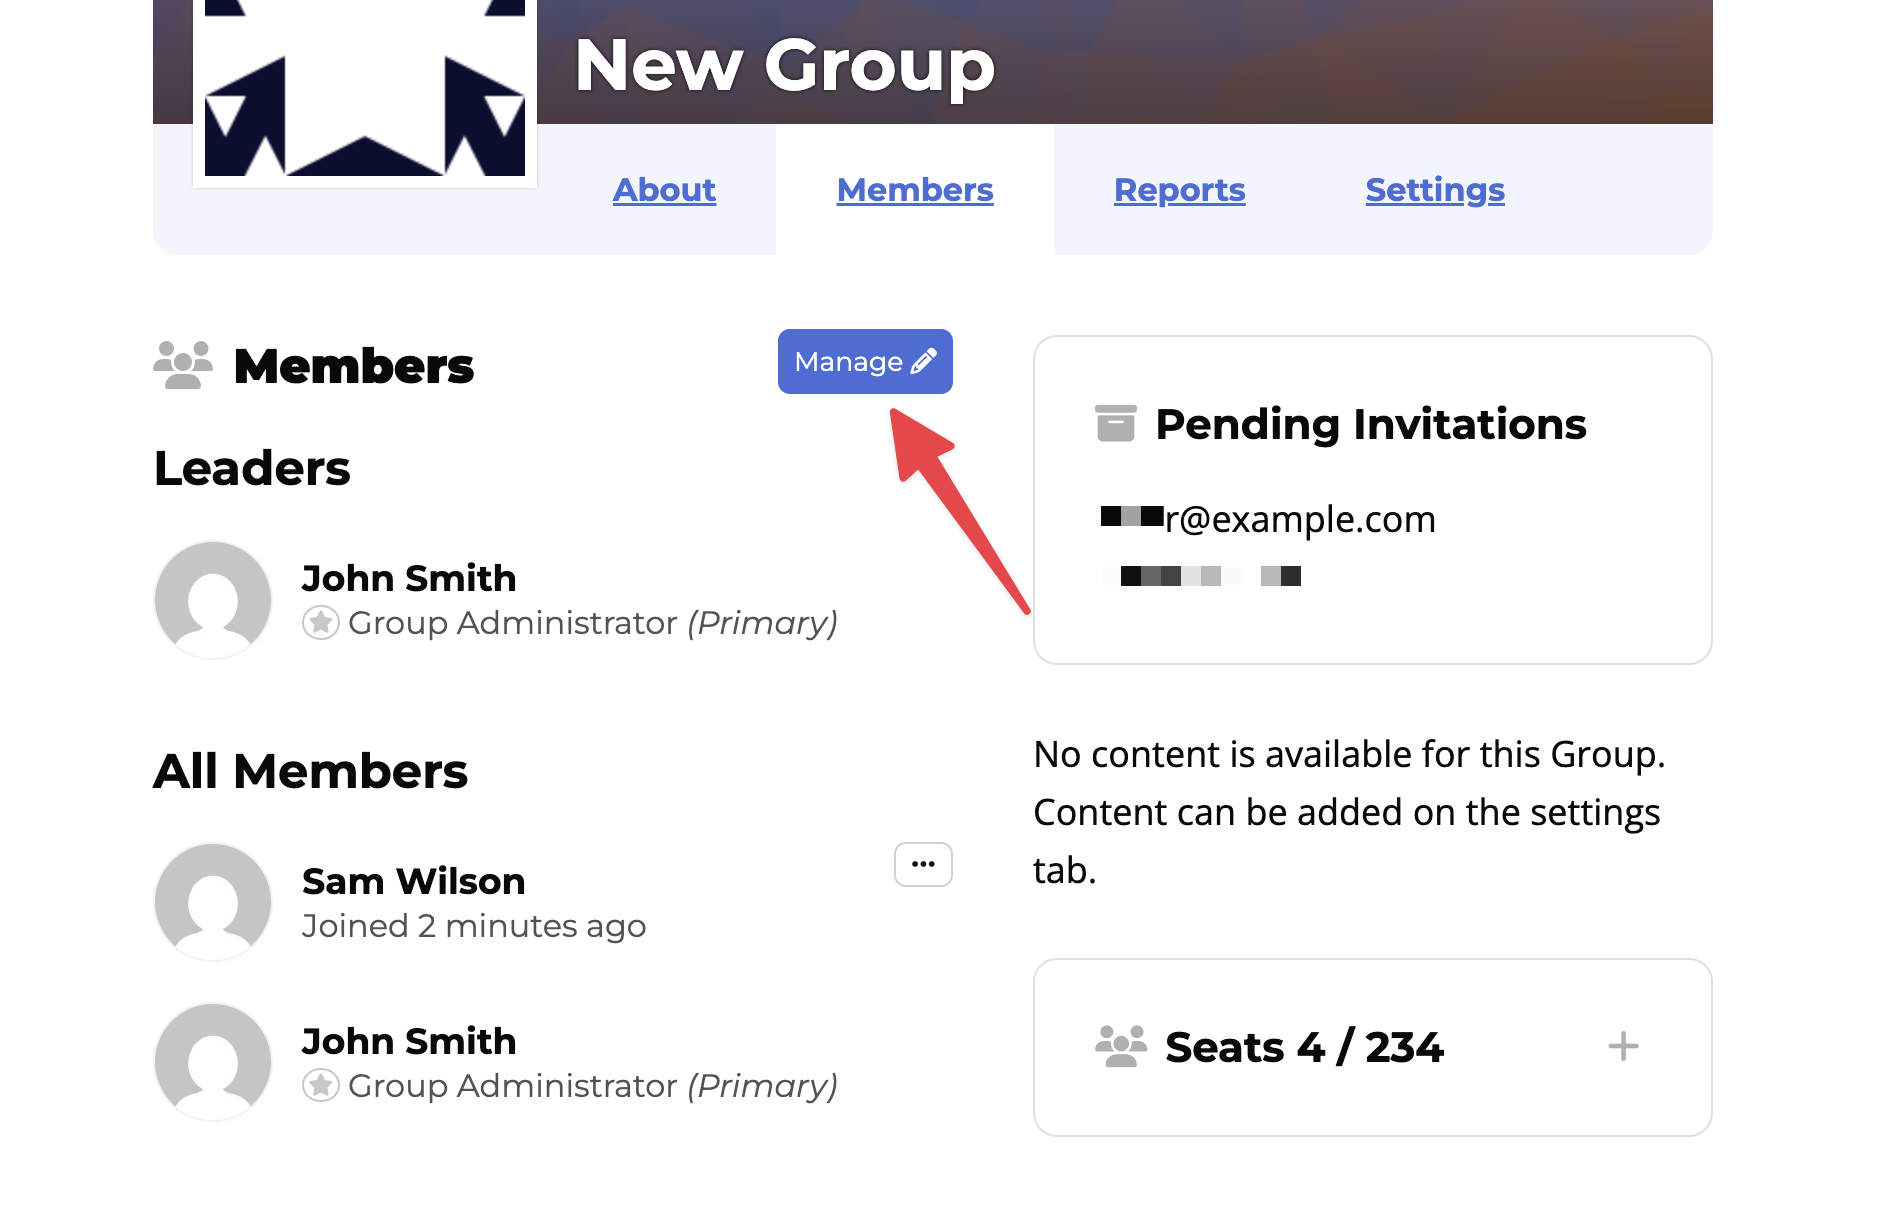
Once you’ve created a group, you can invite students and Group Managers from the group management page.
Editing the Number of Group Seats
Before you send invitations, you must ensure your group has enough available seats. Each person you add occupies one seat.
- Click the Groups tab on the left of your admin dashboard.
- Click on the title of the group you want to manage.
- Click on the Members tab.
- Click on the + icon next to the “Seat Count”.
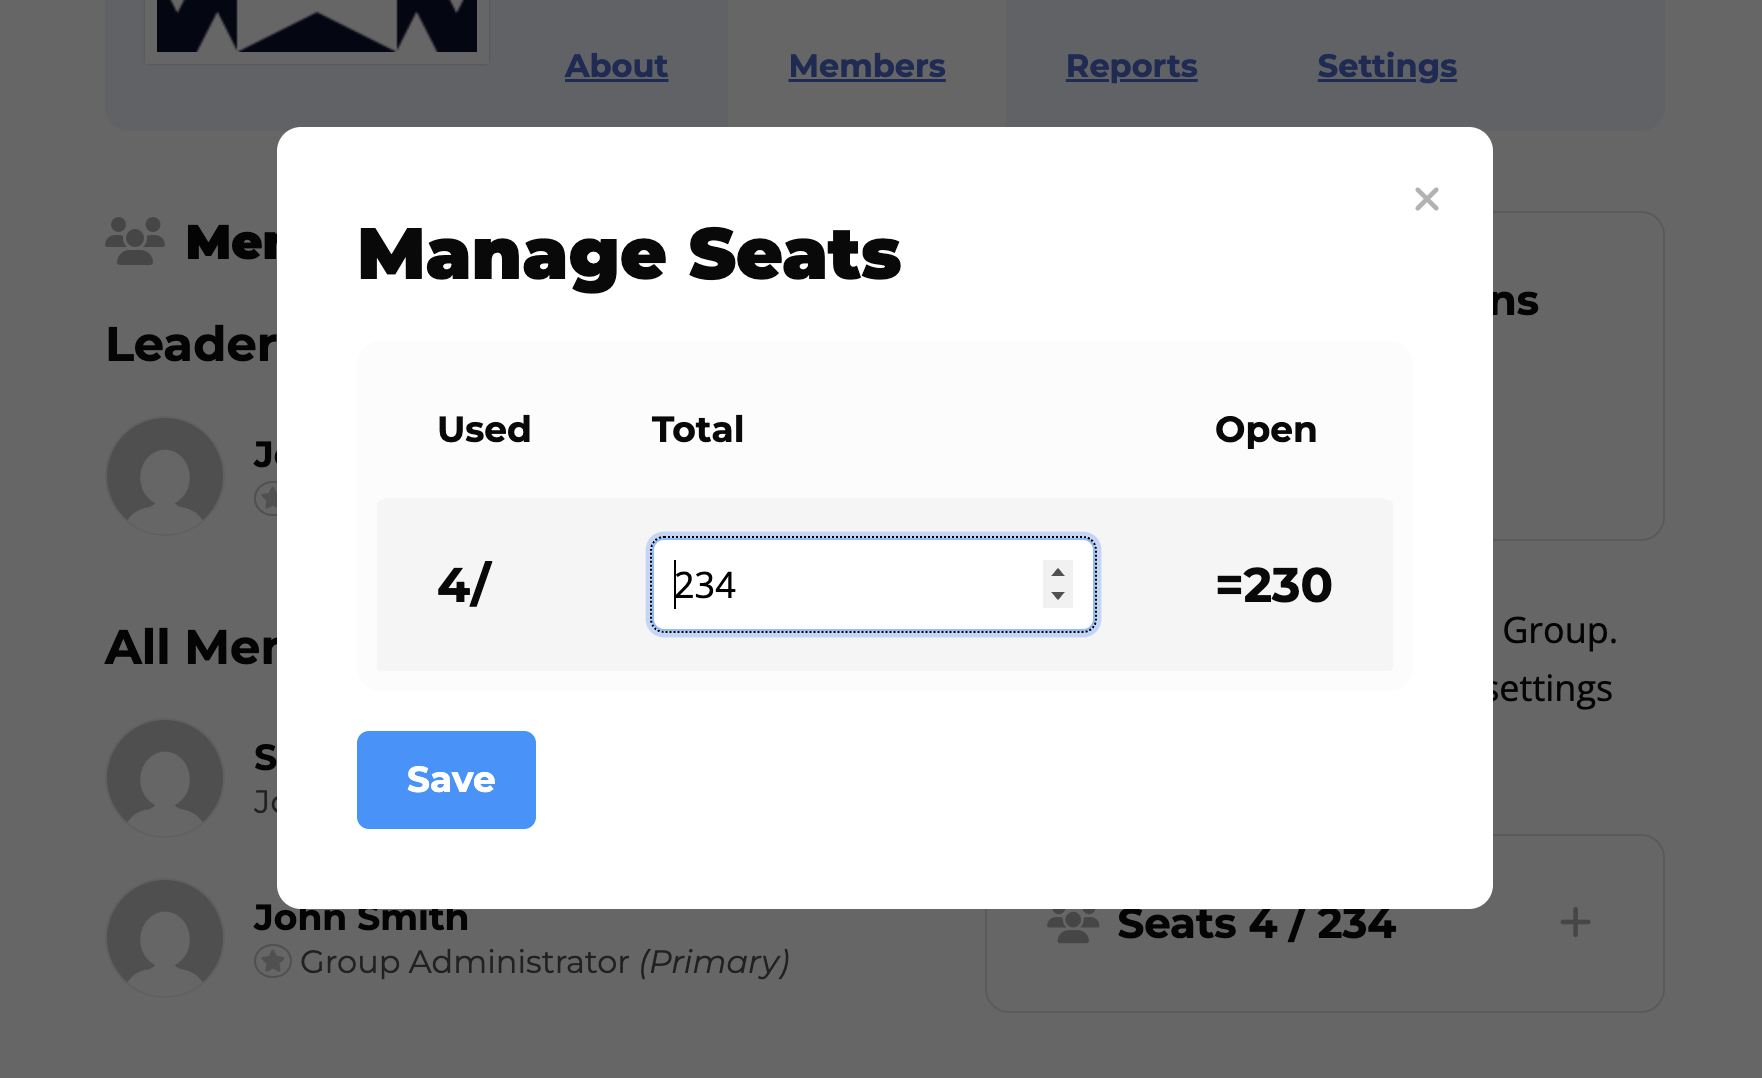
- Enter the total number of people allowed in the group.
- Click the Save button.
Inviting Members via Email
You can also send direct invitations to individuals using their email addresses. This method is best for adding specific people to your group.
- Navigate to the management screen of your group page. (or alternatively, open the group page that you want to edit.)
- Click on the Members tab.
- Click the Manage button.
- Enter the email address of the person in the “Email Address” field.
- Select the “Member Role” for the person you are inviting.
- Click the Send Invitation button.
LifterLMS sends an automated email to the person with instructions on how to join. If your users don’t receive these emails, please refer to our guide on improving email deliverability with SMTP.
Enabling the Group Registration Link
If you want to allow many students to join at once without typing every email address, you can use a registration link. You can send this link to your group contact, who can then share it with their team.
- Navigate to the management screen of your group page.
- Click on the Members tab.
- Click the Manage button.
- Locate the “Invite with Link” section and make sure it is enabled.
- Copy the URL displayed in the “Registration Link” field.
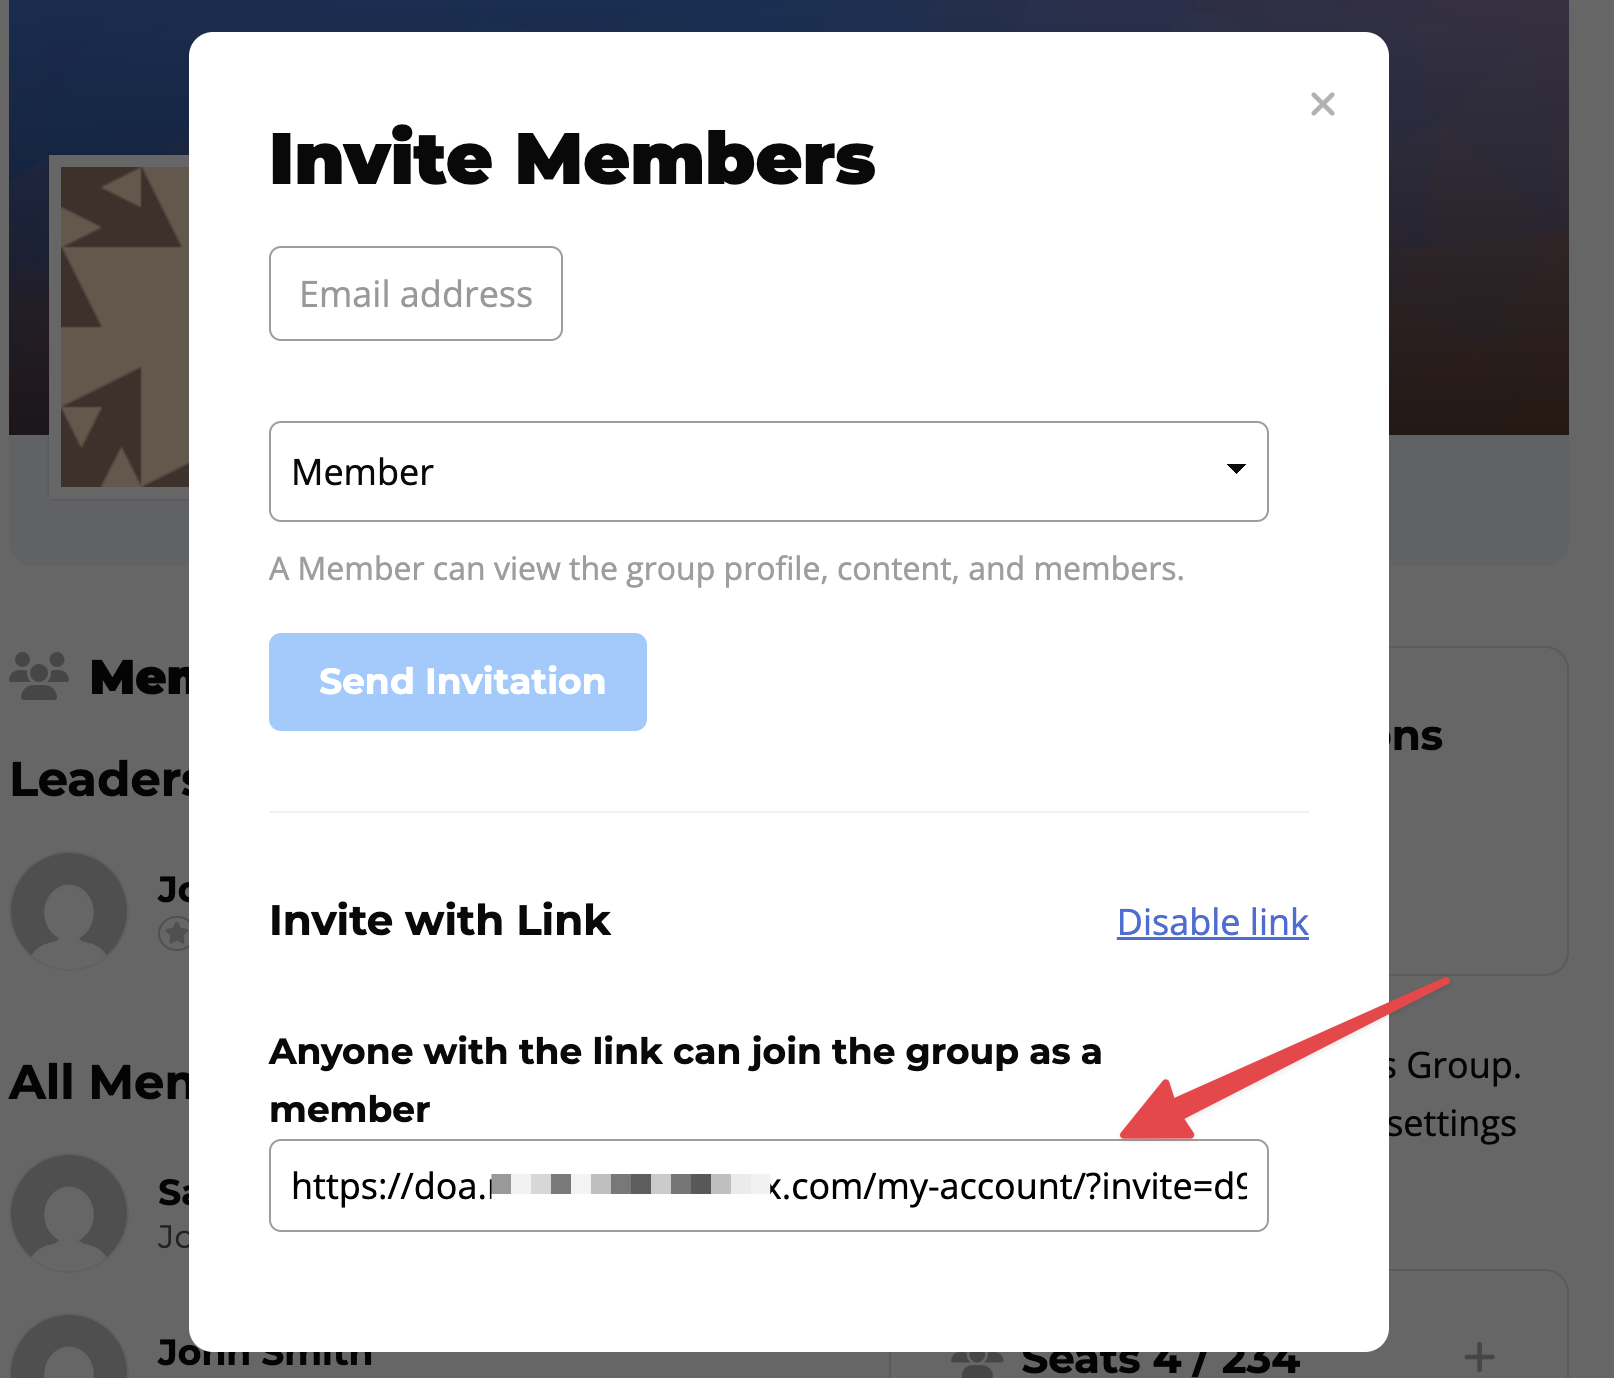
- Send this link and the registration code to the people you want to join.
Once a student clicks the link and completes the registration form, LifterLMS automatically adds them to the group. For more information on managing your members after they join, please see our group member management guide.
How to Remove a Member from a Group
There are times when you may need to remove a student or a Group Manager from your group. When you remove a person, they immediately lose access to the courses and content associated with that group. This action also frees up a seat for a new person to join.
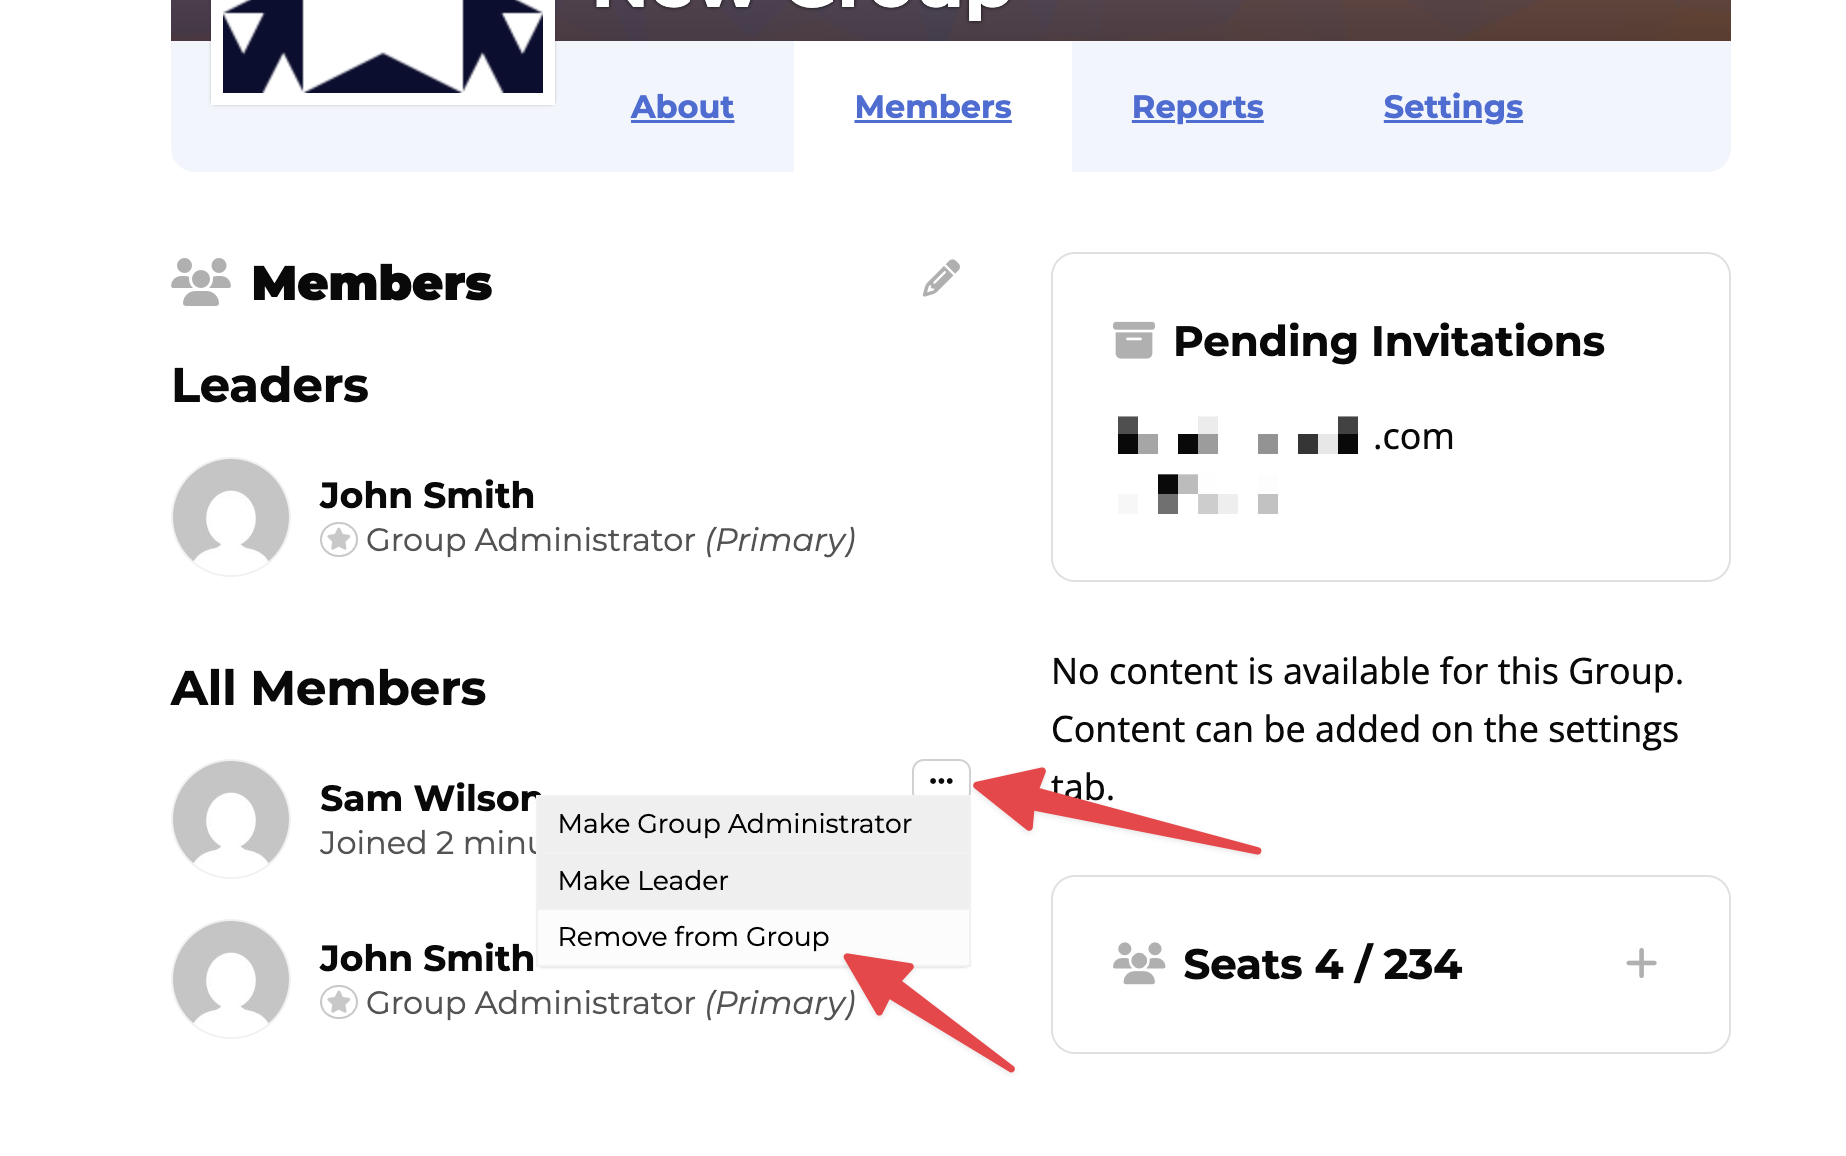
- Navigate to your group page and click on the Members tab.
- Locate the name of the person you wish to remove from the list.
- Click on the three dots (…) icon located to the right of their name.
- Select the “Remove from Group” option from the menu.
You can display a list of groups to your users by using either the LifterLMS Gutenberg block or a shortcode. This is useful for creating a directory page where users can browse your available groups.
Method 1: Using the LifterLMS Group List Block
If you’re using the WordPress block editor, you can add the group list visually:
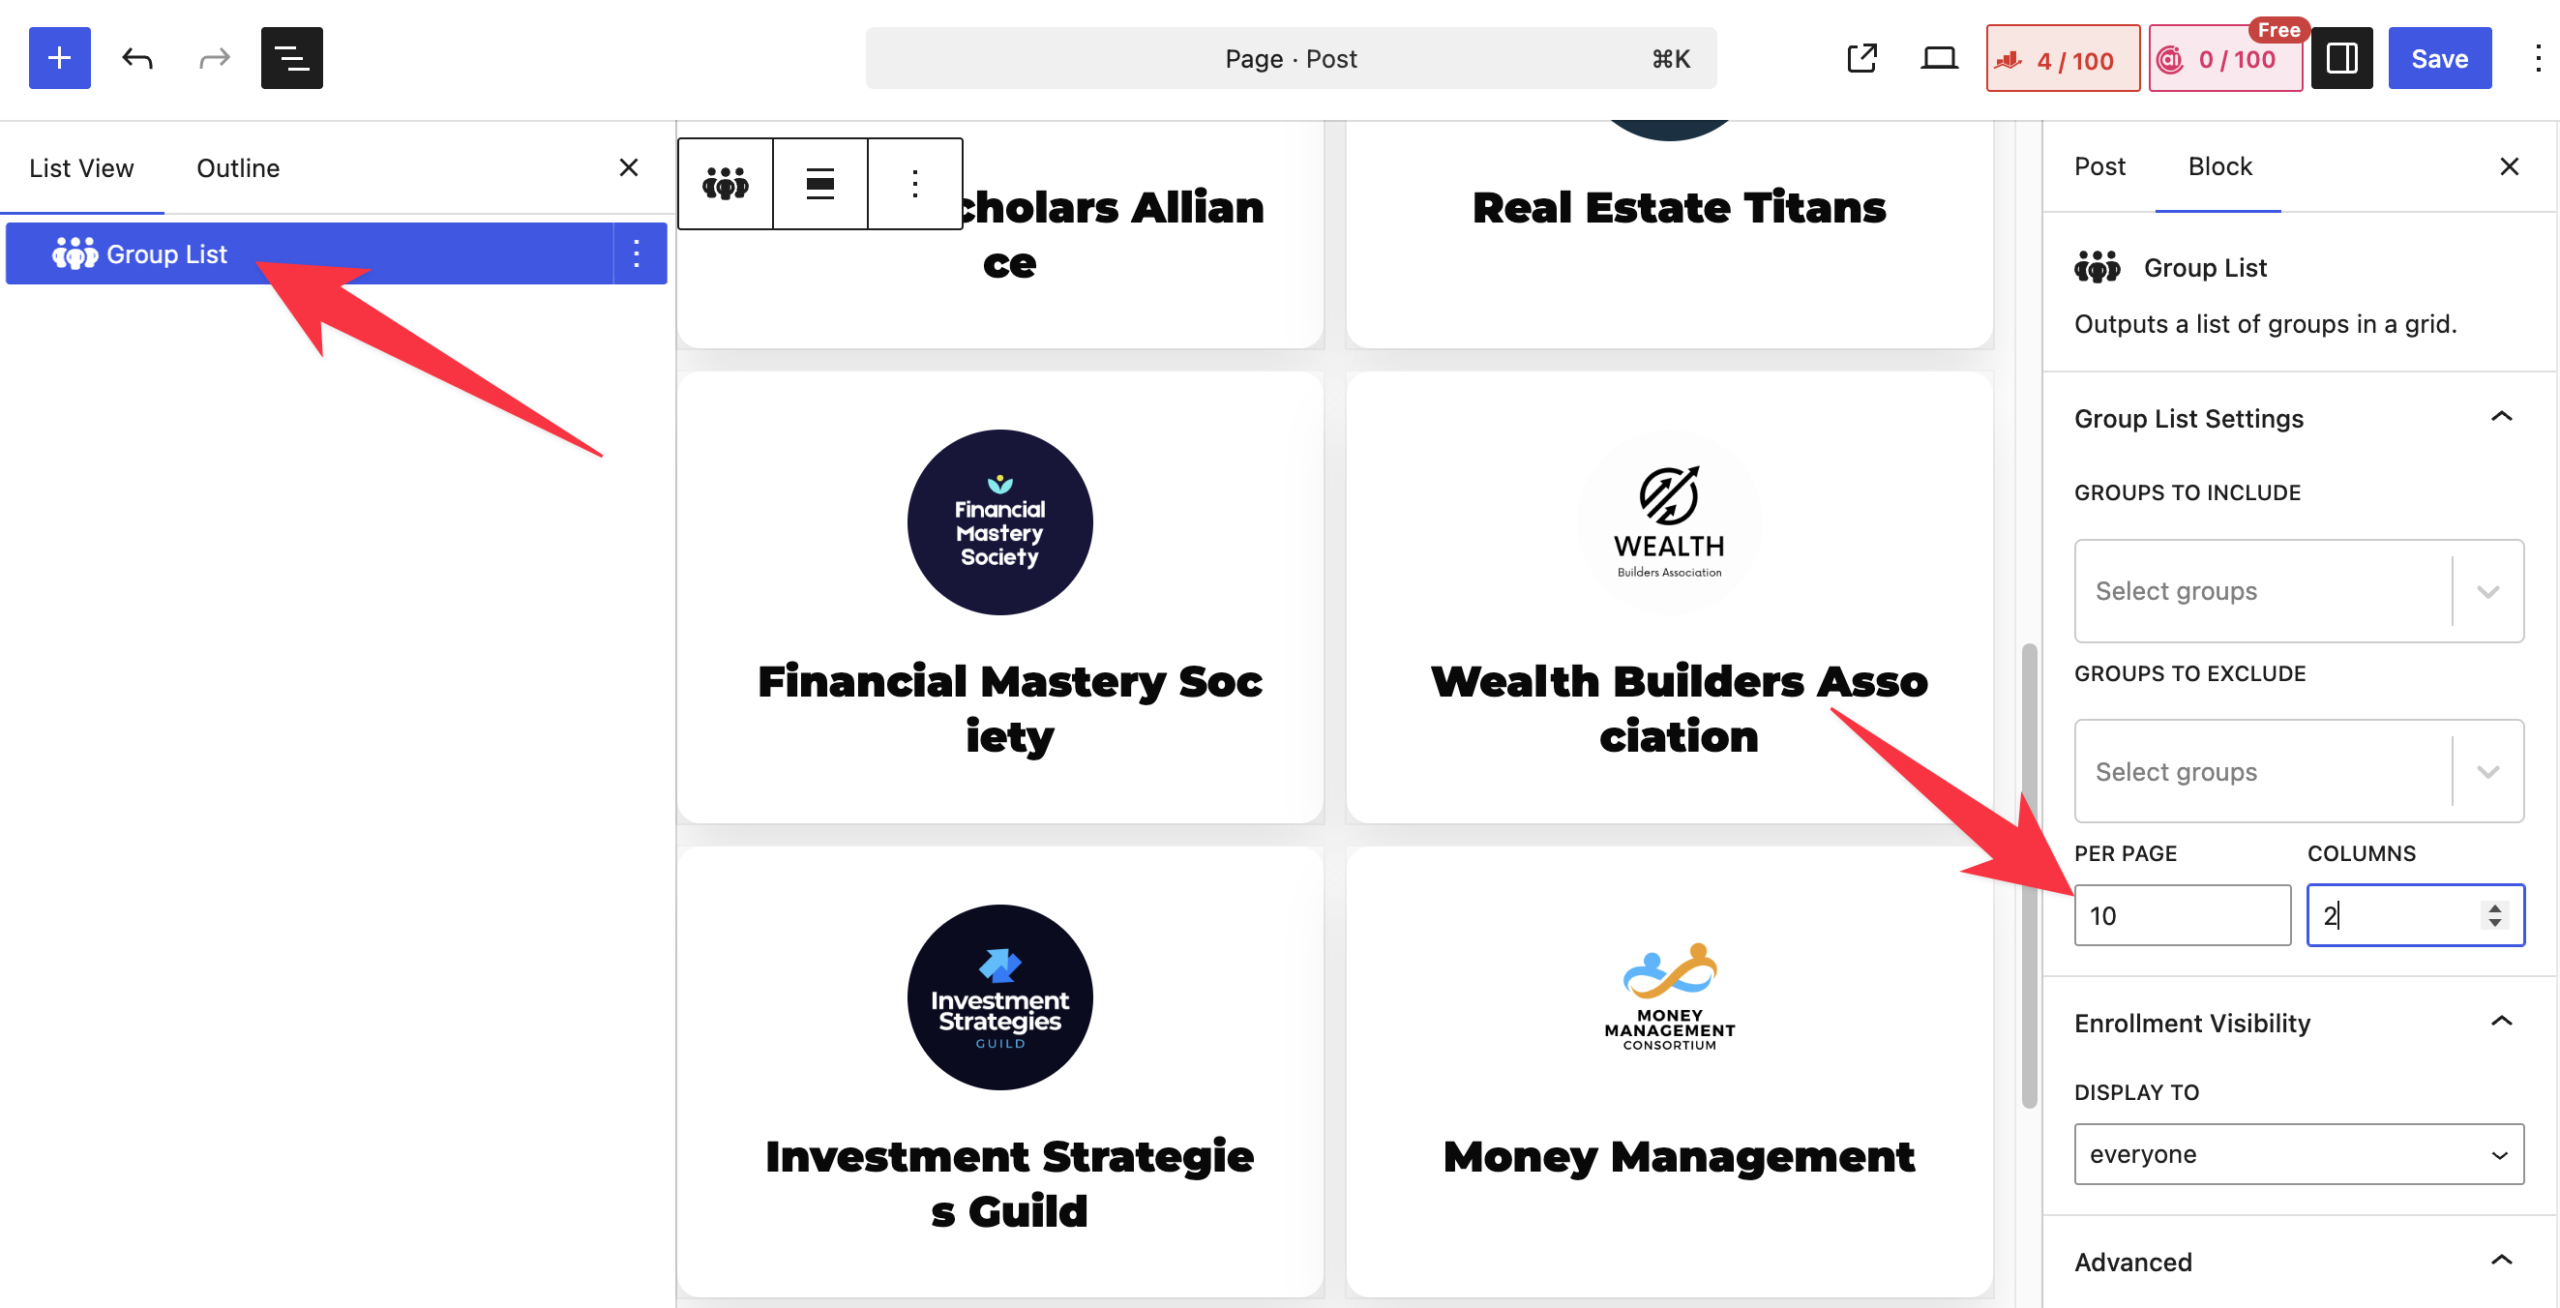
- Open the WordPress editor and click the + icon in the editor to add a new block.
- Search for “Group List” in the search bar.
- Click the “Group List” block to insert it into your page.
- Customize the block settings in the right-hand sidebar menu to adjust the number of groups displayed on the page.
- Save your WordPress page to publish your changes once you are done.
Method 2: Using the Groups Shortcode
If you’re using the WordPress Classic Editor or a third-party page builder, you can display your list of groups using a shortcode.
To add the shortcode to your page, follow these steps:
- Navigate to WordPress Dashboard > Pages.
- Click on the title of the page you want to edit.
- Paste the shortcode
[llms_group_list]into the page editor content area. - Click the Update or Publish button to save your changes.
Shortcode Attributes
You can customize the output of the [llms_group_list] shortcode by using optional attributes. The shortcode supports the following four attributes:
- “count”: Sets the total number of groups to display on the page.
- “columns”: Sets the number of columns to use for the display layout.
- “include”: Allows you to specify the group IDs you want to display, separated by commas.
You can copy and modify these examples to fit your layout needs:
- To display the default list of all your groups:
[llms_group_list] - To display up to 20 groups arranged in a 2-column layout:
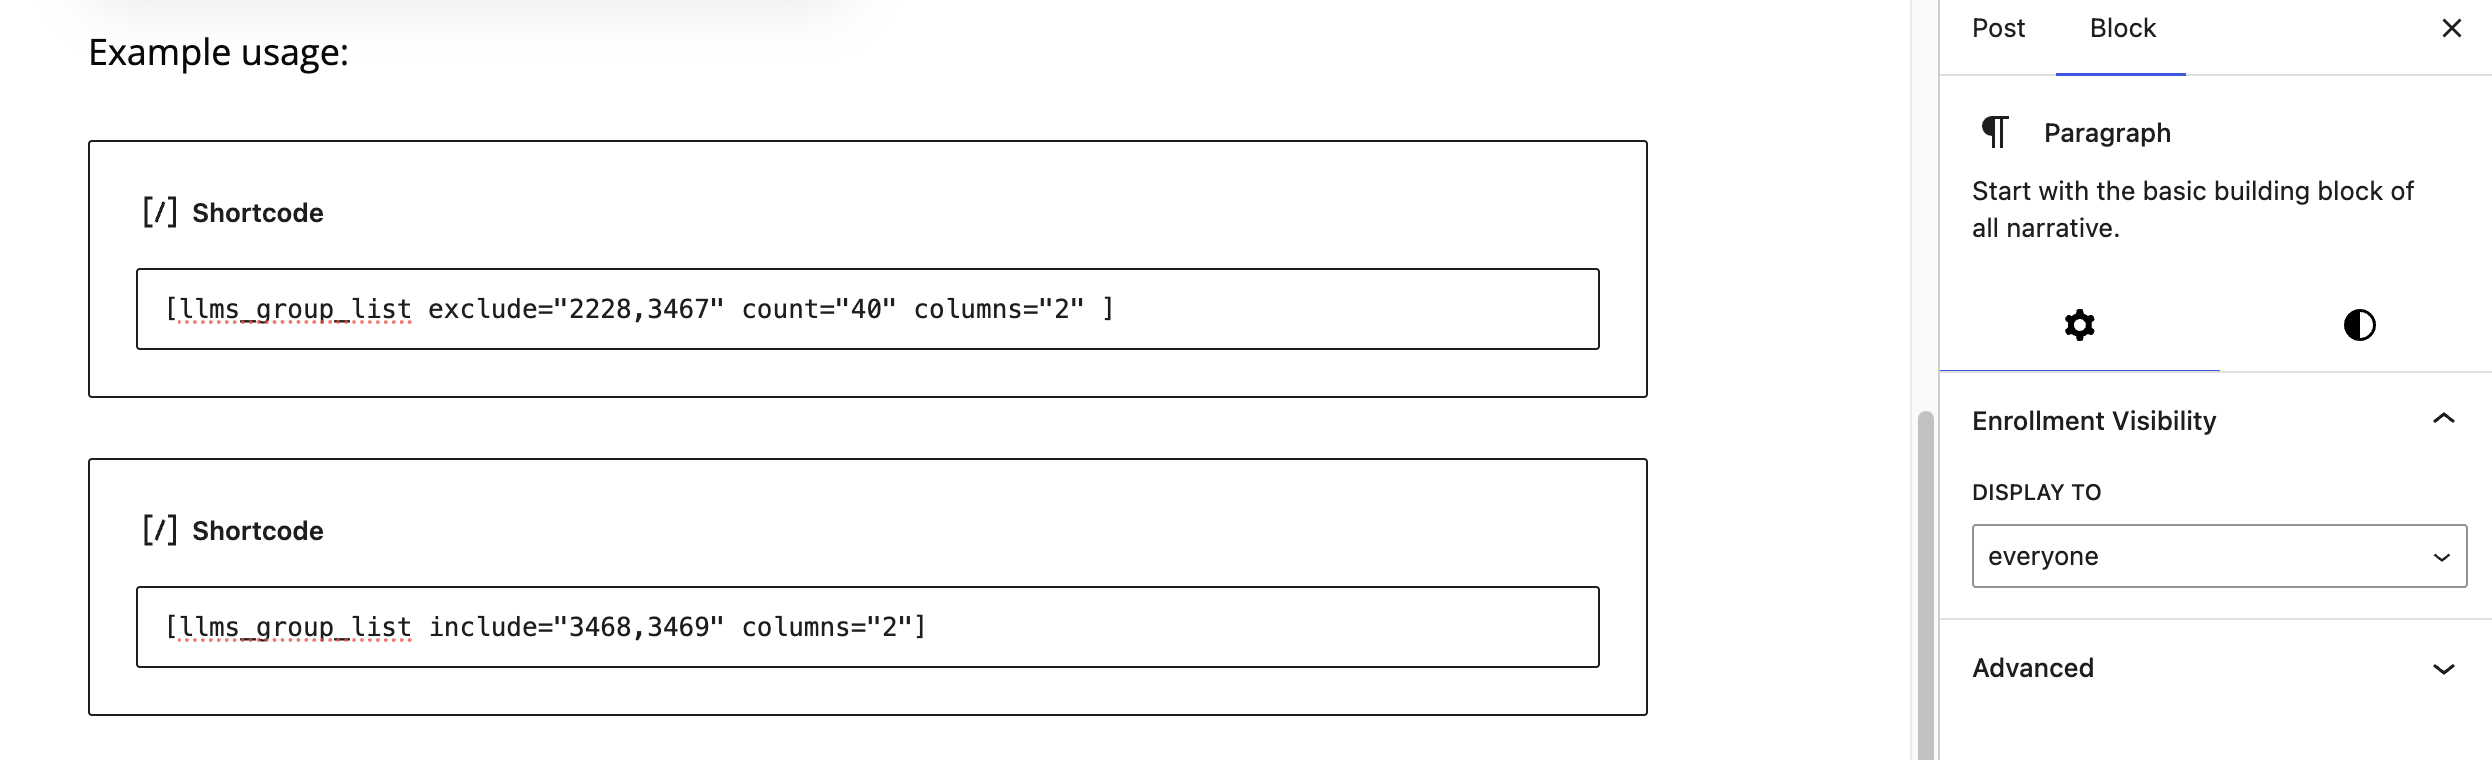
[llms_group_list count="20" columns="2"] - To display only the specific groups with the IDs “3468” and “3469” arranged in a 2-column layout:
[llms_group_list include="3468,3469" columns="2"]
Group leaders have access to a management area on the front of your website. This allows them to manage their team without ever having to see the WordPress admin dashboard.
- Click on the “About” tab to see the group description.
- Click on the “Members” tab to add or remove people from the group.
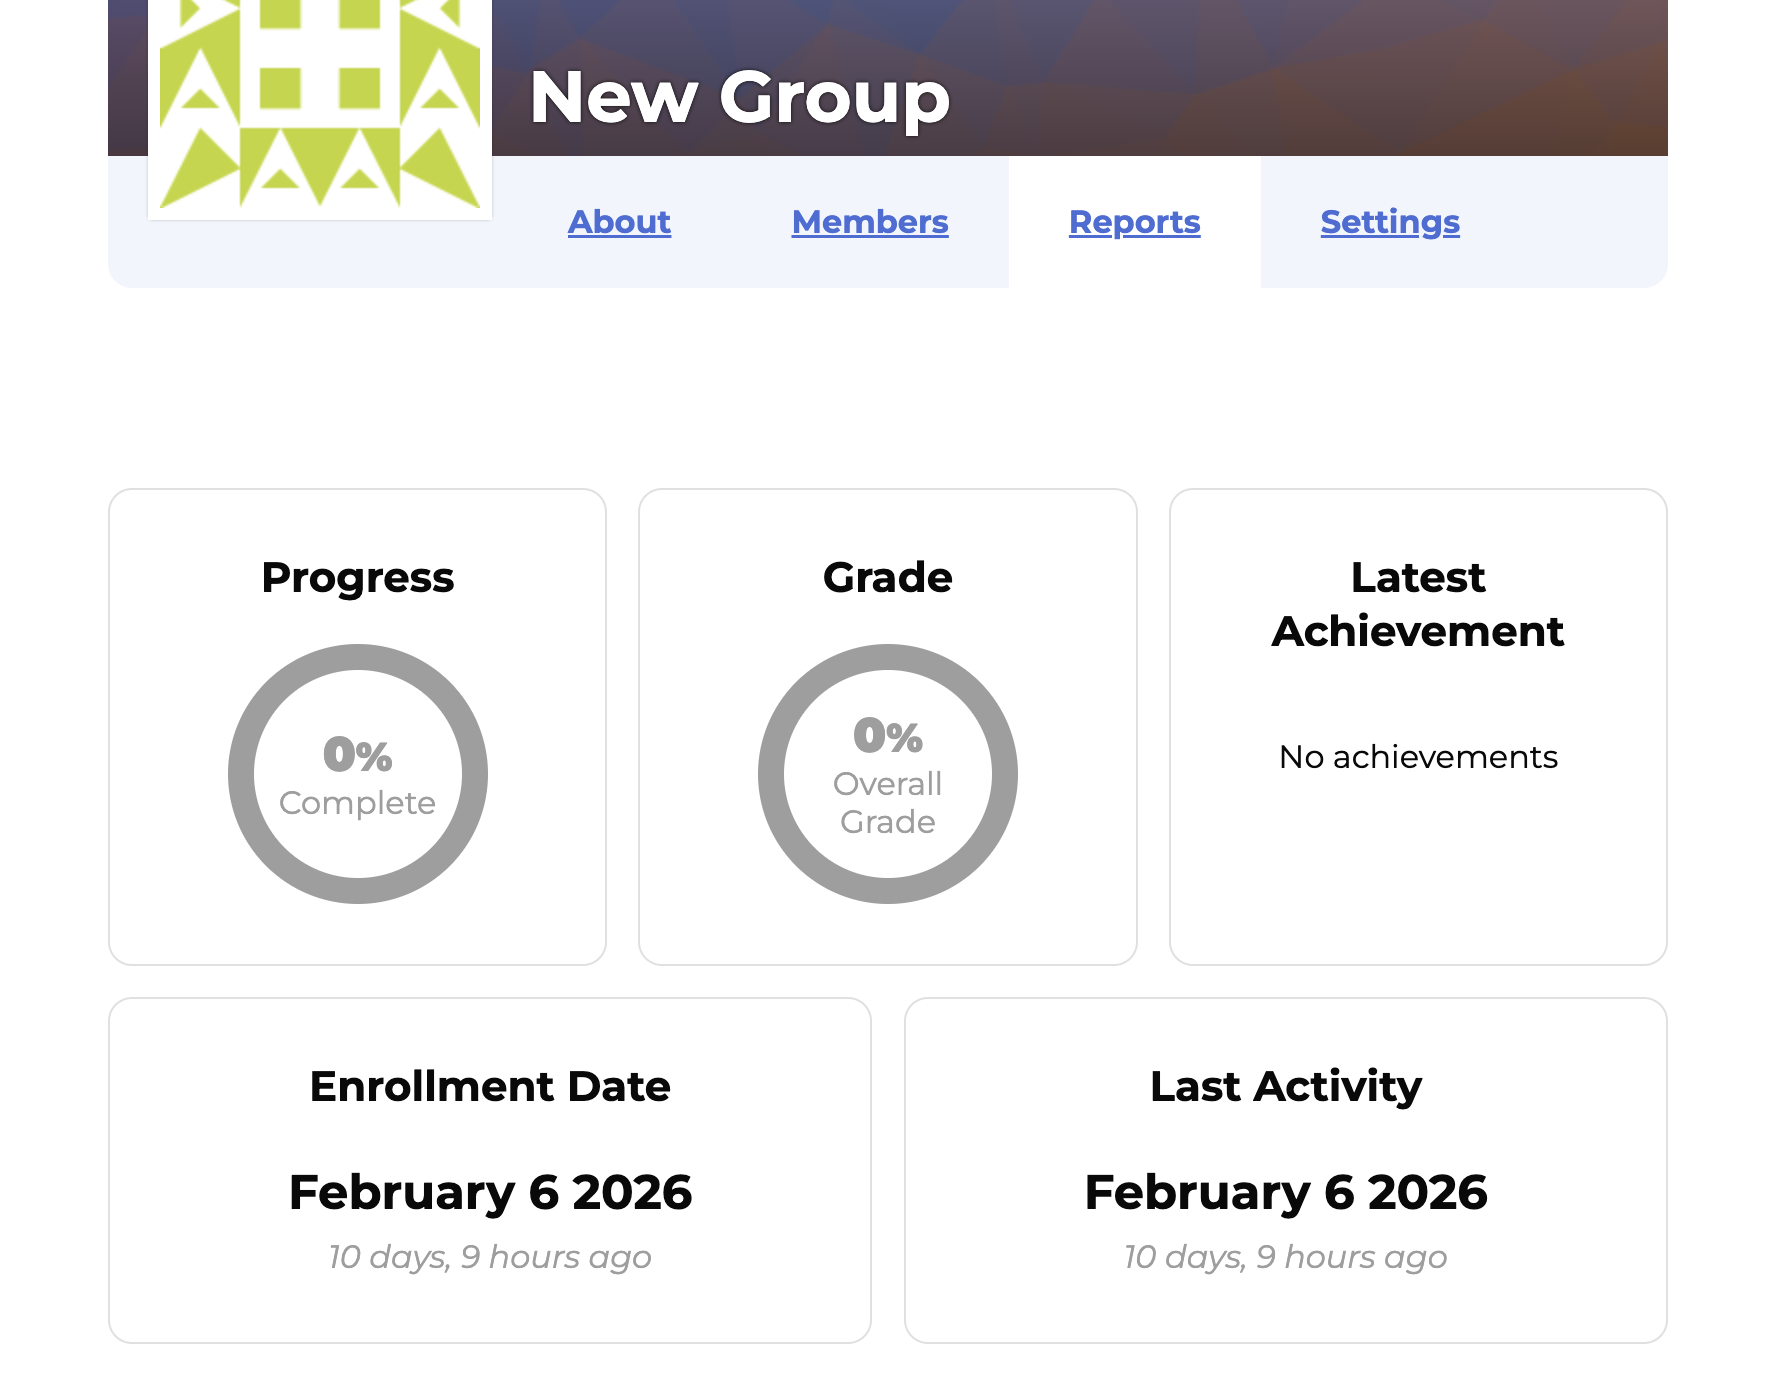
- Click on the “Reports” tab to view the progress and grades of every student in the group.
- Click on the “Settings” tab to update the group name or banner image.
The Groups add-on tracks detailed information for every member. Within the group reports, you can see specific data points for each student.
- Switch to the Reports tab, then click the name of the student you want to track.
- The “Progress” bar shows how much of the course the student has finished.
- The “Grade” section shows the student’s current score based on completed quizzes.
- The “Enrollment Date” indicates when the student first joined the group.
- The “Last Activity” date shows the last time the student logged in to view a lesson.
To learn how to manage group seats, invitations, and members, read the guide.
You can automate the process of selling group training to companies or organizations by enabling group enrollment within an “Access Plan.” When a customer buys this plan, LifterLMS automatically creates a new group and assigns that customer as the “Group Leader.”
- Navigate to the course or membership you want to sell.
- Scroll down to the “Access Plans” meta box.
- Click the Add New button and locate the “Group Enrollment” option.
- Choose your “Seat Registration” type from the dropdown menu. When you sell groups, you can decide exactly how many seats each customer receives, or let them choose the number themselves.
- Fixed Seats: You set a specific number of seats for a flat price. For example, a “Corporate Plan” might always include 20 seats at $500 each.
- Variable Seats: You allow customers to select the number of seats they want to purchase. The price you set applies to each seat.
- Click the Save All Plans button to save the plan.
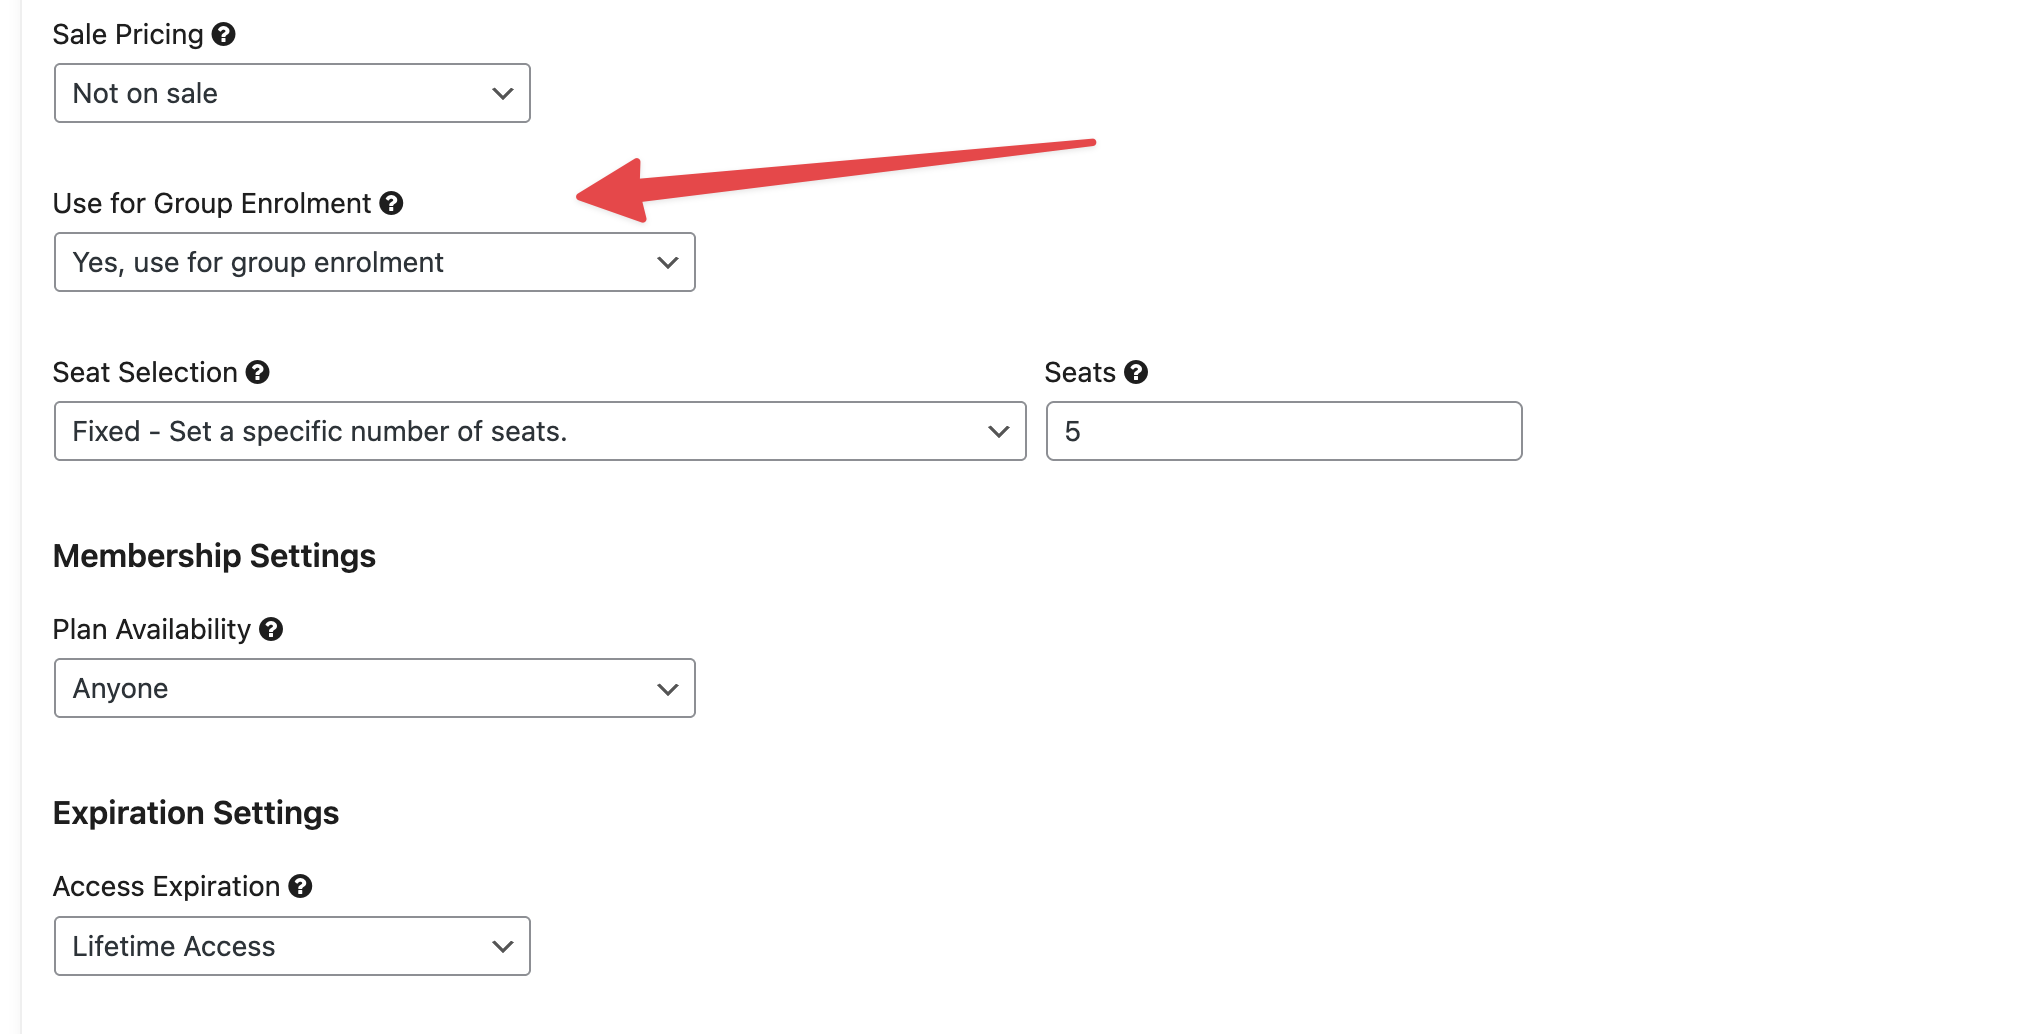
Note: The “Use for Group Enrollment” option will not be visible if the LifterLMS WooCommerce Integration add-on is active. To enable group enrollment and sell course or membership seats, you must first deactivate the LifterLMS WooCommerce Integration plugin.
If you face any problems during this process, you should read our guide on troubleshooting the group invite links.
LifterLMS Groups uses specific roles to control what a person can do within a particular group. This means a single user can be a “Group Member” in one group but act as a “Group Leader” in another.
- Group Leader: This person can add or remove members, view progress reports, and change group settings.
- Group Member: This person can access the courses or memberships assigned to the group, but cannot view reports or manage other users.
These roles ensure that the right people have the authority to manage their own teams without needing access to your entire WordPress site.
Learn more about LifterLMS roles and capabilities.
You can control how your groups appear on your website by adjusting the “Group Visibility” option. To change this setting, follow these steps:
- Navigate to WordPress Dashboard > Groups.
- Hover over the group you want to change and click Edit.
- Scroll down until you see the “Visibility” option in the settings panel.
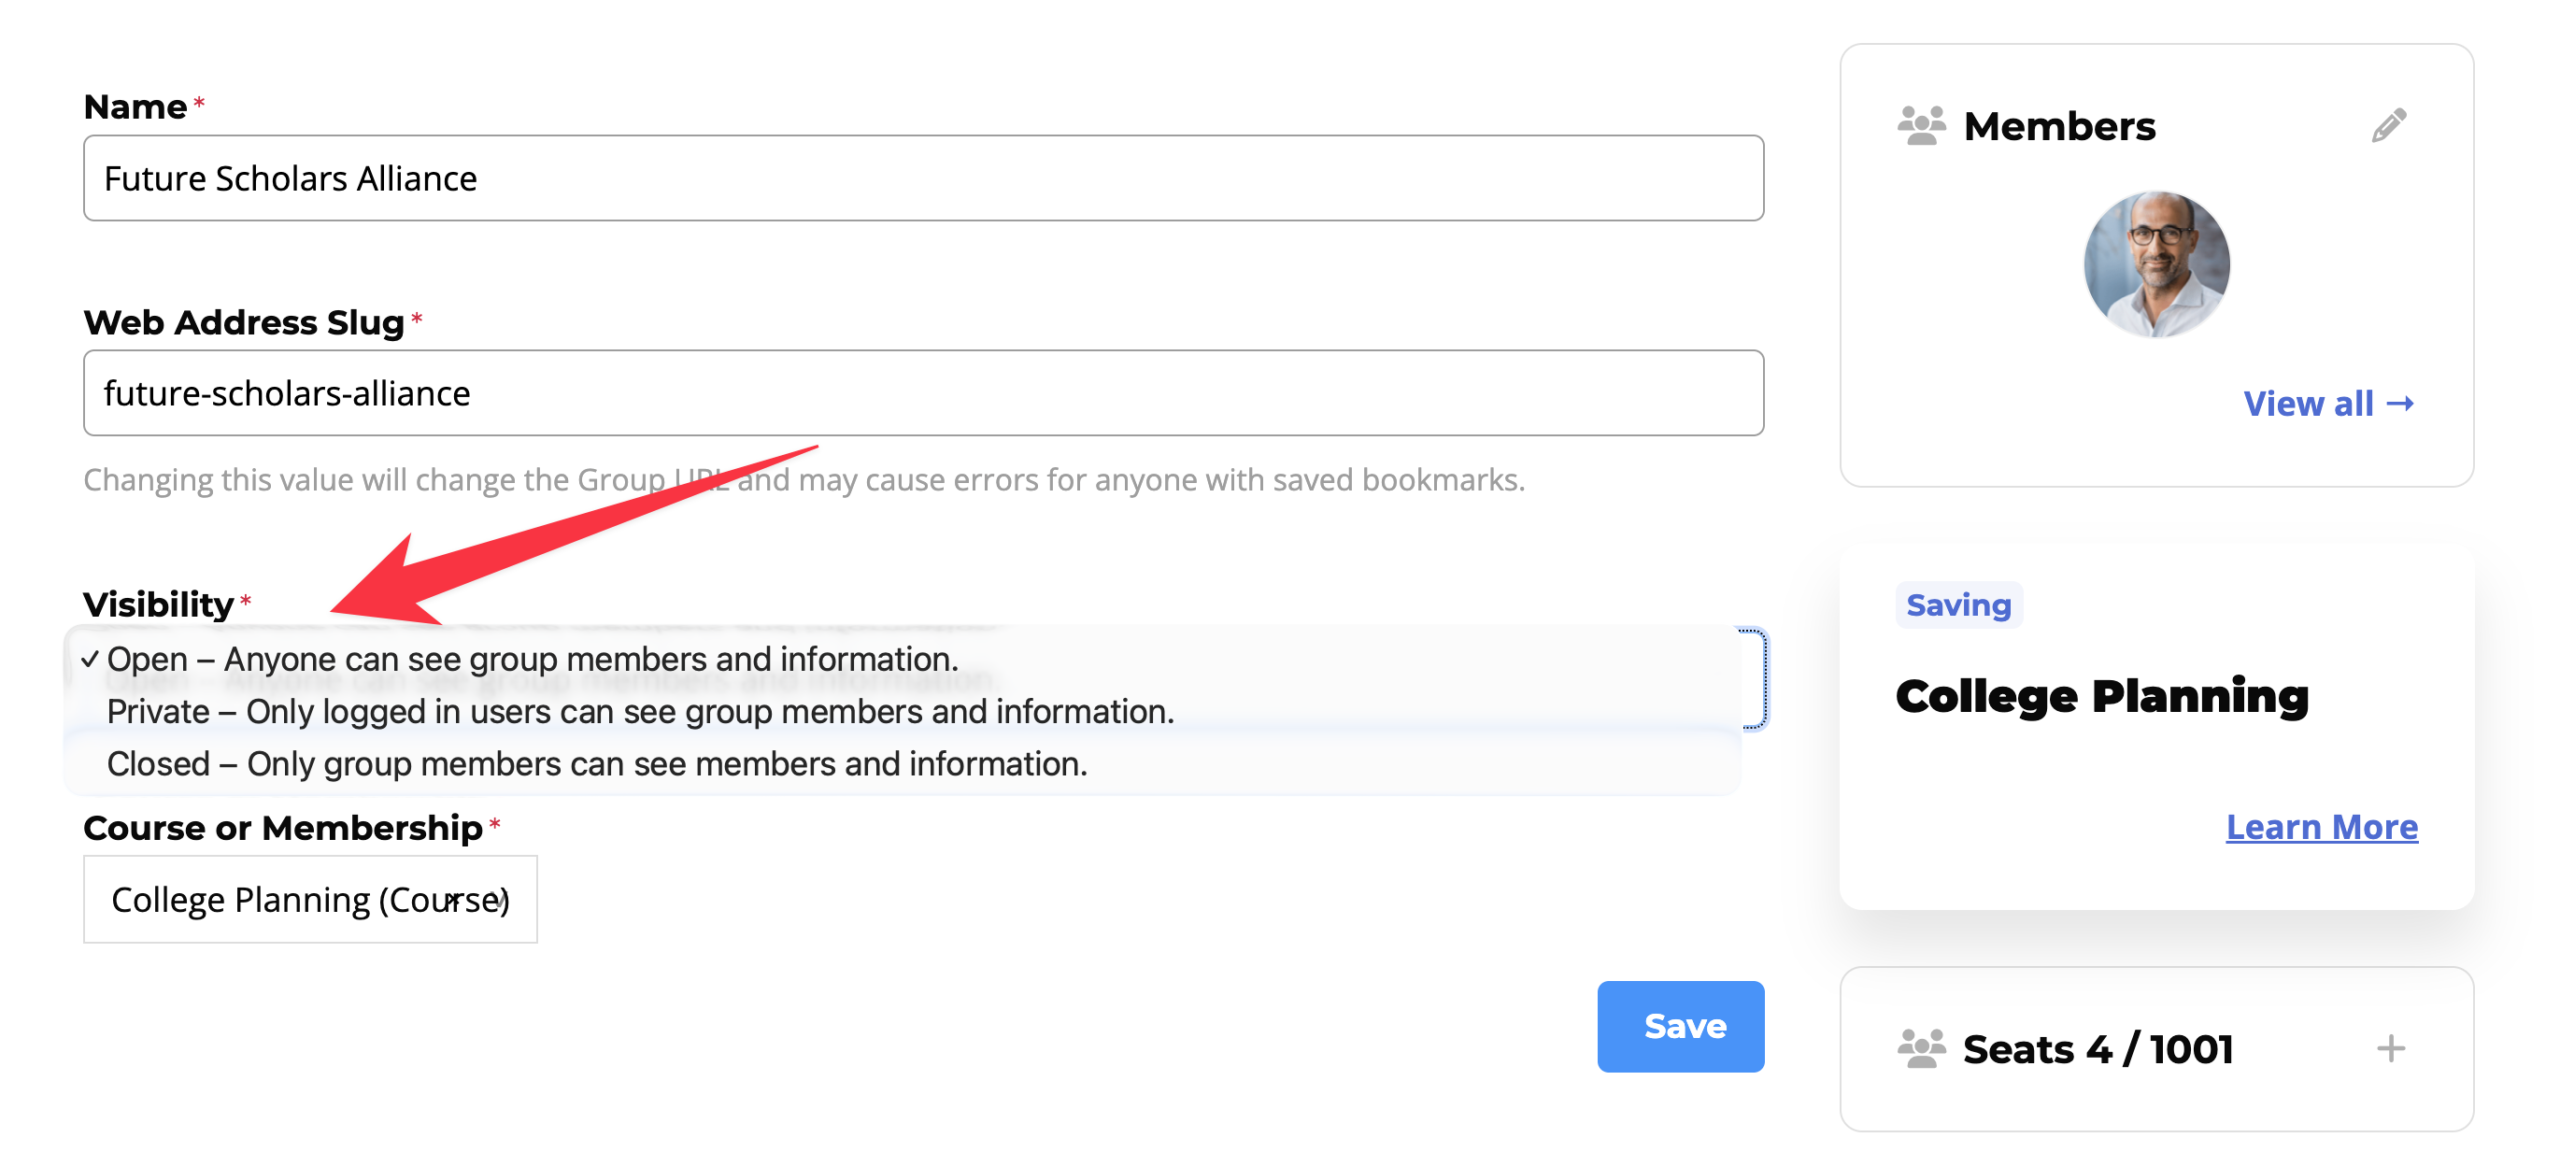
Choose one of the following three options based on your privacy needs:
- “Open”: This setting allows anyone to see the group members and information. Both logged-in users and public guests can view all details of the group. If you want the group roster and information to be completely public to everyone on your site, use this option.
- “Private”: This setting ensures that only logged-in users can see the group members and information. Public visitors who are not logged into an account will not be able to view these details.
- “Closed”: This setting restricts access so that only active group members can see members and information. Even if a user is logged in to your website, they cannot view this information unless they are enrolled in this group. This is the best option for keeping the group roster and details private from non-group members.
If you are a developer or want to connect your groups to other applications, you can use the LifterLMS Groups REST API. This allows external software to communicate with your group data.
- Ensure you have generated valid API keys within the LifterLMS settings.
- Navigate to LifterLMS > Settings.
- Click on the “REST API” tab to manage your keys.
- Review the official LifterLMS Groups REST API documentation to find the specific “Endpoints” for groups.
Using these endpoints, you can programmatically create groups, add members, or pull report data into other systems.


