How Do I Add My License Keys and Add-Ons to LifterLMS On My Website?
To locate your License Key for any LifterLMS product:
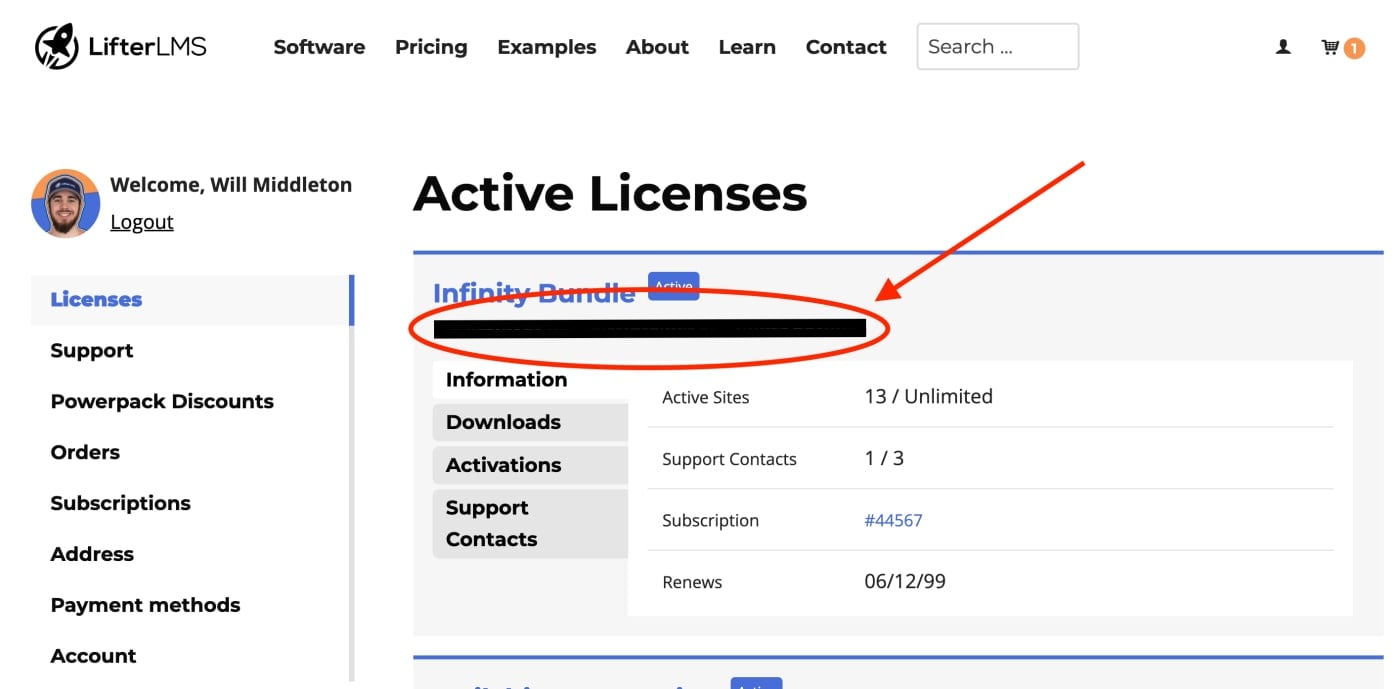
- Log in to your account at LifterLMS.com/my-account.
- Navigate to the “Active Licenses” area.
- Locate the long string of characters under your license (e.g., l1M5-asdfasdfasdf…).
- Copy this key to your clipboard.
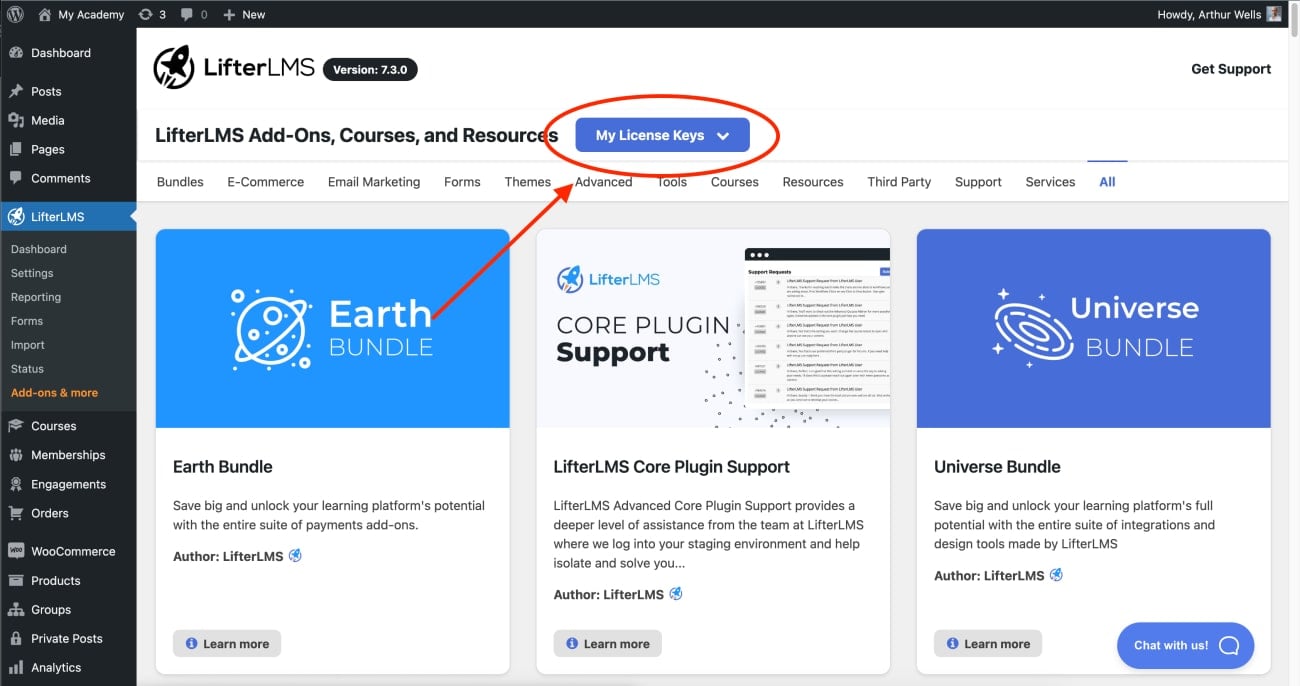
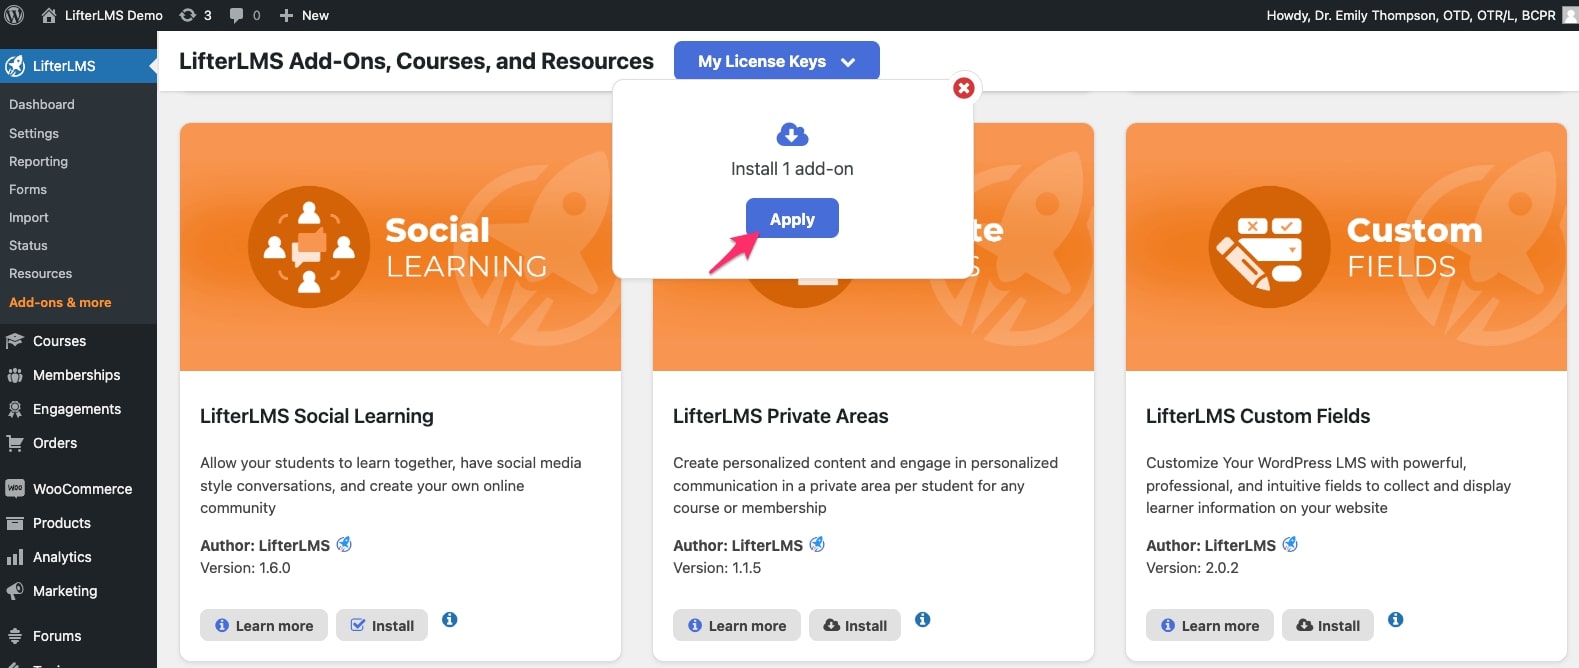
To find the area to enter your license key, head to LifterLMS > Add-ons & More in your WordPress dashboard.
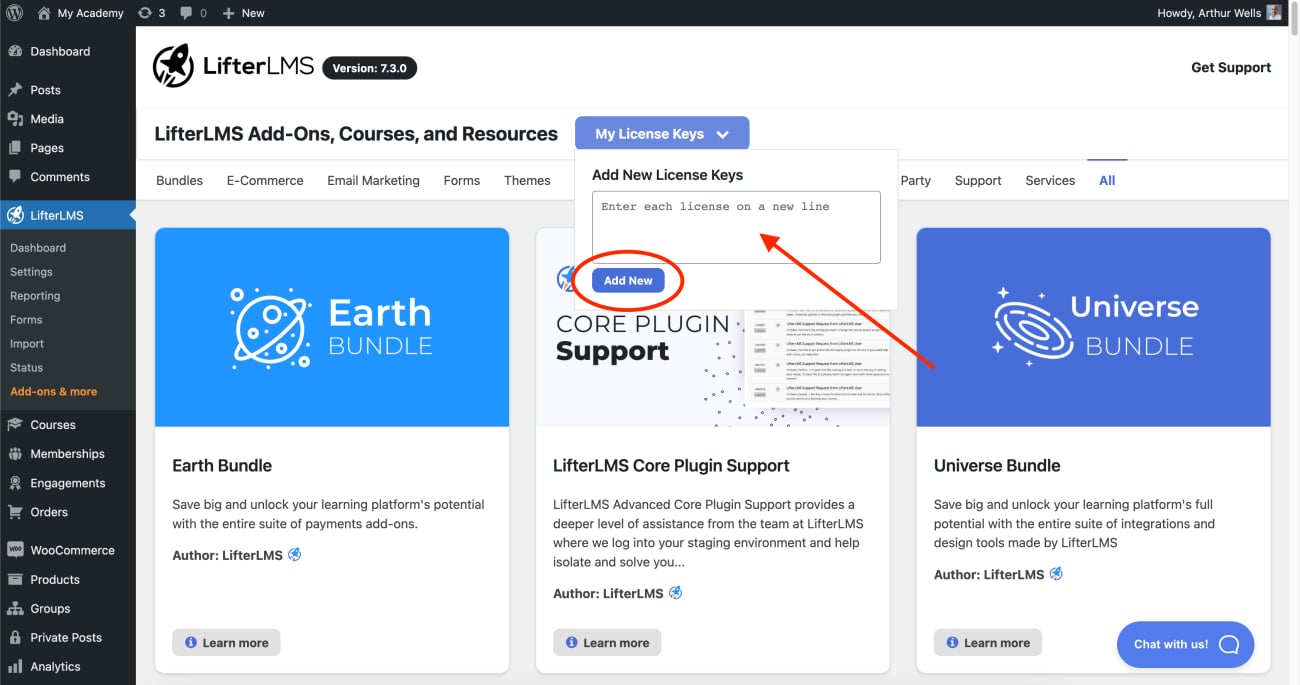
Once you click the ‘My License Keys‘ button, a dropdown will appear where you can remove any existing license keys or enter your new license key. If you’re entering a new license key, copy and paste your key, then select ‘Add New‘.
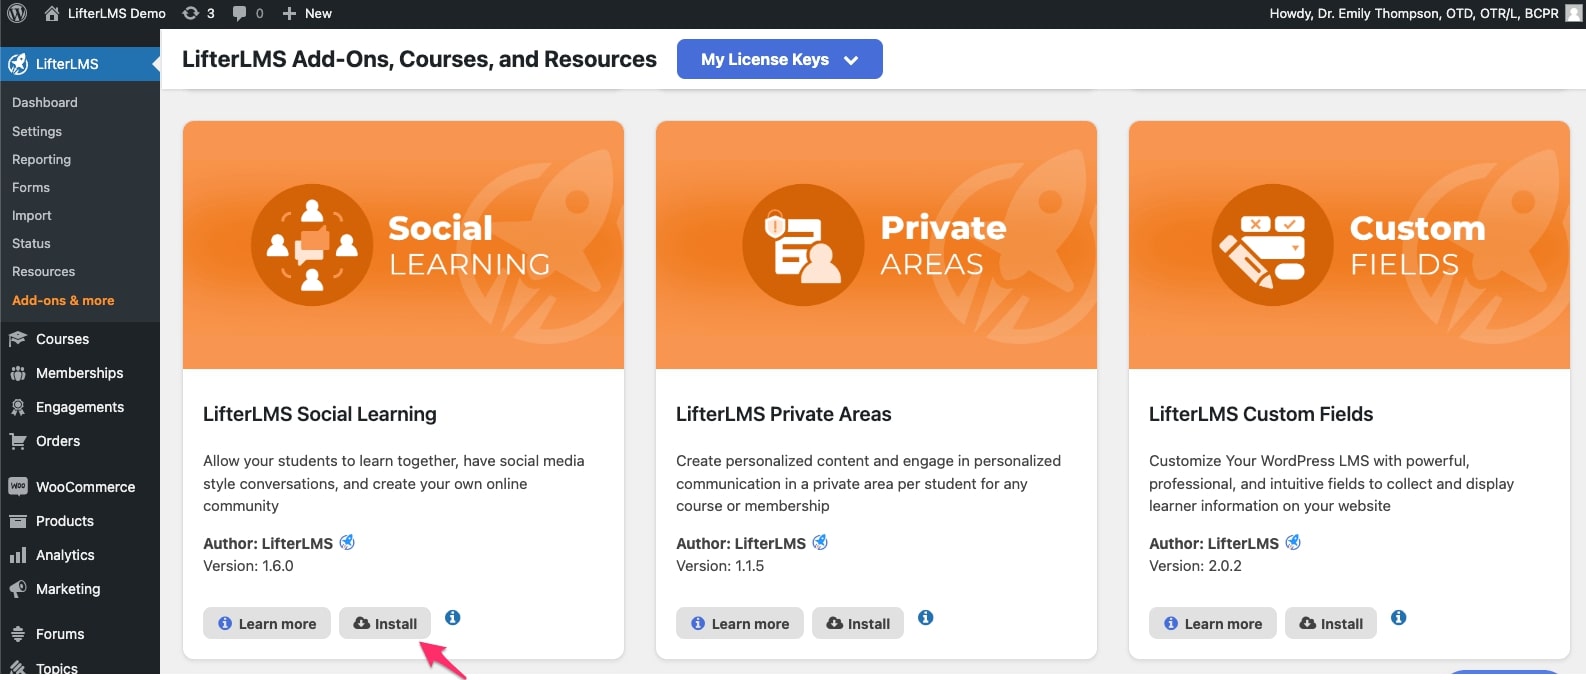
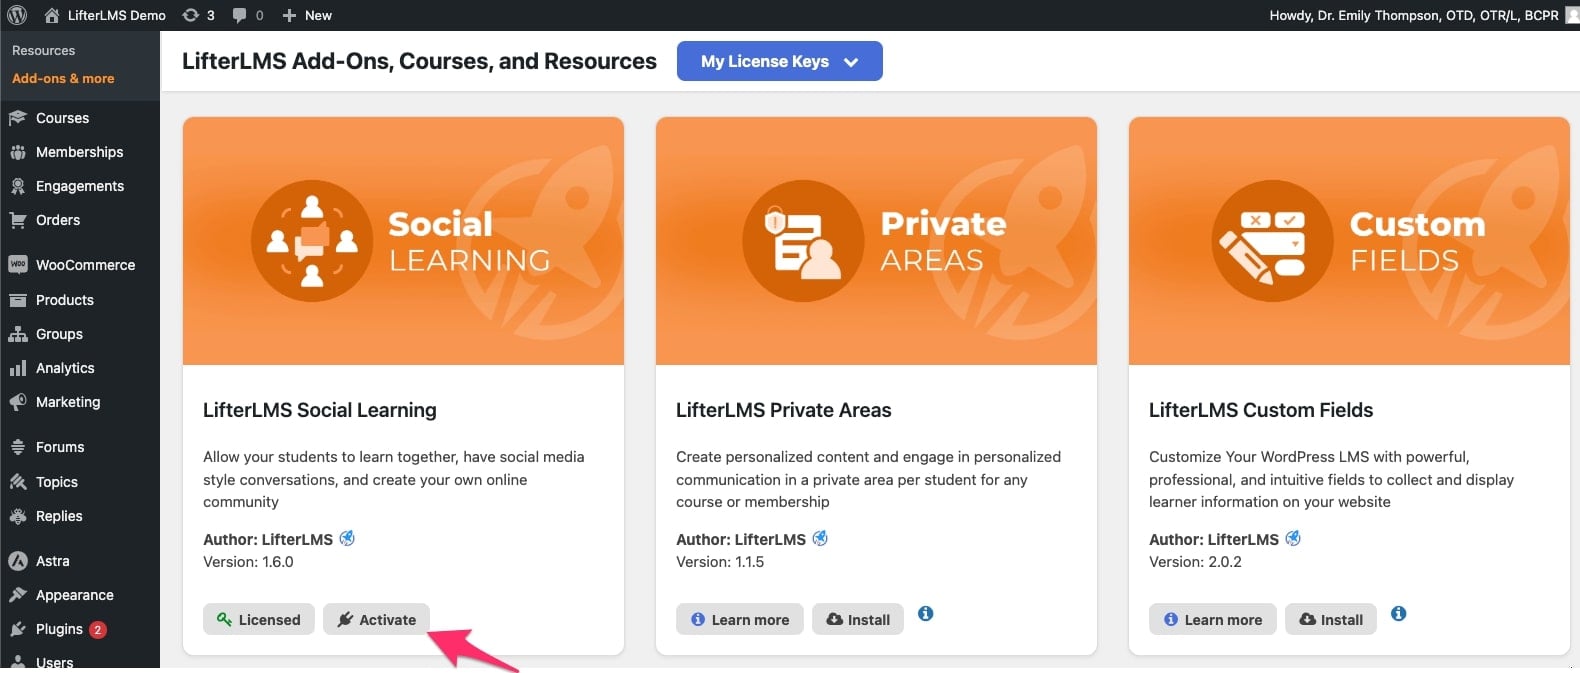
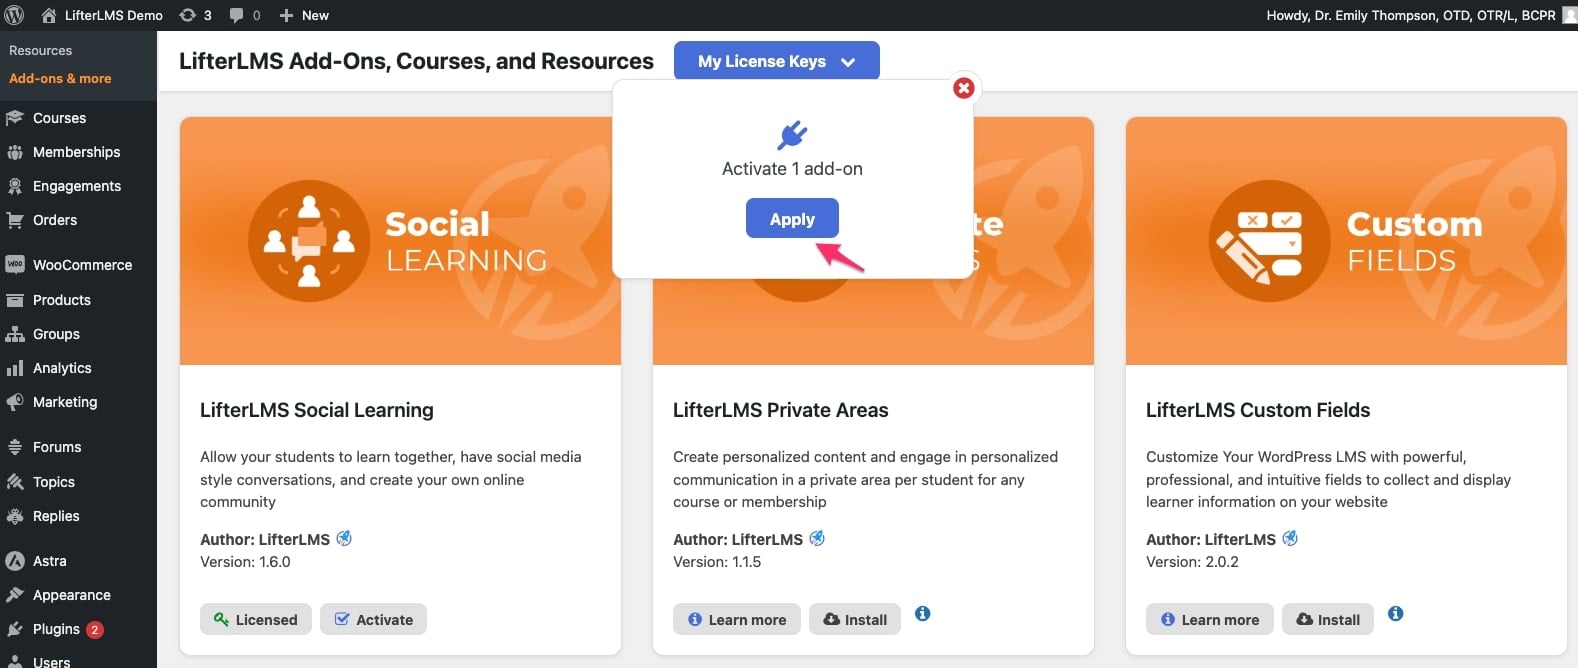
Once your key is added, you’ll be able to install any add-ons right from the backend of your website, on the same screen under LifterLMS > Add-ons & More. You’ll also have access to any updates the LifterLMS development team releases.
Once you have your key, add it to your WordPress site to receive automatic updates and support.
- Log in to your WordPress site as an administrator.
- Navigate to LifterLMS > Add-ons & More.
- Click on the My License Keys button. A dropdown menu will appear.
- Paste your license key into the field.
- Click Add New.
Each LifterLMS license has a limit on the number of active websites you can use it on. The number of active websites you can use your license key on depends on your plan. Please review the LifterLMS pricing page for current details, but generally:
- Single Add-on & Earth Bundle: 1 Active Site
- Universe Bundle: 5 Active Sites
- Infinity Bundle: Unlimited Active Sites
Sometimes, you might try to activate your license on a new website and receive an error message stating that you reached your activation limit. This issue often happens because a staging site or testing environment is using one of your license slots. If you forget that a temporary development site is still active, you will not be able to activate your license on your new website.
Staging and development sites (copies of your website used strictly for testing) do not count against your active site limit, provided they meet the criteria below. To prevent your staging sites from counting against your active license limit in the future, you can use a system-approved URL pattern for your testing environment.
You can learn how to configure your staging site so our system automatically skips counting it as an active site by jumping to the section below on adding your license key and managing staging sites.
You can also log in to your LifterLMS on our website and deactivate any old or unused website URLs. To check your active licenses and deactivate a website, follow these steps:
- Open your web browser and go to the LifterLMS website.
- Click the My Account button at the top of the page and log in to your account.
- Navigate to My Account > Licenses.
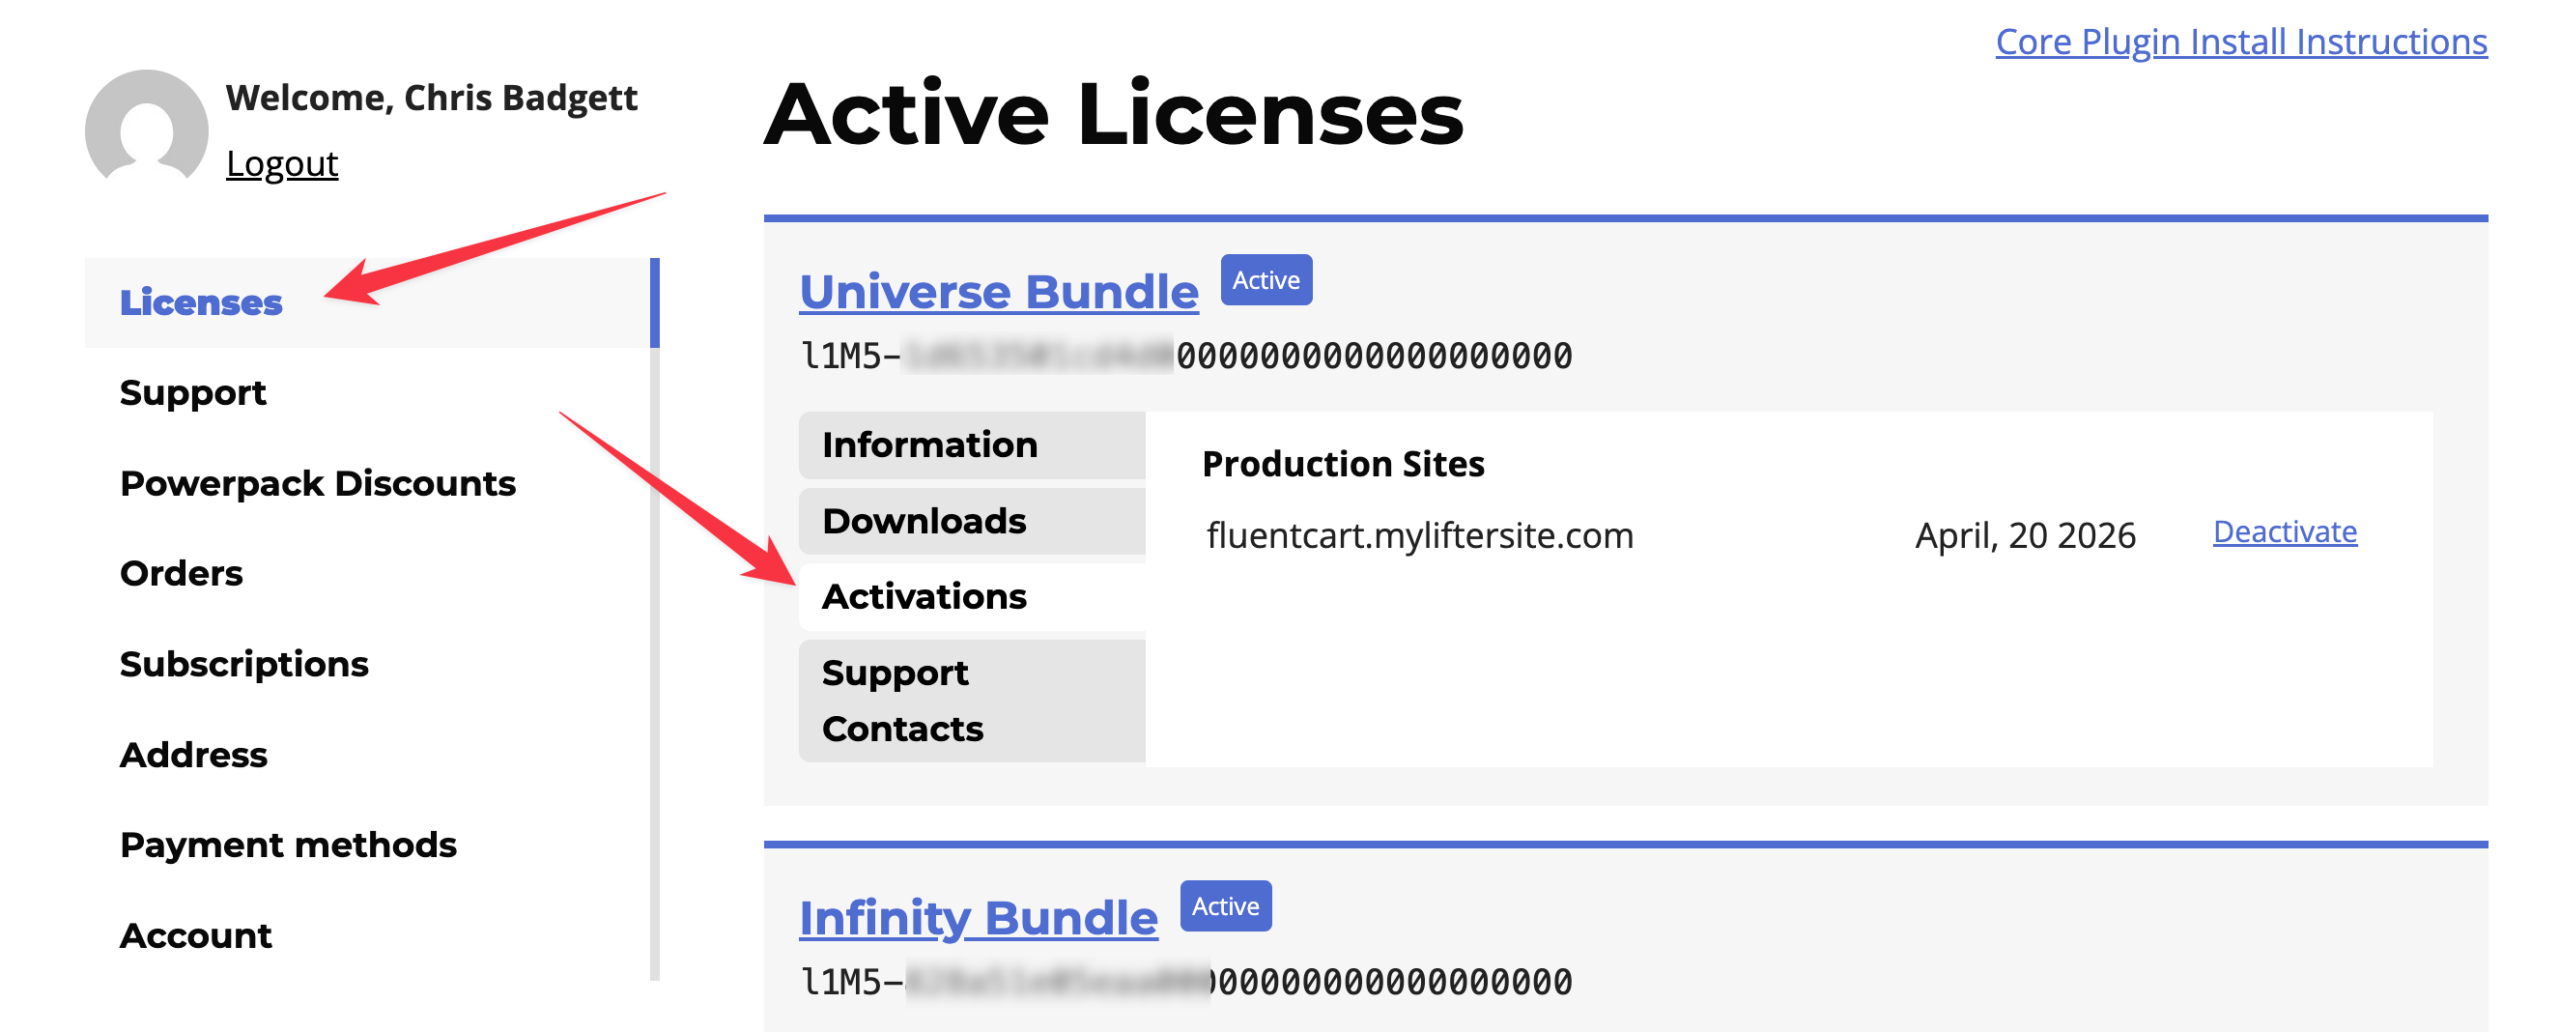
- Find the license key you want to manage.
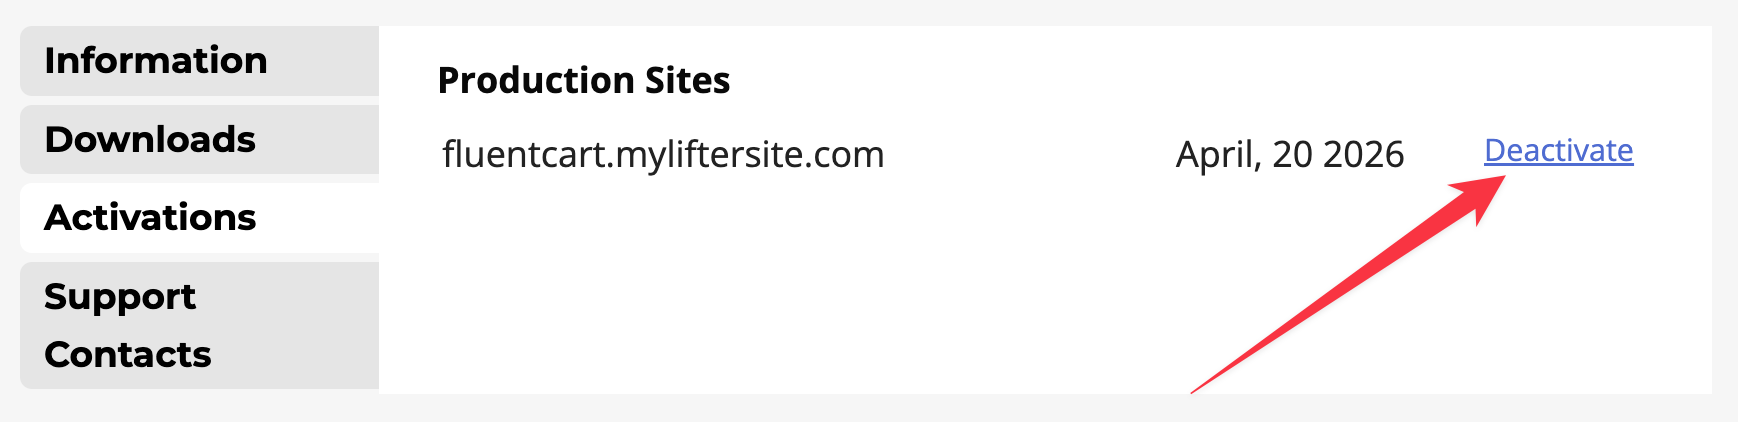
- Look for the list of URLs under the phrase “Activations”.
- Locate the URL of the site you want to disconnect.
- Click the Deactivate button next to that URL.
This action frees up your activation slot. You can now activate your license key on your new WordPress website.
LifterLMS uses an automated system to detect staging environments based strictly on the site’s URL. To ensure your staging site does not count against your active license limit, your site’s URL must match one of our system-approved staging patterns.
If your staging site URL does not match these patterns, it will be counted as a “Live” site and will use a seat on your license.
Approved Subdomains
A site is considered “staging” if the URL begins with any of the following terms:
- dev. (e.g., dev.example.com)
- develop. (e.g., develop.example.com)
- local. (e.g., local.example.com)
- stage. (e.g., stage.example.com)
- staging. (e.g., staging.example.com)
- test. (e.g., test.example.com)
- testing. (e.g., testing.example.com)
Approved Hosting Environments
Your site is automatically considered “staging” regardless of the subdomain if the URL is hosted on one of these specific platforms:
- RunCloud (.temp-site.link)
- WP Engine (.wpengine.)
- Kinsta (.kinsta.)
- Flywheel (.flywheelsites.)
- Cloudways (.cloudwaysapps.)
- Pantheon (.pantheonsite.)
- GoDaddy Managed WP (.myftpupload.)
- GridPane / Access Domain (.accessdomain.)
- Sandboxes: .poopy.life, .wpsandbox.pro
Note: RunCloud staging sites use .temp-site.link, so they count as staging automatically.
If you see an error message stating that your license limit has been reached, check the URL of your staging site.
If you are using a custom subdomain to test a new design (such as new-design.example.com or v2.example.com), this will not be recognized as a staging site. To fix this without upgrading your license, you must rename your subdomain to one of the approved terms listed above (e.g., rename new-design.example.com to staging.example.com).
Some hosting providers use caching or security measures that may prevent the license key from being saved correctly. If you are unable to save your key, you can add the following code snippet to your site (in your child theme’s functions.php file or using a code snippets plugin) to resolve this:
add_filter( 'llms_use_server_for_environment_fetch', '__return_true' );


