Managing Group Members, Invitations, and Seats
The number of members in a group is governed by the number of available seats.
Each group member, leader, and administrator occupies a single seat.
Additionally, each pending or unaccepted invitation occupies a seat.
To add a member to a group, a group leader or administrator must send the member an invitation.
To invite a new member (or a list of members), navigate to the group profile page and click the Manage (pencil icon) button on the right side of the Members sidebar section.

Group administrators can invite group members, leaders, or other administrators, while group leaders can only invite other members.
Multiple members may be invited at a time by entering multiple email addresses. A comma- or space-separated list of email addresses can be pasted into the address field in order to send many invitations at once.
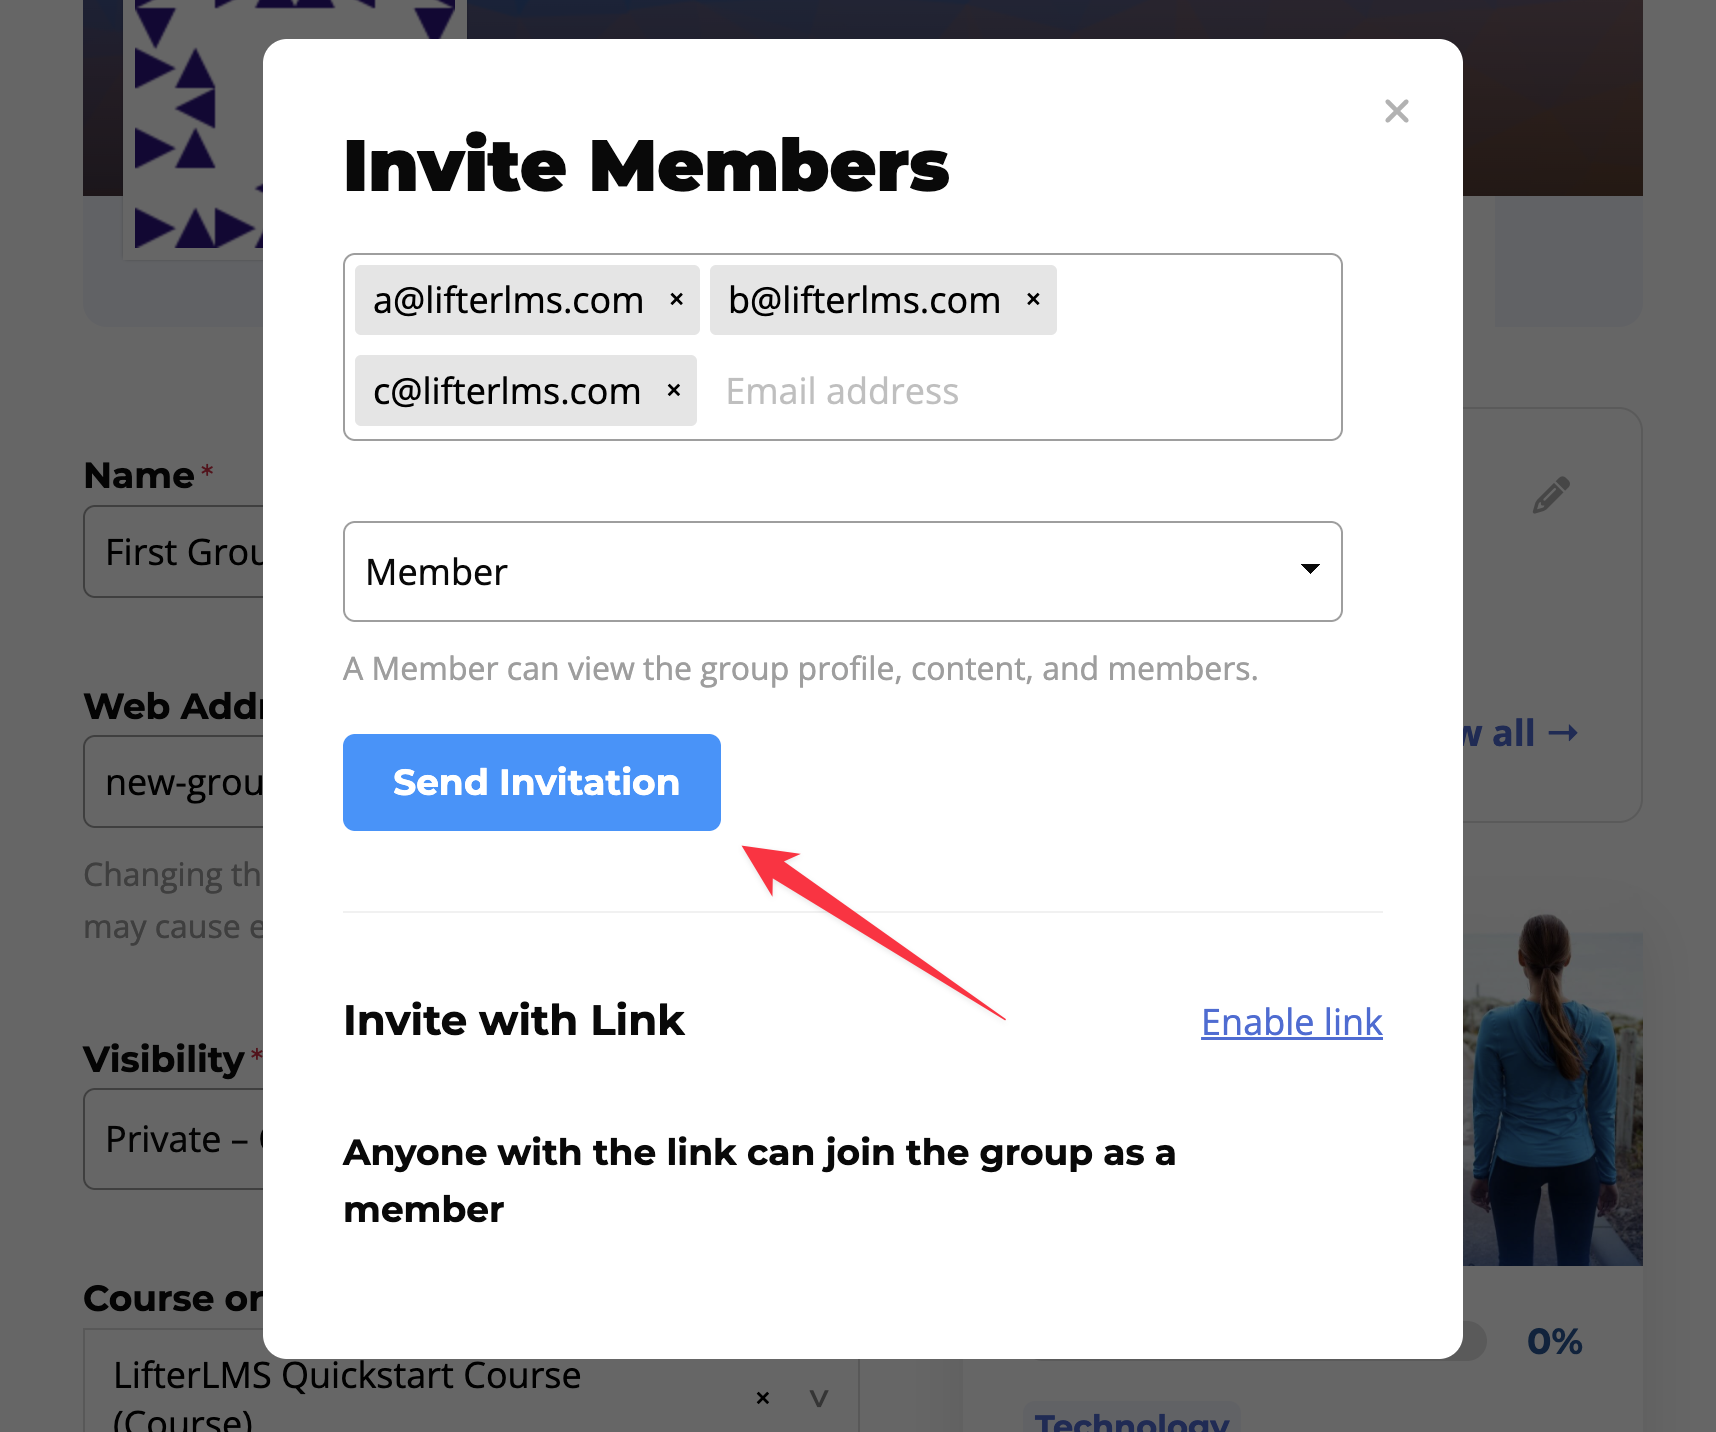
An email will be sent to each group’s invited email address containing a unique invitation acceptance link.
Clicking the link directs the invited member to the Student Dashboard, where they can either create a new account or log in to their existing one. Once the invited member logs in, they will automatically be added to the group (and enrolled in the associated course or membership).
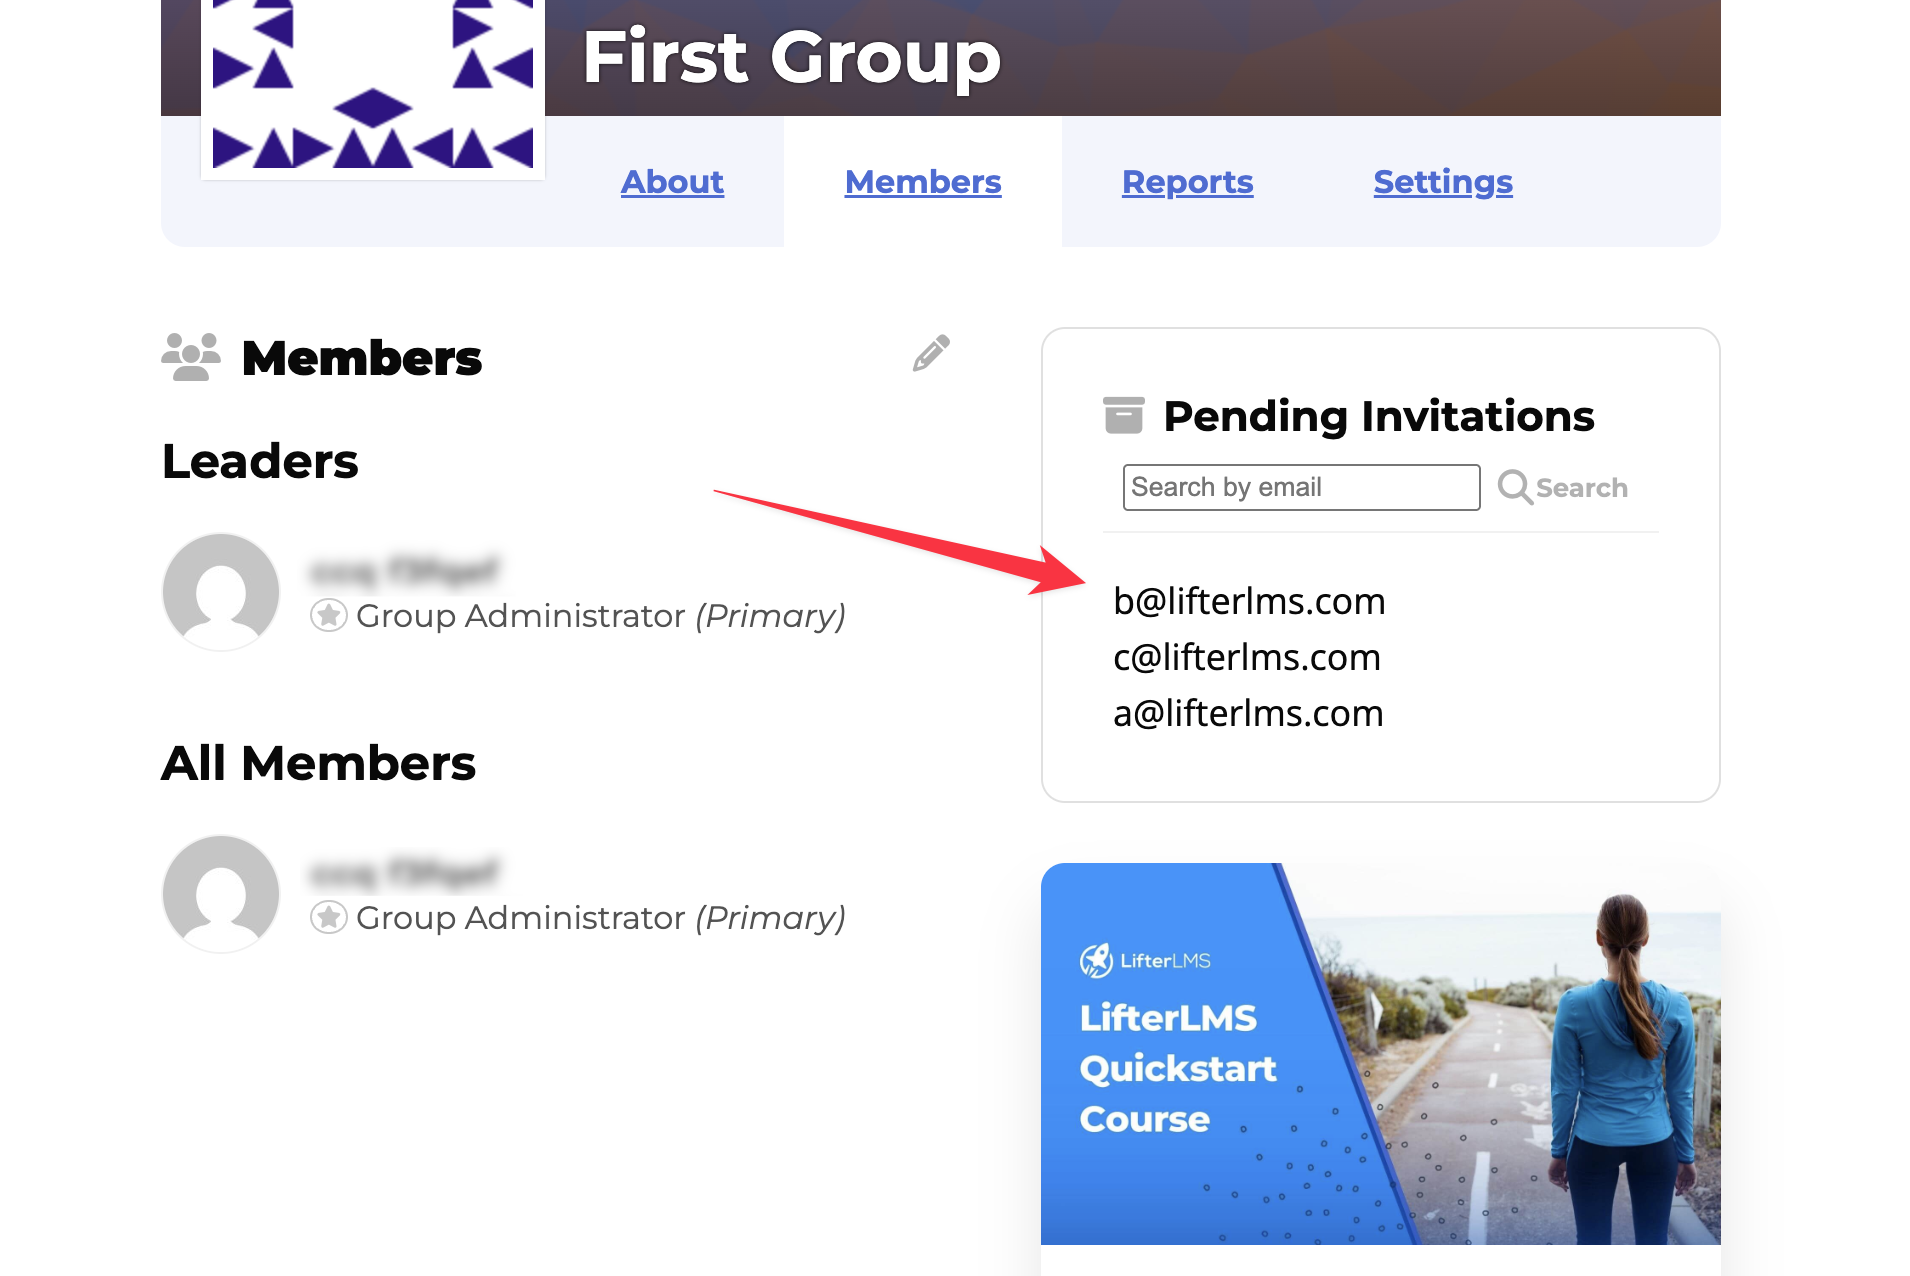
A list of all group invitations that the invited member has not yet accepted can be found on the Members tab of the group profile, in the Pending Invitations area of the sidebar.
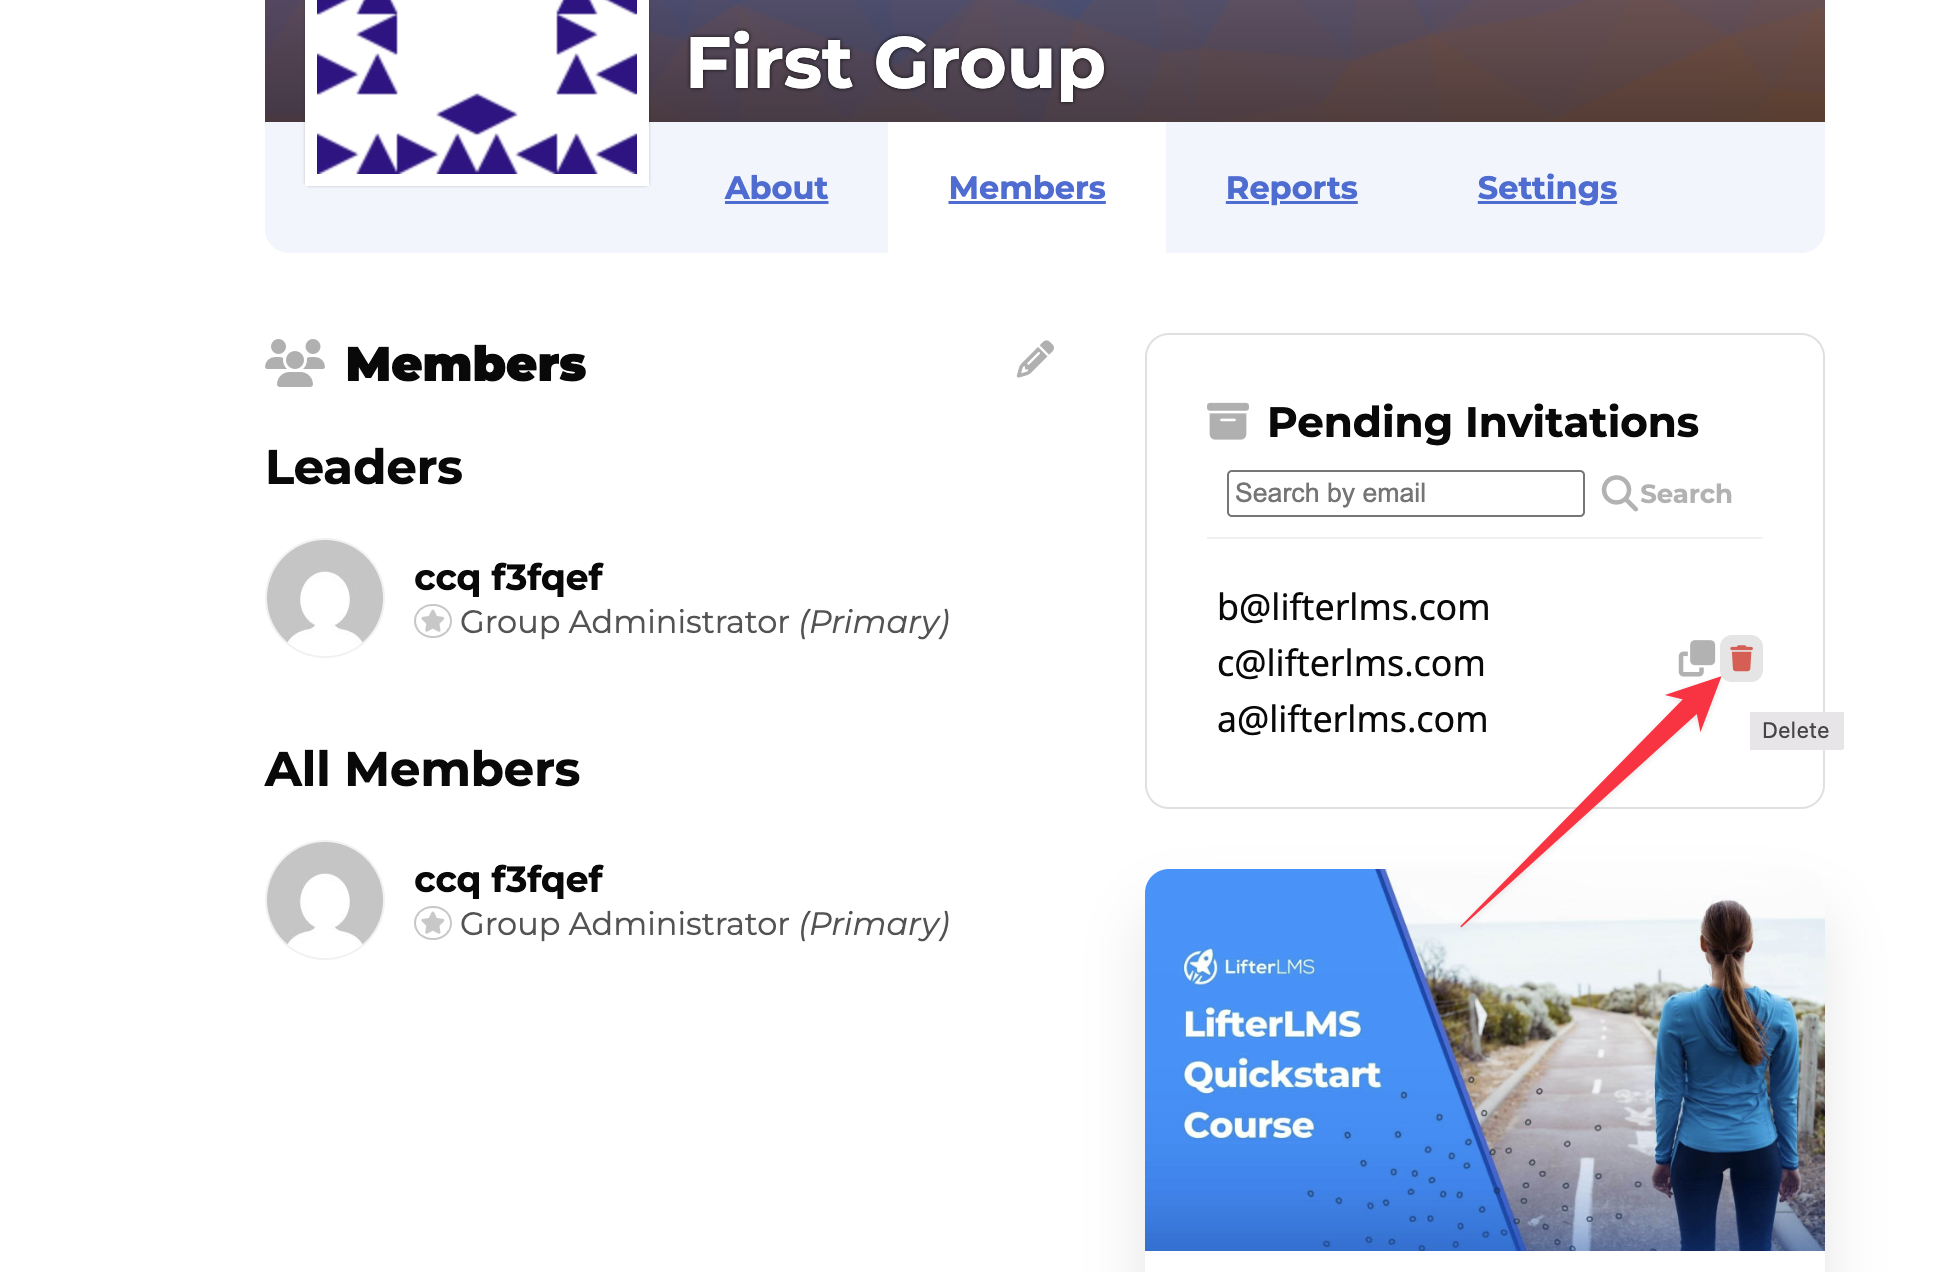
Delete a Pending Invitation
To delete a pending invitation, locate the invitation you want to delete, hover over the email address, and click the red trash can icon.
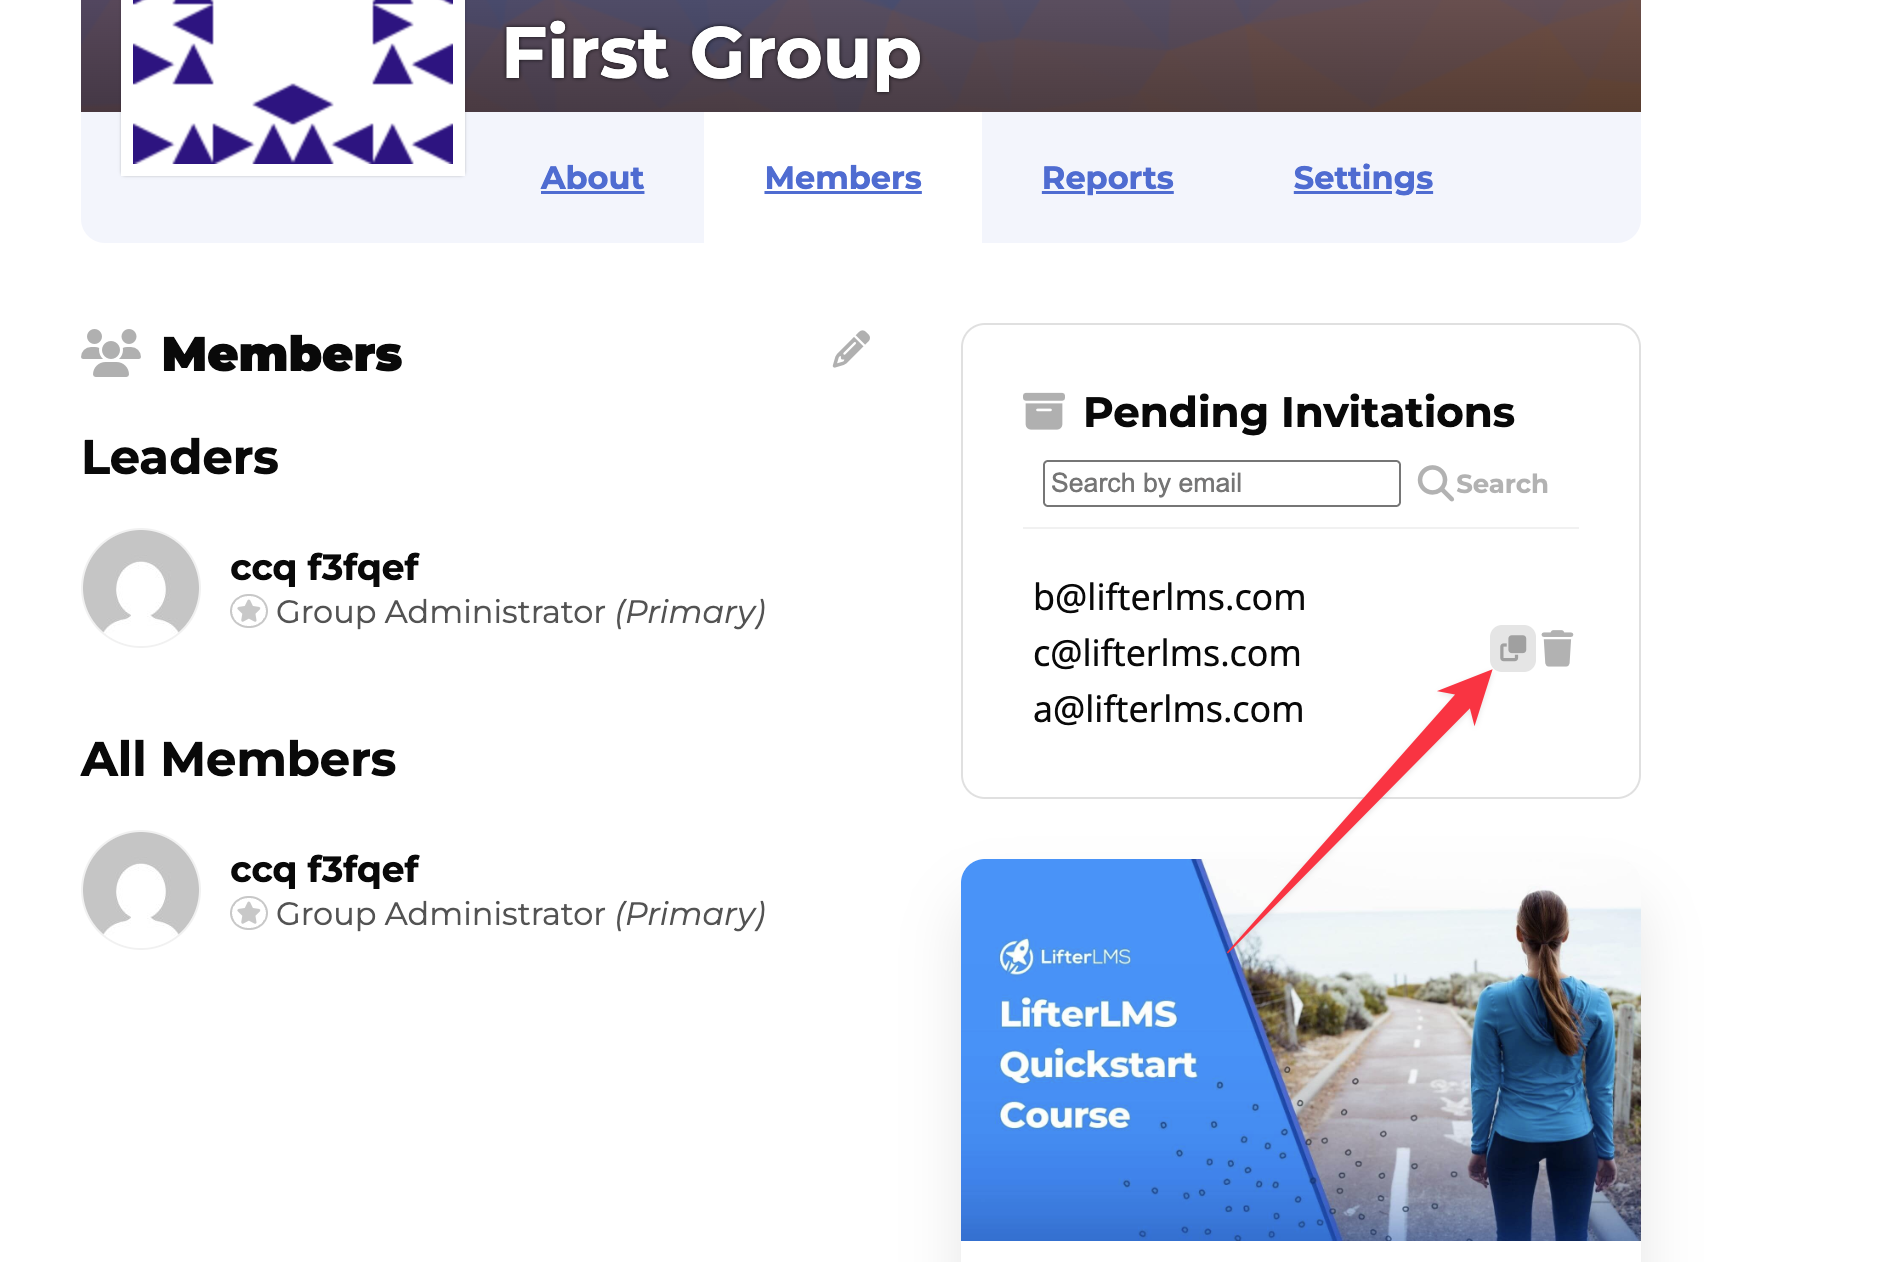
Get an Invitation’s Acceptance Link
To retrieve the invitation’s unique acceptance link, hover over the email address and click the copy icon.
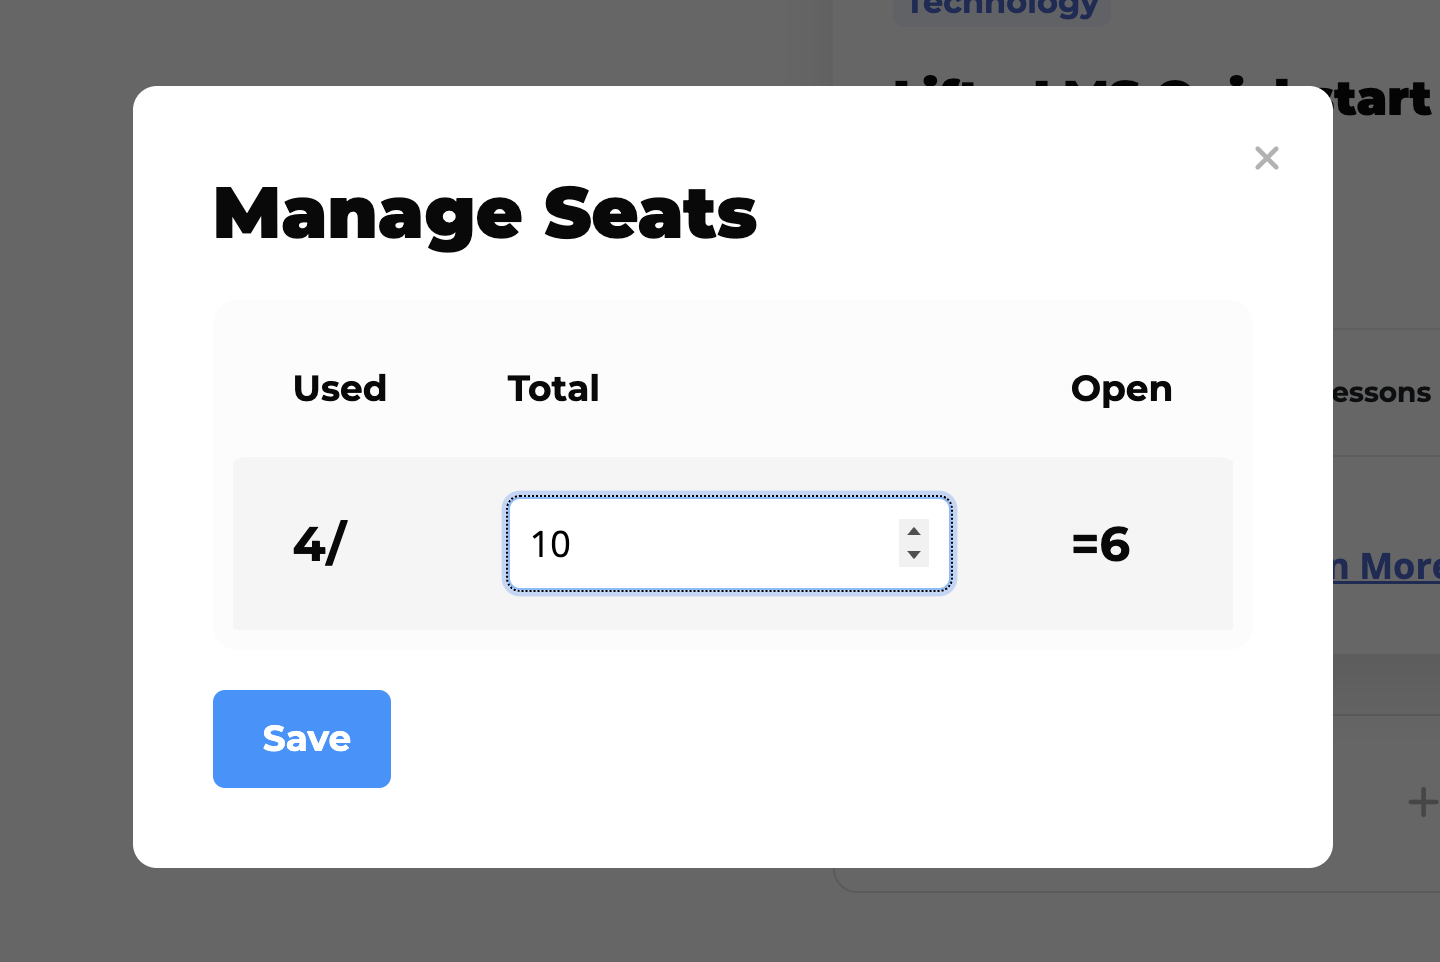
Group administrators can increase or decrease the number of available seats by entering the desired number in a text box.
To manage the number of available seats, visit the group profile, locate the Seats section in the sidebar, and click the + (plus sign) button on the right.
Enter the number of seats you wish to add (or remove) and click Save.
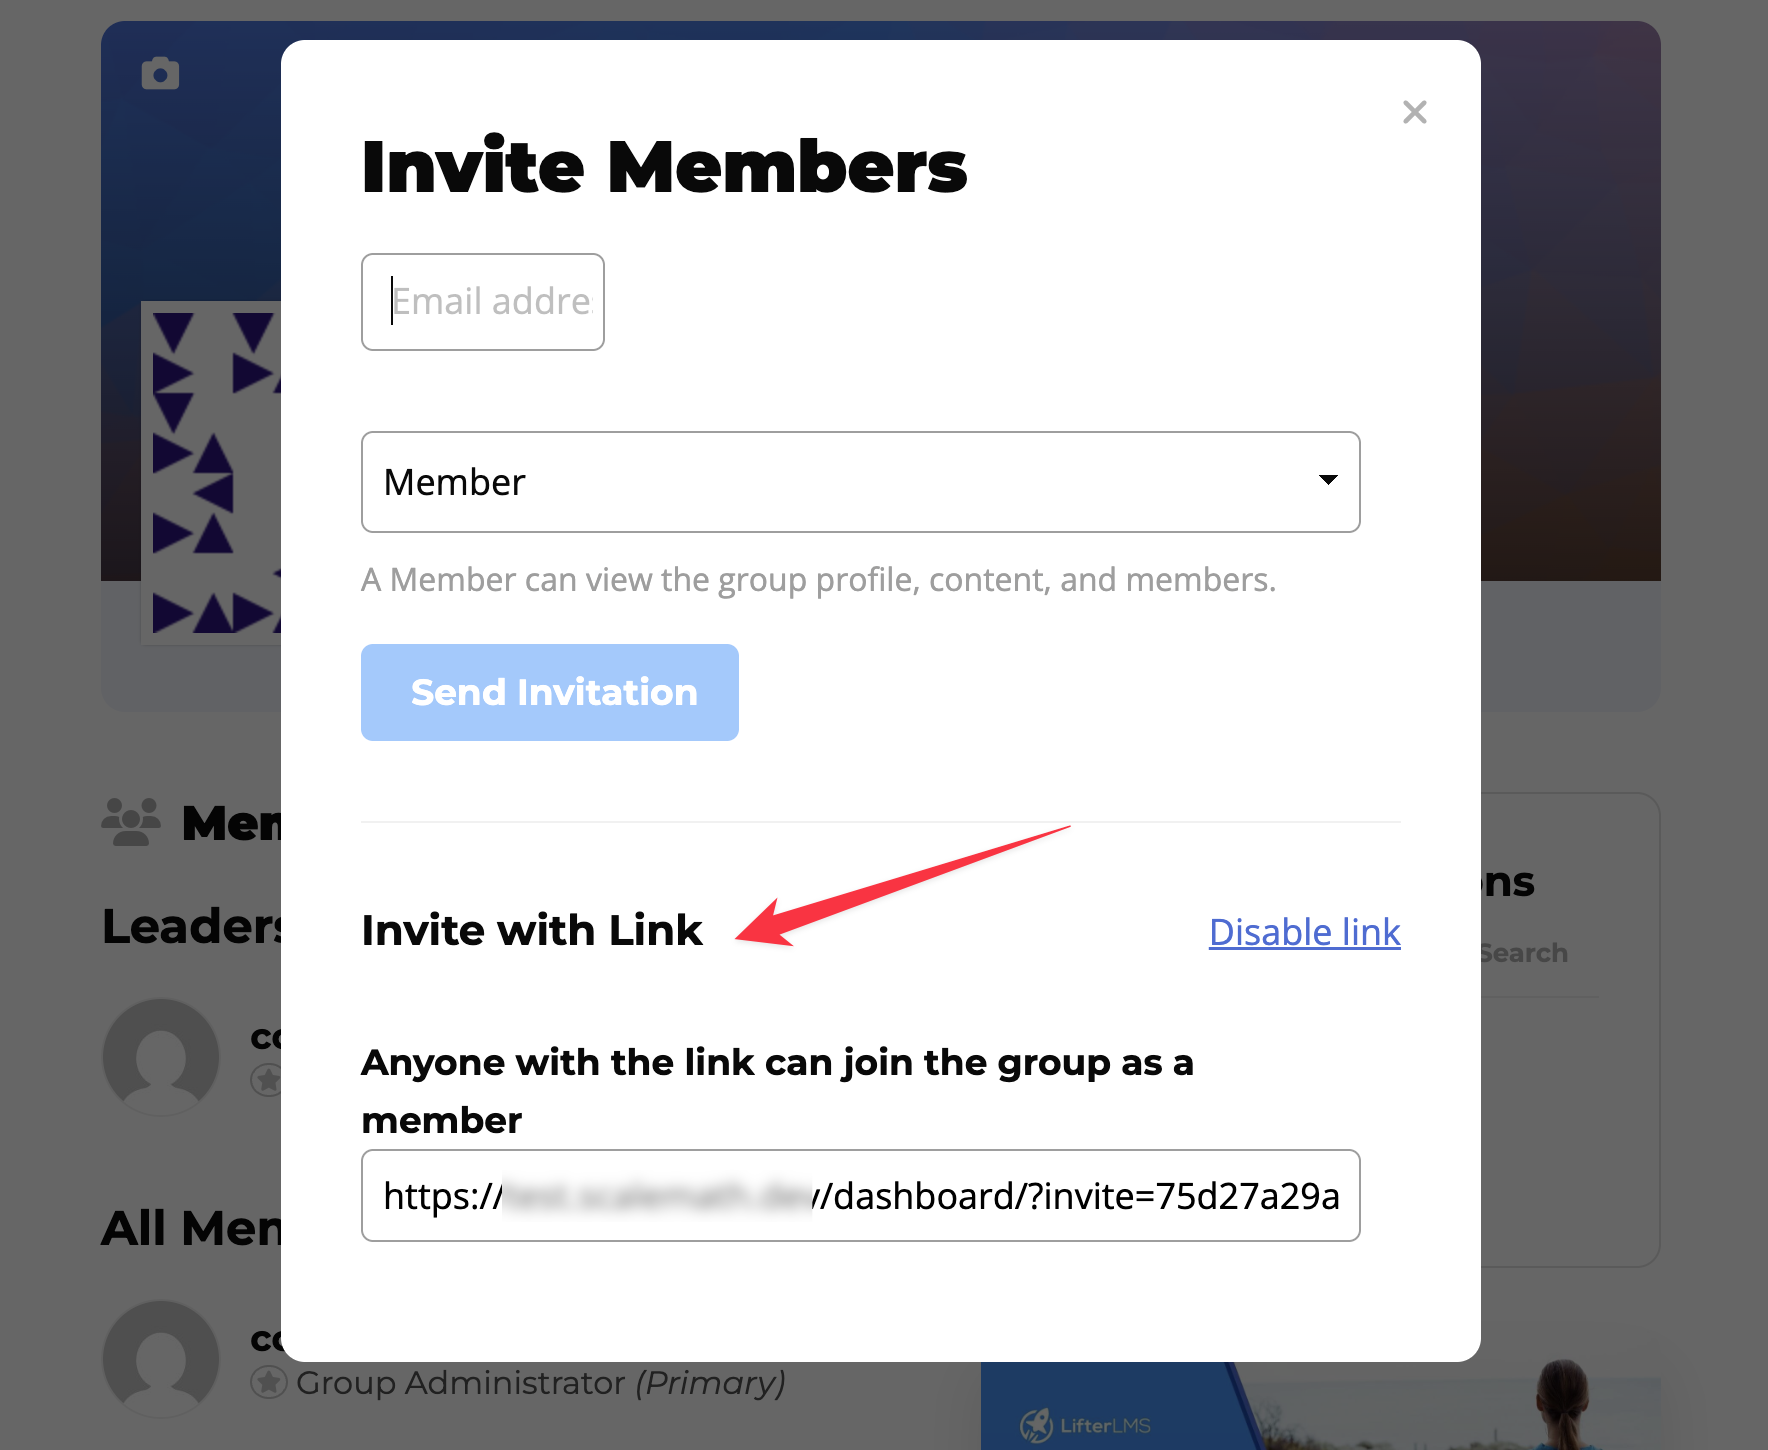
The Open Invitation Link is a link you can share with anyone you wish to allow to join the group.
To enable an Open Invitation Link for the group, navigate to the members’ invitation section described above. At the bottom of the section, click “Enable Link”.
A link will be generated, which you can distribute to members. Anyone with the link can use it to join the group, as long as there are available unoccupied seats.
To disable the link, return to the invitation section and click Disable Link.
To manage your group or see how it appears to your members, navigate to the group profile page on your website’s front end.
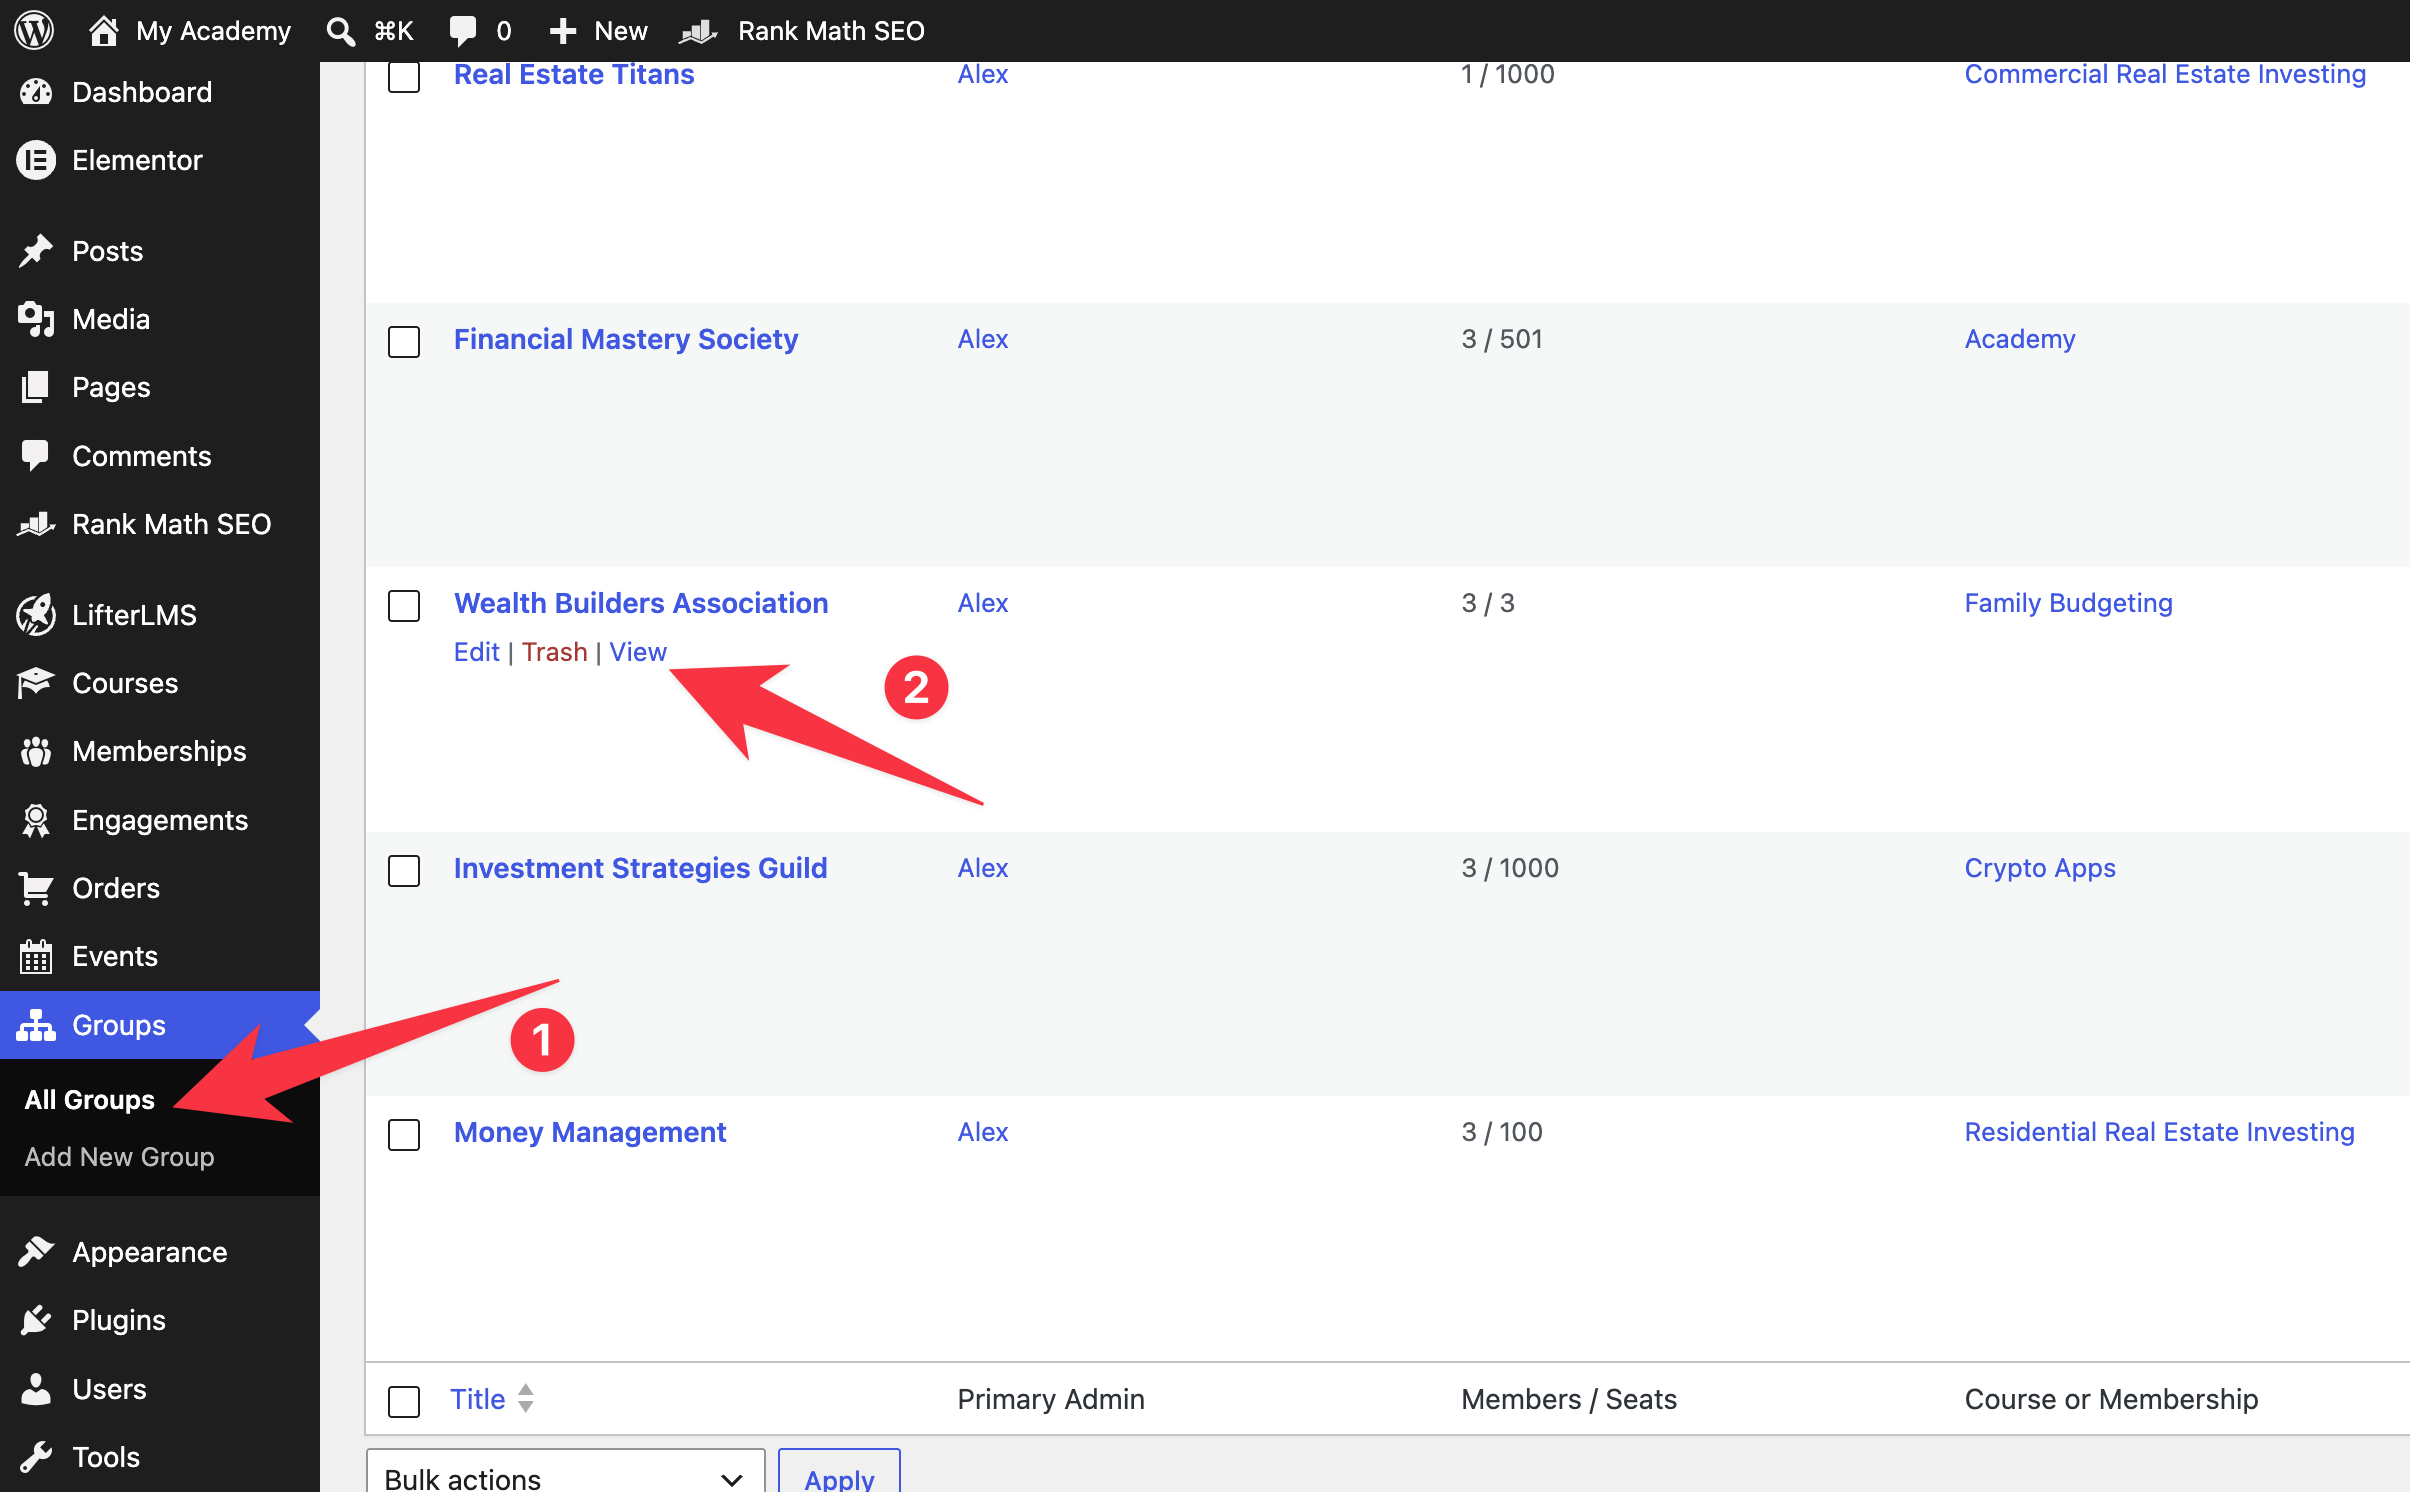
- Navigate to Groups > All Groups in your WordPress dashboard.
- Locate the group you wish to visit.
- Hover your mouse over the name of the group.
- Click the View link that appears in the list of options.
To learn how to invite students to join your group, read our docs on inviting students to LifterLMS groups for a step-by-step walkthrough.
Group members with qualifying permissions can promote, demote, and even remove other members.
To manage another member, visit the Members tab of the group profile. Locate the member and hover over the context menu button.
In the resulting context menu, click the action you’d like to perform on the member.

The group’s primary administrator can transfer group ownership to another group administrator.
The current primary administrator will see an additional option in the member management context menu: Make Primary Group Administrator. Clicking the option will transfer group ownership to that member.

You can now use the LifterLMS eCommerce system to create groups automatically. When a customer purchases a product linked to a group, the system creates the group and assigns the customer as the Group Leader.
To set this up on your site, create a new access plan for your LifterLMS course and select “Yes, use for group enrollment” under the Group Enrollment section.
For a detailed walkthrough on setting up group products and managing enrollment, please refer to our Group Enrollment documentation.

Note: While you can create a new group through a purchase, you cannot currently add more seats to an existing group via the eCommerce checkout. If a Group Leader needs more seats for their team, a site administrator must manually increase the group’s seat count. For more details and step-by-step instructions, refer to the “Getting Started with LifterLMS Groups” guide.


