Gravity Forms & Custom User Management Forms
When using the Gravity Forms User Registration Add-on and LifterLMS Gravity Forms, you can replace the default LifterLMS forms (e.g., the registration form itself, and the edit account form) with custom Gravity Forms. The default forms from LifterLMS can be found in WordPress Dashboard > LifterLMS > Forms.
You can also just replace the registration section of the checkout form (but not the checkout form itself). Similarly, you can also just replace the customer information update section of the checkout page (but not the checkout form itself).
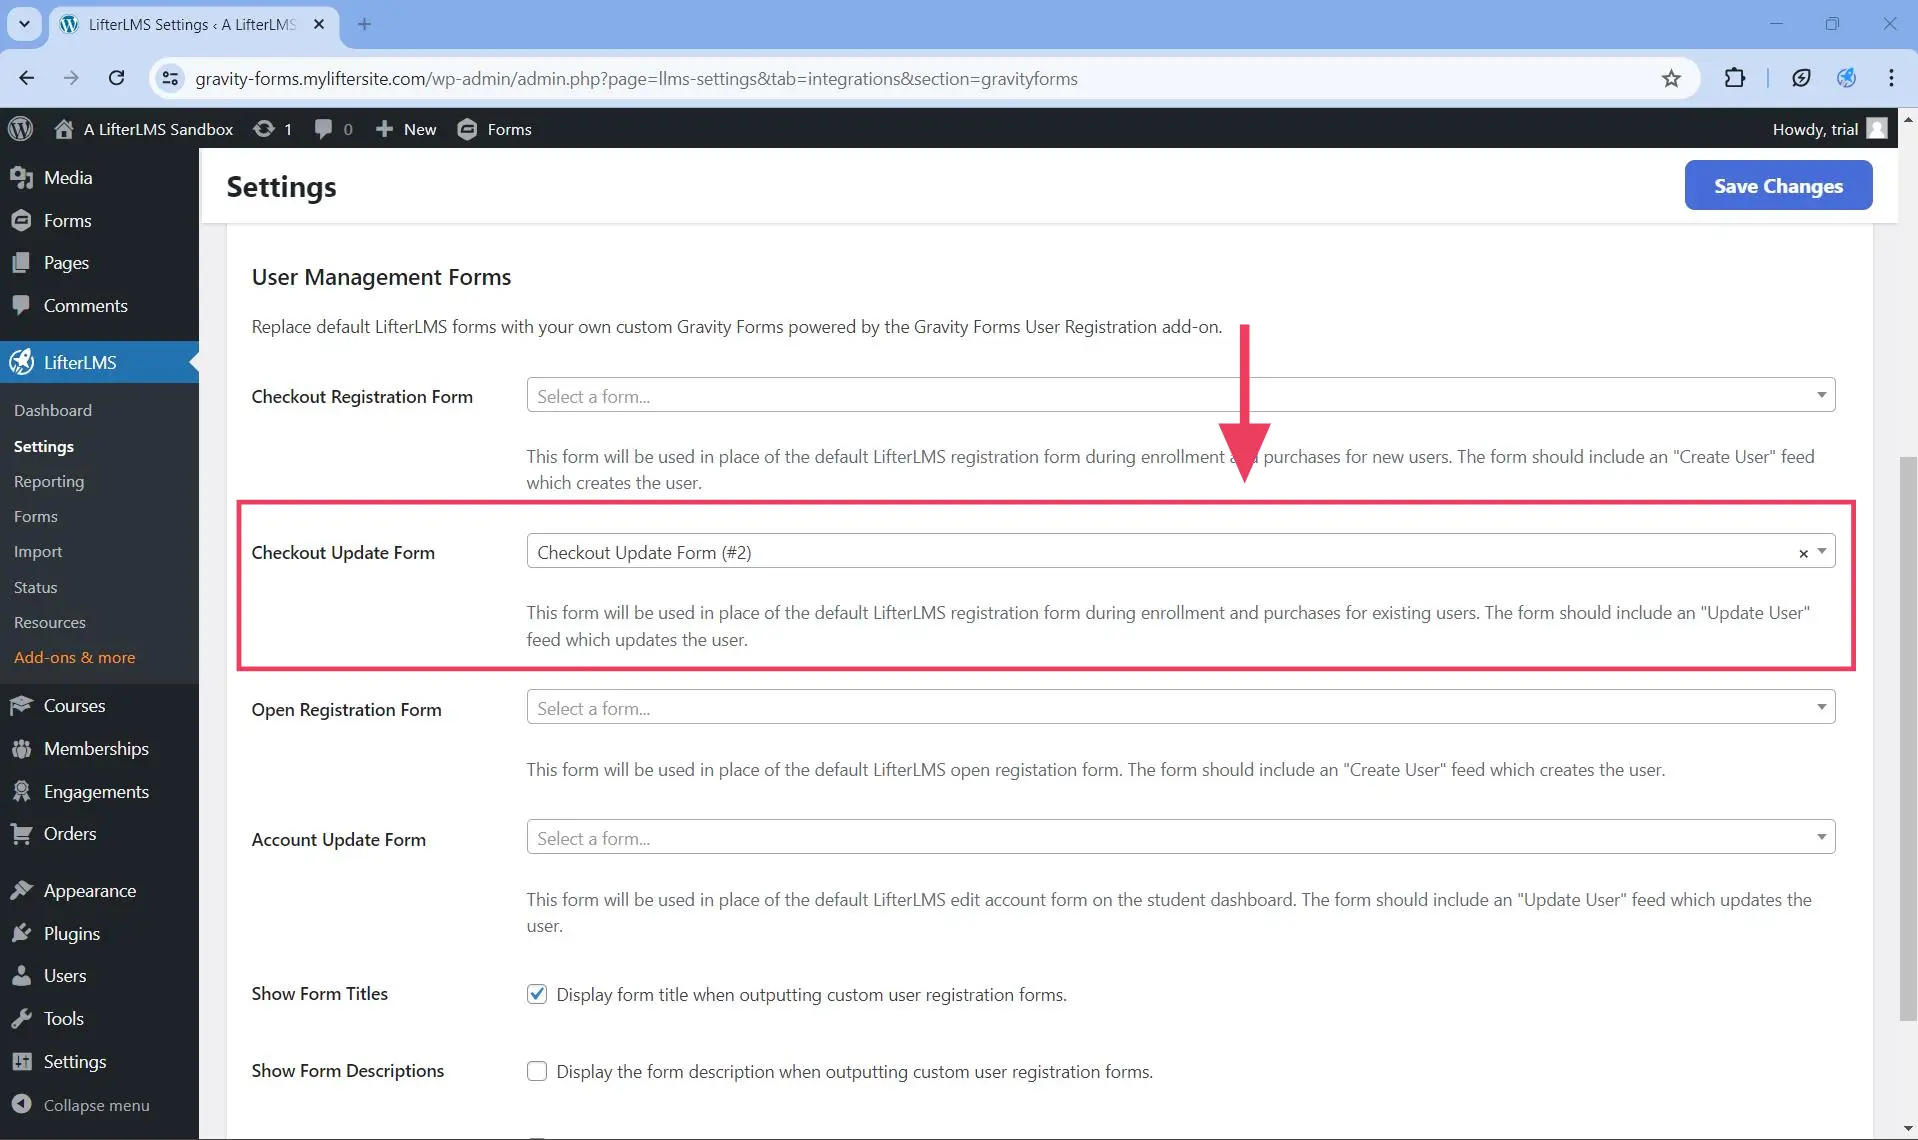
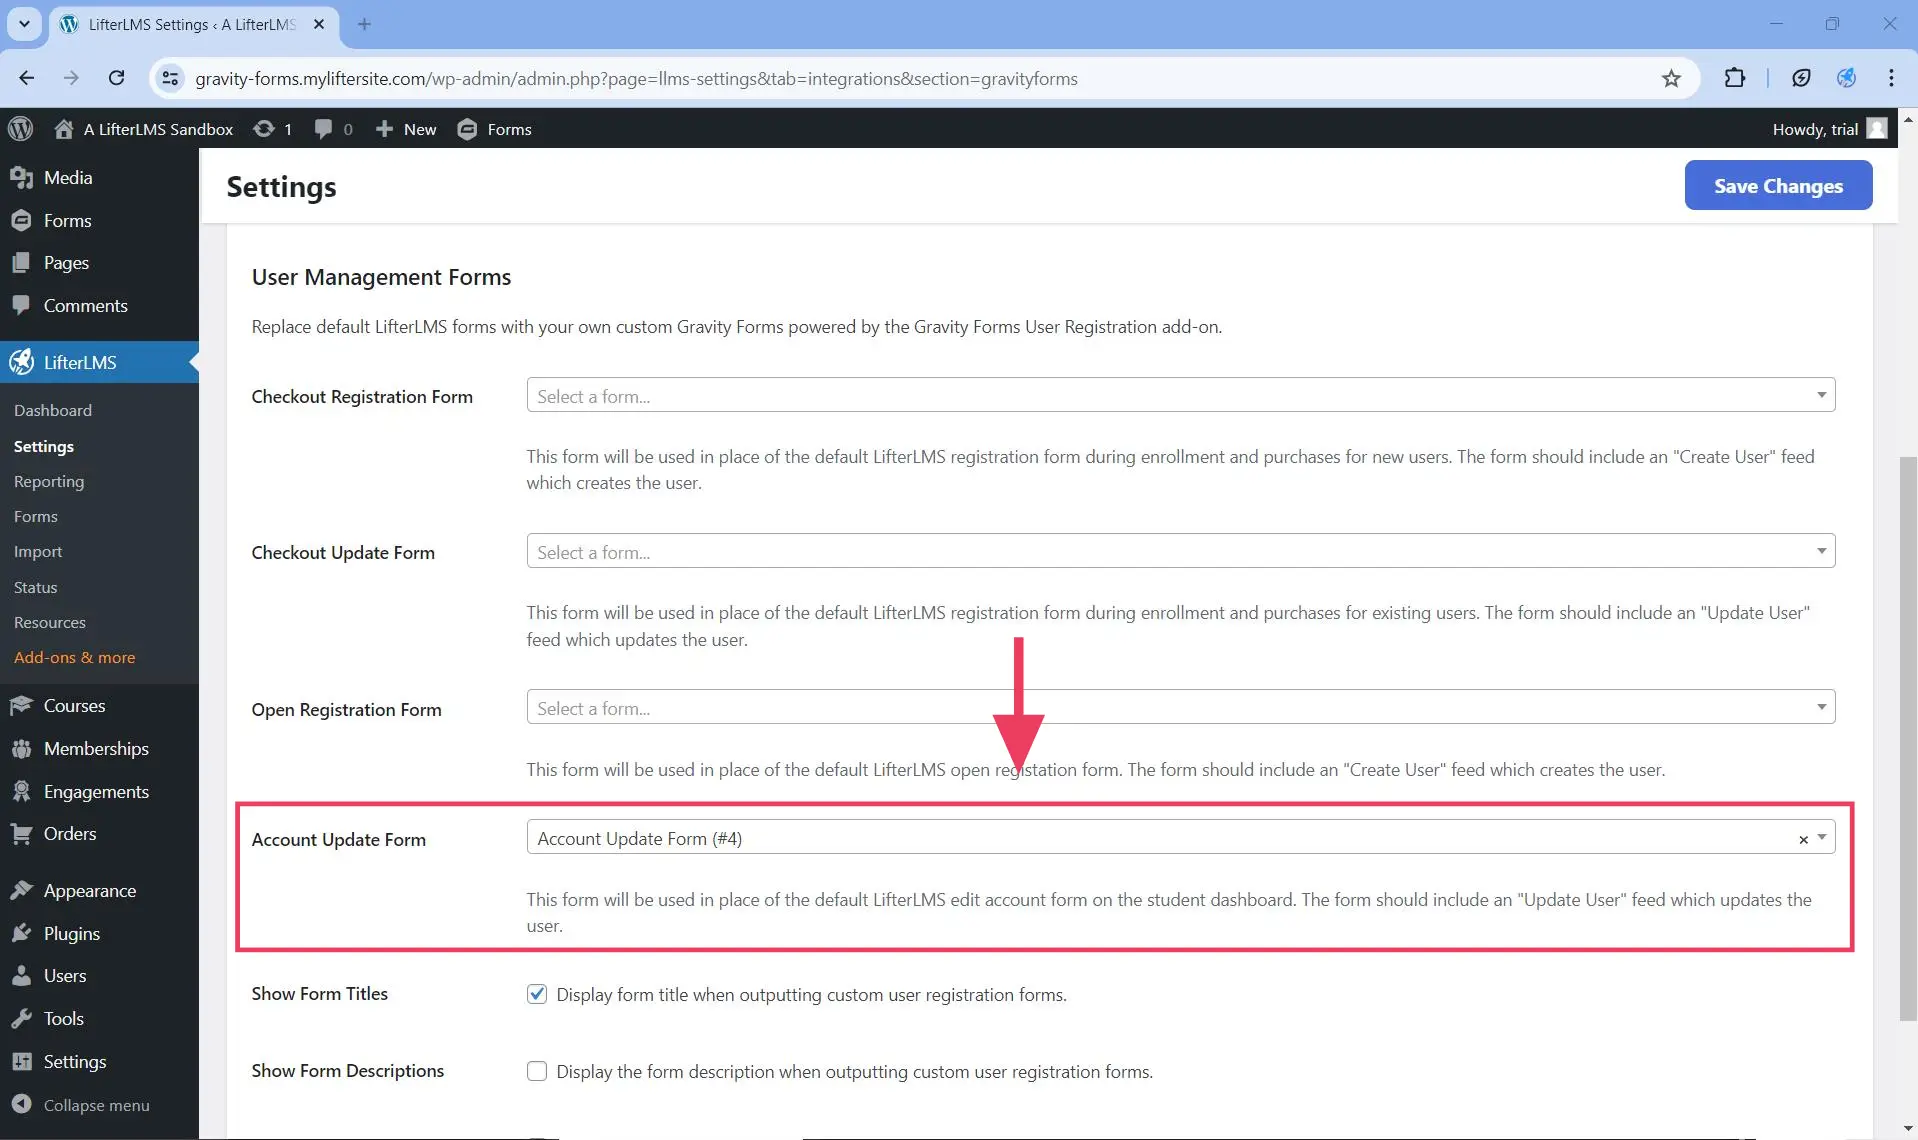
Once you create your custom Gravity Forms form in WordPress Dashboard > Forms, you need to navigate to WordPress Dashboard > LifterLMS > Settings > Integration > Gravity Forms > User Management Forms. You then need to select which form to override with your custom Gravity Forms form, as shown below.
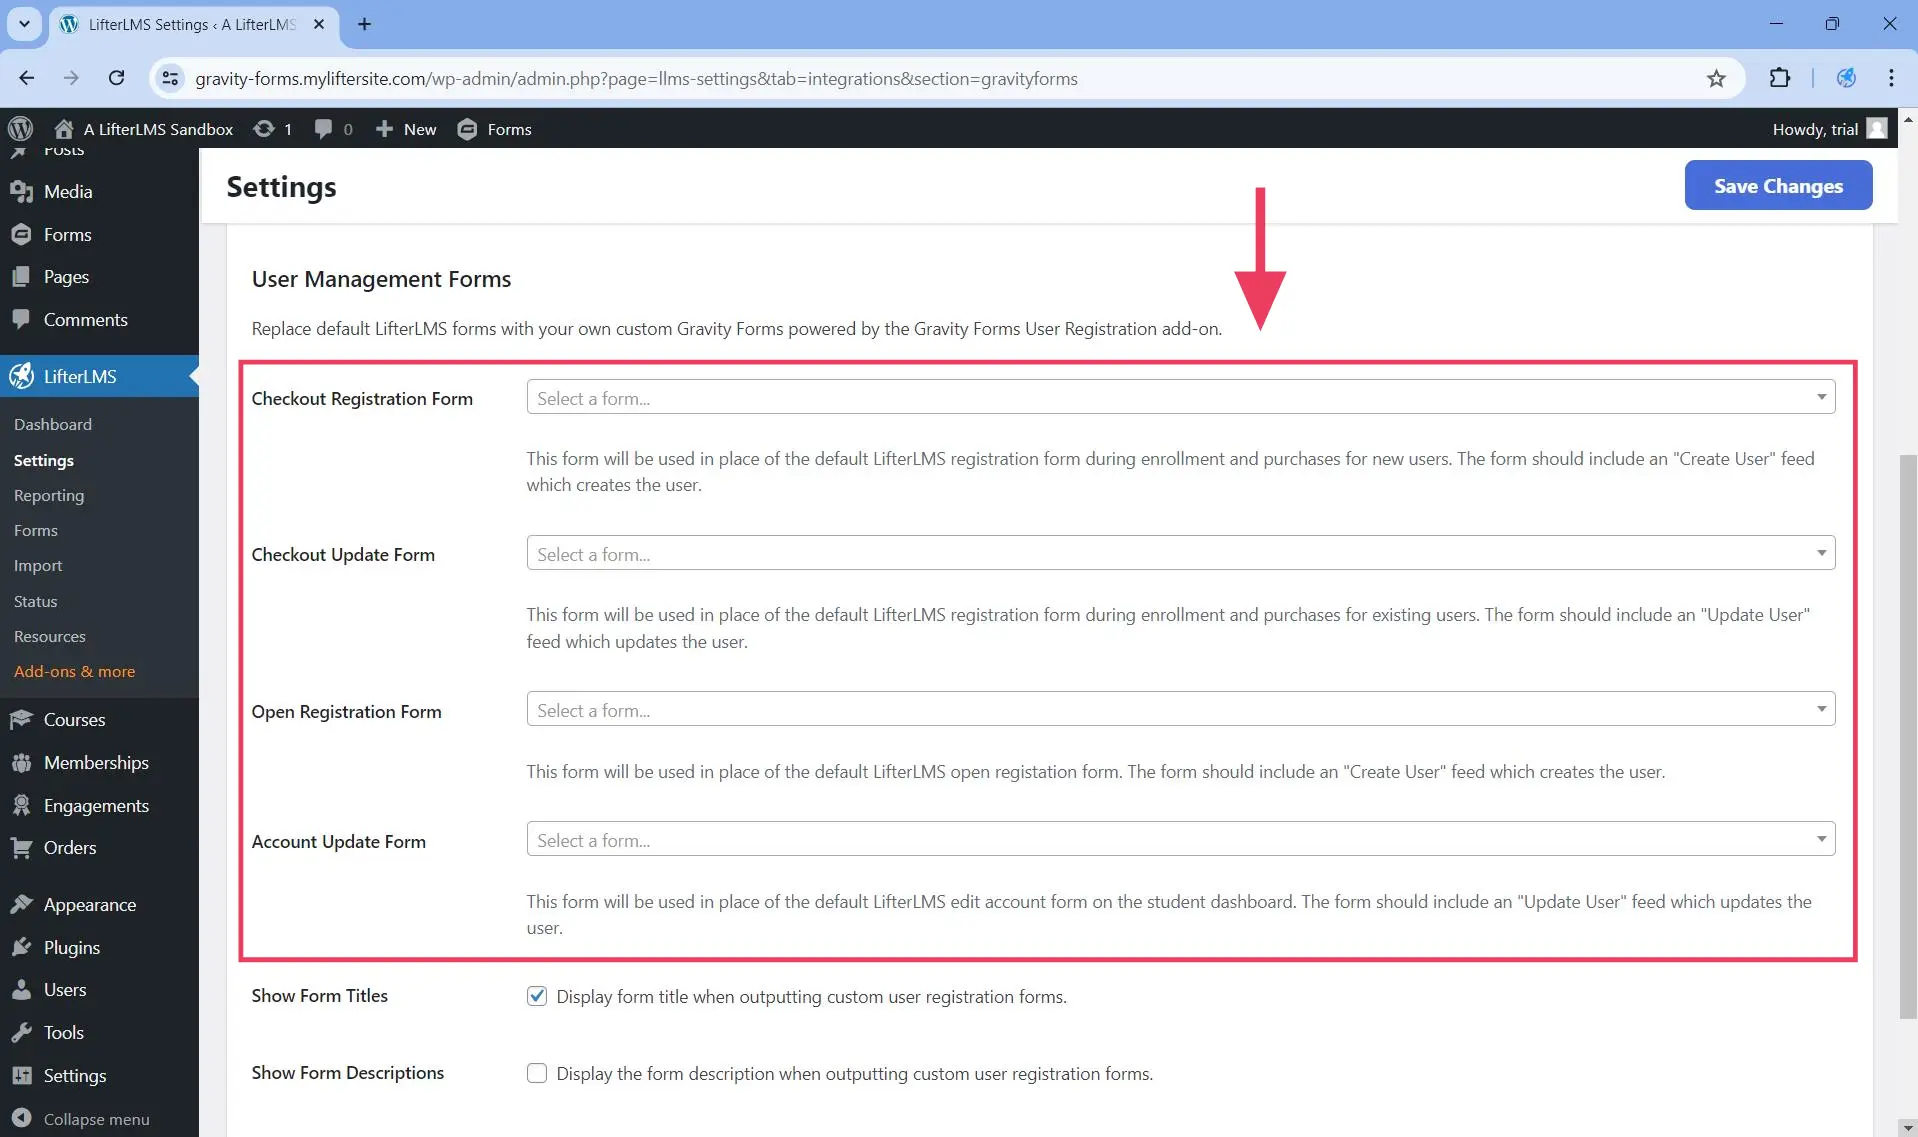
As you can see above, the forms which can be overridden are:
- Checkout Registration Form. This form is displayed to logged out students or visitors during checkout. When this registration form is replaced by Gravity Forms, the checkout flow becomes a two-step process.
- Checkout Update Form. This form is displayed to logged in students during checkout. When this form is replaced by Gravity Forms, the checkout page gets broken into two separate forms on the same page: the update form and the payment form. Each of these forms can be submitted independently of each other.
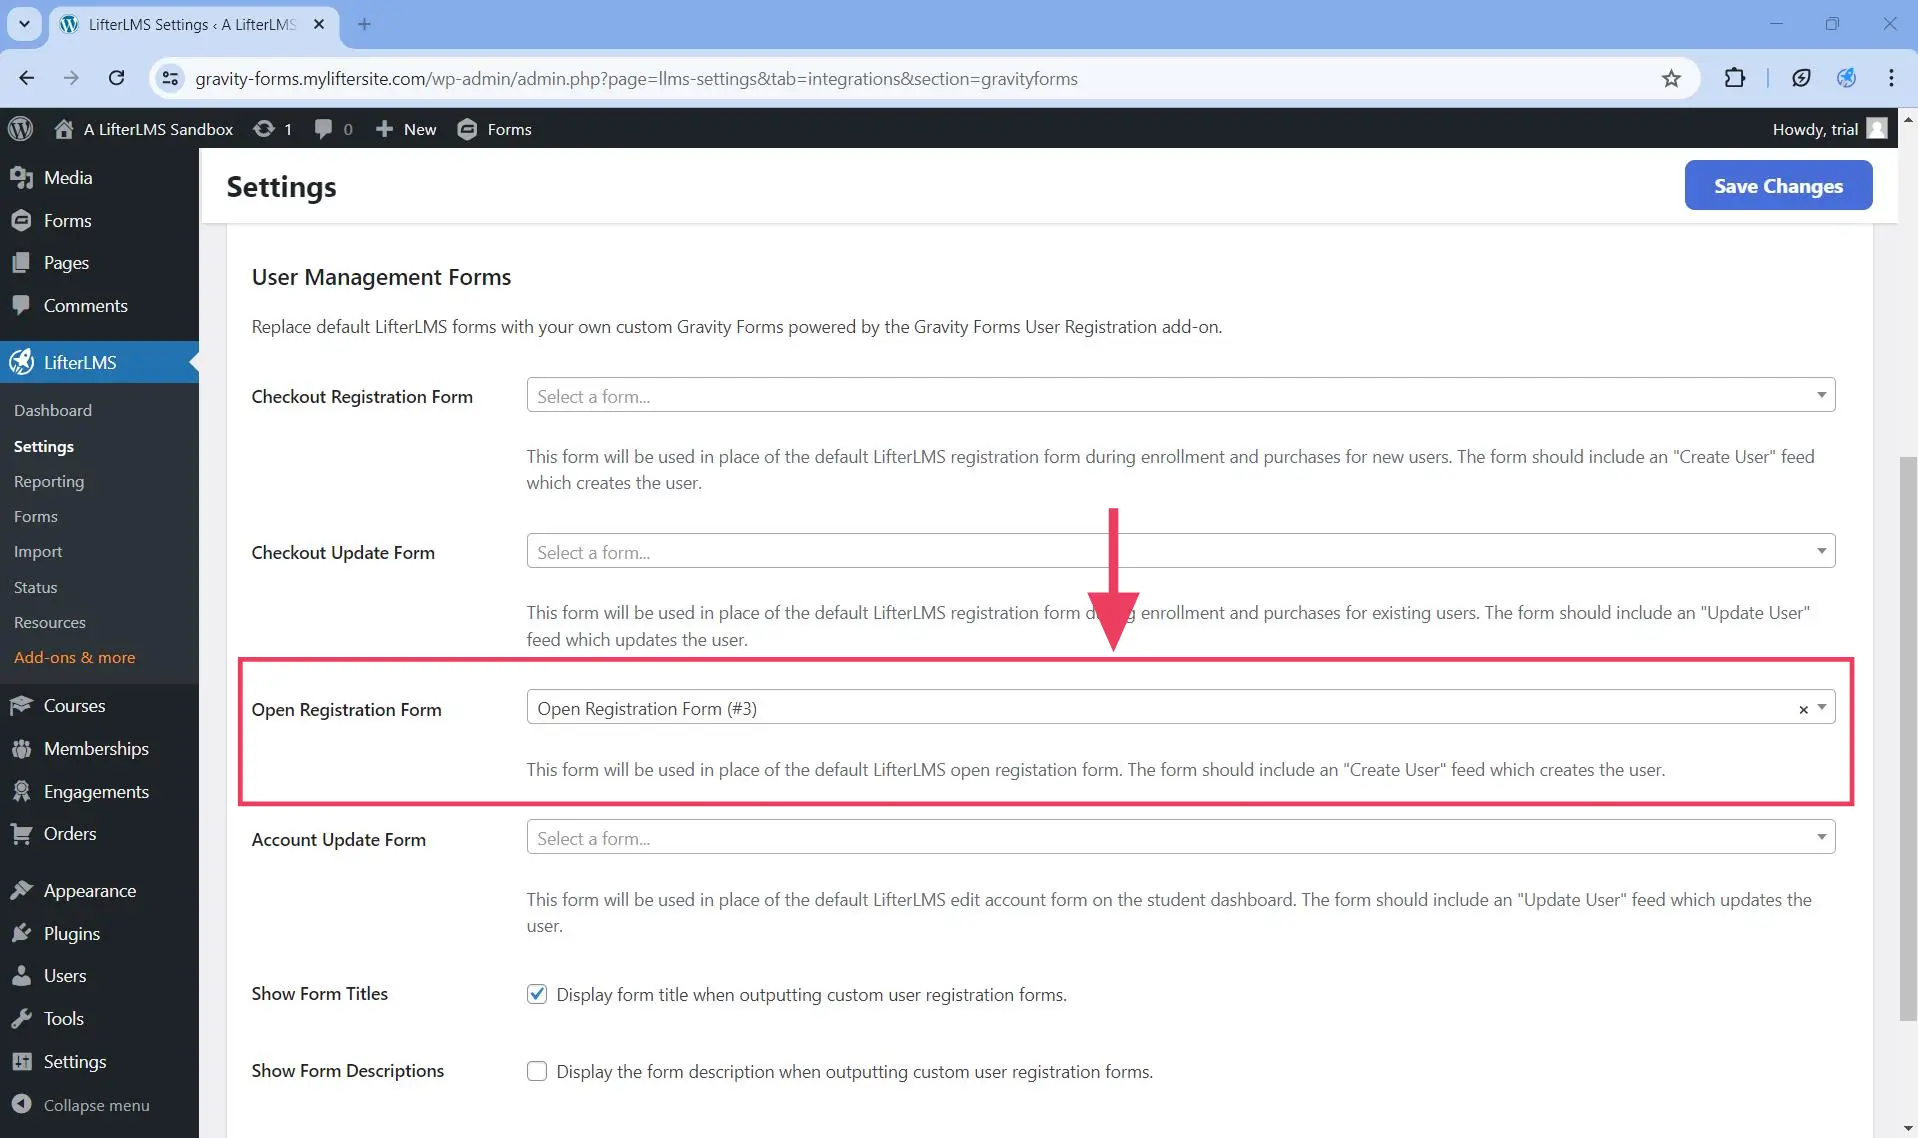
- Open Registration Form. This form is displayed to logged out students or visitors when open registration is enabled
- Account Update Form. This form is displayed on the account update tab of the student dashboard
This step requires that you have the Gravity Forms User Registration add-on active. To create custom user management forms, follow these steps below.
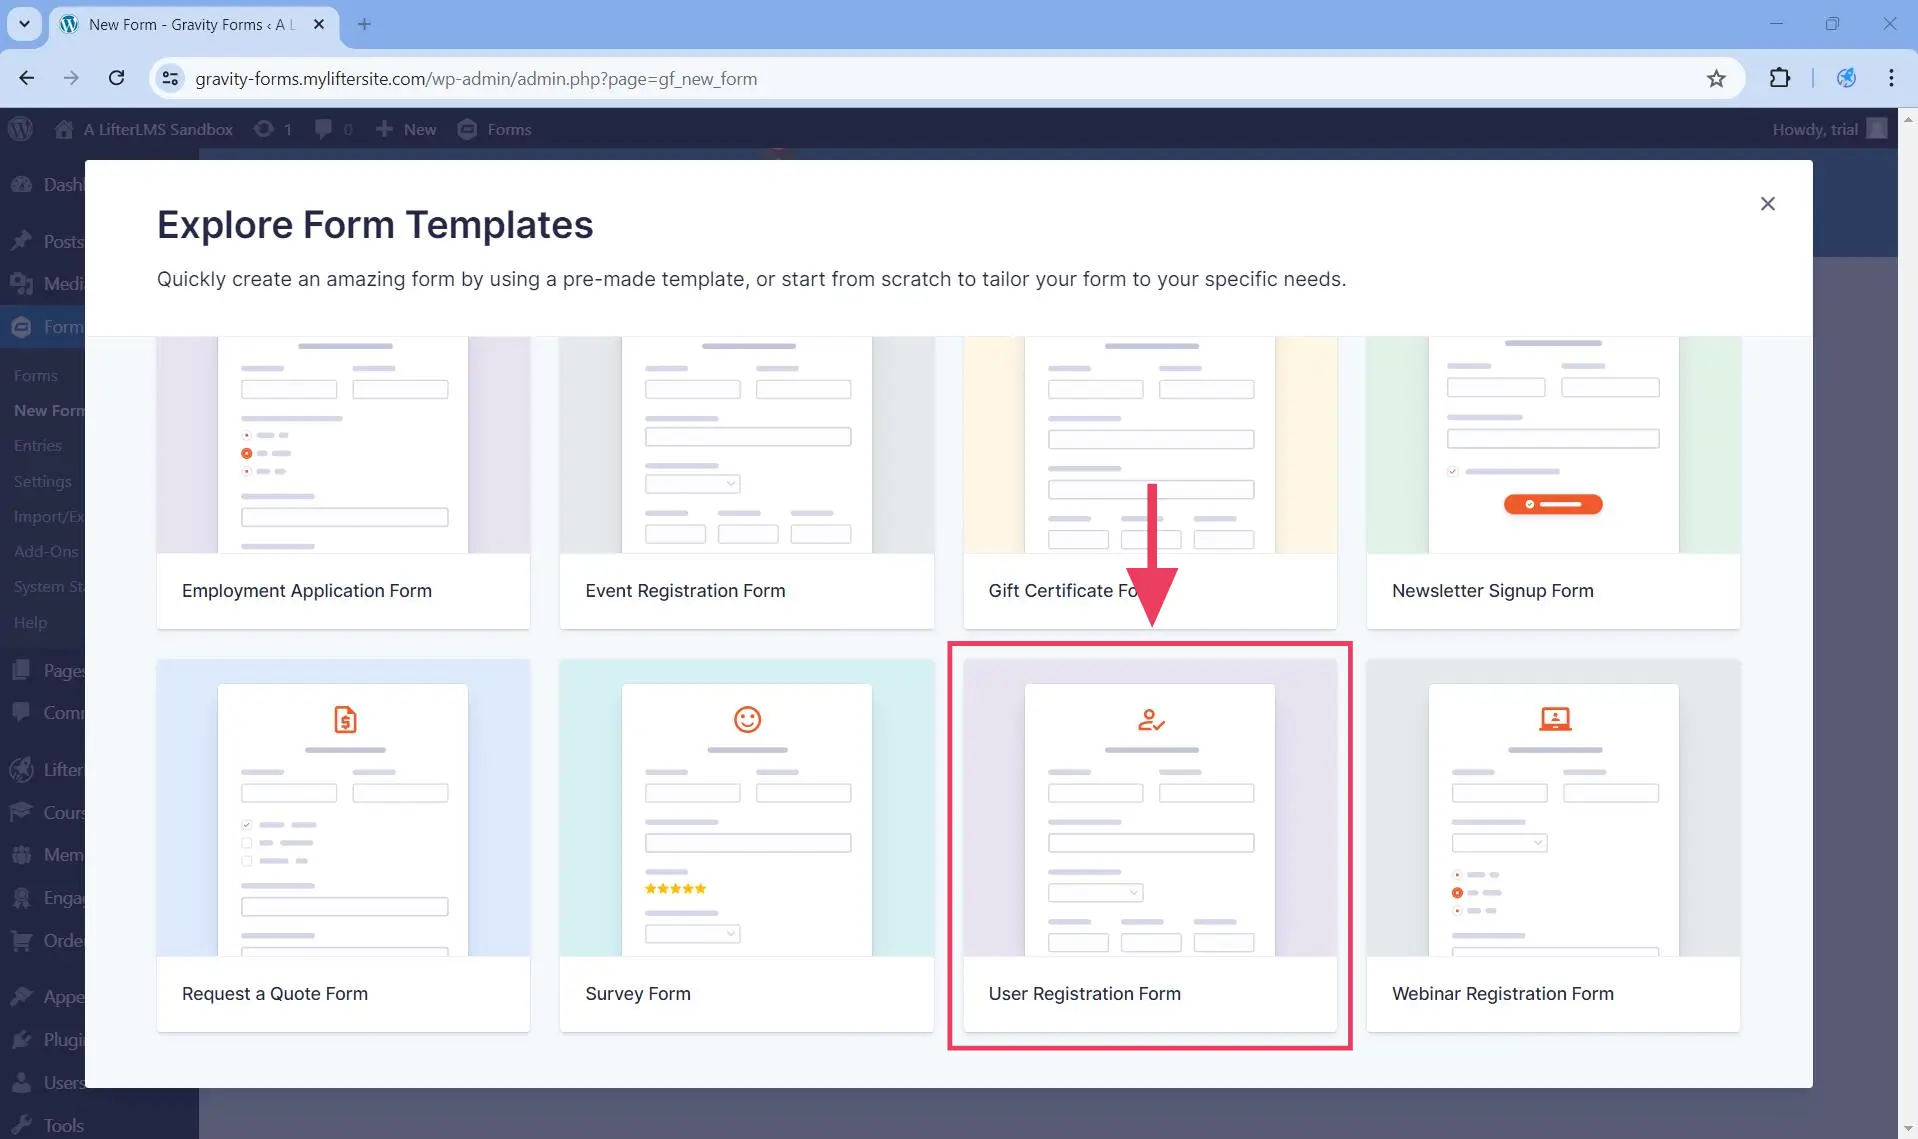
Step 1. Create your custom user forms using Gravity Forms by going to WordPress Dashboard > Forms > New Form if you do not have one already.
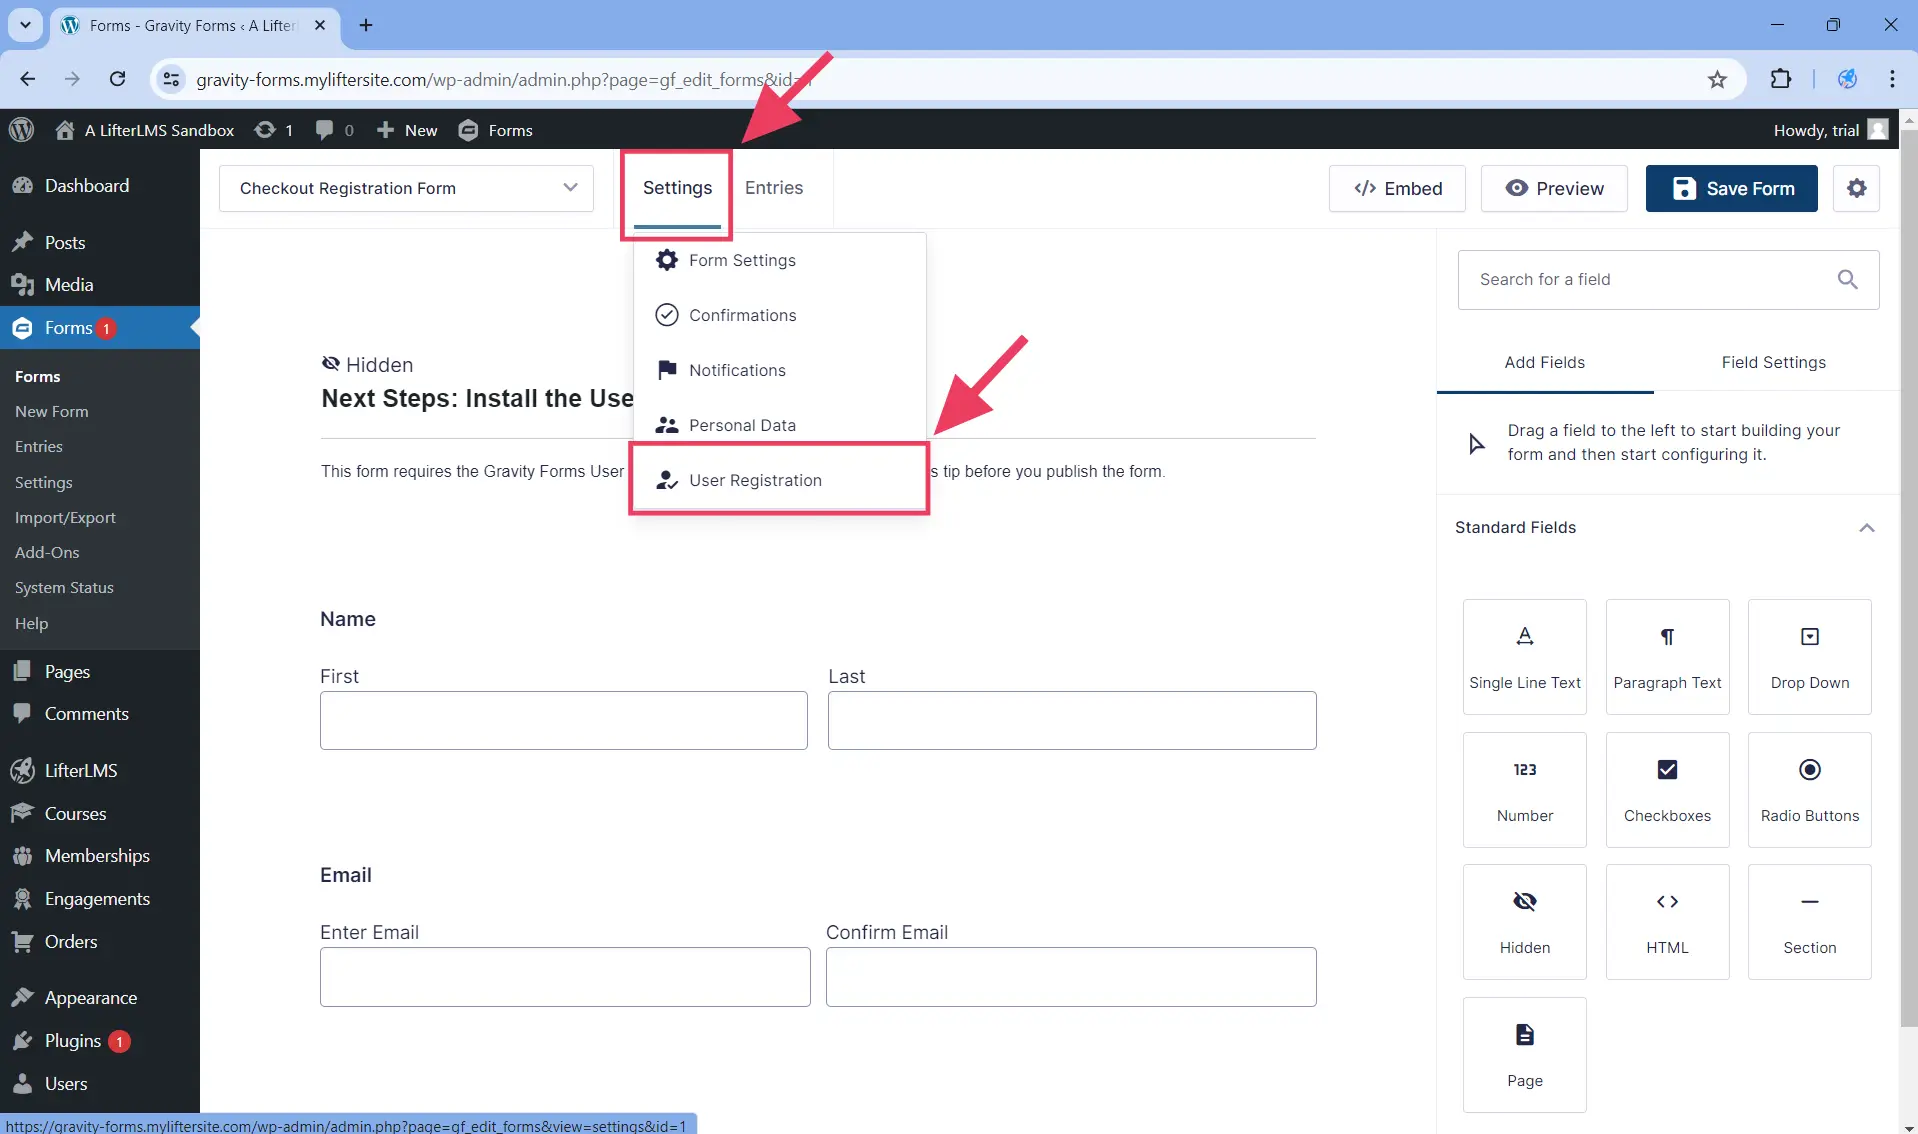
On the lightbox that appears, scroll down and click on the User Registration Form to use that as a template.
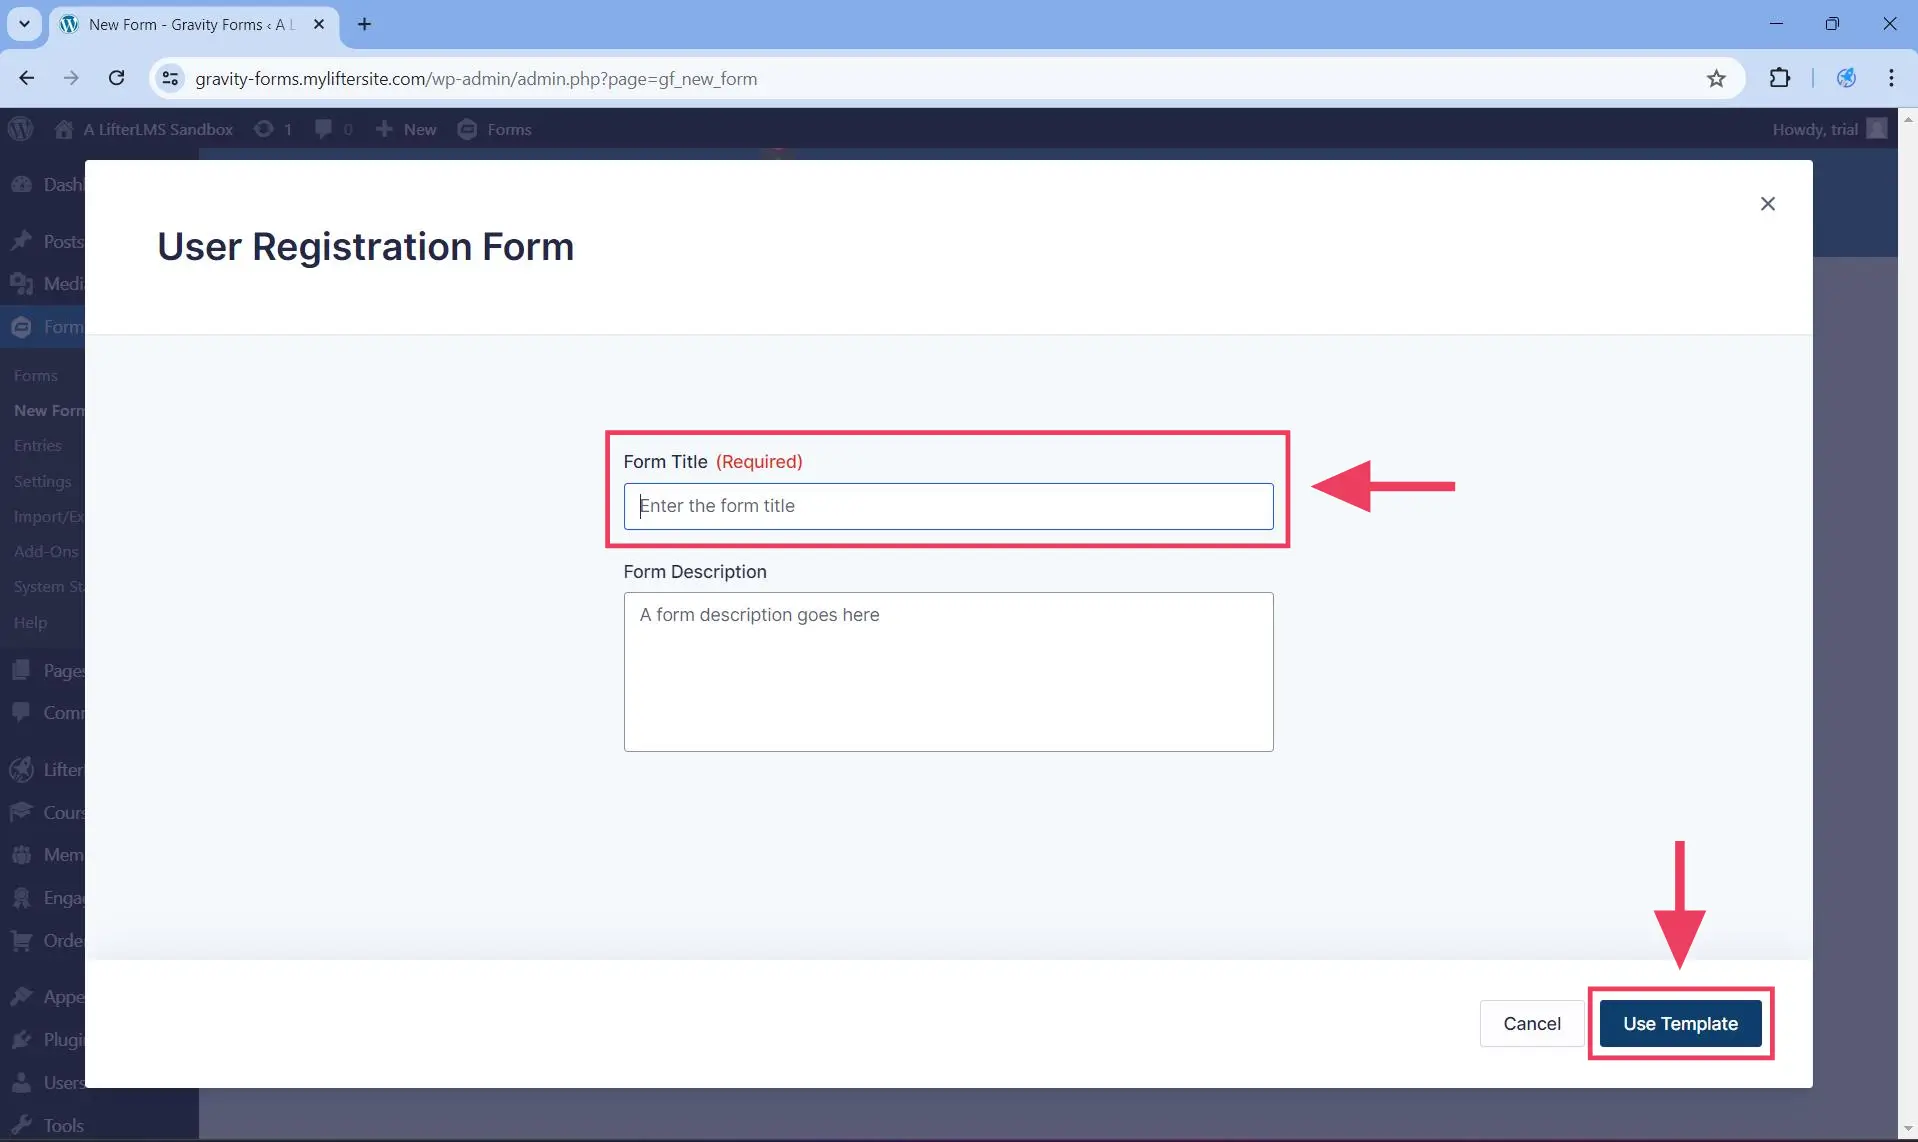
Then, on the screen that loads, add a form title and click on the Use Template button.
Step 2. Customize the form you created using Gravity Forms as much as you want.
Step 3. Using this same Gravity Forms form currently open, follow the instructions for creating a feed. The kind of feed you create will depend on what form you are trying to create:
- Checkout Registration Form. In this case, under Action click on Create User.
- Checkout Update Form. In this case, under Action click on Update User.
- Open Registration Form. In this case, under Action click on Create User.
- Account Update Form. In this case, under Action click on Update User.
Step 4. Don’t forget to select a role on the User Settings > Role dropdown. Typically, you should select the Student role.
Step 5. If you are creating a new user in Action > Create User, do not forget to uncheck Additional Options > User Activation > Enable user activation. Unchecking this checkbox will ensure that users will get automatically logged in once they register using your custom Gravity Forms forms.
Step 6. Save the changes.
Step 7. Follow the next steps below, depending on the type of form you intended to create or replace:
Step 1. Follow the instructions on how to create custom user management forms, in case you do not have one yet.
Step 2. Head to WordPress Dashboard > LifterLMS > Settings > Integration > Gravity Forms > User Management Forms.
Step 3. Select from the Checkout Registration Form dropdown the custom form you created in Step 1.

Step 4. Save the changes by clicking on the Save Changes button.
As you can see in the animated GIF below, this step breaks the LifterLMS checkout flow into a two-step process. In particular, when a non-logged in user clicks the enrollment button on an access plan, the will be redirected to the LifterLMS checkout page. On this same page:
- First, the user will only see the registration form created using Gravity Forms. They won’t see anything else (not even the checkout form where customers can pay).
- Next, once the registration form is submitted, the user will be automatically logged in. Then, on the same page, the customer will see the default LifterLMS checkout form where they can complete their enrollment.
This page will still contain the default checkout update form from LifterLMS. If you want to replace that with Gravity Forms as well, follow the instructions on replacing the checkout update form with a customer form from Gravity Forms.
If the course/membership is not free, they will make the payment on this checkout page. Otherwise, if the course/membership is free, this checkout page is the page where they complete their enrollment.
Step 1. Follow the instructions on how to create custom user management forms, in case you do not have one yet.
Step 2. Head to WordPress Dashboard > LifterLMS > Settings > Integration > Gravity Forms > User Management Forms.
Step 3. Select from the Checkout Update Form dropdown the custom form you created in Step 1.
Step 4. Save the changes by clicking on the Save Changes button.
As you can see in the animated GIF below, this step breaks the LifterLMS page into two separate forms that can be submitted independently of each other.
Step 1. Follow the instructions on how to create custom user management forms, in case you do not have one yet.
Step 2. Head to WordPress Dashboard > LifterLMS > Settings > Integration > Gravity Forms > User Management Forms.
Step 3. Select from the Open Registration Form dropdown the custom form you created in Step 1.
Step 4. Save the changes by clicking on the Save Changes button.
As you can see in the animated GIF below, this step replaces the default LifterLMS registration form with the custom open registration form you created using Gravity Forms.
Step 1. Follow the instructions on how to create custom user management forms, in case you do not have one yet.
Step 2. Head to WordPress Dashboard > LifterLMS > Settings > Integration > Gravity Forms > User Management Forms.
Step 3. Select from the Account Update Form dropdown the custom form you created in Step 1.
As you can see in the animated GIF below, this step replaces the default LifterLMS account update form with the custom form you created using Gravity Forms.
To ensure that your students will be automatically logged in once they register using your custom Gravity Forms form, follow these steps below.
Step 1. Open the Gravity Forms you created.
Step 2. In the form you are working on, navigate to Settings > User Registration.
Step 3. Scroll down to Additional Options and make sure that User Activation > Enable user activation is unchecked.
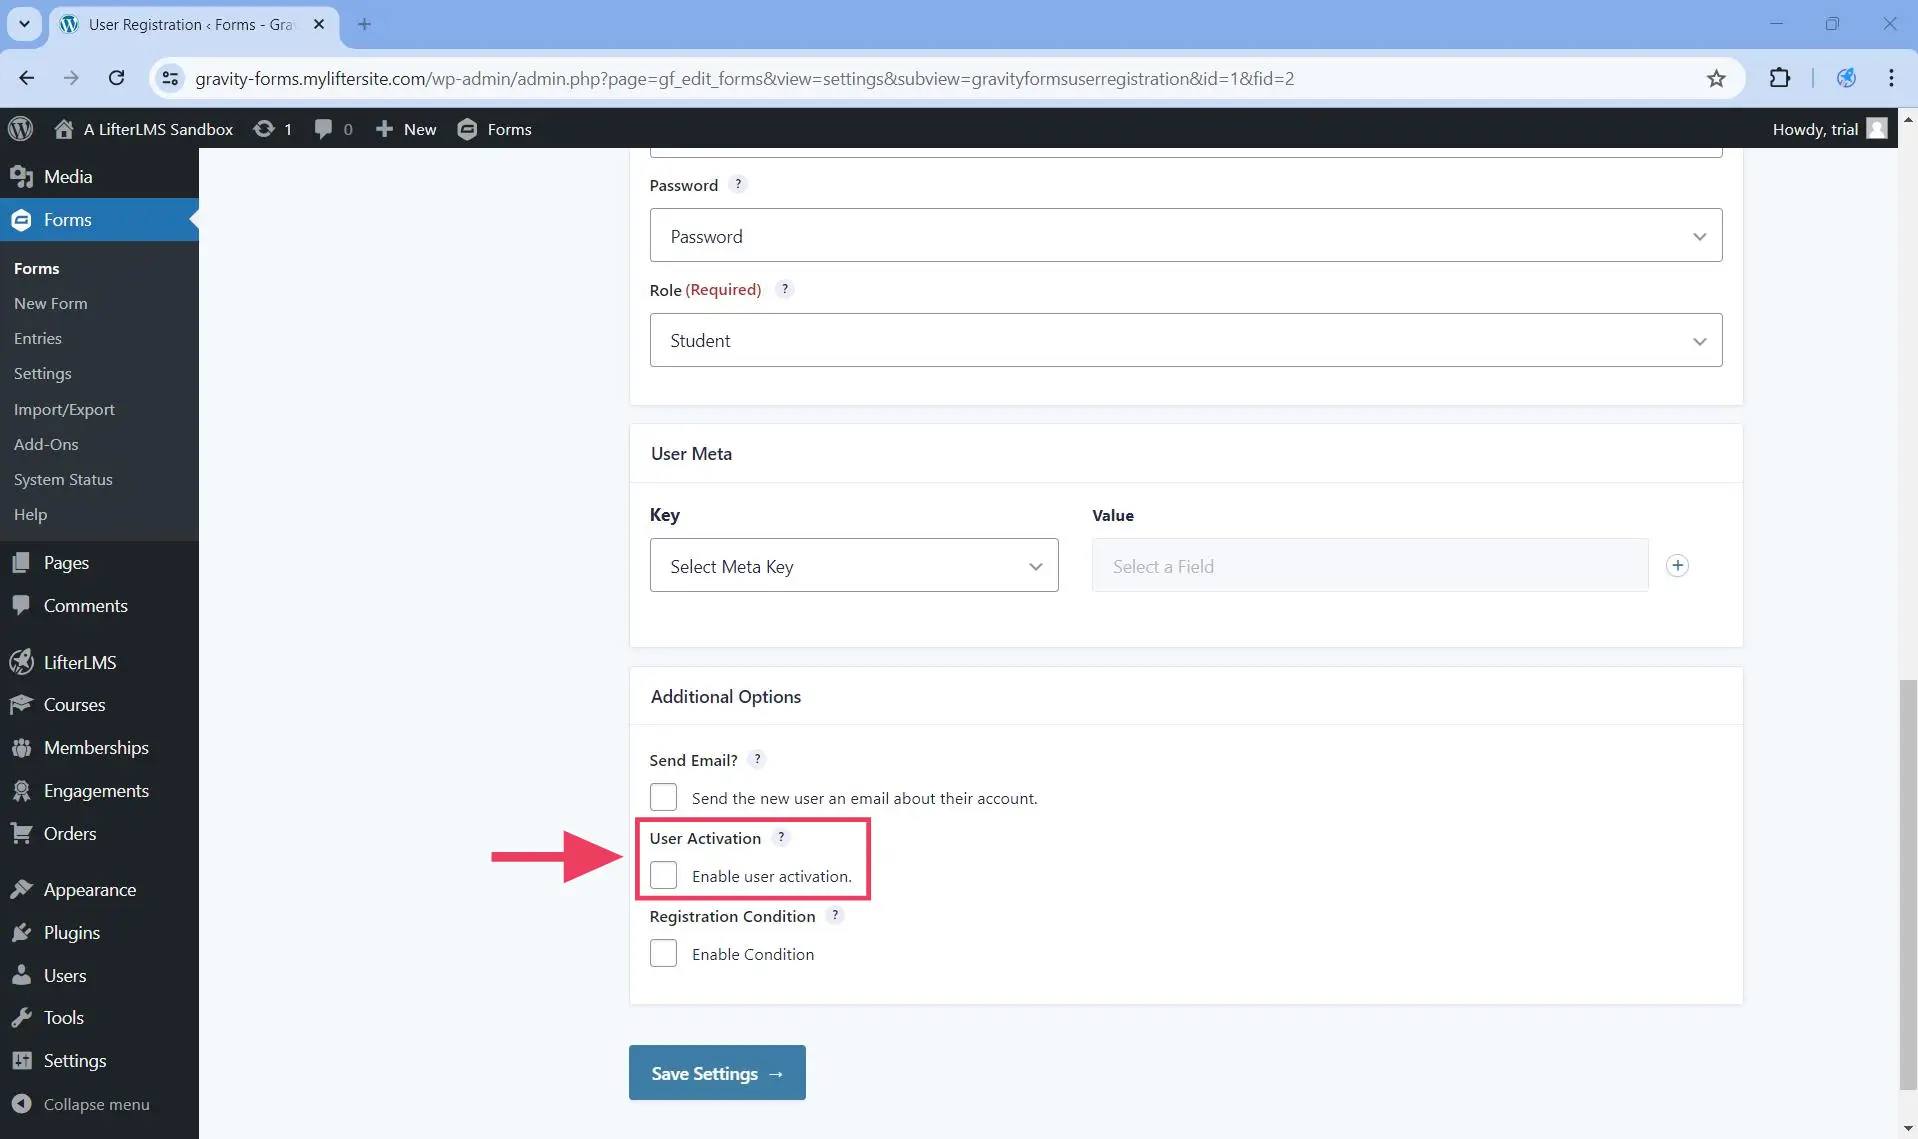
Step 4. Make sure that you save your settings.
The LifterLMS Gravity Forms add-on will not interfere with Gravity Forms’ confirmations or notifications.
Similarly, any LifterLMS engagements attached to user registration will still be triggered when a user registers using a form created using Gravity Forms.


