How To Set Form Fields To Be Required, Optional, or Hidden
This guide shows you how to control which fields appear on LifterLMS forms, and whether those fields are required, optional, or hidden. You will learn how to edit the Purchase, Registration, and Edit Account forms directly from your WordPress dashboard.
Video Tutorial
Prefer a visual walkthrough? This video demonstrates the same form editing steps covered in this guide.
LifterLMS includes three default forms designed to offer key user interactions on your site. These forms cover the essential processes of registration, payment, and account management.
- Register Form: Used when a new student creates an account on your site.
- Billing Information Form: Appears during checkout for paid courses or memberships. For free access, the form is still shown, but the payment fields are hidden.
- Edit Account Information Form: This feature allows logged-in users to update their account details, including name, email address, and password.
LifterLMS forms are built directly into the LifterLMS platform and can be accessed and customized from your WordPress dashboard. Please follow the steps below to access each type of form:
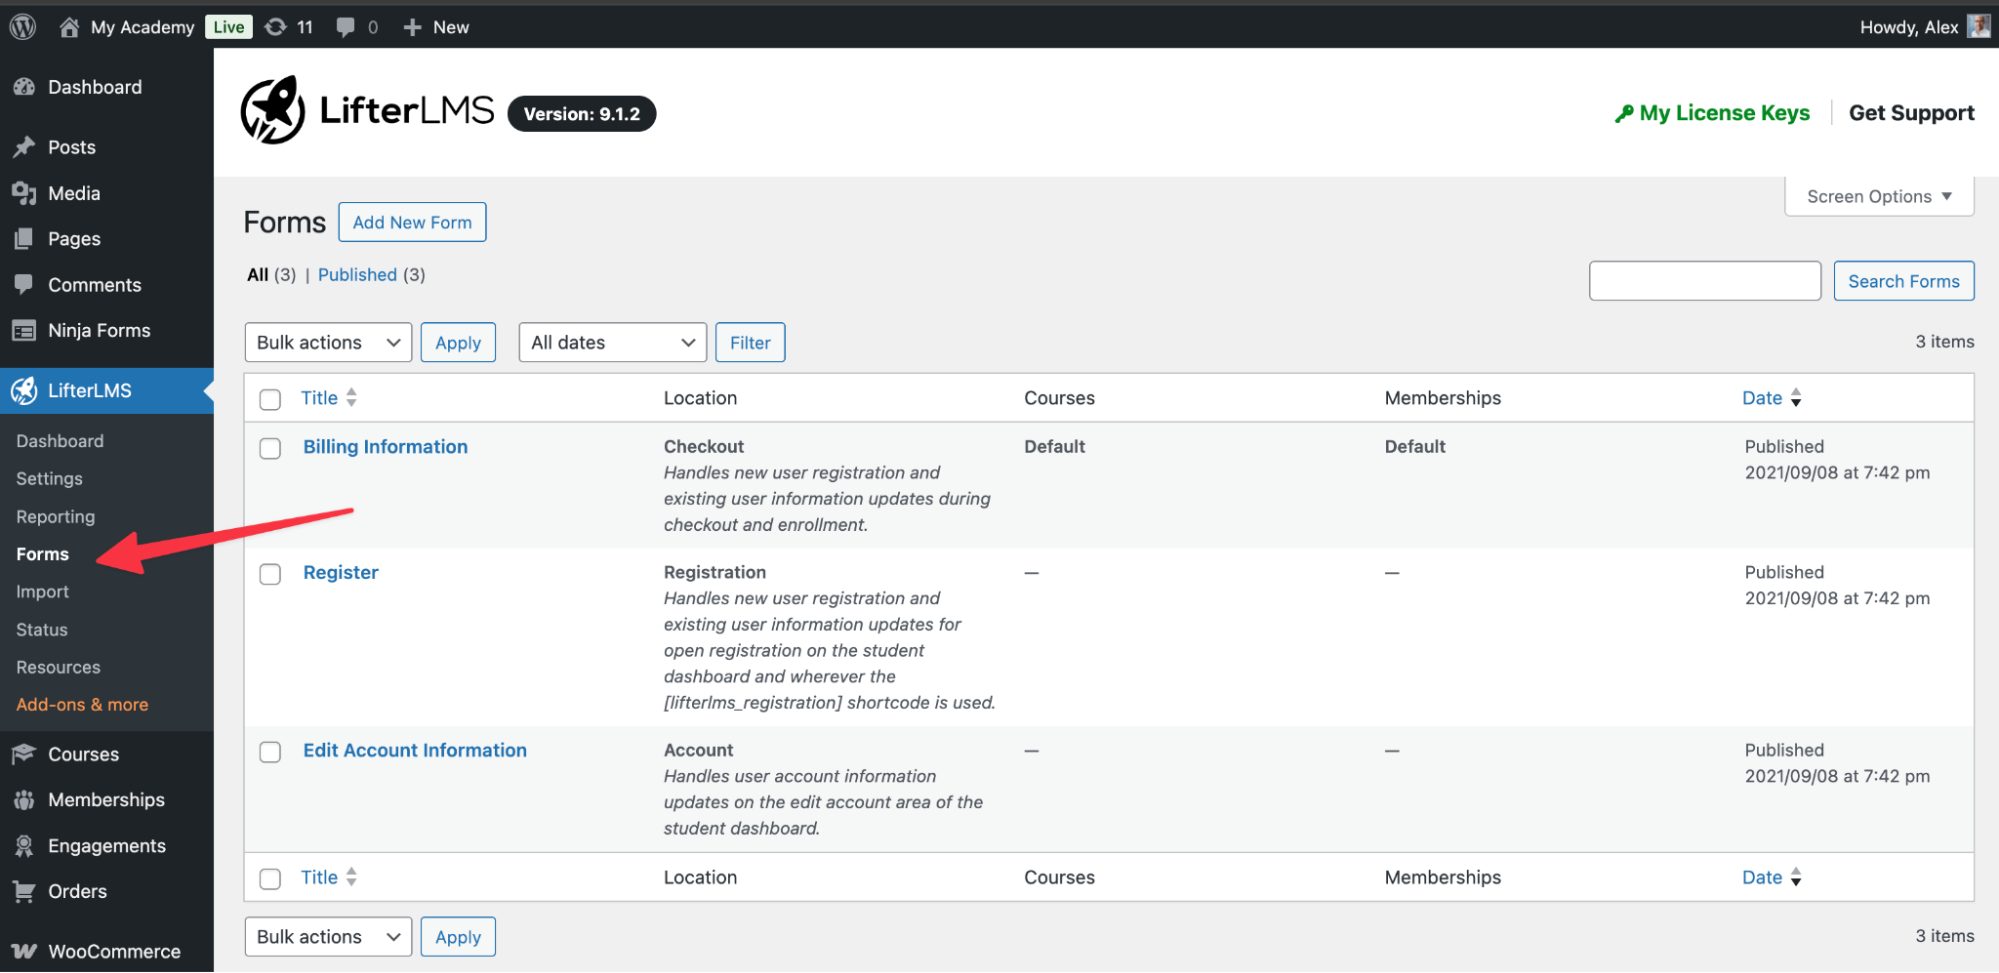
- Go to LifterLMS > Forms in your WordPress dashboard.
- On this screen, you will see the three default forms: “Billing Information,” “Register,” and “Edit Account Information.”
- Click on the title of any of the default forms to begin editing them.
You can customize the labels and fields of LifterLMS forms to meet your specific needs, whether you want to remove, add, or modify form fields.
Note: The LifterLMS Custom Fields add-on provides additional form features, allowing you to create additional forms, access plan-specific forms, and display custom form field data visually in your LMS.
Follow these steps to modify a form, such as the Billing Information Form:
- Go to your WordPress Dashboard and navigate to LifterLMS > Forms.
- Click the Edit link next to the specific form you wish to modify.
- Once the editor loads, open “List View” using the toggle in the top-left corner of the editor.
- Select the block you want to edit from the list.
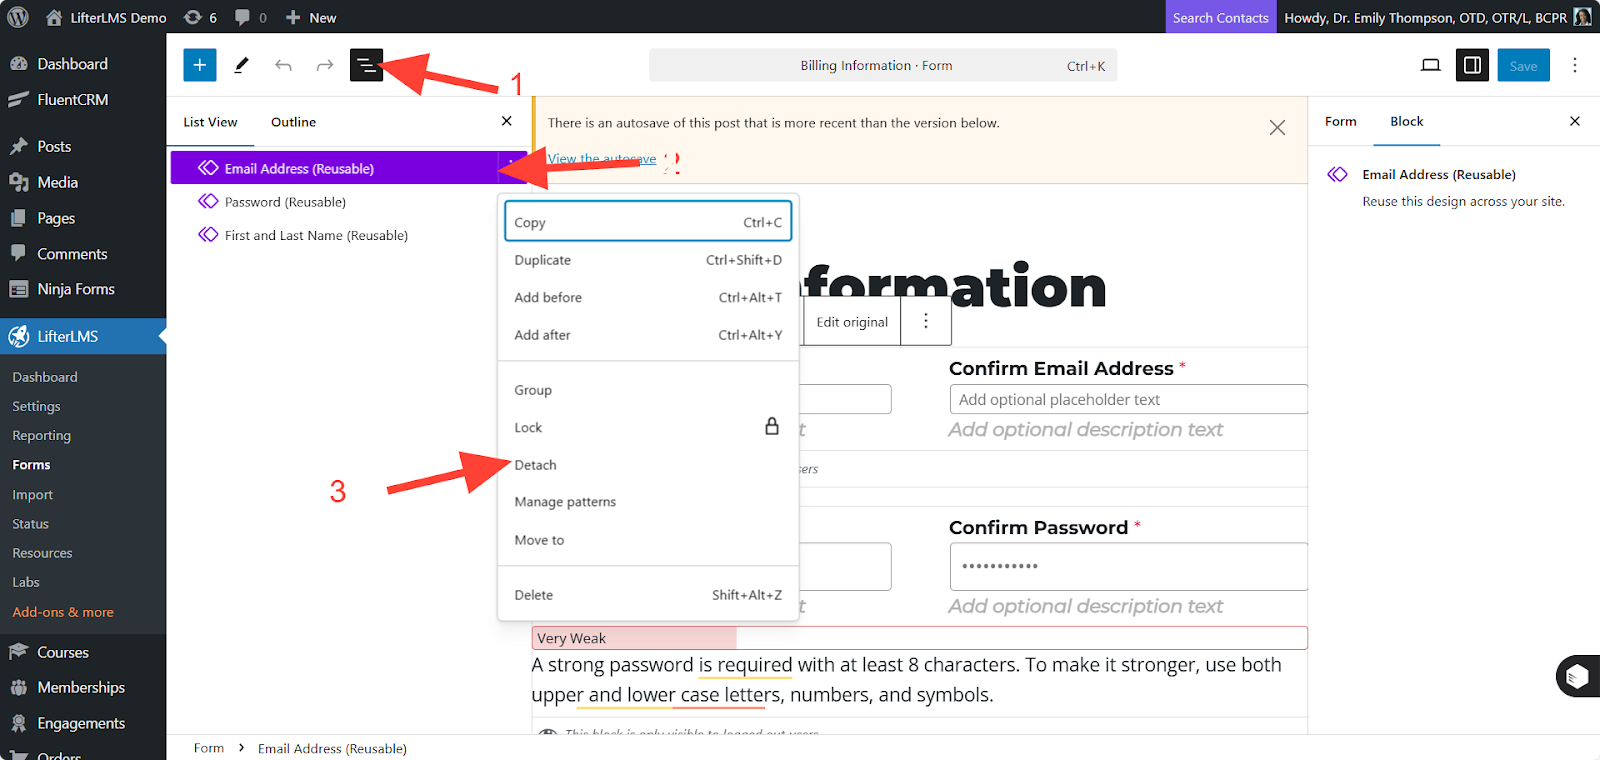
- If the field is part of a reusable block, open the three-dot menu and select Detach. This ensures your changes affect only this form and not other forms using the same block.
- Click on the specific field block you wish to change.
- Update the label text or field content directly within the editor as needed.
To customize which fields are mandatory for your users to fill out, you can adjust the requirement settings for form fields in LifterLMS.
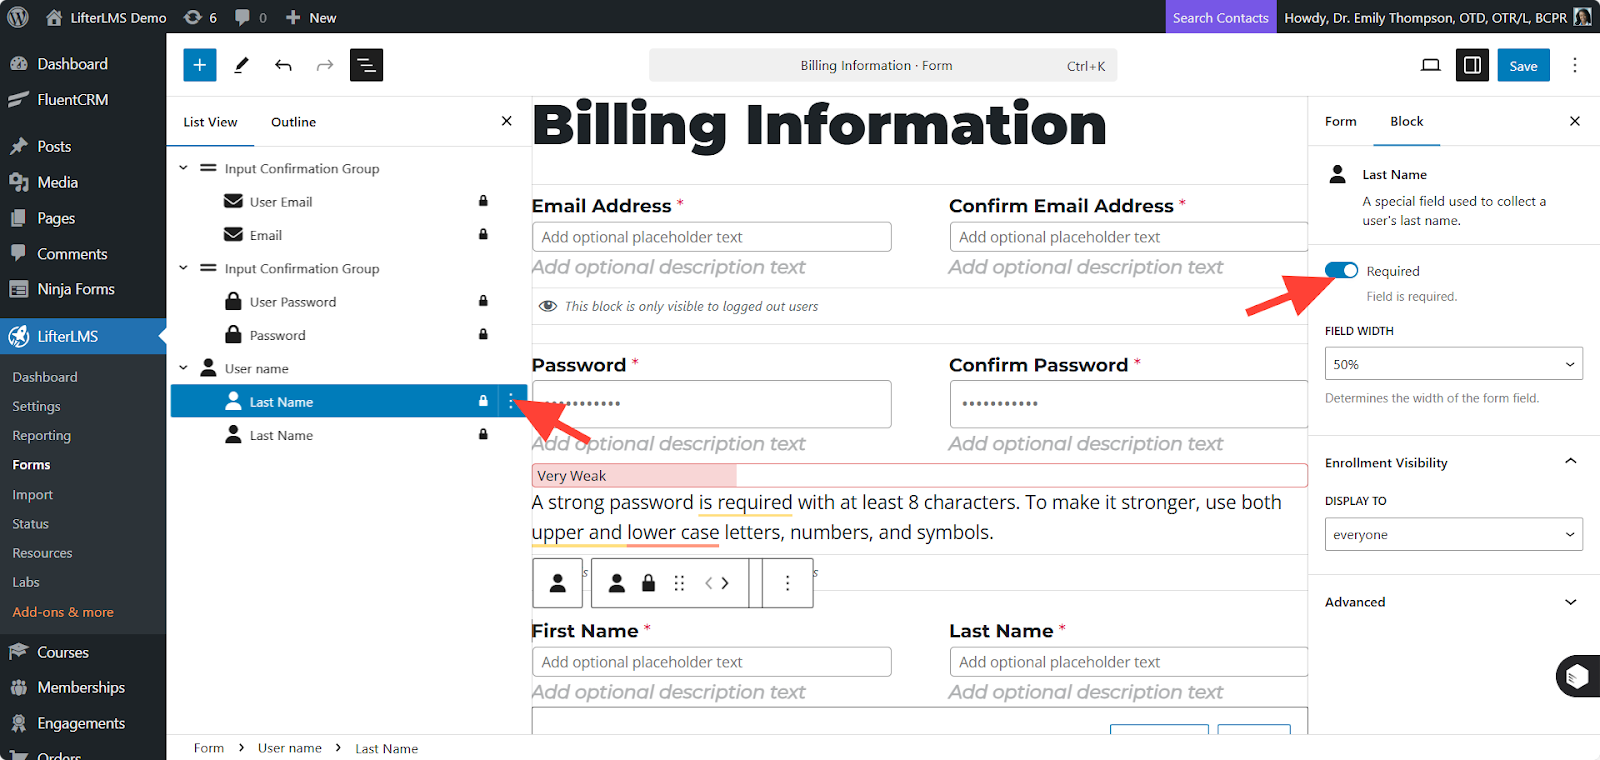
- Navigate to the form you wish to edit and click on the specific field you want to modify (e.g., “First Name”).
- Look at the right-hand sidebar to locate the settings for the selected block.
- Find the toggle option labeled “Required”.
- Toggle the switch on to make the field mandatory, or toggle it off to make the field optional.
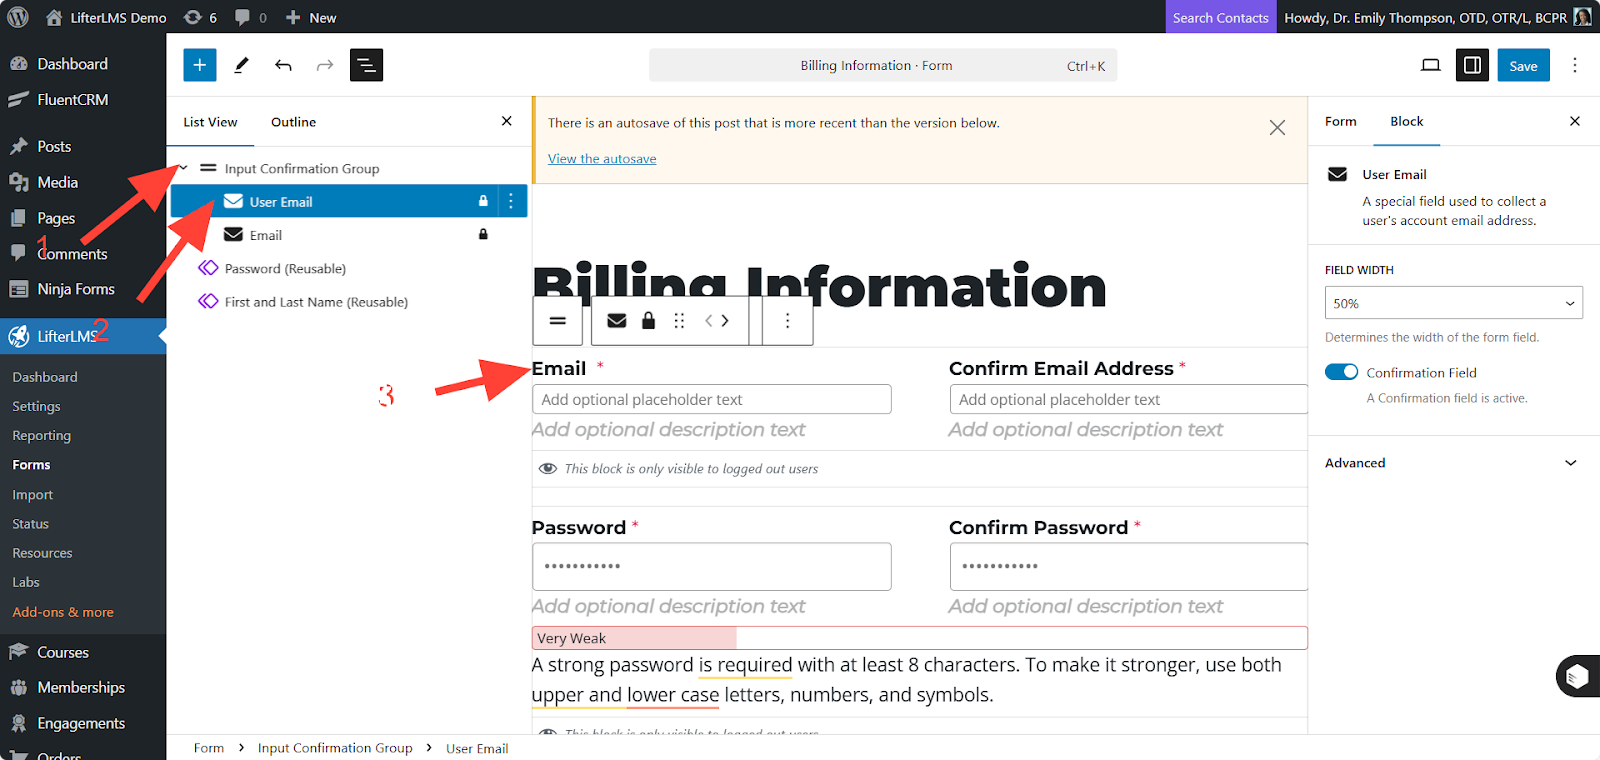
Note: The Email and Password fields are always required in LifterLMS to support account creation and security. These fields cannot be set as optional or hidden.
If you need to collect additional information, you can add new blocks to any LifterLMS form.
- Navigate to your WordPress Dashboard and go to LifterLMS > Forms.
- Click on Edit for the specific form where you want to add a block.
- Select the + (plus) icon in the top left corner to add a block.
- Choose the specific block you want to add from the available options.
Default LifterLMS Blocks
LifterLMS includes the following default blocks that you can use immediately:
- User Name
- User Address
- User Display Name
- User Email
- User Phone
- User Login
Custom Field Blocks
If you have the LifterLMS Custom Fields add-on installed, you can also add the following field types:
- Checkboxes
- Radio buttons
- Dropdown menus
- Textarea
- Input Confirmation Group
- Text
- Number
- Phone Number
- Website Link
If a form includes fields you do not need, you can remove them directly from the editor.
- Ensure you are in the block view (List View) by clicking the toggle icon at the top left of the editor.
- Click on the block you wish to remove to select it.
- Click the three-dot menu located on the toolbar of the selected block.
- Choose Delete from the dropdown menu to remove it from the form.
When you are finished, click Save to apply your changes. Your form will now reflect the updated required, optional, or hidden fields.


