
How do I add content to a lesson?
In LifterLMS, you can add many different types of content to your lessons. Using the Lesson Editor and the course builder, you can include various types of content, such as text, images, videos, WordPress blocks, quizzes, assignments, and more. In this documentation, we will guide you through all the steps to add individual lesson content in LifterLMS.
The LifterLMS Course Builder is a powerful tool designed to help you create and organize course content efficiently. Here’s what you can do with it:
Add Course Content:
- Using the Course Builder, you can add various types of content, including quizzes, assignments, audio, and videos.
- You can also manage and update course materials with ease.
Organize Lessons and Sections:
- Create structured lessons and sections to organize your course content effectively.
- Rearrange lessons and sections as needed to enhance the learning flow.
To access the Course Builder:
Step 1: In the WordPress admin panel, navigate to LifterLMS > Courses.
Step 2: Select the course you want to edit or click Add Course to create a new course.
Step 3: Inside the course editor, click the Launch Course Builder button.
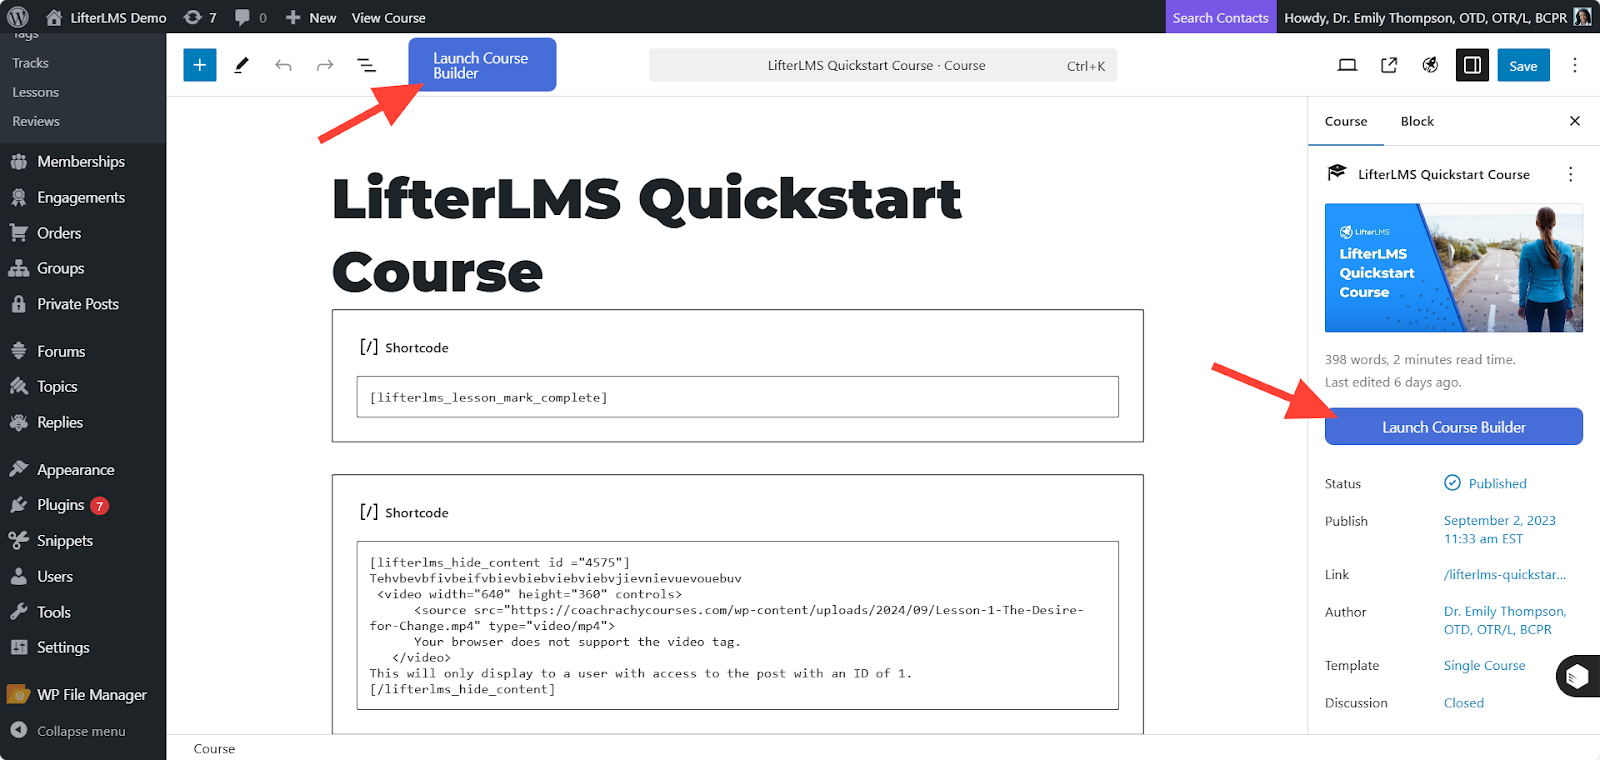
Now, you can use the course builder to add sections, lessons, quizzes, assignments, videos, and audio.
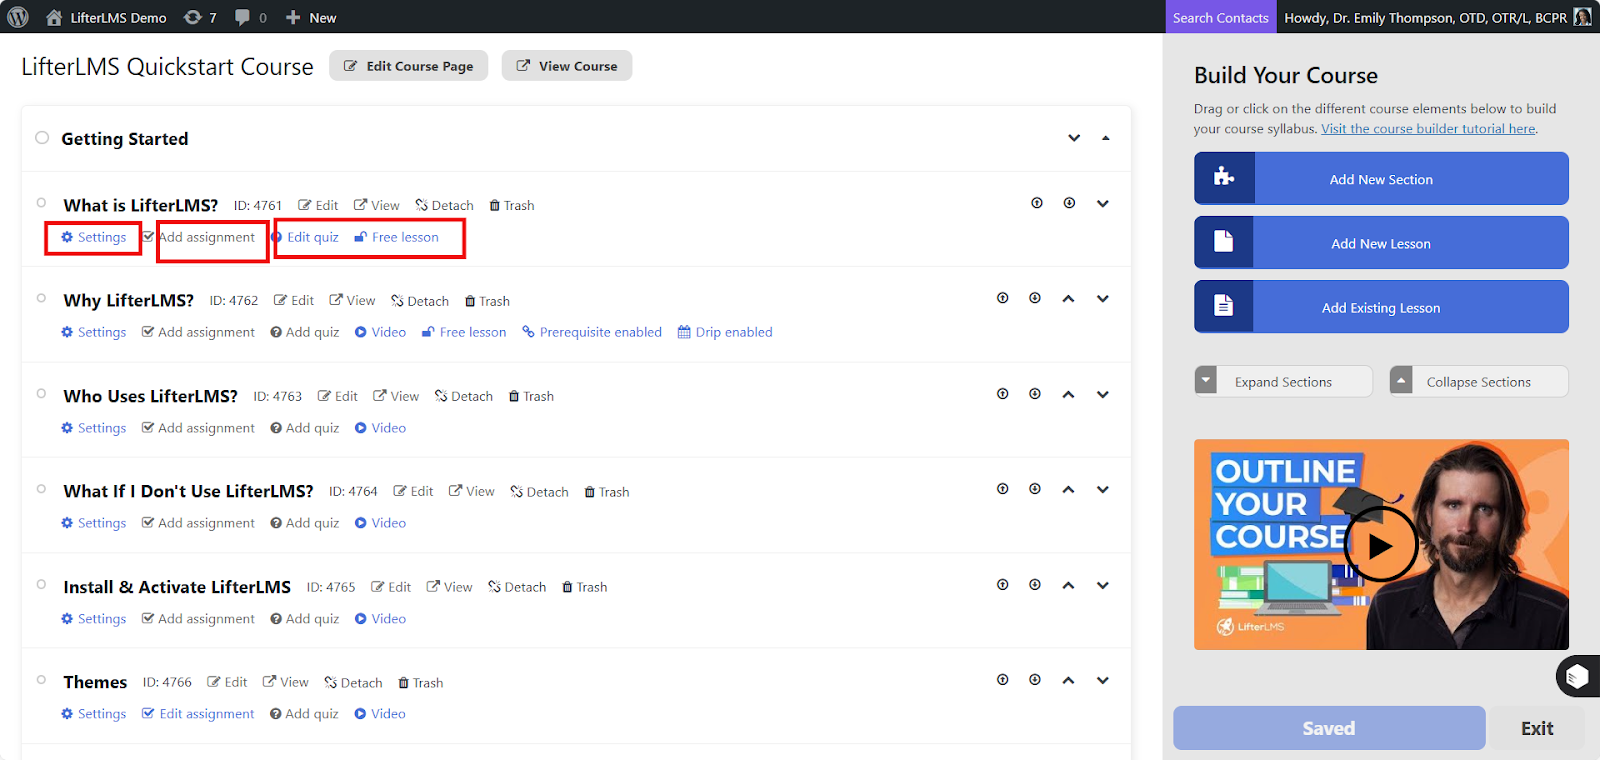
You can learn more about how to use the course builder in more detail from our course builder documentation.
Method 1: Adding Content Using the Course Builder
You can also add content to your lessons directly inside the Course Builder without opening a new tab. This helps you build simple text or video courses much faster. Follow these steps to add content directly to a lesson:
- Navigate to WP Admin > LifterLMS > Courses.
- Hover over your course and click the Builder link.
- Locate the lesson you want to edit and click on it to expand the lesson settings.
- Look for the “Content” area inside the lesson settings panel. You can type text directly into the editor box, and use the formatting toolbar to make text bold, add italics, or create bulleted lists.
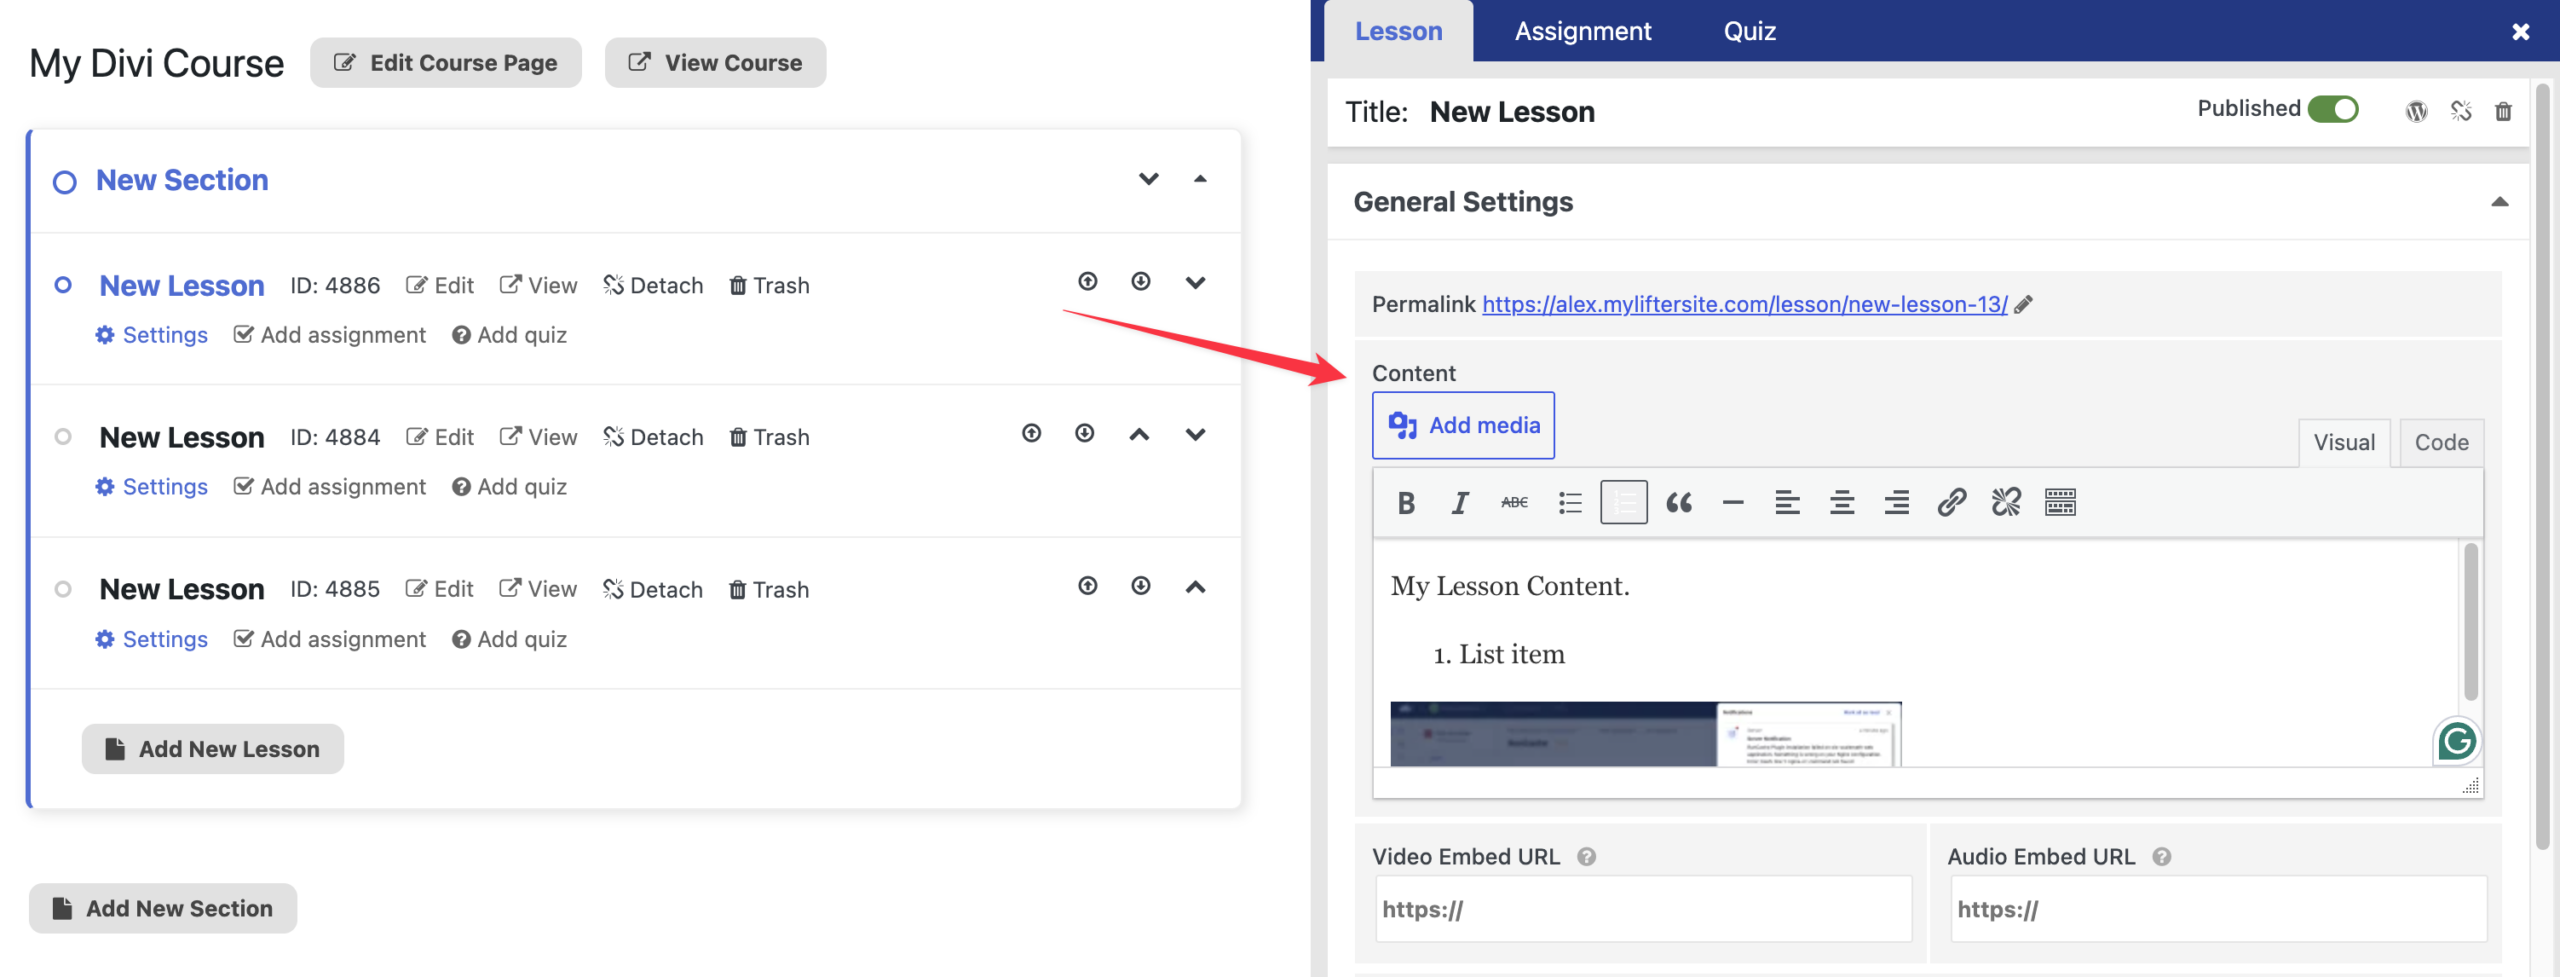
- Click the Add media button to upload or select images from your media gallery.
- Paste video or audio links into the “Video Embed URL” or “Audio Embed URL” fields below the text editor if you have media hosted elsewhere.
- Click the Save changes button in the bottom-right corner of the screen.
If you need advanced layout options, you can still use the traditional WordPress block editor. To do this, click the WordPress icon in the top right of the screen to open the lesson editor in a new tab.
Method 2: Adding Content Using WordPress Editor
With LifterLMS, you can create engaging lessons by adding text, multimedia, and other elements using the WordPress editor. Follow the steps below to add content to a specific lesson:
Step 1: Navigate to LifterLMS > Courses in the WordPress admin panel, select the course you want to edit or create a new one, then click the “Launch Course Builder” button.
Step 2: In the Course Builder, find the lesson you want to edit and click “Edit” beside the lesson. This action will redirect you to the WordPress lesson editor for that individual lesson.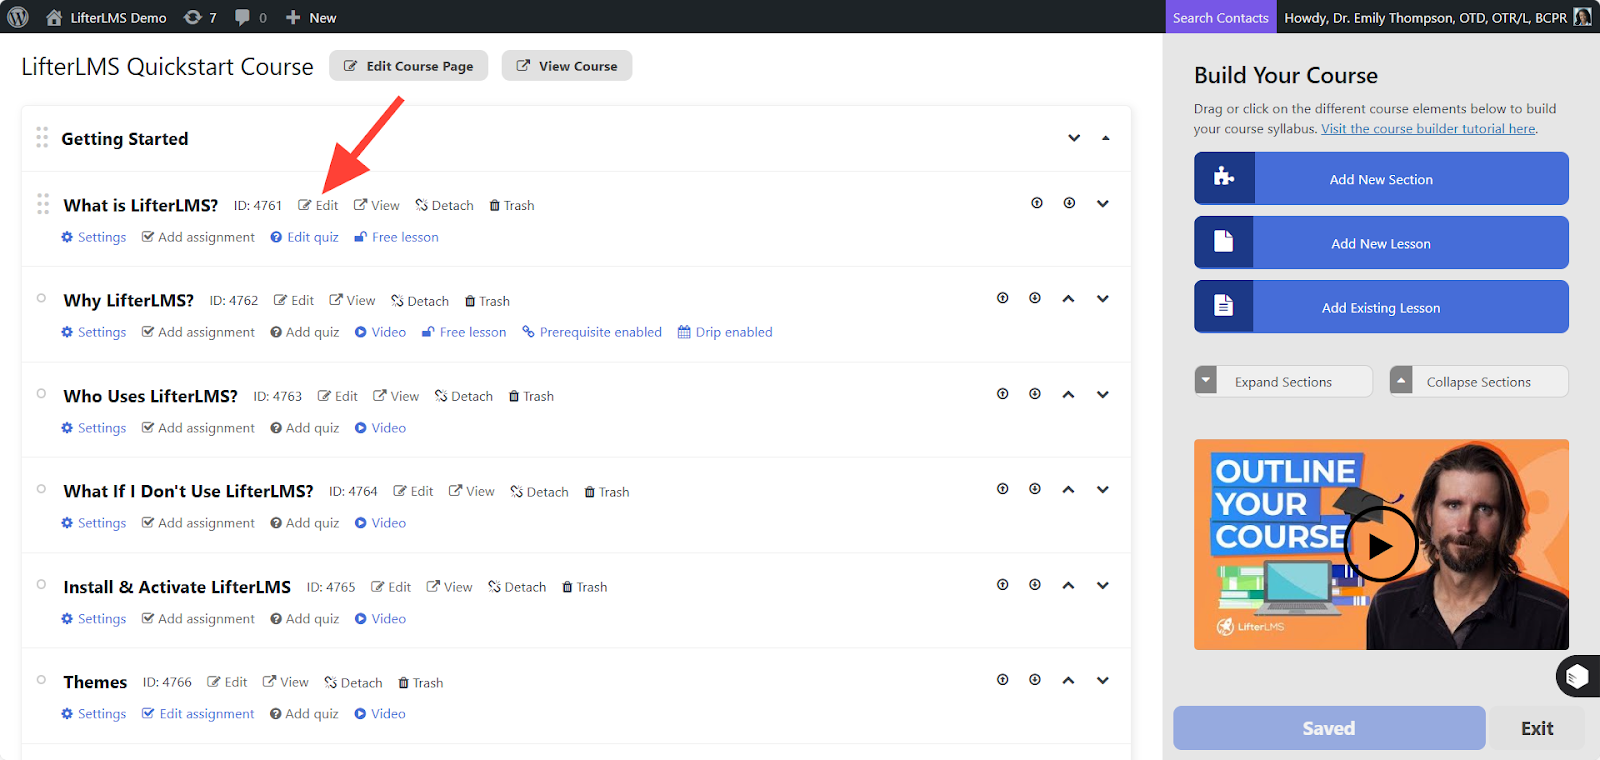
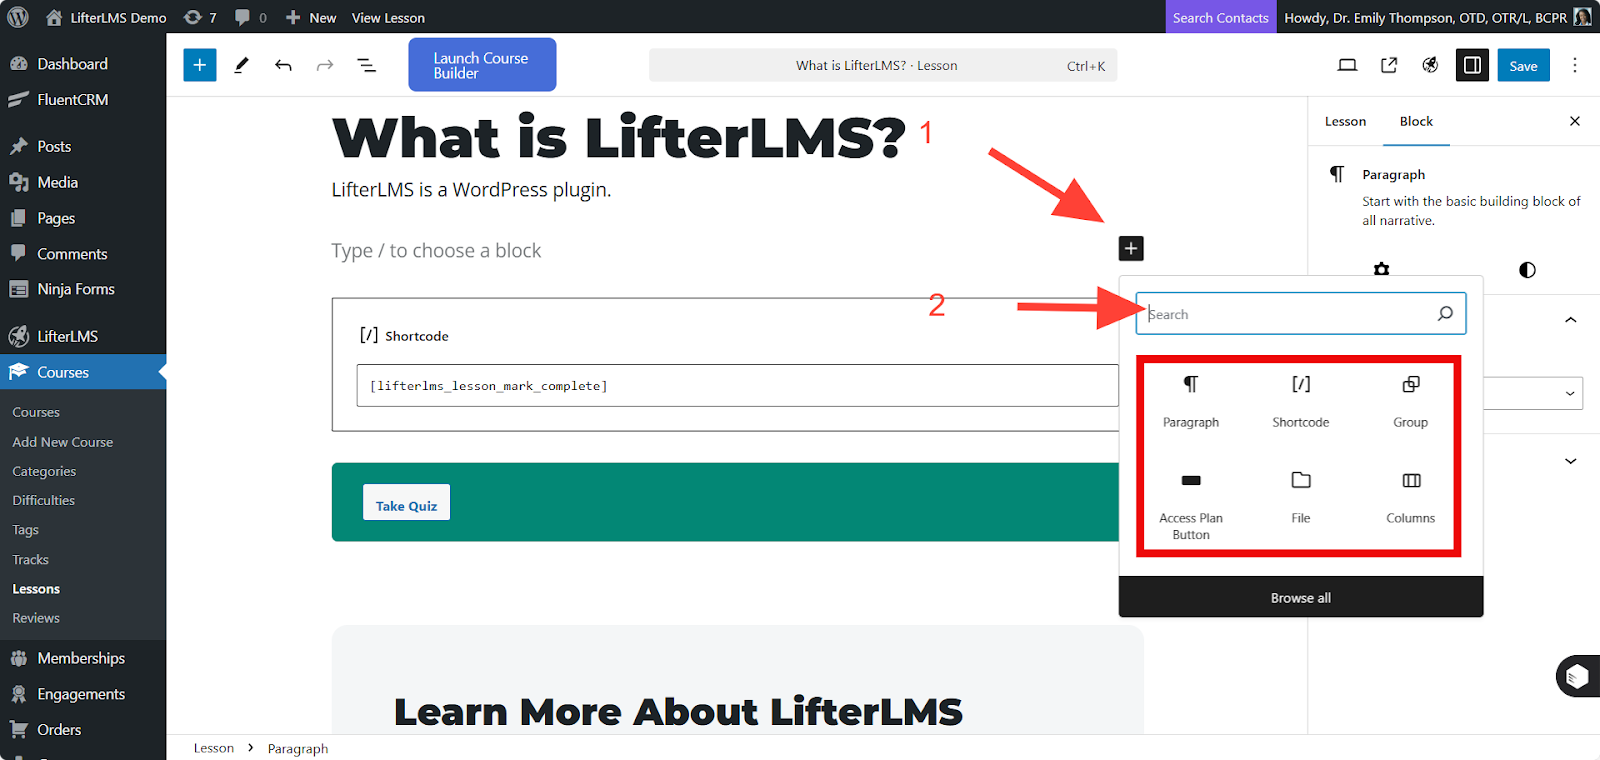
Step 3: Now add your text content using the “+” icon. Add any content you want to the lesson, such as PDF, Video, LifterLMS Blocks, and any other type of content you would like to have on that individual lesson.
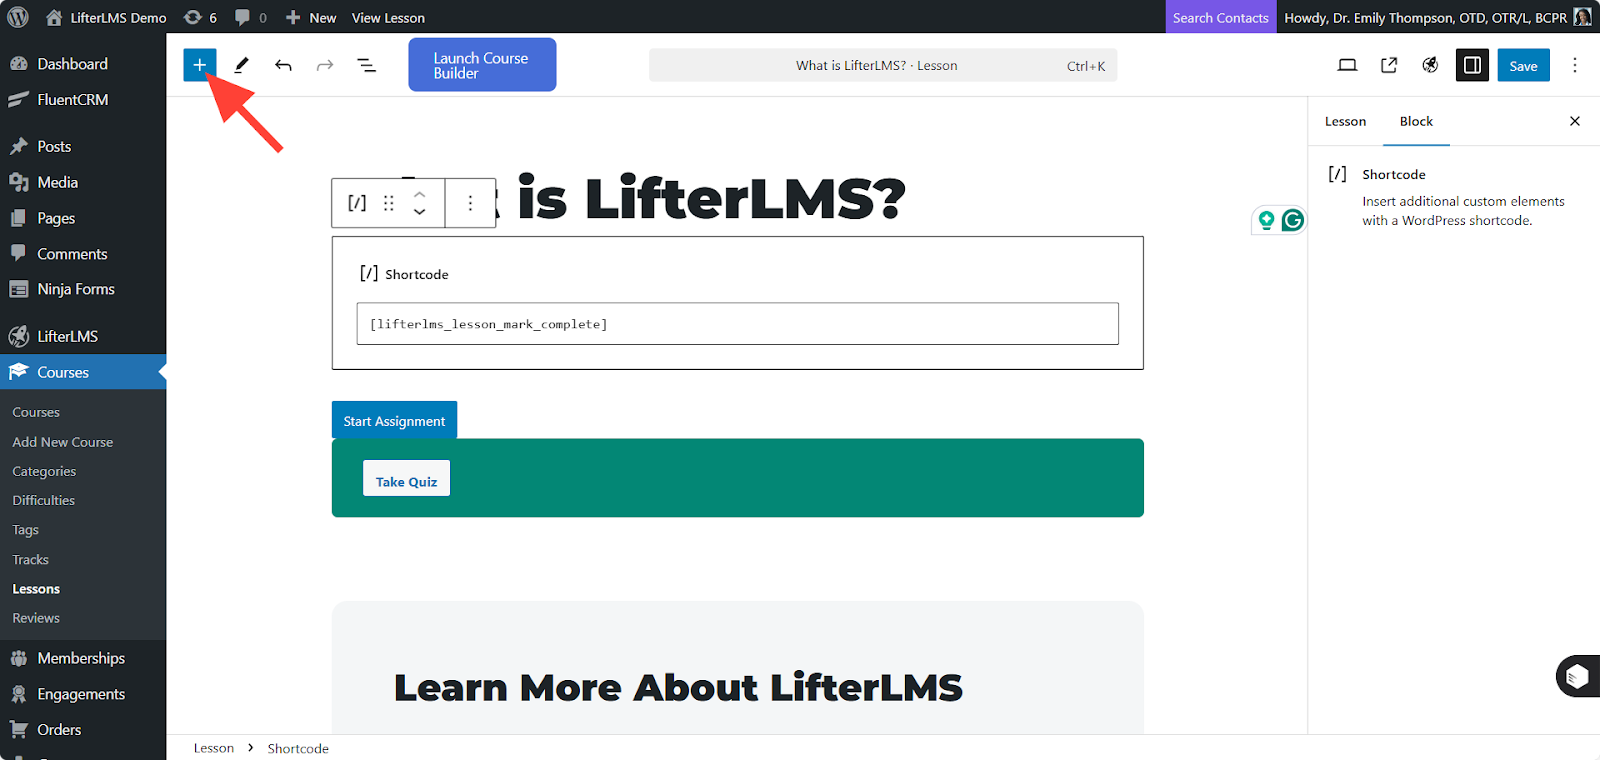
You can also add the block by clicking on the “+” icon in the top left side.
Step 4: Once you’ve added your content, click Publish or Save to save the lesson.
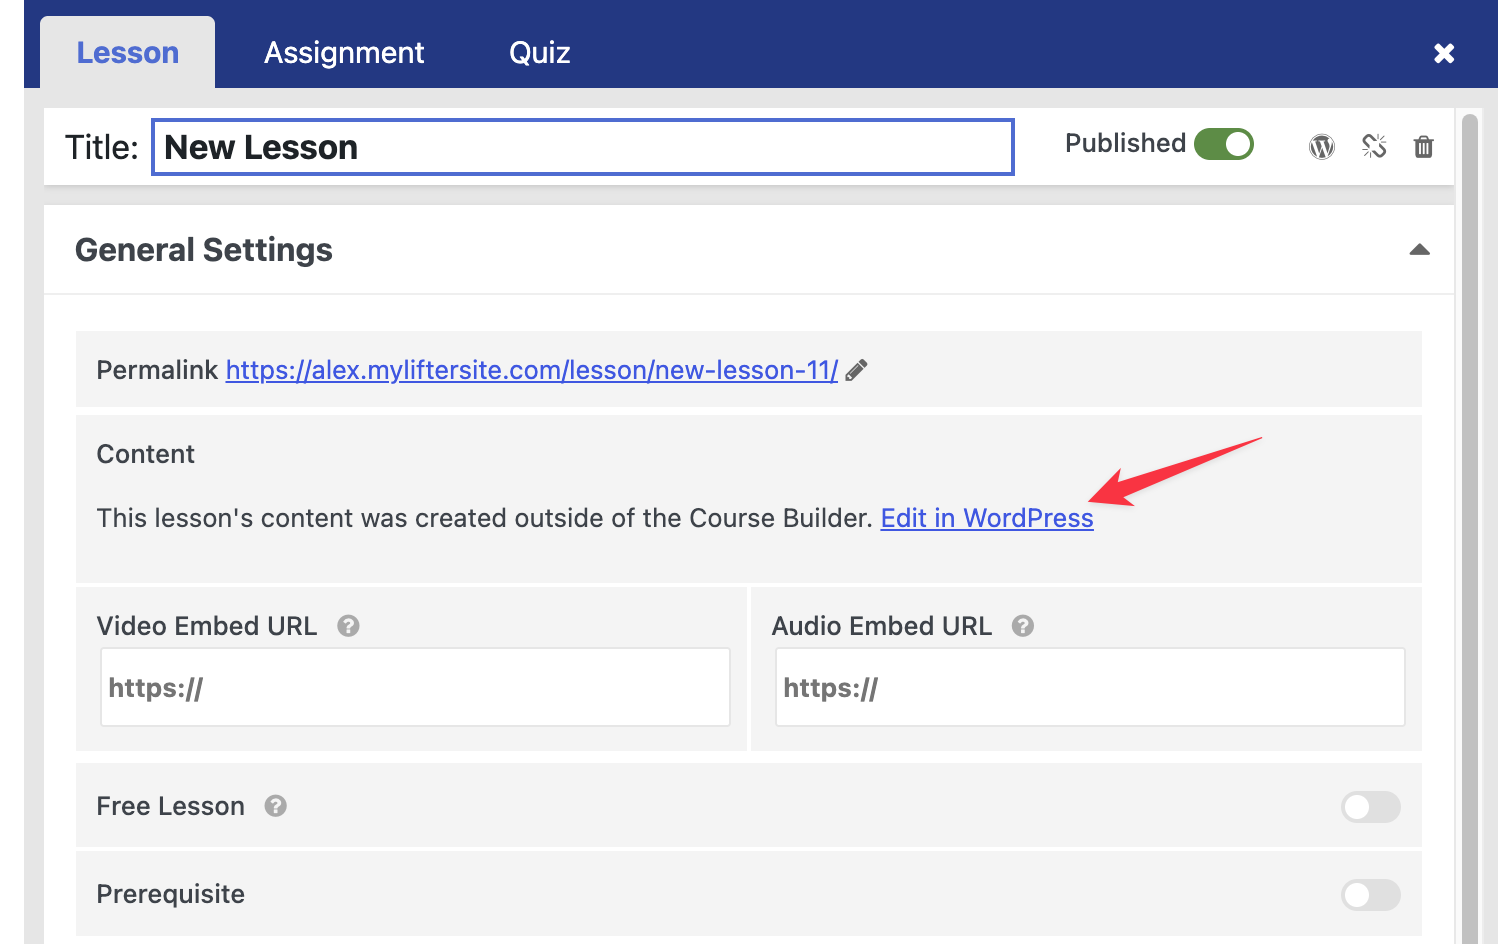
Once you use the block editor, the Course Builder will display a message stating “This lesson’s content was created outside of the Course Builder.” You will then need to click the link to “Edit in WordPress” for any future content changes to that specific lesson.
You can also watch our Feature Friday video to see how to quickly generate a course with Course Builder: