Getting Started With Advanced Coupons
Before using the Advanced Coupons, be sure to familiarize yourself with how regular coupons work with the core LifterLMS plugin.
Once you are familiar with how regular “non-advanced” coupons work, you can follow the instructions on how to use your license key to be able to install our paid LifterLMS add-ons. Once the LifterLMS Advanced Coupons add-on is installed and activated, you can then go back here to learn how to use it.
New Tabs
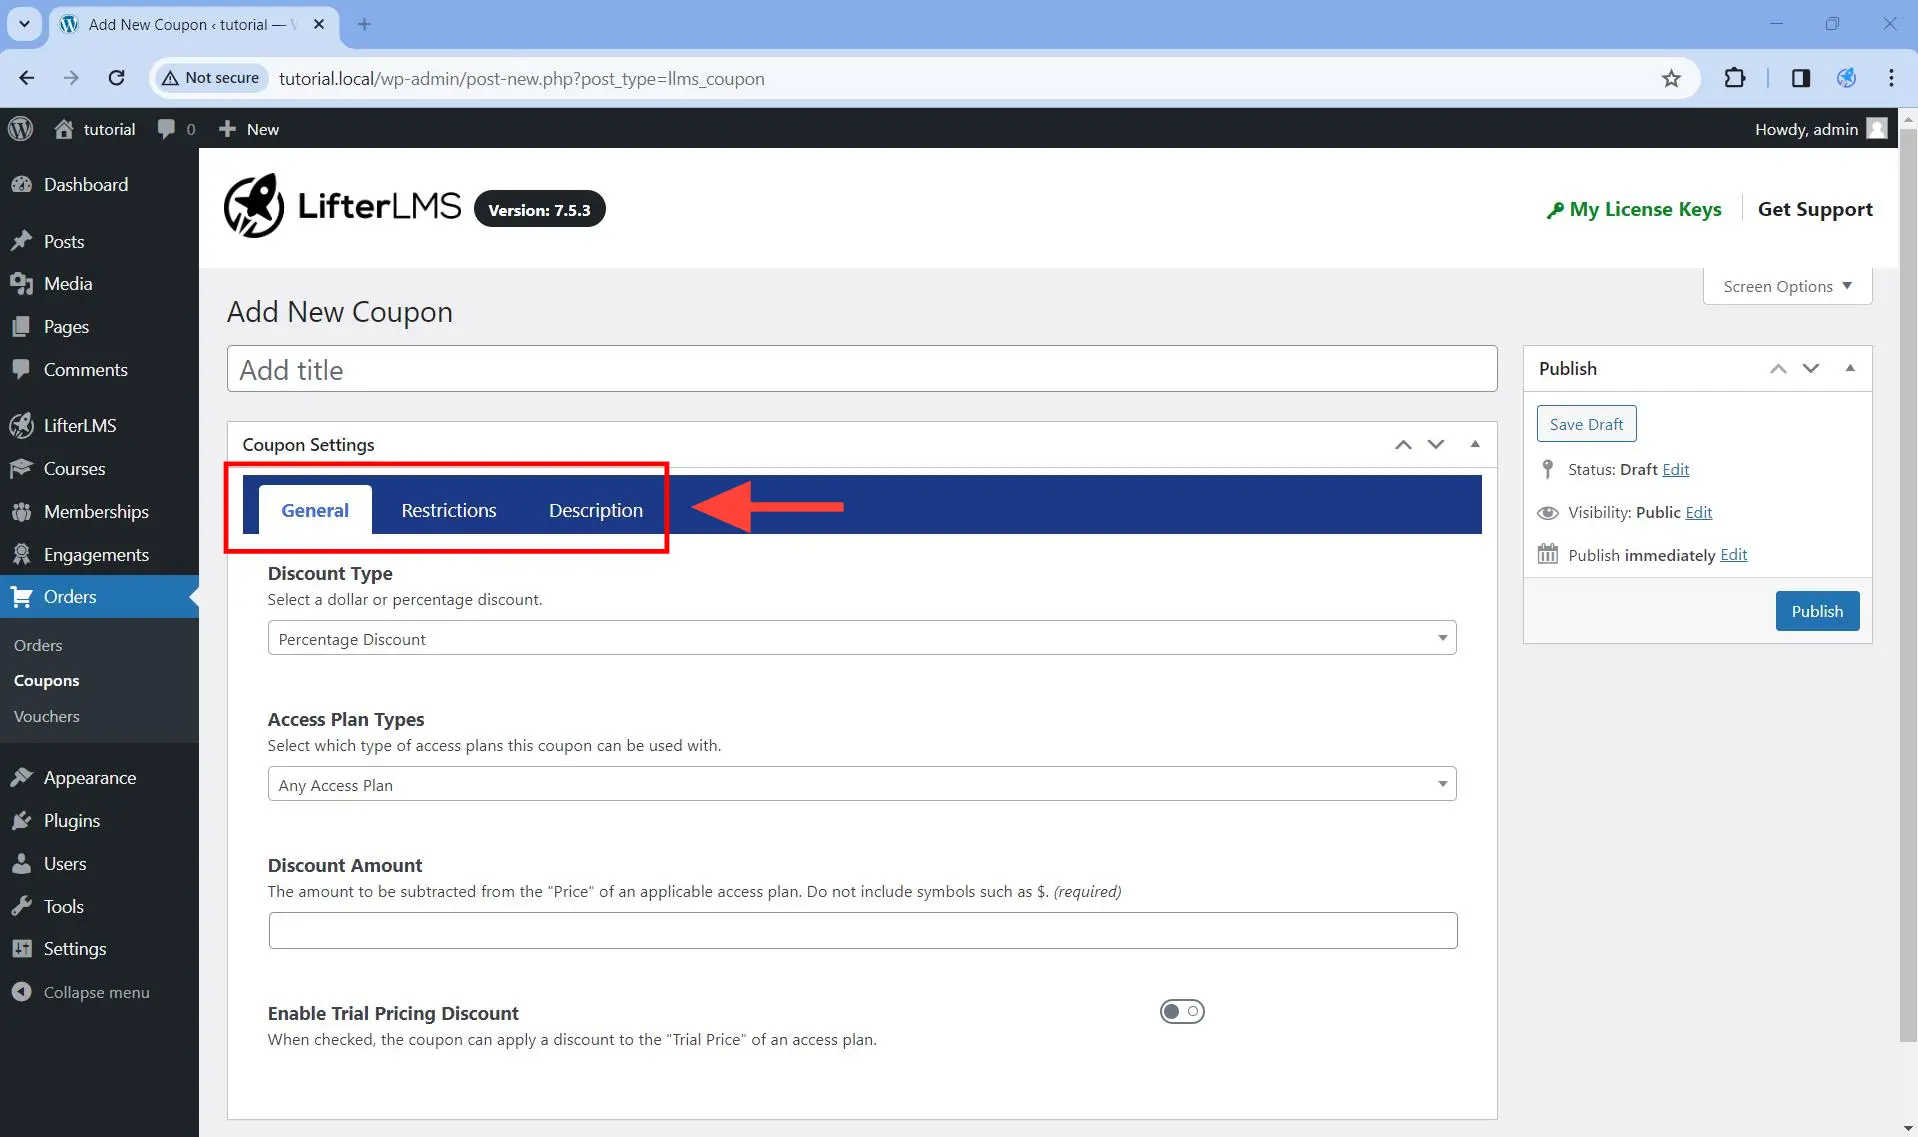
Without the Advanced Coupons add-on, creating a new coupon by going to WordPress Dashboard > Orders > Coupons you will see only three tabs: General, Restrictions, and Description.
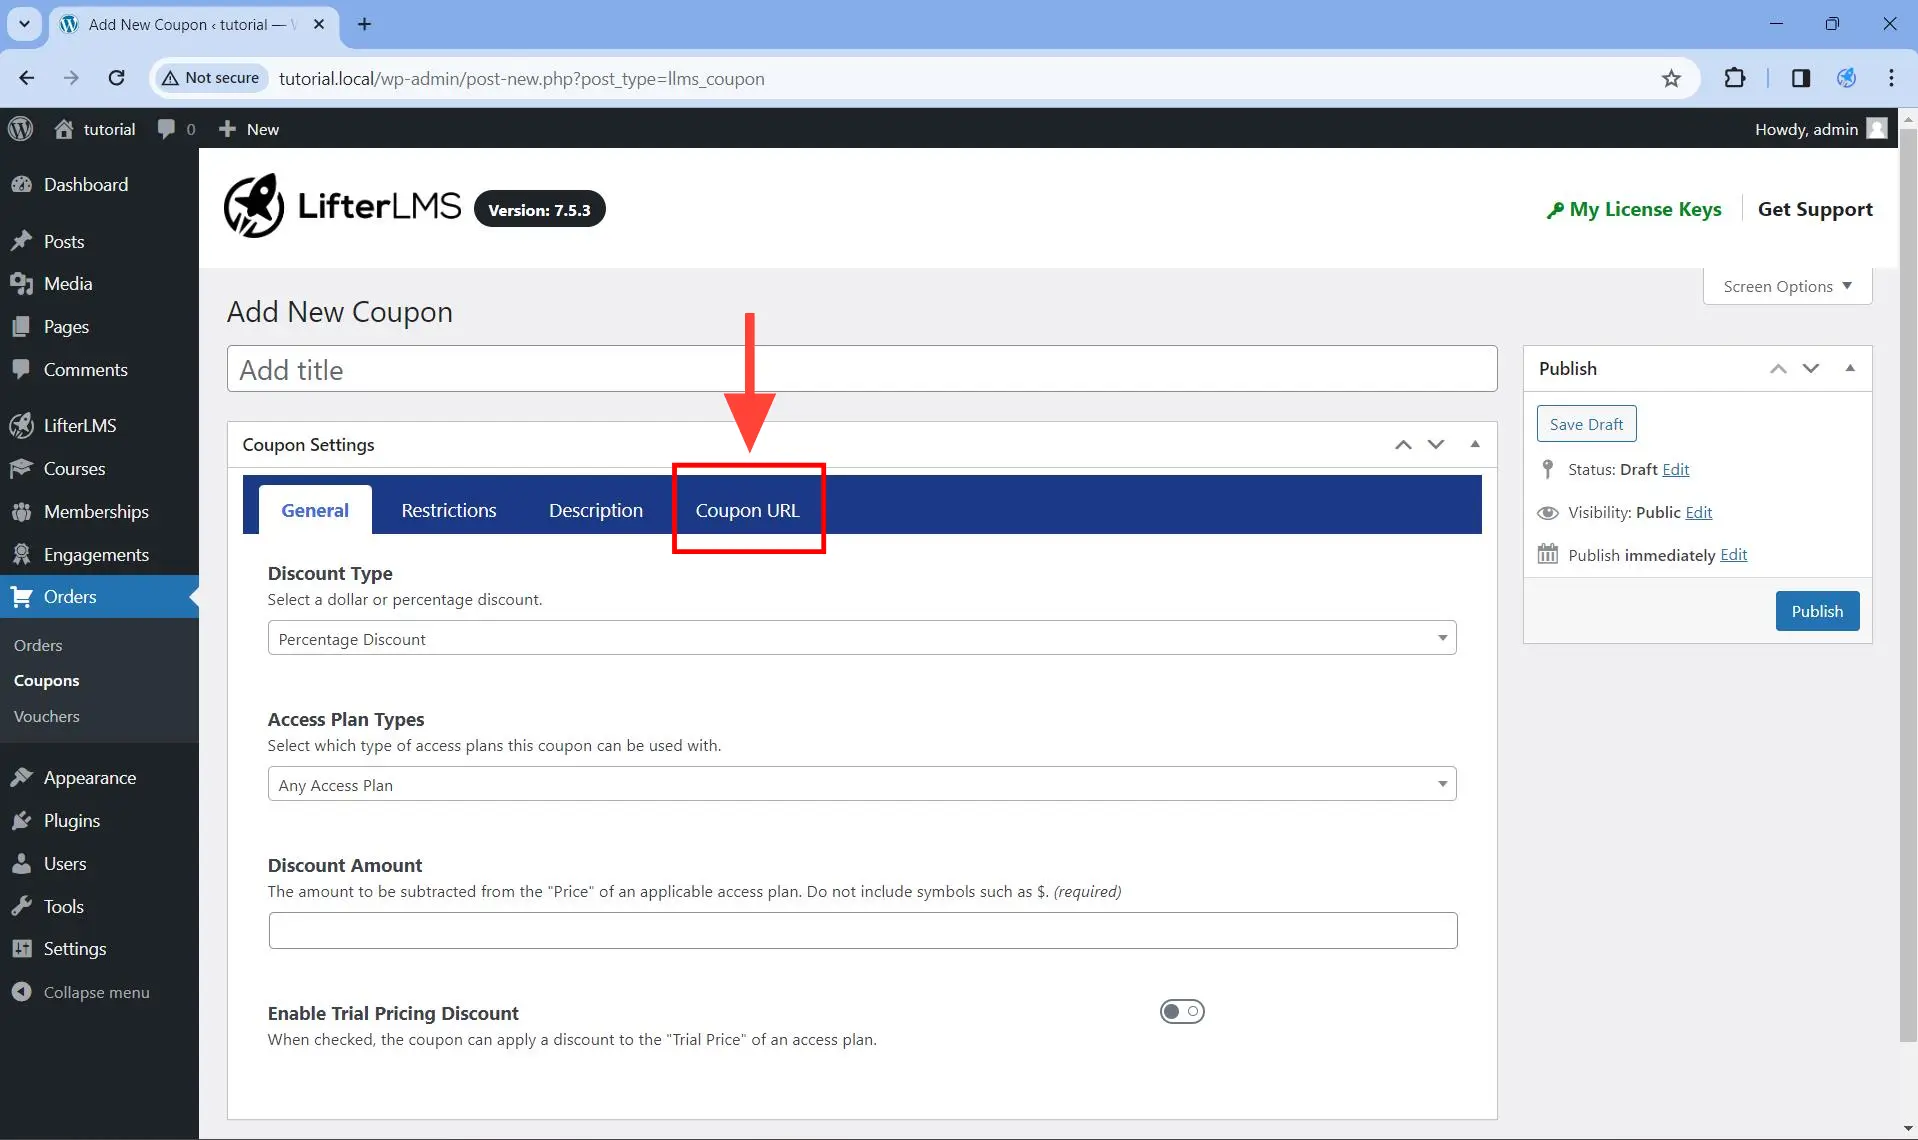
When the Advanced Coupons add-on is activated, creating a new coupon will add the Coupon URL tab.
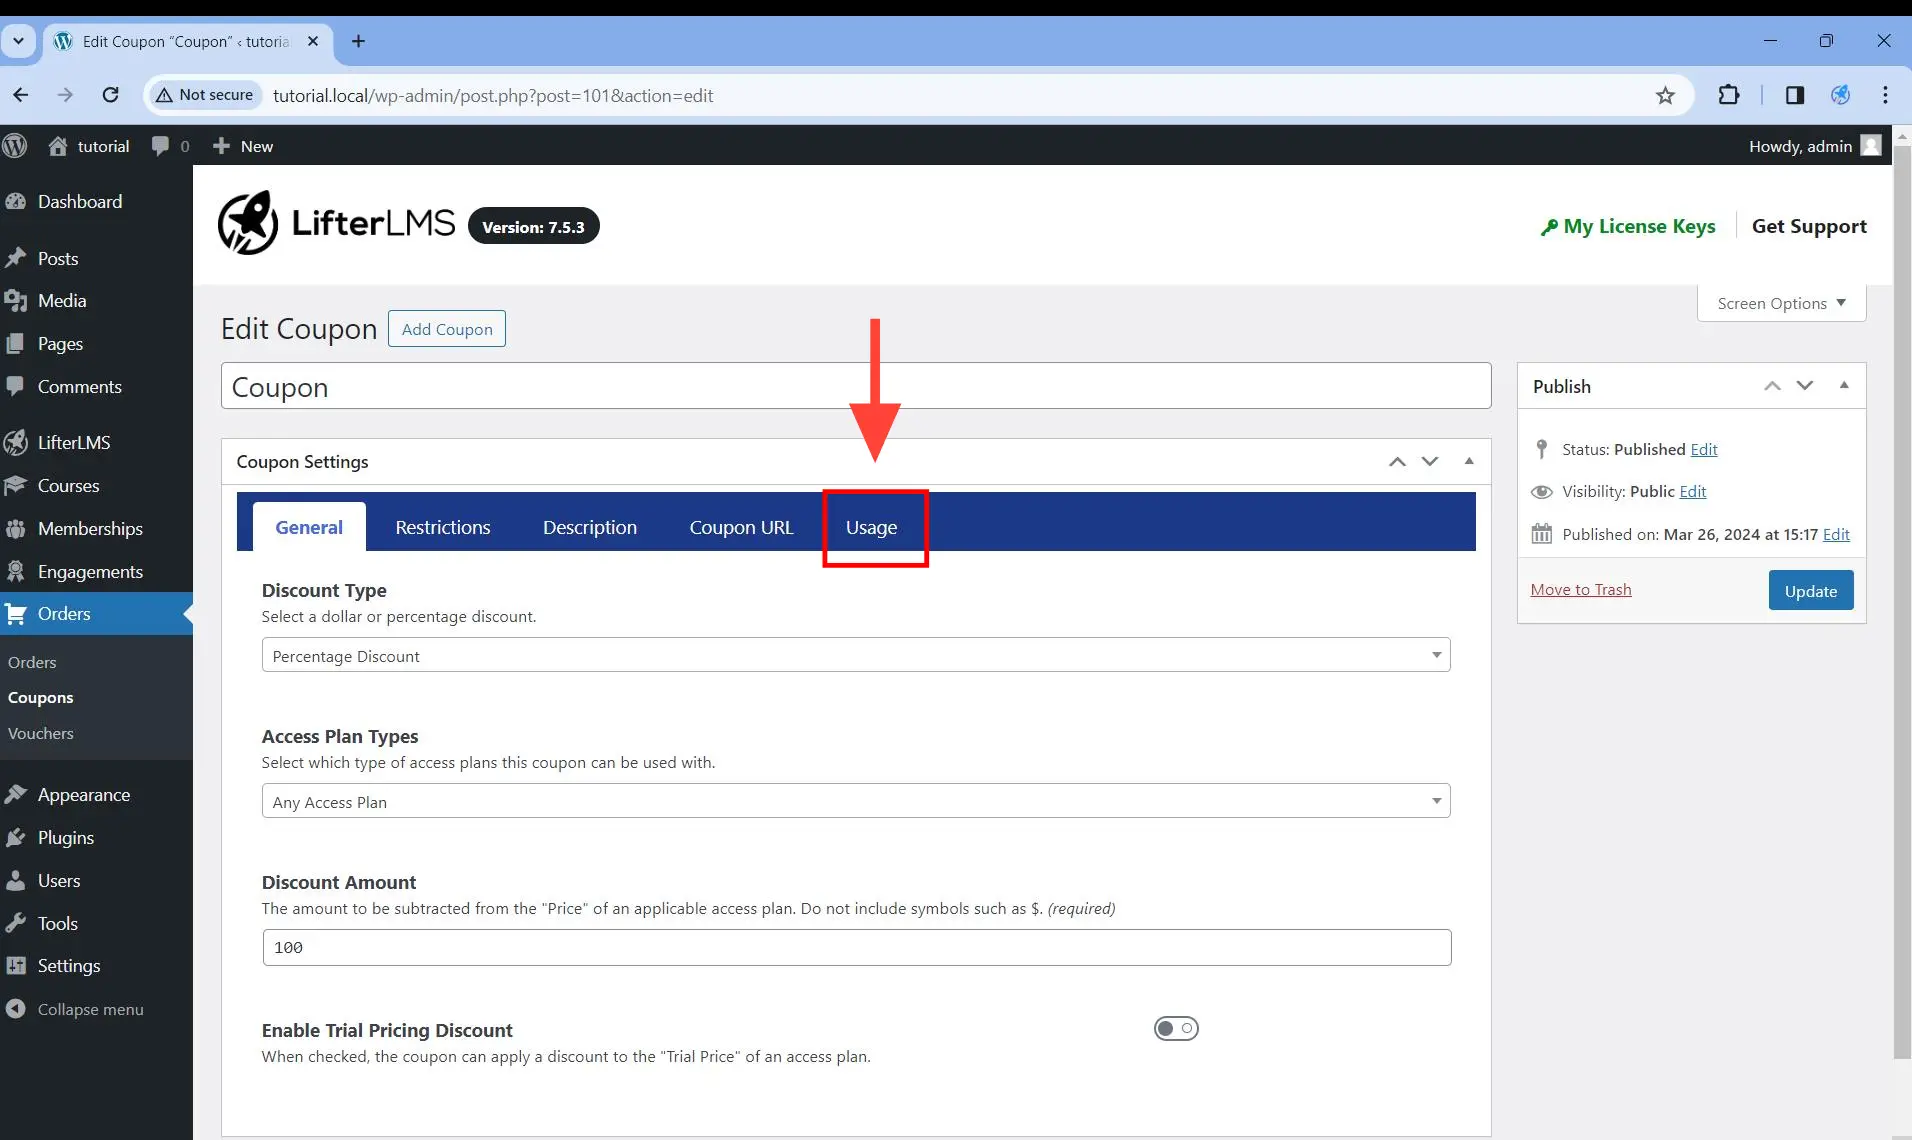
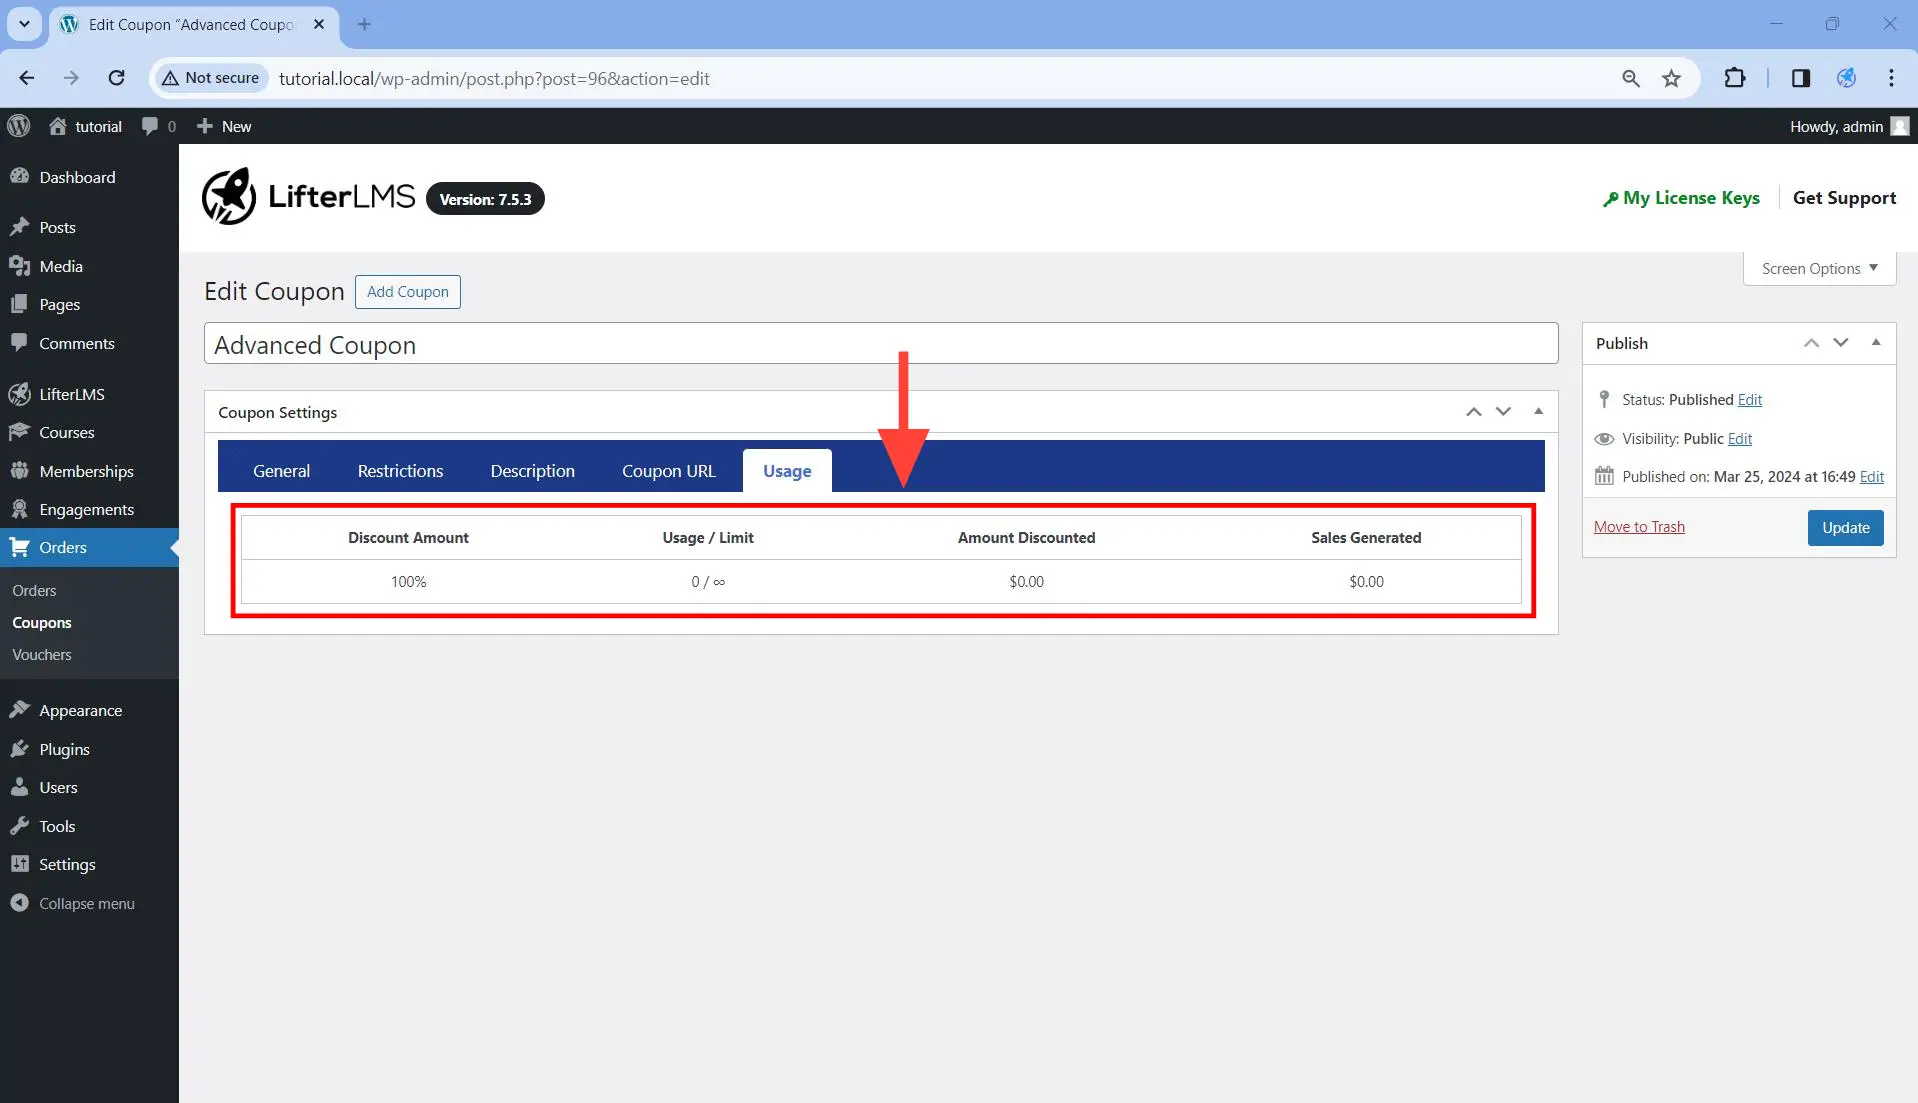
Finally, when the coupon is saved, you will see the last additional tab: the Usage tab.
General Tab
There are no changes in the General tab when the Advanced Coupons add-on is activated.
Restrictions Tab
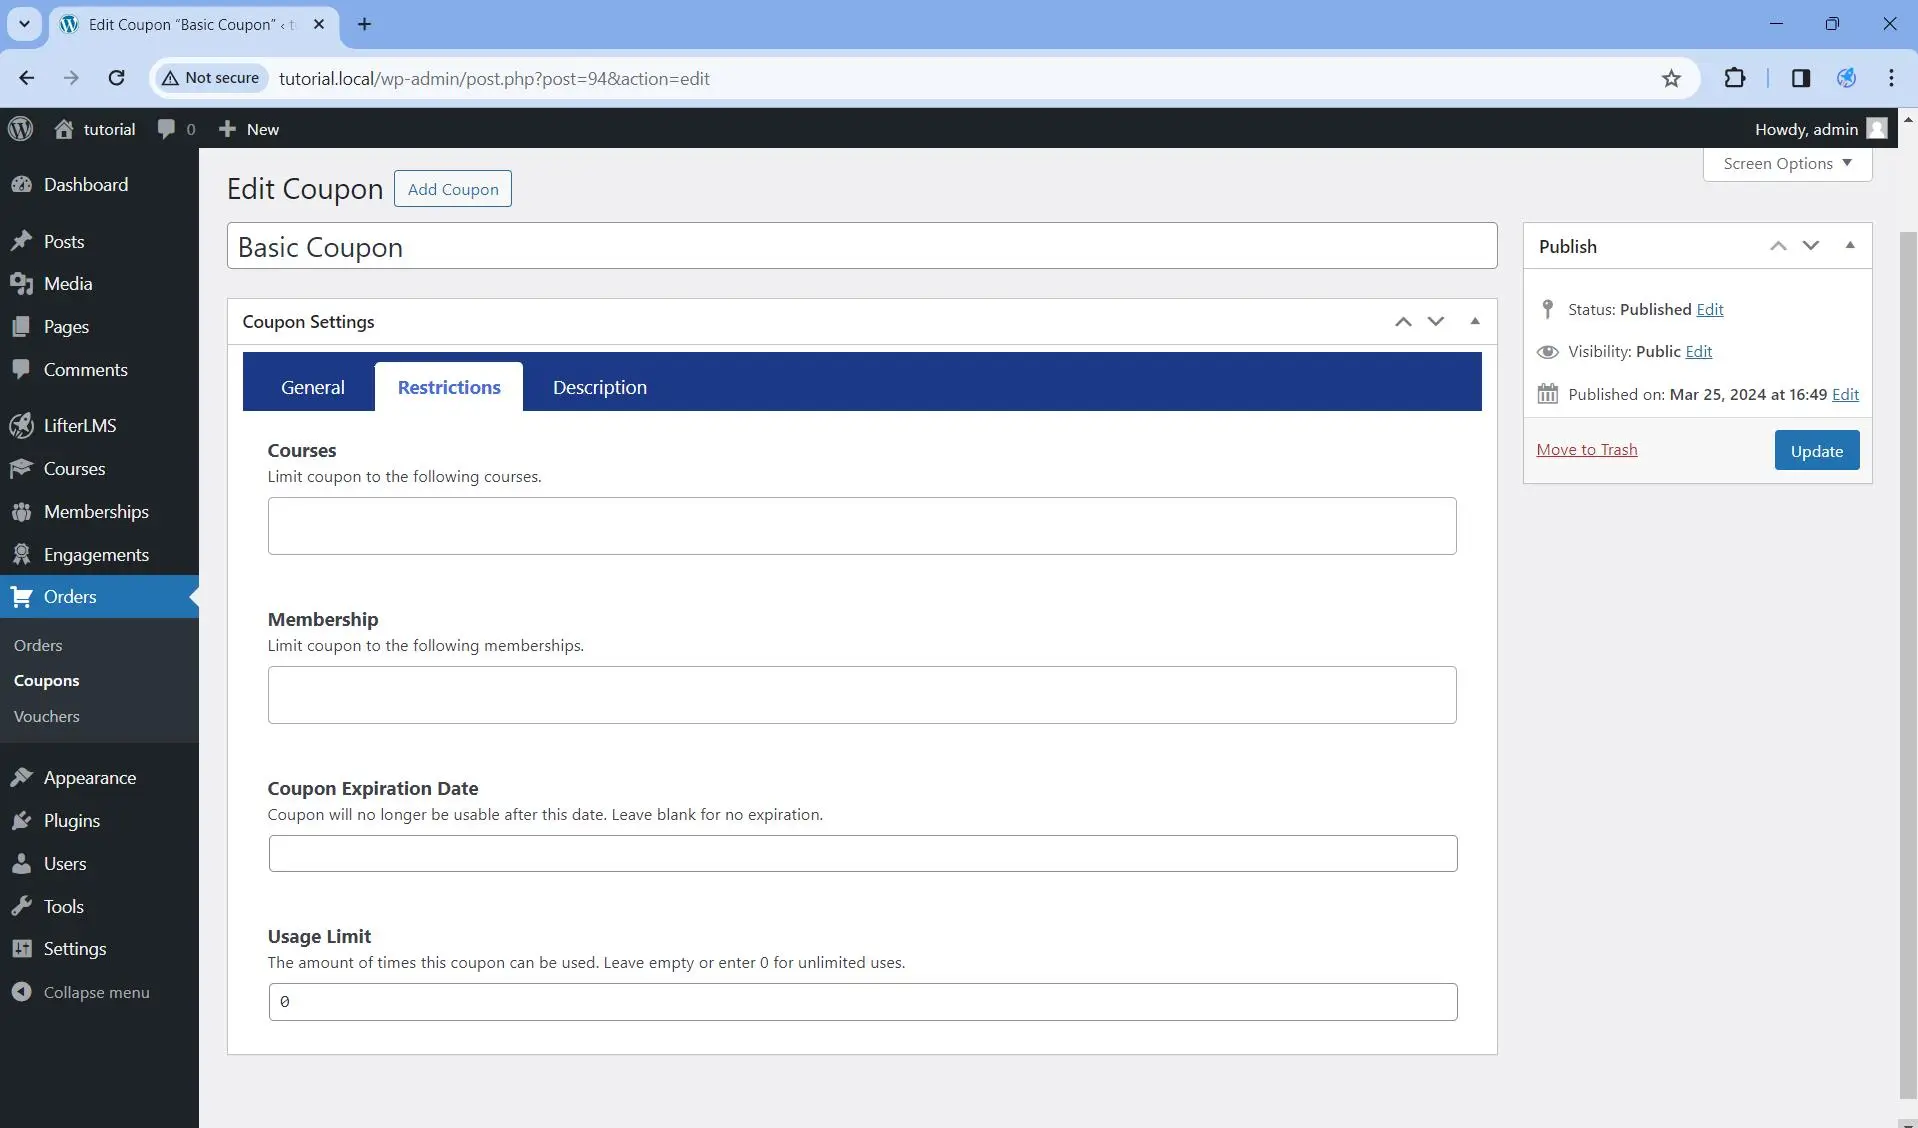
Without activating the Advanced Coupons add-on, this is what the Restrictions tab looks like.
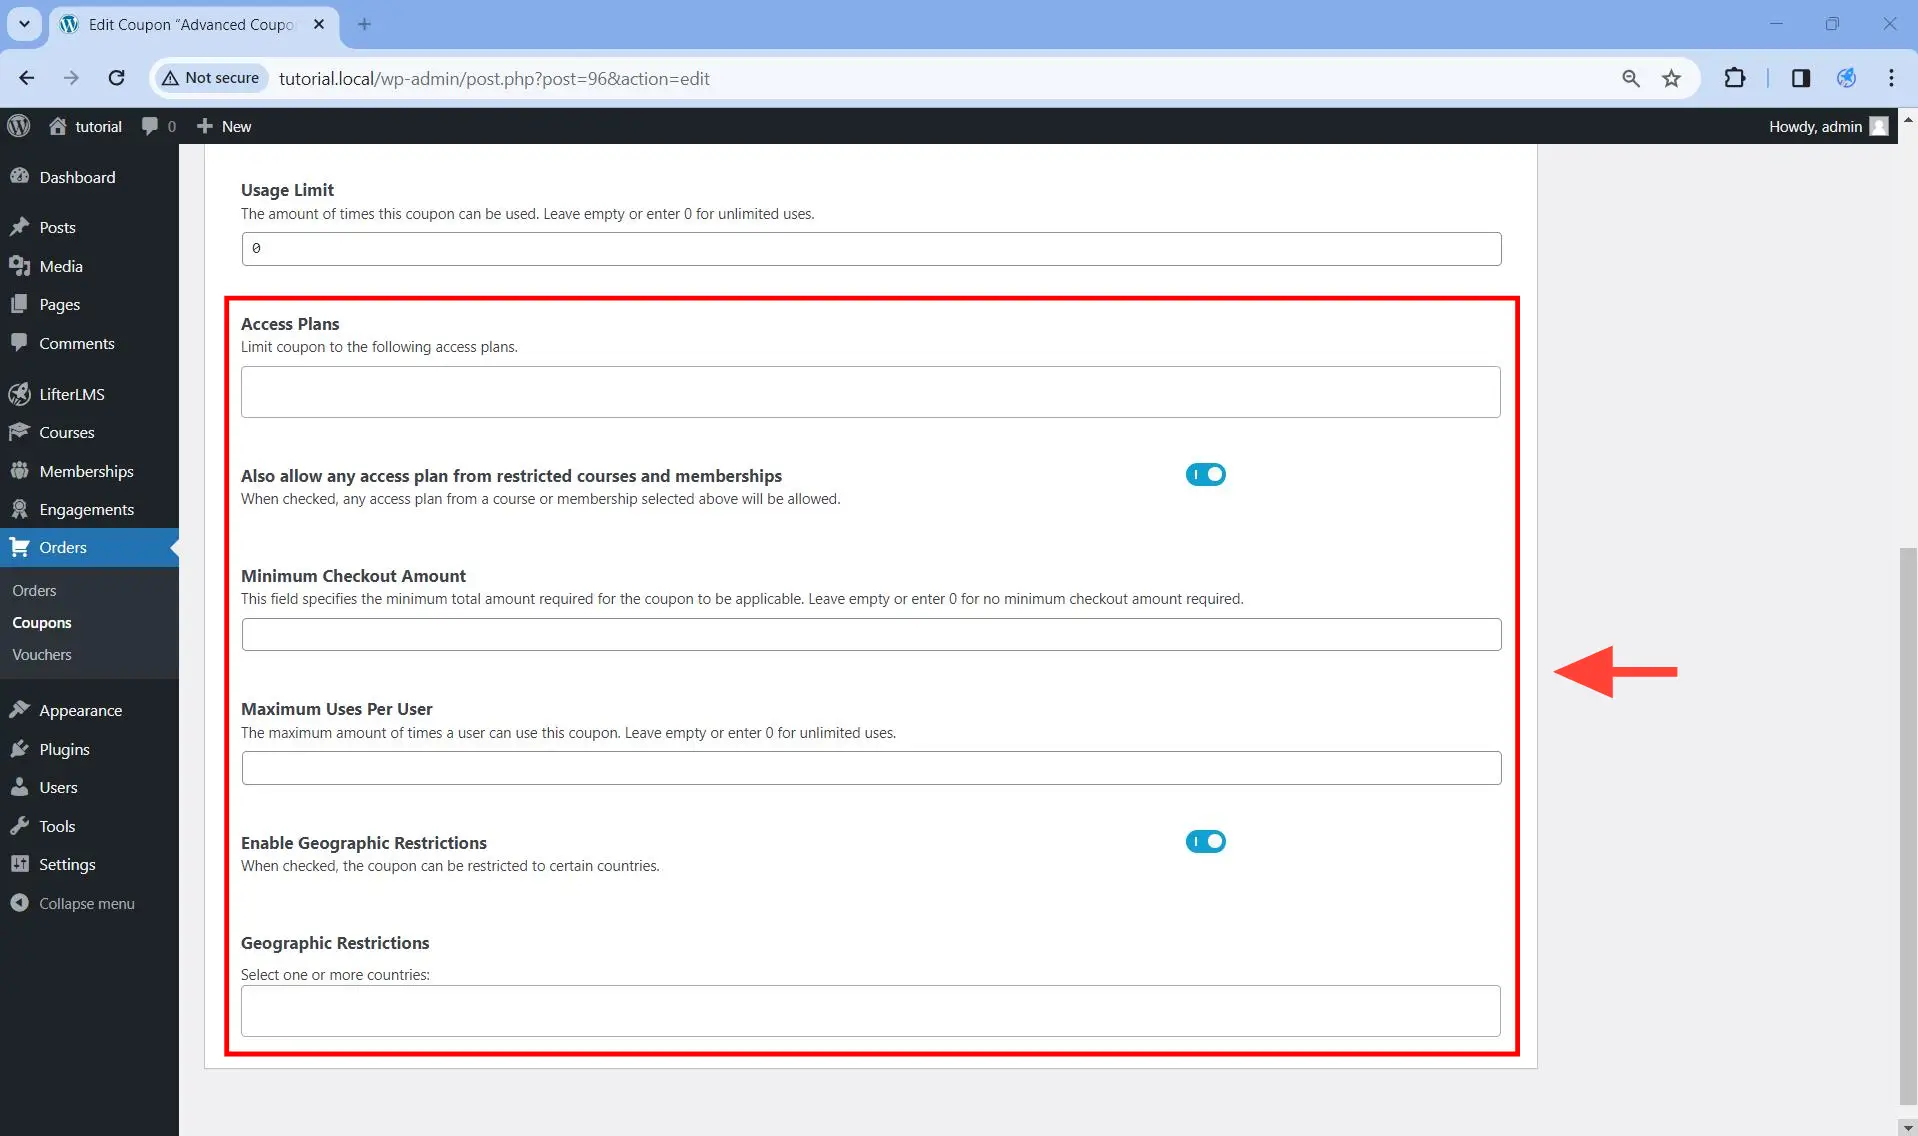
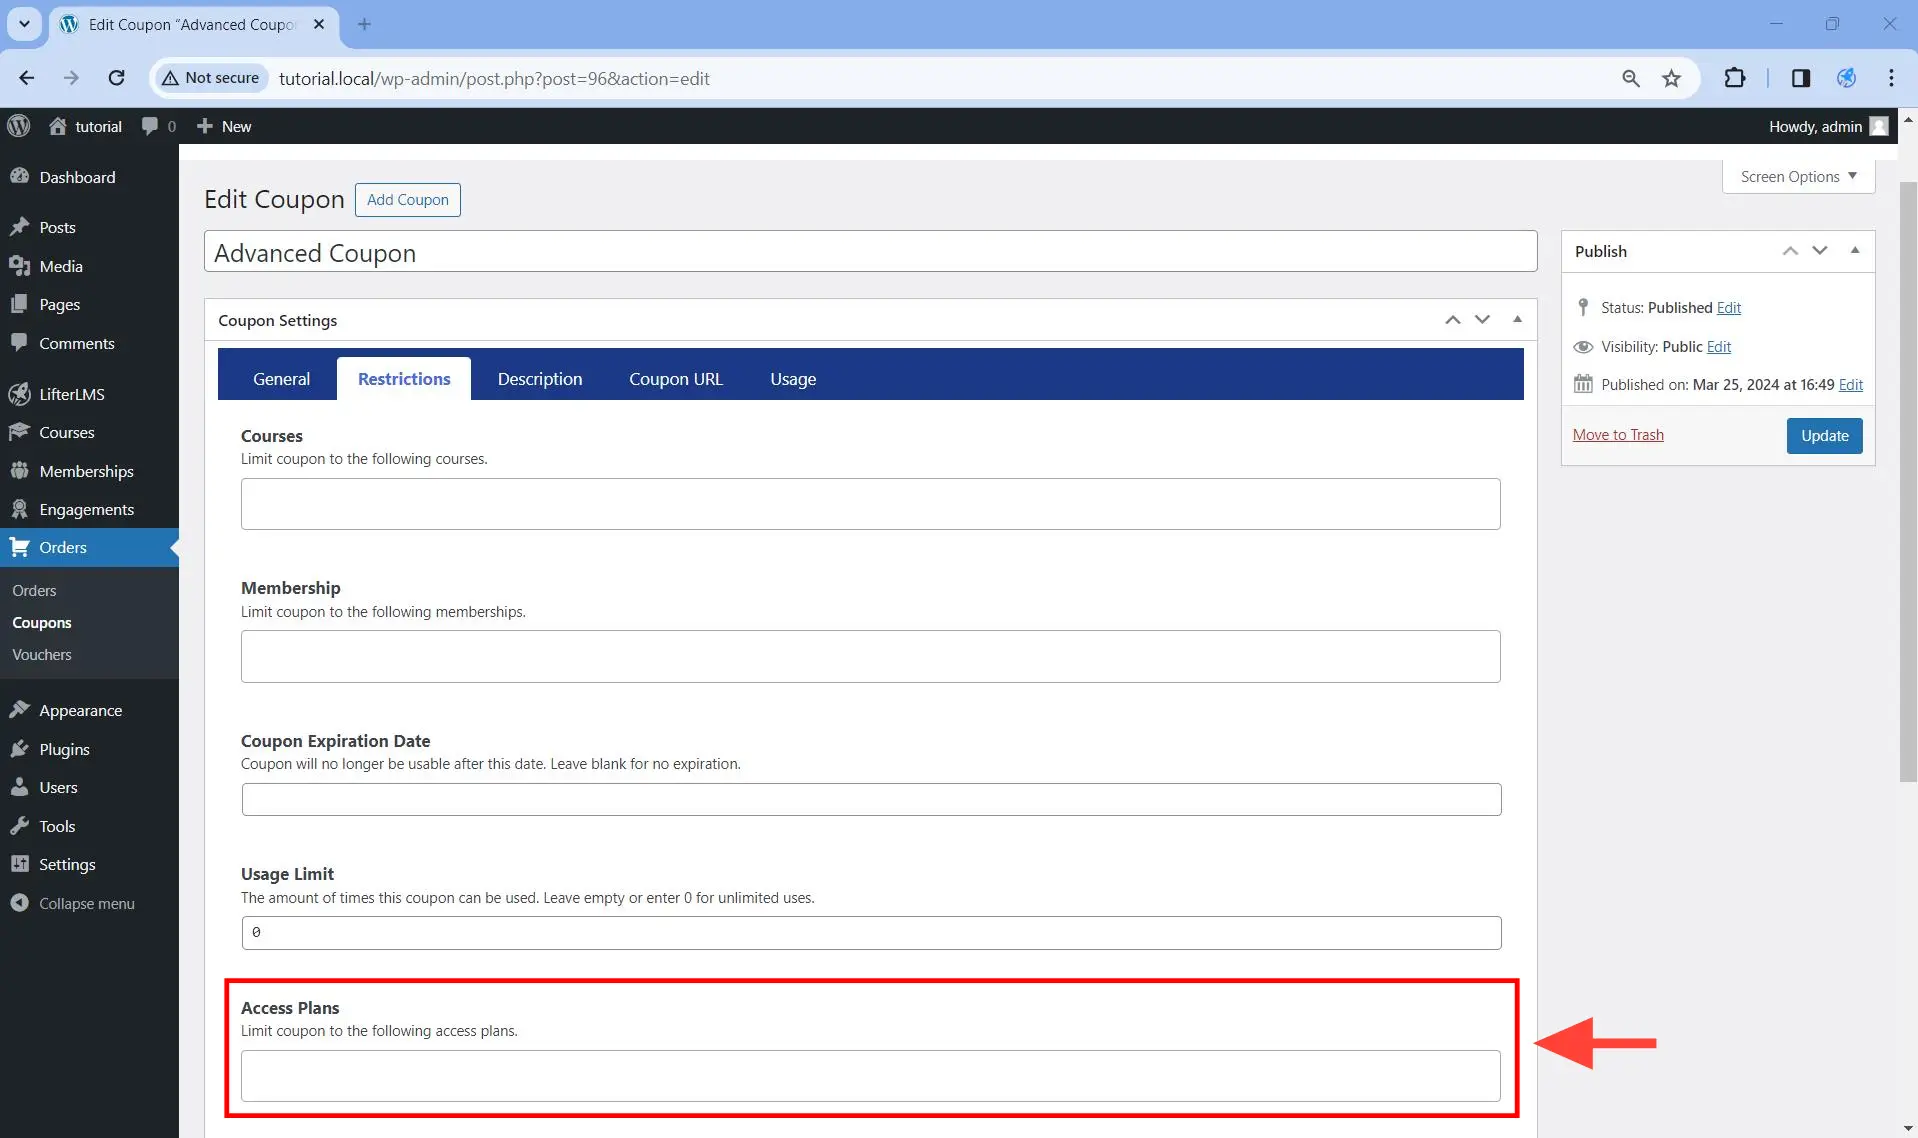
After activating the Advanced Coupons add-on, this is what the Restrictions tab looks like.
Description Tab
There are no changes in the Description tab when the Advanced Coupons add-on is activated.
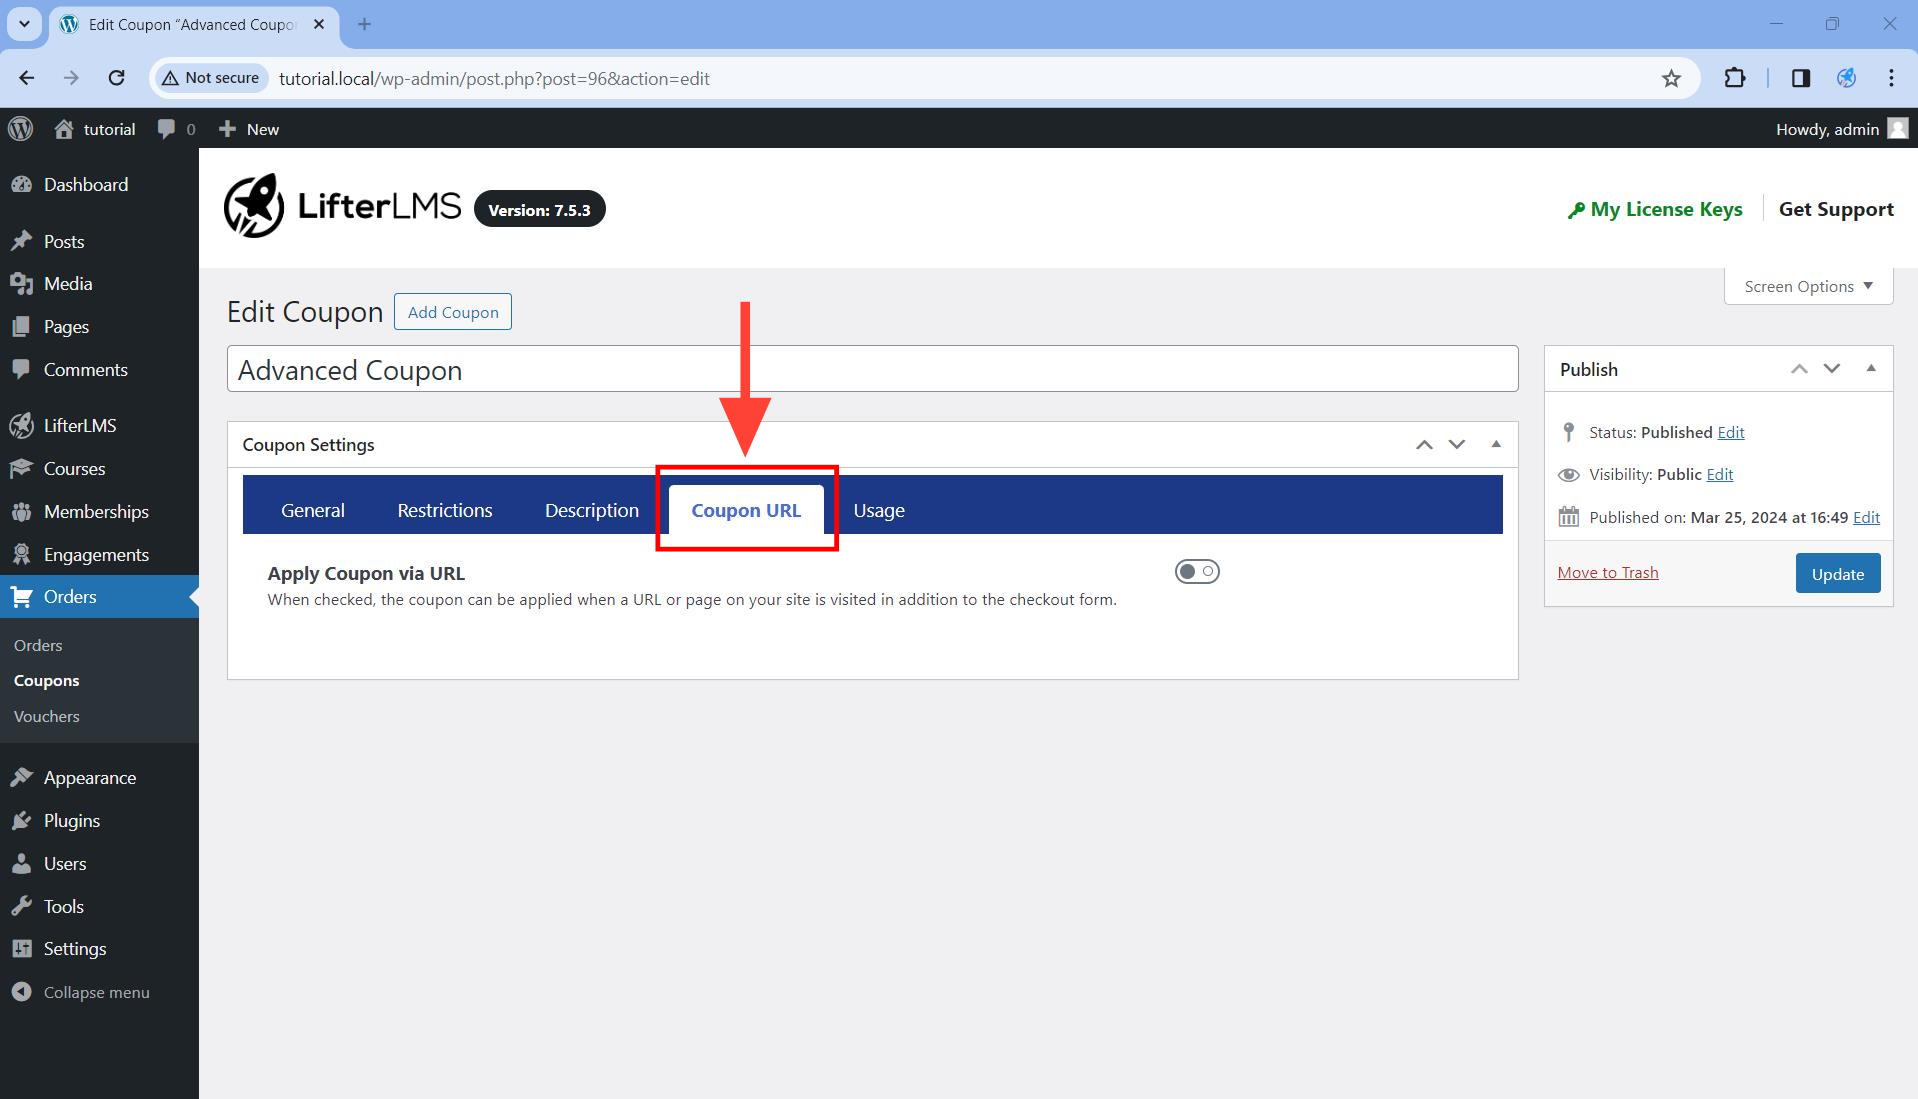
Coupon URL Tab
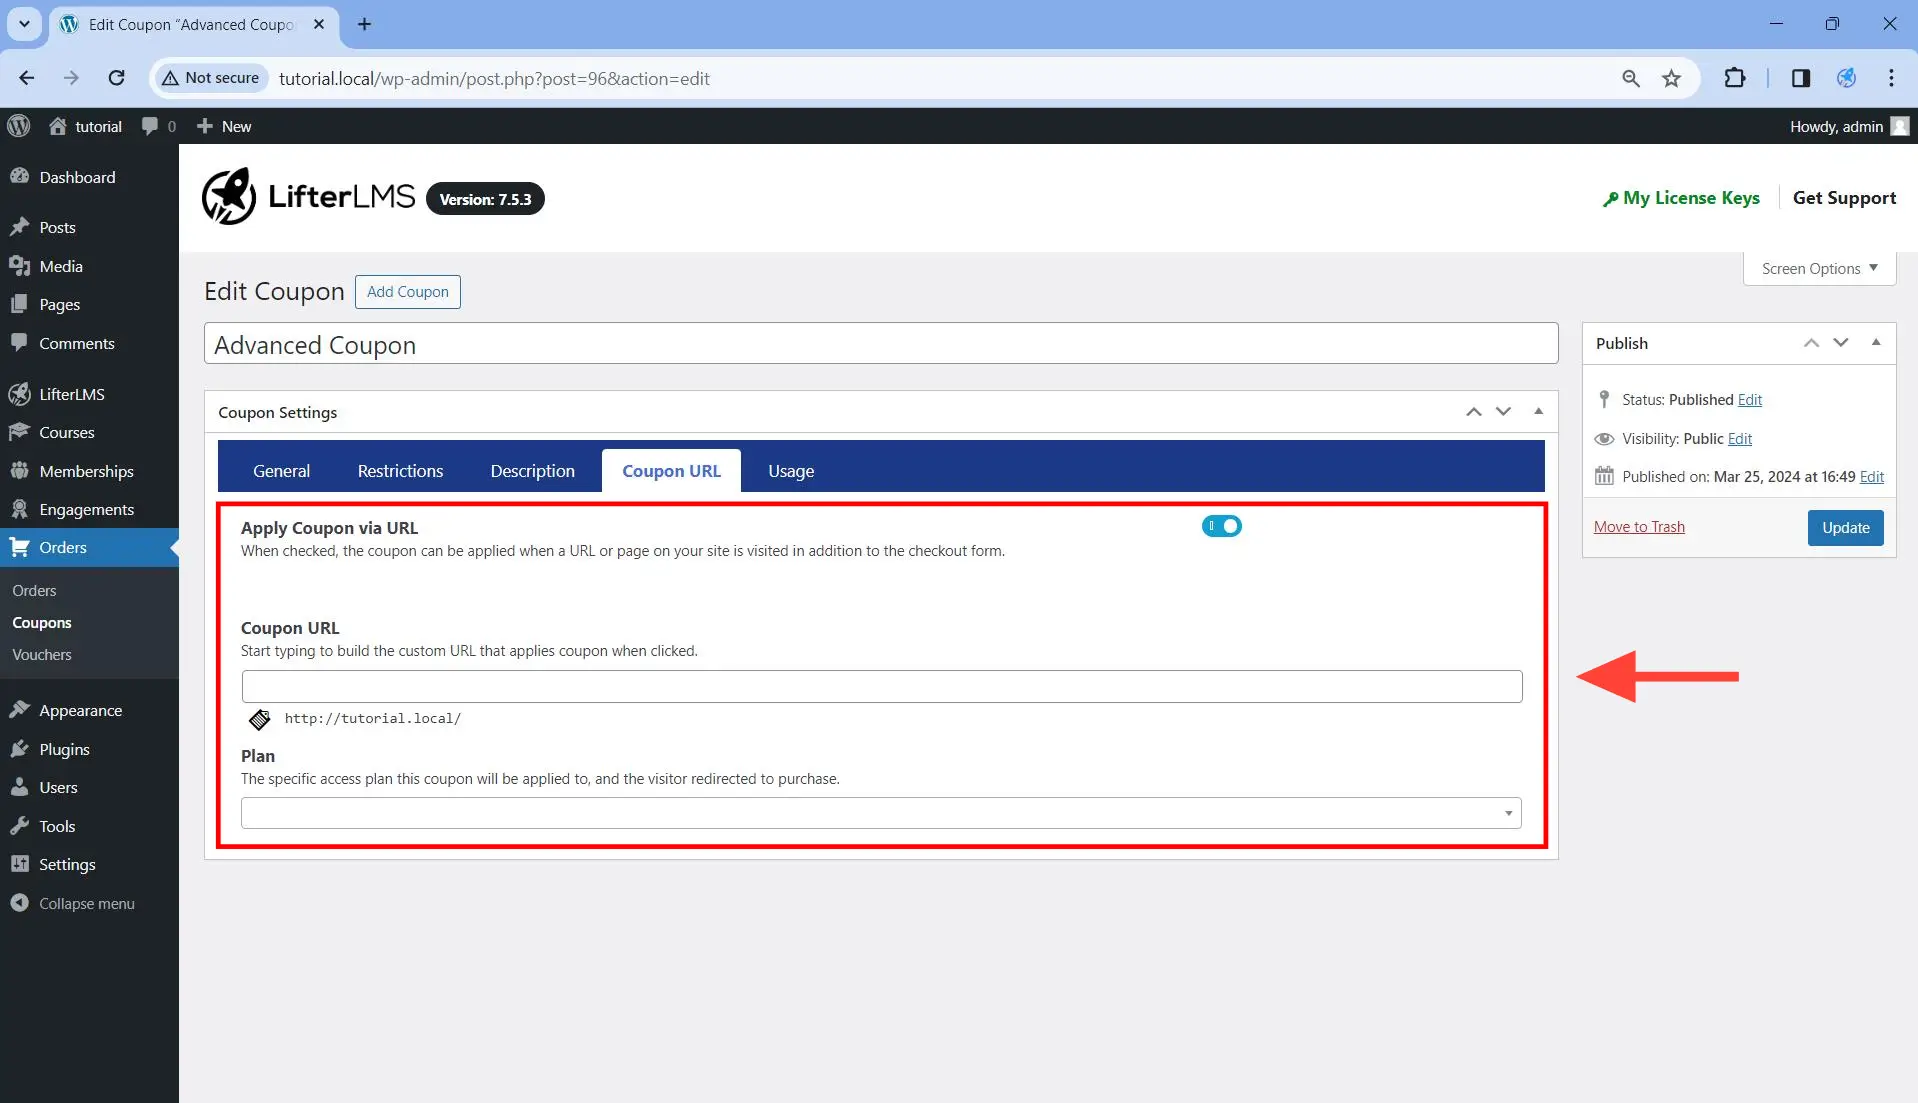
The Coupon URL tab will only be visible if you activate the Advanced Coupons add-on.
Usage Tab
The Usage tab will only be visible if you activate the Advanced Coupons add-on.
Every course and membership in LifterLMS can have a number of access plans associated with each of them. For example, maybe “Course 1” has access plans “Plan 1” and “Plan 2” and “Membership 1” has access plans “Plan 3” and “Plan 4”. If you only want the coupon to apply to “Plan 1” and “Plan 4”, you can do that by following the instructions below.
Step 1. Create a coupon in WordPress Dashboard > Orders > Coupons. If you have an existing coupon, you can just edit that coupon instead.
Step 2. Click on the Restriction tab.

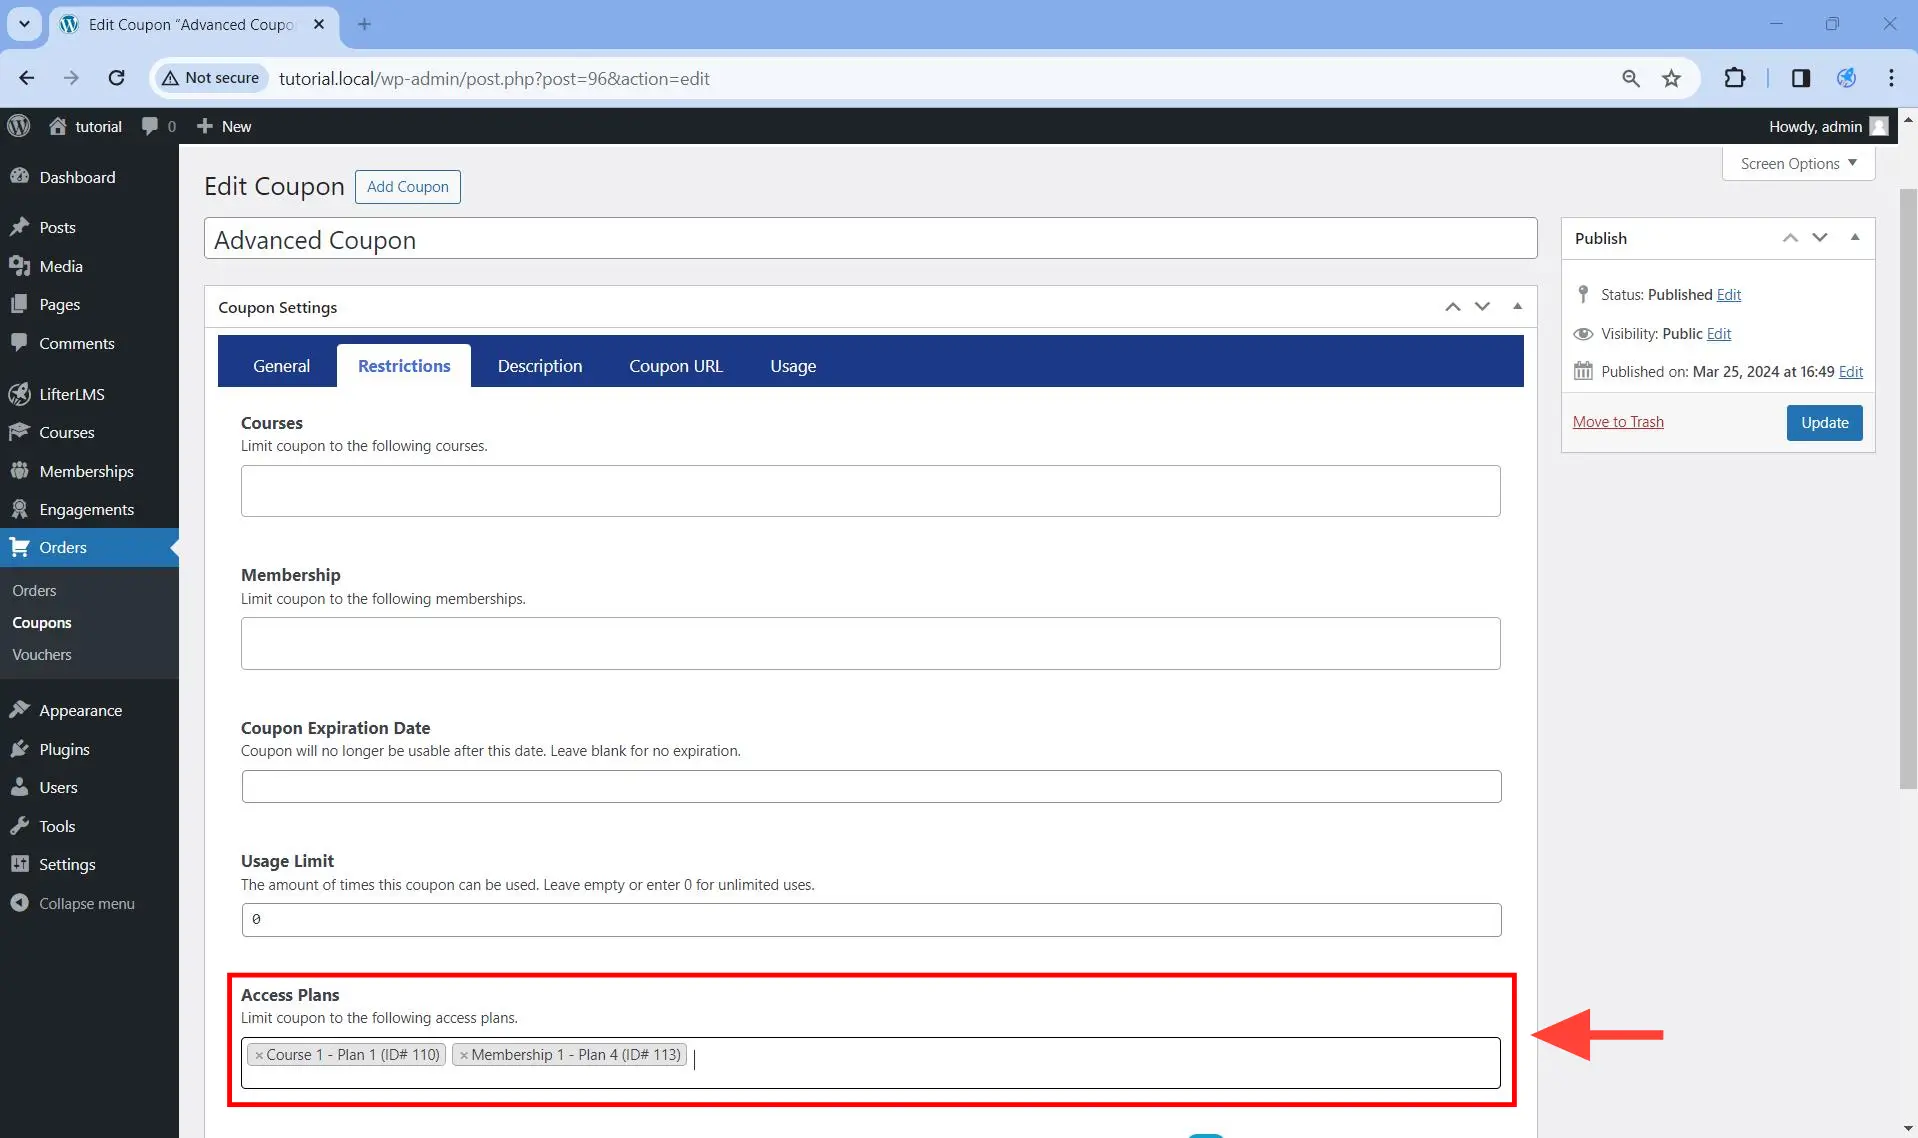
Step 3. In the Access Plans field, select the access plans that you want to restrict the coupon to from the dropdown.
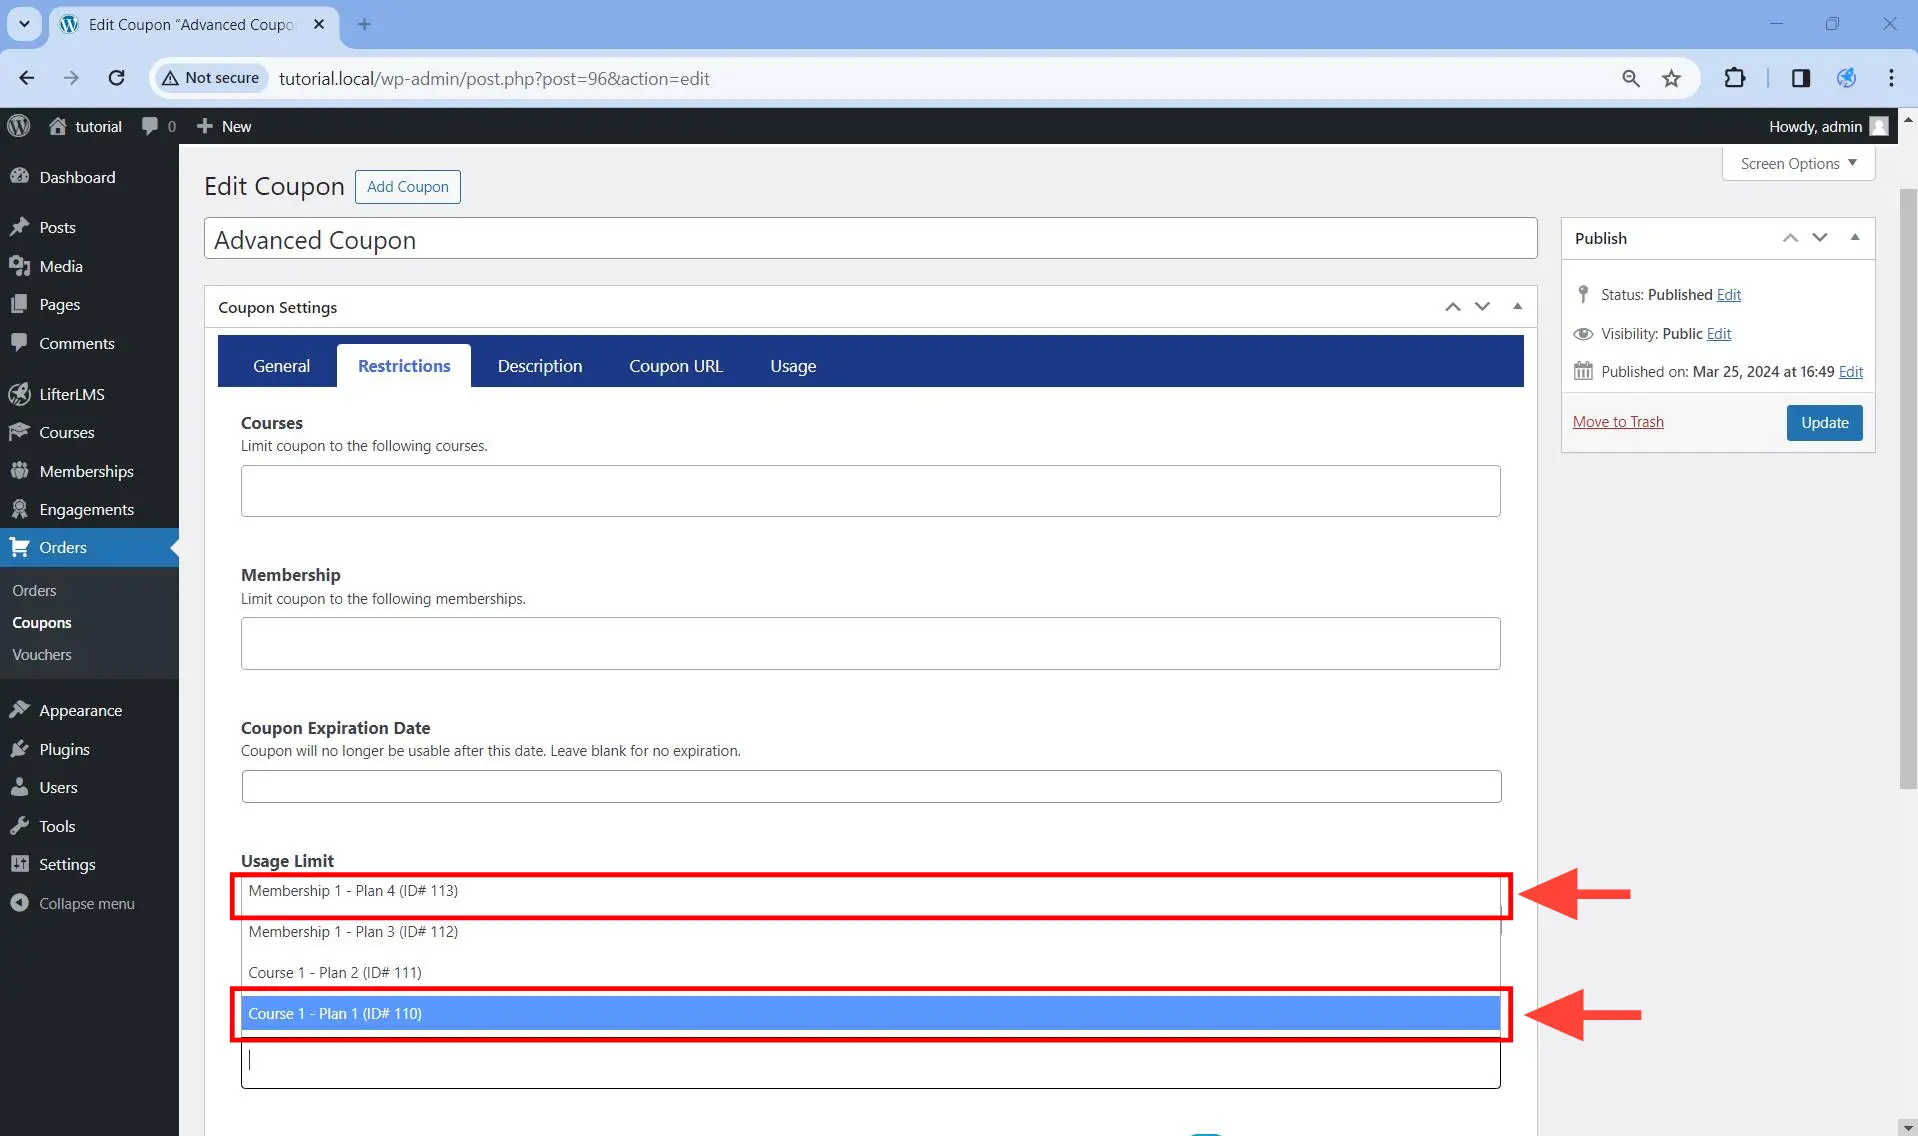
Caveat: Note that access plans from even deleted courses or deleted membership will appear here, so always double-check in if the course/membership listed above actually exists.
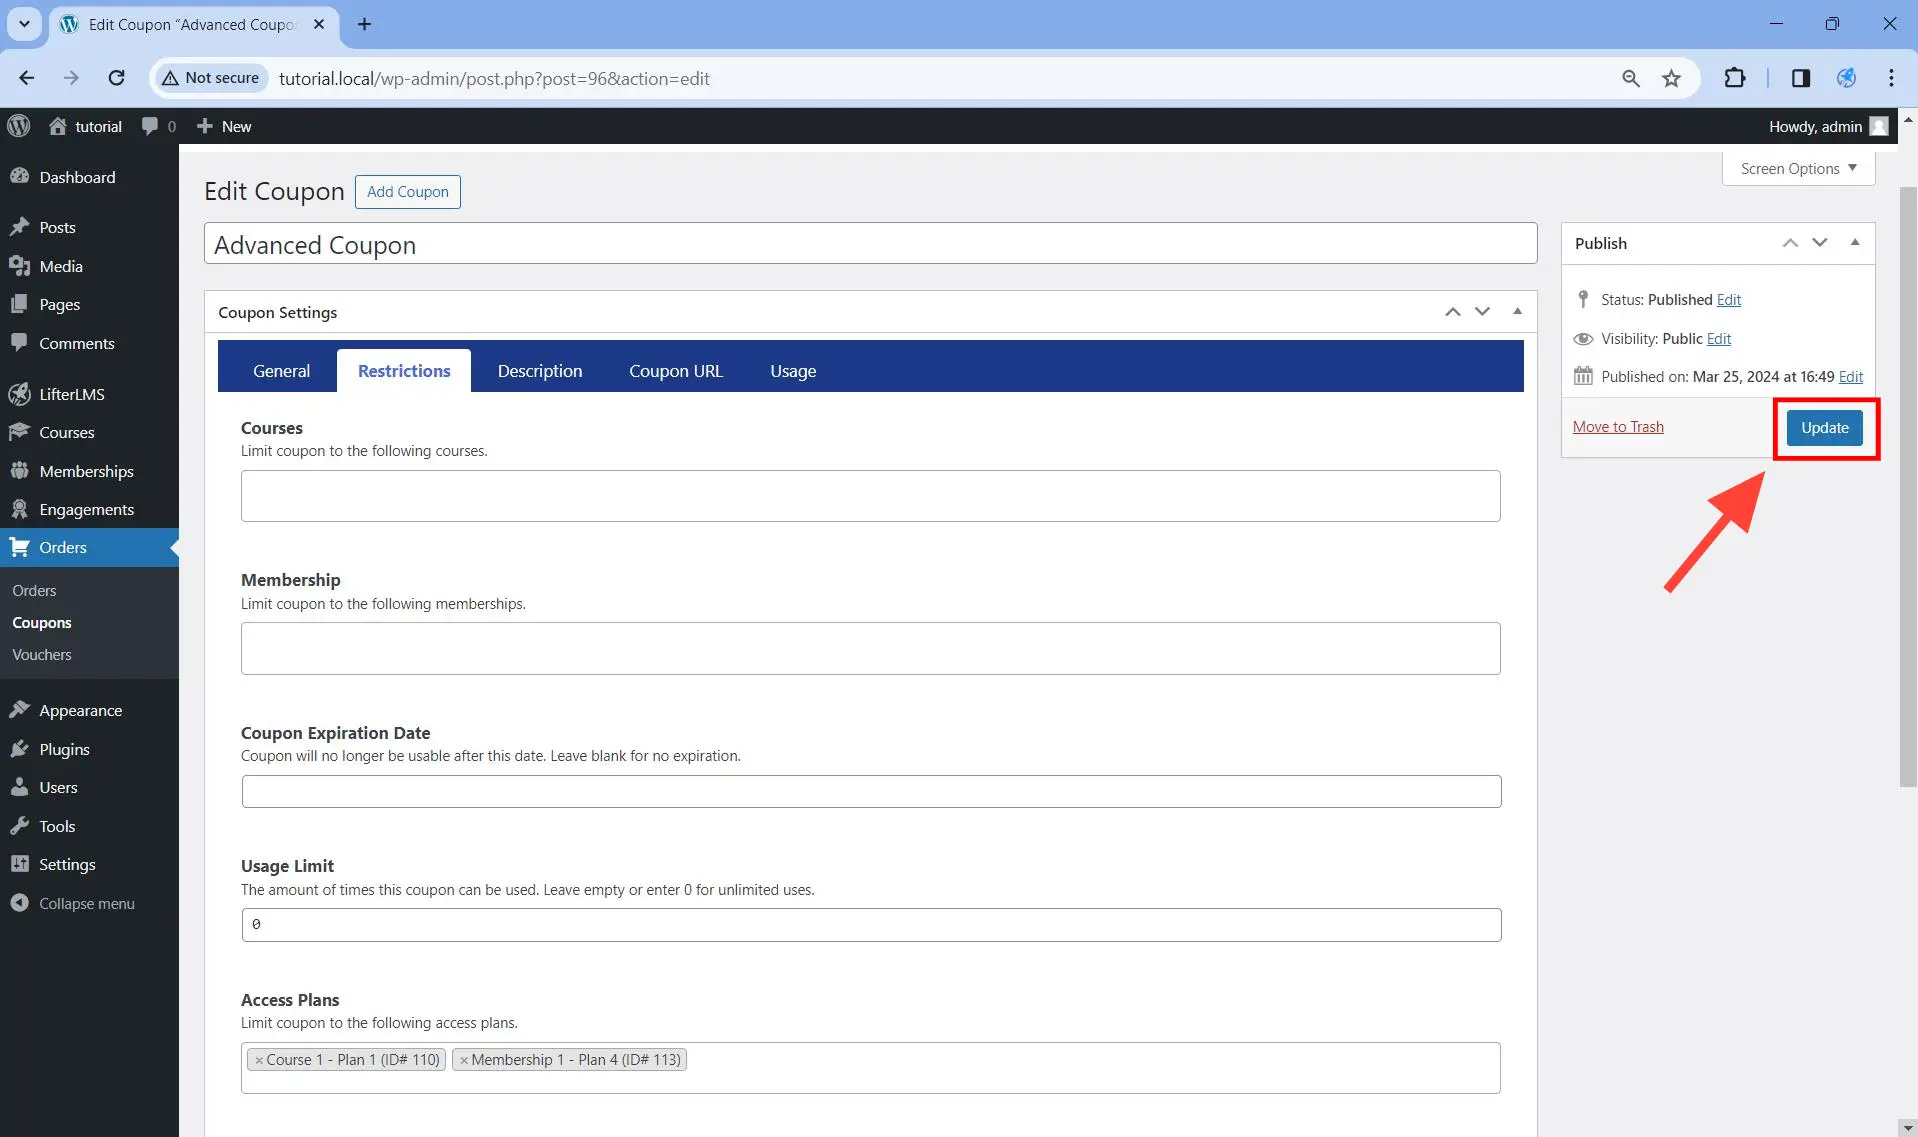
Step 4. Save the changes.
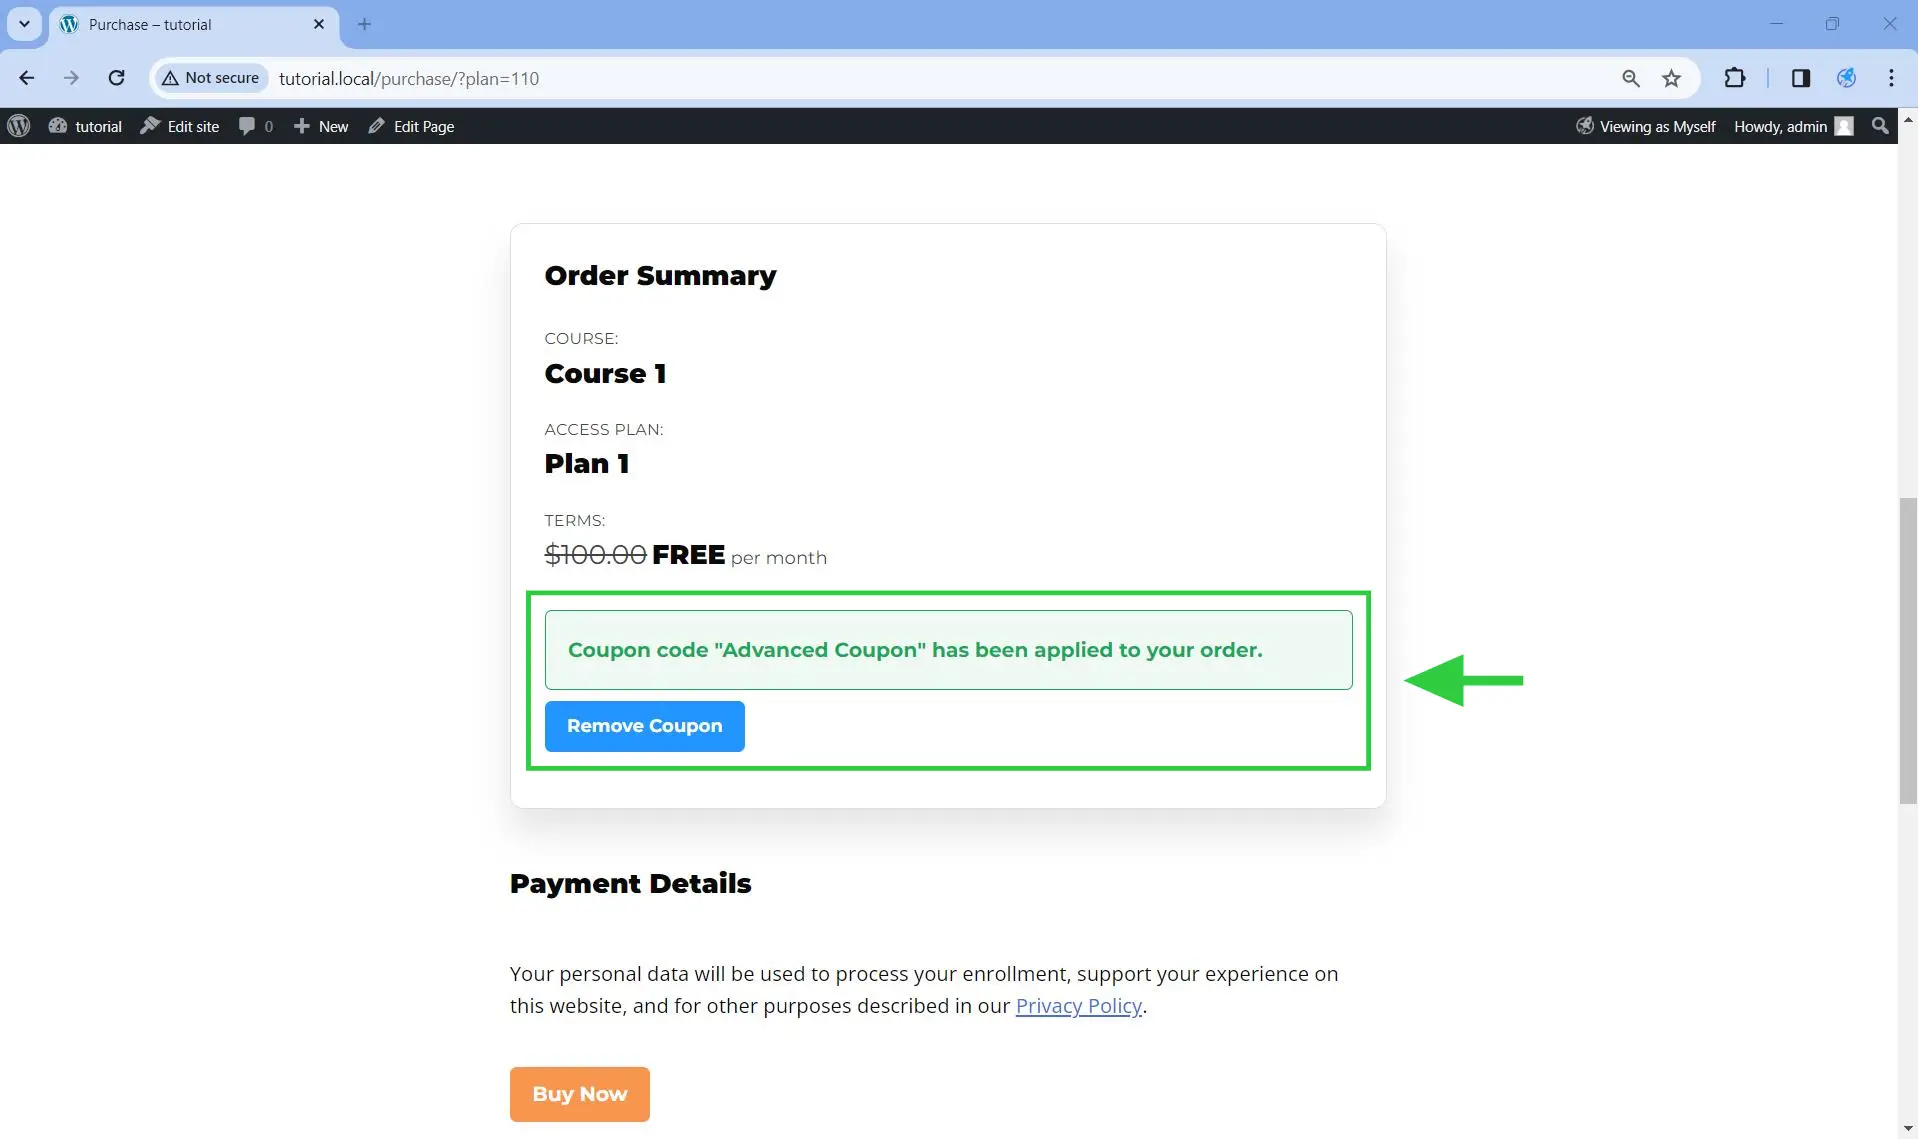
Step 5. Test the coupon on the front end.
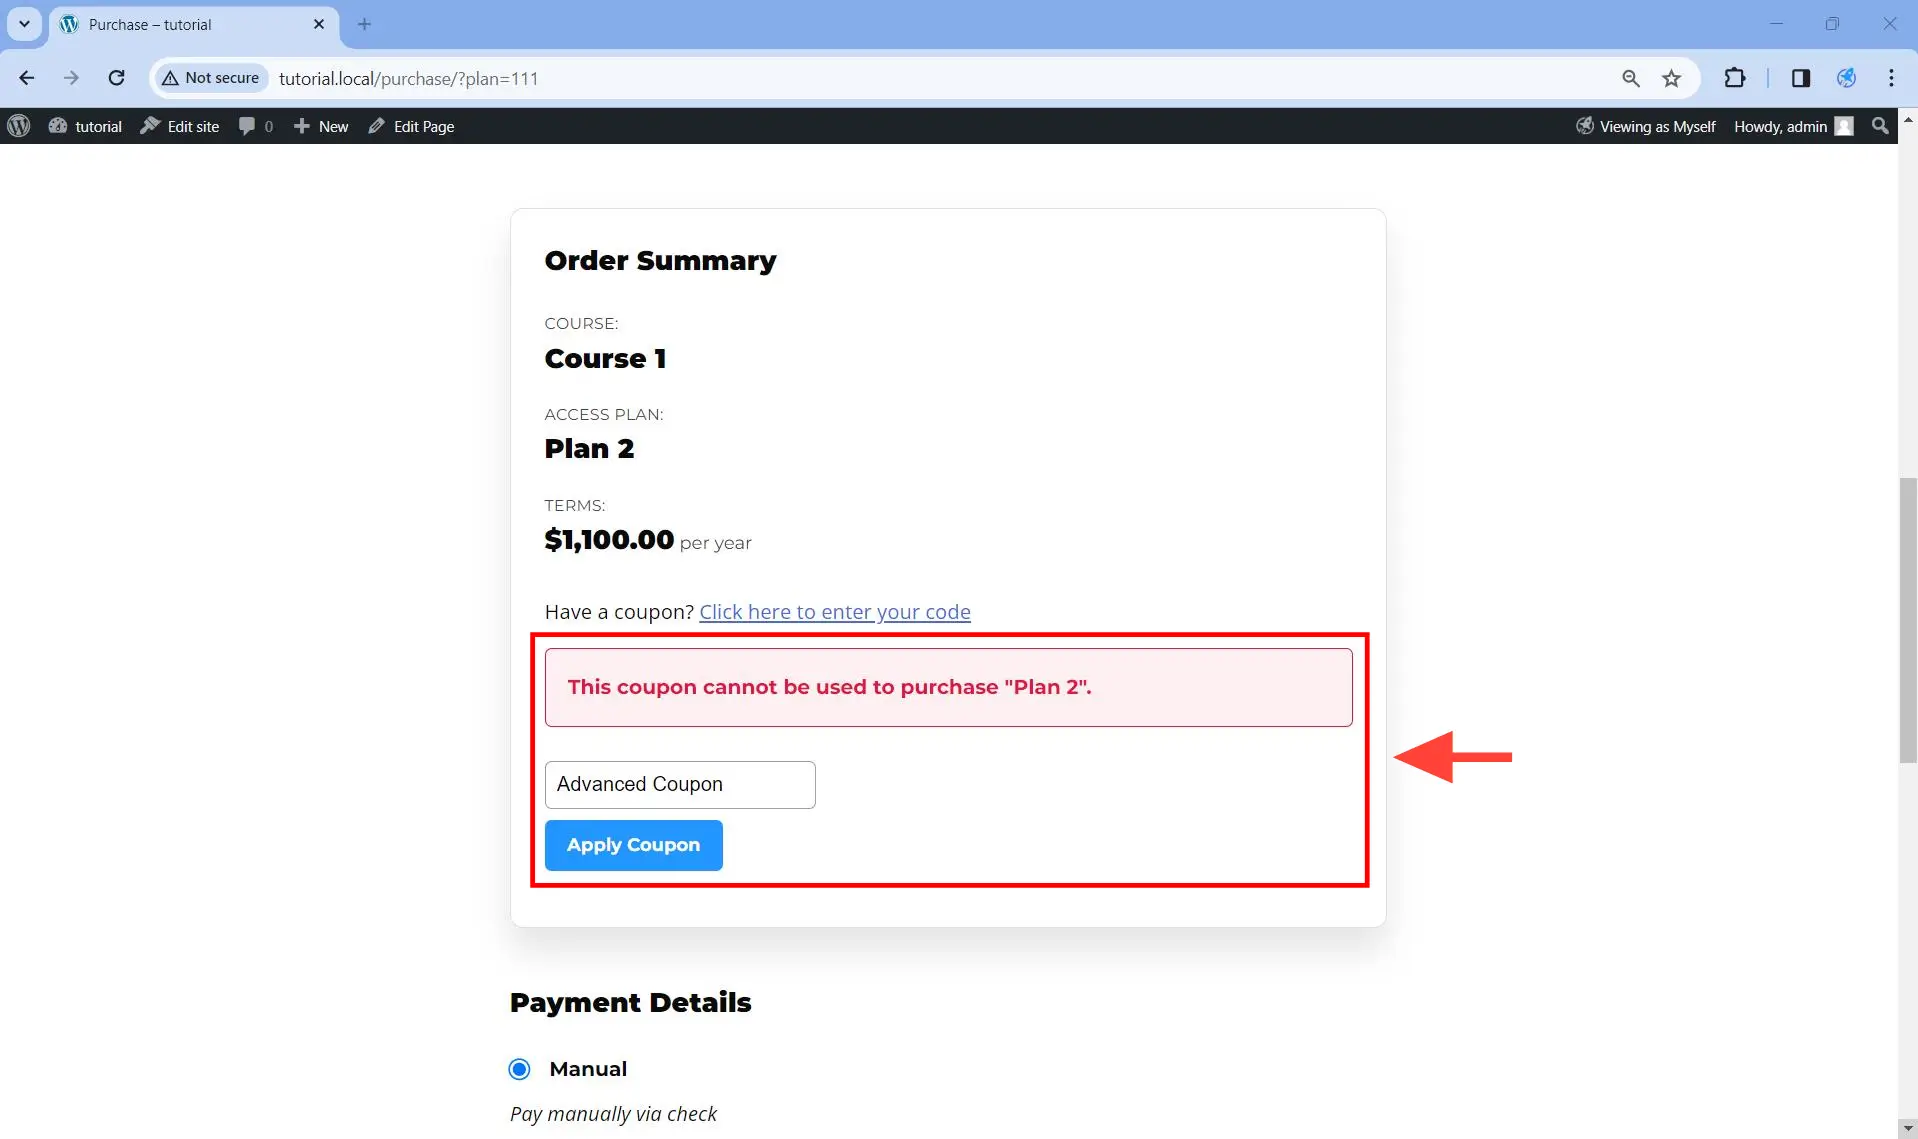
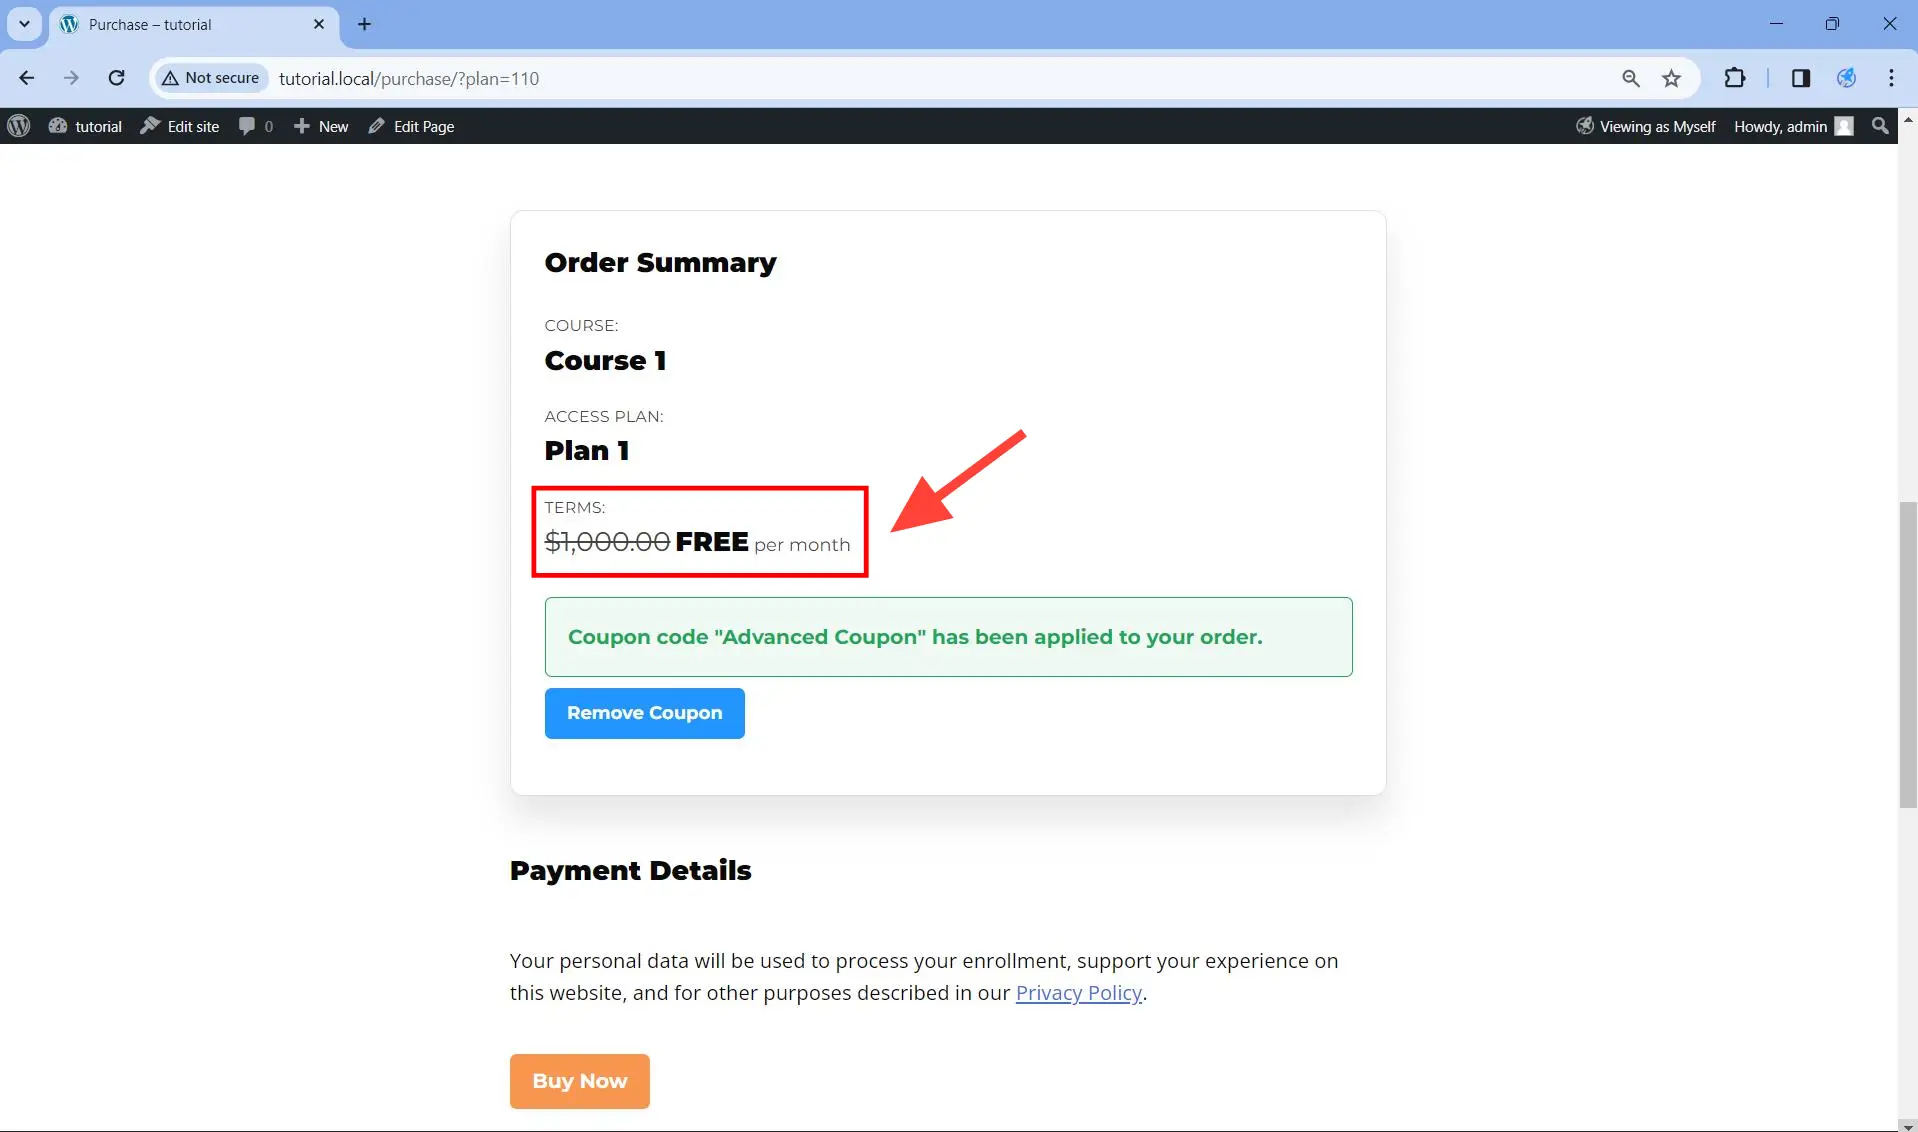
The system will allow you to apply the coupon to the correct access plan, as you can see below.
But if you apply it to the wrong access plan, the system will refuse the coupon.
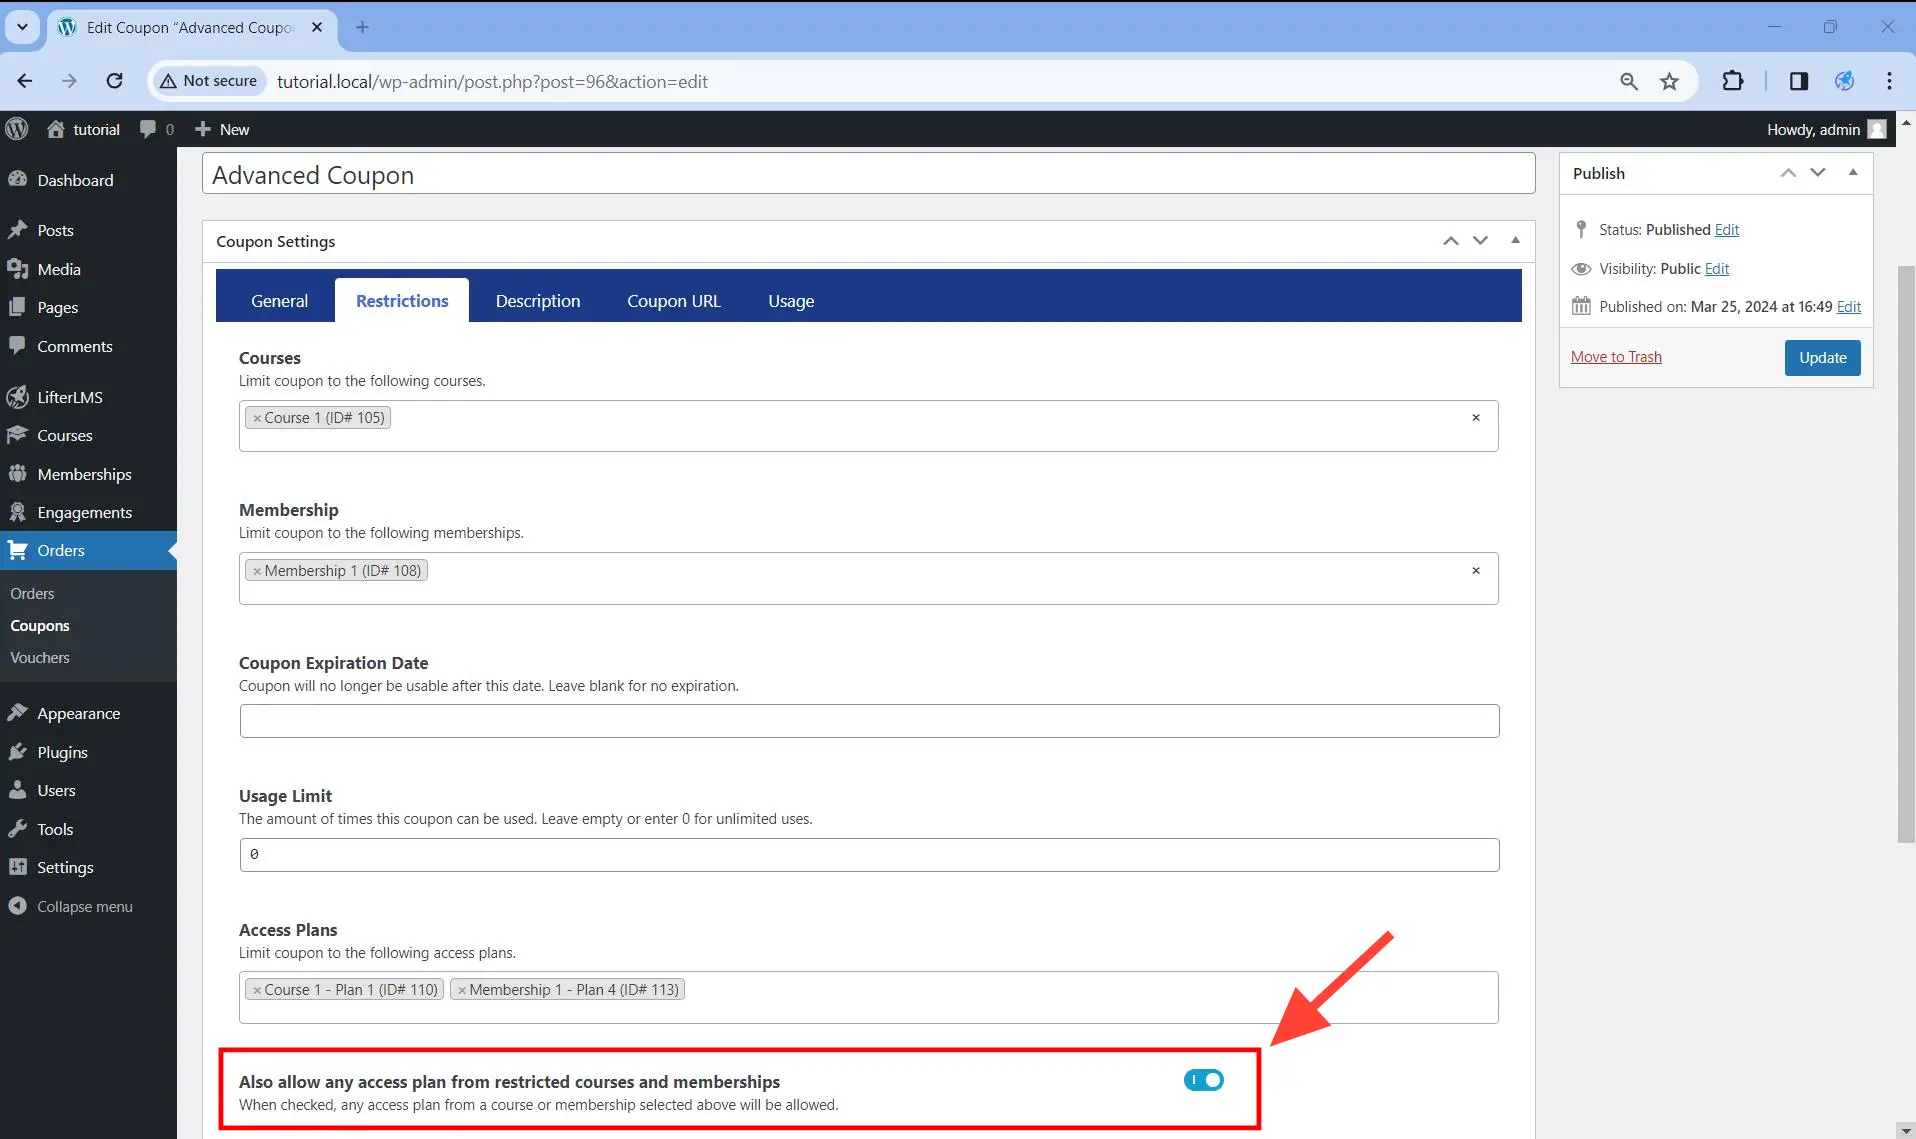
If you also supplied values for the Courses and/or Memberships field under the Restrictions tab as shown below while providing values for the Access Plans field at the same time, then only the Access Plans field will be respected. In other words, the Courses and/or Memberships restrictions will not be used.

If you also want the Courses and Memberships restriction to be used, you need to toggle on “Also allow any access plan from restricted courses and memberships” as you can see below.
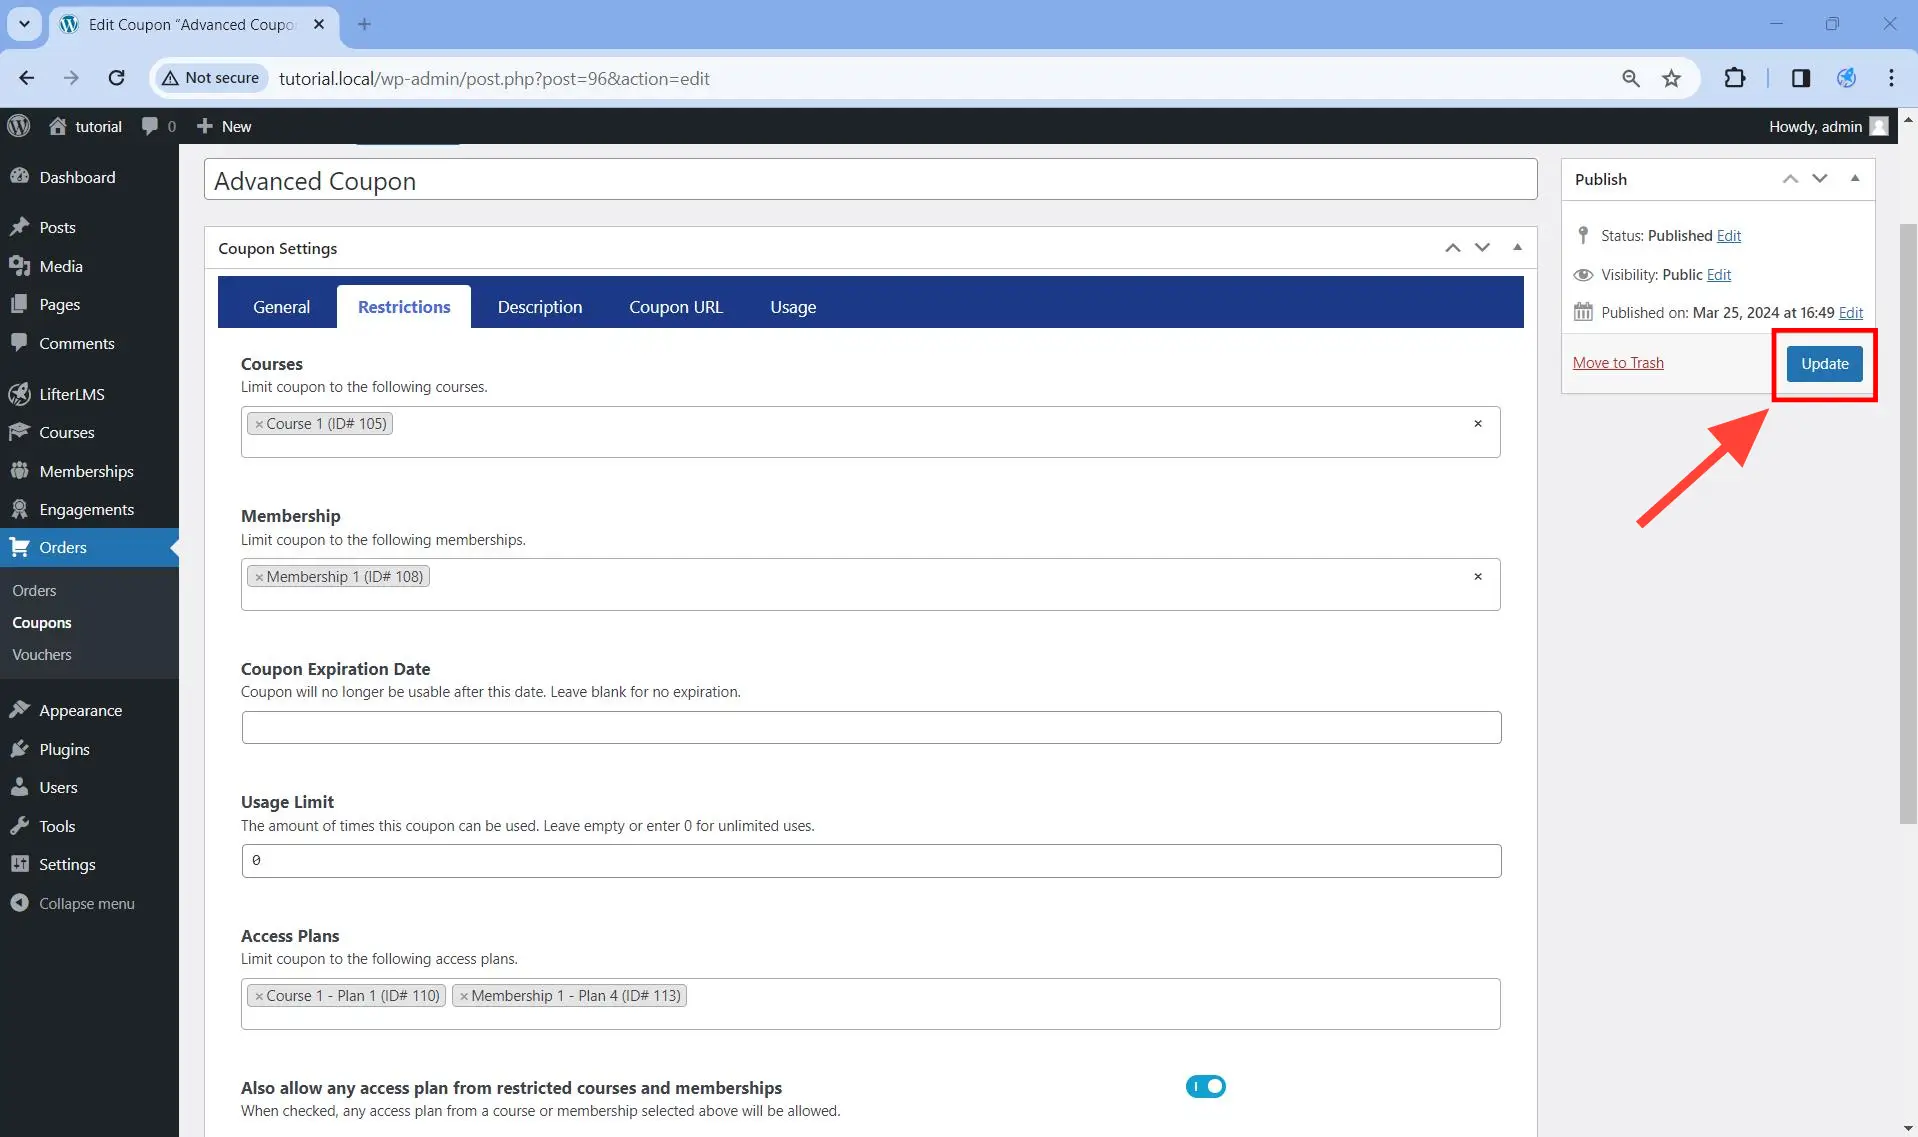
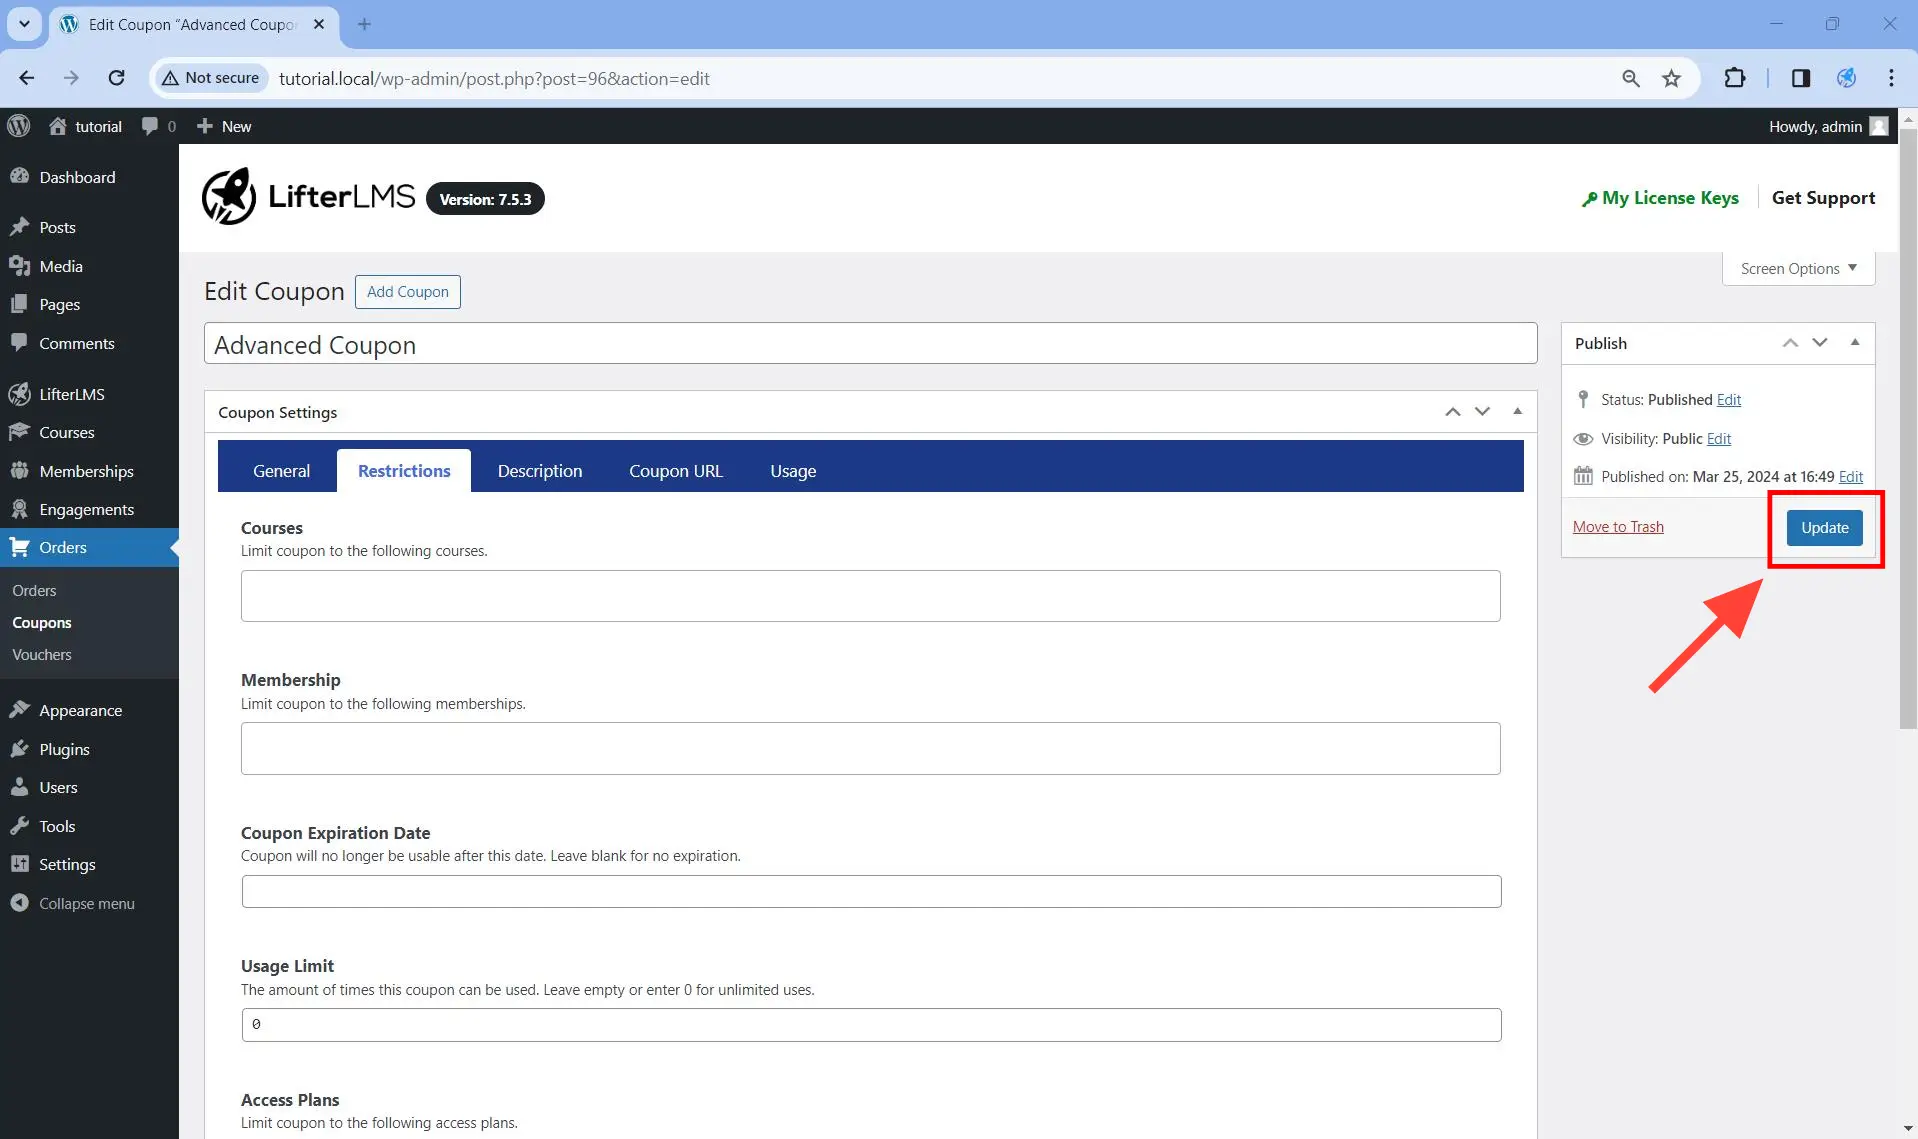
Make sure you save the changes once you are done by clicking on the Update button.
Step 1. Create a coupon in WordPress Dashboard > Orders > Coupons. If you have an existing coupon, you can just edit that coupon instead.
Step 2. Click on the Restriction tab.
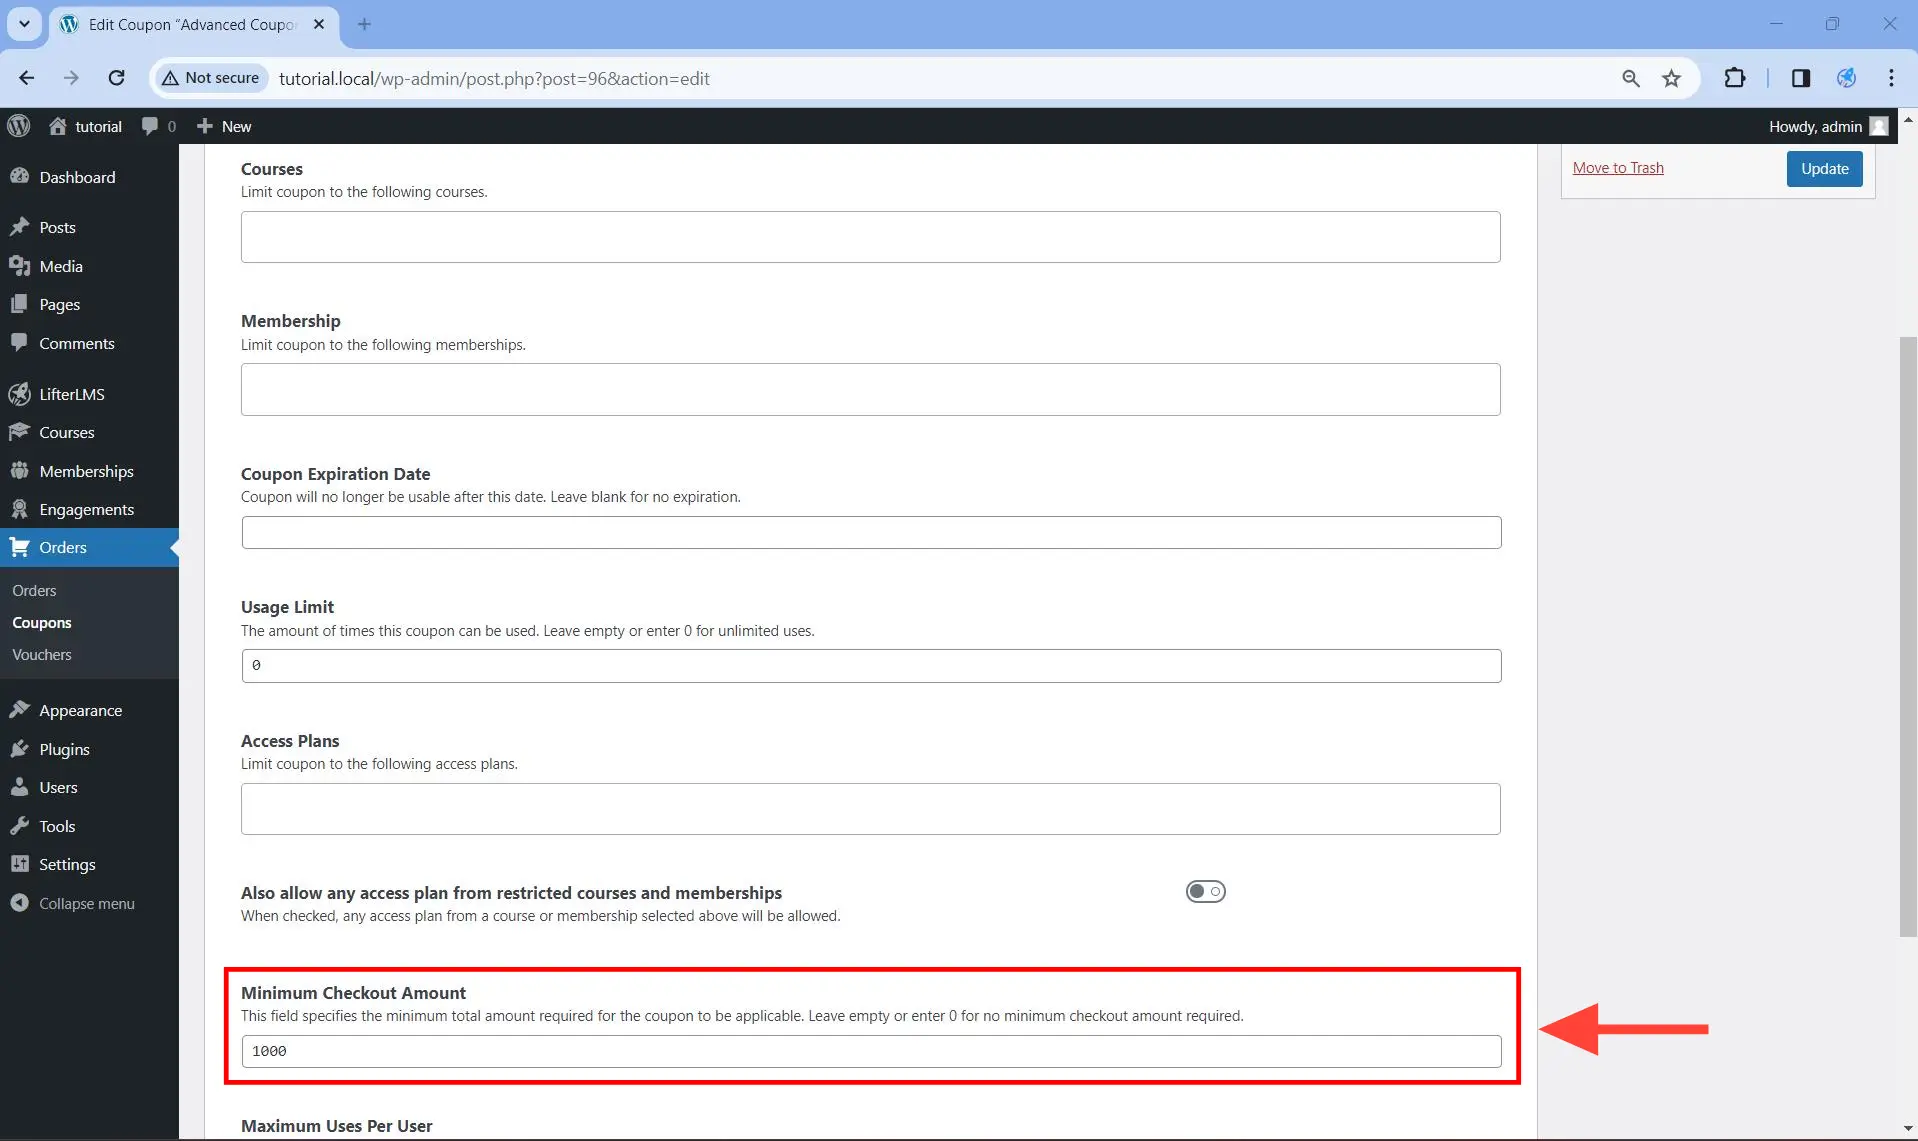
Step 3. Scroll down to and add the value you want on Minimum Checkout Amount. For example, if you add $1000 there, then the coupon will only be applicable to items that cost $1000 or more. Note that the currency used will depend on your LifterLMS settings.
Step 4. Save the changes once you are done by clicking on the Update button.
Step 5. Test the coupon.
If you use the coupon in an access plan that charges a price that is equal to or greater than the Minimum Checkout Amount, the system will accept the coupon.
On the other hand, if you use the coupon in an access plan that charges a price that is less than the Minimum Checkout Amount, the system will reject the coupon.

Step 1. Create a coupon in WordPress Dashboard > Orders > Coupons. If you have an existing coupon, you can just edit that coupon instead.
Step 2. Click on the Restriction tab.
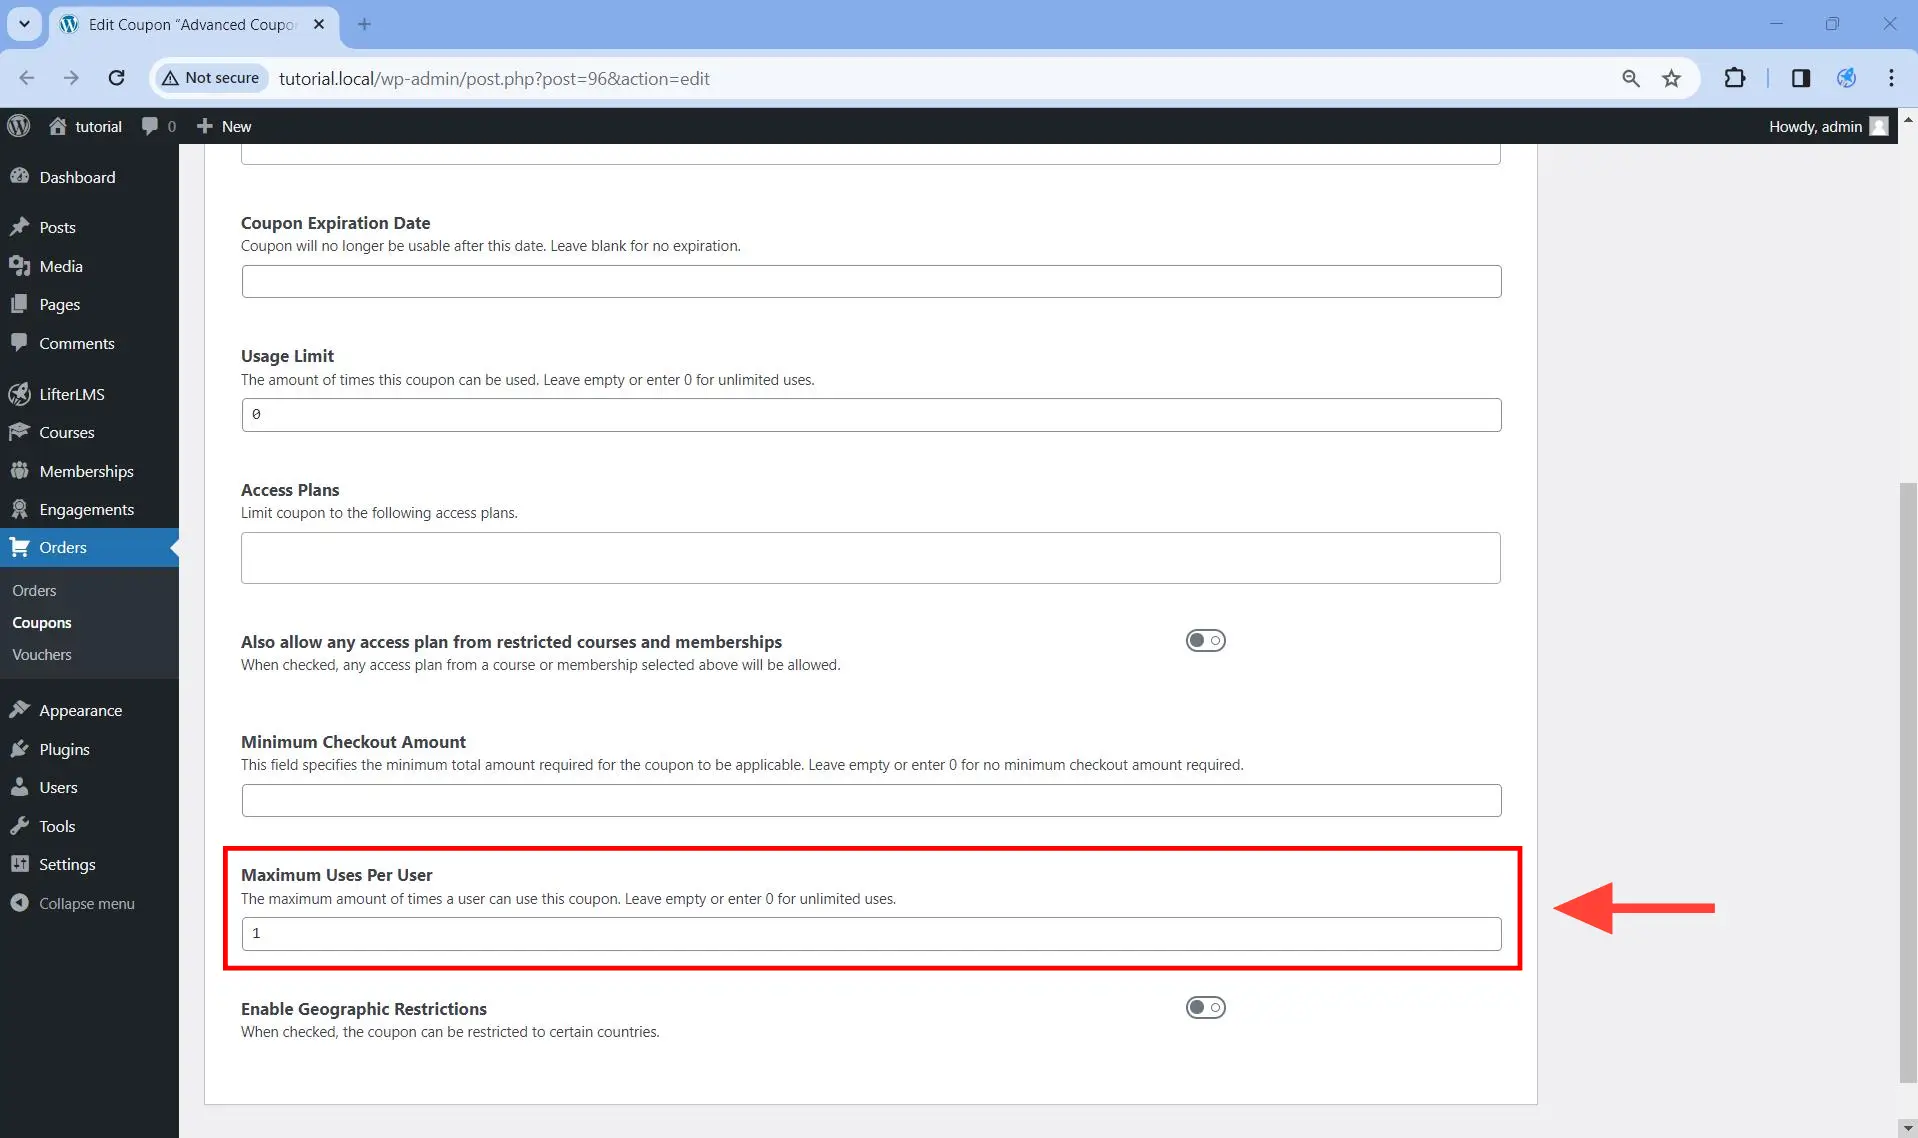
Step 3. Scroll down to and add the value you want on Maximum Uses Per User. If you enter 0, the coupon can be used any number of times without limit. In particular:
- If you enter 1, the coupon can only be used a maximum of 1 times: the user won’t be able to use the same coupon after that first time.
- If you enter 2, the coupon can only be used a maximum of 2 times: the user won’t be able to use the same coupon after that second time.
- If you enter 3, the coupon can only be used a maximum of 3 times: the user won’t be able to use the same coupon after that third time.
- And so on…
Step 4. Save the changes once you are done by clicking on the Update button.
Step 5. Test the coupon.
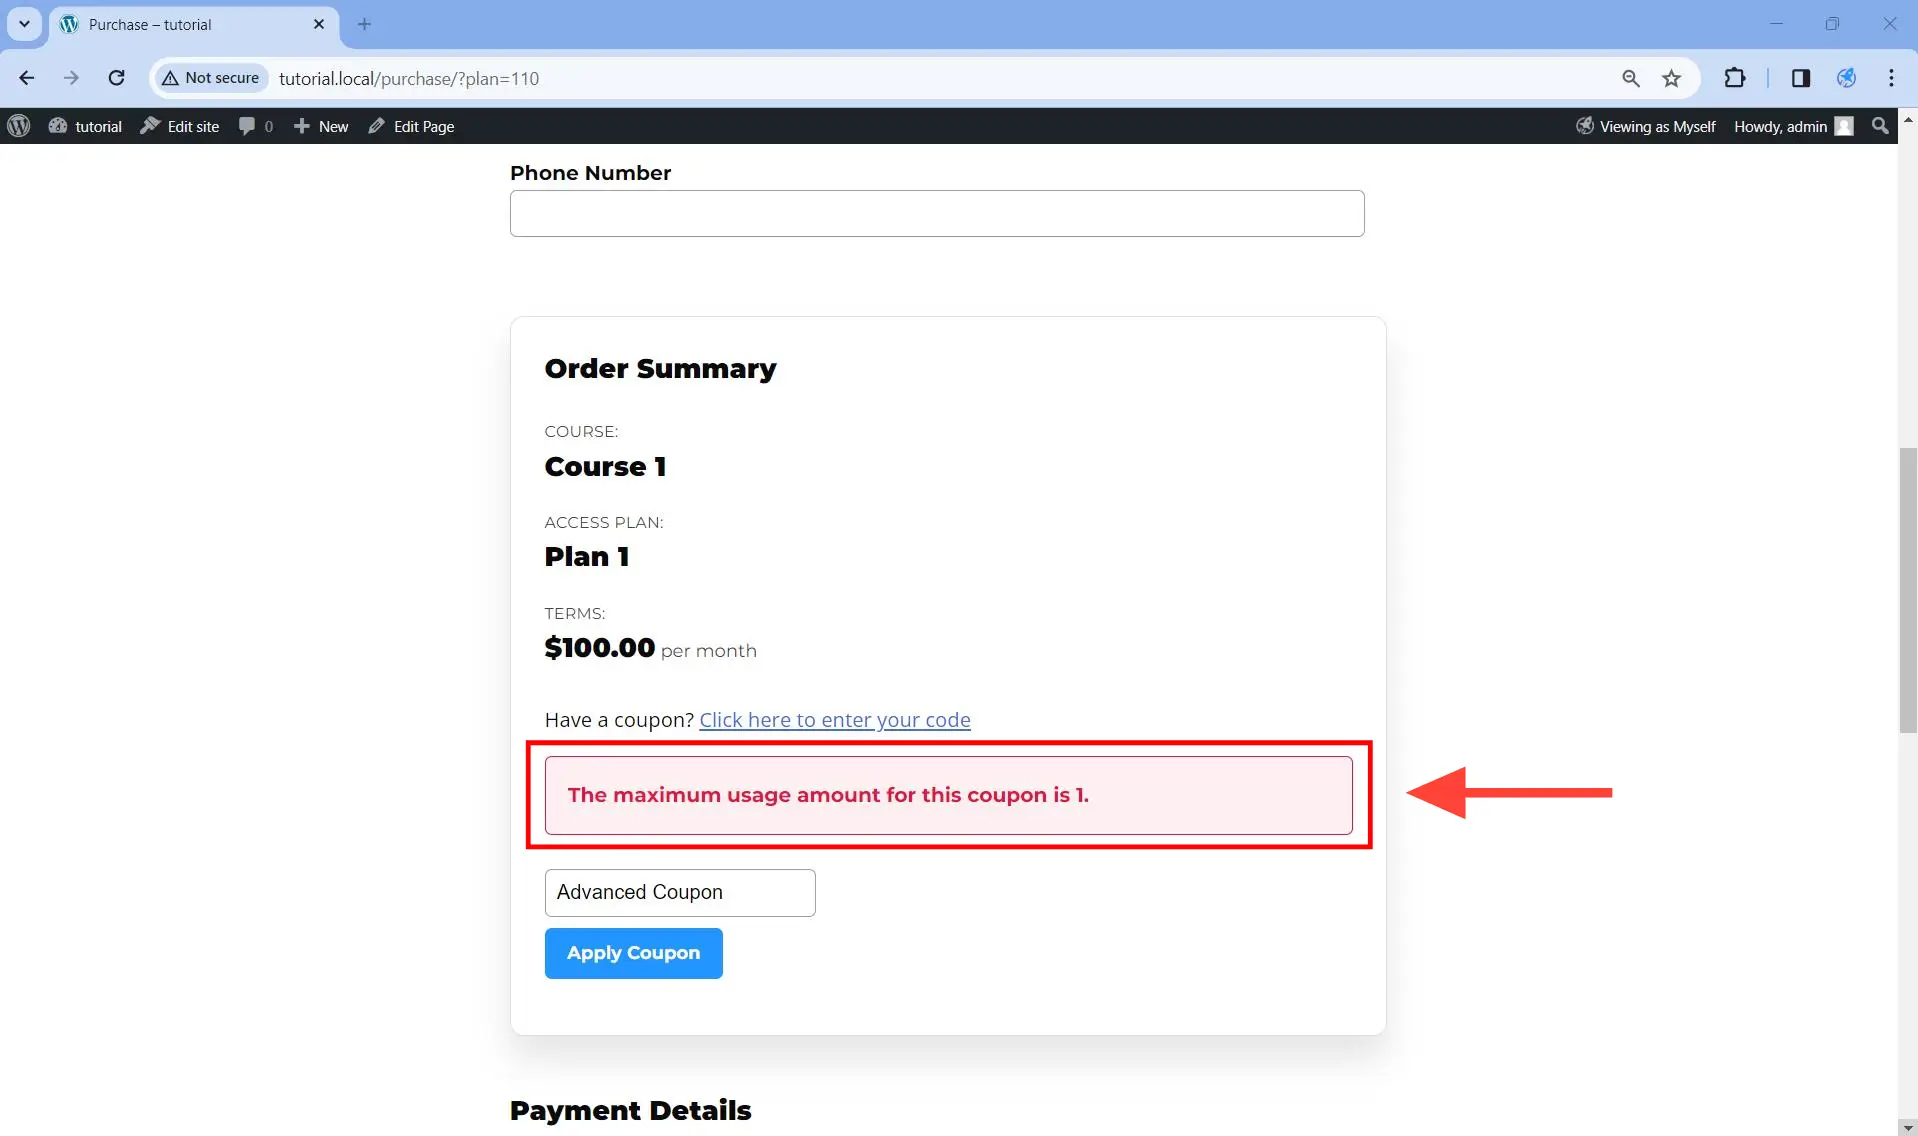
If you try to use the coupon above the threshold you set in the Maximum Uses Per User setting, the system will reject the coupon.
Step 1. Create a coupon in WordPress Dashboard > Orders > Coupons. If you have an existing coupon, you can just edit that coupon instead.
Step 2. Click on the Restriction tab.
Step 3. Scroll down to and toggle on Enable Geographic Restrictions.

Once Enabled Geographic Restrictions is toggled on, the Geographic Restrictions will be visible.
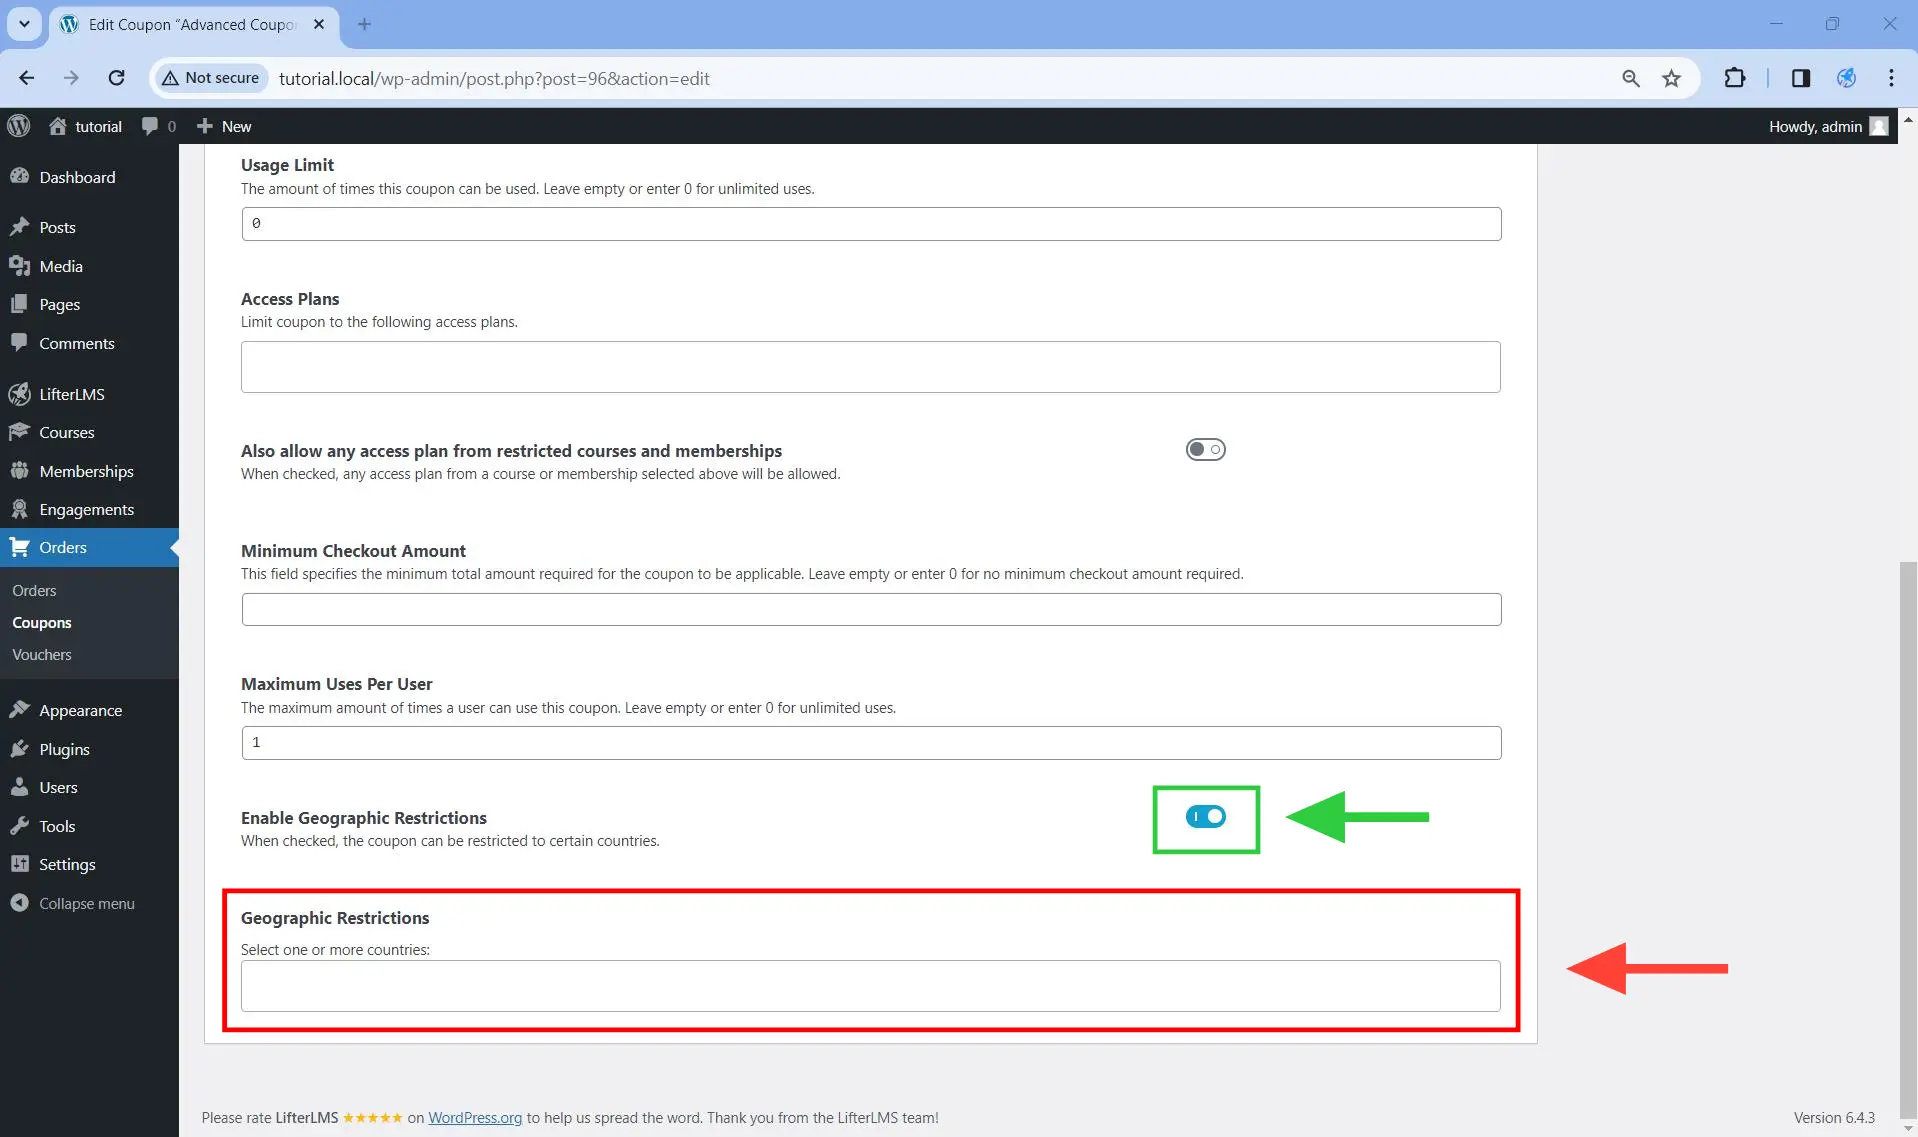
Step 4. Under Geographic Restrictions, select the countries you want the coupon to be limited to. You can add as many countries as you like.
For example, if you choose to add the United States, then the coupon can only be used by users located in the United States. Users outside of the United States will not be able to use the same coupon.

Step 5. Save the changes once you are done by clicking on the Update button.
Step 6. Test the coupon.
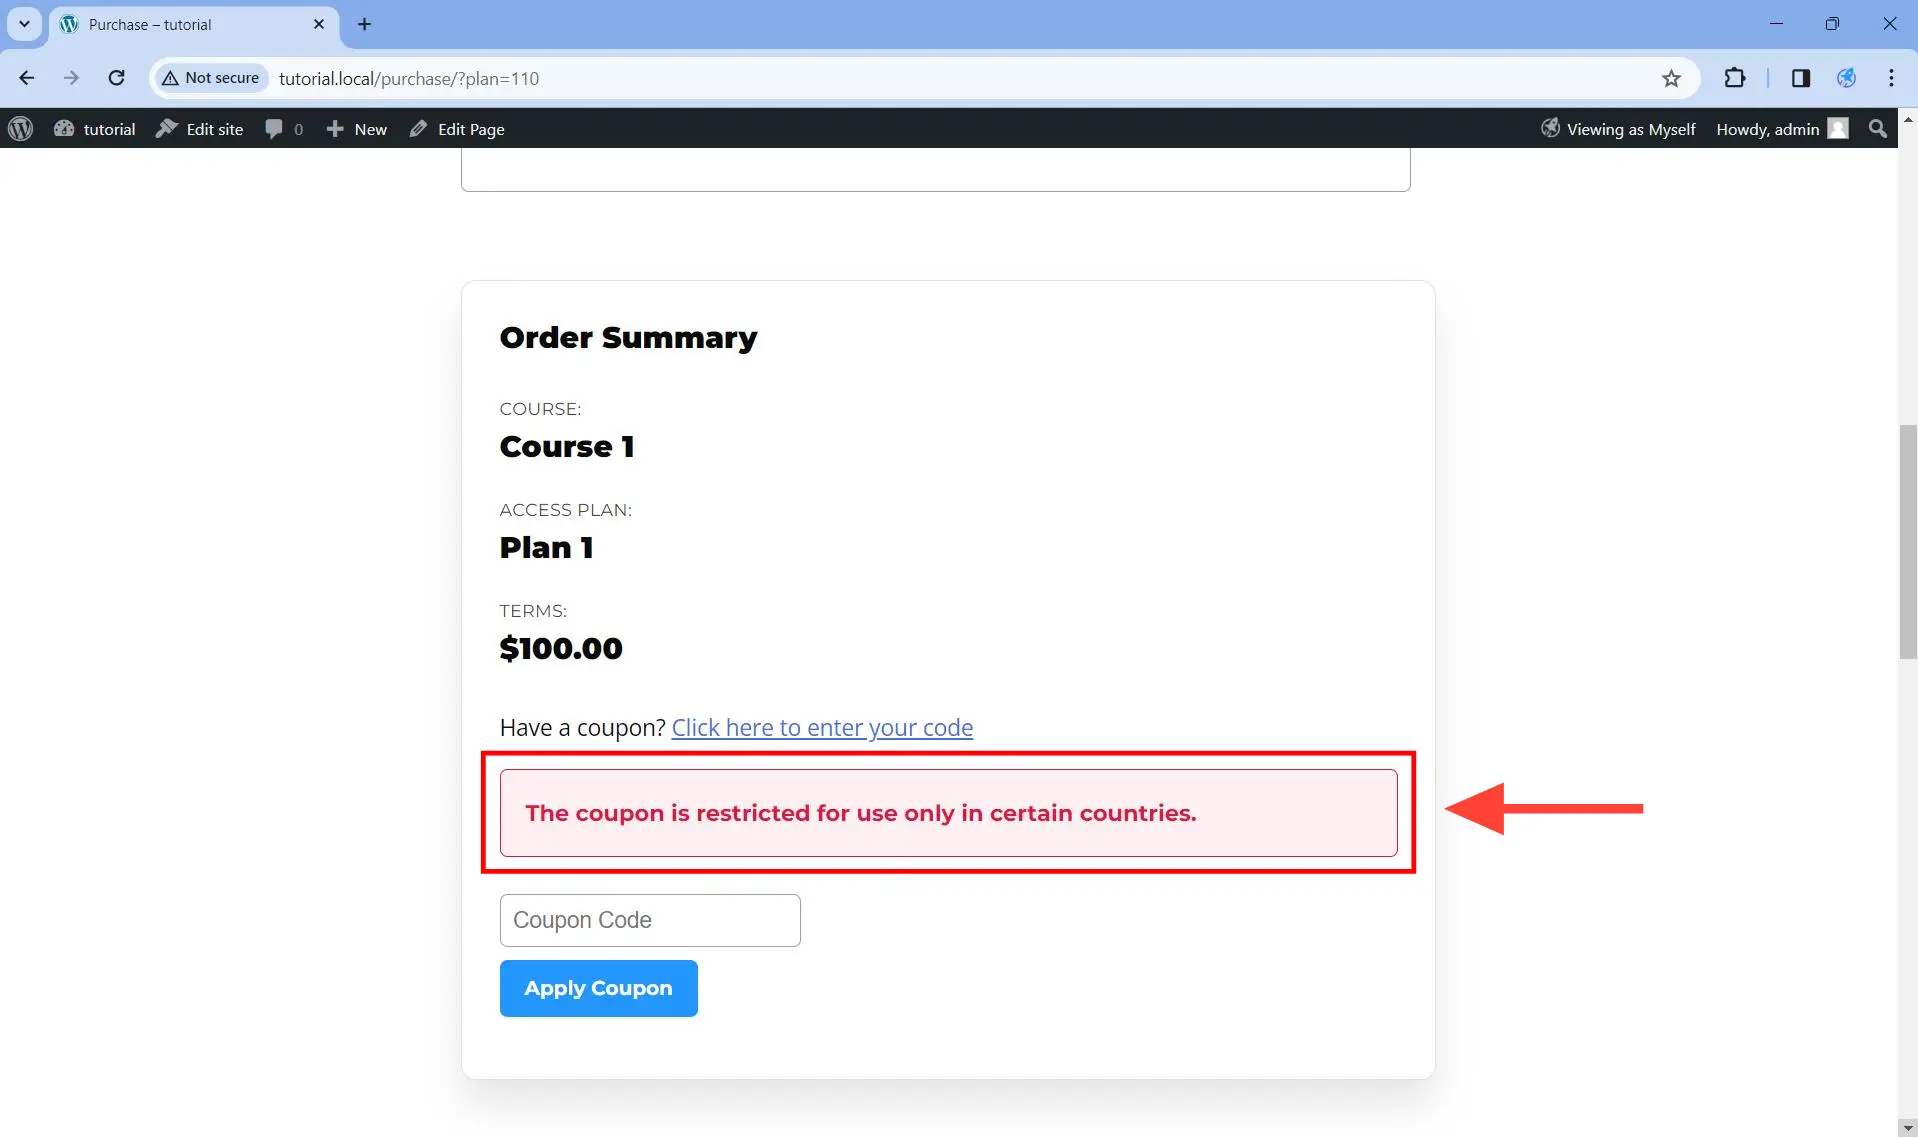
If a user tries to use the same coupon outside of the country or countries allowed by that coupon, the system will reject that coupon.
Step 1. Create a coupon in WordPress Dashboard > Orders > Coupons. If you have an existing coupon, you can just edit that coupon instead.
Step 2. Click on the Coupon URL tab.
Step 3. Click on the Apply Coupon via URL toggle to enable it. Once enabled, this will make the Coupon URL and Plan fields visible, as you can see below.
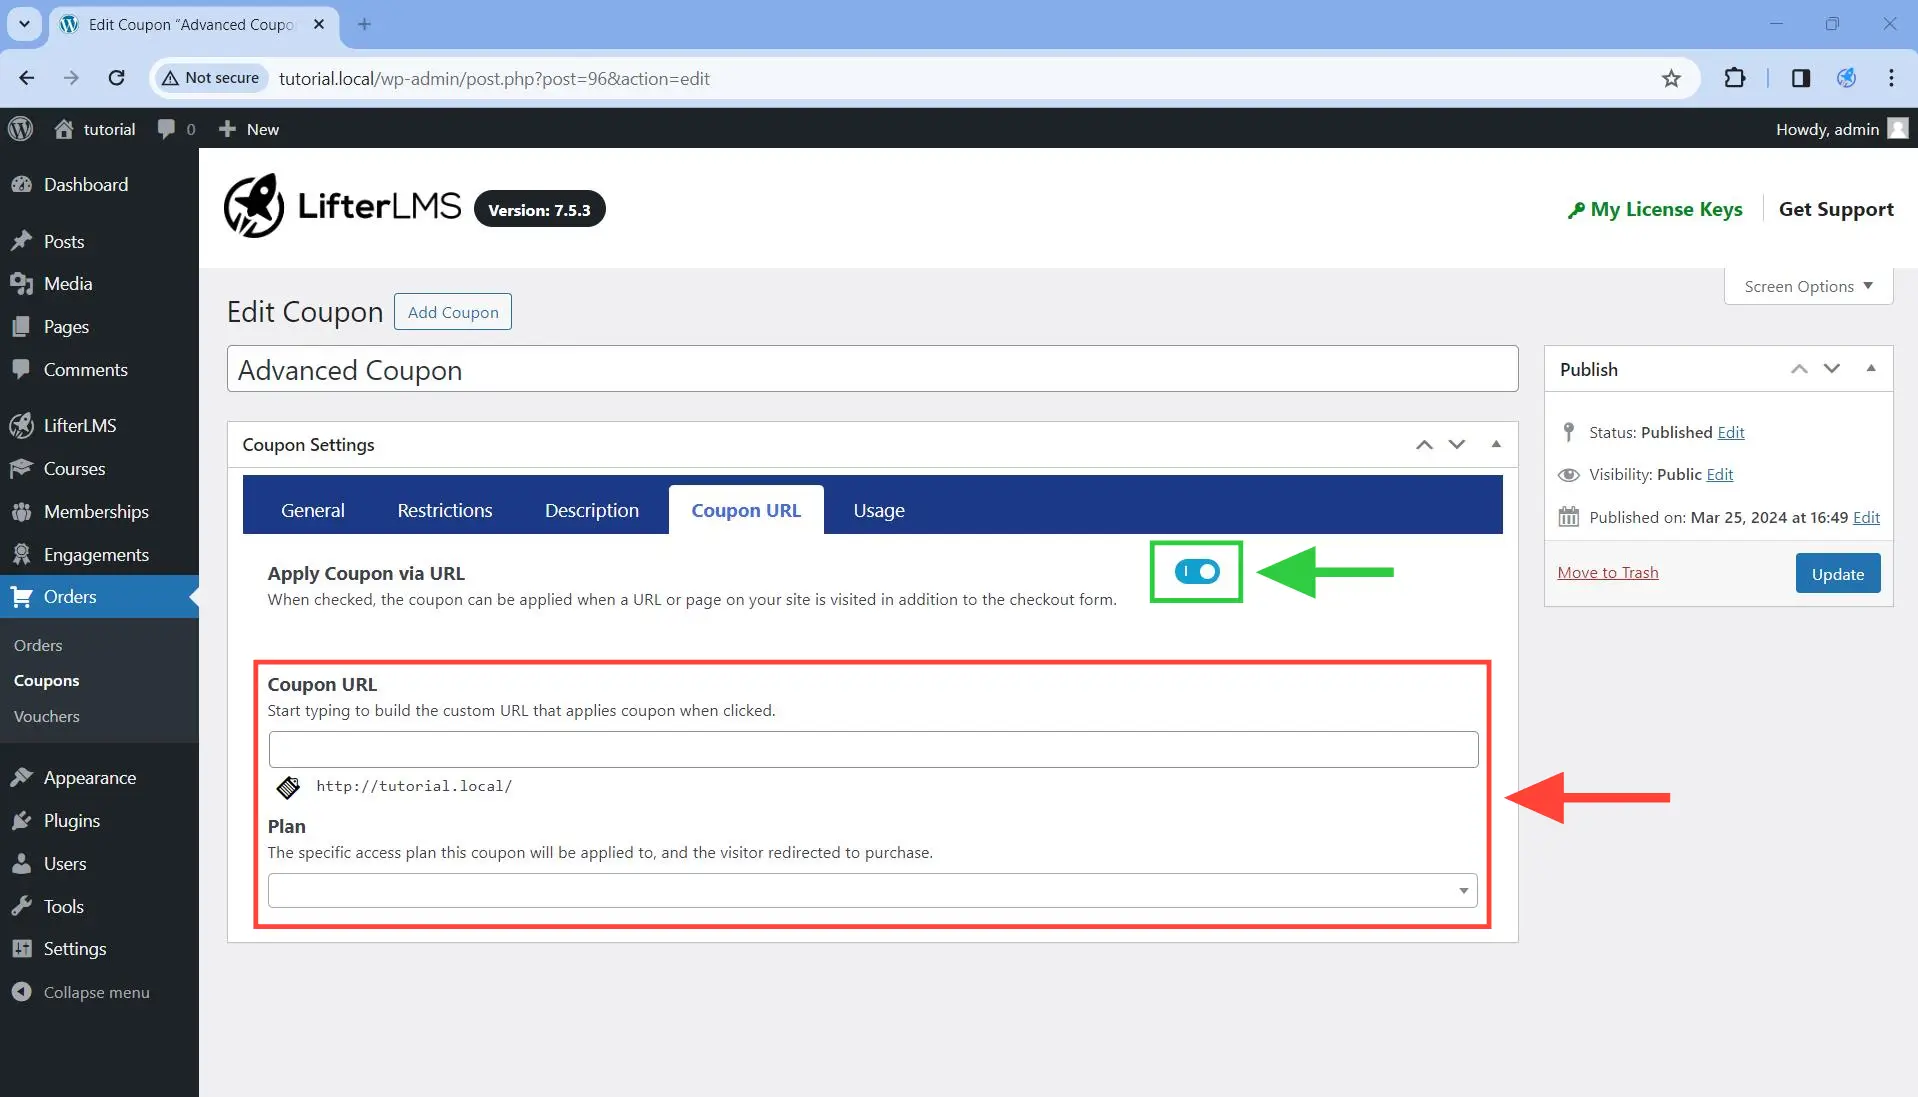
Step 4. From the Plan dropdown, select the plan you want to apply the coupon to when the coupon URL is visited. You can only select one plan.
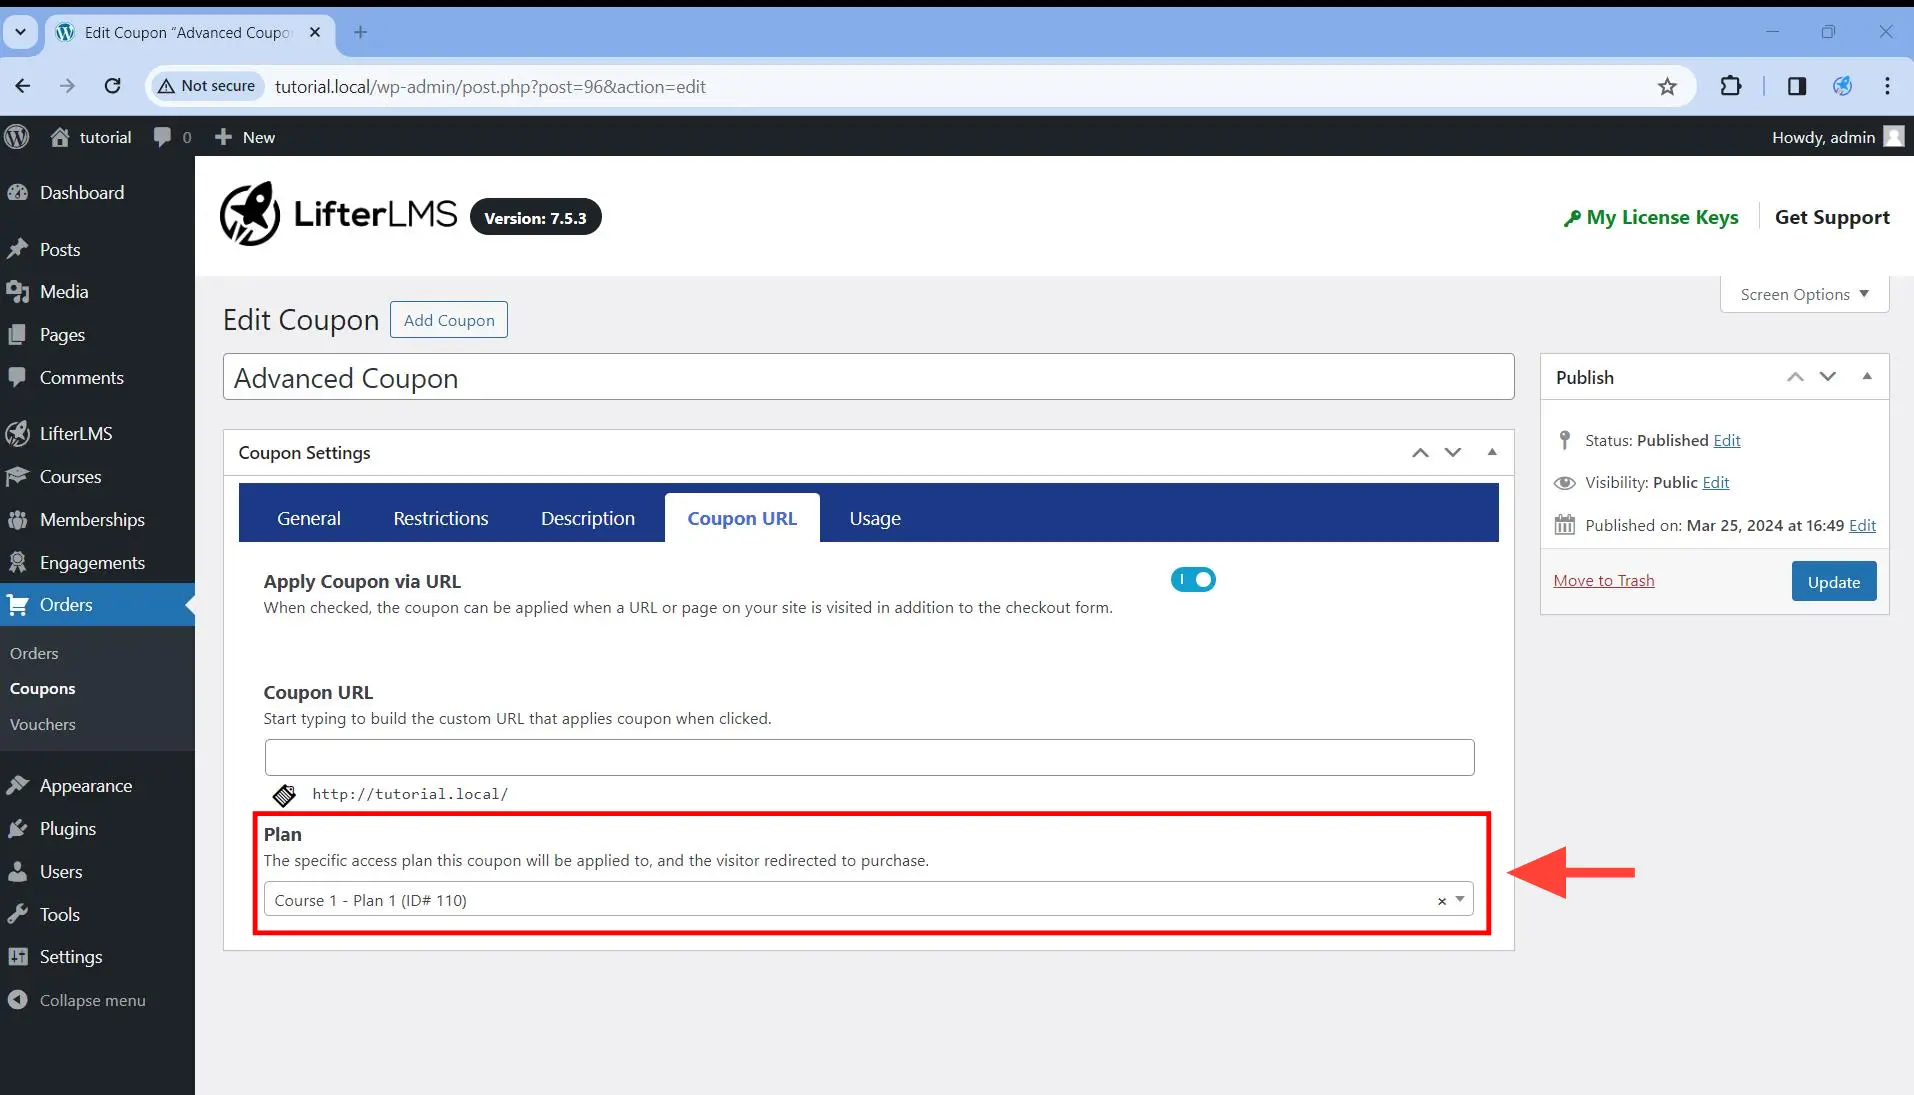
Caveat: Note that access plans from even deleted courses or deleted membership will appear here, so always double-check in if the course/membership listed above actually exists.
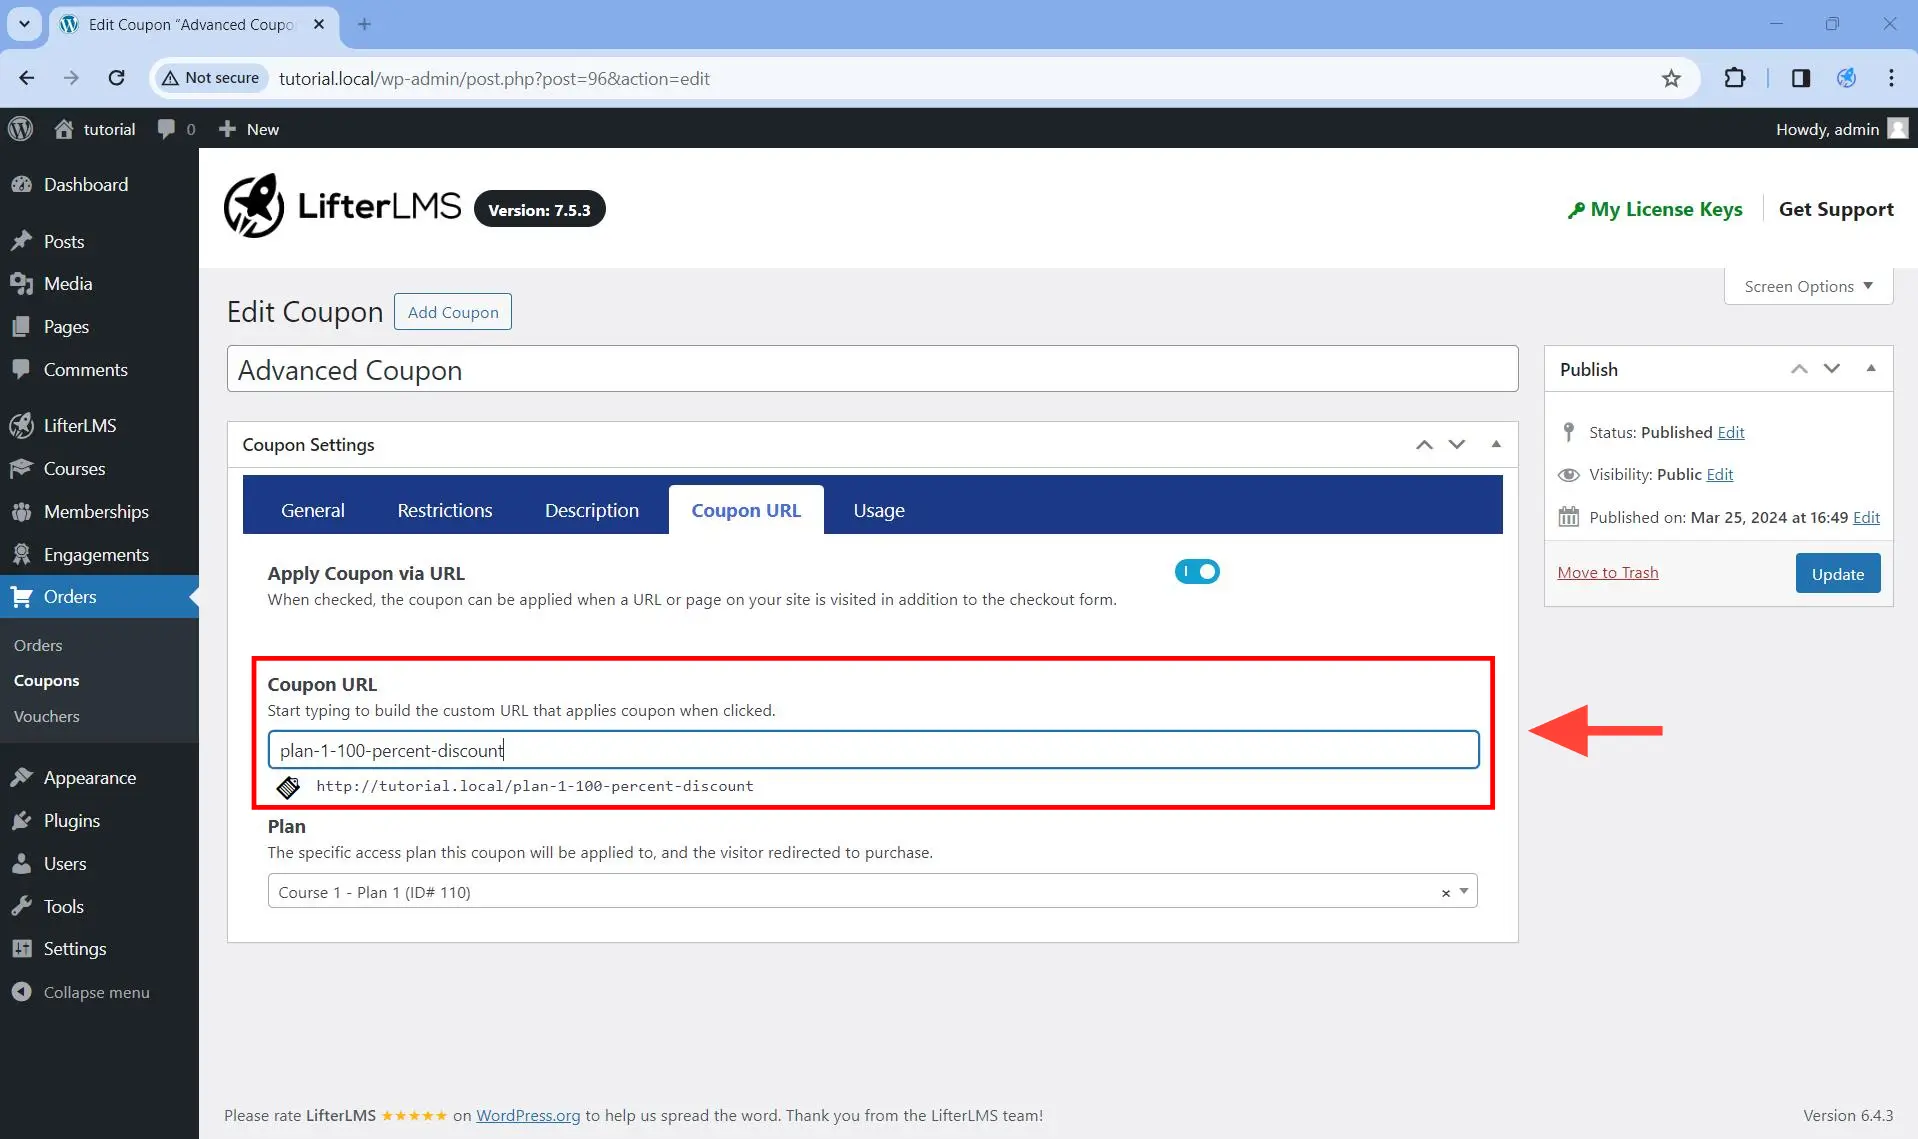
Step 5. Finally, construct the coupon URL by adding some text in the Coupon URL field.
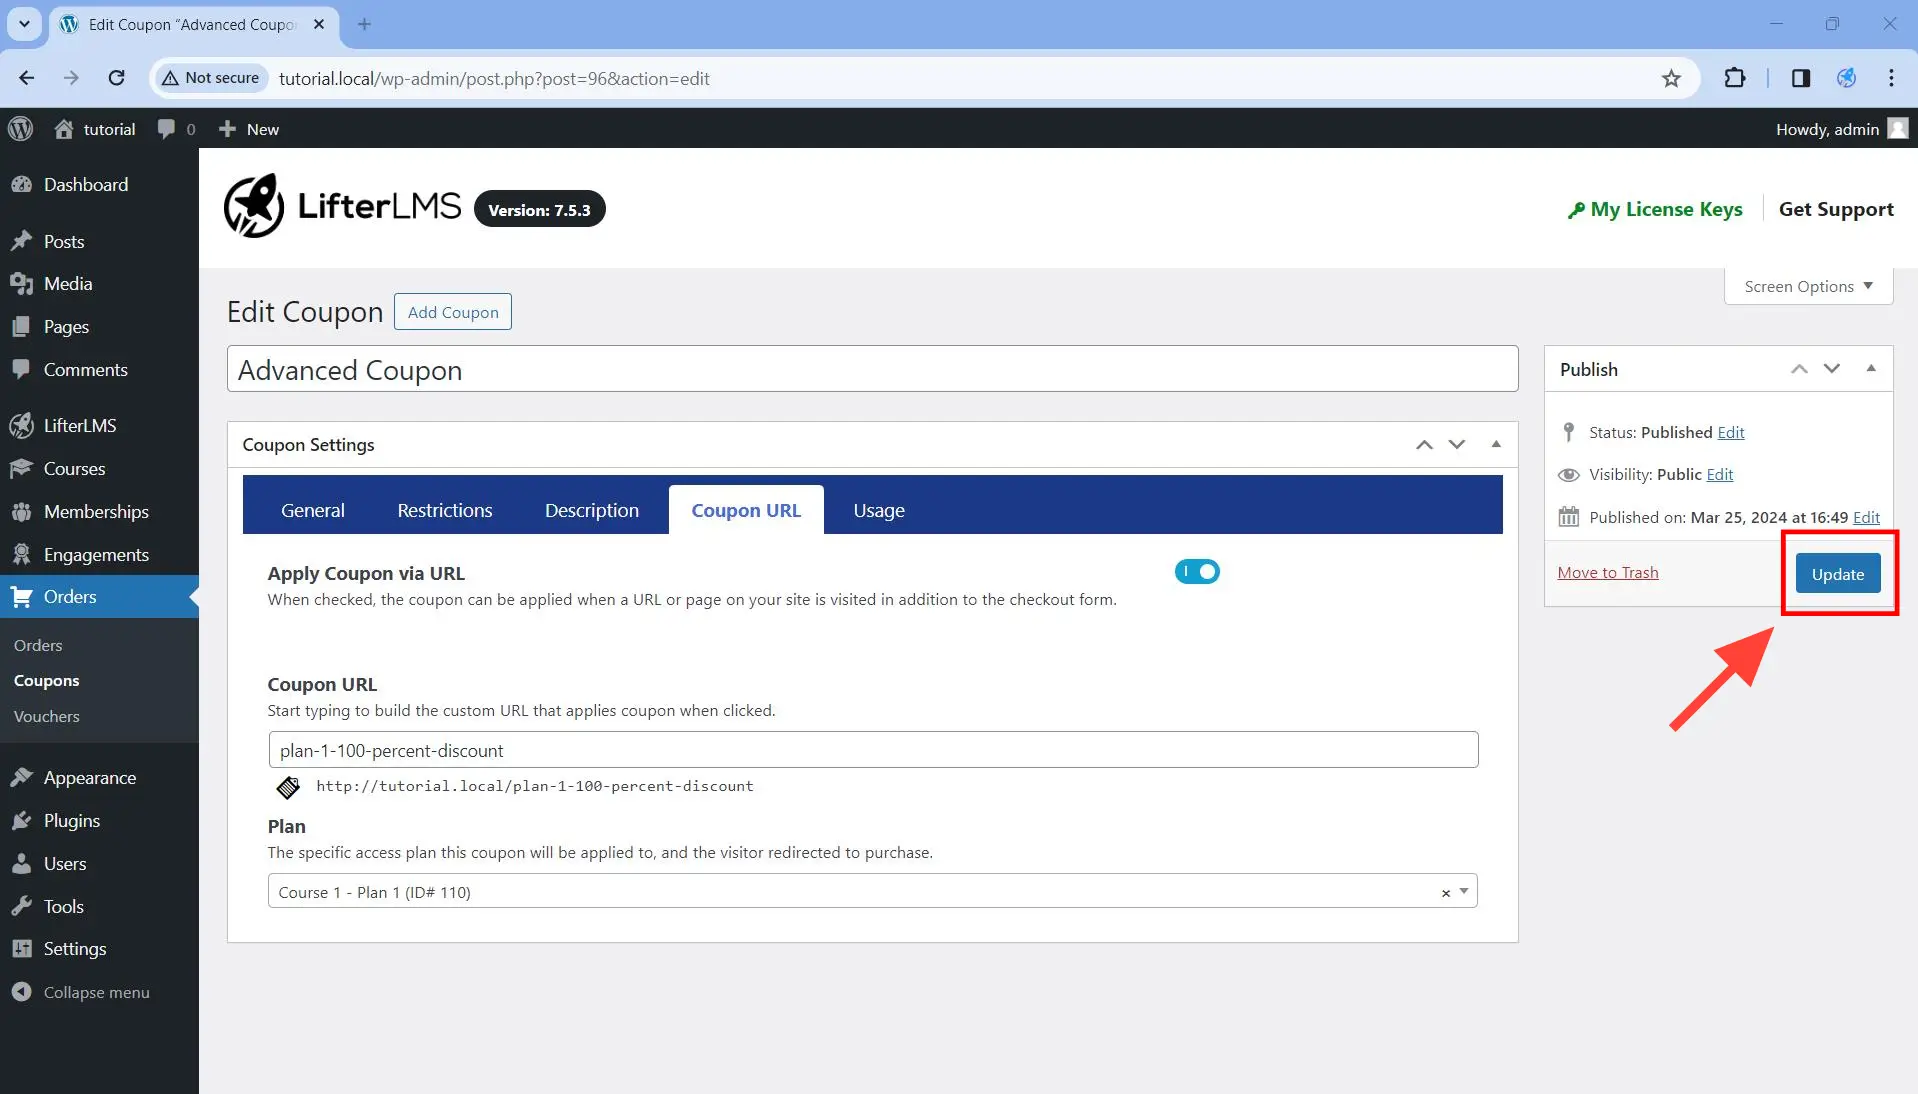
Step 6. Save the changes by clicking on the Update button.
Step 8. Test the coupon.
Copy the URL in the Coupon URL field and load it in the browser. Once loaded, it will automatically redirect to the purchase link of the access plan you have chosen in the Plan field. That purchase link will already have the coupon applied to it, as you can see in the animated GIF below.
Step 1. Create a coupon in WordPress Dashboard > Orders > Coupons. If you have an existing coupon, you can just edit that coupon instead.
Step 2. Click on the Usage tab.
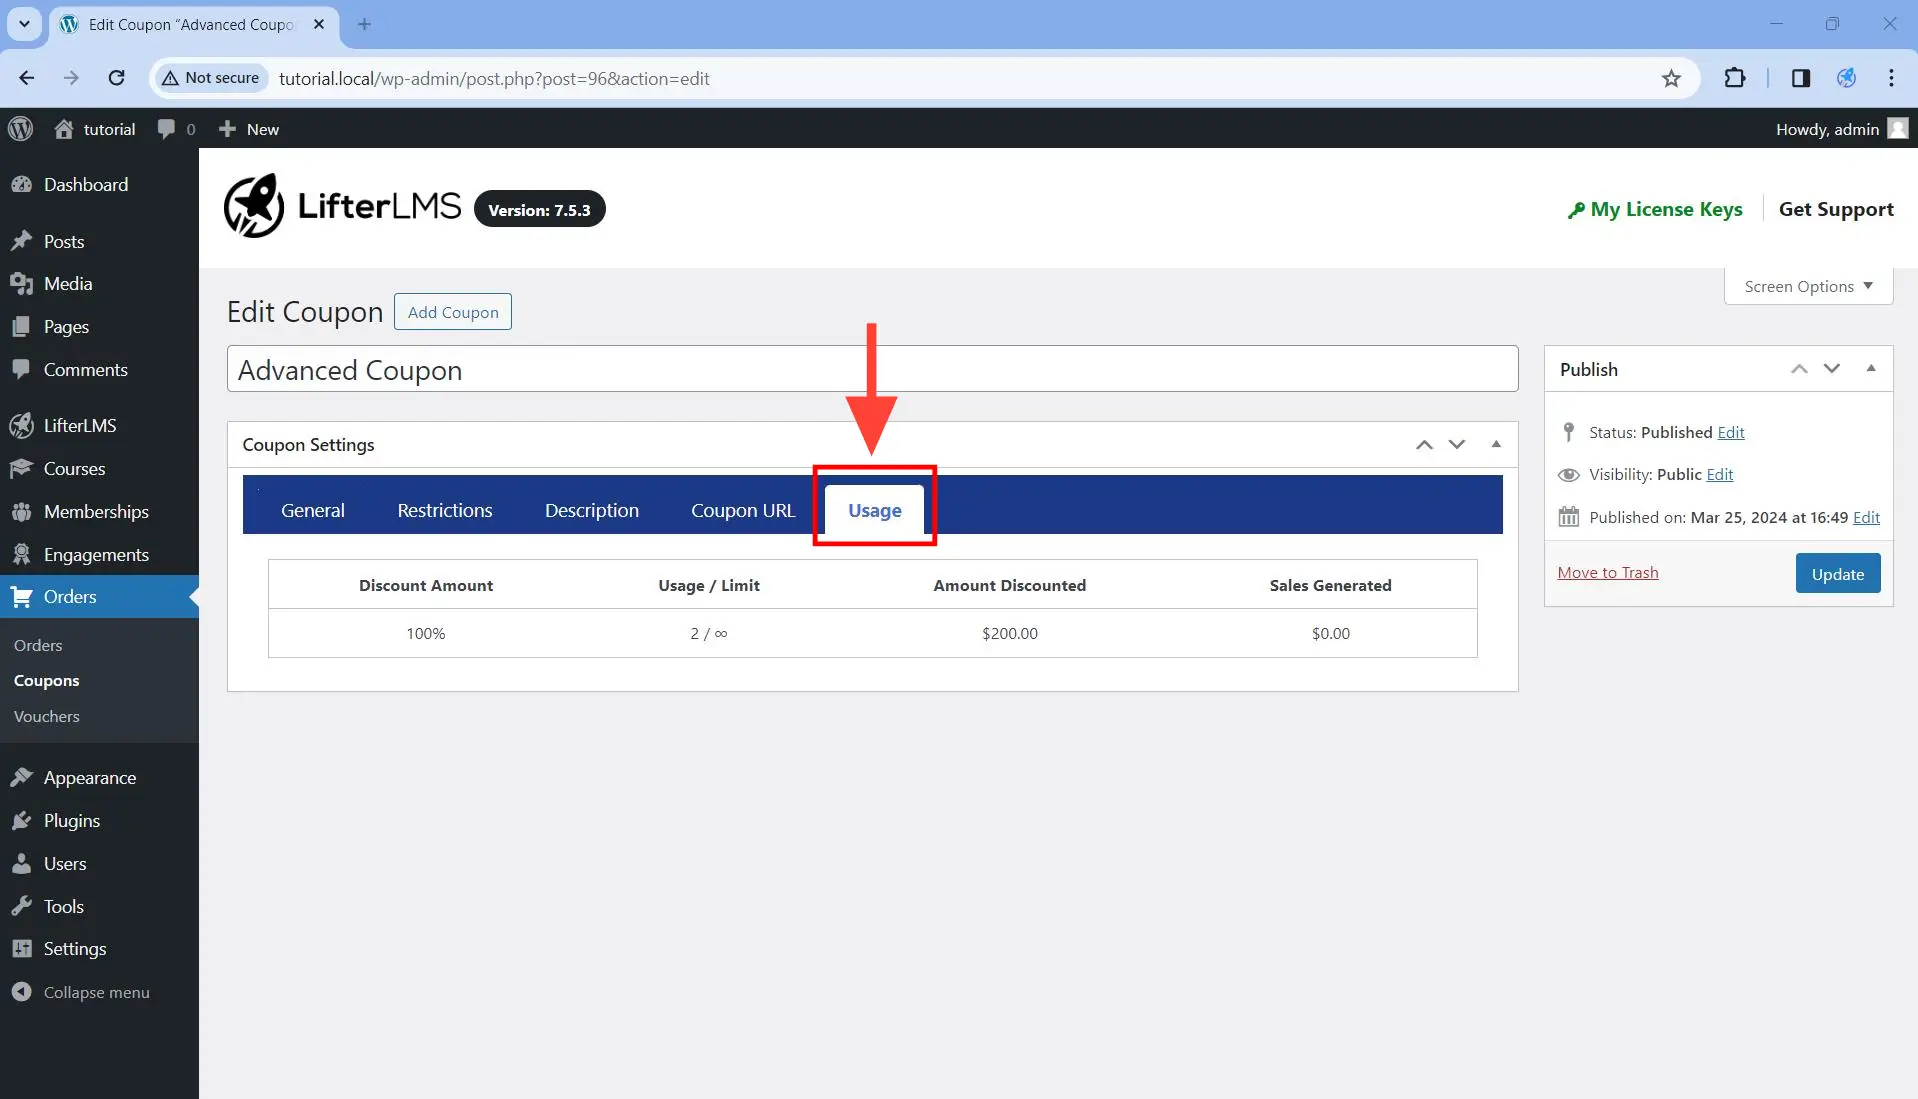
Under this tab, you will see how many time the coupon has been use (Usage), how many times it can be used (Limit), how much the users have saved in total (Amount Discounted), and how much total revenue it generated after the discount is applied (Sales Generated).


