How to Create a Full-Width Course Template Using the Sky Pilot Theme?
The Sky Pilot theme allows you to create full-width templates and customize them to meet your specific requirements. This tutorial provides a step-by-step guide to creating full-width templates for courses and lessons.
To add a full-width lesson template, follow these steps:
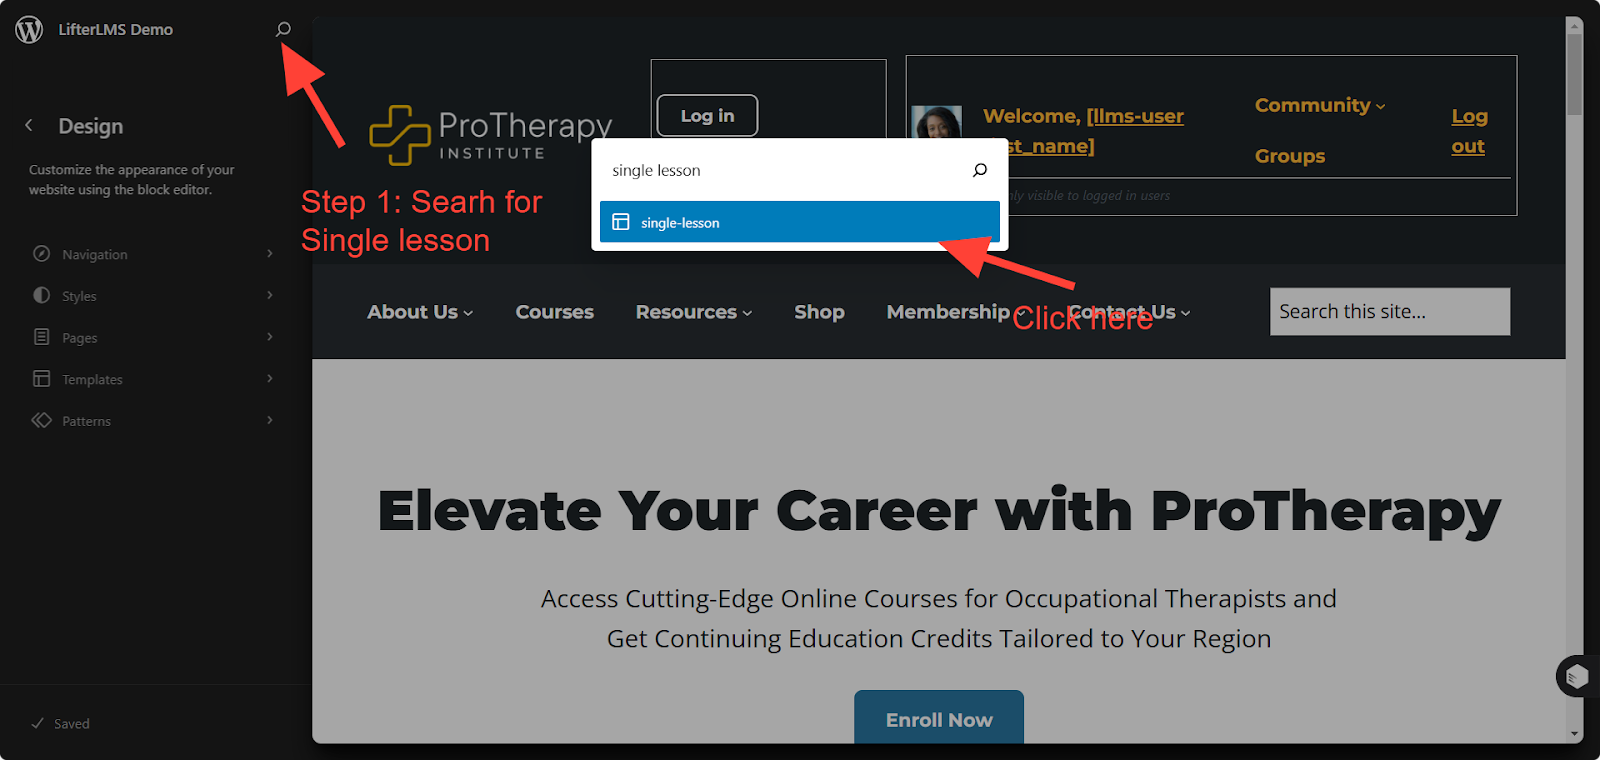
- In the WordPress dashboard, go to Appearance > Editor.
- Use the search bar at the top to search for “Single lesson.”
- Click on “Single lesson” to open it for editing.
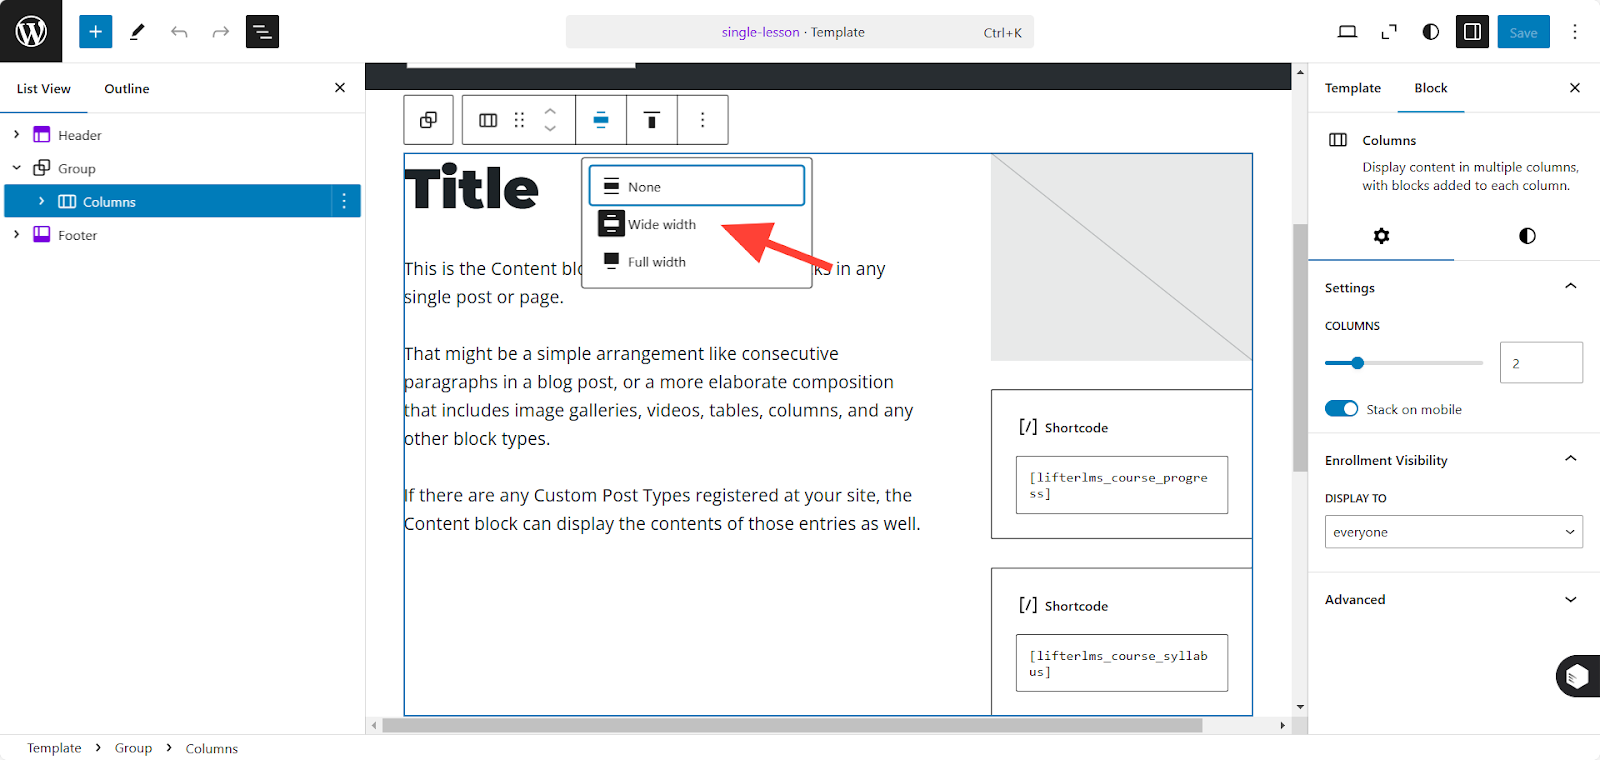
1. From the top-left corner, click the “Document overview” icon.
2. Select the “Columns” block, then choose the “Full width” option. Click Save.

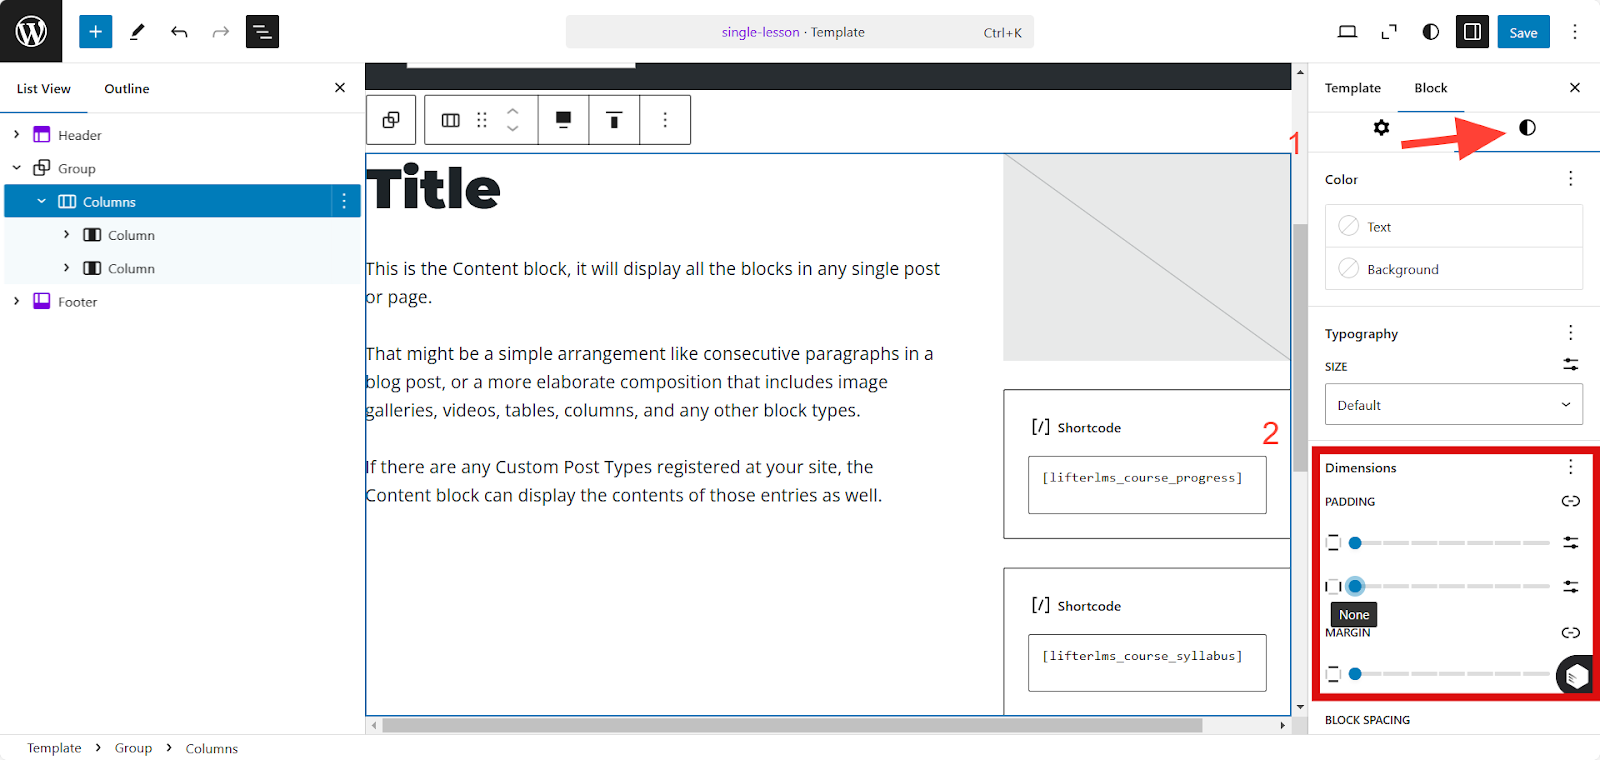
3. To adjust padding, margins, and other dimensions:
- Click the “Circle” (Styles) icon in the right sidebar.
- Add padding and margins as needed.
Here is the final look of a full width lesson template:

To create a full-width course template, follow these steps:
- In the WordPress dashboard, go to Appearance > Editor.
- Use the search bar at the top to search for “Single Course.”
- Click on “Single Course” to open it for editing.
Make the Course Template Full Width
- From the top-left corner, click “Document overview”.
- Select the “Columns” block, then choose the “Full width” option.
- Click Save.
- To adjust padding, margins, and other dimensions > Click the “Circle” (Styles) icon in the right sidebar > Add padding and margins as needed.
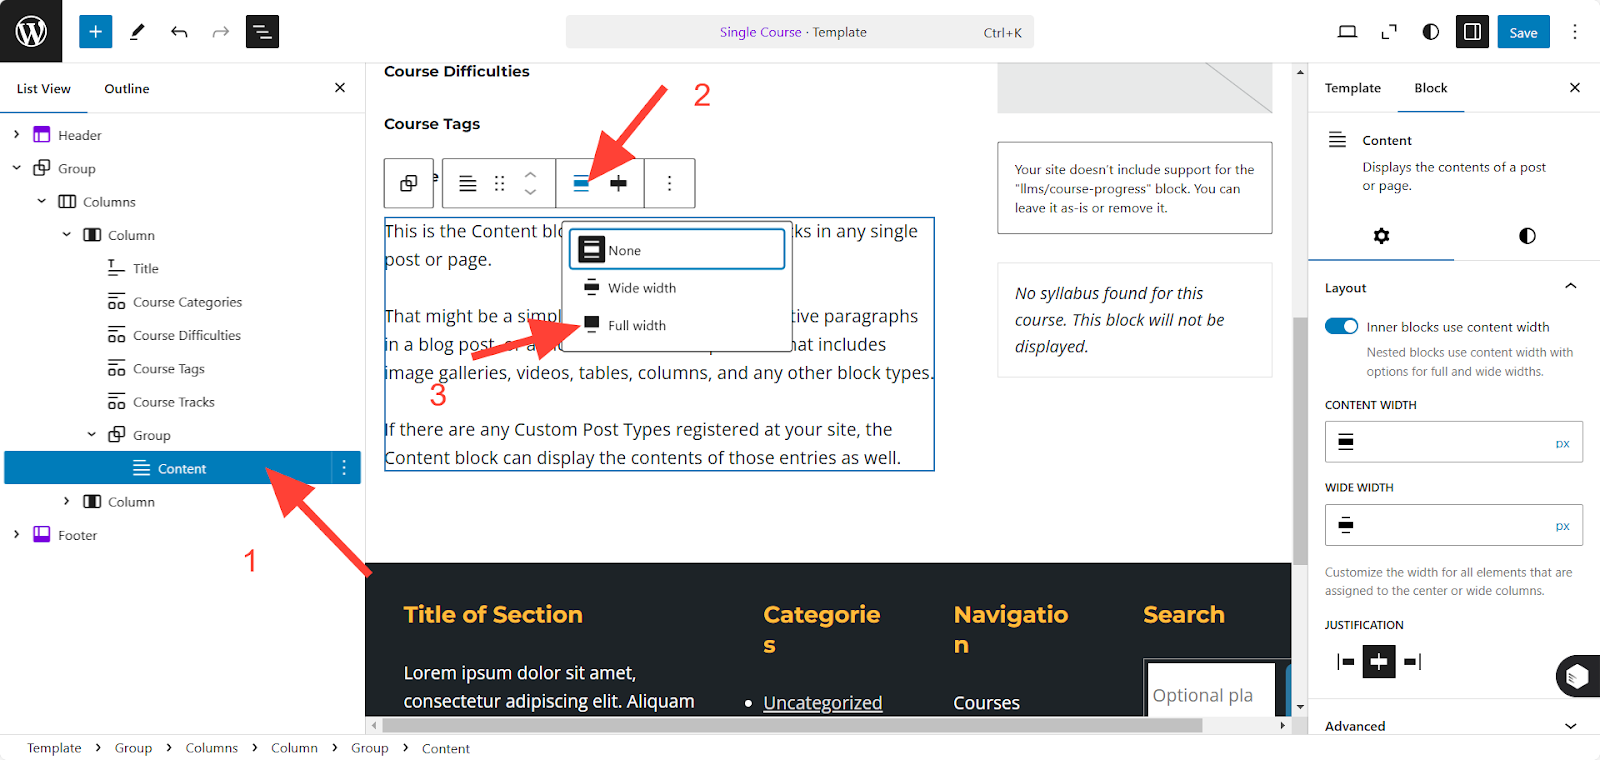
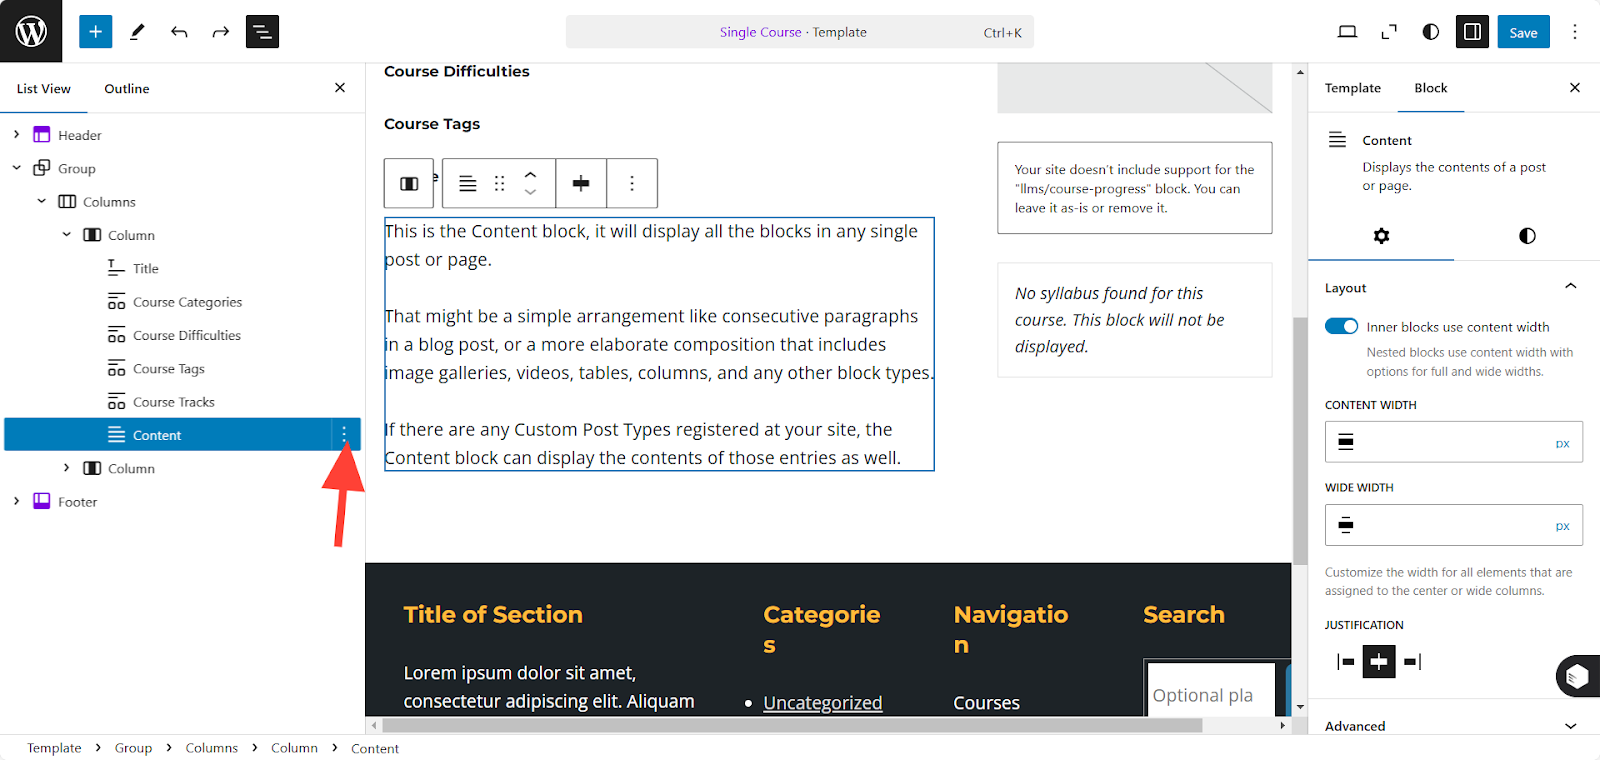
Create Full-Width Content for the Course Template
To make the content in the course template full width, follow these steps:
1. From the top-left corner, click “Document overview” icon.
2. Select the “Content” block, then click the three dots (3 dots) menu and choose “Group”.
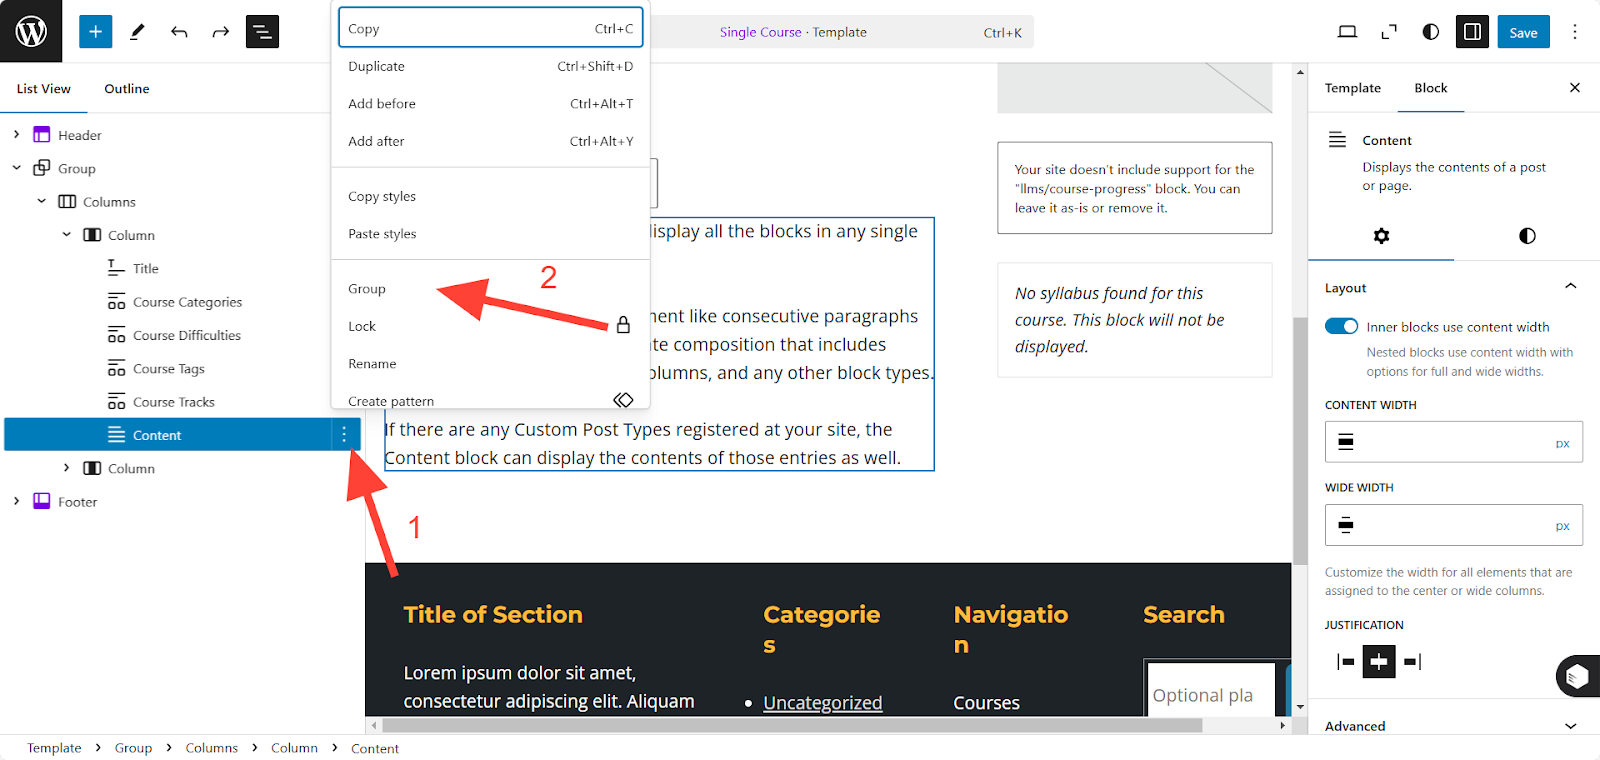
3. Select the “Group” block, then the “Content” block, and set it to “Full width.”