Getting Started with LifterLMS Stripe
To install the Stripe Gateway API Extension:
- Log in to the admin panel of your WordPress site
- Go to Plugins > Add New Plugin
- Click Upload Plugin
- On the Add Plugins page, click Choose File
- Navigate to where the Stripe extension zip file is located on your computer, click on the zip file, then click Open
- Once the file has been chosen, click Install Now
- When the plugin installation is finished, click Activate this plugin
The Stripe Gateway API plugin should now be installed and activated.
Once you have installed the plugin, you can then enable the Stripe gateway.
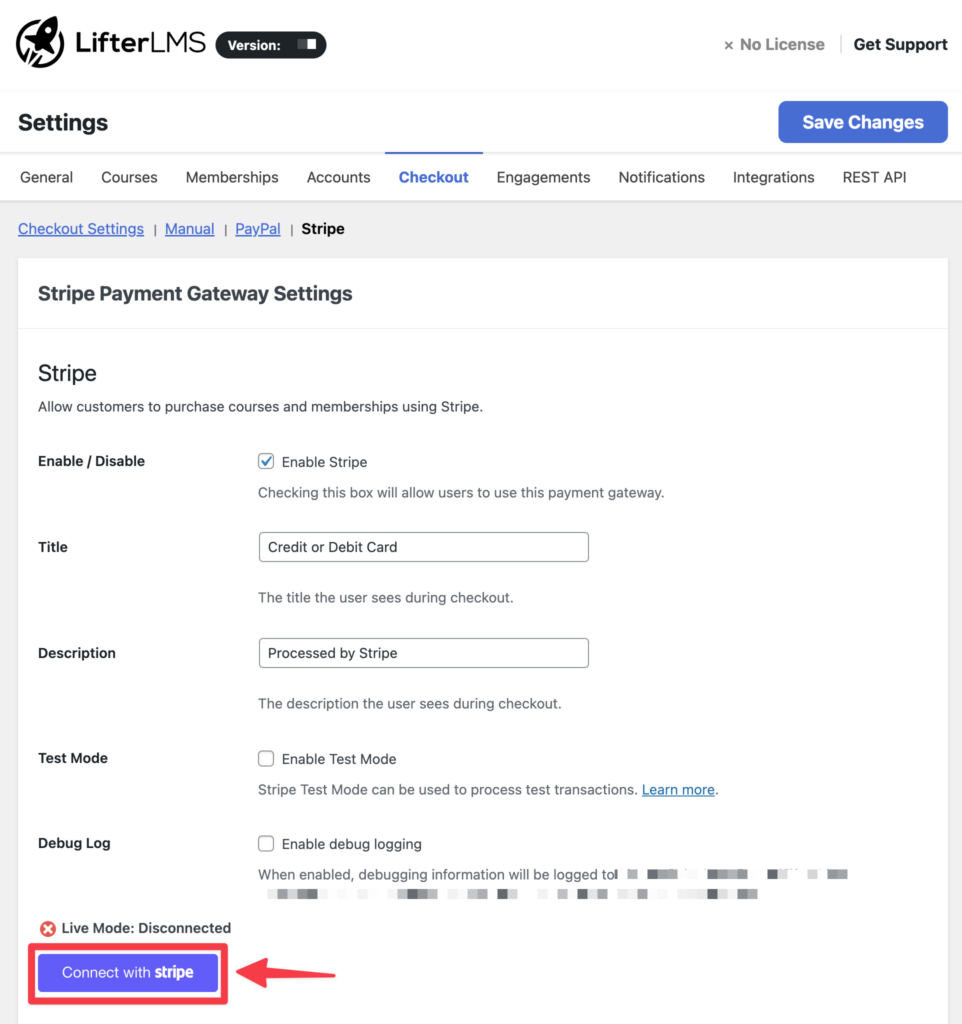
From the WordPress admin, navigate to LifterLMS > Settings and click on the “Checkout” tab. You will see a section titled Stripe.
To enable credit card processing through Stripe, you will check the box “Enable Stripe Payment Gateway.” You will also need to click Connect Stripe or manually enter your Live and Test keys to enable Stripe for payment processing. See the next section for setting your secret and publish keys.
To connect with Stripe, simply click on the Connect Stripe button and follow the steps.
To upgrade to the modern Stripe Connect method, follow these steps:
- Log in to your account on Stripe’s website
- From your WordPress dashboard, navigate to: LifterLMS > Settings > Checkout > Stripe
- Click the “Connect with Stripe” button. You will be redirected to Stripe to confirm the connection to your Stripe account.
- Click the button that says “Connect.” You will be redirected back to your LifterLMS Stripe integration settings page and see a confirmation message from Stripe that says “Live Mode: Connected.”
To enable the Stripe gateway to accept credit cards, you need to enter your Stripe account’s Live and Test Secret / Publishable Keys.
If you do not have a Stripe account, you will need to create one at stripe.com.
You can locate your API keys on the Stripe Dashboard. Follow Stripe’s FAQ How Do I Locate API Keys in the Dashboard for more details on finding your keys in Stripe.
On your WordPress site, navigate to LifterLMS > Settings > Checkout and select “Stripe” from the list of available payment gateways.
Once you’ve located your keys in Stripe, copy and paste them into the respective fields on the LifterLMS Stripe options screen.
This will save your API keys to your site’s WordPress database. If you’d prefer to use a more secure method, you may define your API credentials in your site’s wp-config.php file:
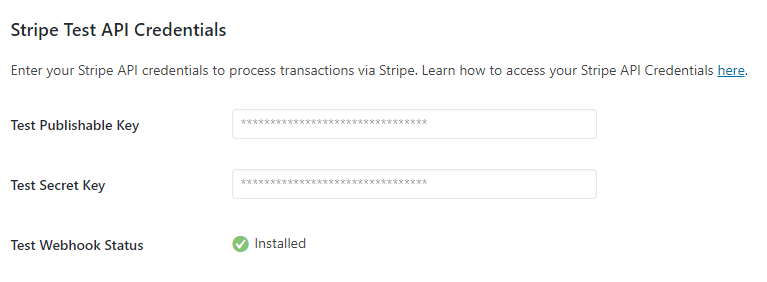
The Webhook Status option you see is an “endpoint” where Stripe sends information to your website about events on Stripe, such as payments being processed or canceled. This is supposed to be configured automatically when you paste in your account keys, and it should show the green checkmark with the Installed status.
To enable test mode to run test transactions using the Stripe credit card gateway go to LifterLMS > Settings, “Checkout” tab and scroll to the Stripe section. Check the box “Enable Stripe Test Mode” and click “Save Changes”
All transactions will now run to stripe as test transactions. You can verify the transactions by going to your Stripe account and toggling from Live to Test.
When you configure your Stripe API keys, LifterLMS automatically creates a new webhook within your Stripe account for the following two events:
charge.failedcharge.refundedcheckout.session.async_payment_failedcheckout.session.async_payment_succeededcheckout.session.completedcheckout.session.expired
You can confirm your site’s Webhook Status on the LifterLMS > Settings > Checkout > Stripe screen.
If your site’s status is not confirmed, you can manually create the webhook in Stripe or check why it might be failing in Stripe’s webhook log.
- Log in to your Stripe dashboard for the connected site.
- Be sure to select the Live or Test mode, depending on which gateway version you want to investigate.
- Navigate to Developers > Webhooks and select the correct webhook for your site.
- From the single webhook screen, you should see that it is configured for the 6 events listed above.
- Review the webhook’s status details on the Logs tab.
If you’re experiencing issues with payments or customer creation, you can use the debug mode to record the communication between your website and Stripe.
It’s important to note that debug mode only records events while it is enabled. It can’t show you logs of past errors.
You must enable this setting first, and then try to reproduce the issue (such as attempting a purchase) to generate a log.
Step 1: Enable Debug Mode
- Navigate to LifterLMS > Settings in your WordPress dashboard.
- Click on the Checkout tab at the top of the screen.
- Scroll down to the Stripe settings area.
- Check the “Enable Debug Logging” box and click Save Changes at the top of the screen.
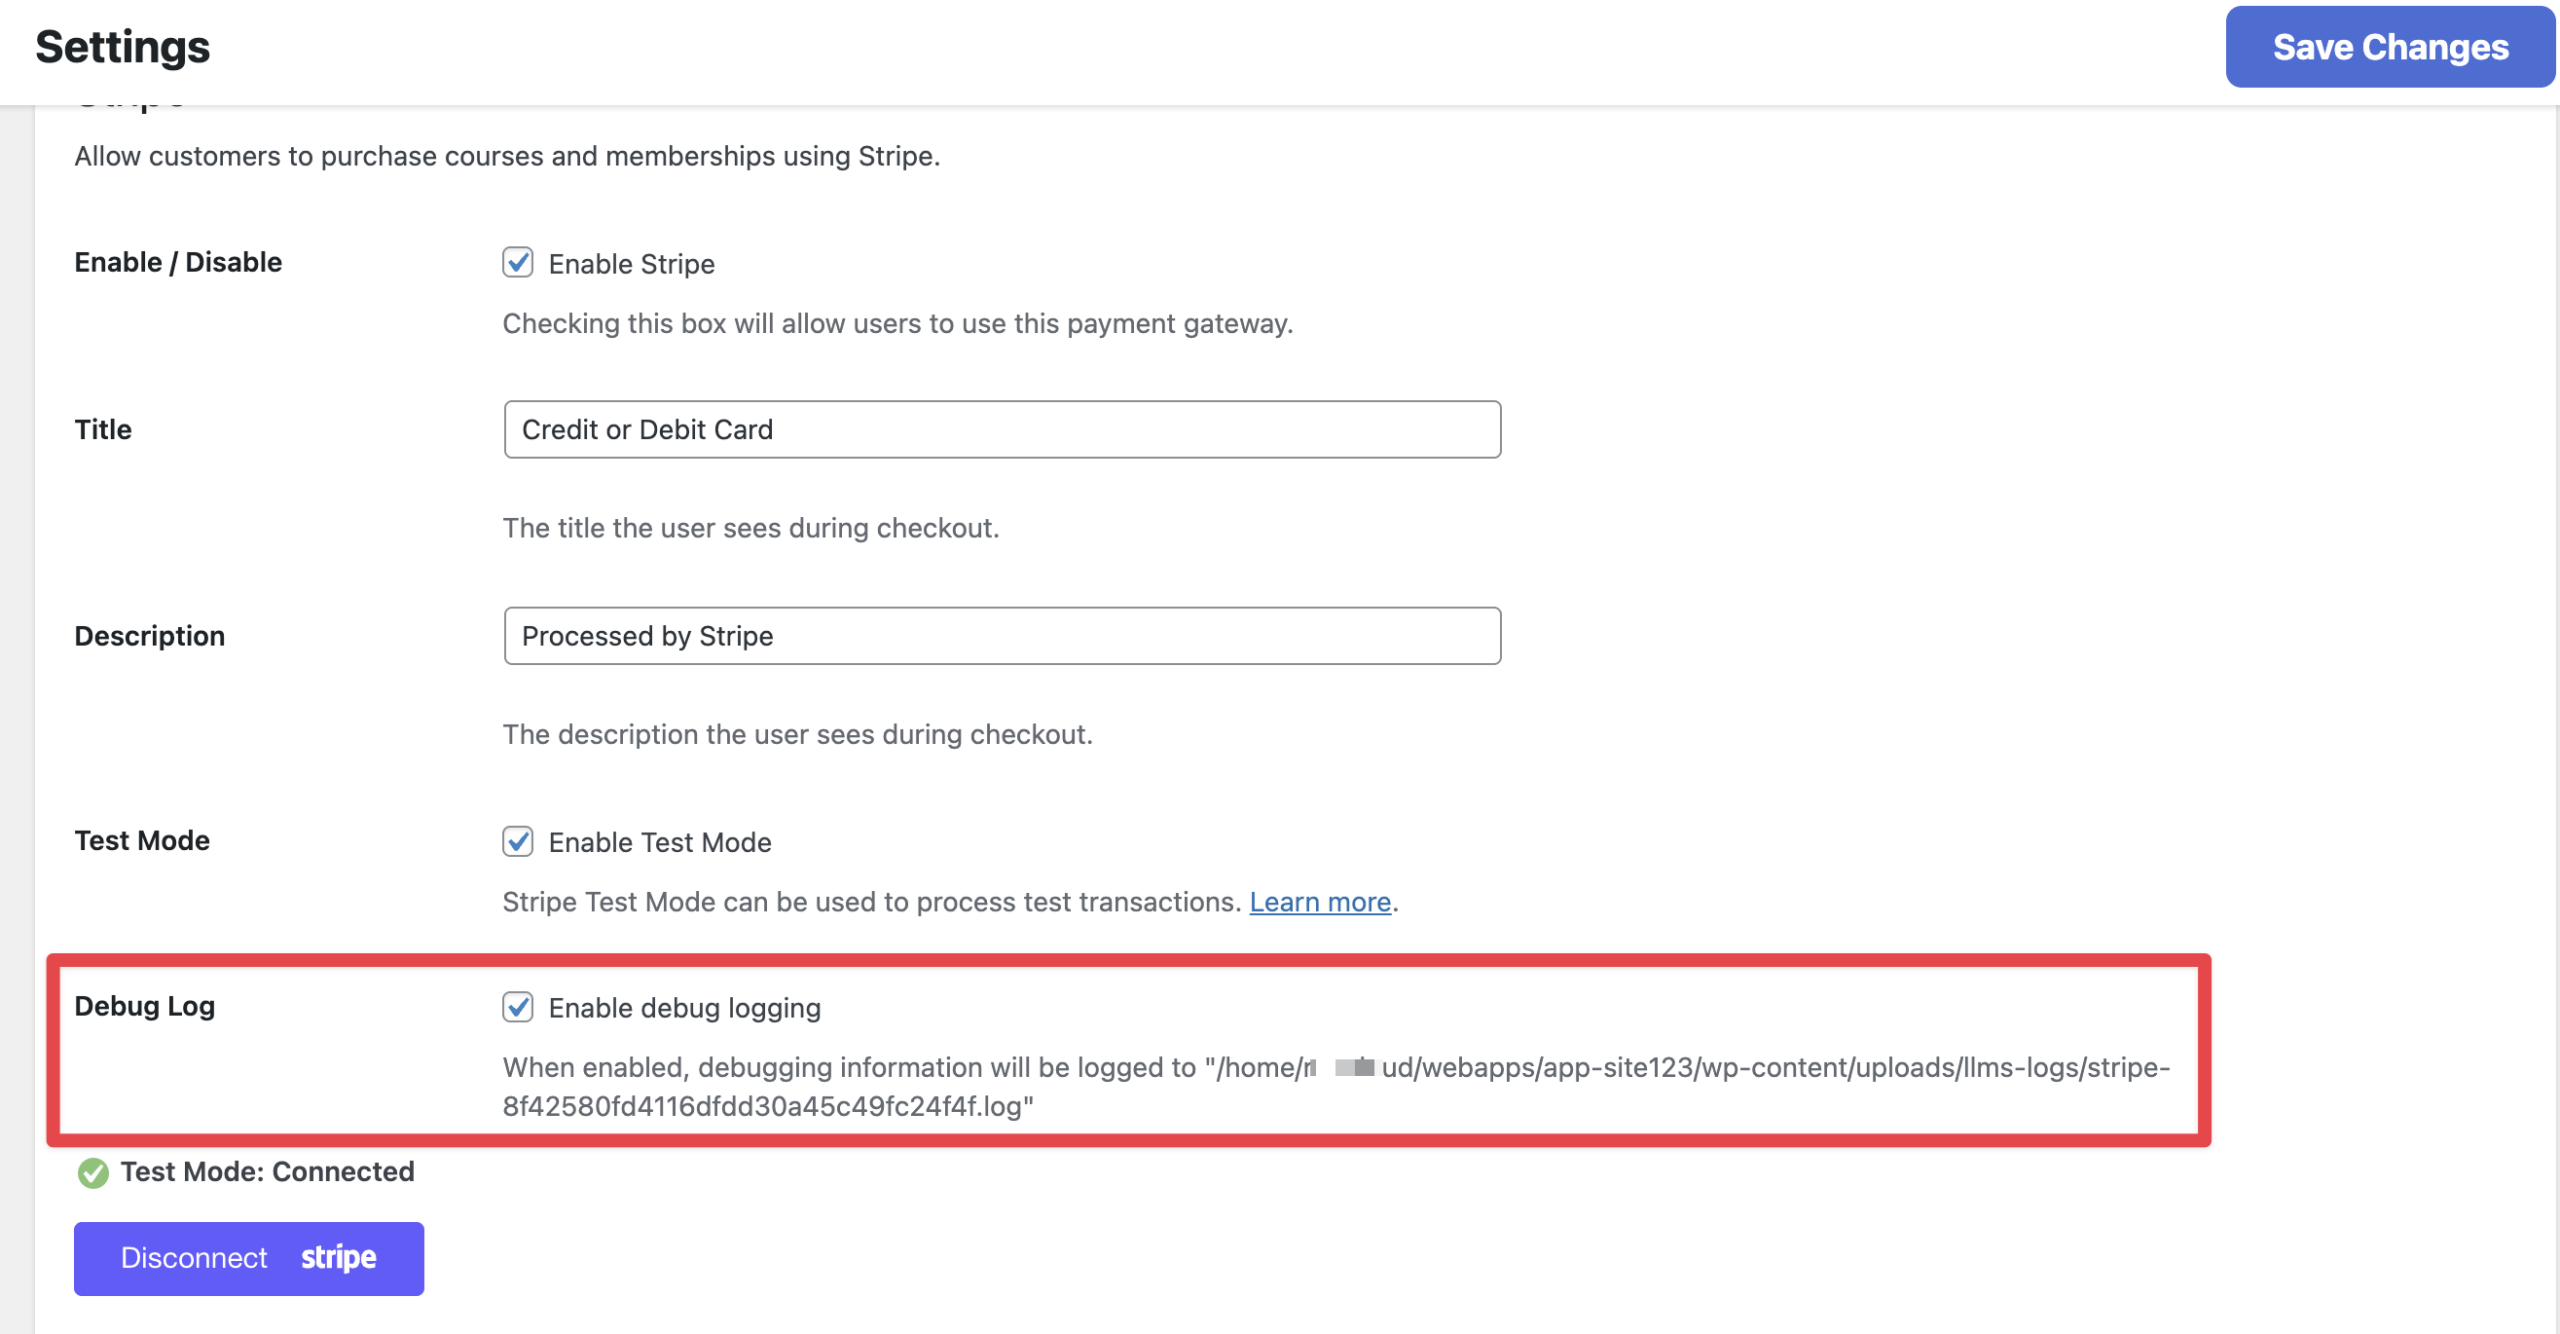
Once this is saved, perform the action that was causing the error (for example, try to buy a course) so the system can record the failure.
Step 2: View the Stripe Logs
After reproducing the issue, you can view the specific log file created by the Stripe integration.
- Navigate to LifterLMS > Status and click on the Logs link in the sub-menu.
- Click the dropdown menu in the “View and Manage Logs” section to see the list of available log files.
- Look for the file name that begins with “stripe-“. It will usually look like a long string of text, such as stripe-8f42580fd4116dfdd30a45c49fc24f4f.log.
- Select that file and click the View Log button.
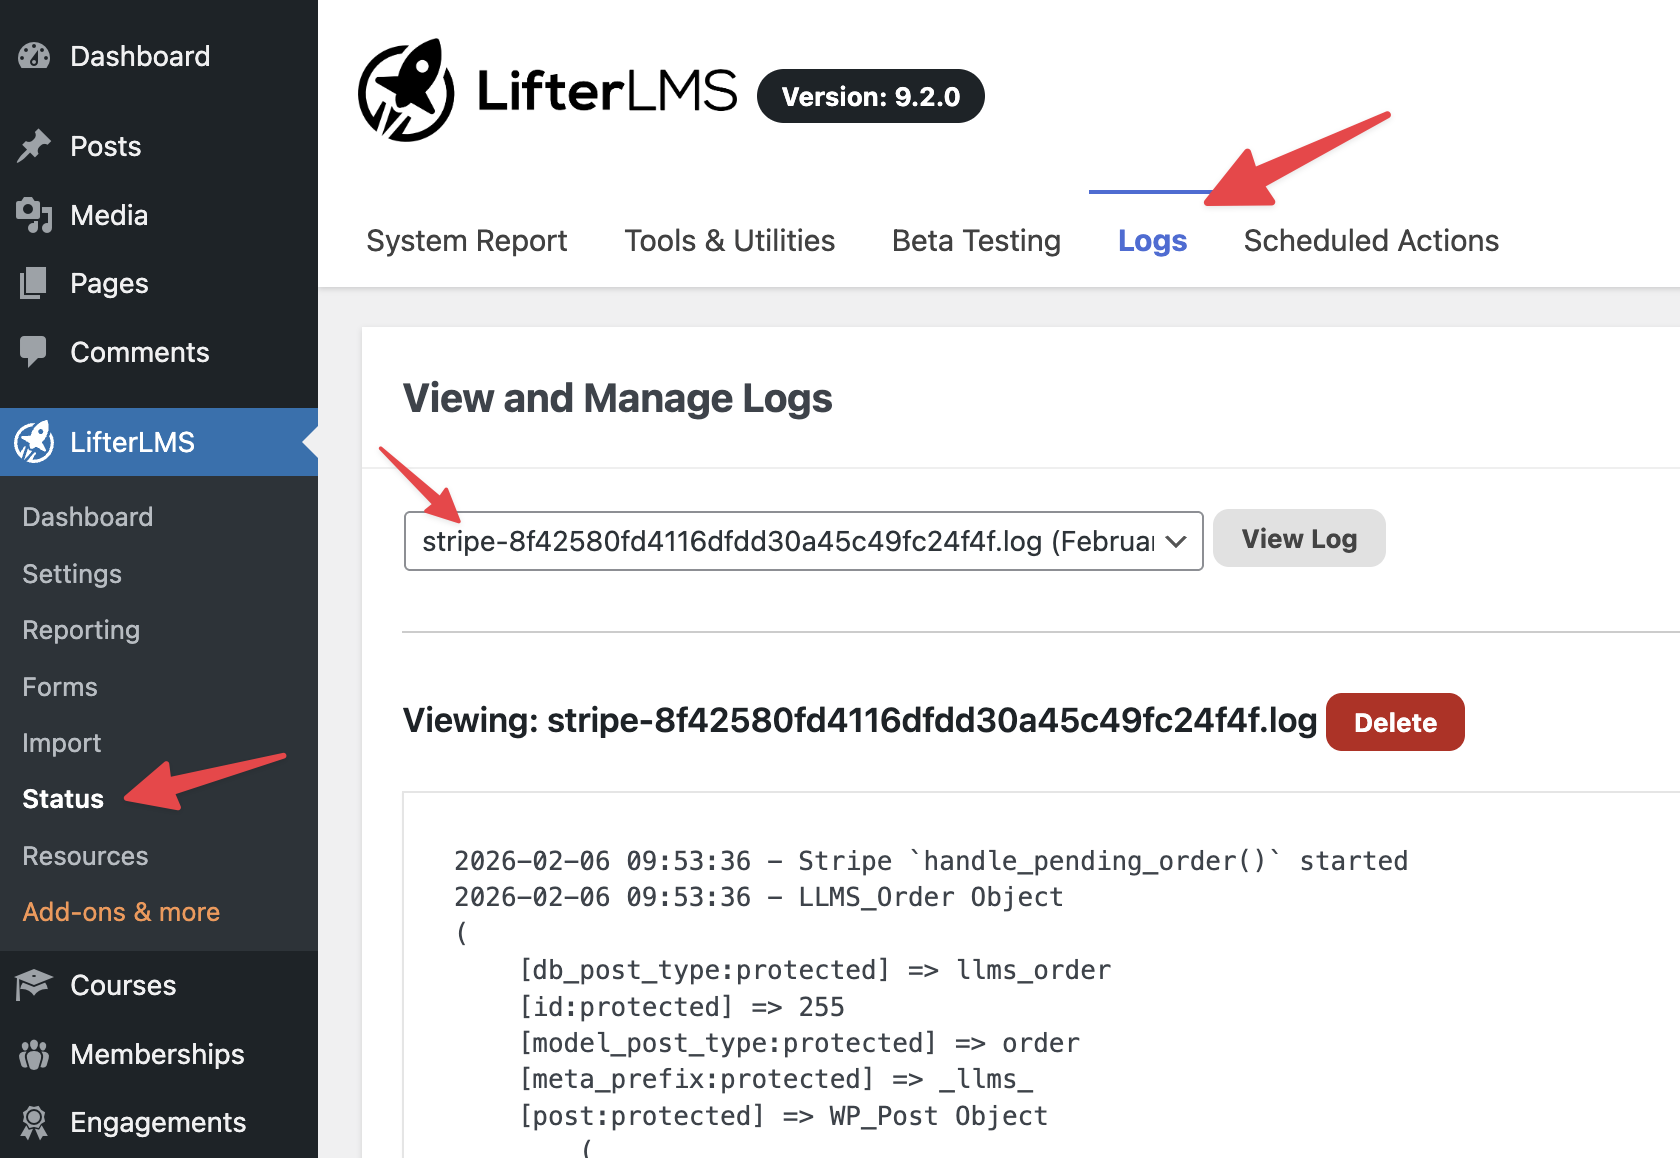
You will now see the technical details of the transaction, which can help support teams diagnose the issue.
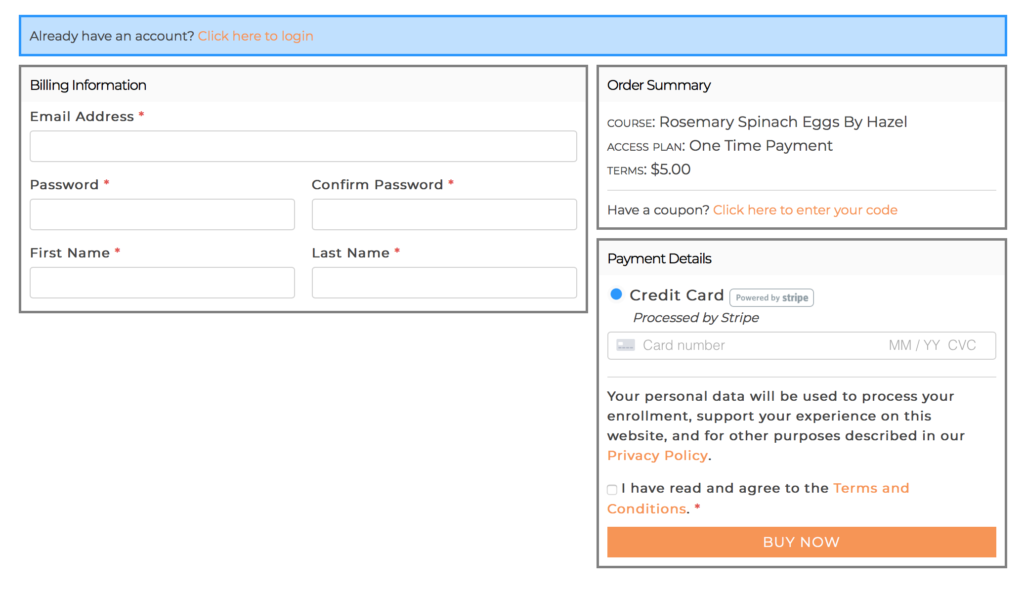
This is an example of a checkout screen with the Stripe Extension installed:
NOTE: Stripe Checkout is currently in beta. We recommend testing this on a staging site, and also testing the flow and monitoring transactions on your live site.
When Stripe Checkout is enabled, customers are redirected to a Stripe-hosted page. This allows additional payment methods, including Apple Pay and Google Pay, to be displayed and used alongside a credit card.
To enable Stripe Checkout, a line needs to be added to your wp-config.php file:
define( 'LLMS_STRIPE_ENABLE_STRIPE_CHECKOUT', true );
Once enabled, go to LifterLMS > Settings, “Checkout” tab, and select the “Stripe” sub-tab. At the bottom, change the “Payment Flow” to “Accept Payments in Stripe (Stripe Checkout).”
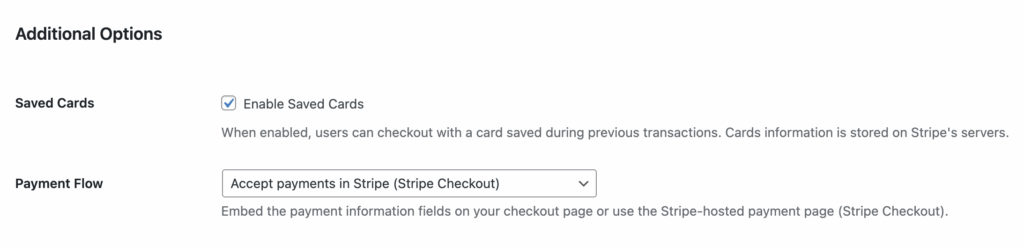
Click Save Changes.
Ensure that the webhooks have been saved. If it says “Not installed,” click Save Changes once again, or manually install the webhooks.

When you use Stripe Checkout with LifterLMS, you can offer your students a wide variety of payment options.
However, you need to configure these payment methods directly inside your Stripe account before your students can use them.
How to Enable Payment Methods
The LifterLMS Stripe add-on doesn’t automatically turn on new payment methods for you. You must enable the payment method you want to use in your Stripe dashboard.
To enable a new payment method, follow these steps:
- Log in to your Stripe account at dashboard.stripe.com.
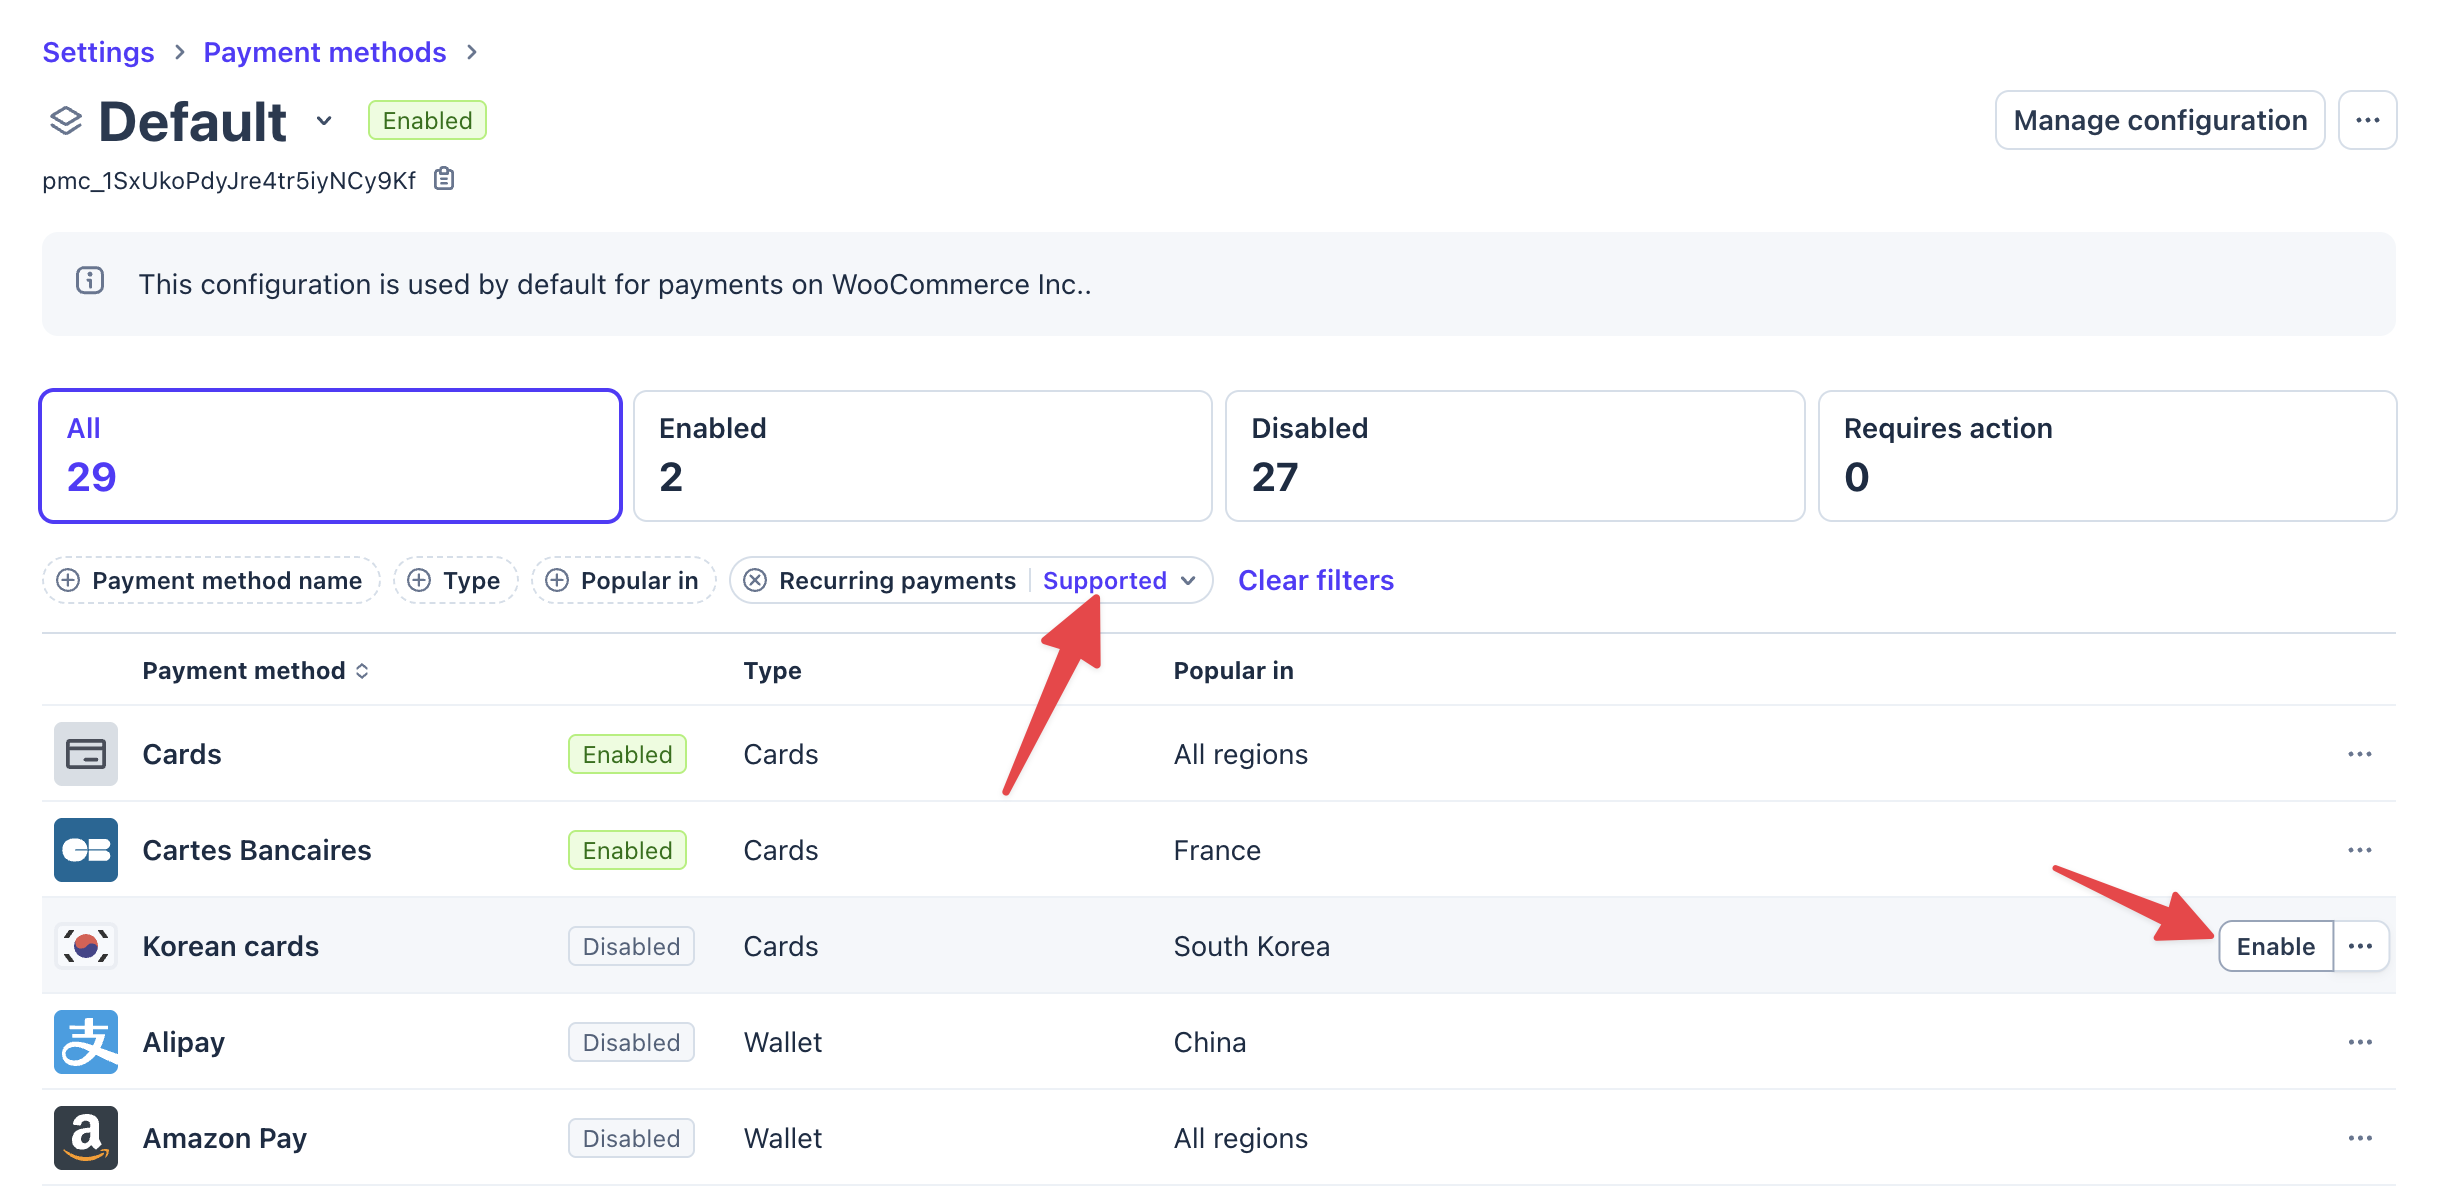
- Navigate to Settings > Payments.
- Look for the “Payment methods” configuration settings.
- Find the payment method that you are using for your checkout workflow.
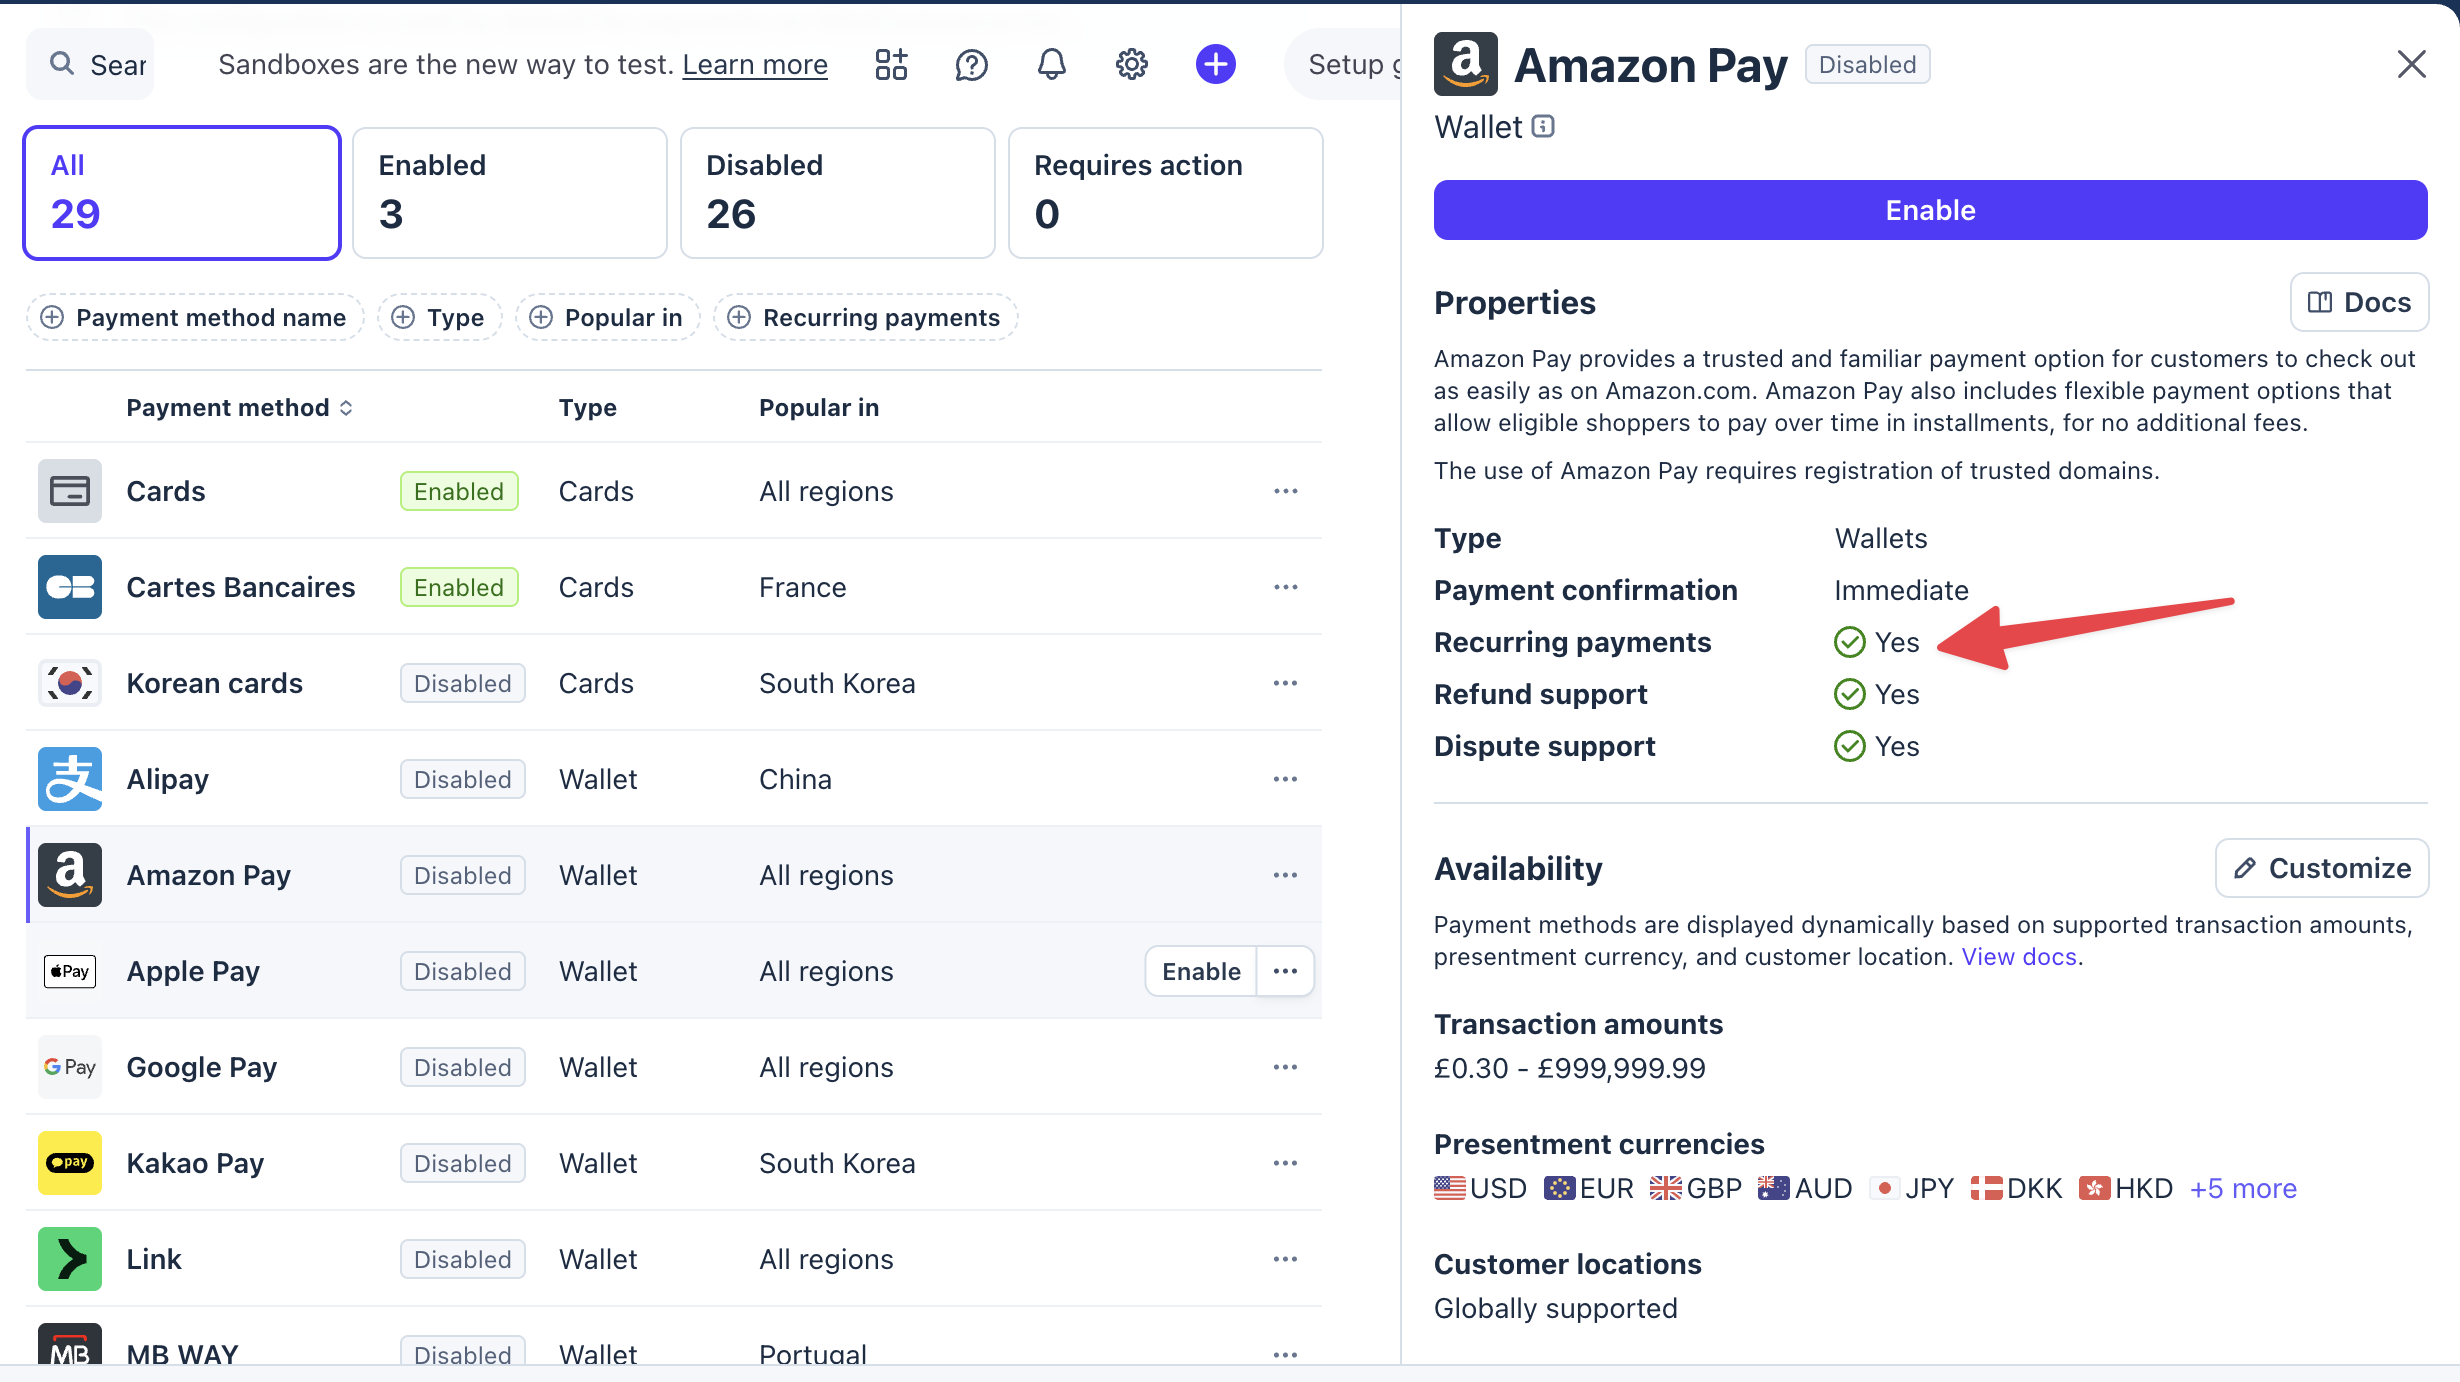
- On this screen, you can filter payment methods by type, popularity, and whether they support recurring payments.
- Scroll to the desired payment method. You will see a status (Enabled or Disabled) next to each payment method.
- Click the Enable button next to that payment method to activate it.
Understanding One-Time vs. Recurring Payments
Stripe offers many payment methods, but some are available only for one-time payments.
If you try to use a one-time payment method for a recurring LifterLMS access plan, the payment will fail.
If you want to offer recurring subscriptions, you must verify that your chosen payment method supports recurring payments.
To check whether a payment method supports recurring payments, click the payment method name to view its supported capabilities.