
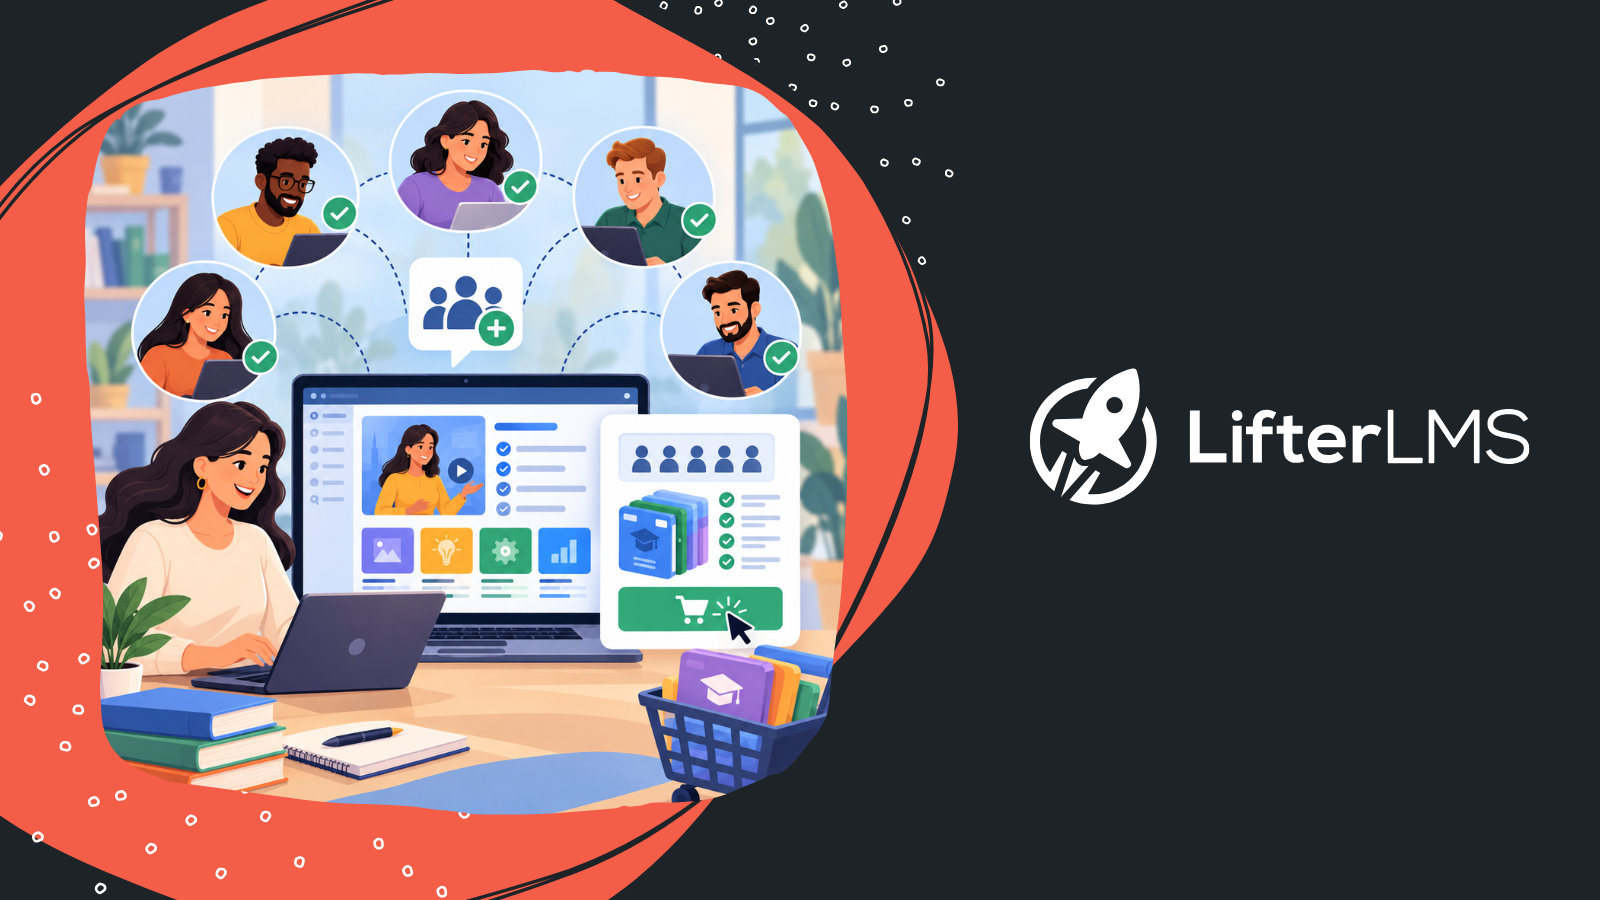
Selling an online course to one person is pretty straightforward. But what if a company wants to buy training for 20 employees?
They probably don’t want to make 20 separate purchases. They need to buy seats for the whole team, decide who gets access, and keep track of everyone’s progress. And when new employees join, they’ll need a way to buy more seats without starting over.
LifterLMS Groups is designed to make it easy to deliver group training programs exactly like this. And, it is fully compatible with WooCommerce, so you can continue using your ecommerce platform of choice, and customers can purchase group access using a familiar checkout experience.
The release of LifterLMS Groups 3.0 brings several changes to how those purchases work. Buyers can now choose their seat quantities directly from the course or membership pricing table. They can also add seats to an existing group or buy another group, even if they’re already enrolled in the course.
In this guide, we’ll set up group training with WooCommerce, follow a purchase from start to finish, and show you how customers can manage their seats afterward.
Note: WooCommerce isn’t required to use LifterLMS Groups. You can also sell group access through the native LifterLMS checkout. In this guide, we’re focusing on WooCommerce for anyone who already uses it or wants its shopping cart and payment options.
How Group Training Sales Work with LifterLMS and WooCommerce
Imagine you run an online training business with a digital entrepreneurship course.
A company wants five employees to take it.
Instead of sending each person to your website to sign up and pay, the company buys five seats in one transaction.
Here’s how that works:
- You create a course or membership in LifterLMS.
- You create a WooCommerce product and link it to a group enrollment access plan.
- The customer chooses how many seats to purchase and pays through WooCommerce.
- Once the order reaches the required status, LifterLMS creates a group and makes the buyer its primary administrator.
- The group administrator can invite employees, manage their access, and check their progress.
WooCommerce handles the purchase process, including pricing, cart, and checkout. LifterLMS Groups handles the group itself, as well as seat allocation and training access.
Let’s say you charge £25 per seat. A company buying five seats pays £125. A few months later, it hires five more employees. The group administrator can return to your course page and buy another five seats for the same group.
Or perhaps the company wants separate groups for its sales and marketing departments. It can purchase another group for the same course and manage the teams independently.
This approach works well for corporate training, employee onboarding, professional development, and other situations where an organization needs to train several people at once.
What You Need to Sell Group Training with WooCommerce
You’ll need four WordPress plugins:
- LifterLMS: Creates and delivers your courses and memberships.
- LifterLMS Groups: Handles group enrollment, seat management, and learner reporting.
- WooCommerce: Provides the shopping cart and checkout.
- LifterLMS WooCommerce Integration: Connects LifterLMS access plans to WooCommerce products and orders.
For the features covered here, you’ll need LifterLMS Groups 3.0.0 or later and LifterLMS WooCommerce Integration 3.1.0 or later.
Before starting, check your installed versions under Plugins in the WordPress dashboard. Make sure you’re running the latest compatible versions of all four plugins.
You’ll also need a course or membership to sell. If you haven’t created one, see our guides to creating a course with LifterLMS and getting started with LifterLMS Groups.
Enable the WooCommerce Integration
Once the plugins are installed and active:
- Go to LifterLMS > Settings > Integrations.
- Select “WooCommerce”.
- Check Enable / Disable to turn on the integration.
- Under Order Enrollment Status, choose the WooCommerce order status that should trigger enrollment. The default is Completed.
- Click Save Changes.
The enrollment status controls when LifterLMS grants access after a purchase.
LifterLMS uses this setting to determine when to grant access after a purchase. For example, if the enrollment trigger is set to Completed, LifterLMS creates the group once WooCommerce marks the order as completed.
You can read more about these settings in our Getting Started with LifterLMS and WooCommerce guide.
Step 1: Create a WooCommerce Product for Group Training
Start with the product customers will buy.
- In WordPress, go to Products > Add New.
- Give the product a name, such as “Digital Entrepreneurship 101 – Group Training”.
- Add a description of the training.
- Under “Product data”, select “Simple product”.
- Enable “Virtual”, since you’re selling online training rather than a physical product.
- Enter the regular price.
- Publish the product.
You have two options when pricing group training. You can sell a package containing a set number of seats or charge per seat and let customers choose how many they need.
| Pricing model | Example | WooCommerce product price |
| Fixed seats | 10 seats for £500 | £500 for the package |
| Variable seats | £25 per seat | £25 per seat |
For a variable-seat plan, WooCommerce calculates the total from the quantity purchased. Five seats at £25 each, for example, cost £125.
Make sure Sold individually is disabled in the WooCommerce product settings so customers can buy multiple seats in one order.
You don’t need a separate product for every quantity. With variable seat selection, buyers can choose how many seats they want within the limits you set.
Step 2: Create a Group Enrollment Access Plan
Now you’ll connect the WooCommerce product to your course or membership.
- Go to Courses or Memberships in WordPress.
- Edit the course or membership you want to sell.
- Scroll down to “Access Plans”.
- Click Add New Plan.
- Enter a title, such as “Group Training – Team Access”.
- Set the button text to something like “Purchase Group Seats”.
- Set “Plan Type” to Paid.
- Under “WooCommerce Product”, select the product you created in Step 1.
If you’ve used LifterLMS access plans before, you might notice that the editor looks different with WooCommerce Integration enabled.
That’s expected. WooCommerce handles the pricing and payment details, so you won’t see the usual LifterLMS payment settings. Instead, the access plan connects your course or membership to its WooCommerce product.
Enable group enrollment and seat selection
Next, tell LifterLMS that customers will be purchasing group seats.
- Find “Use for Group Enrollment”.
- Select “Yes” for group enrollment.
- Under “Seat Selection”, choose Fixed or Variable.
The choice depends on how you want to sell your training.
Fixed seat selection
Choose “Fixed – Set a specific number of seats” when every purchase should include the same number of places.
For example, you could offer a corporate training package containing 10 seats for £500. Enter 10 in the Seats field.
Variable seat selection
Choose “Variable – Allow number of seats to be selected at checkout” if you want customers to decide how many seats they need.
You can set a minimum and maximum quantity.
For our example, we’re using:
- Minimum seats: 5
- Maximum seats: 100
- Price per seat: £25
- Access expiration: Lifetime Access
Once you’ve entered the settings, click Save All Plans.
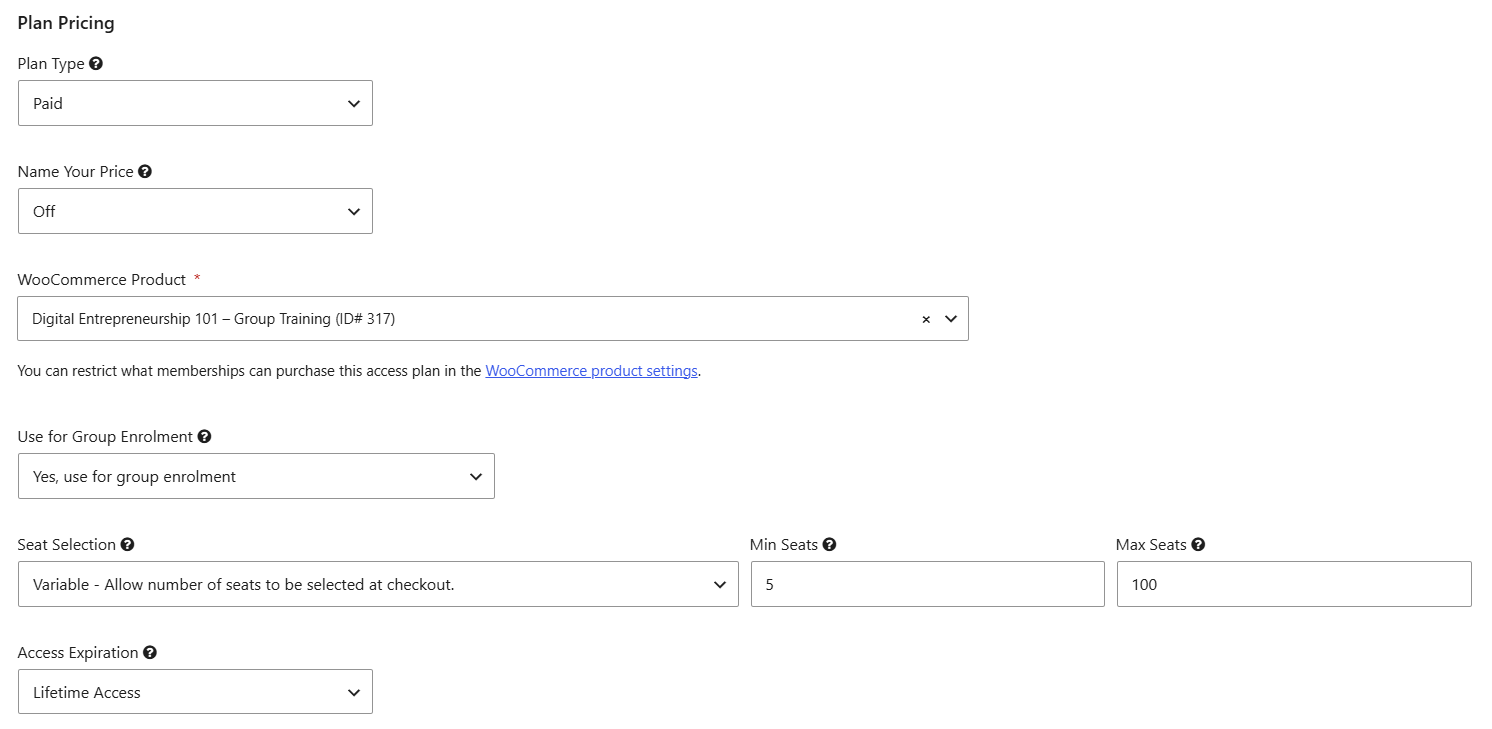
That’s the group access plan configured. LifterLMS now knows that purchases through this plan are for group enrollment rather than individual access.
The plan will appear on the course or membership pricing table, ready for customers to purchase.
Step 3: Let Customers Choose Their Group Seats
One of the changes in Groups 3.0 is where customers choose their seat quantities.
With WooCommerce checkout enabled, buyers can enter the number of seats they want directly on the LifterLMS pricing table, before adding the product to their cart.
For a variable-seat plan, they’ll see the plan name, price, seat quantity field, description, and purchase button.
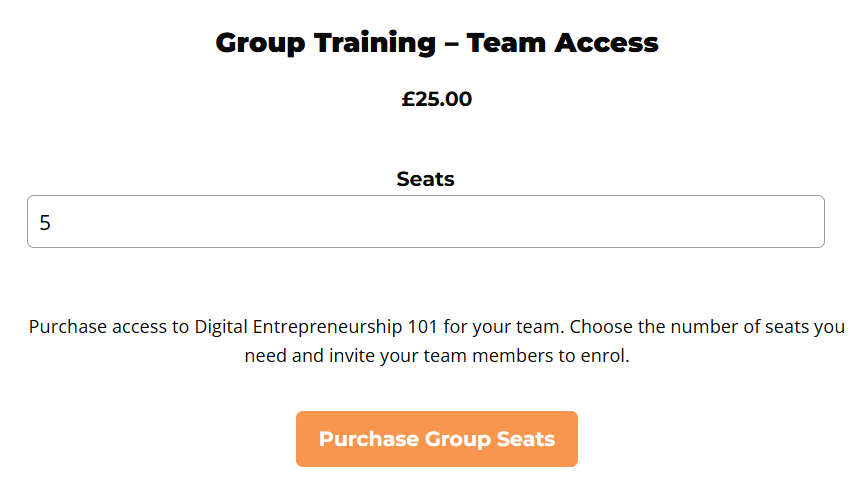
In our example, the company chooses five seats at £25 each.
When the buyer clicks Purchase Group Seats, LifterLMS adds all five seats to the WooCommerce cart.
A confirmation message appears on the course page, letting the buyer know the seats have been added.
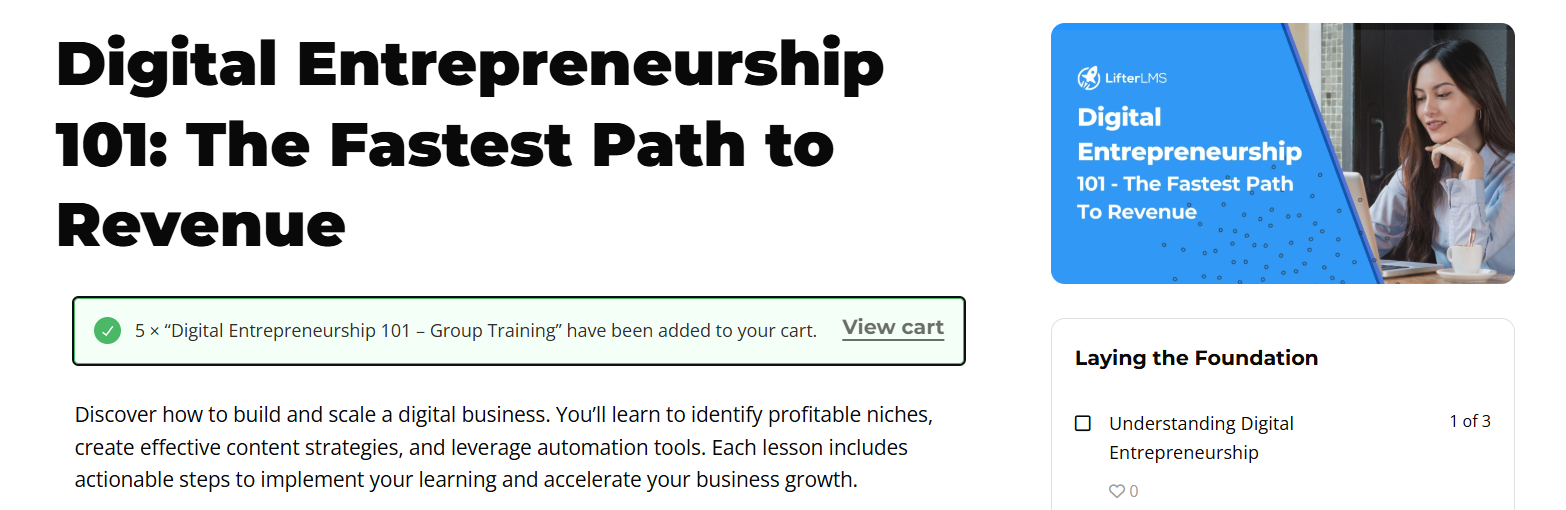
From there, the customer can open their cart and review the purchase.
Step 4: Complete the Purchase Through WooCommerce
Once the seats are in the cart, the customer follows the normal WooCommerce checkout process.
The cart shows the product, quantity, and total cost.
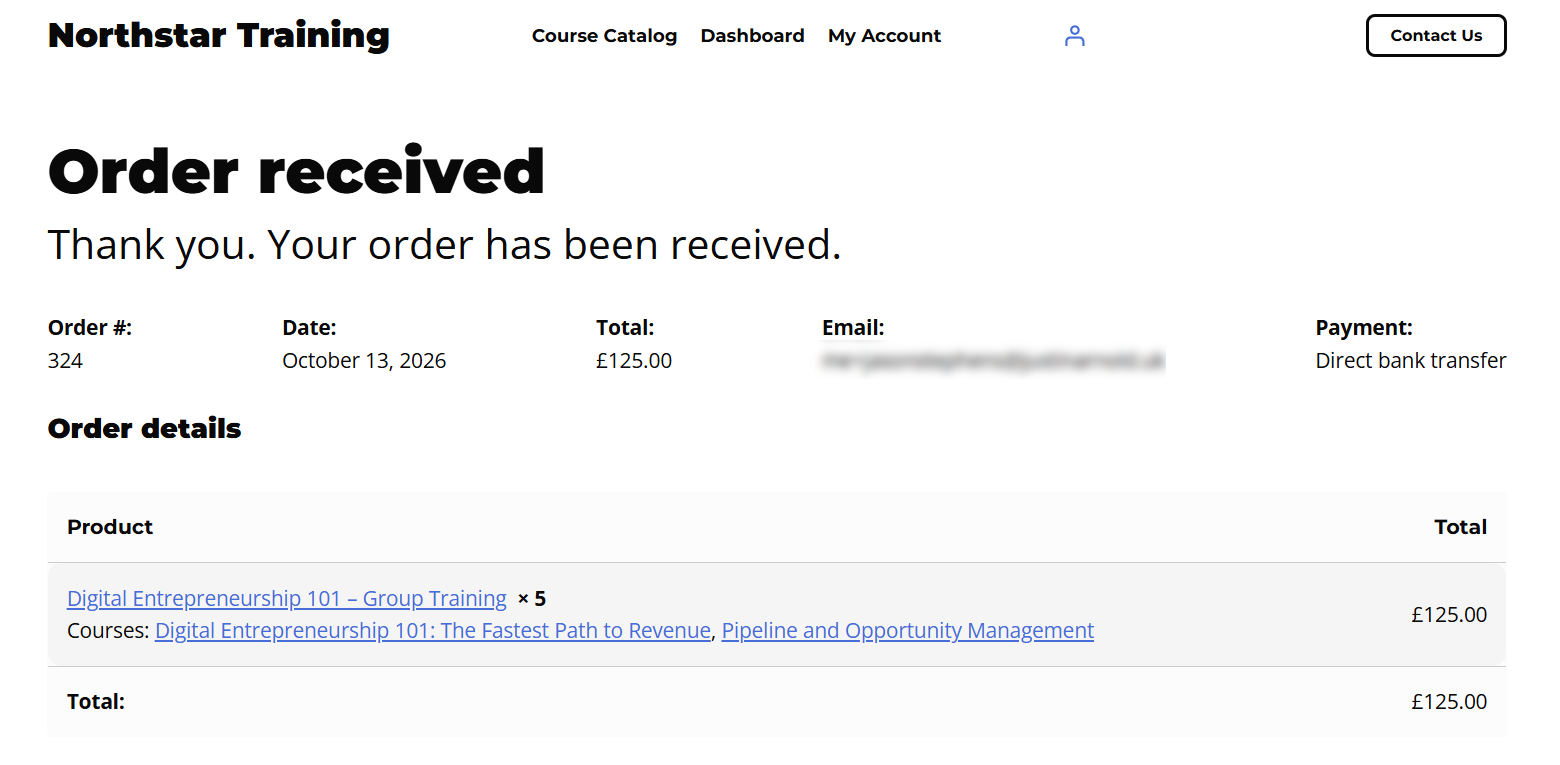
In our example, the purchase looks like this:
- Product: Digital Entrepreneurship 101 – Group Training
- Price per seat: £25
- Quantity: 5
- Total: £125
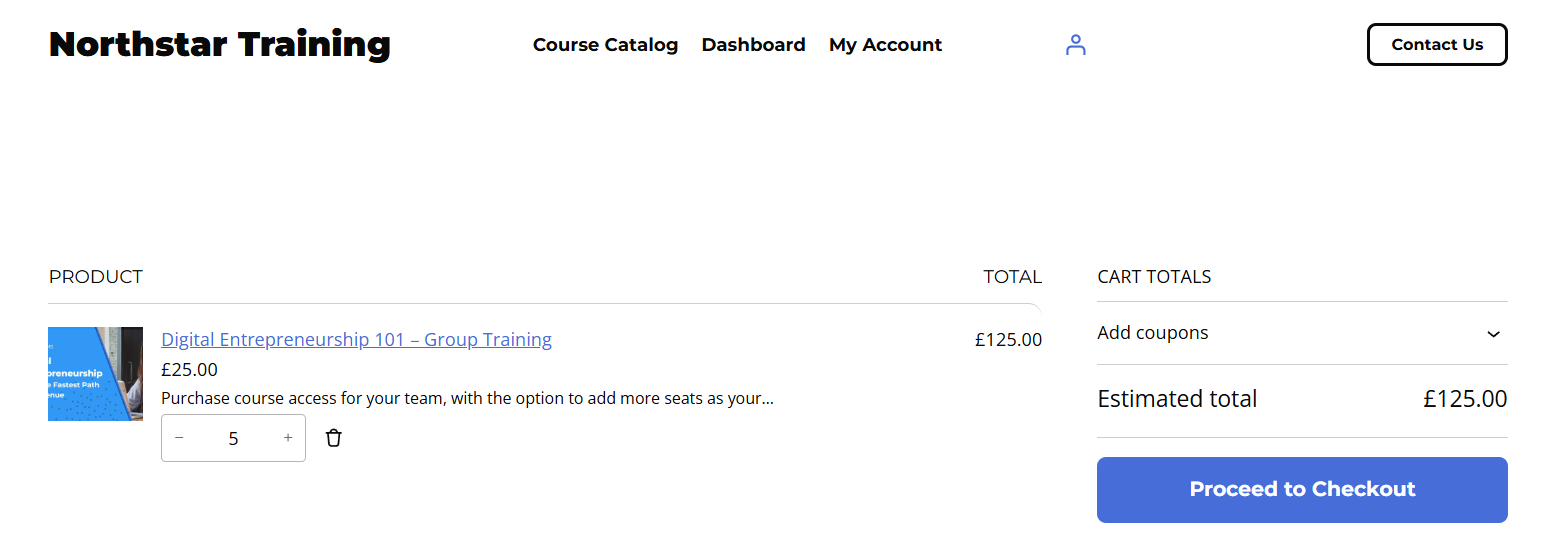
The customer can check the details, adjust the quantity within the plan’s limits, and proceed to checkout.
They can then pay using whichever payment methods you’ve enabled in WooCommerce.
Once they’ve placed the order, WooCommerce displays a confirmation with the purchased product, quantity, and total.
What happens after checkout?
Once the WooCommerce order reaches the enrollment status configured in LifterLMS, the group is created automatically.
For most straightforward online purchases, this happens as soon as payment is successfully processed and the order reaches the required status.
LifterLMS then:
- Creates a group linked to the purchased course or membership.
- Allocates the number of seats purchased.
- Makes the buyer the group’s primary administrator.
In our example, the customer purchases five seats through WooCommerce.
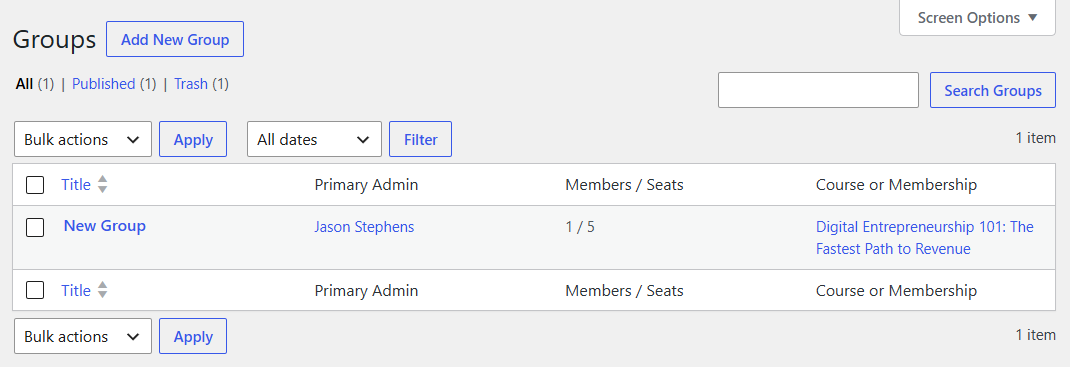
Once the order is completed, LifterLMS creates a new group and assigns the purchaser as its primary administrator.
The Groups administration screen shows 1/5 under Members/Seats. One seat is occupied, leaving four available for other team members.
The buyer can now access the group’s management page and start inviting people to the training.
Step 5: Manage the Group and Invite Members
After purchasing group access, the customer can manage their team from the front end of your website. There’s no need to give them access to the WordPress administration area.
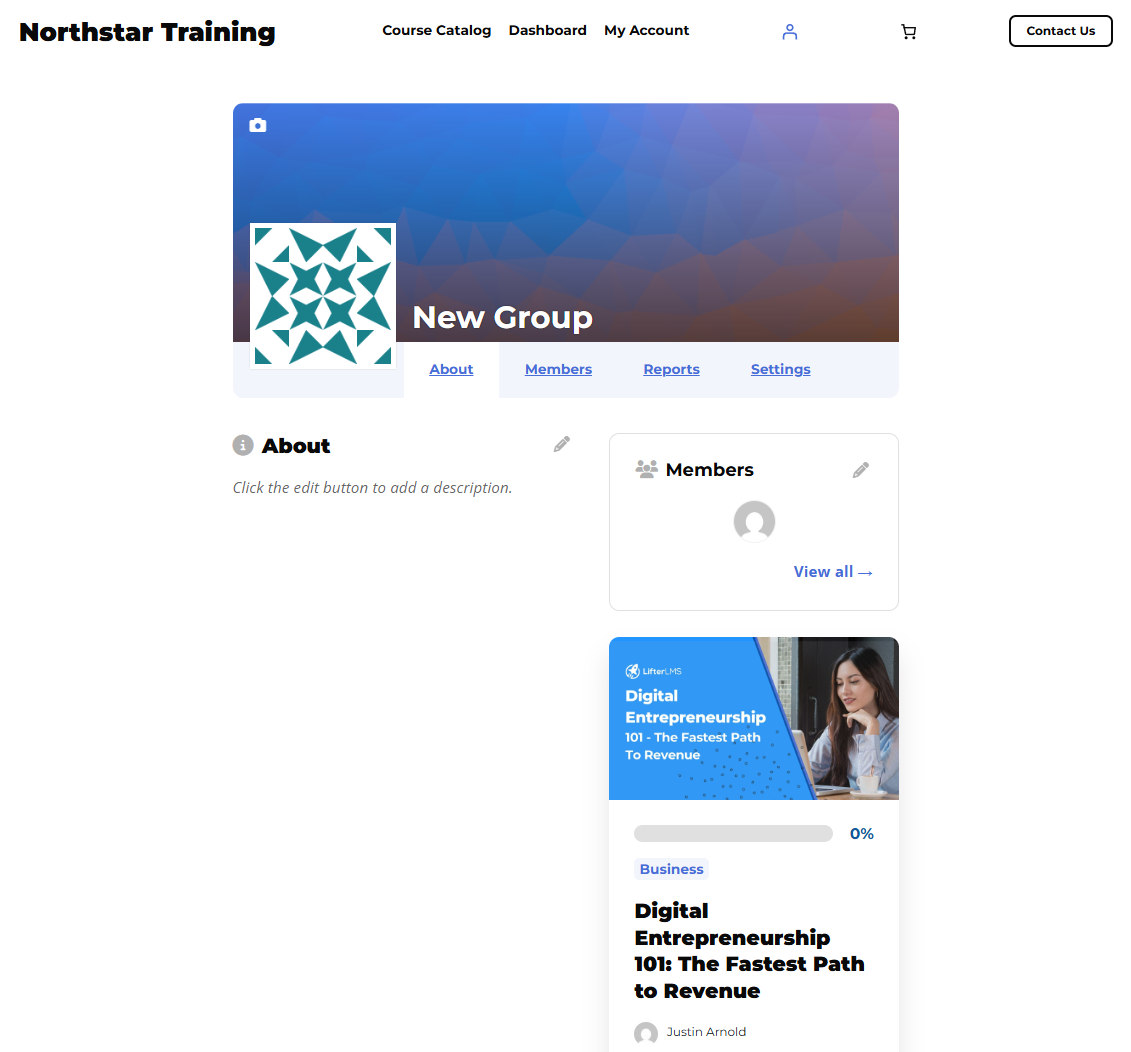
The group dashboard has four main tabs:
- About: View or edit the group’s description and other information.
- Members: Manage members and invitations.
- Reports: Check learner progress and results.
- Settings: Change details such as the group’s name and visibility.
For example, a company manager can invite employees to join the group and check how they’re getting on with the training.
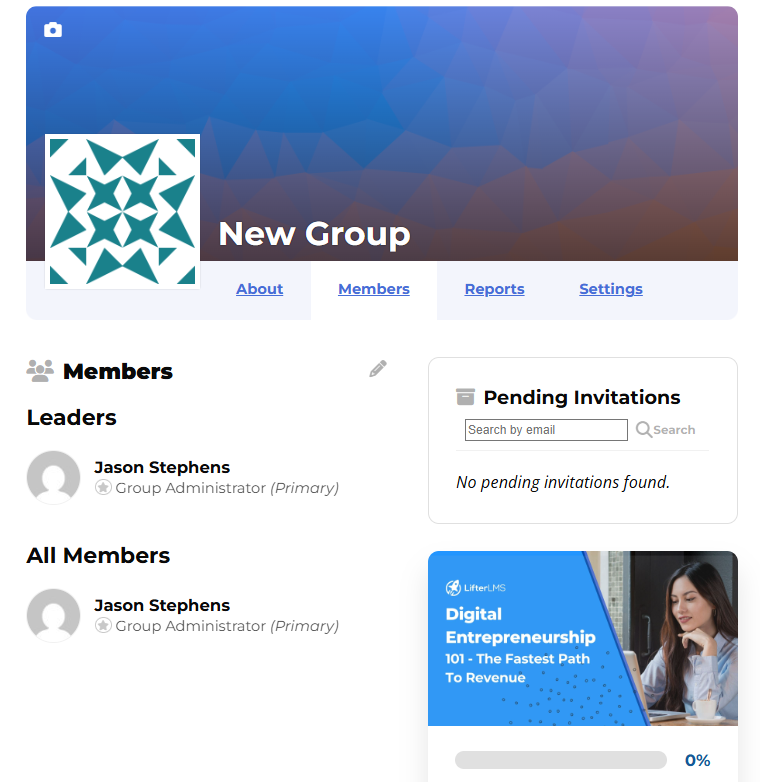
The Members tab shows the group’s leaders, enrolled members, and pending invitations.
Under “Settings”, administrators can change the group’s name, URL slug, and visibility.
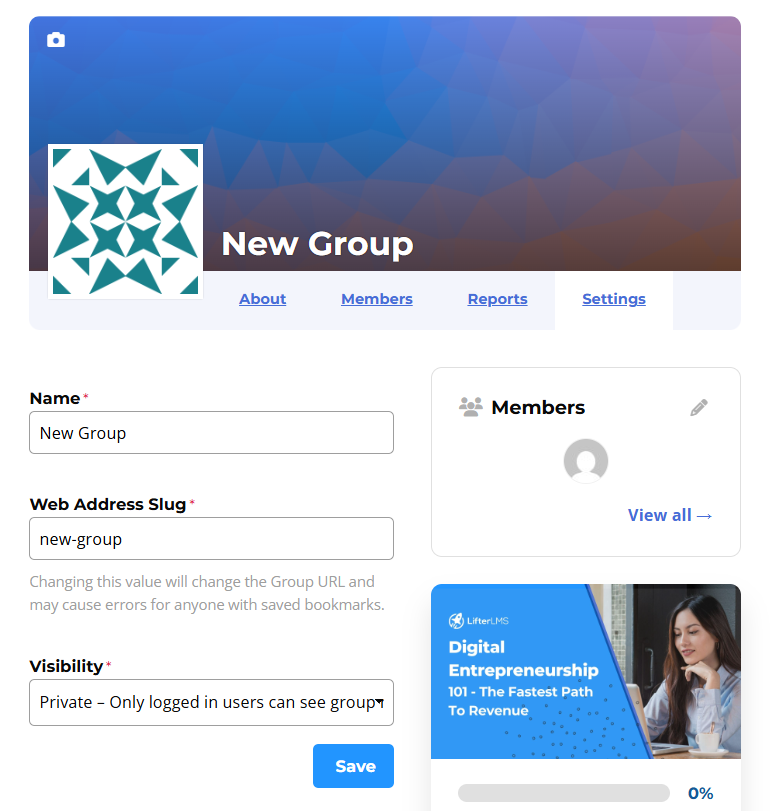
The customer handles their team’s enrollment and progress, while you manage the courses and memberships they access.
For more on invitations, member management, and reporting, see our Getting Started with LifterLMS Groups guide.
Step 6: Allow Existing Customers to Purchase Additional Seats
A company might start by training five employees, then need another five seats when new people join.
They don’t have to purchase a completely new group.
Groups 3.0 lets customers buy additional seats for a group they already manage, using WooCommerce checkout.
First, check that additional seat purchases are enabled:
- Go to LifterLMS > Settings > Integrations > Groups.
- Find “Allow Additional Seat Purchases” under Group Purchasing.
- Make sure the option is enabled.
When an existing group administrator returns to the course or membership pricing table, they’ll see a Group dropdown.
They can use it to select a group they already manage or create a new one.
To buy additional seats:
- Open the course or membership page.
- Find the group access plan.
- Select the existing group from the Group dropdown.
- Enter the number of additional seats.
- Click Purchase Group Seats.
- Complete checkout through WooCommerce.
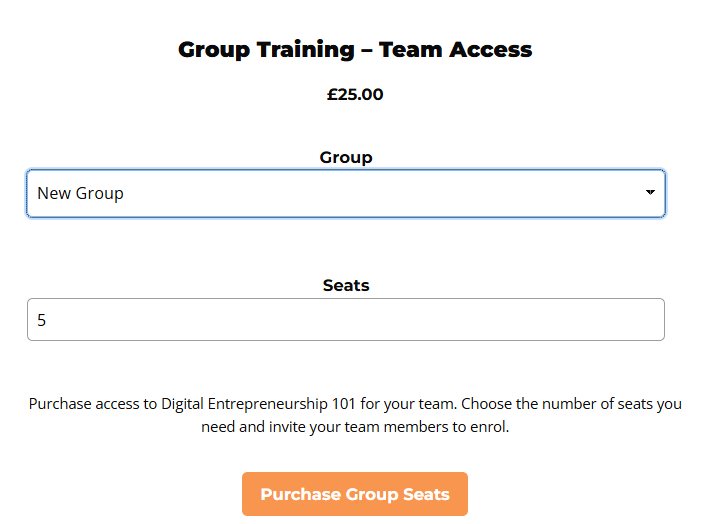
Once the order reaches the required enrollment status, LifterLMS adds the purchased seats to the selected group.
Example: Increasing a group from five to ten seats
Let’s return to our example of a company that purchased five seats for its employees.
The company now needs another five places. Its group administrator returns to the course page, selects the existing group, and purchases five additional seats through WooCommerce.
Once the order is completed, LifterLMS increases the group’s capacity from five seats to ten. The existing members and group administrator remain unchanged, and there’s no need to create another group.
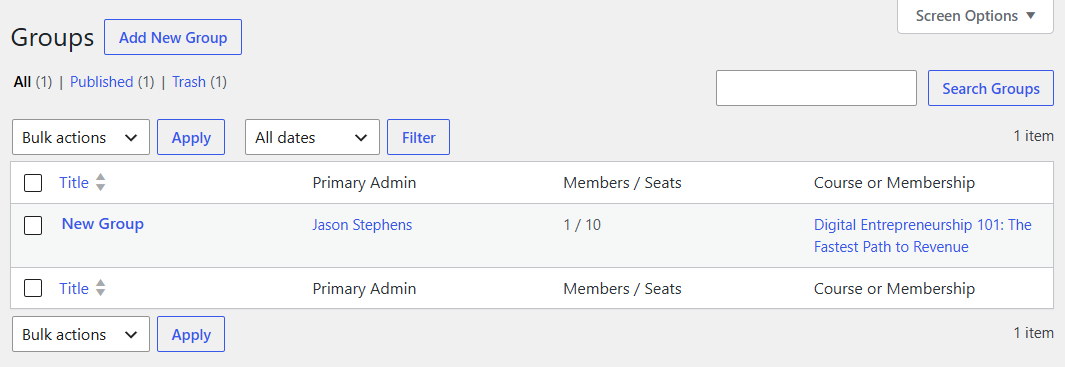
The company now has nine available seats instead of four, all managed within the same group.
Step 7: Sell Another Group to an Existing Customer
Sometimes buying more seats for an existing group isn’t the answer.
A company might want its sales and marketing teams to complete the same course but keep their training records separate.
Groups 3.0 lets customers buy another group for a course they’re already enrolled in.
Previously, enrollment-related restrictions could get in the way of these purchases. With Groups 3.0, group access plans remain visible to enrolled customers using WooCommerce checkout, and eligible group purchases can proceed through the cart.
An existing customer can return to the pricing table and choose whether to buy more seats for a current group or create another one.
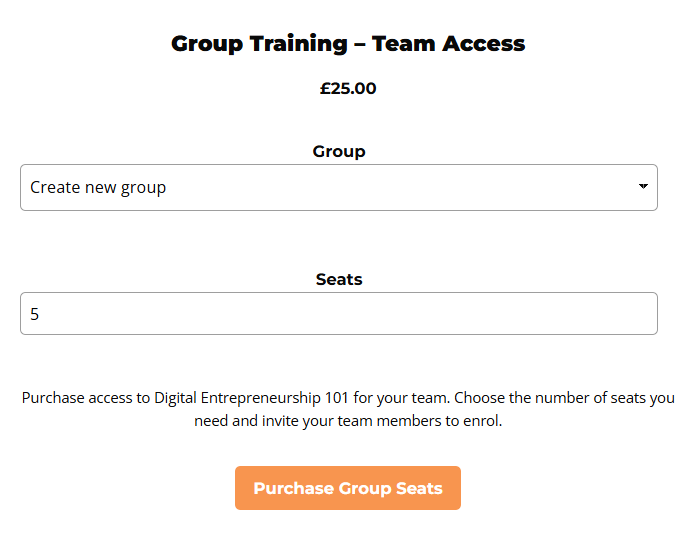
To purchase a new group:
- Open the course or membership page.
- Find the group access plan.
- Under “Group”, select “Create new group”.
- Enter the number of seats.
- Click Purchase Group Seats.
- Complete checkout through WooCommerce.
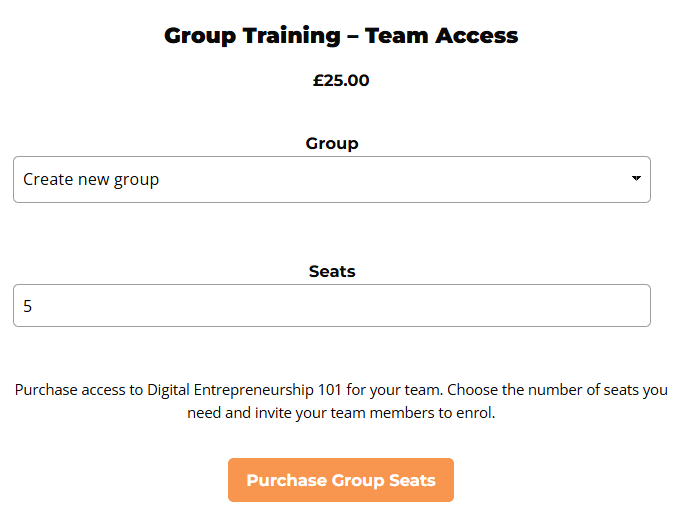
Once the order reaches the configured enrollment status, LifterLMS creates another group with its own seat allocation.
Example: Purchasing two groups for the same course
Suppose the company now wants to provide the same training to a different department, but prefers to keep the two teams separate.
Its group administrator returns to the course page, selects Create new group, and purchases another five seats.
Once the order is completed, LifterLMS creates a second group rather than adding seats to the first.
The Groups administration screen now shows two groups linked to the same course:
- The original group, with 10 seats.
- The new group, with 5 seats.
Both groups have the same primary administrator.
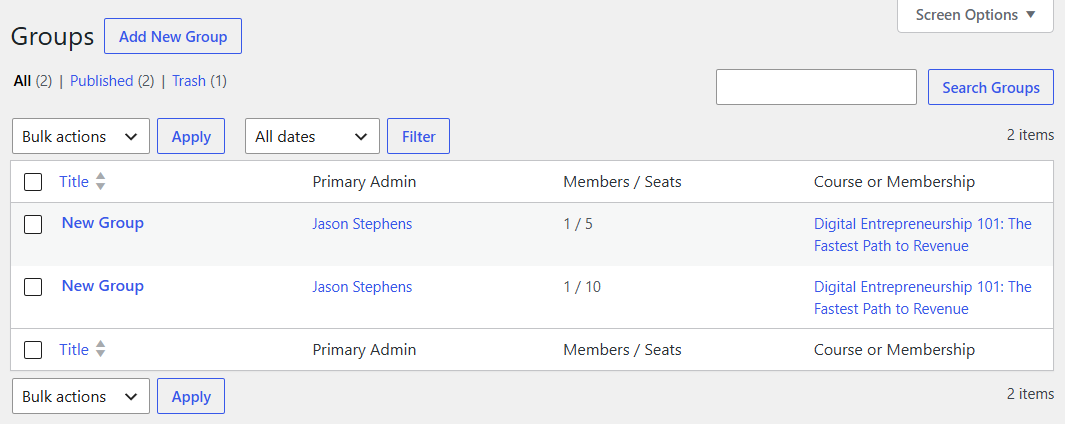
The administrator can manage each group independently, even though both have access to the same course.
For example, the company could use one group for its sales department and another for marketing, keeping each team’s enrollment and progress records separate.
Do You Need WooCommerce to Sell Group Courses with LifterLMS?
No. WooCommerce is an option, not a requirement.
You can sell group access using the native LifterLMS checkout without installing WooCommerce.
Which one should you choose? That depends on what you’re selling and how your website is set up.
If you’re already using WooCommerce, or you sell other products alongside your courses, keeping everything in the same shopping cart may make sense. WooCommerce also gives you access to its payment methods, coupons, and other store features.
If your website only sells courses and memberships, you may prefer the simpler setup offered by native LifterLMS checkout.
Either way, LifterLMS Groups handles the group enrollment, seat allocation, and learner reporting.
If you’d rather use native checkout, our Getting Started with LifterLMS Groups guide covers that approach.
Start Selling Group Training with LifterLMS
When a business buys training for an entire team, it needs more than a checkout button for individual learners.
It needs to purchase multiple seats, manage who uses them, and buy more as its training needs change.
LifterLMS Groups handles those requirements, while Groups 3.0 gives WooCommerce users more control over the purchasing process.
Customers can select seats before adding them to the cart, purchase more seats for existing groups, and buy separate groups for the same course without enrollment restrictions getting in the way.
And if you’re already using WooCommerce, you can offer these options through the checkout your customers are familiar with.
Want to start selling courses and memberships to teams? Explore LifterLMS Groups to see how it works with your training website.
Frequently Asked Questions
No. LifterLMS Groups supports group enrollment through the native LifterLMS checkout, so WooCommerce is optional. If you already use WooCommerce or want its shopping cart, payment methods, and other store features, you can use the LifterLMS WooCommerce Integration add-on to handle group purchases.
Yes. LifterLMS Groups supports group access to courses and memberships. You can connect either to a WooCommerce product through a group enrollment access plan, allowing organizations to purchase access for multiple people in one transaction.
Yes. When you configure a group access plan with variable seat selection, customers can enter the number of seats they need directly on the course or membership pricing table. You can also set minimum and maximum quantities to control how many seats they can purchase.
Alternatively, you can offer a fixed-seat package with a set number of places.
Yes. With Allow Additional Seat Purchases enabled, group administrators can return to the course or membership pricing table, select a group they already manage, and purchase more seats through WooCommerce.
Once the order reaches the required enrollment status, LifterLMS adds the seats to the existing group. There’s no need to create another one.
Yes. LifterLMS Groups 3.0 allows enrolled customers to purchase additional groups for the same course through WooCommerce.
They can select Create new group on the pricing table, choose the number of seats, and complete checkout. LifterLMS then creates a separate group with its own seat allocation.
Yes, once the WooCommerce order reaches the enrollment status configured in your LifterLMS WooCommerce Integration settings.
For example, if the enrollment trigger is set to Completed, LifterLMS creates the group when the order reaches that status. The purchaser becomes the group’s primary administrator and can invite members to join.
Yes. Group administrators can access their group’s management area to view members, manage invitations, and check learner progress through the Reports tab.
They don’t need access to the WordPress administration dashboard to manage their group.