How Do I Add a New Instructor to a LifterLMS Course?
On any LifterLMS course, the original author is automatically assigned as the primary instructor. You can add additional instructors, change existing ones, or remove them as needed.
This guide explains how instructor assignment works in LifterLMS and how to manage instructors at the course level.
Each course has one primary instructor and may have additional instructors.
The primary instructor is the default course owner. Additional instructors are attached to the course but do not replace the primary instructor unless reordered.
Instructor assignment affects:
- The instructor name and label shown to students
- The order instructors appear on the course page
- Which instructor can or cannot be removed
Instructor assignment does not affect:
- WordPress user roles
- Site-wide permissions
- Access to other courses
You can assign multiple instructors to a single course and even define their roles with custom labels.
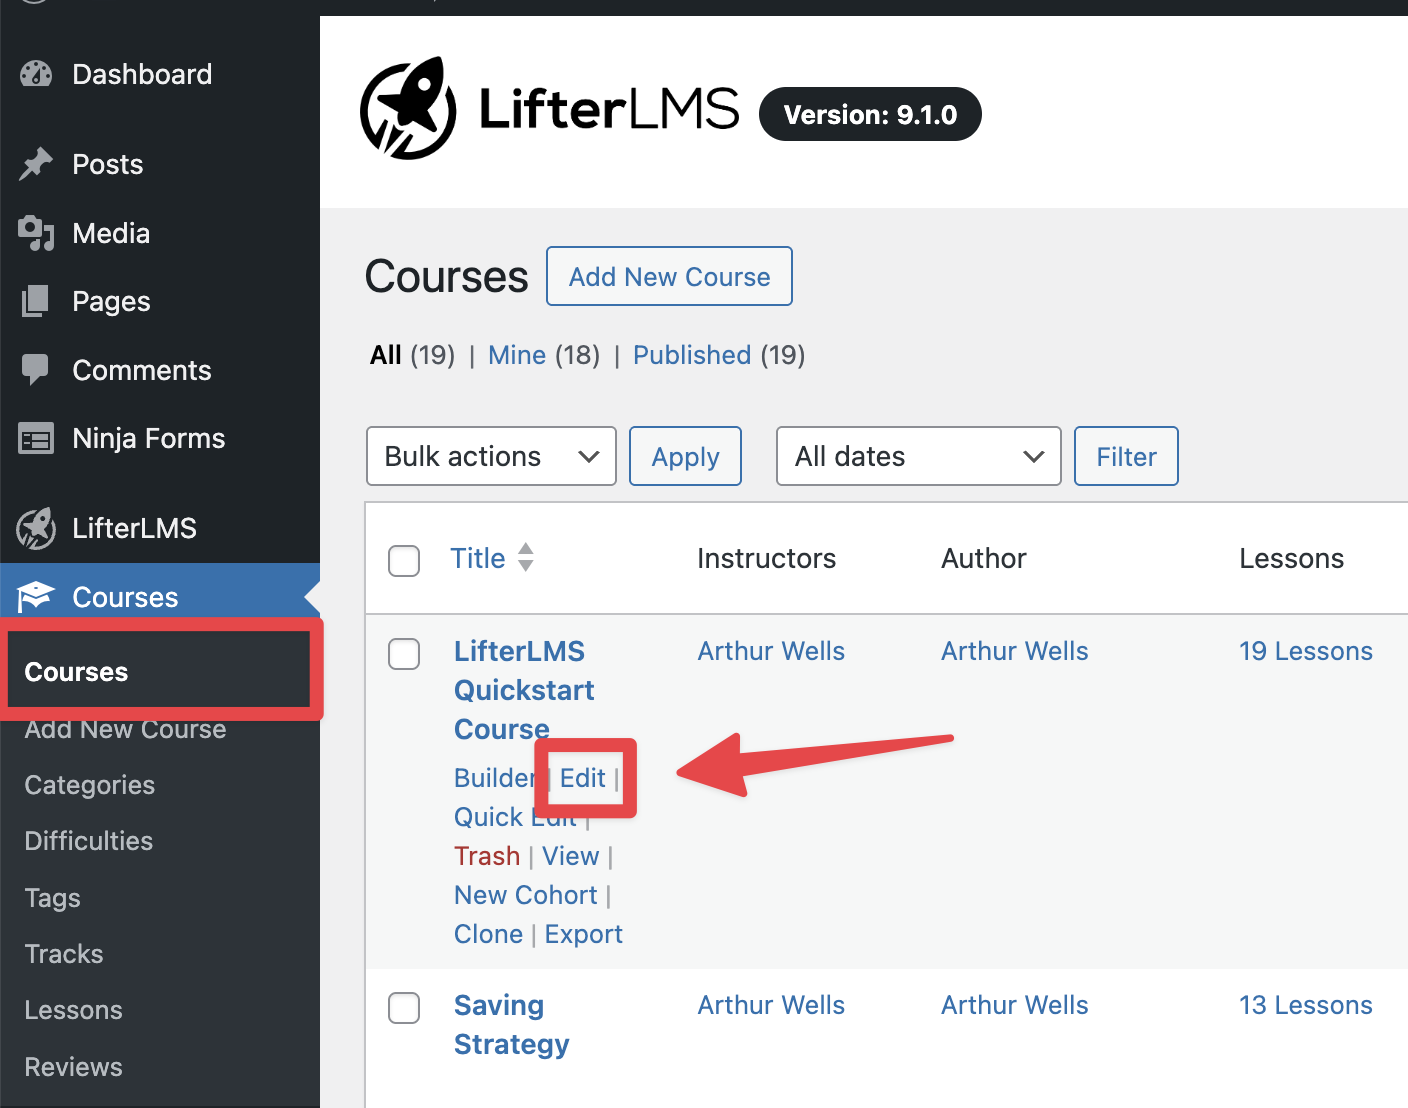
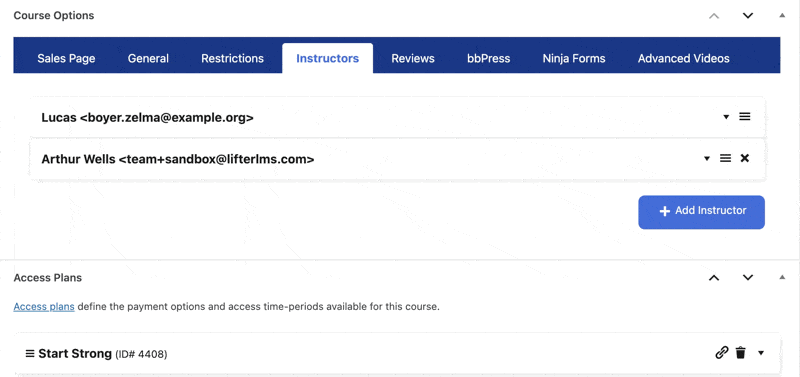
- In your WordPress dashboard, navigate to Courses, then open the course you wish to edit.
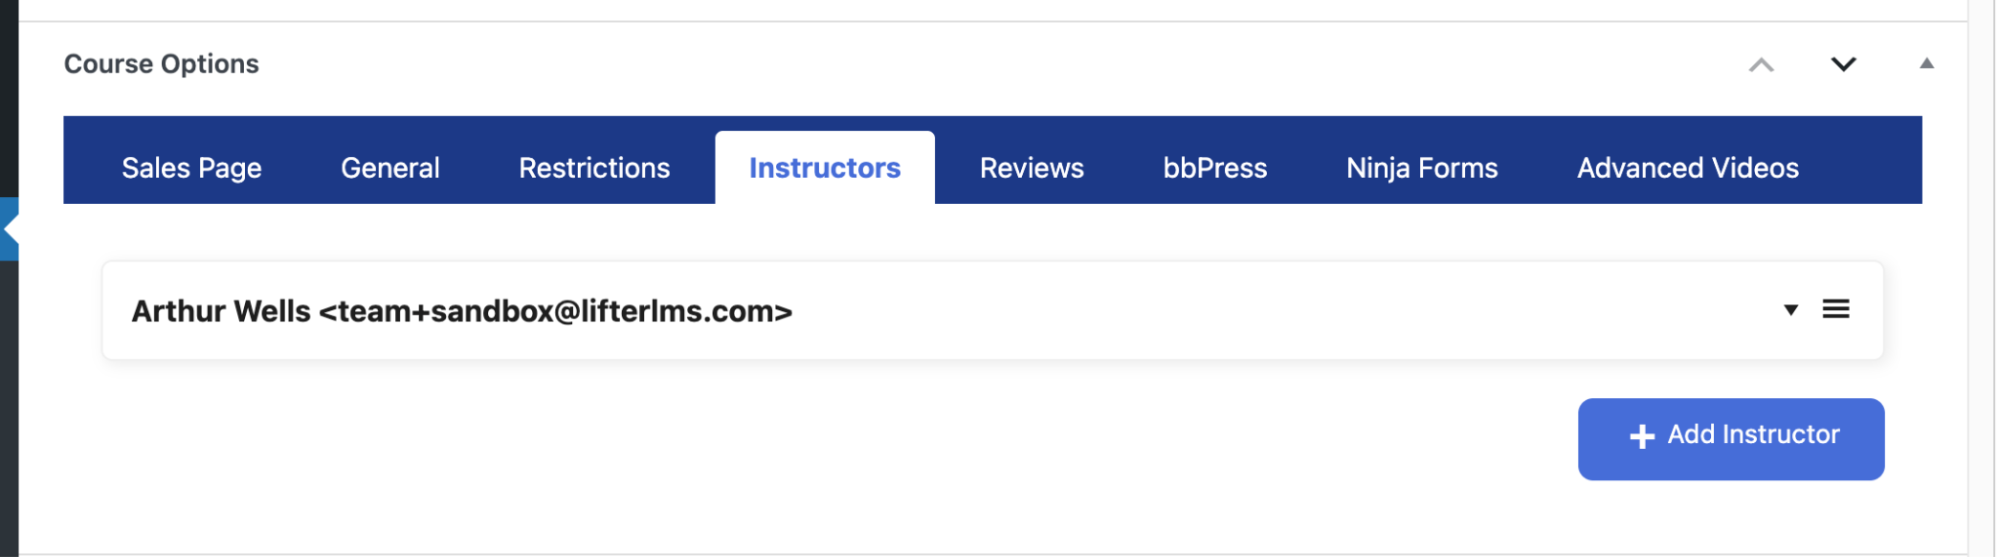
- Scroll down to the “Course Options” section below the main content editor.
- Click on the “Instructors” tab to open the instructor settings.
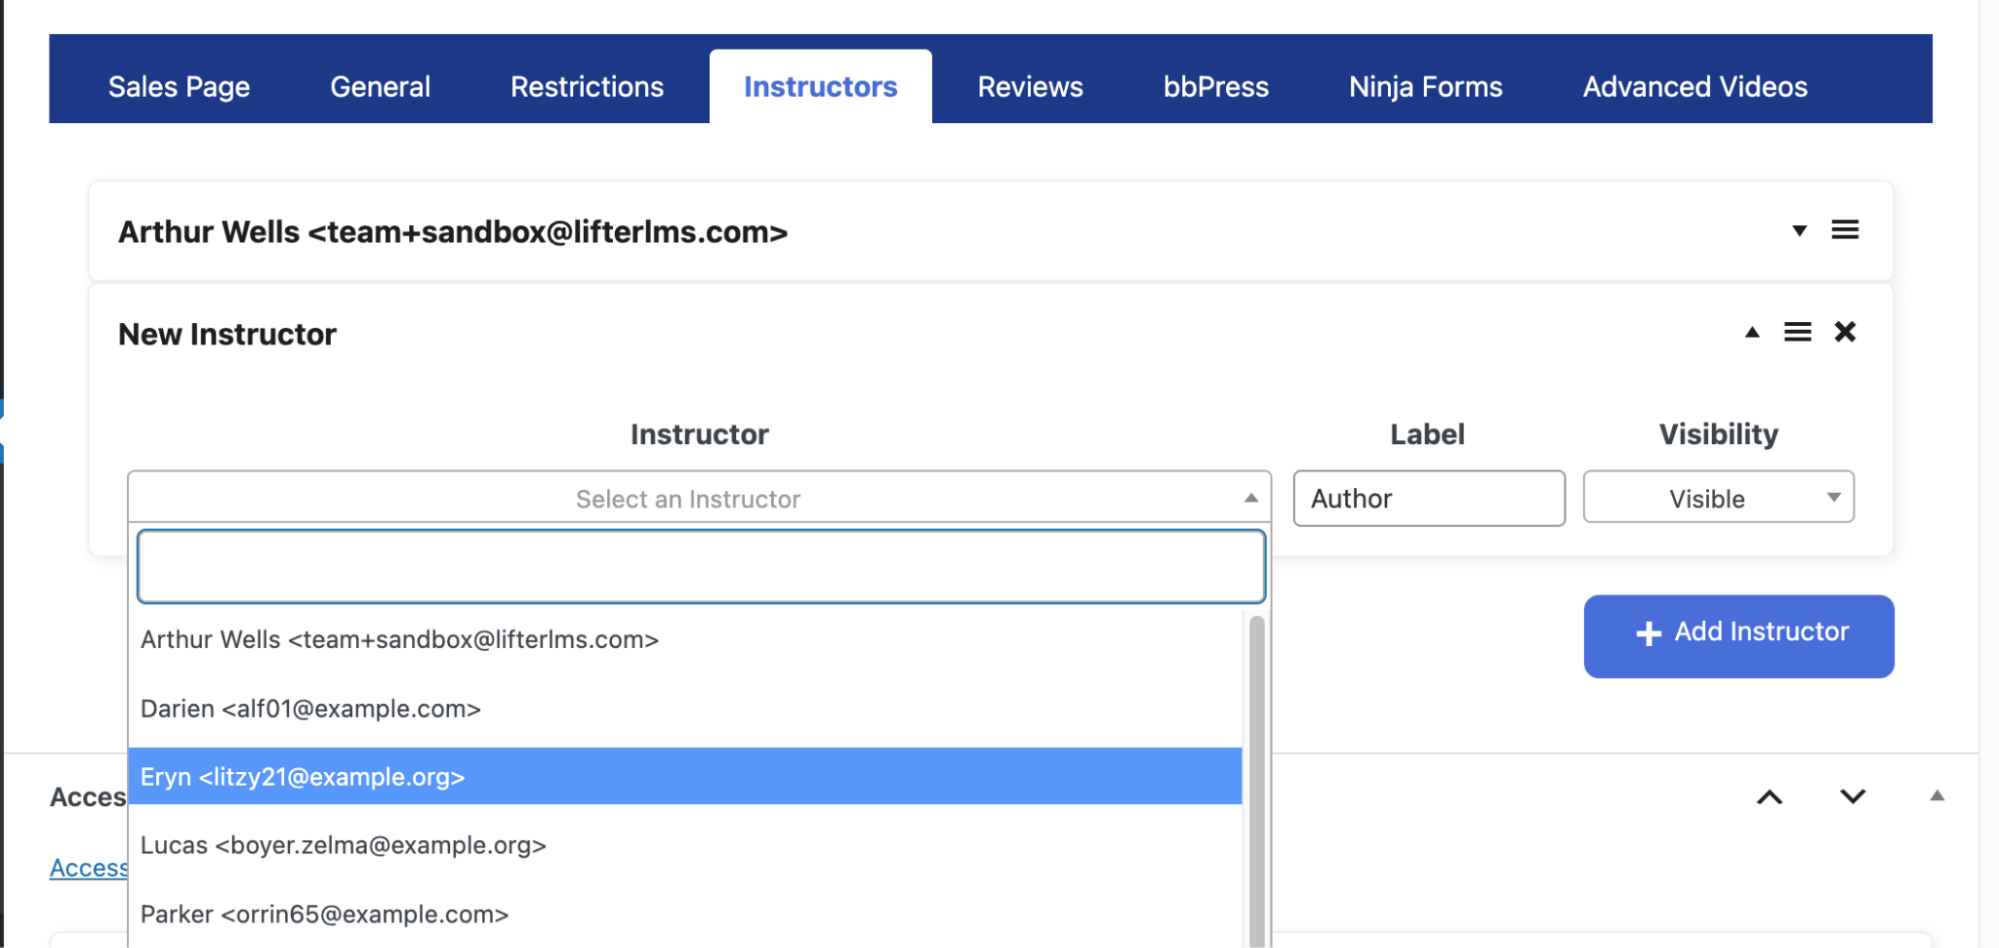
- Click the blue + Add Instructor button to create a new instructor slot.
- In the newly added row, click the Instructor dropdown menu. You can search by name or email to find and select the WordPress user you want to add.
Note: The user must already exist on your WordPress site and have a role that includes instructor permissions. By default, this includes the Instructor and Administrator roles.
If a user does not appear in the Instructor dropdown, check their WordPress role first.
- (Optional) In the Label field, you can assign a title to the instructor, such as “Author,” “Guest Instructor,” or “Assistant.” This label will be visible to students.
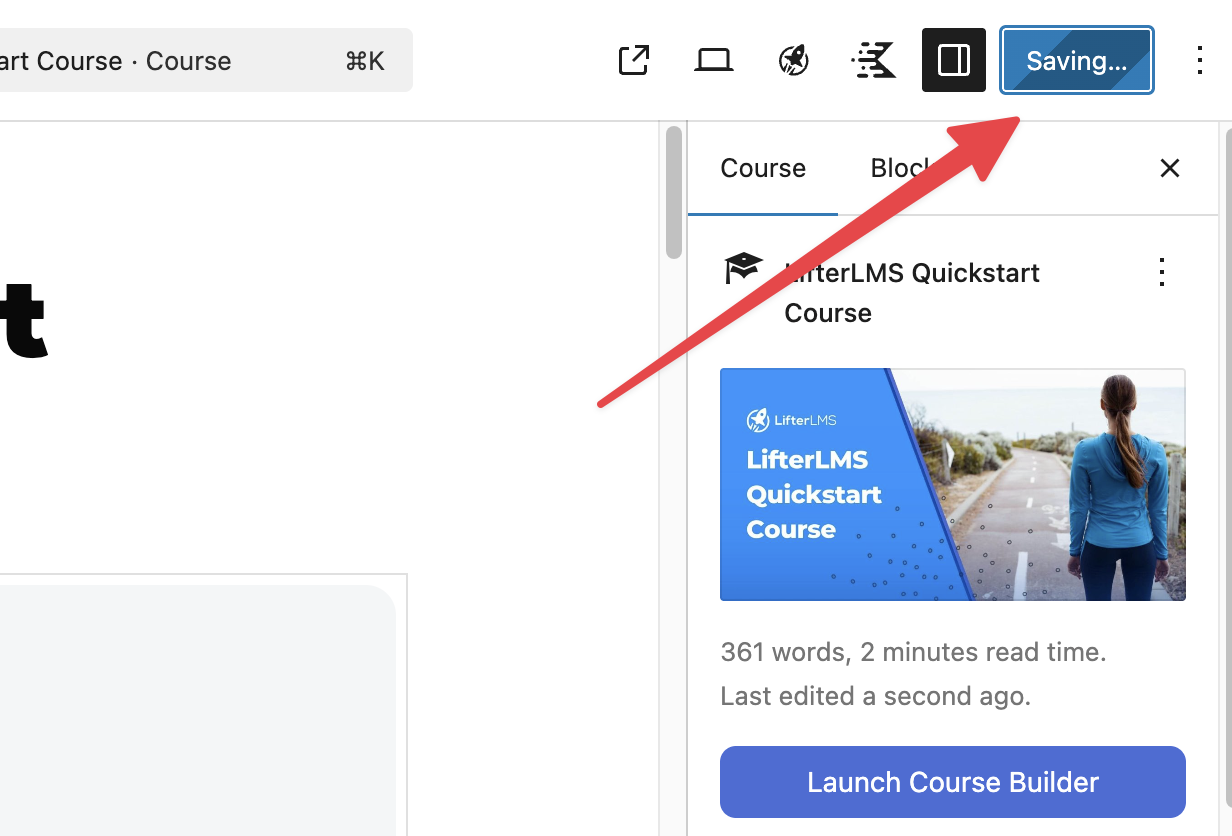
- Click the Save button in the top-right corner of the screen to save the changes.
When you add an instructor, they are assigned only to this course. This does not change their WordPress role or give them access to other courses.
If you need to replace an assigned instructor with a different user, you can do so directly without deleting the instructor slot.
- Navigate to the Instructors tab within the “Course Options” panel for the relevant course as described in the previous section.
- Locate the instructor you wish to replace and click the small arrow on the right to expand their settings.
- Click on the Instructor dropdown menu, which currently shows the assigned instructor’s name.

- Search for and select the new user you want to assign to this slot.
- Click the Save button in the top right of the course editor to save your changes.
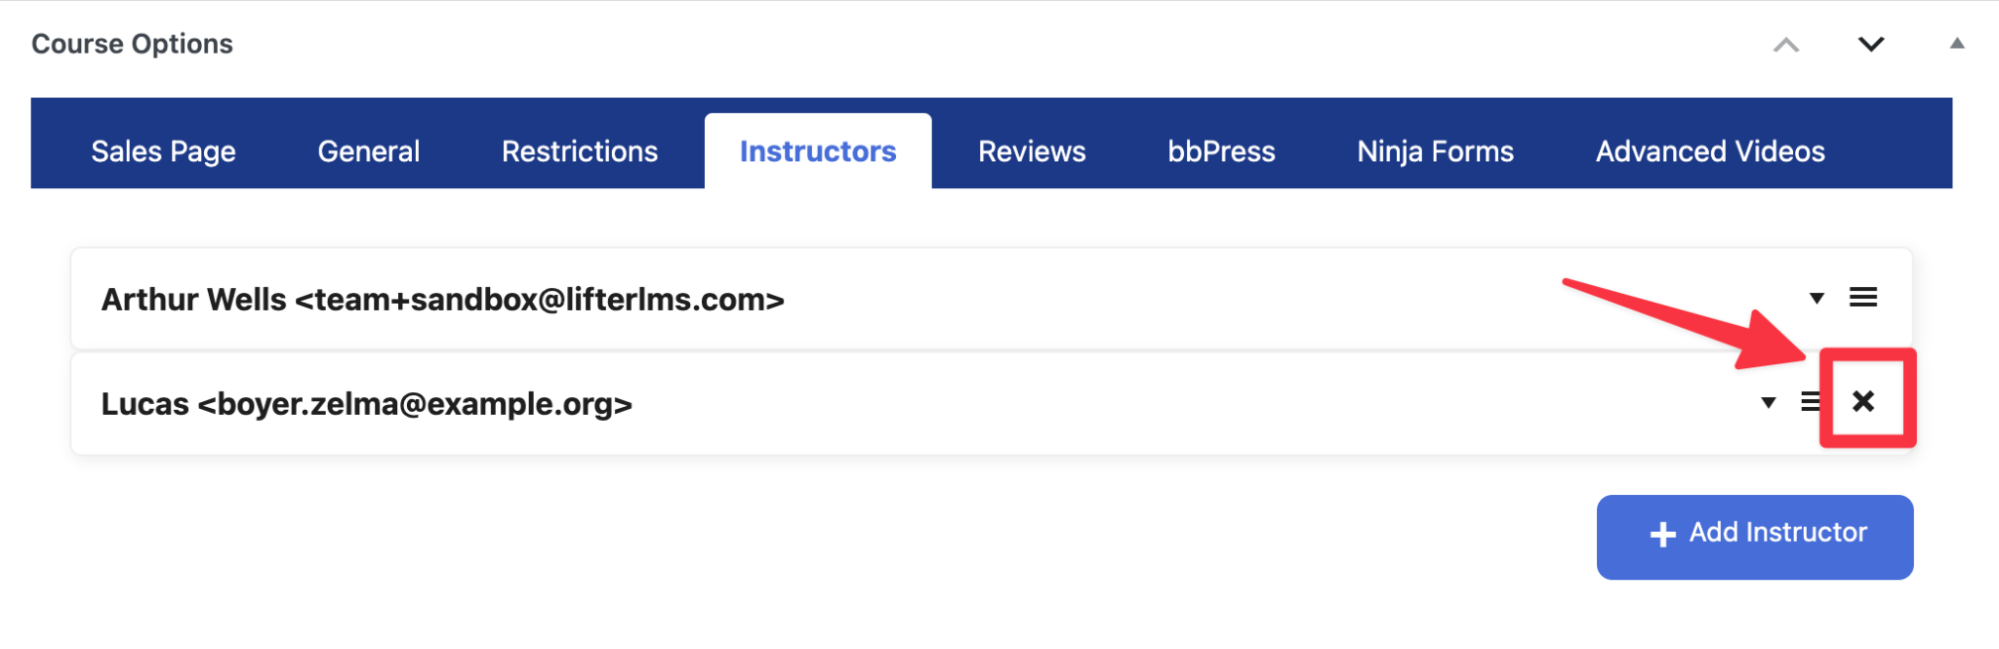
Removing an instructor is a simple action.
- Go to the Instructors tab in the “Course Options” section of the course editor as described above.
- Find the instructor you wish to remove from the course.
Primary Instructor Rules
- The top-listed instructor is the primary instructor
- The primary instructor cannot be removed
- To remove them, you must first drag another instructor above them
Once the primary instructor changes, the remove option will appear.
- Once you have rearranged the instructors, you will see an X icon on the far right of that instructor’s row. When you click the X icon, the row will be removed instantly.
- Be sure to click the Save button on the course page to finalize the removal.
For larger teams, managing instructors one course at a time may not be practical. In these cases, it can help to manage access using WordPress roles first, then assign instructors at the course level only where instructor visibility or attribution is required.


