Order Management
After an order has been placed by a student, administrators can manage the status of the order and the student’s enrollment status with regards to the related course or membership.
In the event of limited-access orders, the expiration date of the student’s enrollment can be modified.
For recurring orders, administrators can additionally manage the payment method and the date of the next payment due for the order.
Video Demo
- From the WordPress admin panel navigate to Orders
- Find the Order you’d like to modify
- Locate the “Order Information” area use the “Update Order Status” dropdown to select a new order status.
- Click “Update Order” to save
When updating the order status some actions will occur automatically as the result of the status change. For a list of what actions will occur, see the order status guide.
In most scenarios enrollment status is automatically managed by the order status but in some scenarios it may be necessary to manually modify a student’s enrollment status.
To change the student’s enrollment status:
- From the WordPress admin panel navigate to Orders
- Find the Order you’d like to modify
- Locate the “Student Enrollment” area and use the “Status” dropdown to choose the desired enrollment status.
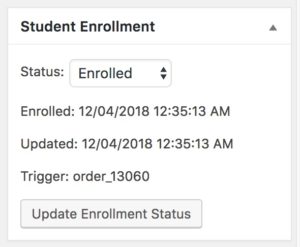
- Click “Update Enrollment Status” button to save.
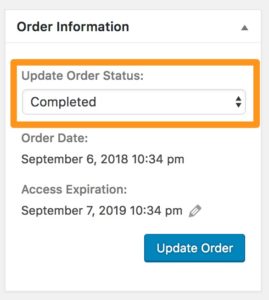
- From the WordPress admin panel navigate to Orders
- Find the Order you’d like to modify
- Locate the “Order Information” area and click the pencil icon next to “Access Expiration”

- Use the date pickers to select the date and time you’d like the student’s access to be expired.
- Click “Update Order” to save
To modify the payment method for a recurring order:
- From the WordPress admin panel navigate to Orders
- Find the Order you’d like to modify
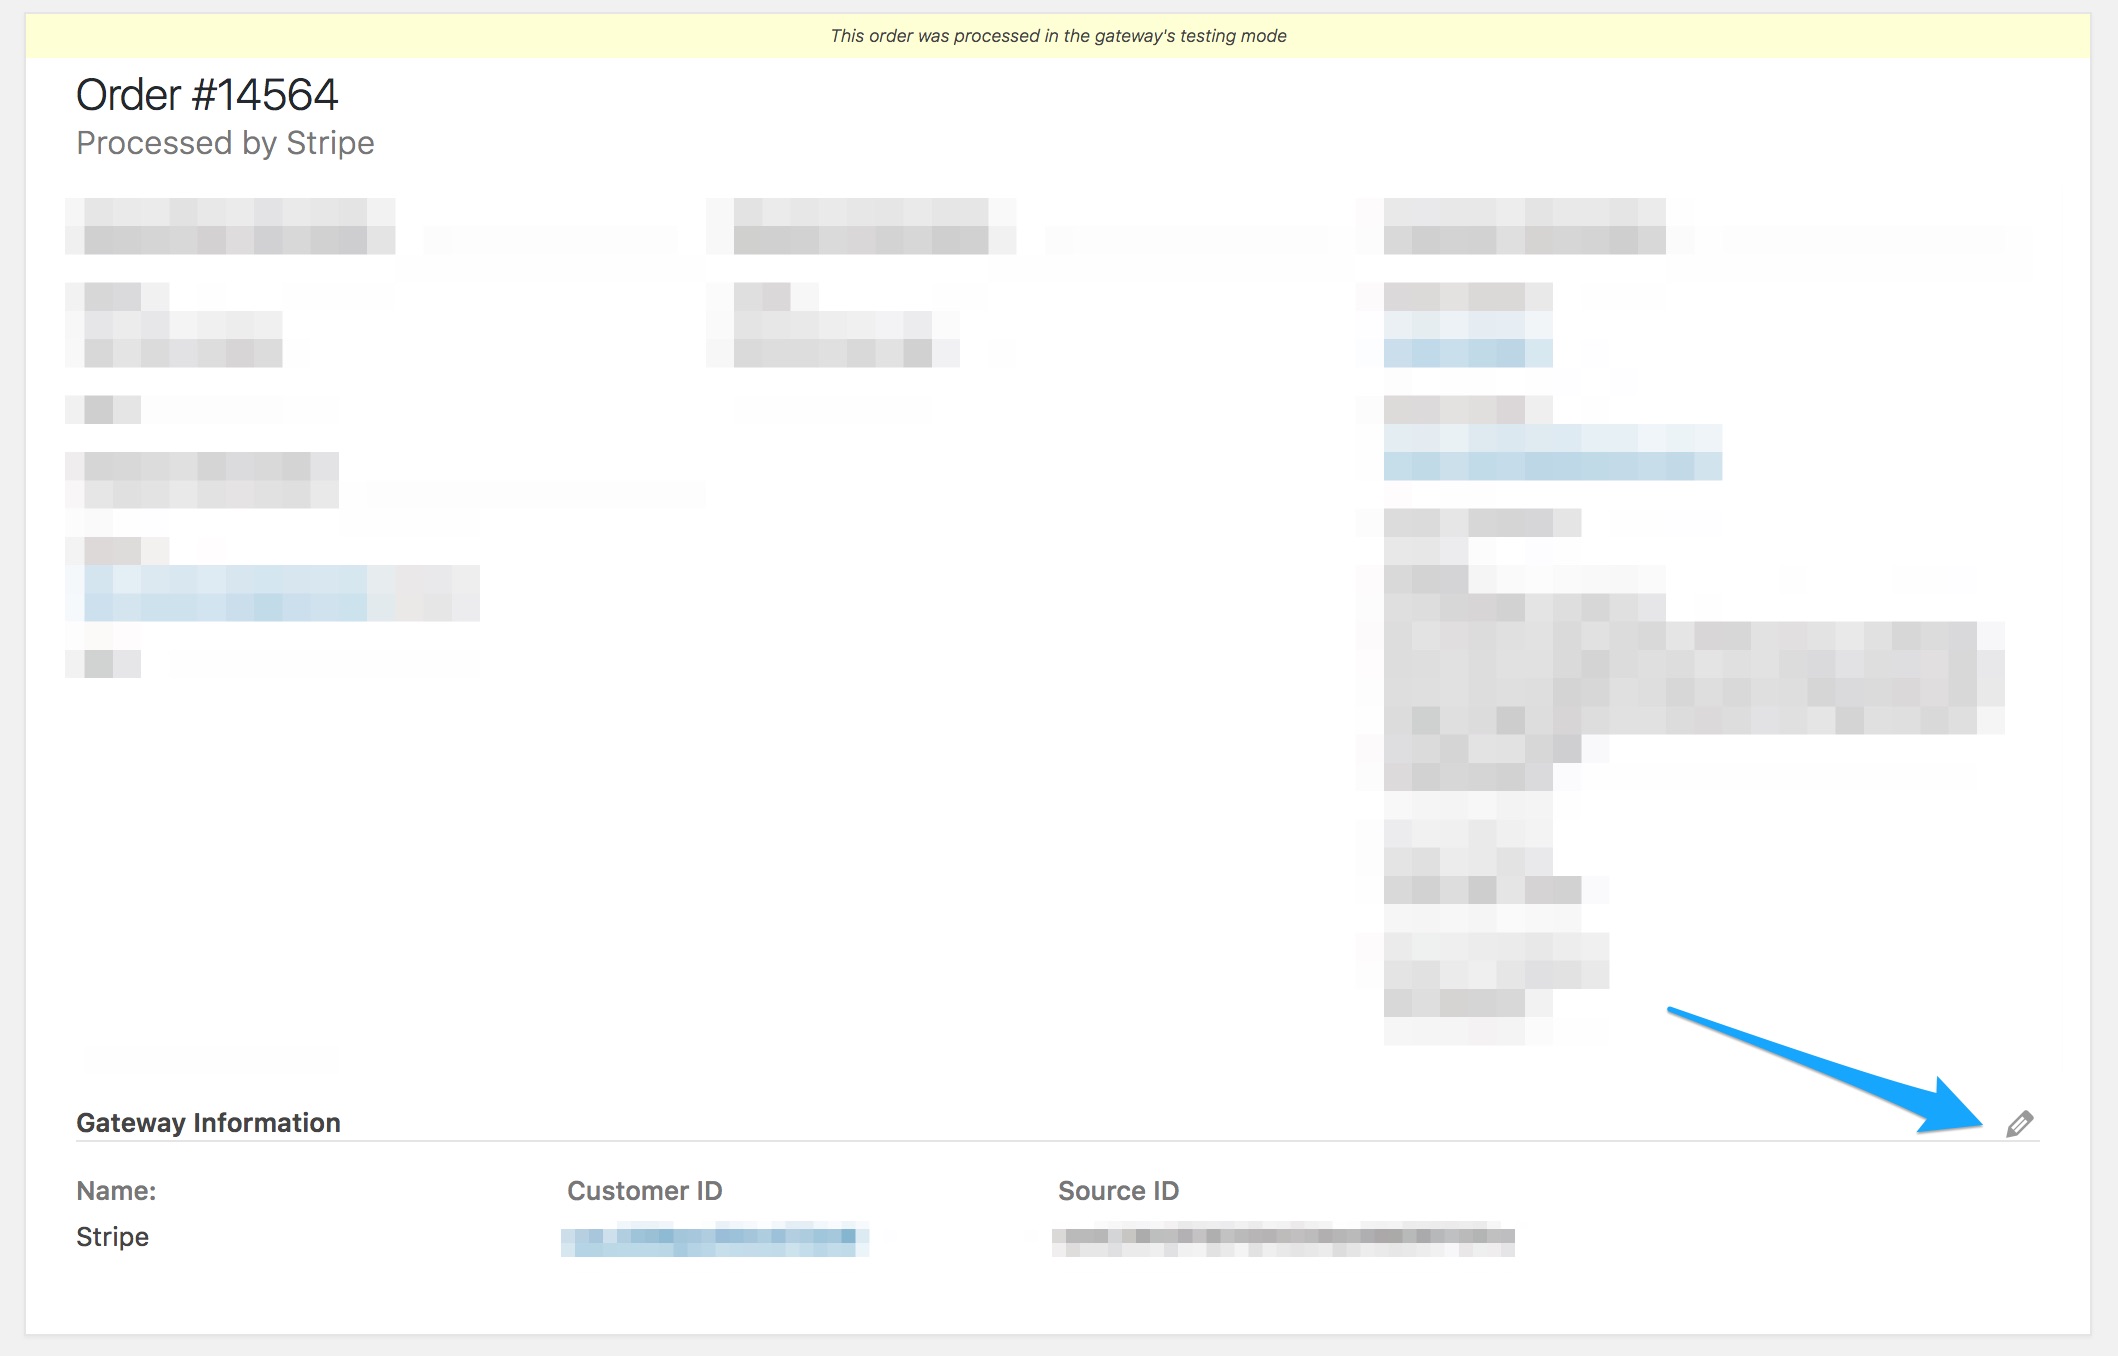
- Locate the “Gateway Information” area and click the pencil icon
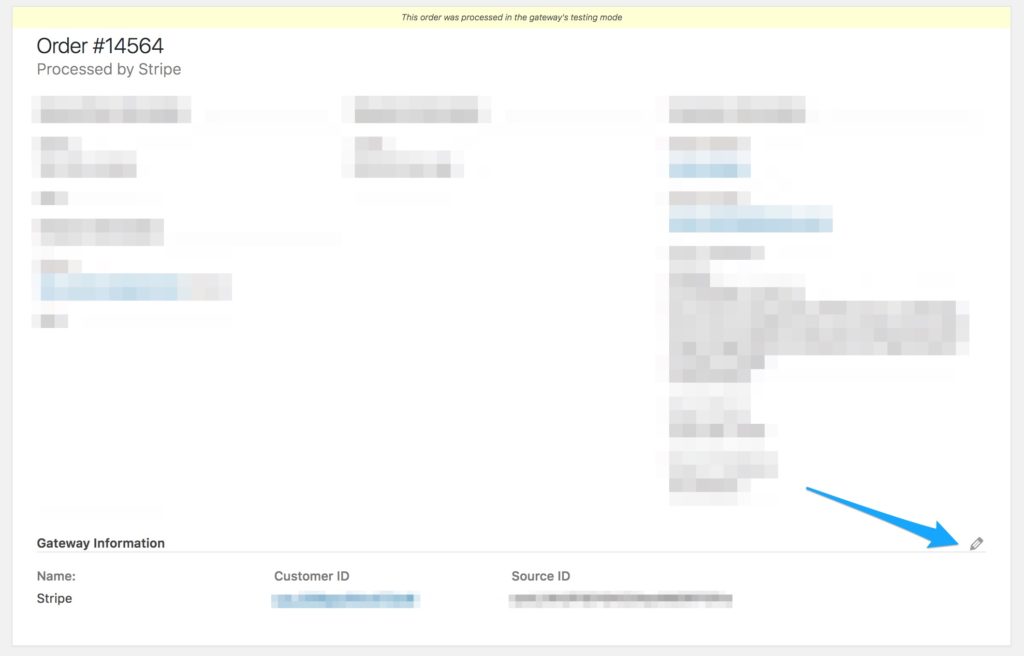
- Select the Gateway (leaving it the same if you’d like to update the method for the same gateway)
- Enter the information required by the gateway
- Stripe Customer and Source IDs can be gathered from your Stripe Dashboard.
- PayPal Subscriptions cannot be created manually
- Click “Update Order” to save the information
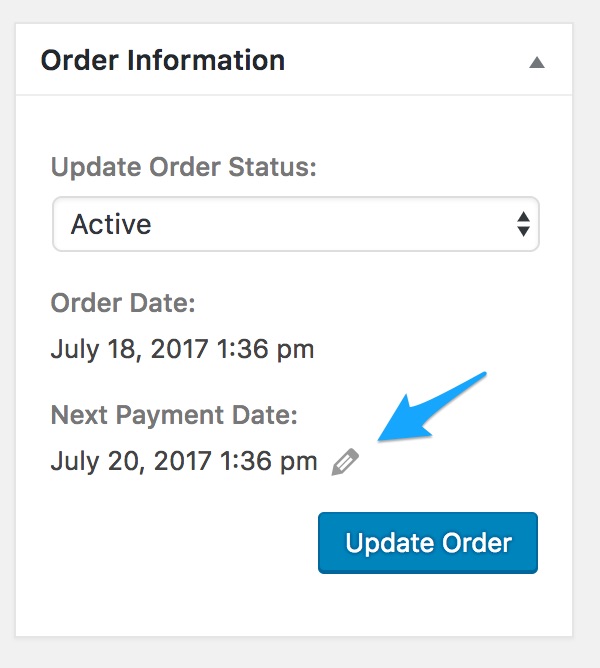
- From the WordPress admin panel navigate to Orders
- Find the Order you’d like to modify
- Locate the “Order Information” area and click the pencil icon next to “Next Payment Date”

- Use the date pickers to select a next payment date and optionally enter the time of day for the next payment.
- Click “Update Order” to save