LifterLMS Orders
Orders are the foundation of payments, enrollments, and access control in LifterLMS.
Every course or membership purchase creates an order. Orders act as the central record for:
- Payments and payment attempts
- Subscriptions and renewals
- Student enrollment and access
- Refunds and cancellations
- Order history and activity tracking
If you are familiar with older payment or enrollment workflows in LifterLMS, Orders now replace and unify those systems into a single, consistent order record.
This article explains the core features available in the LifterLMS Orders screen.
An order is created whenever a student purchases or enrolls in a course or membership.
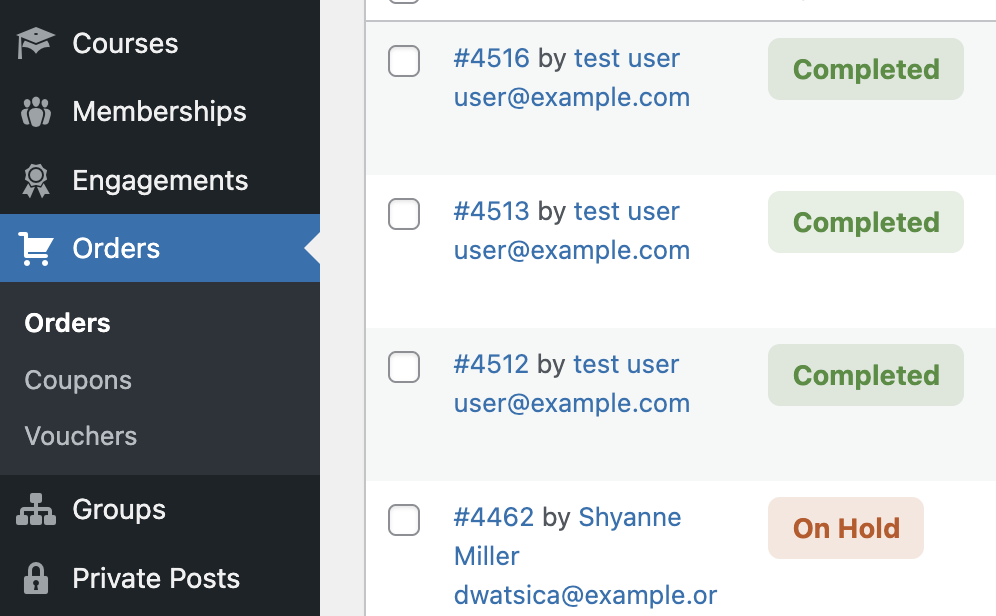
The main Orders screen provides a list of all orders. From here, you can:
- View all orders: See a comprehensive list of every transaction that has occurred on your site.
- Filter and search for orders: Use the search bar and filtering options to find specific orders by status, date, or customer.
- View order details: Click on an order to see more detailed information, including the customer’s details, the products purchased, and the order status.
Order statuses reflect both payment state and student access. Understanding how each status behaves helps you manage enrollments, troubleshoot payment issues, and handle cancellations or refunds correctly.
- Active: This status applies only to recurring orders and indicates that the subscription is currently active. The payment gateway will automatically schedule and process future recurring payments.
- Cancelled: This status means that an administrator has manually cancelled the order. When an order is cancelled, the student is automatically unenrolled from the associated course or membership.
- Completed: This status means that the transaction was processed successfully for one-time payments.
- Expired: This recurring-only status indicates that a subscription has reached the end of its term and is no longer active. For example, a 12-month access plan will become “Expired” after the final payment has been made.
- Failed: This status appears when a payment attempt for a single or recurring order has failed. The gateway was unable to process the transaction successfully.
- On Hold: This recurring-only status denotes that the subscription has encountered payment issues.
- Pending: An order is marked as “Pending” when it has been created, but no payment has been attempted yet. This is a common starting status for orders before the payment is processed.
- Pending Cancellation: This recurring-only status indicates that a student has cancelled their subscription from their account dashboard. The student will retain access until the end of the current billing period, at which point the status will change to “Cancelled.”
- Refunded: This status means that a full or partial refund has been processed for a transaction associated with the order.
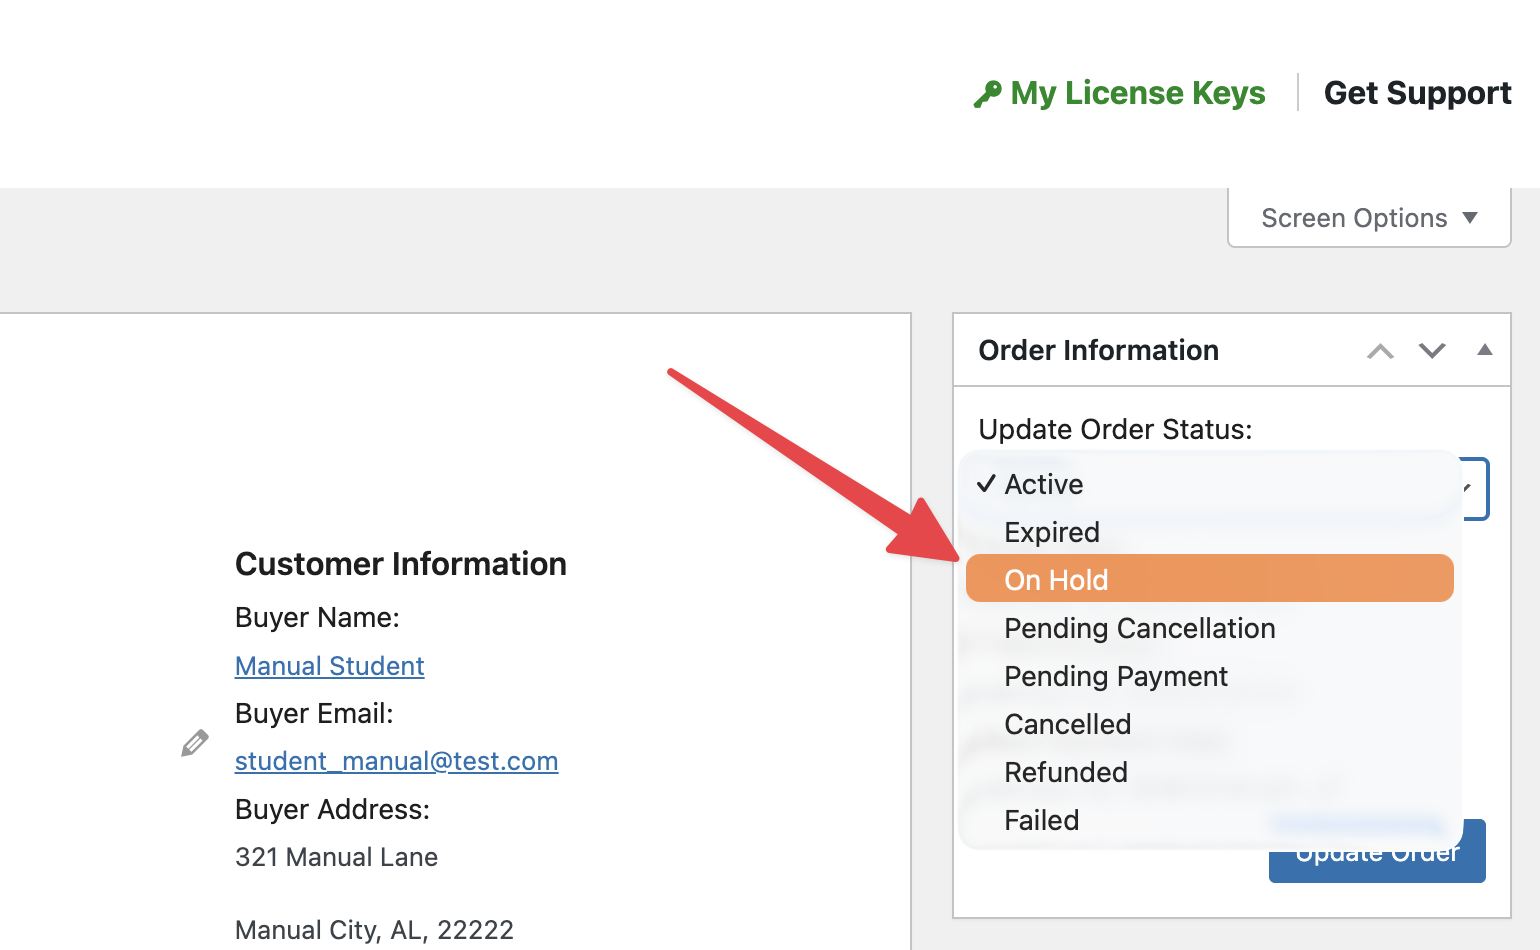
You can pause a student’s recurring payments by manually changing their order status.
Note: When you change an order status from “Active” to “On-Hold“, LifterLMS will temporarily prevent any new recurring payments from being processed for that subscription.
This is a helpful feature if a student requests a temporary billing pause or needs a short break from their course. When the student is ready to resume their subscription, you can manually change the status back to “Active” so the regular billing cycle can continue.
To change the status of an order and pause recurring payments, follow these steps:
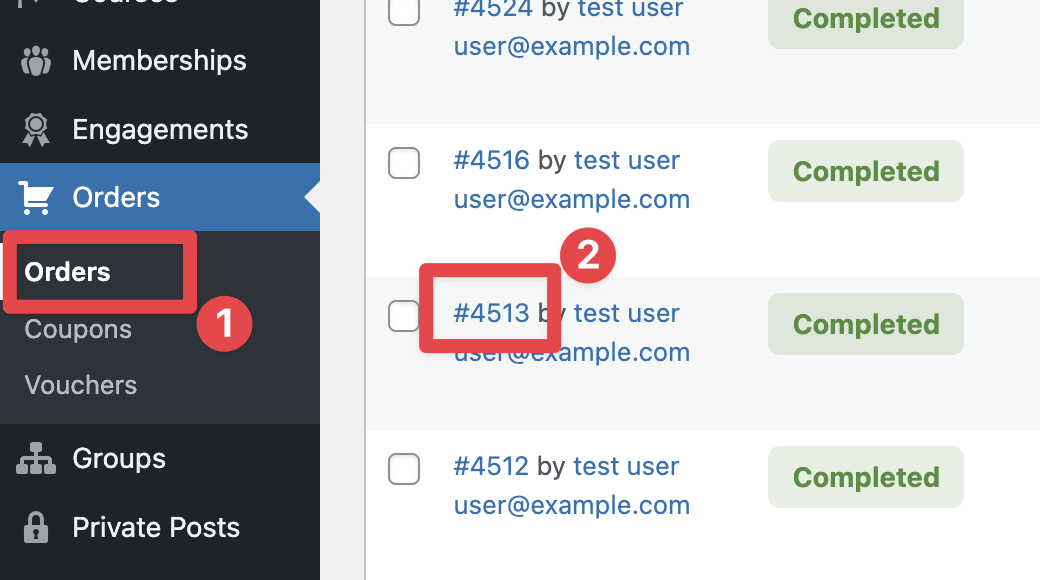
- Navigate to WordPress Dashboard > LifterLMS > Orders.
- Click on the order number that you want to manage.
- Find the “Status” dropdown menu on the order screen.
- Select “On-Hold” from the dropdown options.
- Click the Save Order button to apply the new status.
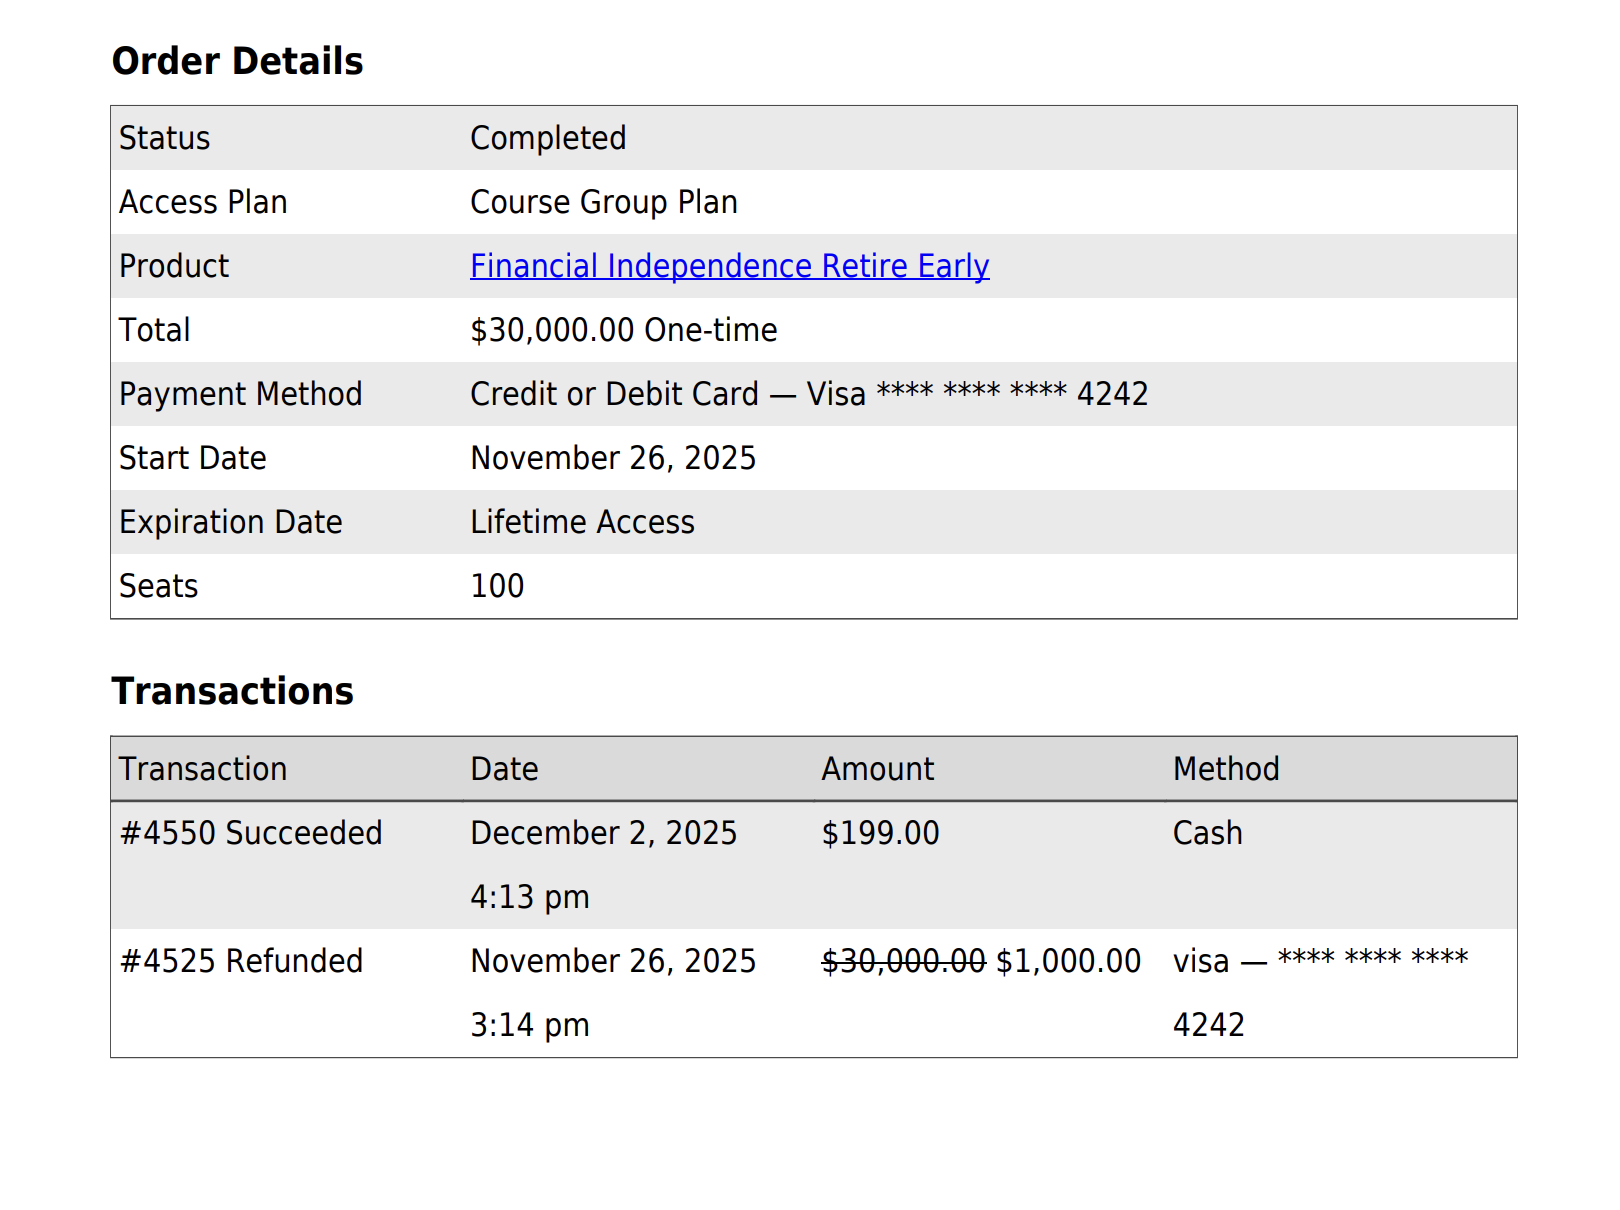
Every payment attempt is recorded as a transaction. Transactions give you a complete payment history for an order, including failed charges, retries, and refunds, making them essential for support and accounting.
For a recurring order, you will see multiple transactions over the lifespan of the order. For a single payment order, you will only see one transaction in most cases.
![]()
After reviewing an order’s transactions, you may need to save the information for bookkeeping, tax records, or an accountant. LifterLMS gives you a few ways to collect order and transaction records, depending on whether you need a single order record, summary totals, or a spreadsheet-style export.
Saving Individual Orders as PDFs
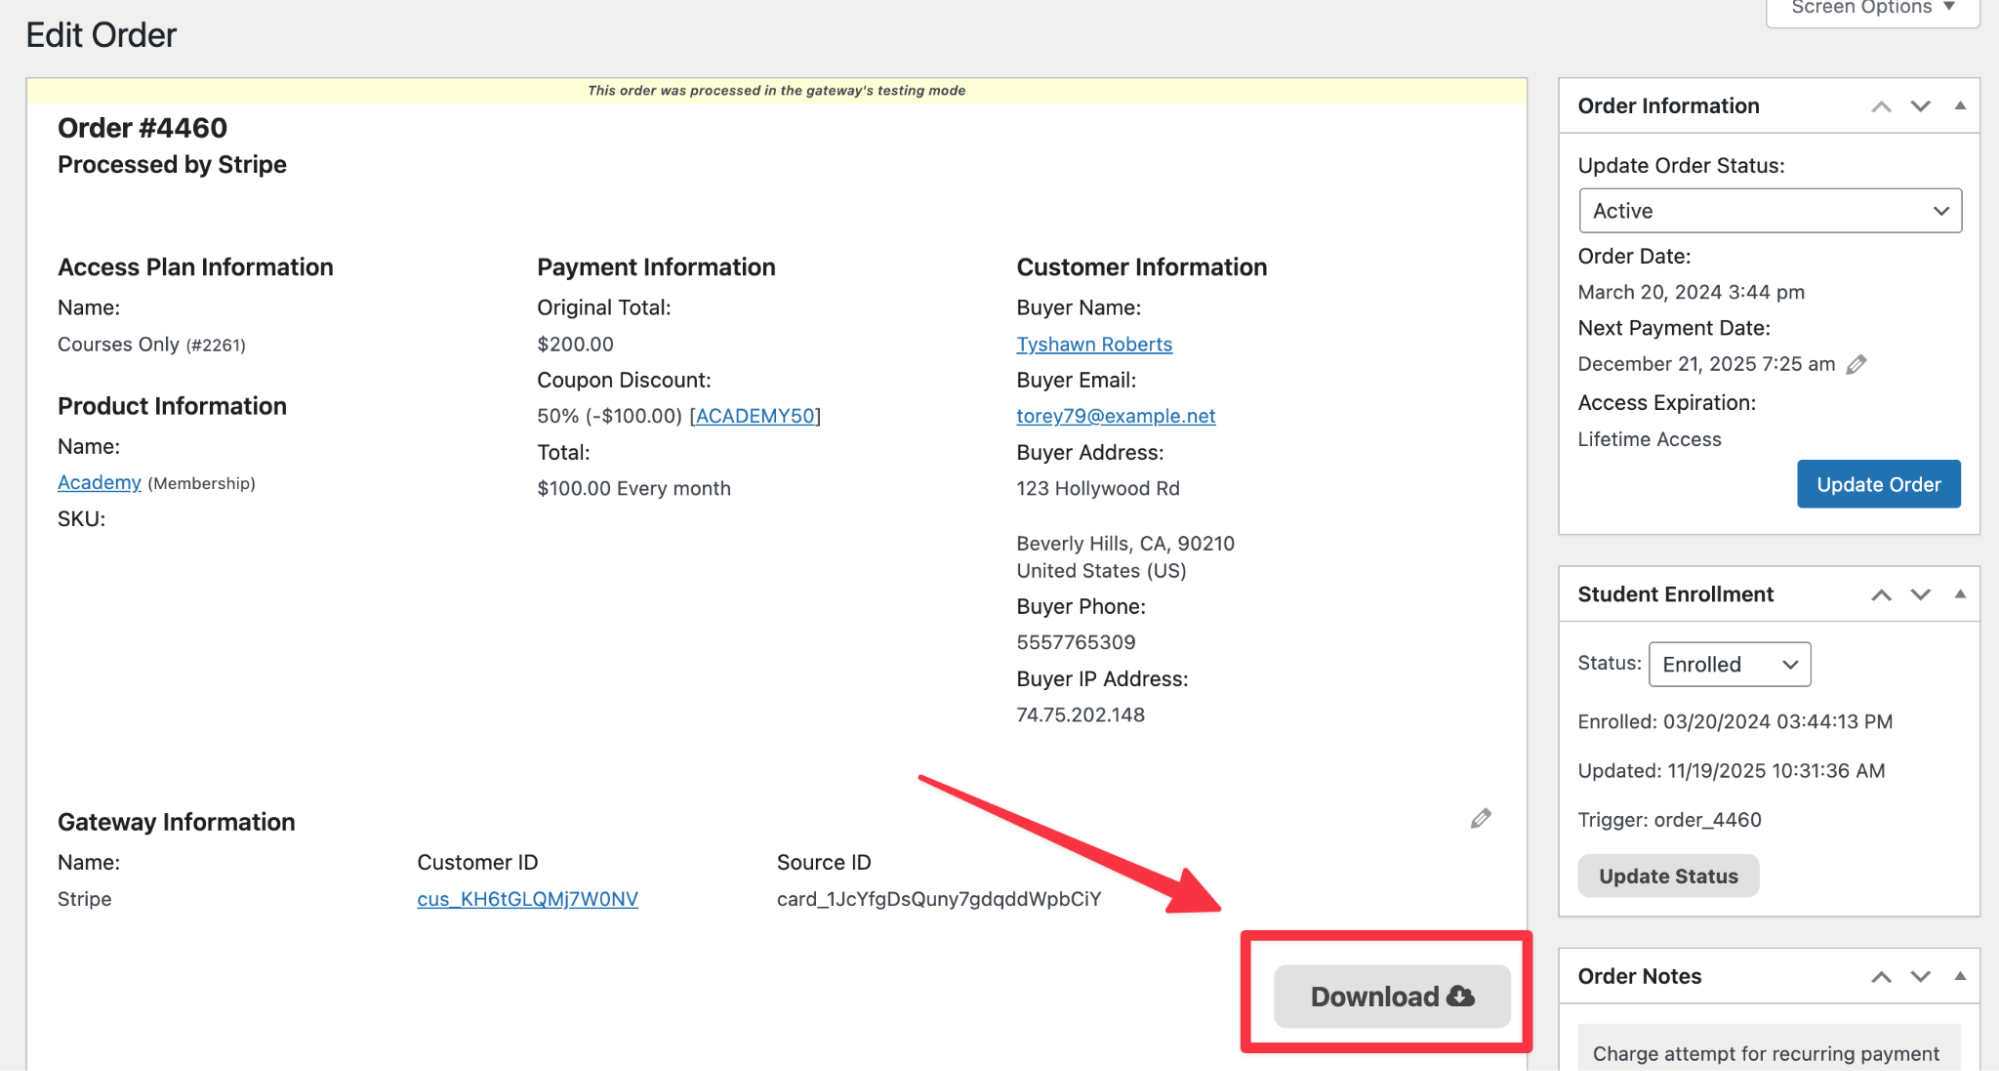
Each order includes key details such as customer information, payment information, refunds, access plan, product, and transaction history.
You can save an individual order as a PDF. This is useful when you need to provide an official order record or invoice for a specific customer.
- Go to LifterLMS > Add-ons & More.
- On this screen, make sure that the LifterLMS PDFs add-on has been purchased, installed, and activated for your LifterLMS site.
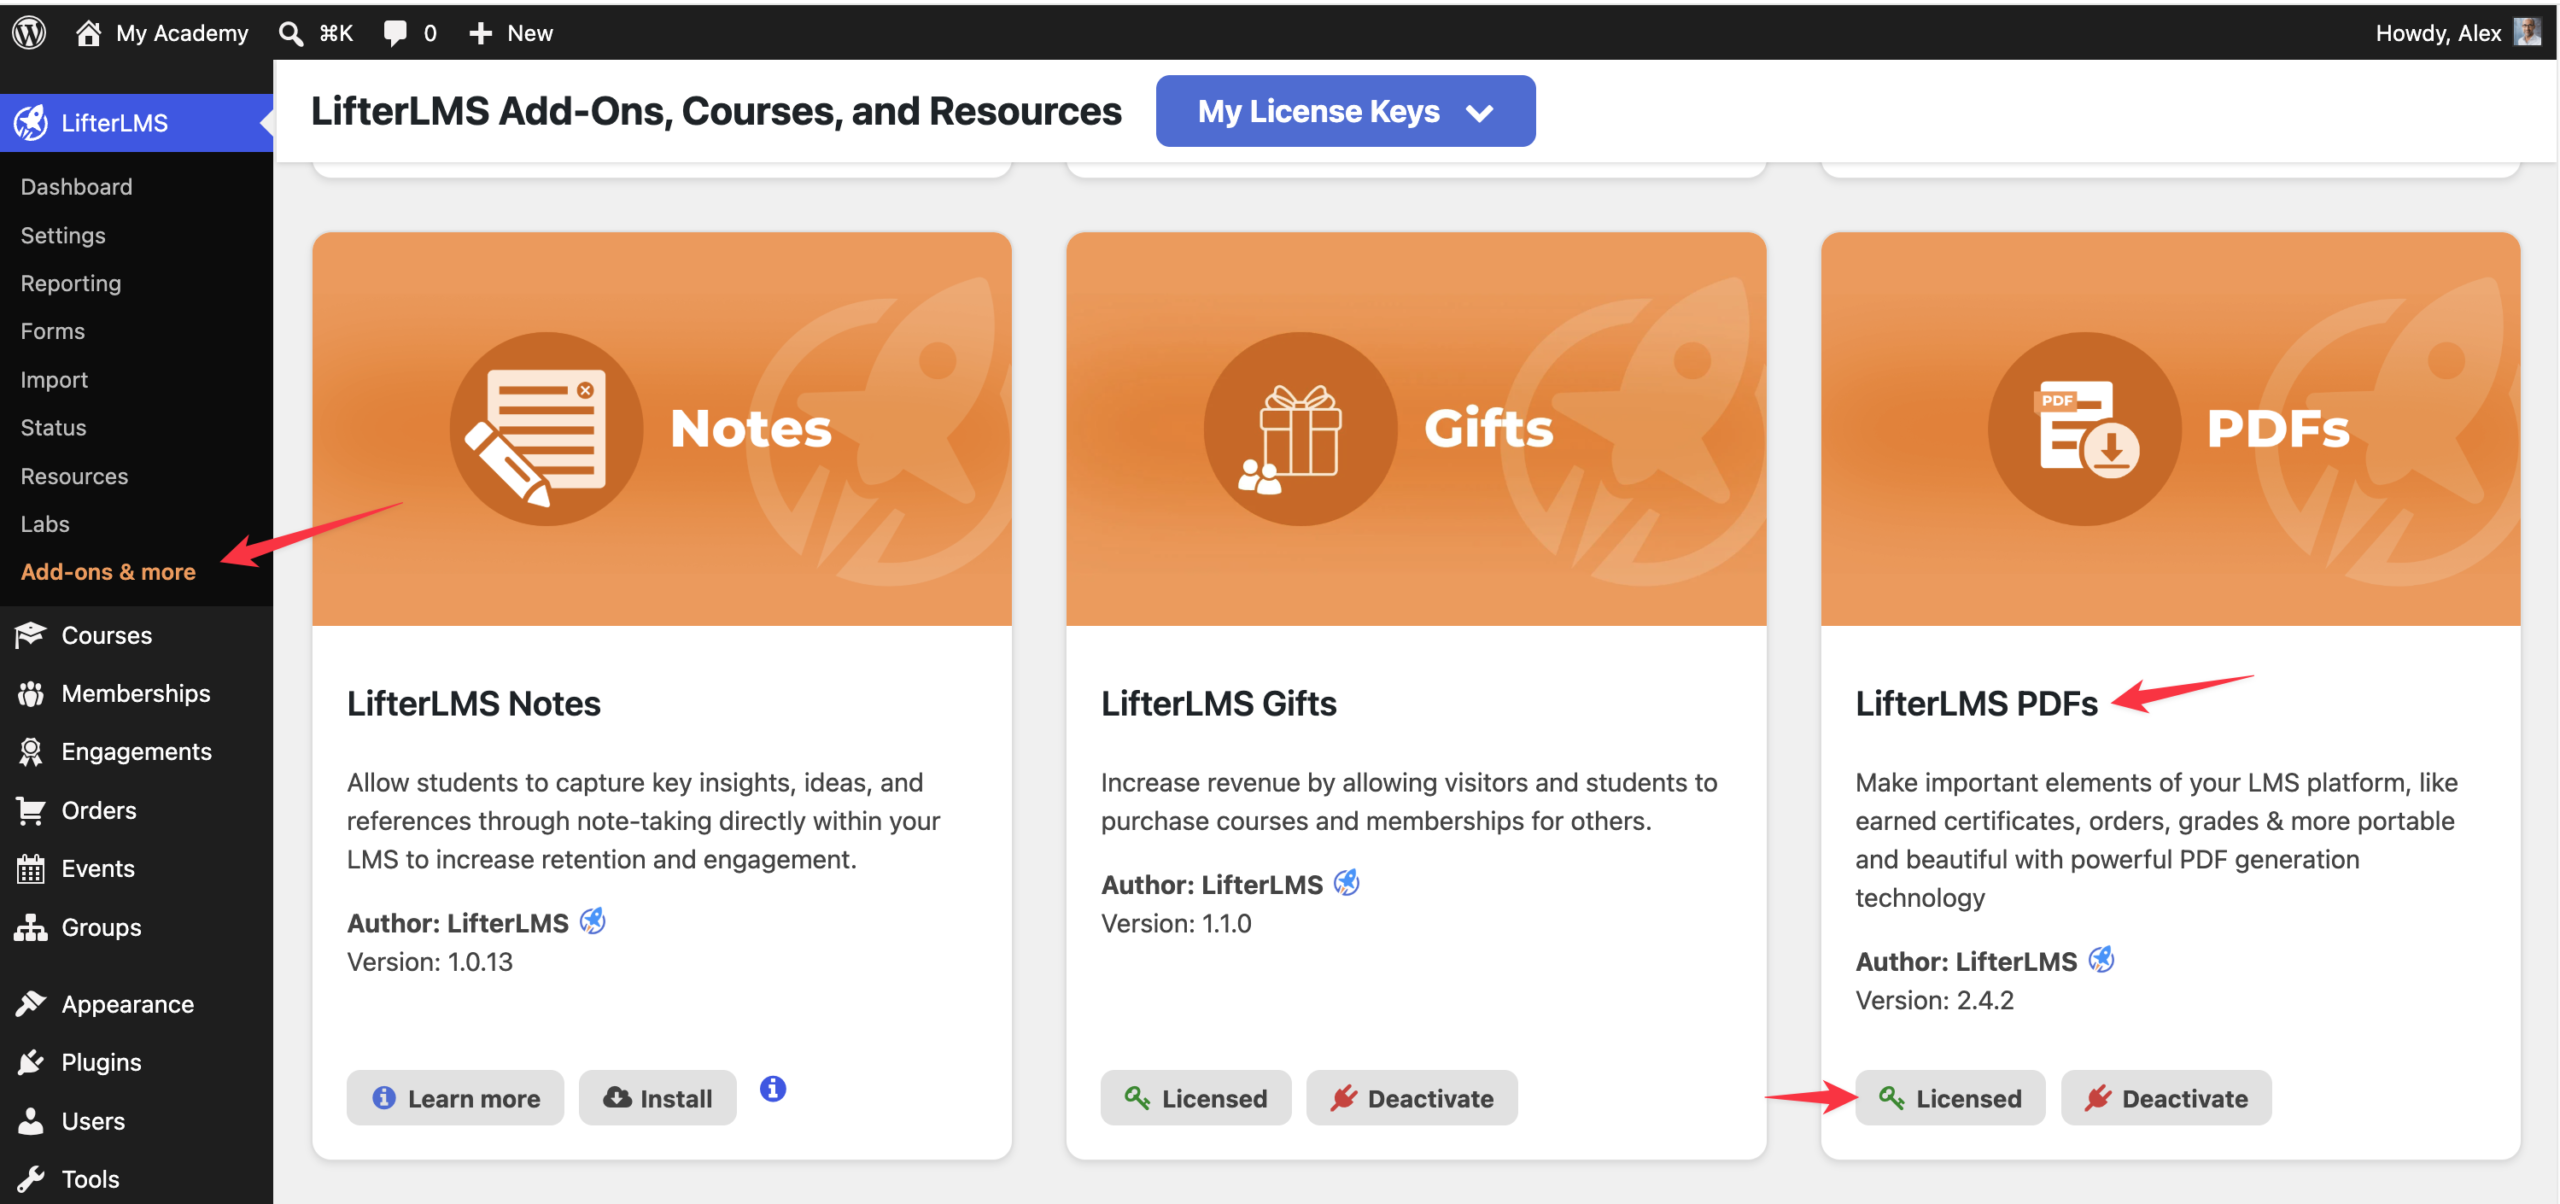
- After that, navigate to LifterLMS > Orders.
- Click the order ID you want to save.
- Click the Download button on the order page.
- Save the PDF to your computer.
This is the most accurate way to provide official order records or individual invoices.
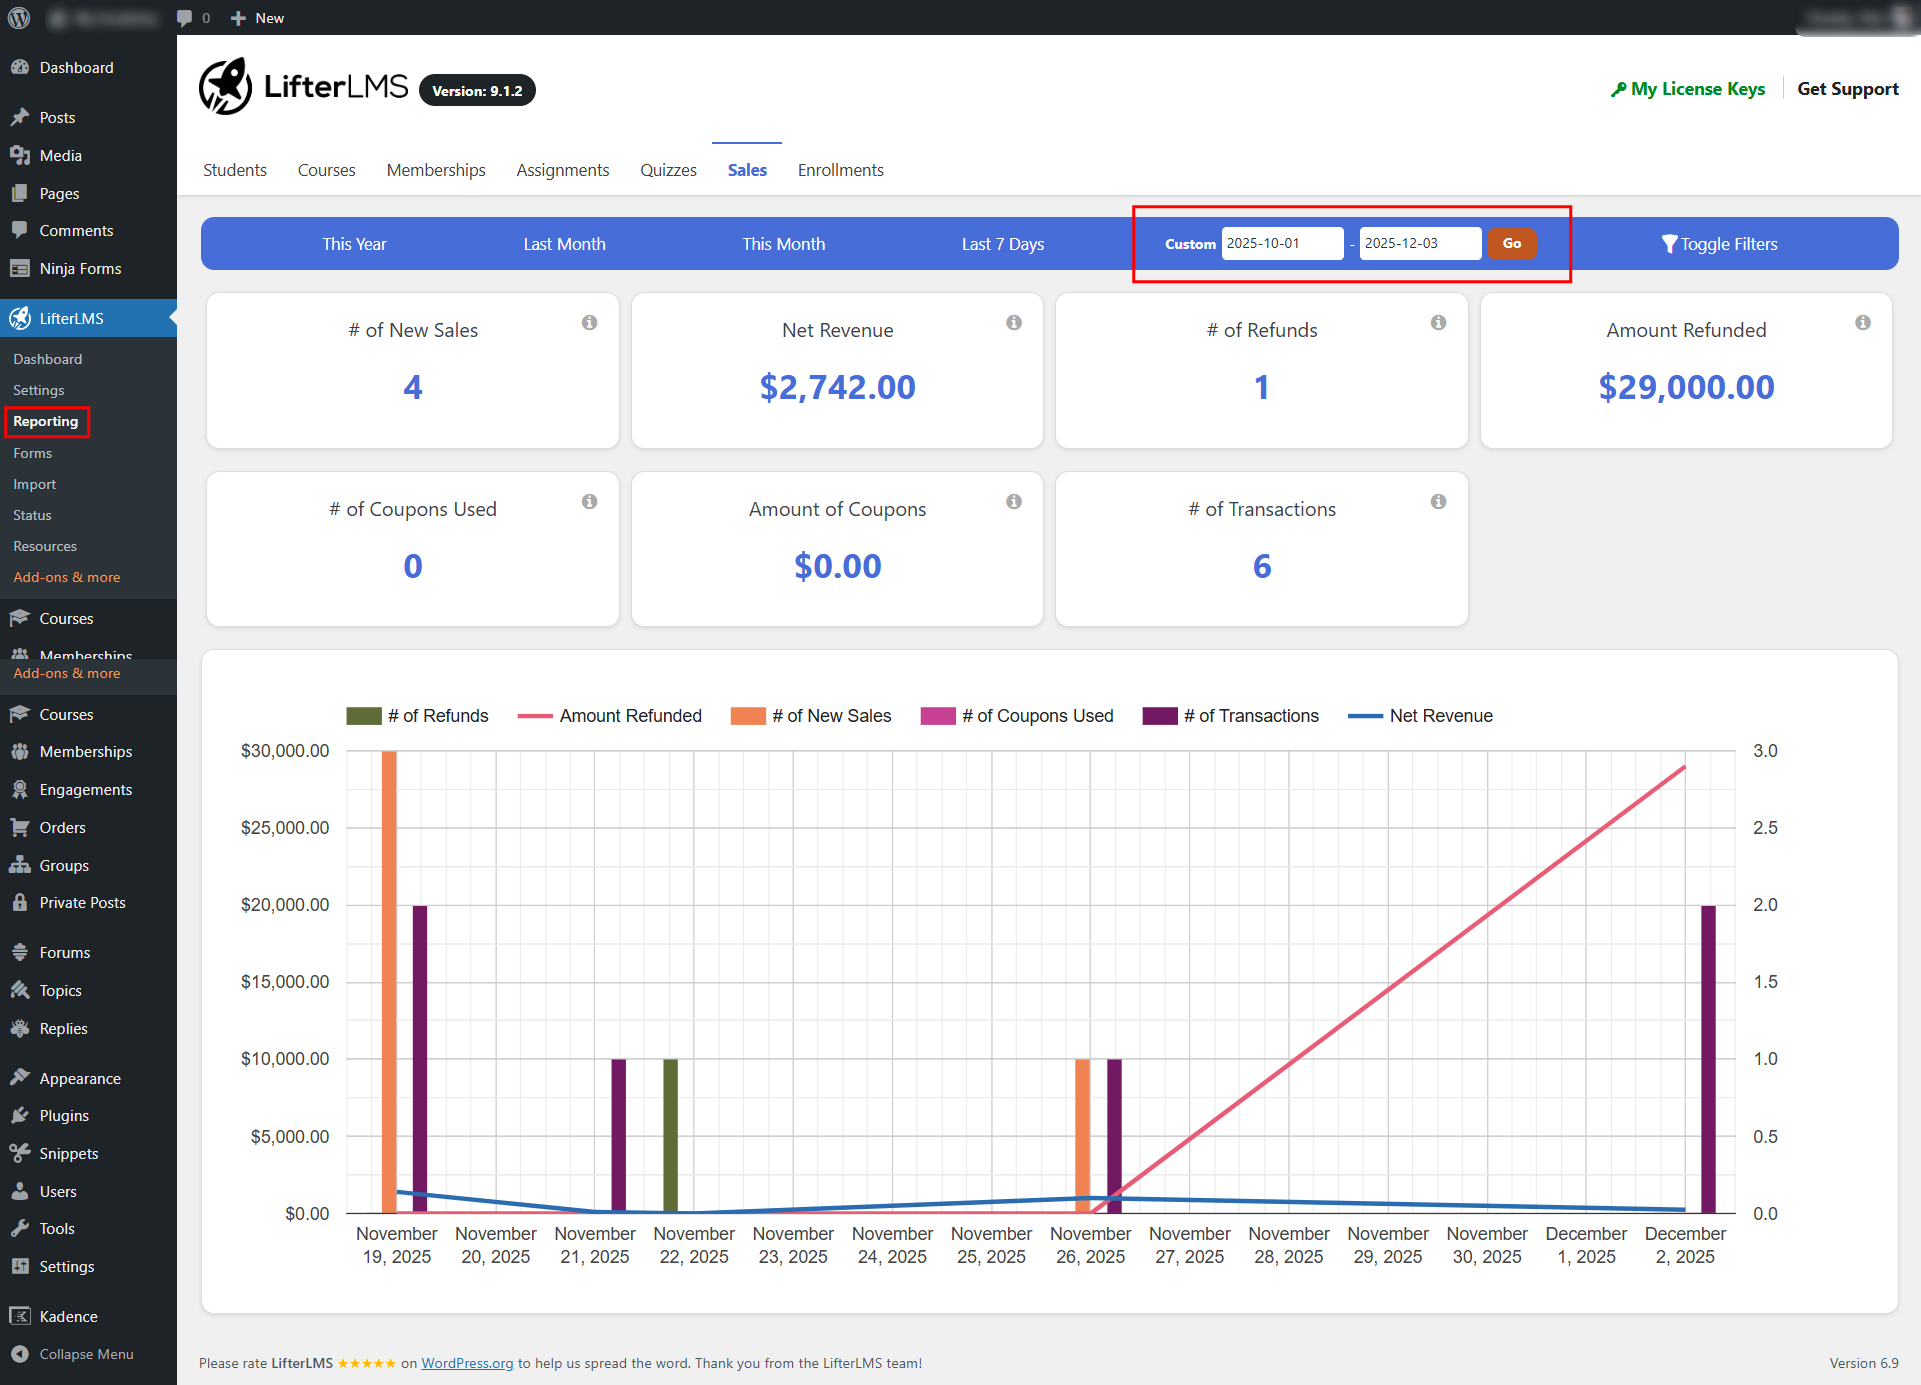
Using the Sales Reporting Dashboard
The Reporting area gives you a complete view of your sales activity across any date range. This includes:
- Number of new sales
- Net revenue
- Refunds
- Coupons
- Transactions
- A visual timeline of activity
You can adjust the date range using presets such as This Month, Last Month, Last 7 Days, or a custom range.
- Go to LifterLMS > Reporting.
- Open the “Sales” tab.
- Choose the date range you want to review.
- Use the displayed figures and chart to record totals for your accounting period.
This view is useful when you only need summary totals rather than line-by-line order exports.
Option 1 – Copy the Reporting Data Into a Spreadsheet
This works well when you only need totals.
- Open LifterLMS > Reporting > Sales.
- Select your date range.
- Copy the values shown in each sales metric.
- Paste them into a spreadsheet for your accountant.
This provides a concise summary of revenue, refunds, new sales, and transactions.
Option 2 – Export Orders and Transactions Using a WordPress Export Plugin
LifterLMS stores order and payment data across two related post types:
- Orders store the original order record, including the student, product, access plan, order status, and initial payment details.
- Transactions store the individual payment events connected to an order, including recurring payments, refunds, and failed payment attempts.
Because this data is split between Orders and Transactions, a bulk export usually needs to include both post types. Exporting only Orders may not give your accountant the full payment history for recurring subscriptions.
LifterLMS doesn’t include a built-in CSV export for this data. If you need a spreadsheet export, you may be able to use a WordPress export plugin that supports custom post types and custom fields.
For example, a plugin such as WP All Export may be able to export LifterLMS Orders and Transactions, but the exact fields and relationships need to be selected carefully.
We recommend using this option only if you are comfortable working with WordPress export tools, custom post types, and order metadata.
You can process refunds directly from the order details screen. LifterLMS supports both full and partial refunds. When a refund is processed, you have two options:
- Process automatically via the payment gateway: The funds will be automatically returned to the customer.
- Process a manual refund: You will need to return the funds to the customer manually.
By default, processing a refund automatically unenrolls the student from the associated course or membership. If you need to issue a refund without removing access, you must re-enroll the student after the refund is completed.
Order notes provide a history of activity related to an order. This includes:
- Transaction details
- Enrollment changes
- Order status changes
- Refunds
You can view and manage a student’s enrollment status directly from the order screen. Enrollment changes are handled automatically based on payment and order status. Manual adjustments are useful when resolving payment disputes, correcting enrollment errors, or granting access as an exception.
Student access is controlled by the access plan linked to the order. Time-limited plans expire automatically, while lifetime plans remain active unless a recurring payment fails or the order is cancelled.
To delete student enrollment for expired students, refer to the ‘How Do I Delete Student Enrollment‘ documentation for instructions.


