LifterLMS and Divi Theme: Setup and Compatibility Guide
Page builders such as Divi often apply strict layout rules to a website, and these rules can sometimes conflict with a learning management system’s default layouts.
The “Lifti: Divi Theme Compatibility” lab helps LifterLMS course, lesson, and membership pages work more predictably with the Divi theme. The Lifti lab helps resolve common structural conflicts between LifterLMS and Divi, including issues with page width, sidebars, and supported layout settings.
Before you begin, you must install and activate the Divi Builder, the core LifterLMS plugin, and the free LifterLMS Labs plugin.
You must install the LifterLMS lab before you can use the compatibility features.
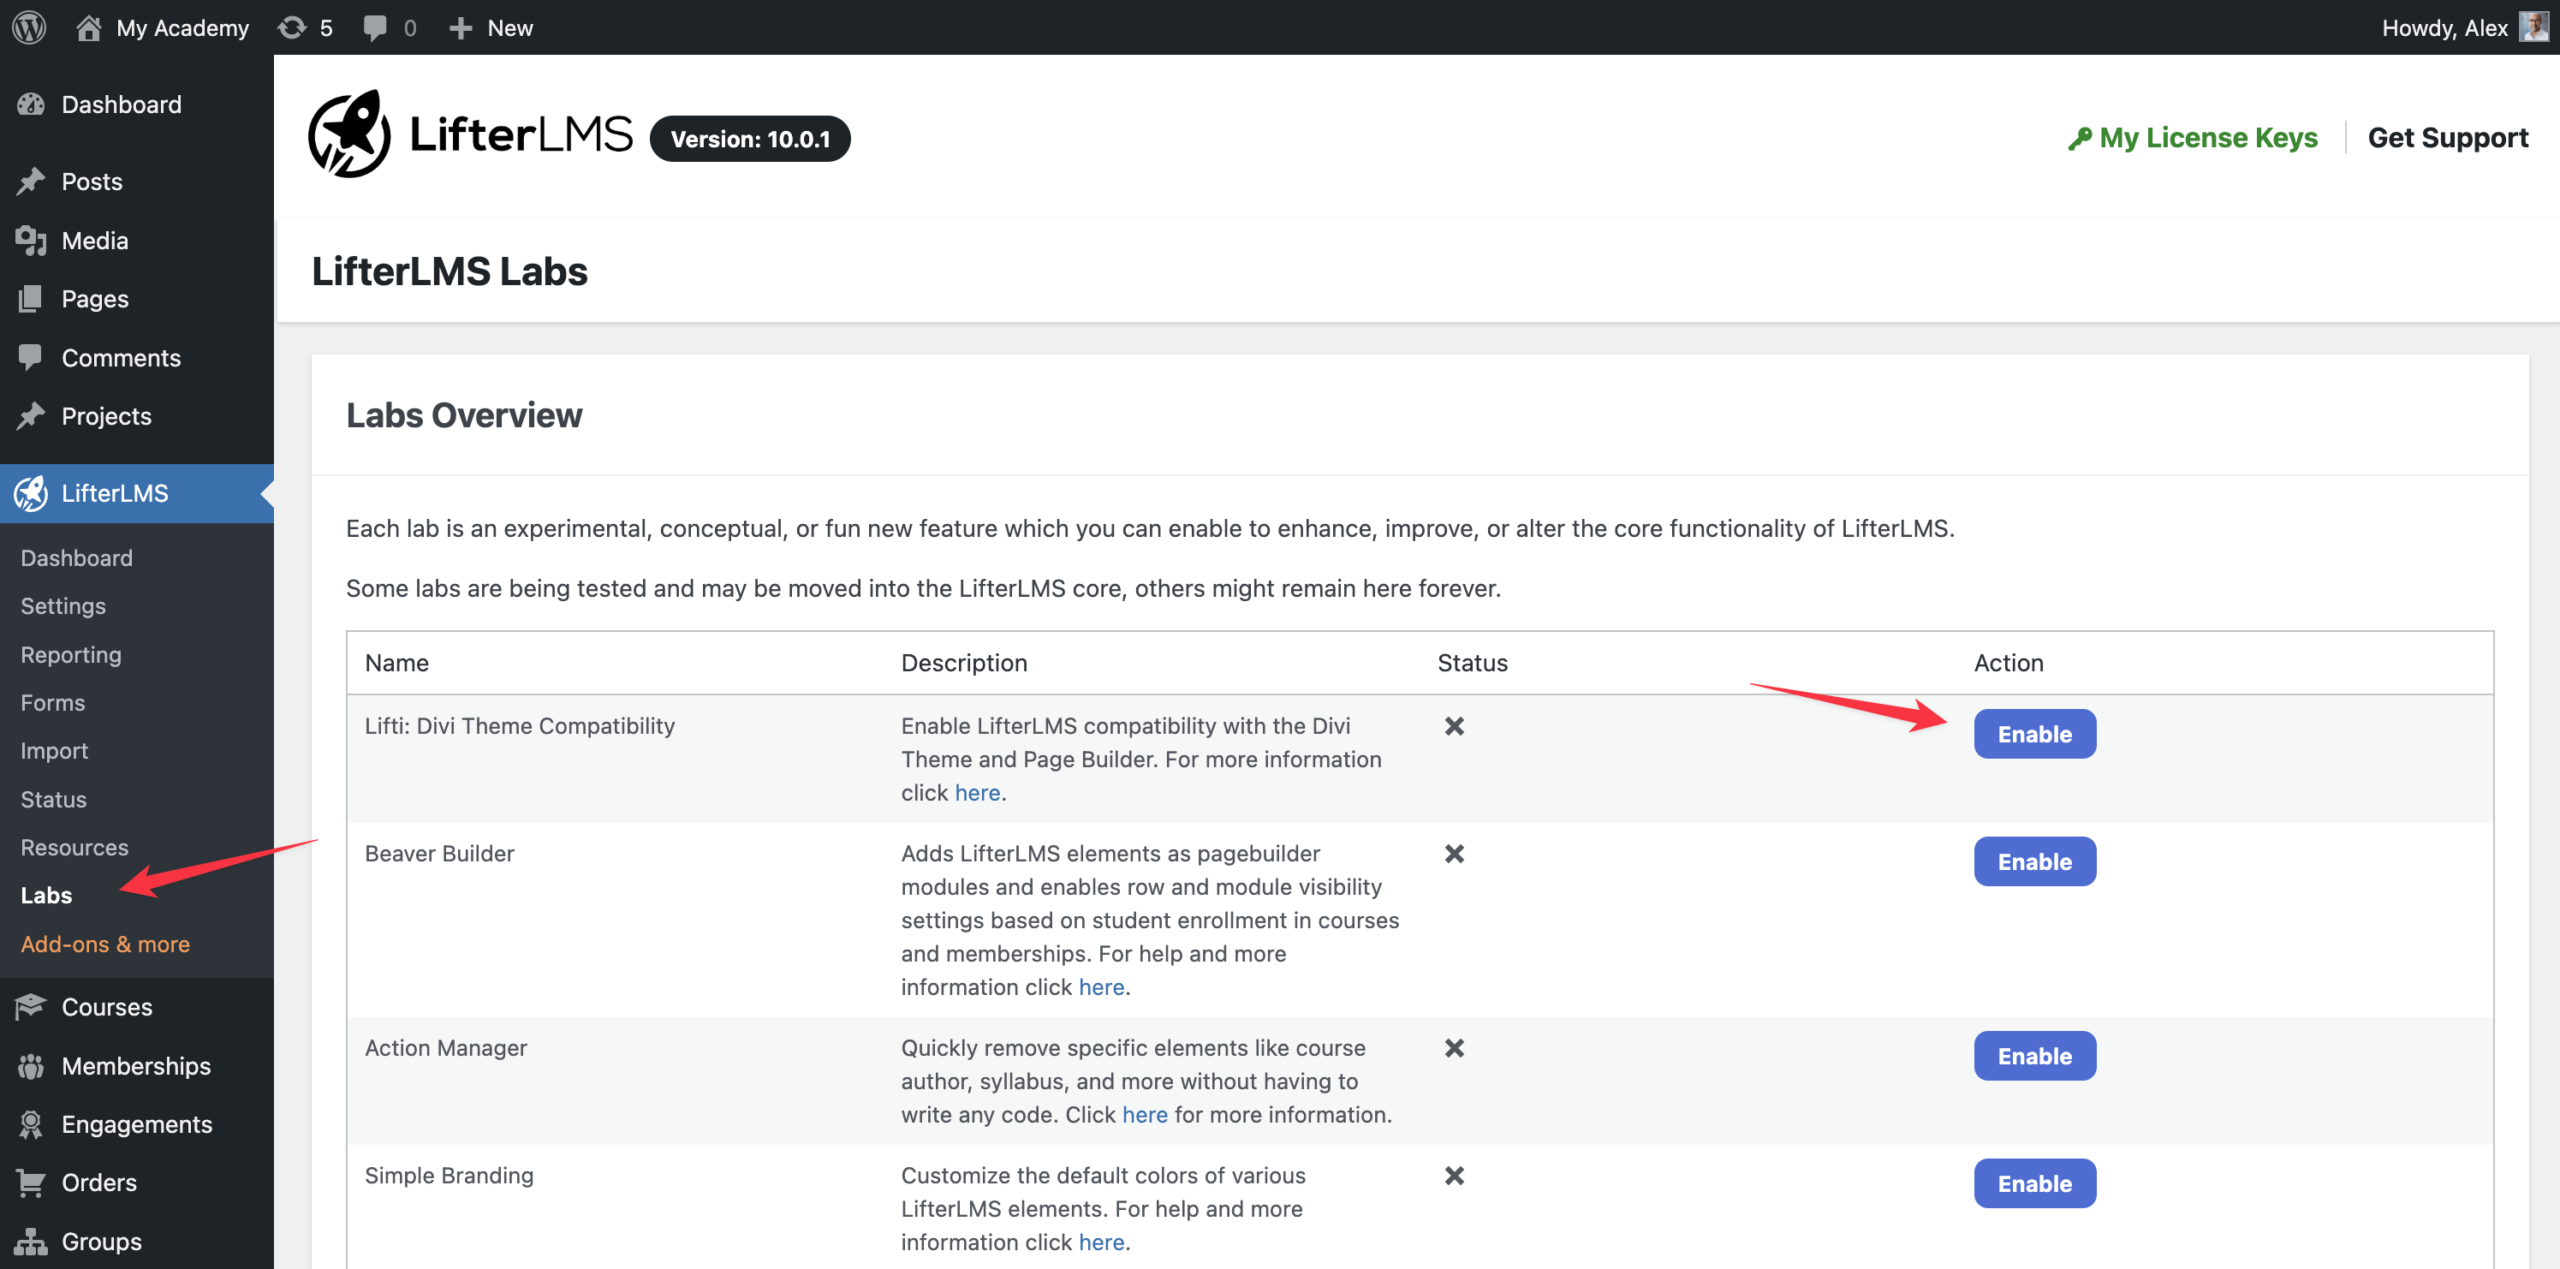
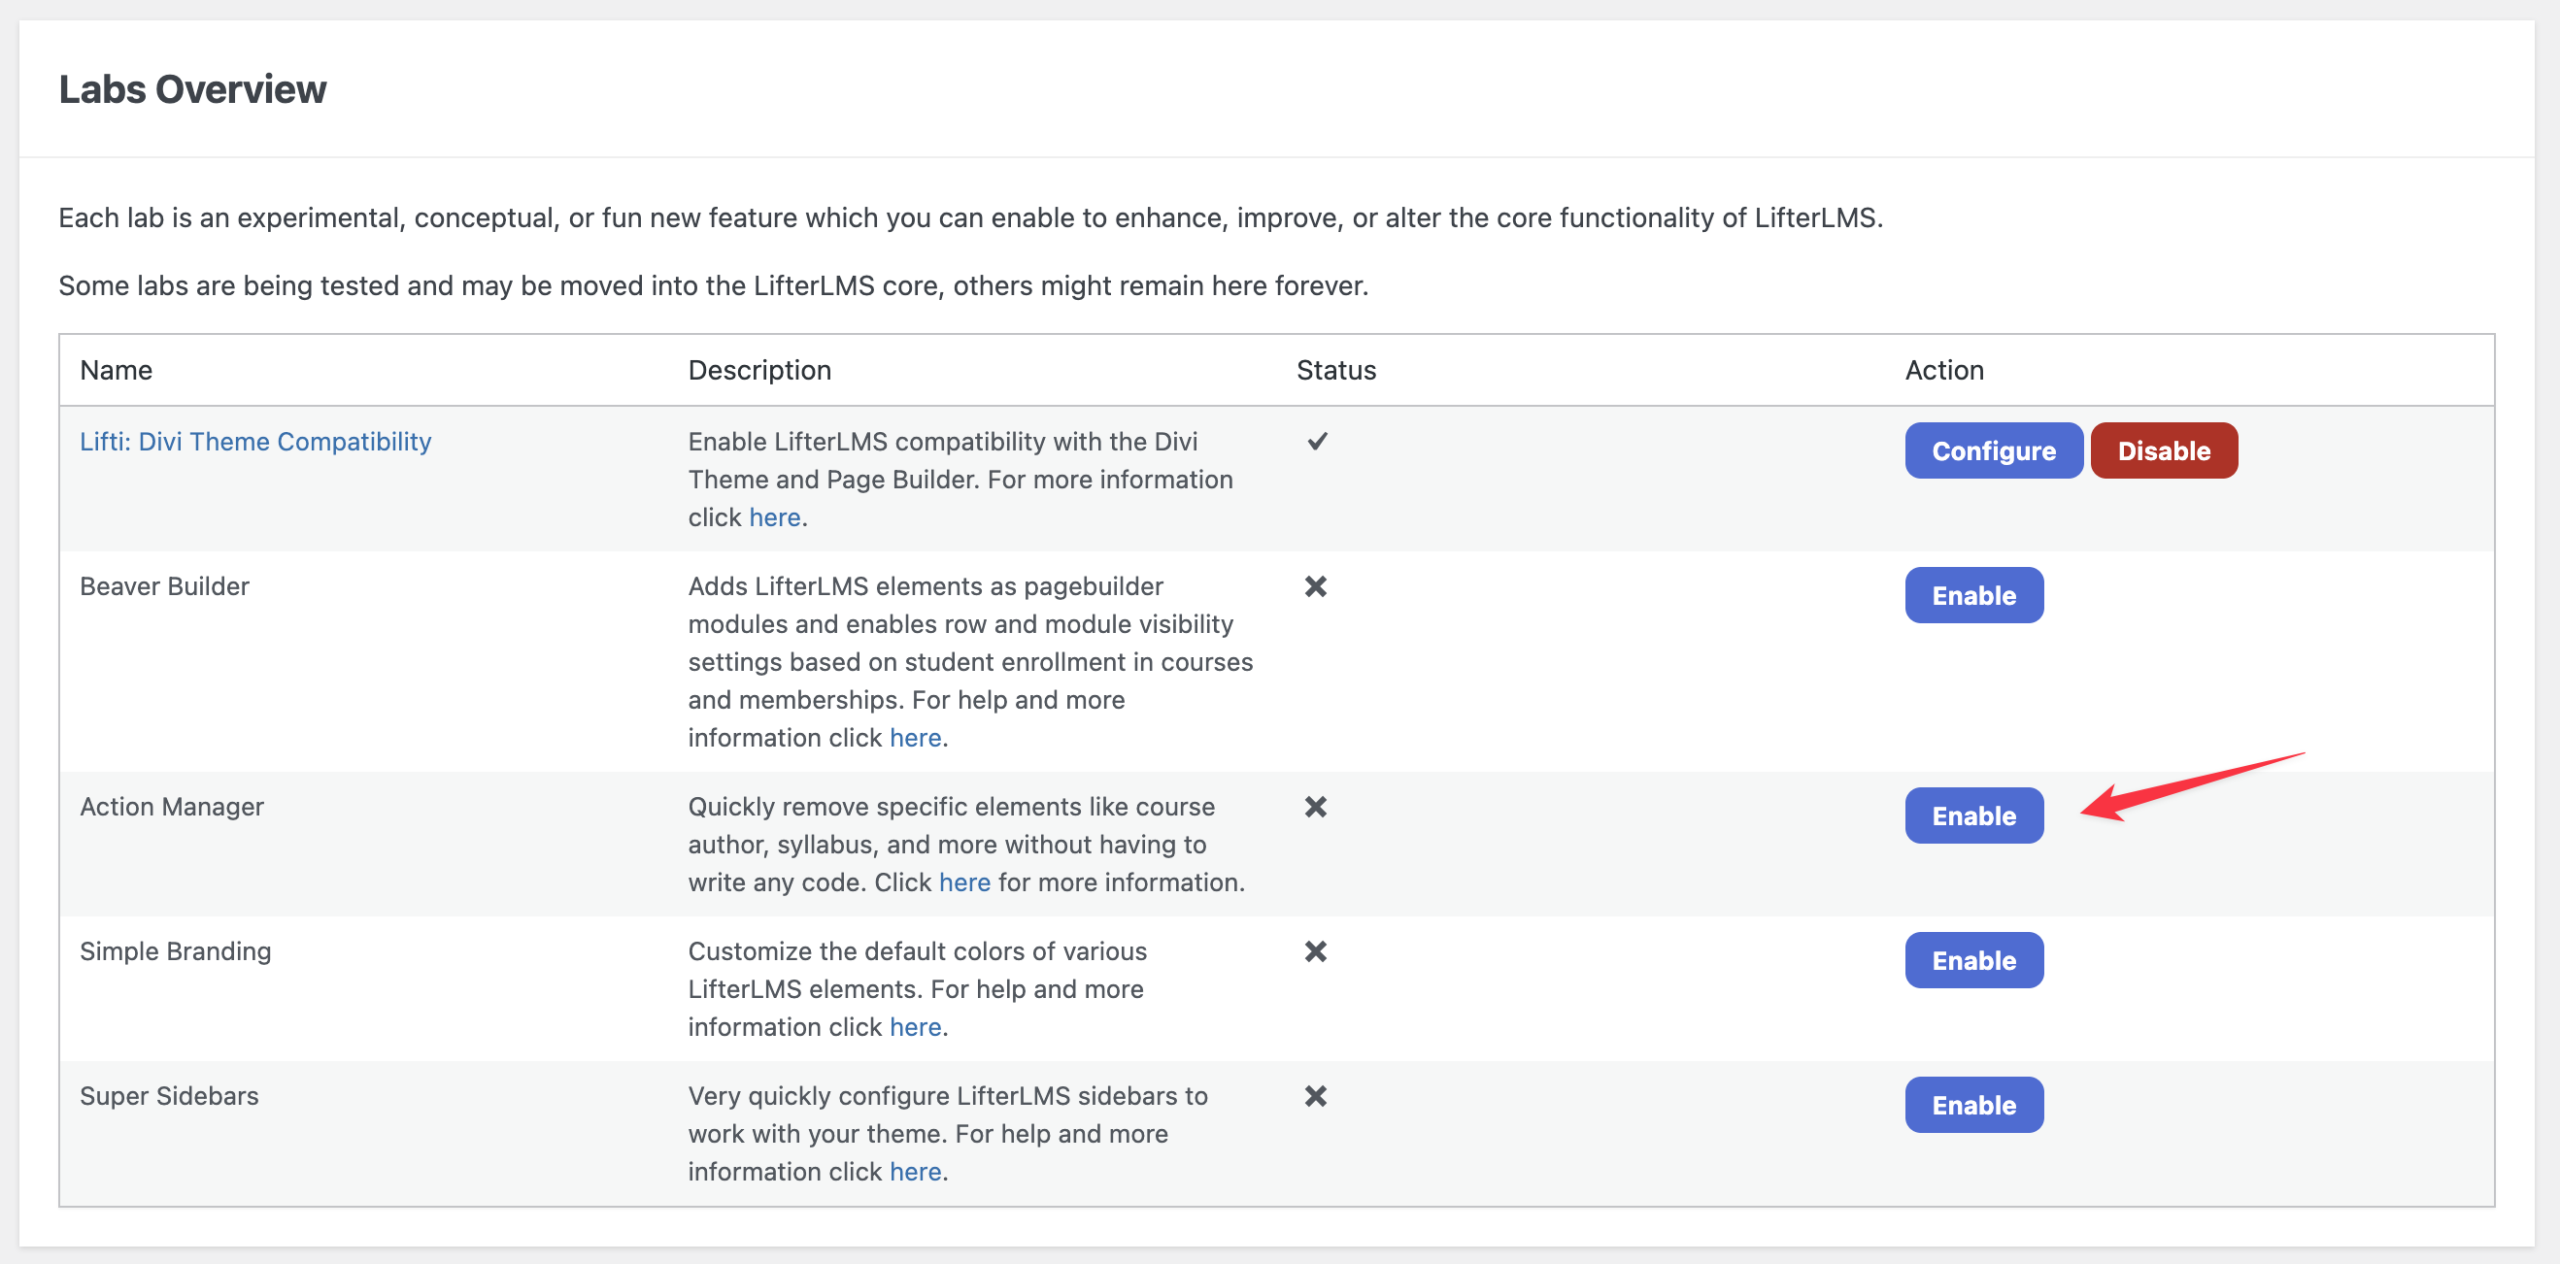
- Navigate to LifterLMS > Labs in your WordPress dashboard menu.
- Look for the “Lifti: Divi Theme Compatibility” option in the list of available labs.
- Click the Enable button on the right side of the screen.
Once you enable the lab, you’ll gain access to new layout controls inside the standard WordPress customizer. This allows you to set specific sidebar preferences for your LMS pages.
- Navigate to LifterLMS > Labs in your WordPress dashboard menu.
- Locate the “Lifti: Divi Theme Compatibility” row.
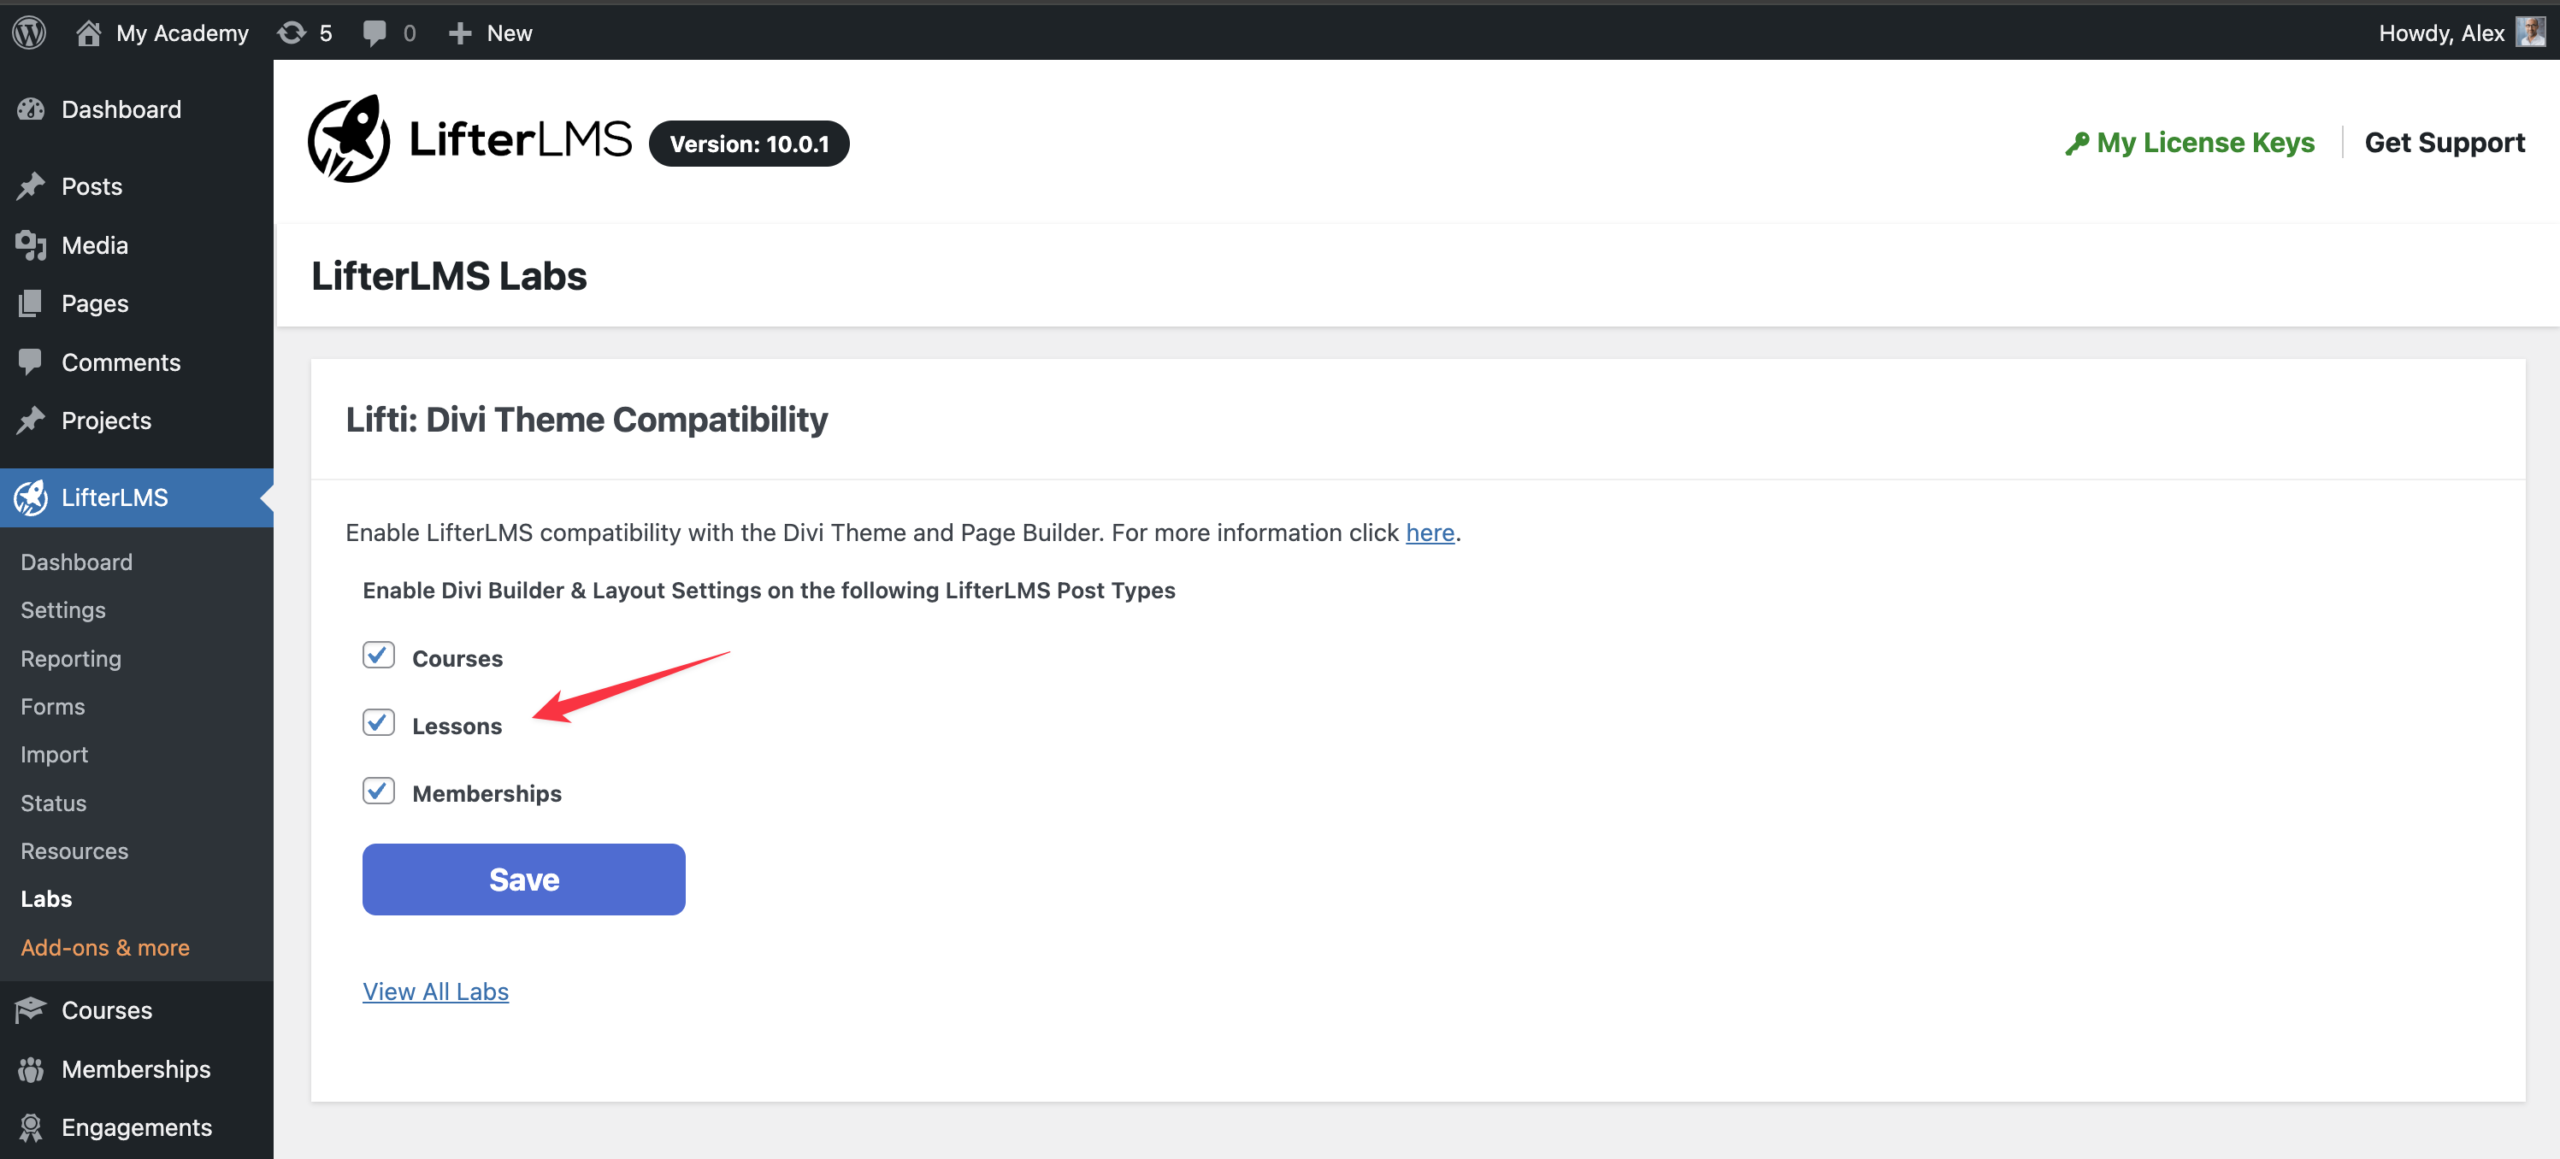
- Click the Configure button to open the settings screen.
- On the settings screen, check the box next to each LifterLMS post type (such as Courses, Lessons, and Memberships) for which you wish to enable the Divi Builder and layout settings.
- Click the Save button to apply your new layout settings.
If you decide to change your WordPress theme in the future, you should turn this lab off.
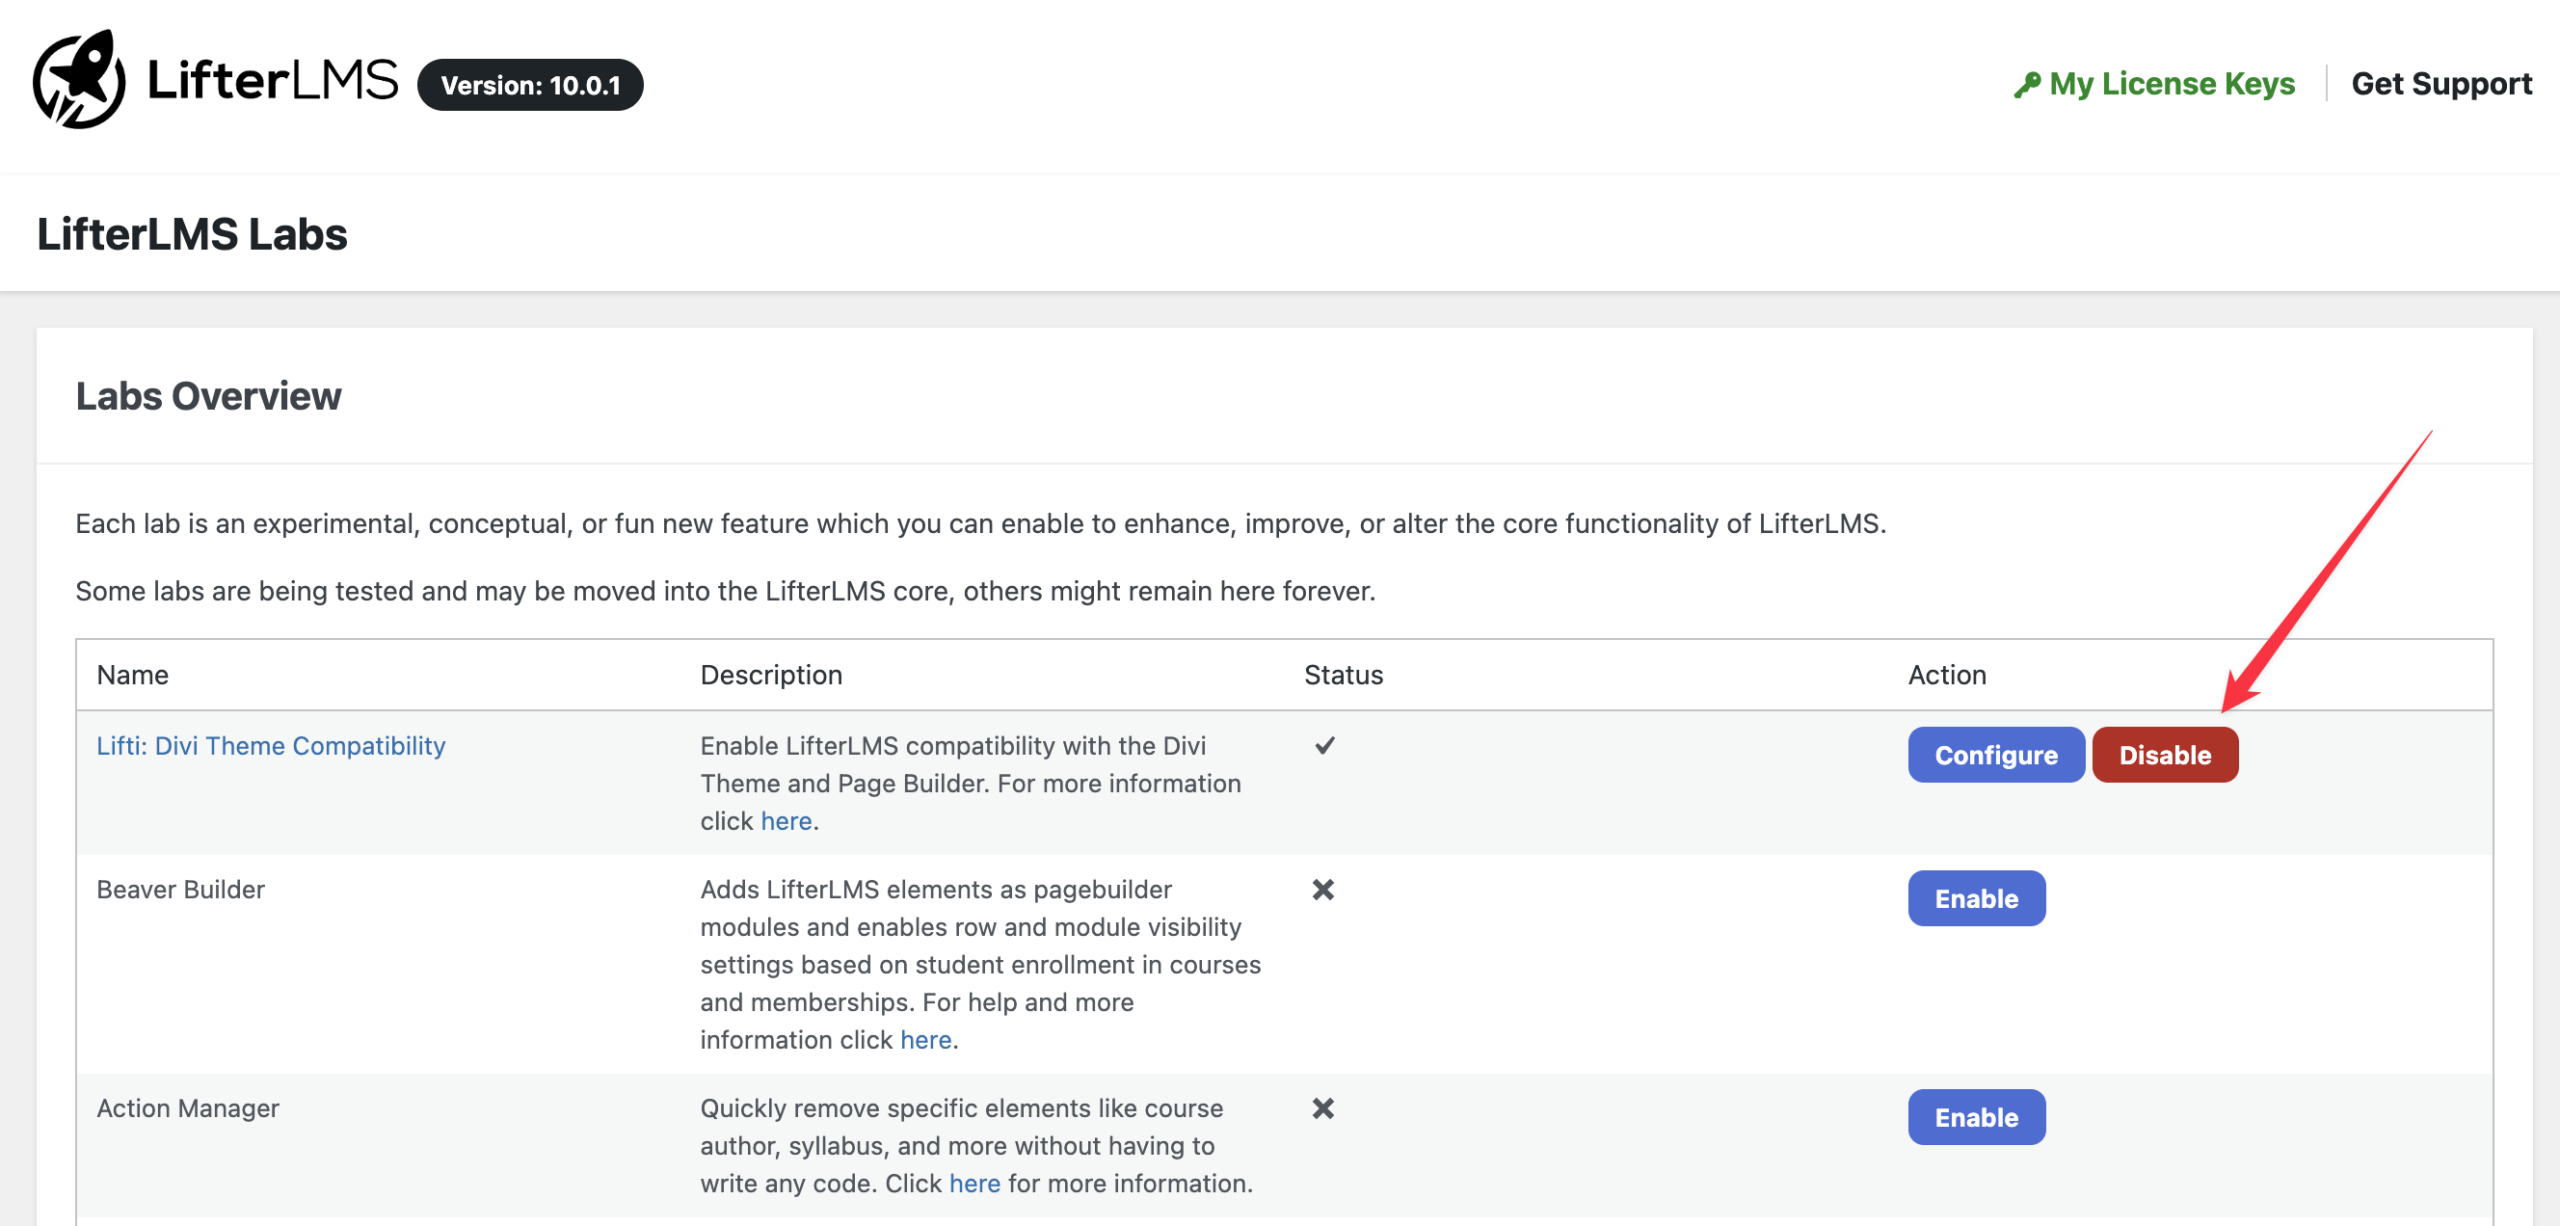
- Navigate to LifterLMS > Labs in your WordPress dashboard menu.
- Locate the “Lifti: Divi Theme Compatibility” row.
- Click the Disable button to turn off the compatibility features.
It is important to understand exactly how the Lifti lab helps your website so you can plan your design process.
| What Lifti Does | What Lifti Does Not Do |
|---|---|
| Lifti allows you to open and use the visual Divi Builder on LifterLMS custom post types, such as courses, lessons, and memberships. | Lifti does not allow the Divi Builder to visually edit the inside of a few core LifterLMS elements. |
| Lifti resolves structural conflicts between the Divi theme and the LMS. It ensures your page width and sidebars display correctly. | It does not automatically style your LMS. Lifti does not automatically apply your Divi theme colors and fonts to the default LifterLMS elements. You must write custom CSS to change the appearance of those specific items. |
| Lifti gives you new options inside the standard WordPress customizer so you can set global layout preferences for your course and membership pages. | You must build your layouts manually using the available Divi modules. |
When you use the Divi theme with LifterLMS, you can use the Divi visual builder to design your course pages. This gives you drag-and-drop control over supported Divi content and layout areas on your course pages.
Some core LifterLMS elements, such as the course outline and lesson navigation areas, still use LifterLMS templates and require CSS or template changes for deeper styling.
How to Open the Divi Builder for a Course
You must launch the visual builder from the standard WordPress editor to start designing your course.
- Navigate to Courses > Courses in the left-hand WordPress dashboard menu.
- Hover your mouse over the name of the course you want to edit.
- Click the Edit link.
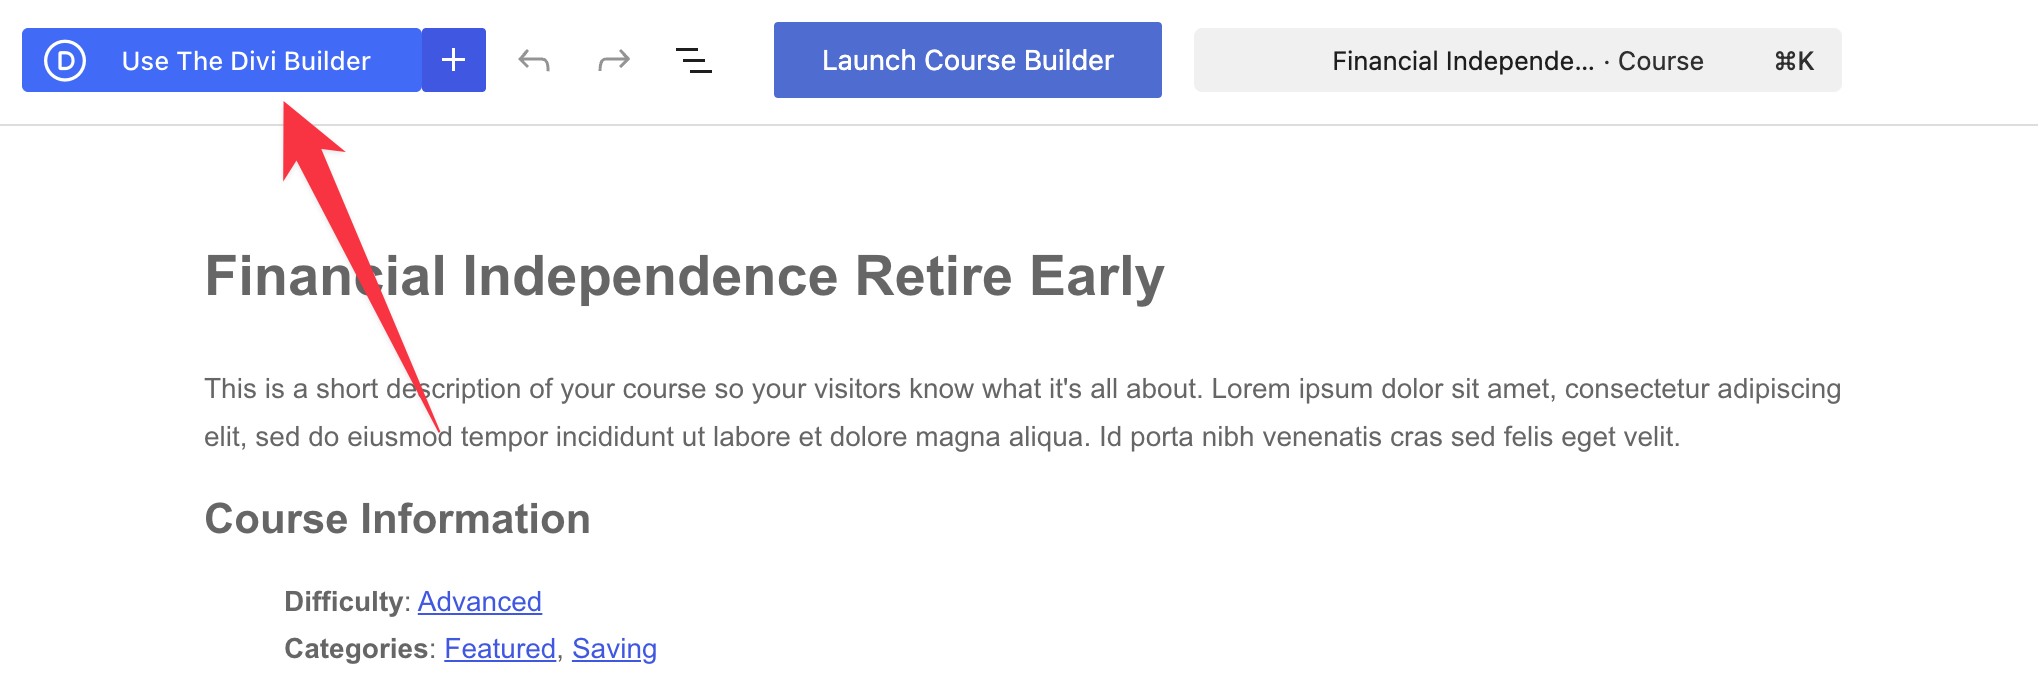
- Click the Use The Divi Builder button at the top of the screen to launch the visual editor.
How to Edit Course Details
The Divi builder provides a dedicated settings panel to update your core course information, such as the title and cover image.
- Look at the settings panel on the right side of your screen.
- Click the “Content” tab located under the “Course” heading.
- Locate the “Title” field and type the name of your new course.
- Scroll down to the “Excerpt” text box and type a short description of your course.
- Scroll down to the “Featured Image” section.
- Click the Add Image button to upload or select a cover photo for your course from your media library.

How to Customize the Course Layout
You can interact directly with the main canvas to change the design of your course elements.
- Move your mouse over the main canvas area in the center of your screen.
- Hover over specific elements like the “Course Information” or “Course Instructor” blocks to reveal the Divi control menus.
- Click the gear icon on any module to open its specific design and content settings.
- Click and hold the move icon to drag sections up or down the page to rearrange your layout.

Understanding What You Can Edit with Divi
When you use the Divi Builder with LifterLMS, you can control the overall structure and layout of your page. However, LifterLMS uses its own built-in templates to display core course features.
Because of how these templates work, Divi cannot directly modify the design of every single element. You cannot use the visual drag-and-drop builder to change the colors, text sizes, or spacing of the following core LifterLMS elements:
- The course syllabus and outline
- Lesson navigation buttons (like the previous and next lesson buttons)
- The “Lesson Complete” areas
- Student review boxes
When you use the Divi Builder for a course or membership, you replace the standard LifterLMS content editors. Instead of having separate boxes for enrolled and non-enrolled students, you now use one unified builder to design the page for everyone.
To maintain the ability to show different content to different people, you must add custom CSS classes to the section modules within your Divi layout. If you don’t add a class to a section, that section will be visible to all students and visitors, regardless of their enrollment status.
Here are the custom CSS classes you can use:
- To display a section only to enrolled students, use the class:
llms-enrolled-student-content - To display a section only to visitors who are not enrolled, use the class:
llms-non-enrolled-student-content
Because the Divi visual builder cannot control the deeper design settings of LifterLMS templates, you might see large gaps, plain colors, or oversized videos. You will need to use Custom CSS to adjust the spacing, colors, and layout of these specific items.
Custom CSS allows you to write specific design rules that override the default LifterLMS styles. If you’re not familiar with writing code, you may need to hire a developer to help you achieve your exact design goals.
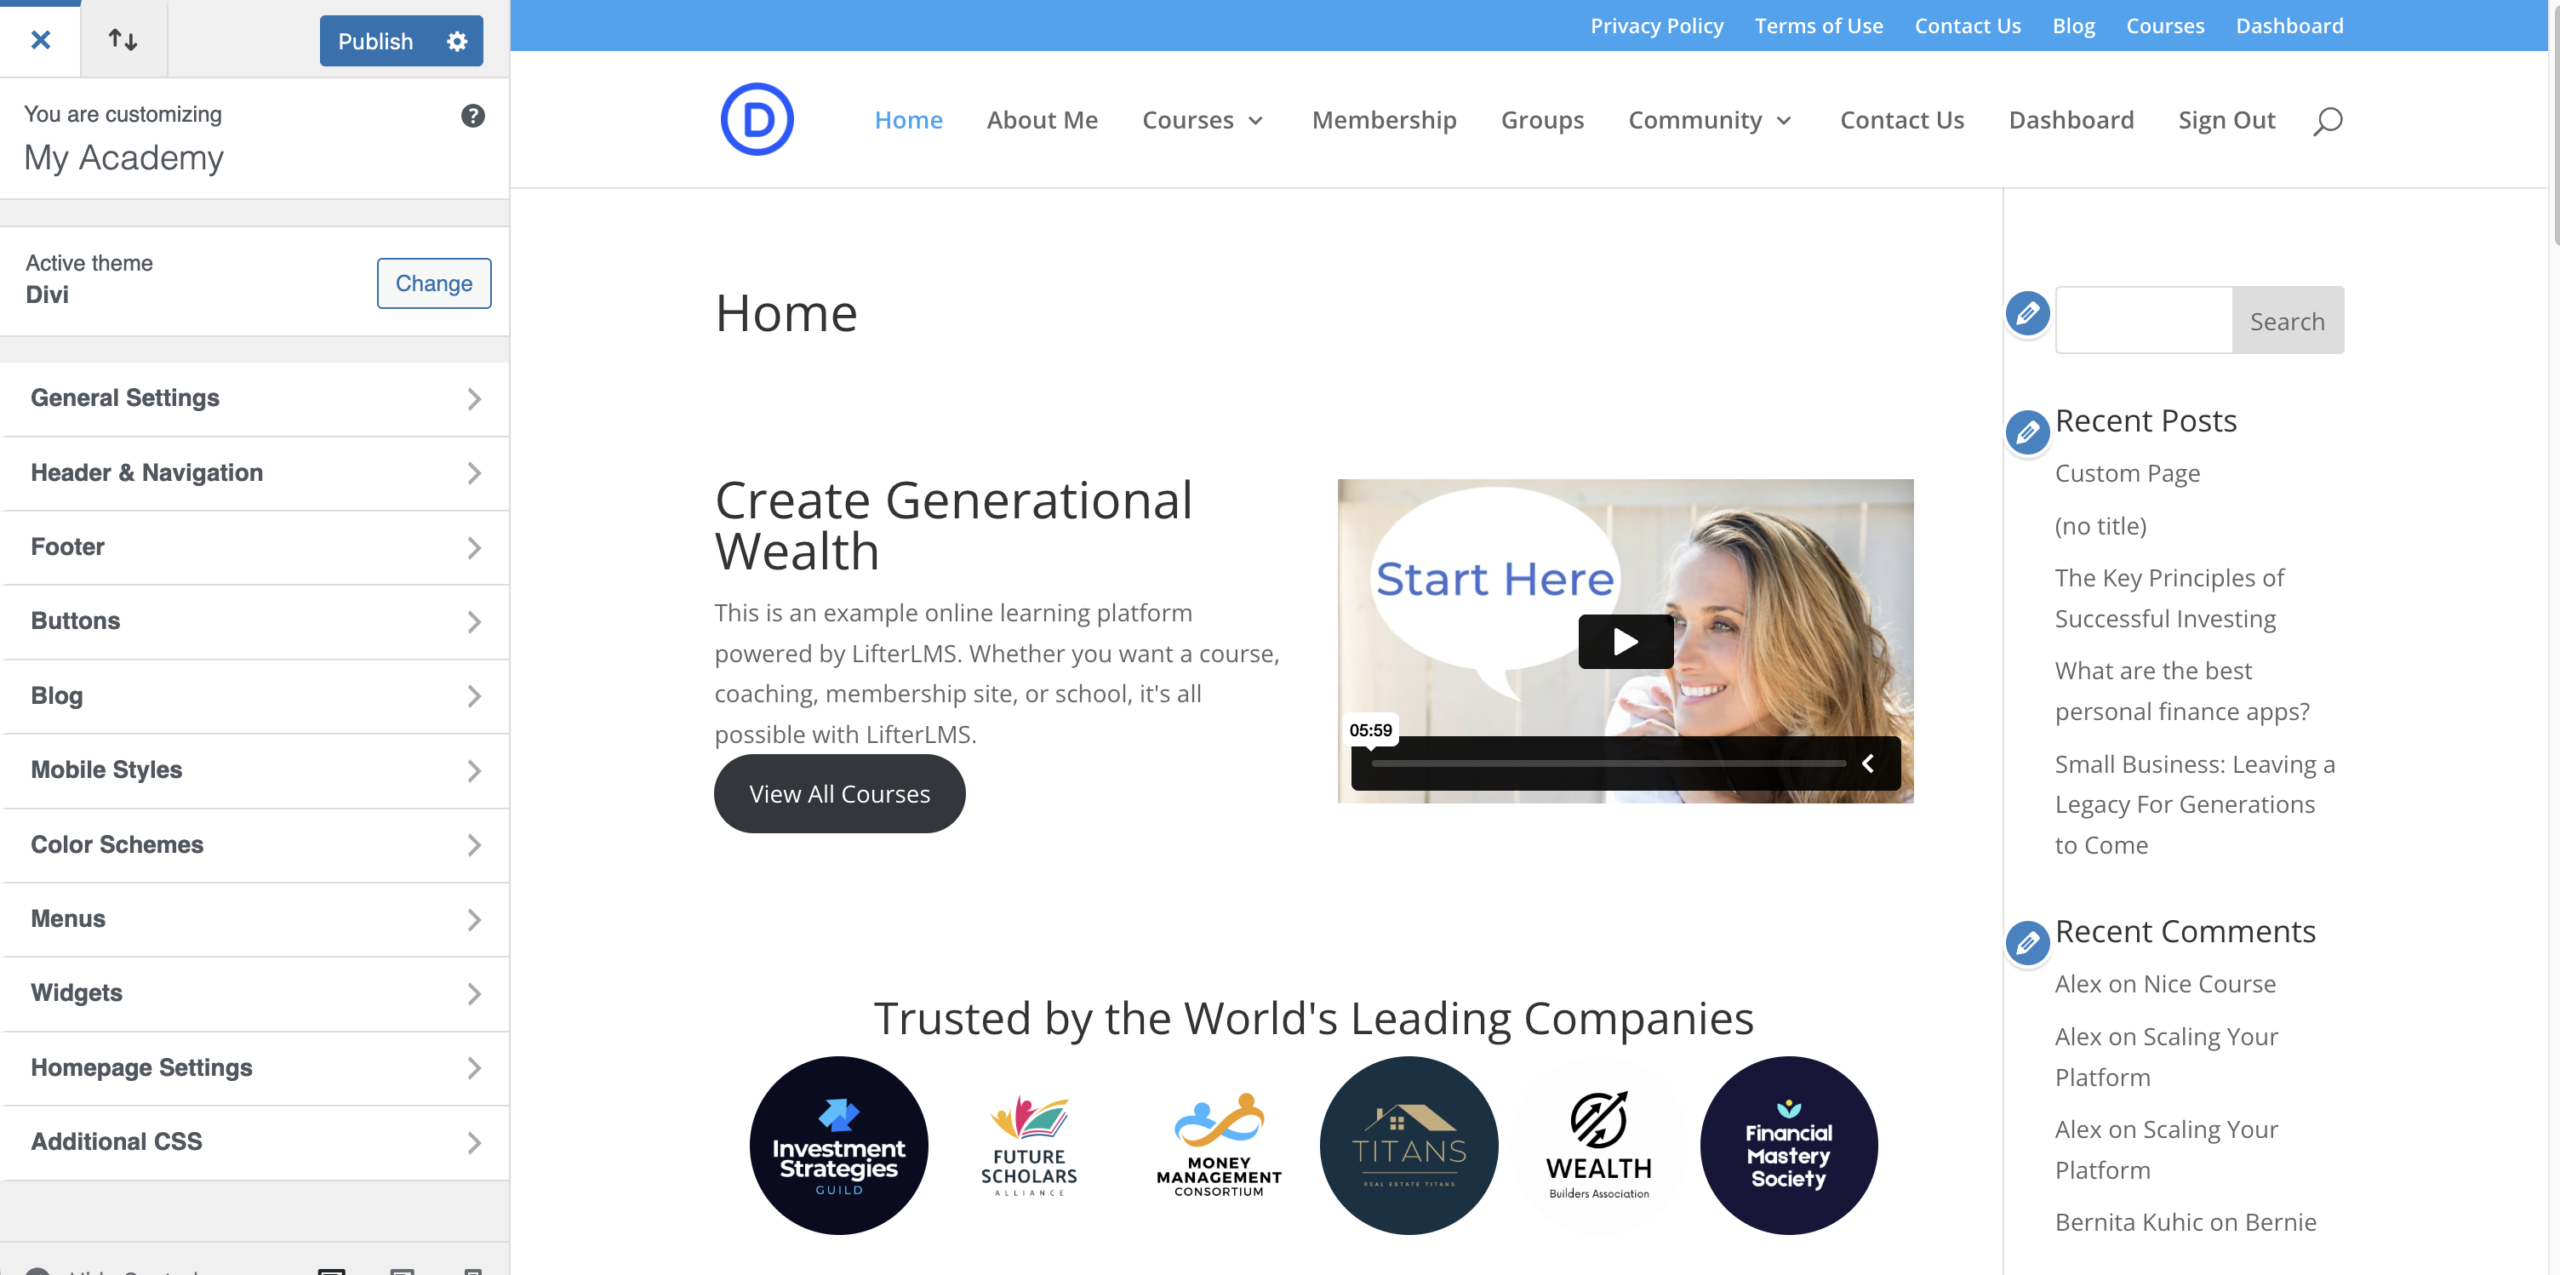
If you have custom CSS code ready, you can add it to your website using the standard WordPress Customizer.
- Navigate to Appearance > Customize in your WordPress dashboard menu.
- Click on the “Additional CSS” option at the bottom of the left-hand menu.
- Click inside the text box and paste your custom CSS code.
- Click the Publish button at the top of the menu to save your styling changes.
When you build a custom course page with the Divi Builder, you will probably add elements such as the course syllabus or the course author manually. This can cause those elements to appear twice on your page, because LifterLMS still tries to load the default versions.
You will need to remove the default LifterLMS elements to create a clean design. These default elements are loaded via WordPress action hooks. You have two options to remove them:
Option 1: Use the Action Manager Lab
This is the easiest method because it requires no coding.
- Navigate to LifterLMS > Labs in your WordPress dashboard.
- Locate the “Action Manager” lab and click the Enable button.
- Follow the Action Manager instructions to uncheck and remove specific course elements with a few simple clicks.
Option 2: Use Action Hooks
If you are comfortable writing PHP, you can programmatically remove the elements by unhooking the default LifterLMS action hooks in your custom child theme.
It’s important to note that a fresh installation of Divi and LifterLMS will appear quite minimal at first. This is because LifterLMS focuses on providing the essential learning infrastructure, while the Divi theme serves as the styling and layout layer of your website. Achieving a polished, professional design like those seen in demos requires active customization using the Divi Builder.
For a comprehensive guide on using the core drag-and-drop elements and design settings, read the official documentation for the Divi Visual Builder.


