Discussion and Commenting in Courses and Lessons
In LifterLMS, course and lesson discussions use the native WordPress commenting system, which provides a familiar interface for student engagement. While the core functionality relies on WordPress standards, LifterLMS integrates these comments to ensure they respect the flow of your course content.
If you want even more advanced community features (such as timelines, profiles, and likes), you can enhance your platform by adding the LifterLMS Social Learning add-on to your site.
The default discussion settings for your courses and lessons are inherited directly from the global WordPress configuration. To manage how comments behave across your entire website, you must configure the default WordPress discussion settings.
- Navigate to Settings > Discussion in your WordPress dashboard.
- Locate the setting labeled “Default article settings.”
- Check the box for “Allow people to submit comments on new posts” if you wish for all new courses and lessons to have commenting enabled by default.

- If you want to restrict discussions to enrolled students only, ensure you also check the box labeled “Users must be registered and logged in to comment.”
- Click Save Changes at the bottom of the screen.
When these global settings are configured, every new course or lesson you create will automatically inherit these preferences unless you manually override them on a specific page.
Regardless of your global configuration, you will have the flexibility to enable or disable commenting for any specific course or lesson. This is particularly useful if you want to encourage discussion on a particular topic while keeping other instructional content read-only.
- Navigate to Courses > Courses (or Courses > Lessons if you want to edit lessons).
- Click on the title of the course or lesson you wish to edit.
- Open the settings sidebar and locate the Discussion panel.
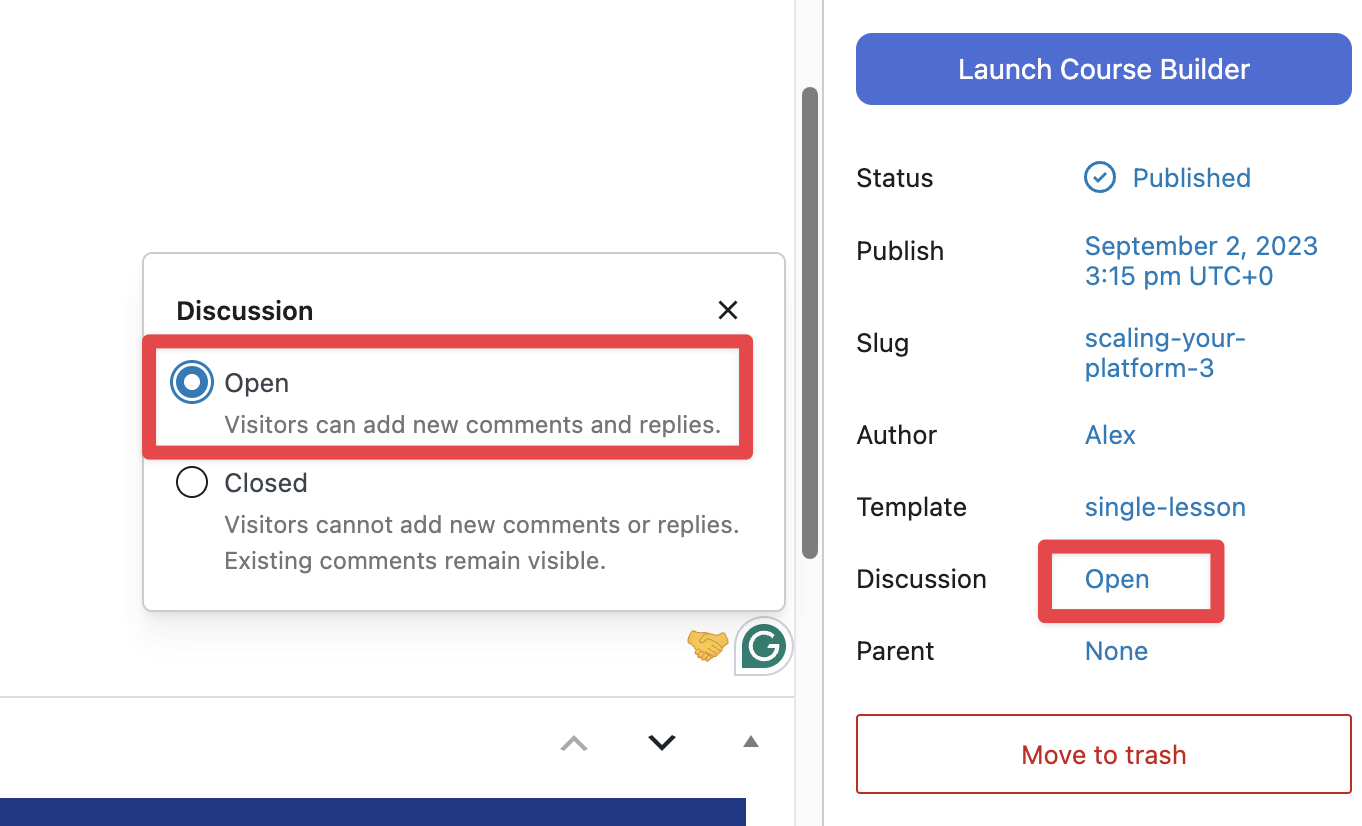
- Check the box labeled “Open” to enable the discussion area for this specific post.
- Click Update to save your changes.
Bulk Editing Comment Status
If you need to change the comment status for many courses at once, you can use the Bulk Edit feature to save time.
- Navigate to the Courses or Lessons list view in your dashboard.
- Check the boxes next to the items you wish to modify.
- Click the Bulk Actions dropdown menu at the top of the table, select Edit, and then click Apply.
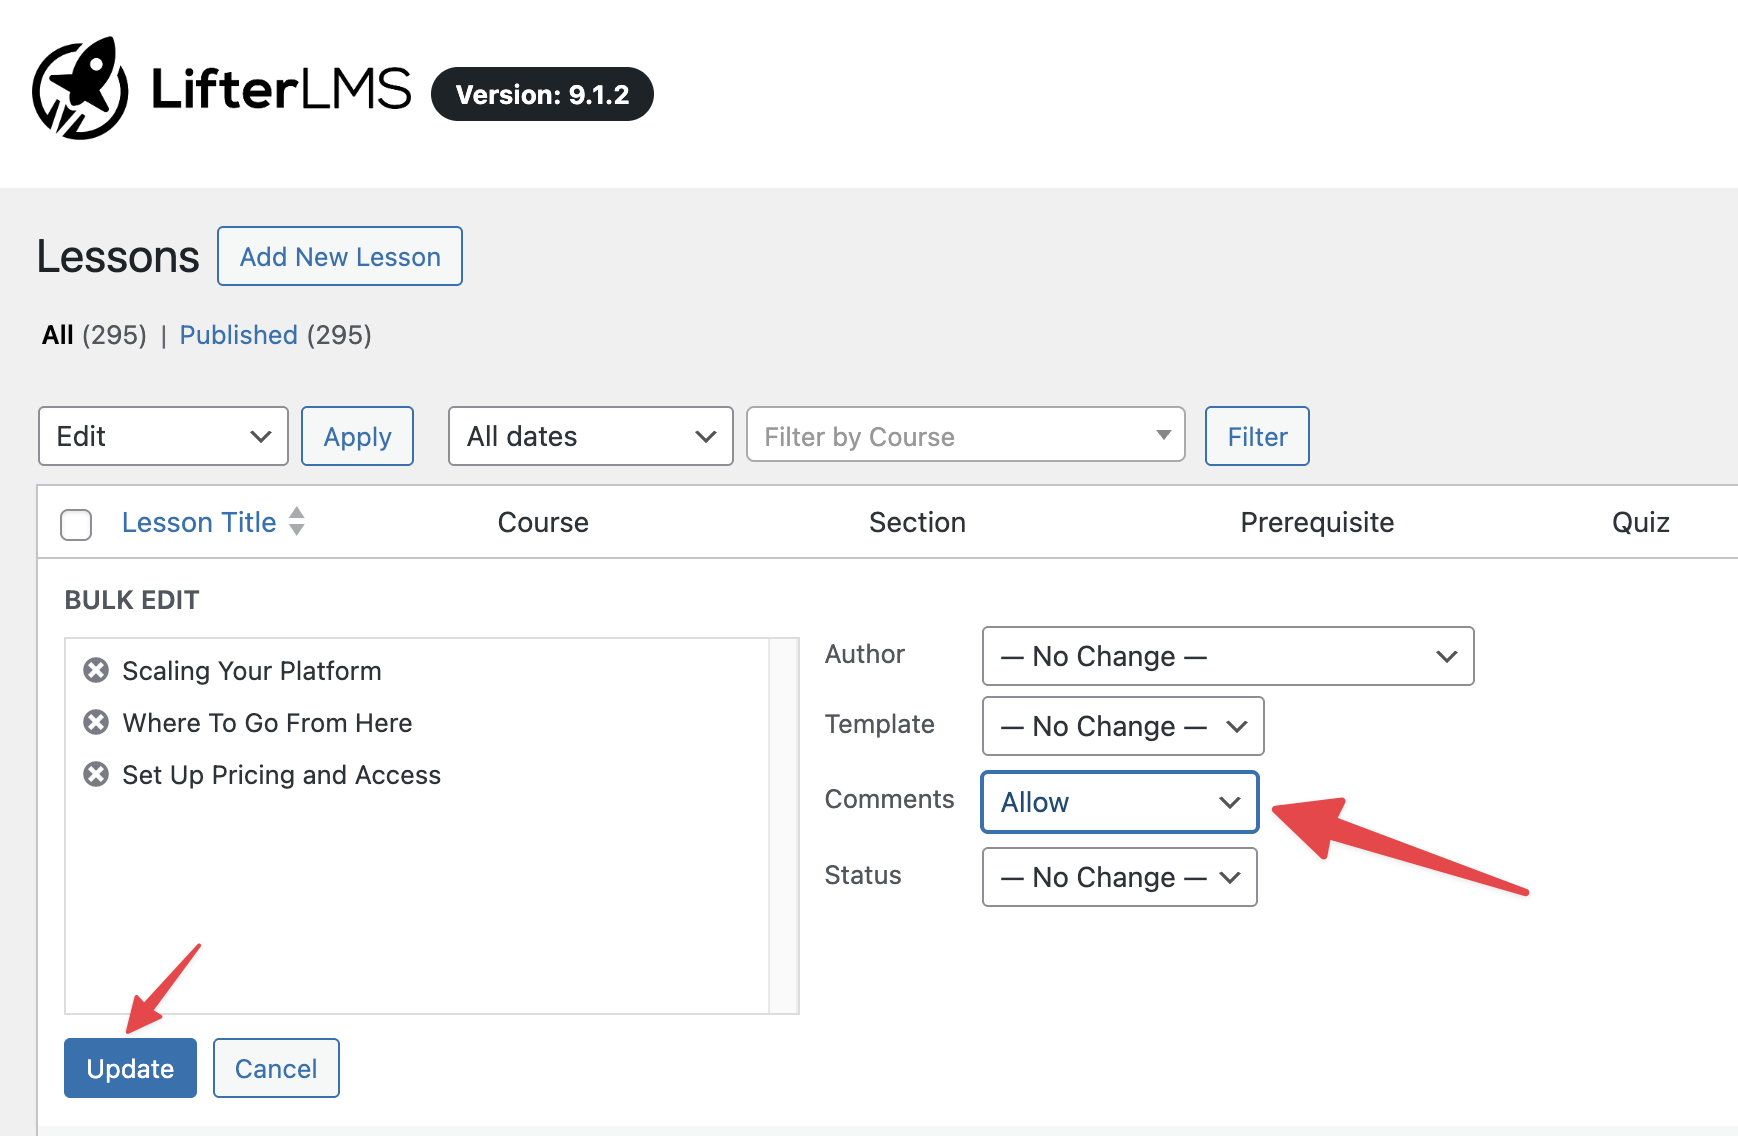
- This will open up a new editing panel. On this panel, locate the “Comments” dropdown.
- Change the status to “Allow” to enable the comments and discussion on selected courses.
- Click the Update button to apply the changes to all selected items simultaneously.
After you have successfully configured your global discussion settings and enabled comments on the individual post, you might notice that the actual comment interface is still missing from the frontend view of your courses or lessons. This happens because the modern WordPress Block Editor gives you total control over the page layout, requiring you to explicitly place the Comments block within your content to render the discussion area.
Even if “Allow Comments” is checked in the settings, the form will not appear until the block is added to the page structure.
Follow these detailed steps to manually add the discussion area to your Course or Lesson pages:
- Navigate to Courses > Courses within your WordPress dashboard to view your list of content.
- Locate the specific Course or Lesson title you wish to modify and click the Edit link to launch the WordPress Block Editor interface.
- Scroll through your existing content to determine exactly where you would like the discussion area to appear.
- Click the Toggle block inserter button (the blue + icon usually located in the top left corner of the screen) to open the library of available blocks.
- Type “Comments” into the search bar to filter the results and isolate the correct block.
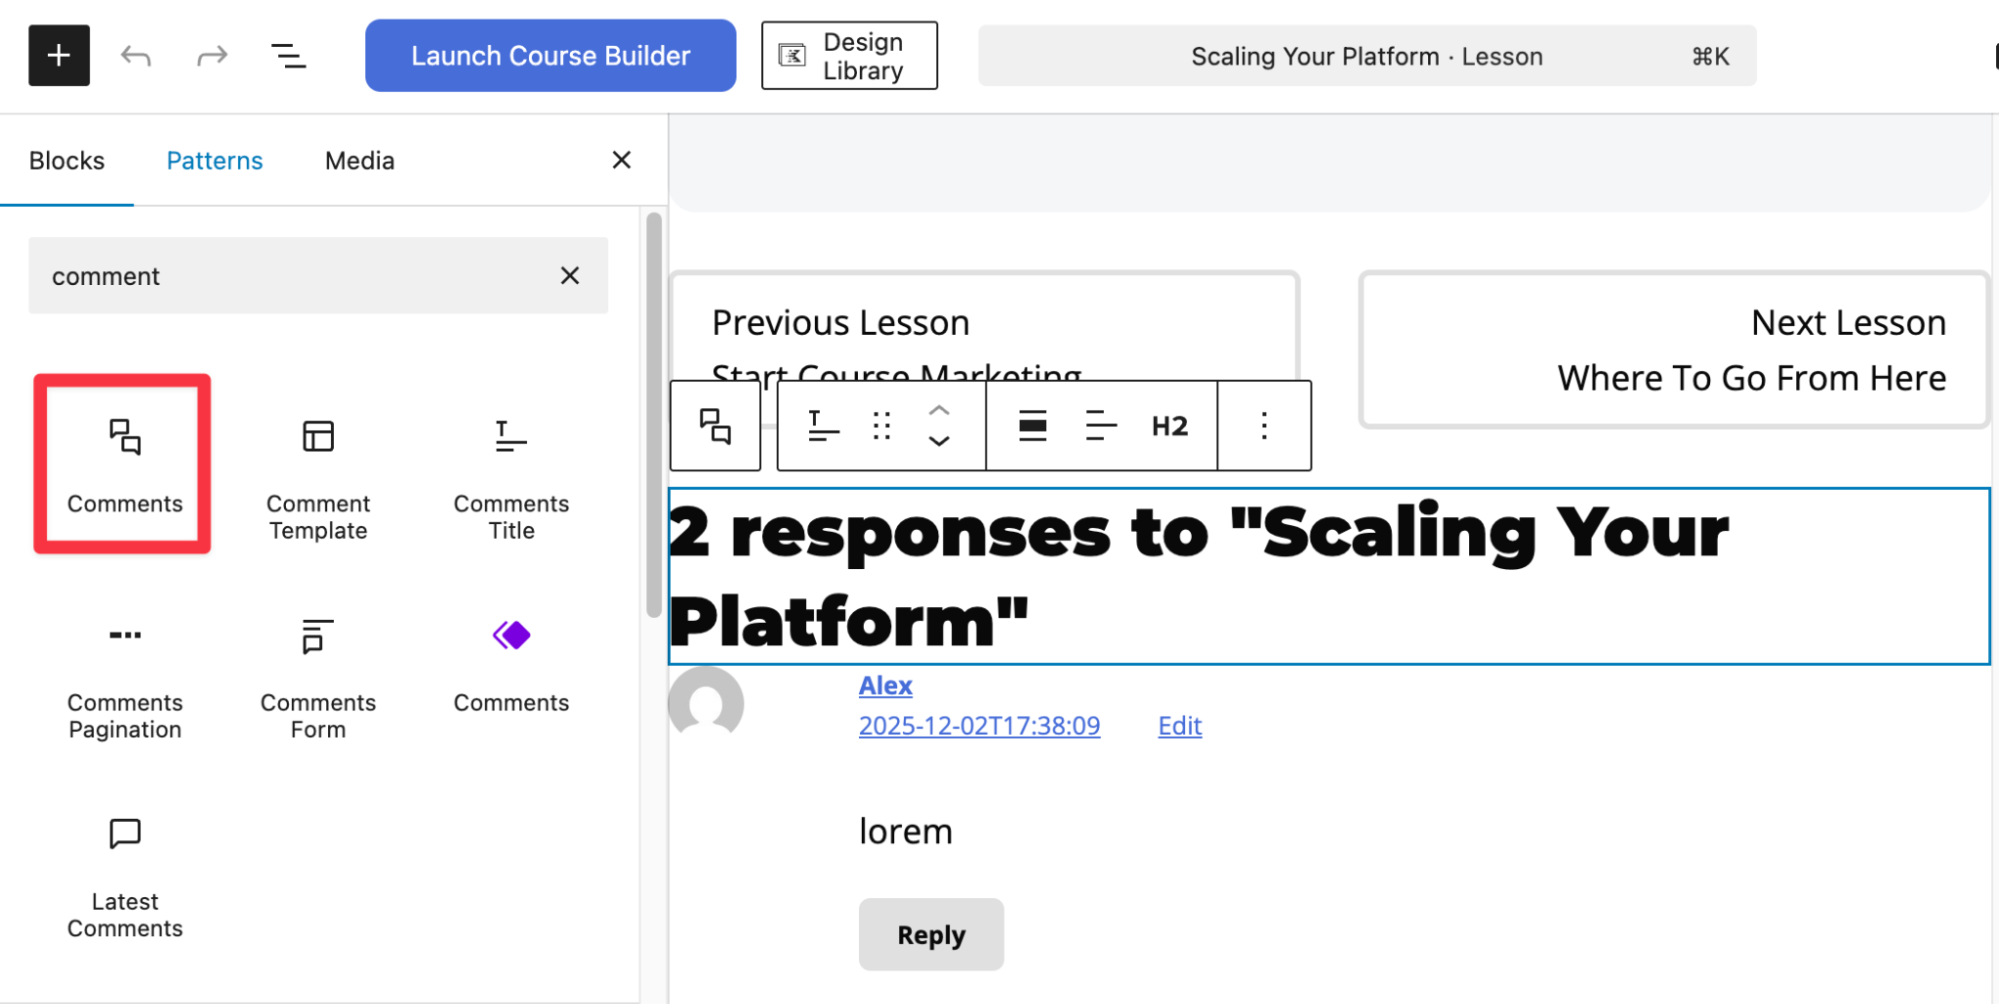
- Select the Comments block from the list to immediately insert the standard WordPress discussion form into your page layout.
- Click the Update button located in the top right corner of the screen to save these changes and publish the comments section to your live site.
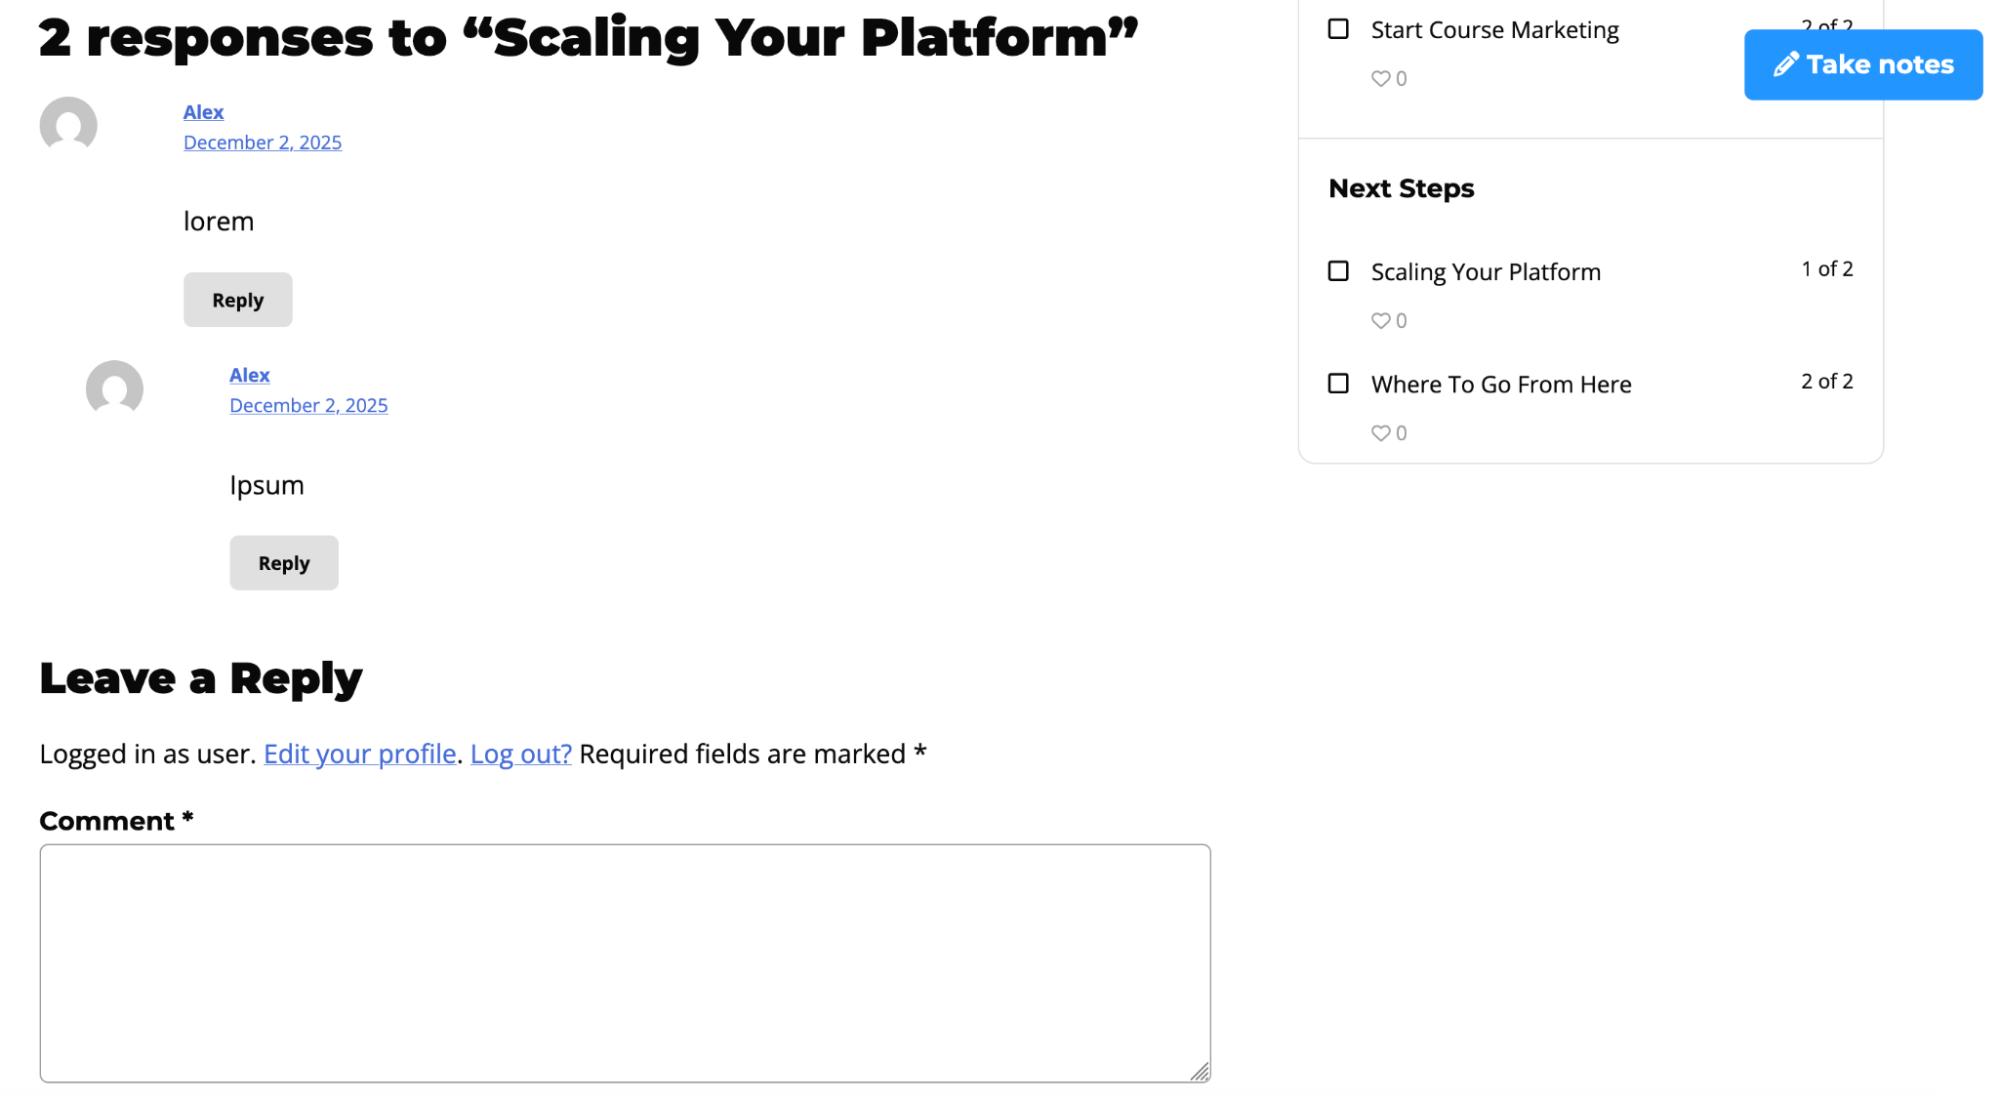
Once completed, you should visit the page on the frontend to verify that the comment submission form and any previous discussion history are now visible to your students.
It is important to understand who can see the discussions taking place on your platform. LifterLMS applies visibility logic based on the enrollment status and the access settings of the specific page.
- Courses: Commenting threads on Course pages are always public. Any visitor to your site can view these comments, regardless of whether they are enrolled in the course.
- Free Lessons: Similar to courses, comments on lessons that are marked as “Free” will be visible to anyone who visits the lesson page.
- Restricted Lessons: Comments on non-free lessons will only be visible to students who have legitimate access to that lesson. This includes students who are enrolled and have met any necessary prerequisite or drip-content requirements.


