Do you want to create a Learning Management (LMS) website like Udemy? The best Learning Management System tool, LifterLMS, will help you make an LMS website like Udemy.
What is Udemy?
Udemy is currently the most popular education marketplace for experts and educators to sell courses and for students to learn.
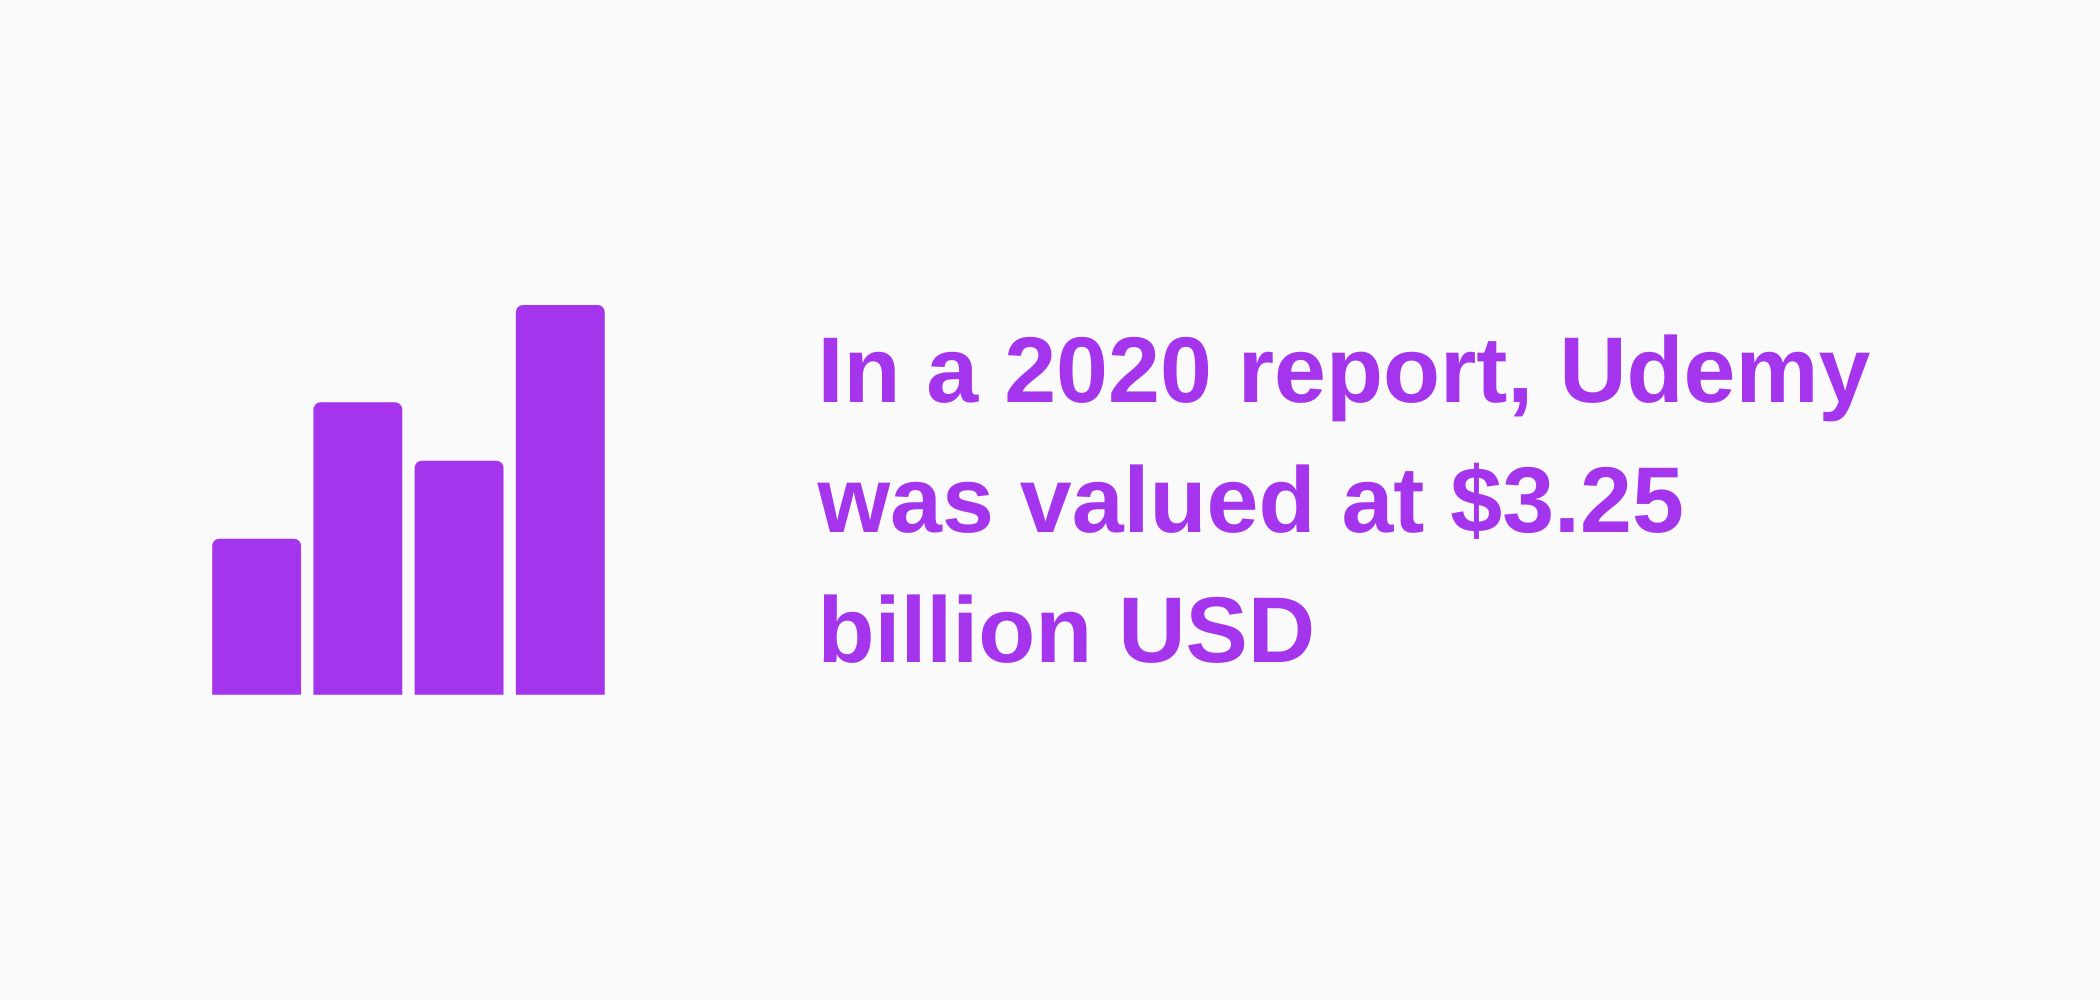
“Udemy reported revenue of $599.22 million in 2022”
Forbes
Also, Udemy is a Learning Management System Platform. Udemy has thousands of expert educators like Frank Kane who produce valuable information for the public. Udemy offers paid and free courses for students.
9 Mandatory Technology Pieces Required to Create your Udemy Clone:
Step 1) Register Your Domain Name
A domain name is an address that visitors use to access your website. It instructs the web browser on where to look for your website. For example with LifterLMS, “LifterLMS.com” is the address / domain name of our website.
Here is a popular place to register a domain name:
Step 2) Get Web Hosting
Your website needs a place to live, and that’s what web hosting is. A hosting provider saves your website and all of its key files and data on a server that it supplies, allowing visitors to access your website through the internet.
No one would ever be able to discover or access your website on the Internet without the server offered by your hosting service.
Most hosting providers also have a backup of your website so that you can easily restore your website if there is a problem with your website for any reason.
Here are some popular web hosting providers that have WordPress ready to go on the server:
Video Tutorial: How to Create a Course Marketplace Website Like Udemy with WordPress
This Udemy Clone video tutorial walks you through all the steps below in this article.
Step 3) Install the Theme
Introduction to Themes:
A theme is one of the essential parts of any WordPress website. The theme is the foundation for a website’s overall appearance. For this tutorial, we’ll use the Kadence theme.
There are thousands of free or premium themes on WordPress.
Here are some popular themes for an LMS website:
Installing Your Theme
Step 1) First, download your theme Zip file.
To upload your paid theme to your dashboard, follow the below steps:
Step 2) Navigate to your WordPress Dashboard > Appearance > Themes > Add New.
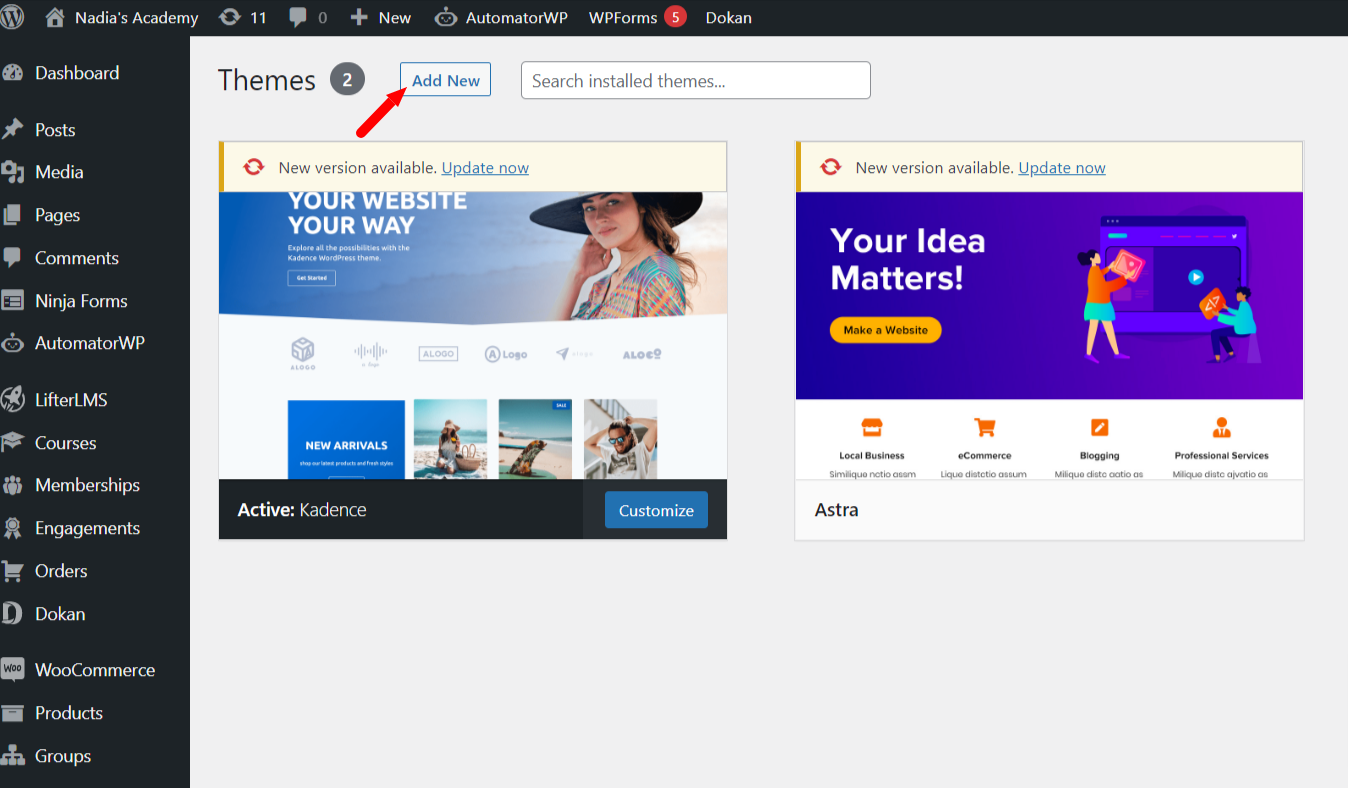
Step 3) Now, Click on Upload Theme > Choose your downloaded zip file > and click on Install > And then Activate.
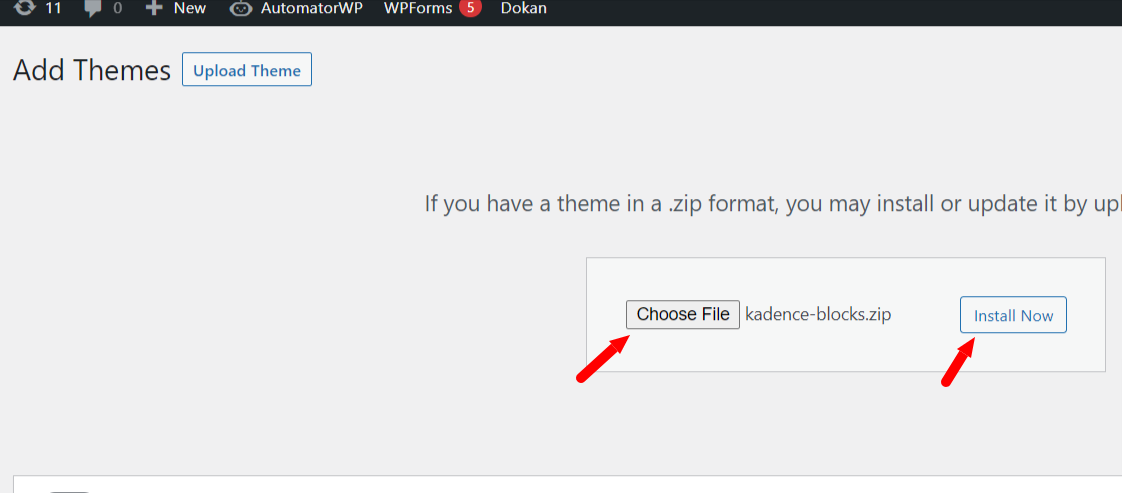
Now your Kadence theme is Installed.
Step 4) Install the Best LMS Plugin
What is an LMS?
A Learning Management System (LMS) is used to quickly develop, host, and manage online classes and training programs.
LMS platform-based businesses are trending because anyone can build a Udemy Clone website with an LMS plugin and WordPress. Many people want to build their own Udemy style website when they learn how much money Udemy made over the past years.

We recommend you use the most powerful and one of the most popular learning management systems: LifterLMS.
Installing LifterLMS
Now, an essential part of creating a Udemy Clone is the Learning Management System (LMS) plugin.
In this tutorial, we’re using the LifterLMS plugin. LifterMS is the best free WordPress LMS plugin.
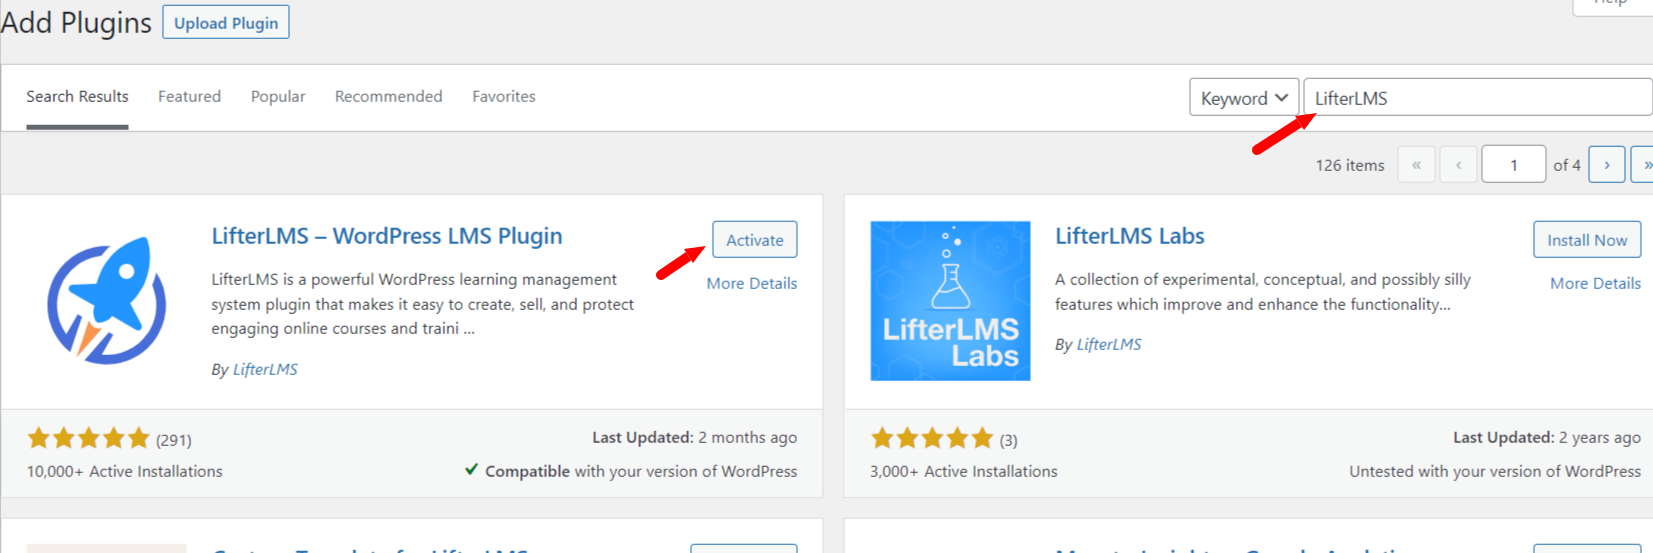
To install LifterLMS, follow the below steps:
Step 1) Navigate to the Dashboard> Plugins > Add New > In the search box, type for LifterLMS > Install Now > Activate.
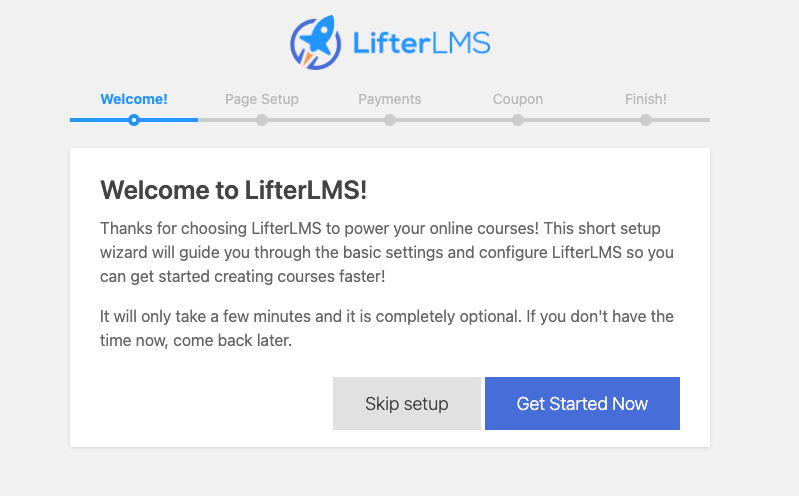
After activating the plugin, it will redirect you to the setup wizard page. Now click on Get Started Now > Save & Continue > Select your country and currency. Check the Enable offline payment option and click on Save & Continue > Allow > Start from Scratch.
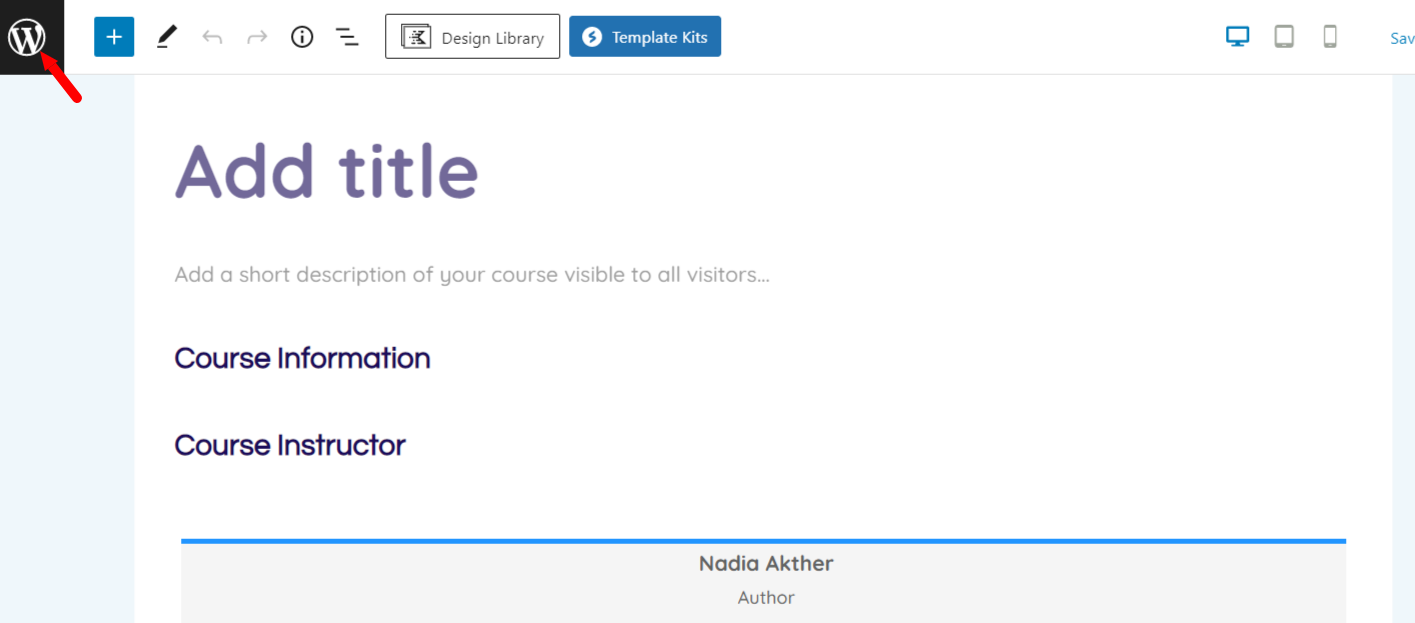
After LifterLMS is successfully installed, click on Start from Scratch. It will redirect you to the Course Page. But we will create a course later. We must click on the WordPress logo to return to our Dashboard.
For this tutorial, we will use LifterLMS Infinity Bundle. The Infinity bundle is the top-rated bundle of LifterLMS that includes everything LifterLMS makes. This bundle has all the advanced features that we need to make a Udemy Clone website.
After buying the Infinity Bundle, we have to add our license key to our website.
For adding a Licence key, visit your Dashboard > LifterLMS > Add-ons & more > My License Key > Paste your license key > Add.
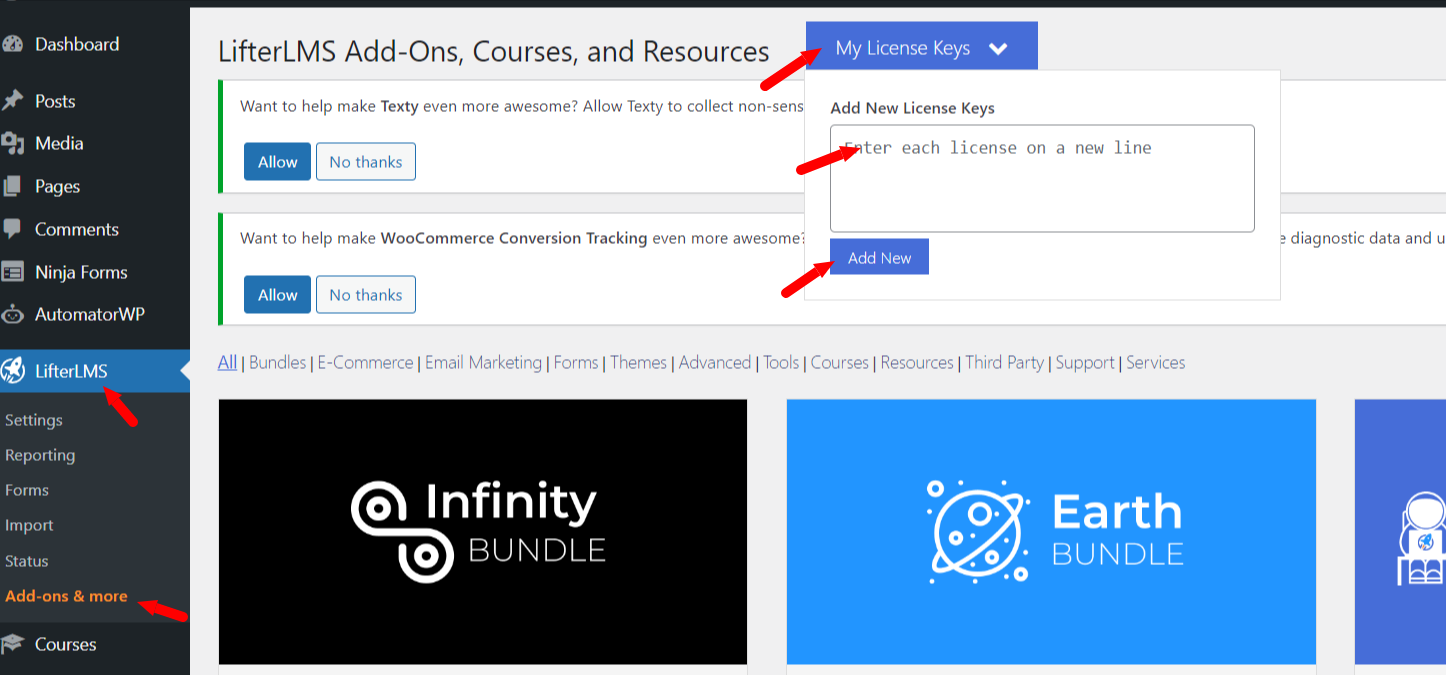
Now our Infinity Bundle is ready for use, and we can access all the LifterLMS Advanced Add-ons. Also, you can buy single Add-ons from LifterLMS if you want to go that route.
Step 5) Setup WC Vendors Marketplace
WC Vendors is a multivendor plugin for your WooCommerce Shop. The plugin lets you set up your marketplace and allows multiple sellers to sell their products and earn a commission from it.
Installing WC Vendors:
Step 1) Visit your Dashboard> Plugins > Add New > Search for “ WC Vendors” > Click on Install > Activate.
Now, on your Dashboard WC Vendors option is available. Hover over on WC Vendors > Settings > Click on Run the Setup Wizard.
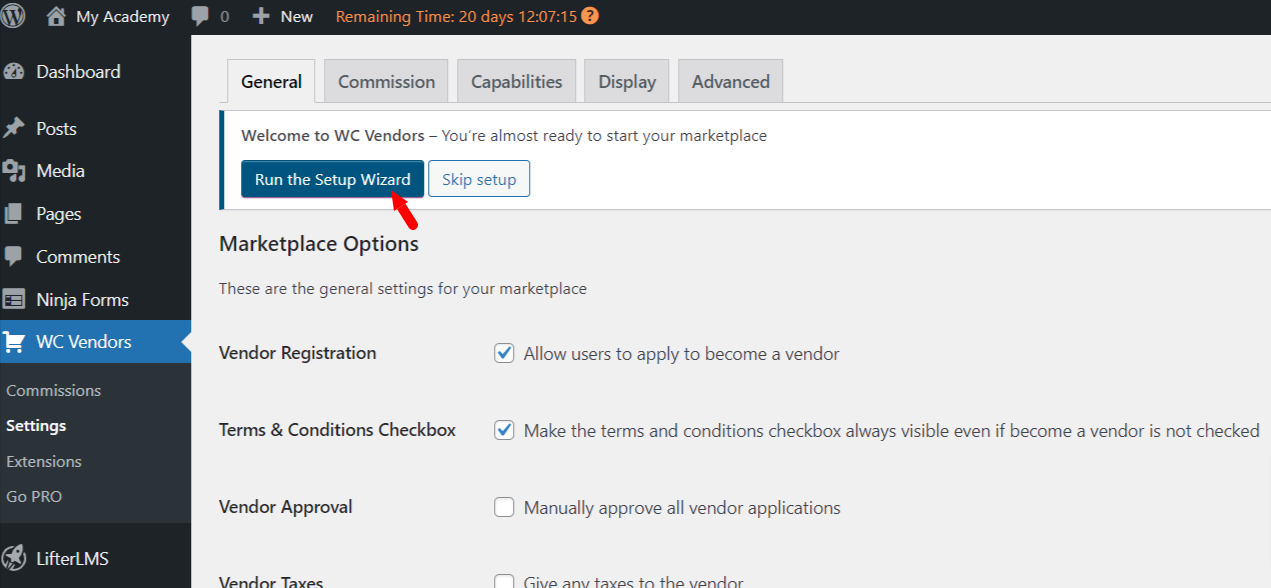
The Setup Wizard will help you to configure your marketplace.
Now, you can check to mark the desired General option and add the Commission rate. Then click on Next.
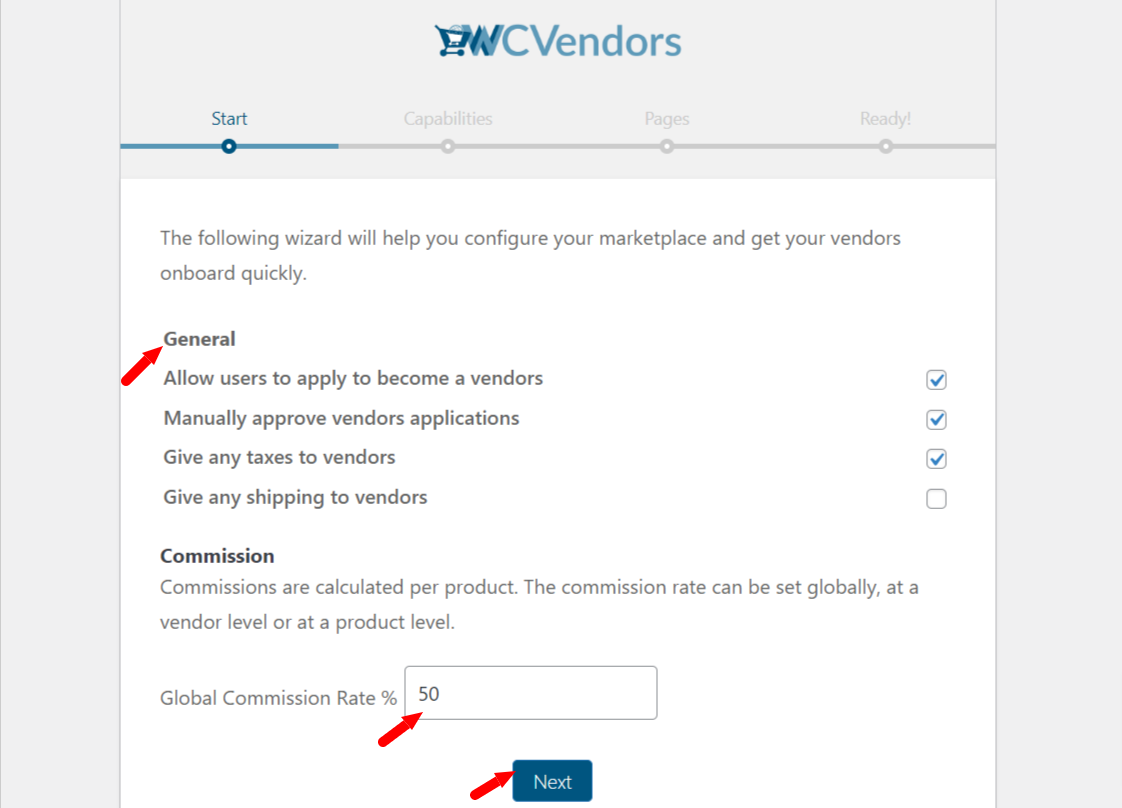
After, Clicking on Next. it will redirect you to the vendor Capabilities tab so you can control the “permissions” or what your vendors can do in your marketplace website. Select those options as per your requirements and then click on Next.
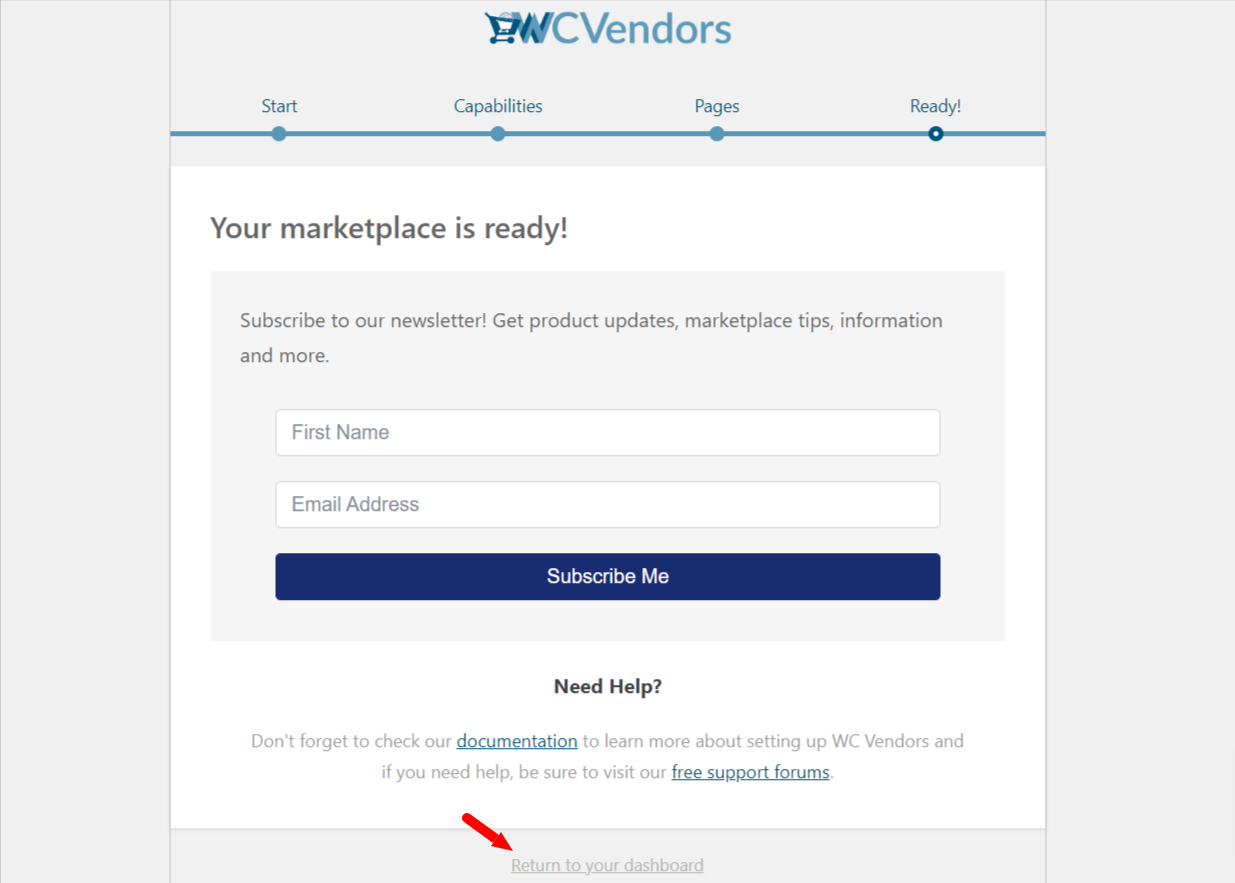
Now you will redirect to the Pages tab then click on Next.
So, your marketplace is ready. Now Click on Return to Dashboard.
Now you can enable or add any option as per your need from the Display and Advanced Tab.

Step 6) Implement Design
Home Page:
We will use the Kadence starter templates that come with the Kadence theme for designing this website.
To activate the Kadence Template, Follow the below steps.
Step 1 ) Navigate to the Dashboard > Appearance > Kadence > then click on the Starter Templates tab > Install Kadence Starter Templates.

With the Kadence starter templates installed on your website, you can use any of them as per your design preference.
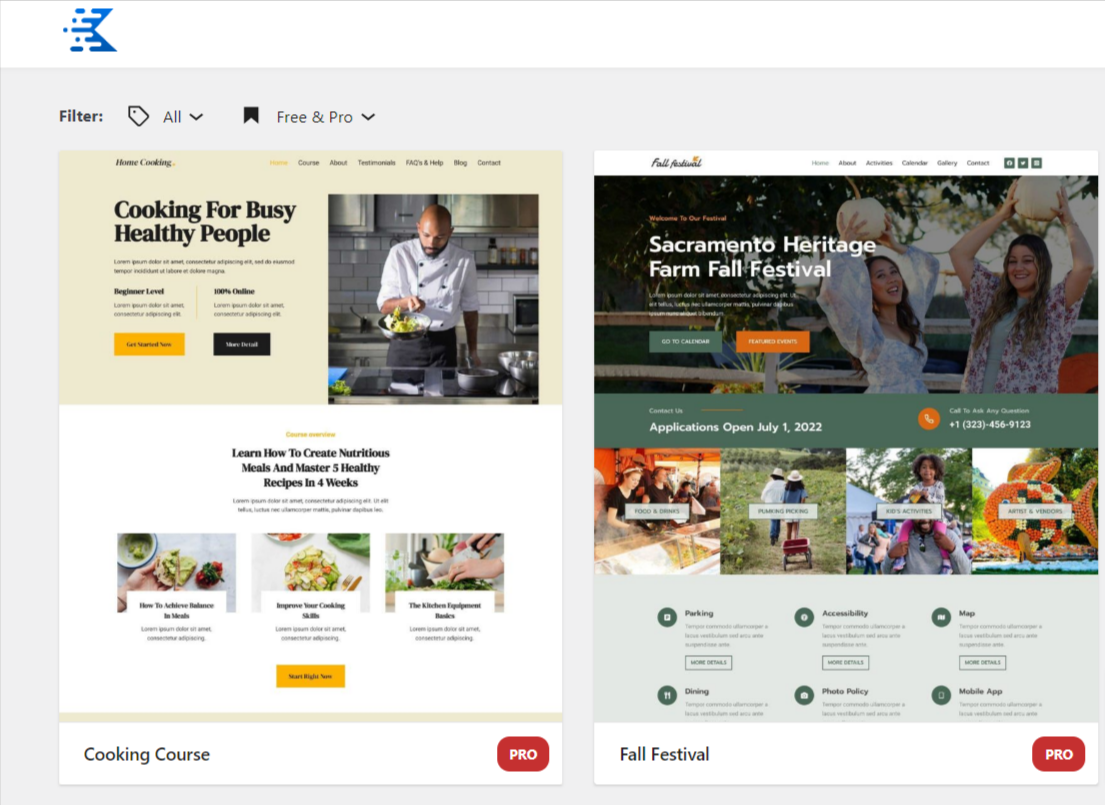
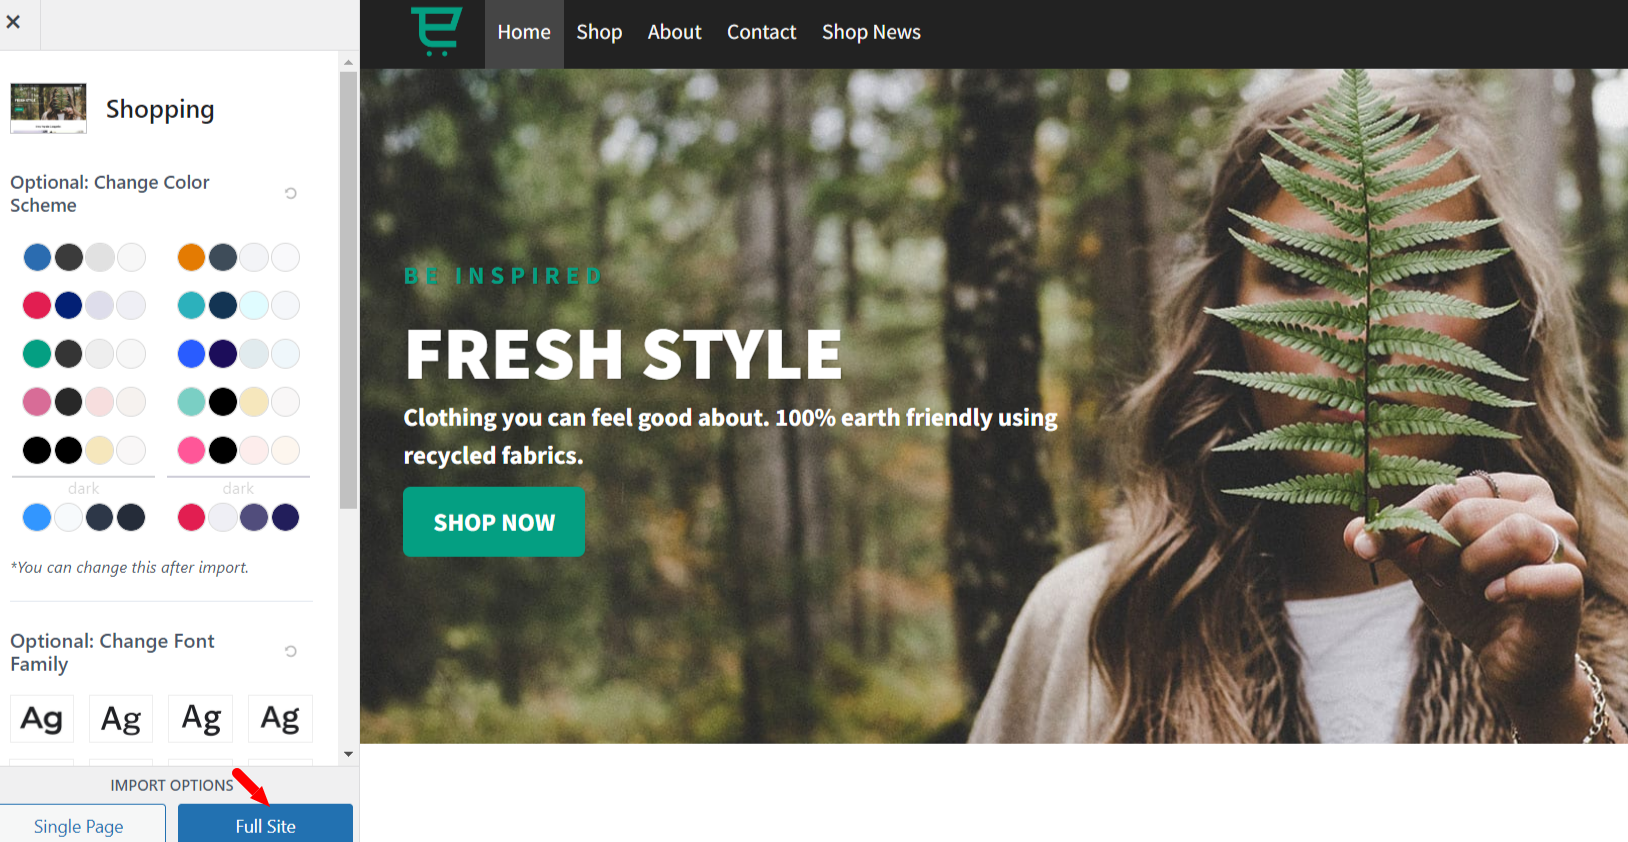
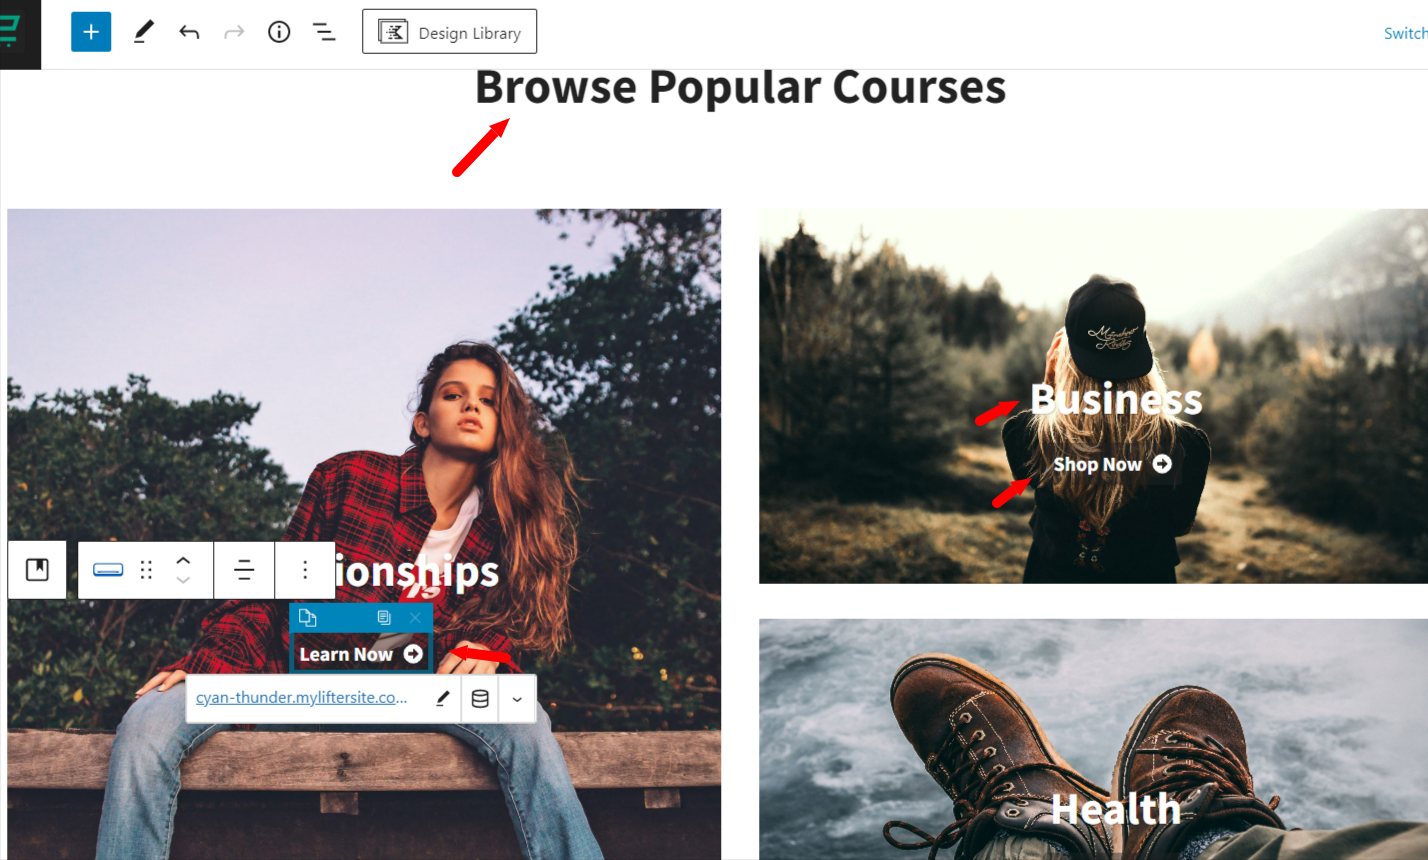
We have selected this template for this tutorial. Click on Full Size to import the templates > Subscribe & Start Importing.
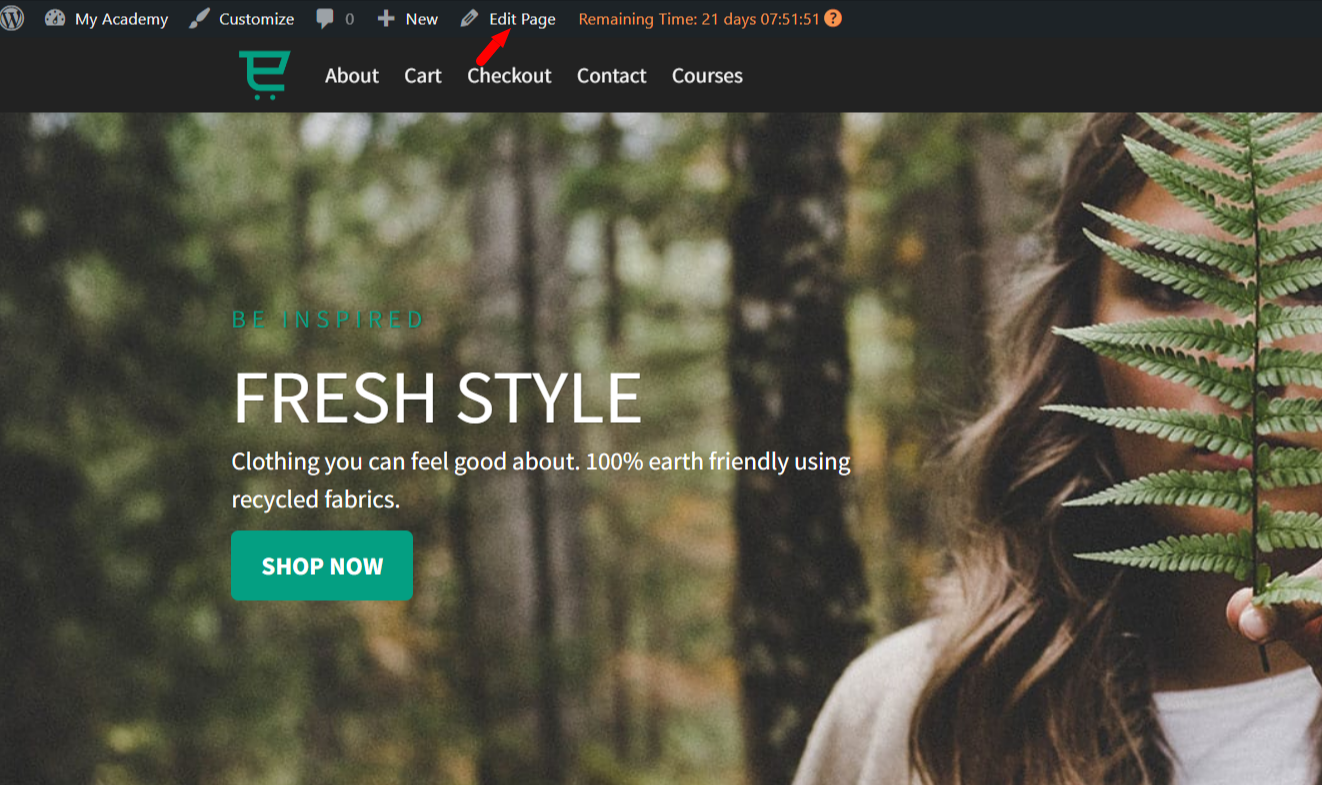
Final Look of this Kadence Template.

Now, You can modify this template depending on your needs. To edit the home page click on the Edit Page option.
Clicking on the Edit Page option will redirect you to the edit page. Now you can add or remove sections. You can change the text and button link for editing the text, hover over the text, and write your desired text.
Replace Starter Site Website Content with Your Own Content:
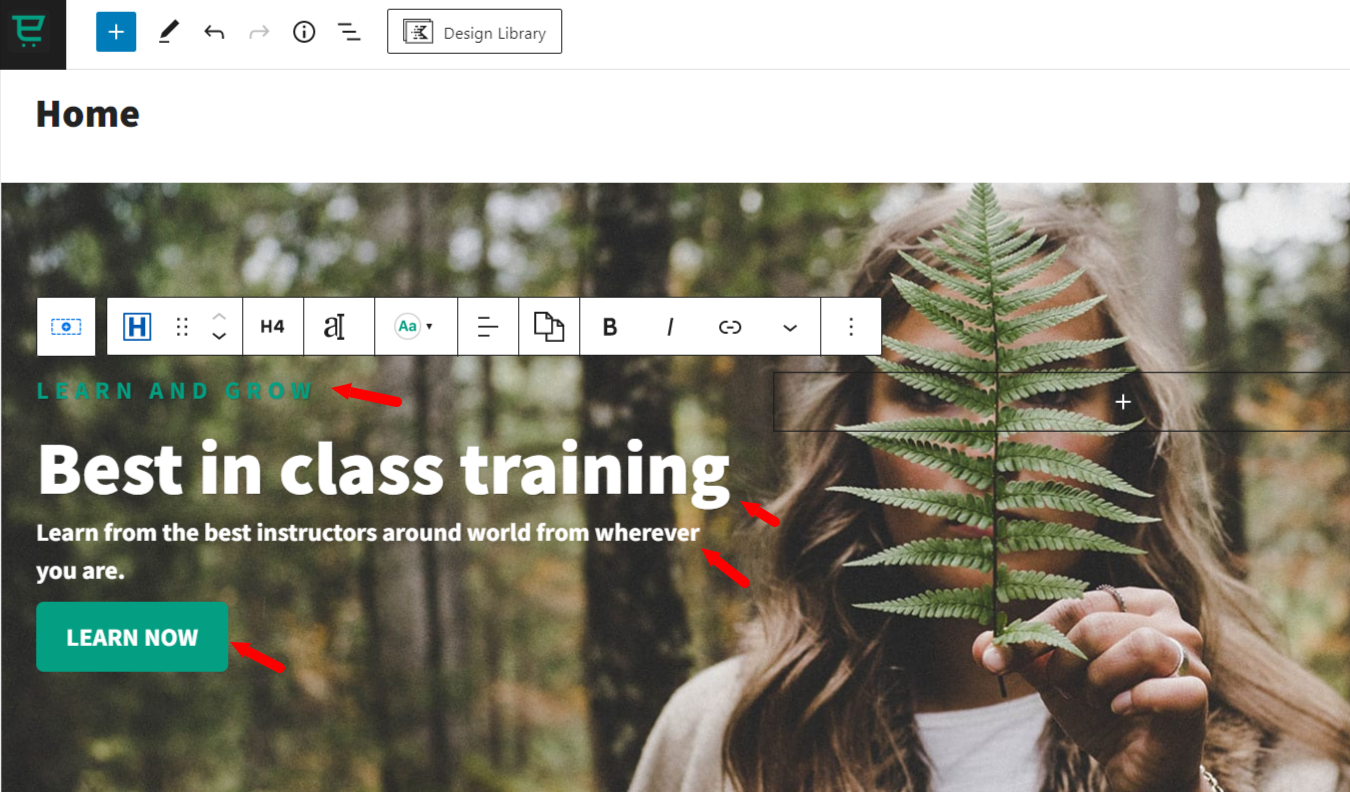
We can change the title, image text, and button link & text.
Step 7) Install and Configure WooCommerce
Install WooCommerce:
Do a plugin search for WooCommerce and install it on your website. Review this guide on using LifterLMS with WooCommerce.
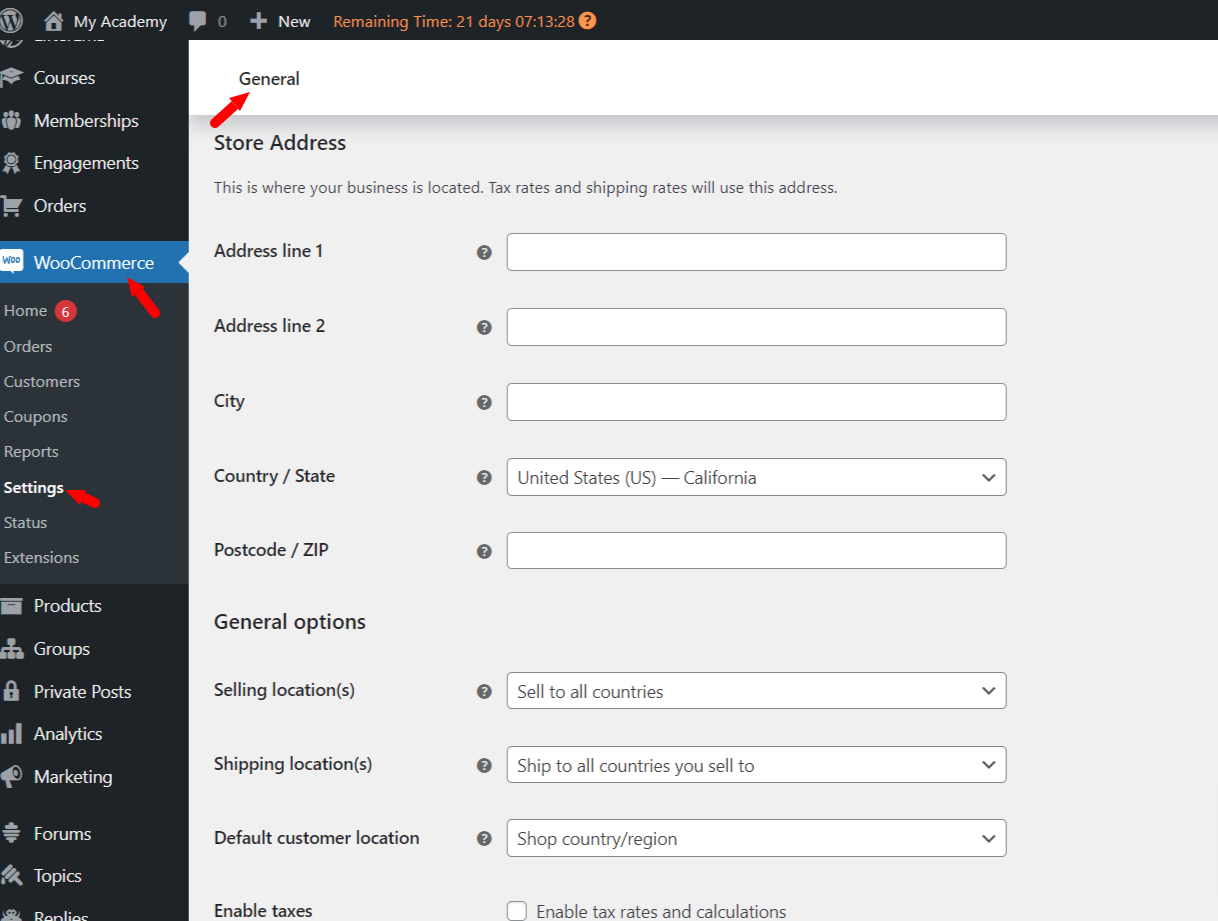
Configure Shop Page:
Now it’s time for Shop Page settings. We have to add our store address and other information. For adding information visit your WordPress Dashboard > WooCommerce > Settings > General Tab (Provide your address information) > Save Changes.
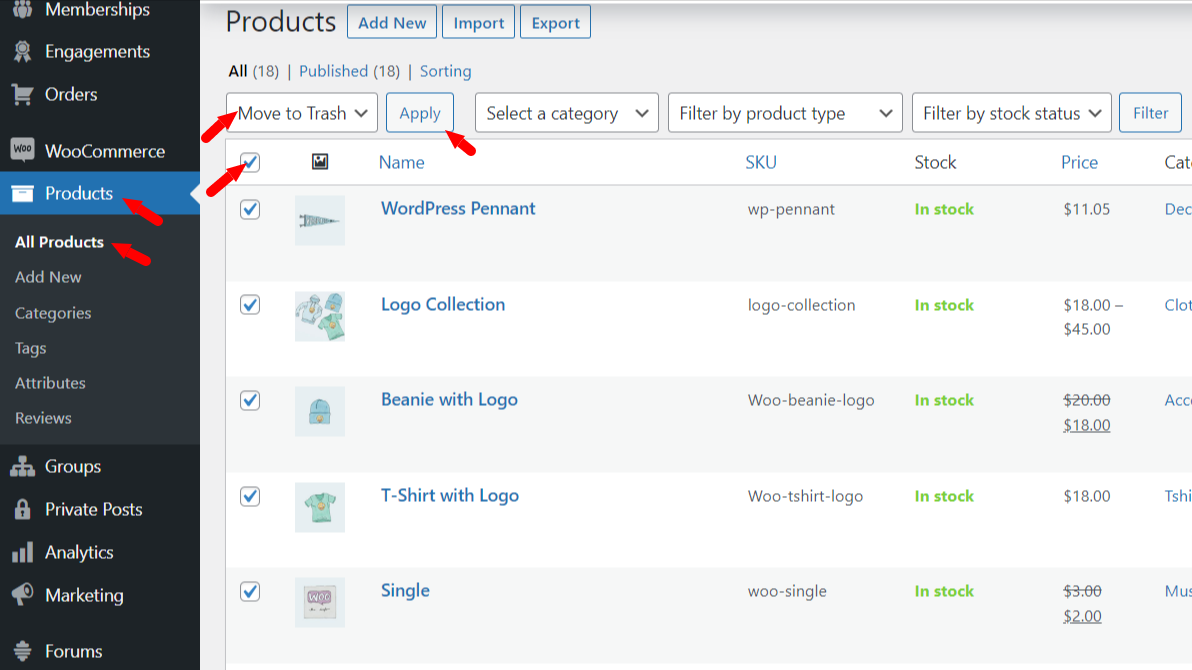
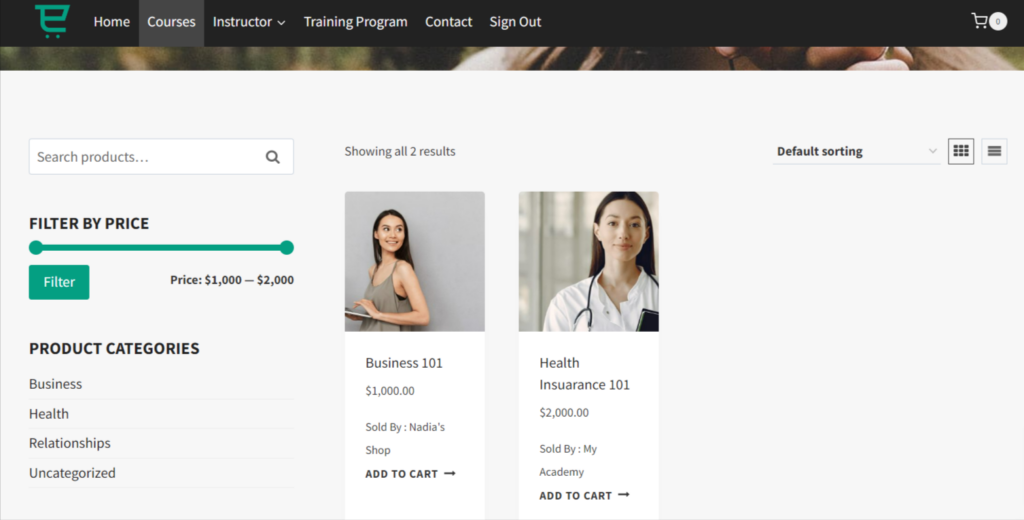
As we used a Kadence starter template to design this website, on the shop page, we will see a massive collection of default products and categories.
To delete those products visit your Dashboard > Products > All Products > Select Move to Trash category from the Bulk Action drop-down> Select all >Apply.
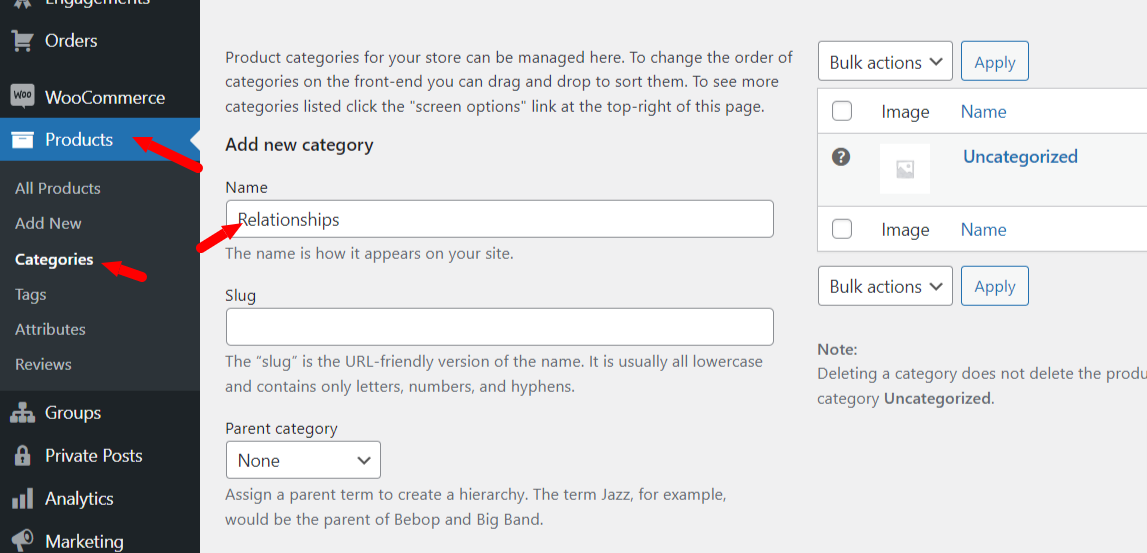
Now let’s create new course product categories for our Udemy clone website.
Creating Categories:
Adding Categories visit your Dashboard > Products > Categories > Add your category name > Add New Category.
Modify Your Website Menu:
We already have the default Kadence starter site menu, but let’s modify the menu to make it fit exactly what we want for our Udemy clone.
Visit your Dashboard > Appearance > Menus > Select the Shop Menu from the drop-down box > click on Select.
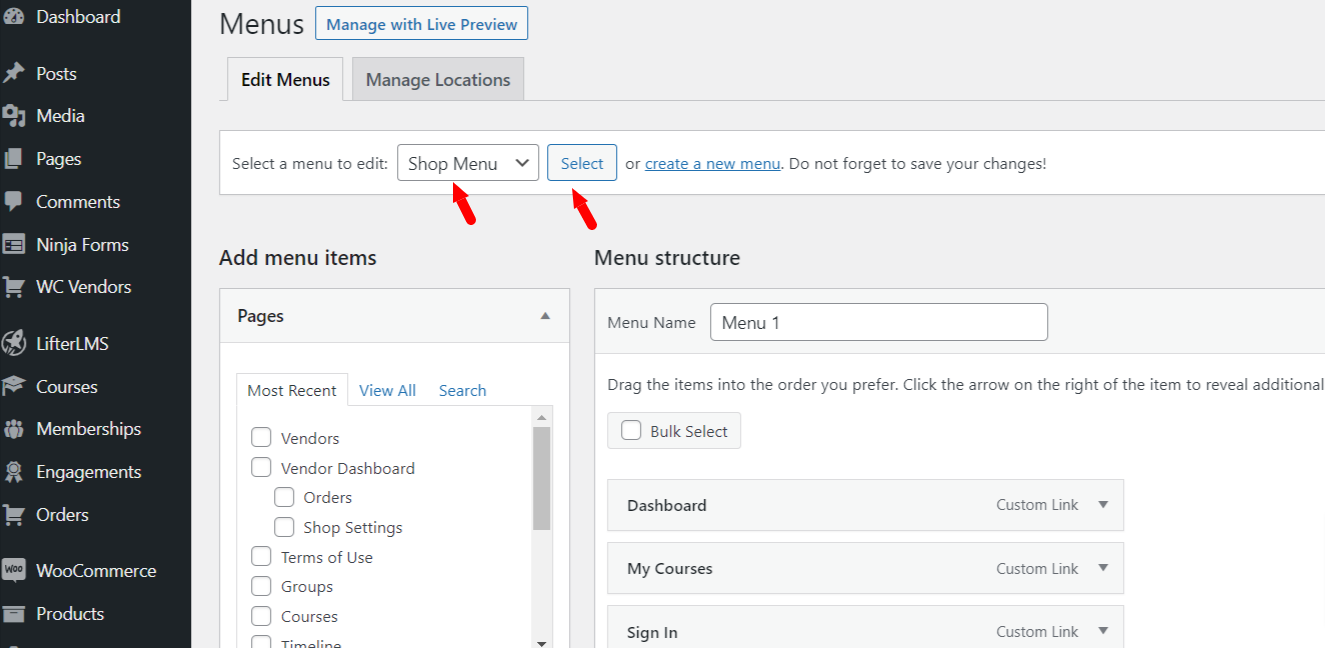
Now we will rename the shop page as Courses. We can delete unnecessary pages or add pages from the left-side Pages option. Add the Vendors pages. Select the Vendors, Vendors Dashboard, and Orders page and click Add to Menu.
Also, don’t forget to enable the LifterLMS items in the menu options by clicking on the top right side “Screen Options” and then enabling LifterLMS.

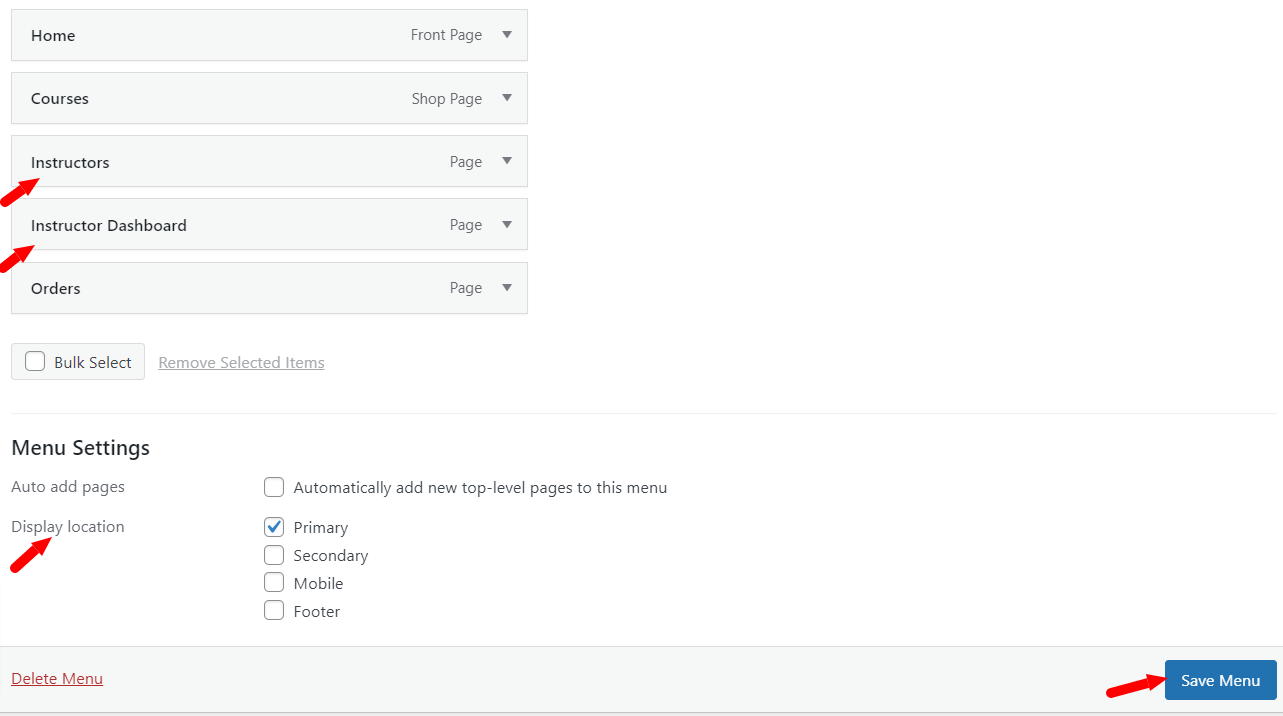
Rename that pages to meet your needs. As an example, we renamed the “Vendors” page to the “Instructors” page.
Then Select the Display location (you want to display your menu) > Save Menu.
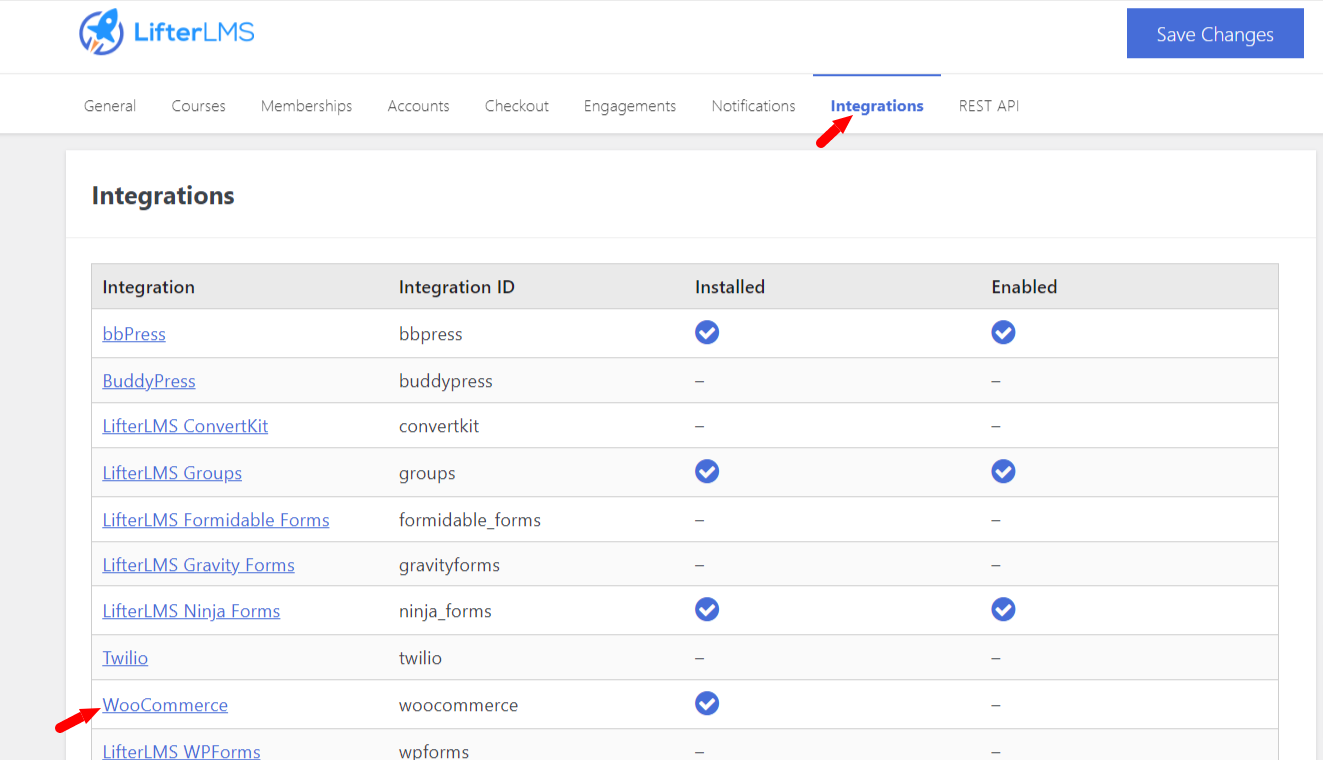
Now we have to enable the LifterLMS WooCommerce Integration. To allow this integration, visit your Dashboard > LifterLMS > Integration > Click on WooCommerce > Enable the check box > Save Changes.
Vendor Registration:
If we want to allow vendors to create accounts, we have to follow the below steps:
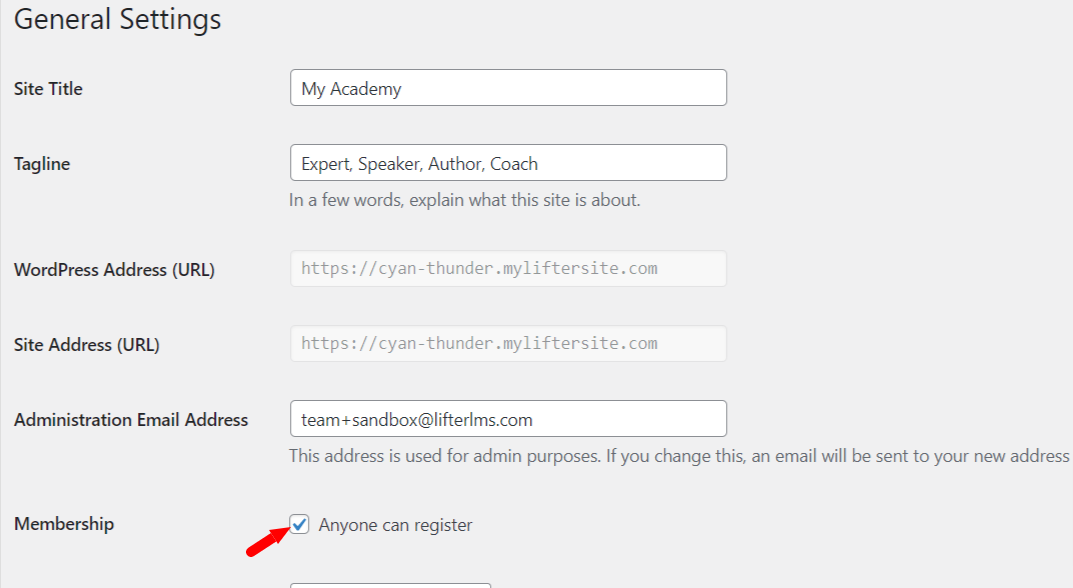
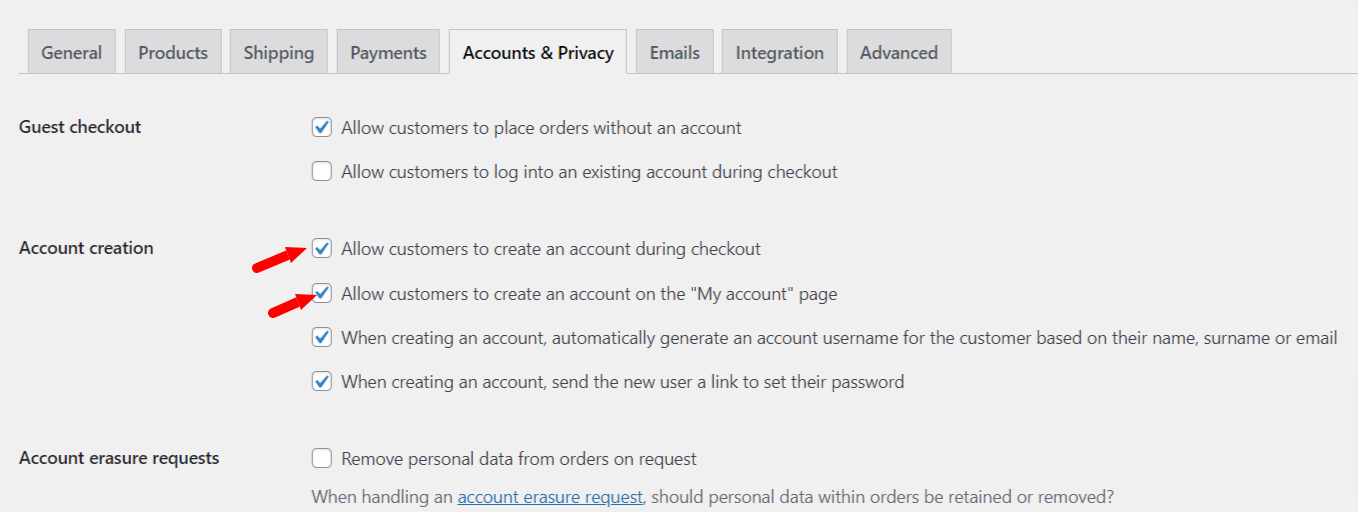
Step 1) Visit your Dashboard > Settings > General > Enable the Membership Checkbox > Save Changes.
Step 2) Visit your Dashboard > WooCommerce > Settings > Account & Privacy tab > Enable the Allow customers to create an account during checkout & Allow customers to create an account on the “My account” page option > Save Changes.
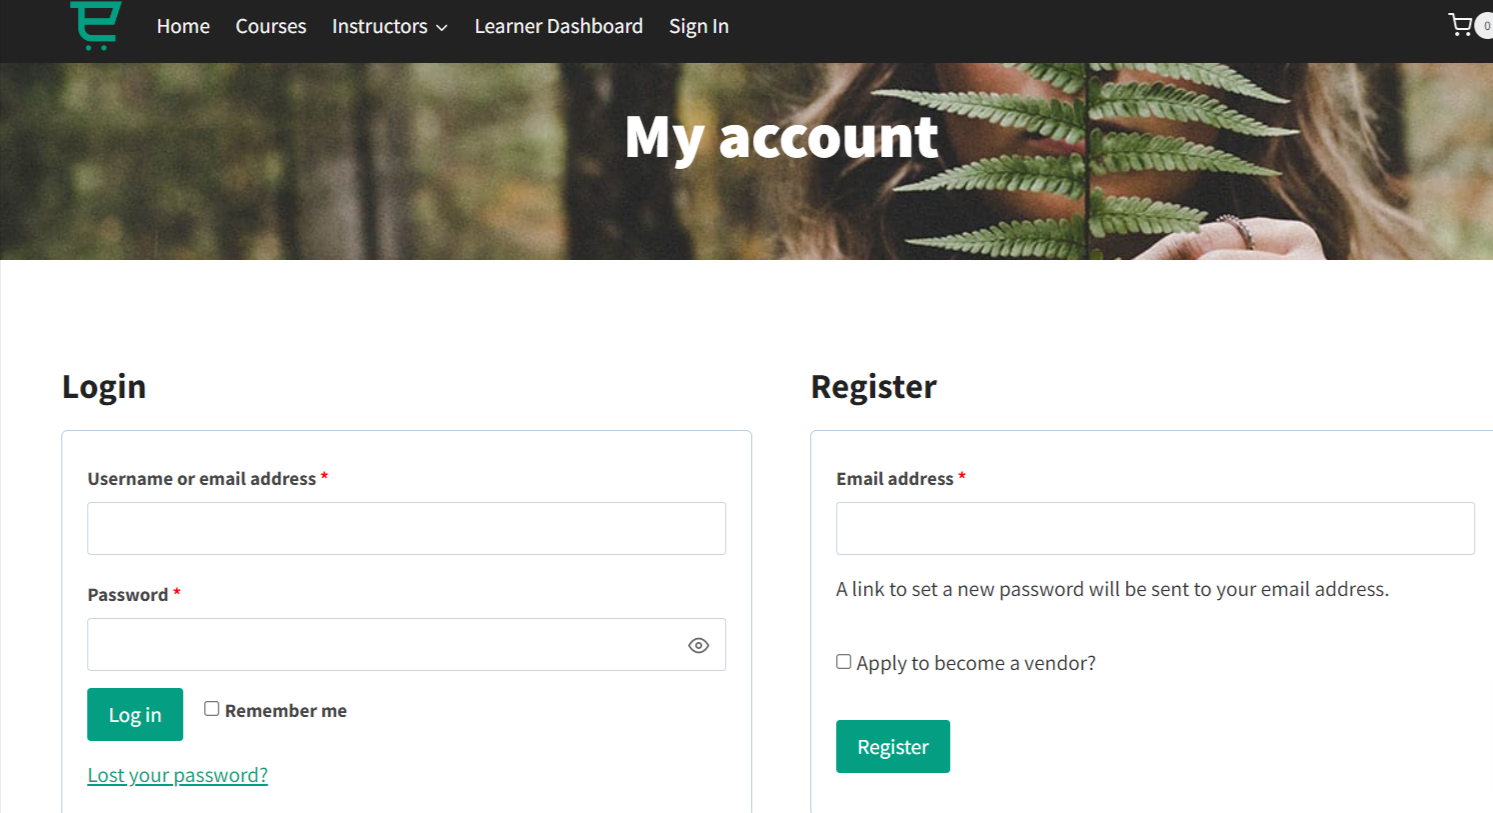
Now, a vendor can register for your website.
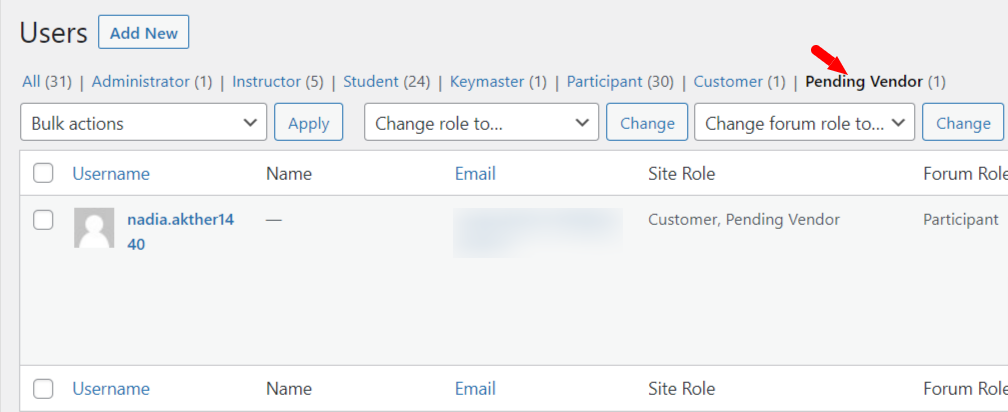
Now Vendors need approval from you after they register.
You will get all the vendor requests on your Website Dashboard. Visit your Dashboard > Users > Pending Vendor > Approve.
Step 8) User Role Editor
Now we need a plugin to help assign vendors to multiple roles. Use the PublishPress Capabilities plugin for this.
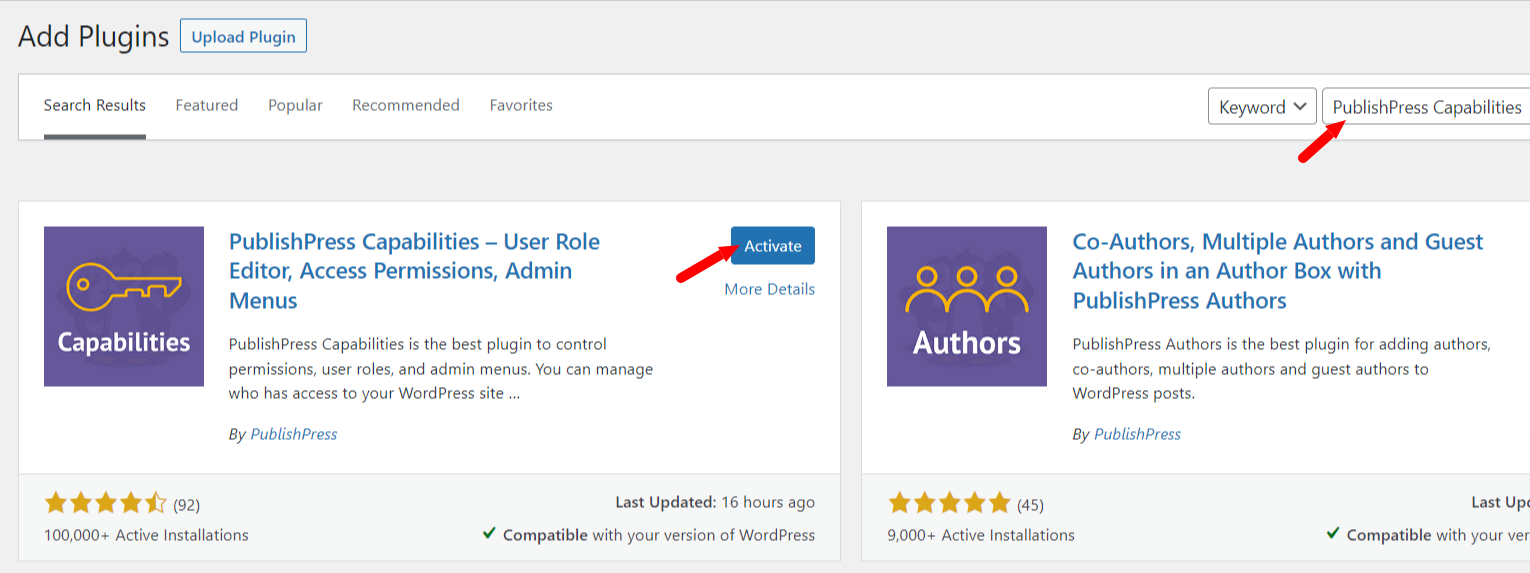
After activating the PublishPress Capabilities plugin, follow these steps to assign multiple roles to your vendor instructors.
Step 1 ) Visit your Dashboard > Users > Vendor tab > Edit > Role (now you can select multiple roles for your vendor) > Update User.
Now your instructors can access their restricted view of the website admin so they can create and manage their own courses.
Create Course as a Vendor:
Follow the below steps.
Step 1) Visit your Dashboard > Products > Add New > Fill out all the information ( Title, Description, Image) > Publish.
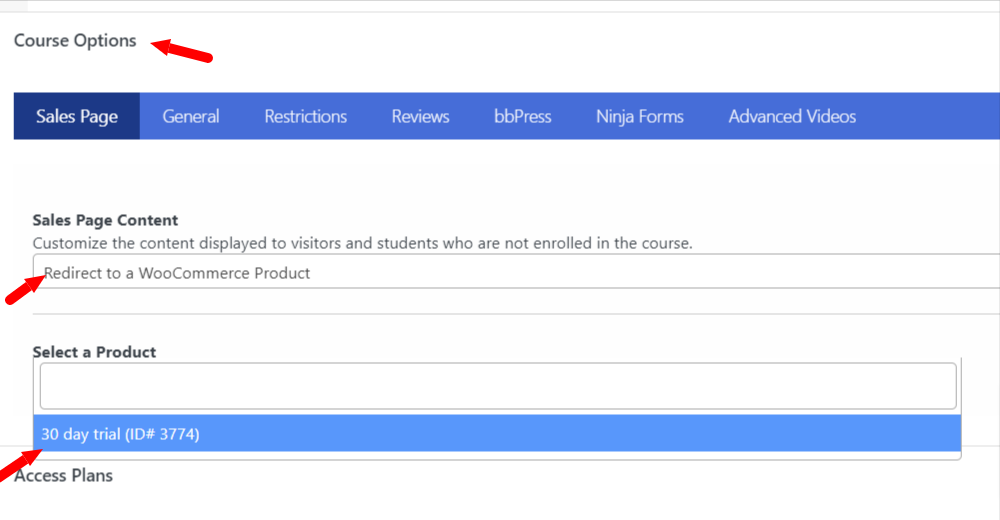
Step 2) Your WordPress Dashboard > Courses > Add Course > Course Tittle > Information > Select the Redirect to WooCommerce Product option from Sales Page Content > Select your product.
Now Create an access plan, lesson quiz, and any other learning experiences. We have a detailed tutorial about creating courses and other learning experiences.
Now Our Vendor / Instructor courses are ready.
Vendor Shop Settings:
You can add your PayPal and Bank account for handling the commissions and also you can add your shop display name, seller Info, and shop description.
For adding this information visit your Dashboard > Shop Settings > Add all the information > Save Shop Settings.
Your multi-instructor website like Udemy is mostly complete.
But, we can optionally add even more functionality like group enrollments and group learner management.
Add Group Learning:
LifterLMS Groups is a powerful tool that allows you to offer courses and memberships to group buyers. The group leader is given the ability to invite, enroll, and manage group members in the program. This includes being able to view progress and reporting specifically for their group members, making it easy to monitor the progress of the group as a whole. It’s a simple and effective way to manage group learning and training.
LifterLMS Groups is also available in the LifterLMS Infinity Bundle.
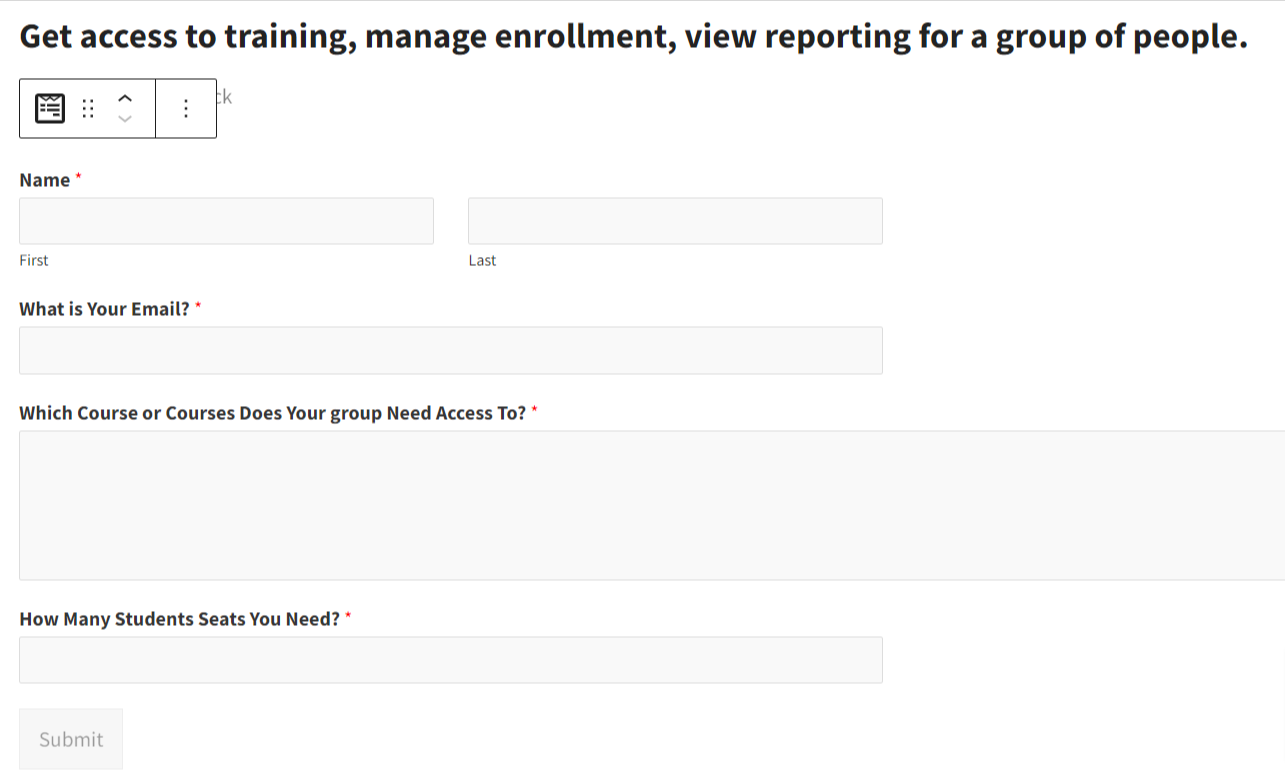
Step 9) WP Forms:
Follow the below steps to create a group program request form with WP Forms:
Step 1) We need to create a Page. Visit your Dashboard > Pages > Add New > Add the title and content > Publish.
Step 2) Install WP Forms Plugin for creating a simple contact form (WP Forms has paid version with amazing functionality). Here we have created a simple form.
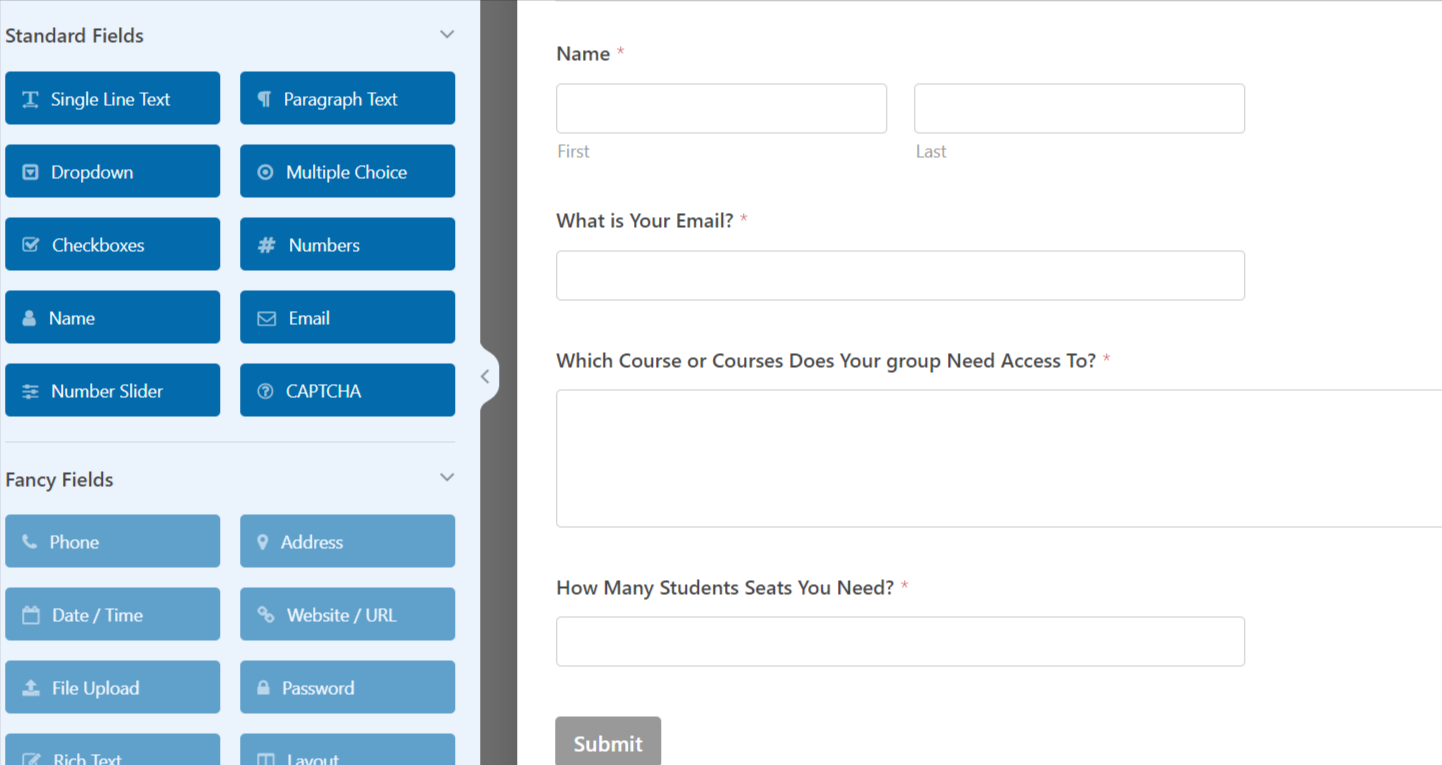
Step 3) Now, we will add that form to our Training Program Page. Visit the Training Program Page > Click on Add Block > Search for WP Forms > Click on WP Forms > Select your created form > Update.
So, when you get a group learning request from your website visitors, you can set up the Group homepage for them, you can add the course or memberships, adjust the number of seats allowed, and invite the group admins in so they can start managing their group.
Step 4) Now visit your Dashboard > LifterLMS > Groups > Add New > Fill out the Information > Add Seats > Invite Members > Save.
Your Udemy Clone Website is Complete
Congratulations on creating your Udemy clone website with WordPress!

If you get stuck or have questions feel free to ask the community or contact the LifterLMS team for help.