Are you an expert in some professional field and unsure exactly what kind of expert business to make? Today we’re going to go over the massive Continuing Education Credit Education Company opportunity…
Chris has been in the online course business for a decade. He’s been a course creator, a coach, an affiliate, a CEU site building agency owner, and is the creator of the leading WordPress LMS software LifterLMS. In all this time he’s witnessed that some of the most successful education entrepreneurs build professional continuing education companies serving the various markets requiring CEU credits.
Perhaps you’re struggling with challenges figuring out what type of expert business to make…
- You’re unsure the best path to monetize your industry expertise
- You’re not sure what the most efficient profitable business model might be
- You’re worried that you’ll have to swing back and forth from marketing to delivery in a feast or famine mode
When you focus on becoming a certified continuing education company you become …
- Focused so your time is well spent
- Empowered and profitable through a strong recurring revenue business model so you can build a strong asset
- Supported by recurring revenue as the continuing education market creates recurring income opportunities by design
5 Key Principles to build CEU
The 5 key principles to building a profitable certified continuing education company for niche professionals.
1) Choose a strong tech stack like WordPress and LifterLMS so your project becomes your asset and the platform has unlimited customizability and scalability.
2) Create one-off CEU credit courses and also course bundles with LifterLMS memberships.
3) Partner with certification governing bodies to get steady website traffic and therefore sales.
4) Consider bringing in outside experts and resources so you don’t have to invent all the training from scratch.
5) Consider hiring a WordPress and LifterLMS expert to help build out the site so you can focus on building out all the other parts of the CEU business.
At LifterLMS we’ve seen and helped lots of CEU businesses grow in fields like law, medicine, real estate, pharmaceuticals, massage, and many more areas. When you’re in the business of helping people keep their jobs and get promoted, the sale is much easier.
Online continuing education has experienced a surge in demand in recent times, and it’s not going away.
We’ve even seen some education entrepreneurs act as publishers, and build Continuing Education (CEU) businesses without creating the curriculum themselves. They do this through licensing and hiring content creators.
Sections we will cover in this blog:
Video Tutorials : How to Create and Sell Continuing Education CEU Courses as a Curriculum Developer
SOFTWARE TOOLS MENTIONED IN VIDEO:
- LifterLMS (FREE DOWNLOAD)
- LifterLMS Infinity Bundle
- LifterLMS Stripe
- LifterLMS Custom Fields
- Kadence Theme (FREE DOWNLOAD)
SERVICES MENTIONED IN VIDEO:
Step 1: Installing Theme
To create a website, you will first need a Theme. A theme is a base for a website’s overall appearance. For this tutorial, we’ll use the Kadence theme. For more details follow our step-by-step guide on How to Install a WordPress Theme.
Popular WordPress Themes
Popular WordPress Themes
Importing Kadence Templates
We will use the Kadence starter templates with the Kadence theme for designing this website.
To activate the Kadence template, follow the below steps.
Navigate to the Dashboard > Appearance > Kadence > then click on the Starter Templates tab > Install Kadence Starter Templates.

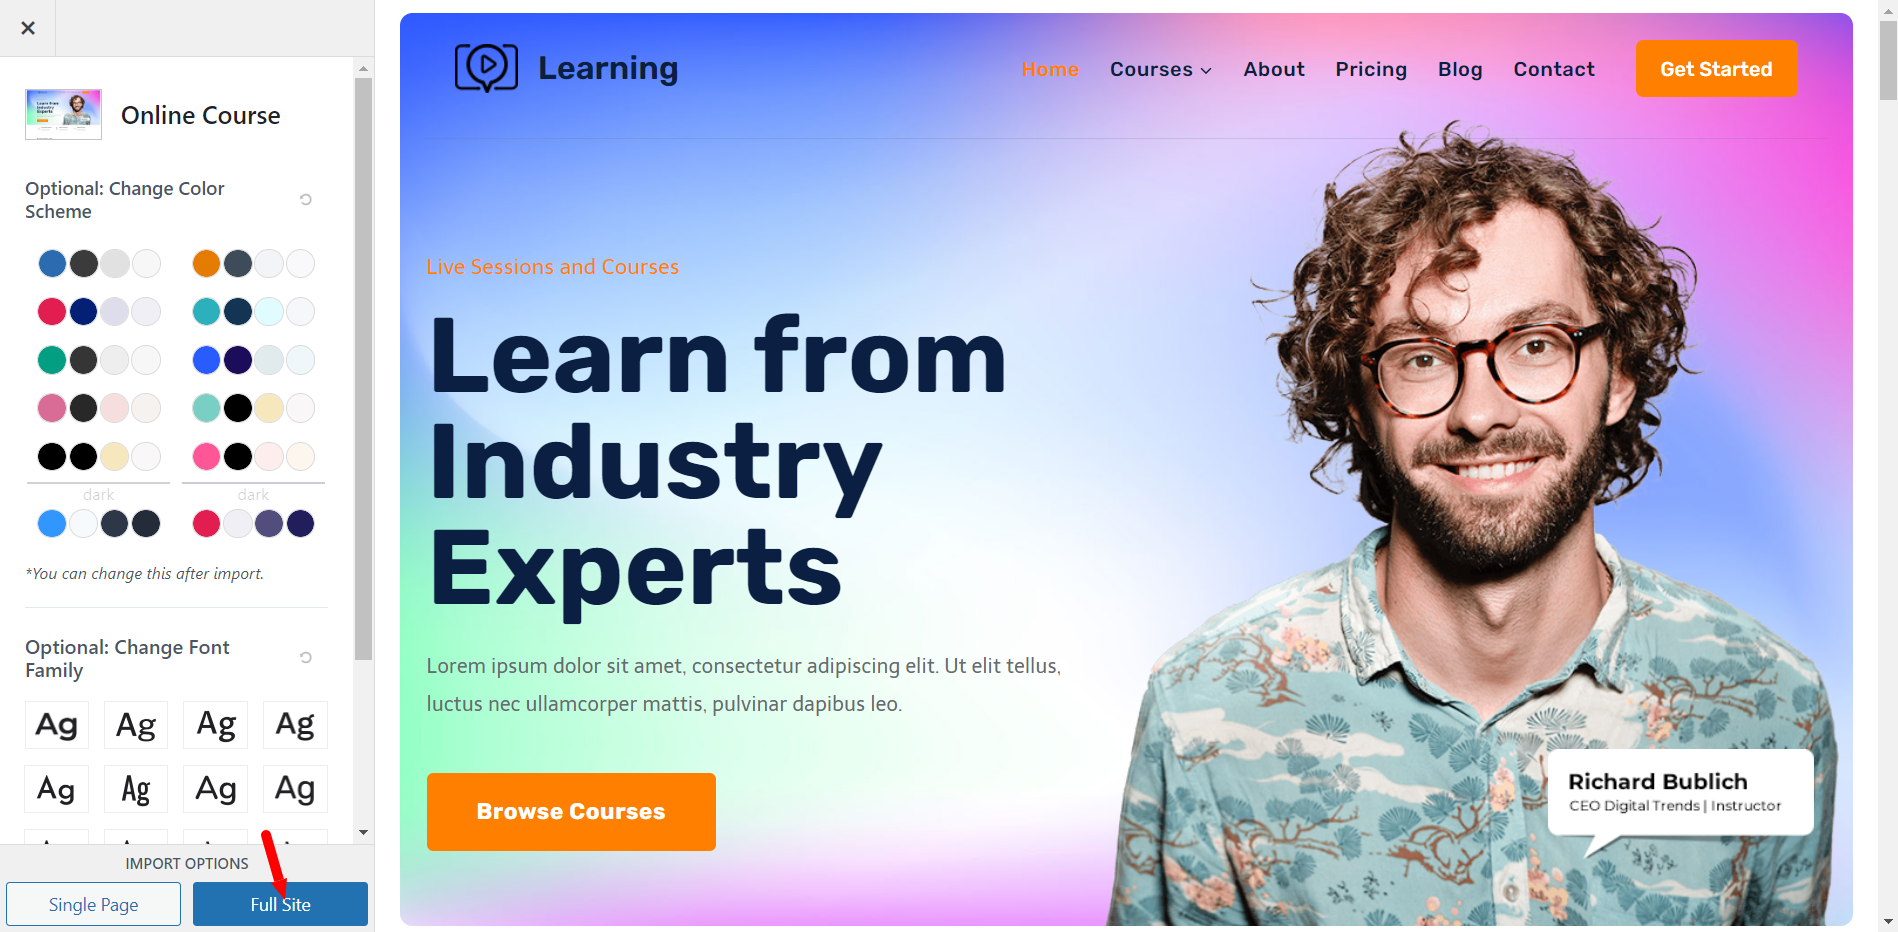
With the Kadence starter templates installed on your website, you can use any of them per your design preferences. The Kadence templates are responsive to any website design.
We have selected this template for this tutorial. Click on Full Site to import the templates > Subscribe & Start Importing > Finished! View Your Site.
Now the Kadence template has successfully imported into your WordPress site.
Replace Your Website Content
Now, You can modify this template depending on your needs. To edit the home page click on the Edit Page option.
Clicking on the Edit Page option will redirect you to the edit page. Now you can add or remove sections. You can change the text and button link for editing the text, hover over the text, and write your desired text.

Also, you can change your site title and logo. To edit this, follow the below steps.
Navigate to your WordPress Dashboard > Appearance > Customize > Header > Logo > now you can click on Change Logo to add your new logo. Also, if you scroll down, you will get an option for Site Title; you can add your title here > Publish.
Step 2: LifterLMS Plugin
LifterLMS is the most powerful Learning Management System (LMS). A comprehensive solution that includes course management, quizzes, assignments, payments, memberships and many more advanced features. You can easily create a educational website with the help of this LMS plugin.
Installing LifterLMS
Now, the most essential part is to install the best LMS plugin. For more details follow our step-by-step guide on How to Install a WordPress Plugin.
LifterLMS Setup Wizard
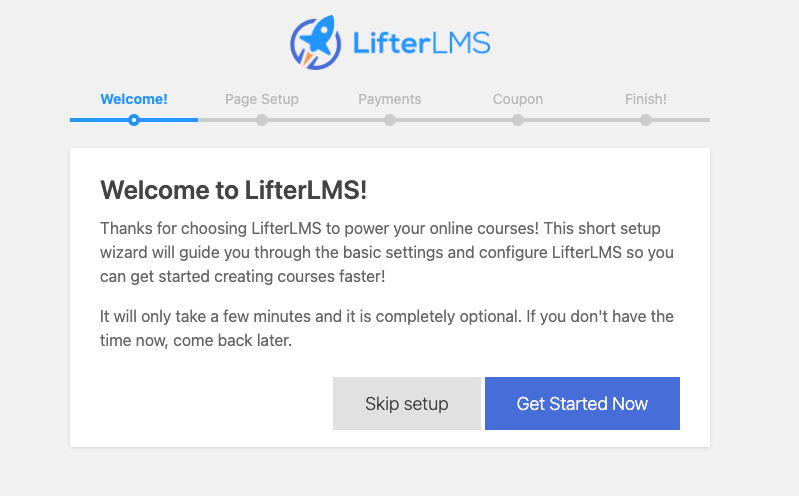
After activating the plugin, it will redirect you to the setup wizard page. Now click on Get Started Now > Save & Continue > Select your country and currency. Check the Enable offline payment option and click on Save & Continue > Allow > Start from Scratch.
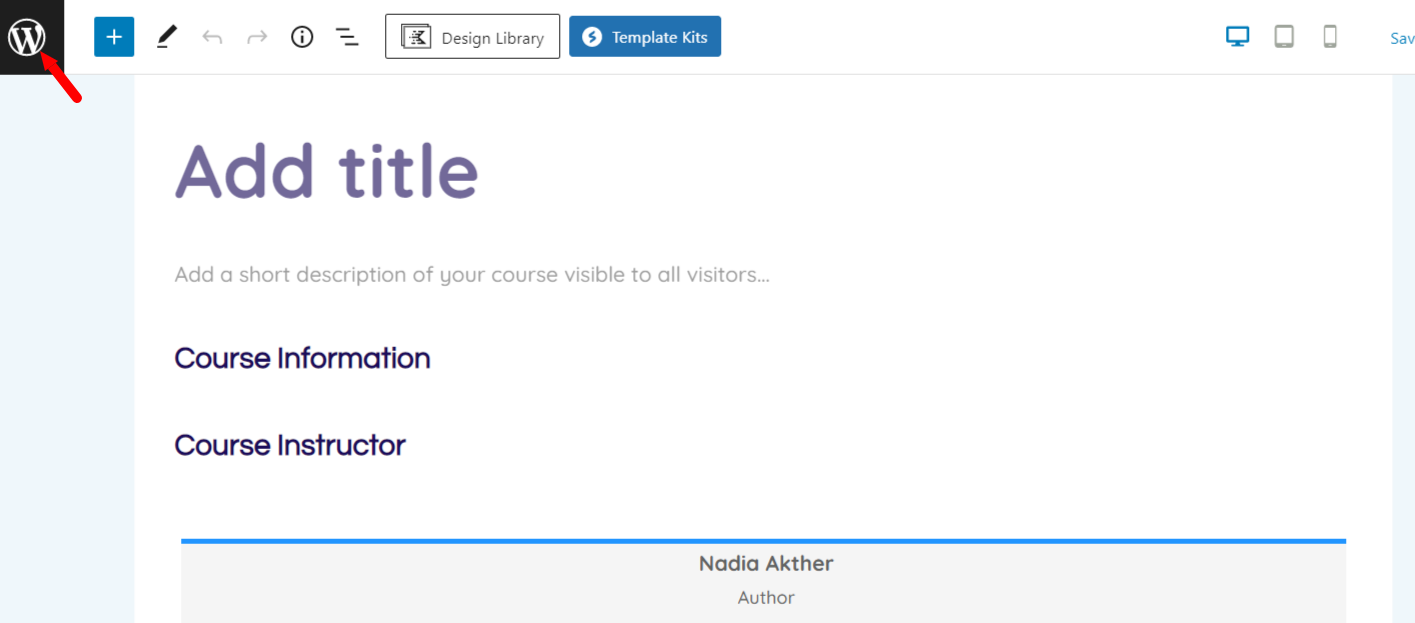
After LifterLMS is successfully installed, click on Start from Scratch. It will redirect you to the Course Page. But we will create a course later. We must click on the WordPress logo to return to our Dashboard.
For this tutorial, we will use LifterLMS Infinity Bundle. The Infinity bundle is the top-rated bundle of LifterLMS that includes everything LifterLMS makes. You will get all the advanced features of LifterLMS in this bundle.
Activate License Key
After buying the Infinity Bundle, we have to add our license key to our website.
For adding a License key, visit your Dashboard > LifterLMS > Add-ons & more > My License Key > Paste your license key > Add.
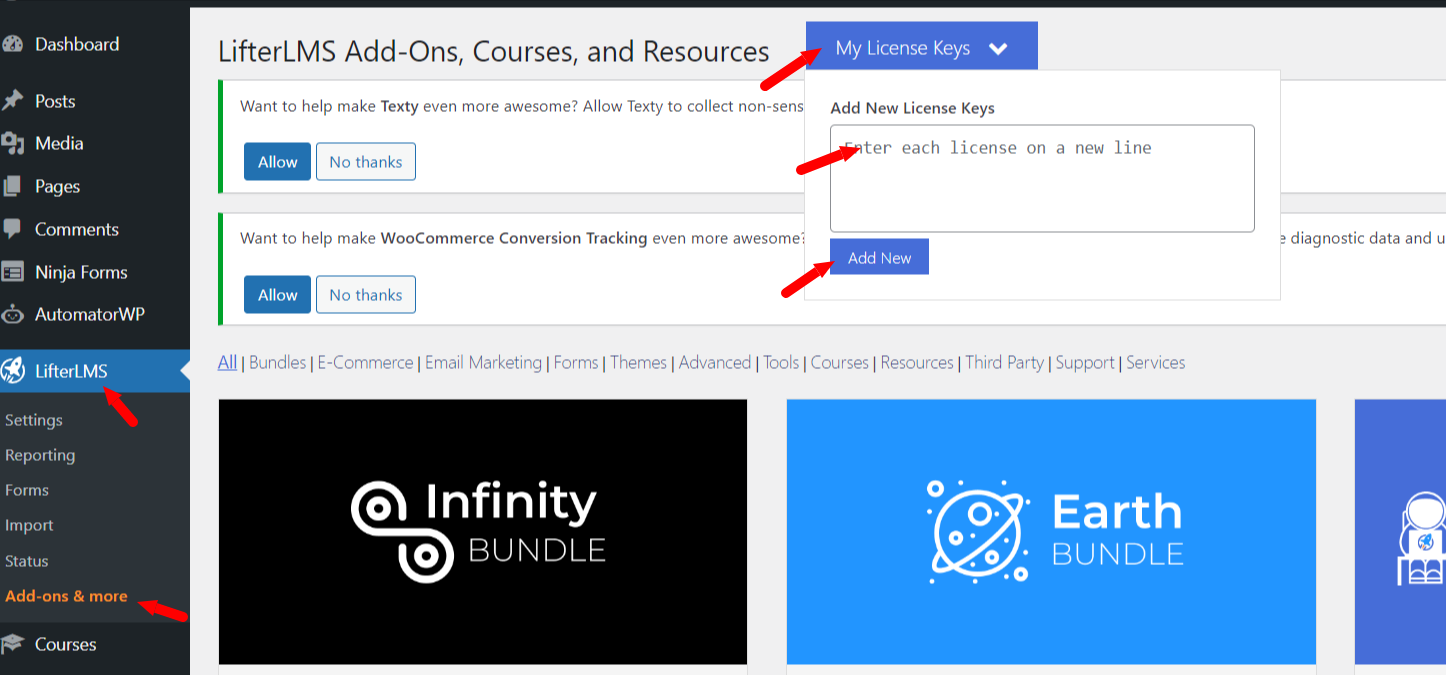
Now our Infinity Bundle is ready for use, and we can access all the LifterLMS Advanced Add-ons. Also, you can buy single Add-ons from LifterLMS if you want to go that route.
Step 3: Modify the Menu
You already have the Kadence template’s default menu. But you can modify your menu to make it fit exactly what you want for your continuing educational website. Follow the below process to modify your menu.
Visit your Dashboard > Appearance > Menus > Select the Online Course Menu from the drop-down box > click on Select.
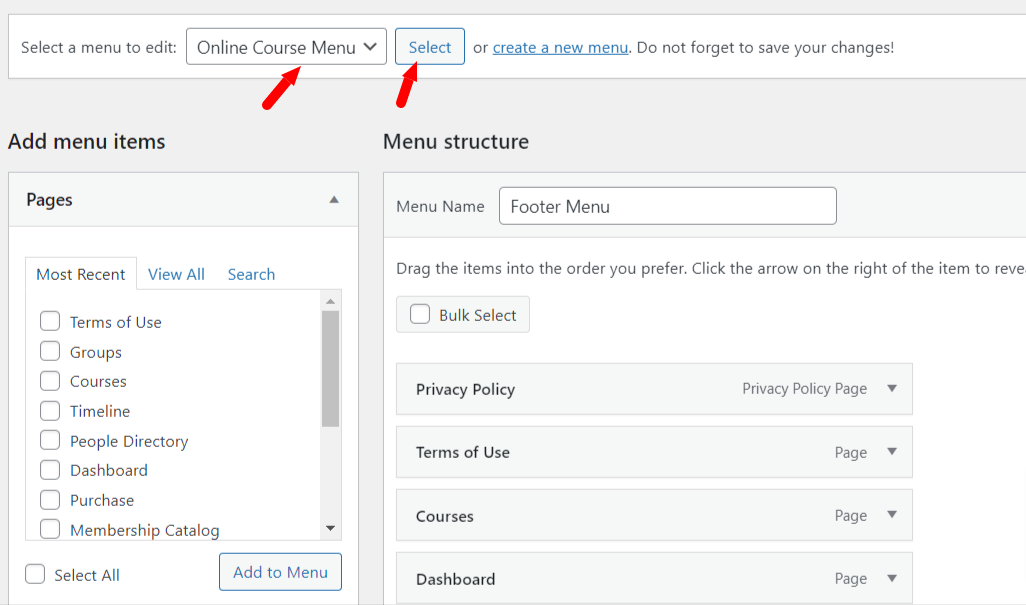
Now, remove the default course page and add all the pages you want to add (Important pages: Course Catalog page, Dashboard, Membership, My account, Sign in and Sign out) > Select the Display Location > Save Menu.
Note: You can rename these pages as well. For example, we have renamed the course catalog page to courses.
Also, don’t forget to enable the LifterLMS items in the menu options by clicking on the top right side “Screen Options” and then enabling LifterLMS.
Step 4: Create Courses
To create your first online course, follow the below process.
Navigate to your WordPress Dashboard > Courses > Add Course > Course Tittle > Information > Access Plan and other information.
Also create lesson quizzes and any other learning experiences with the Launch Course Builder option. We have a detailed tutorial about creating courses and other learning experiences.
Now your courses are ready.

Course/Lesson Sidebar
You can add a sidebar to your course and lesson. To enable the sidebar option visit your WordPress Dashboard > Appearance > Customize > LifterLMS > Course Layout > Select your preferable sidebar layout > Publish.
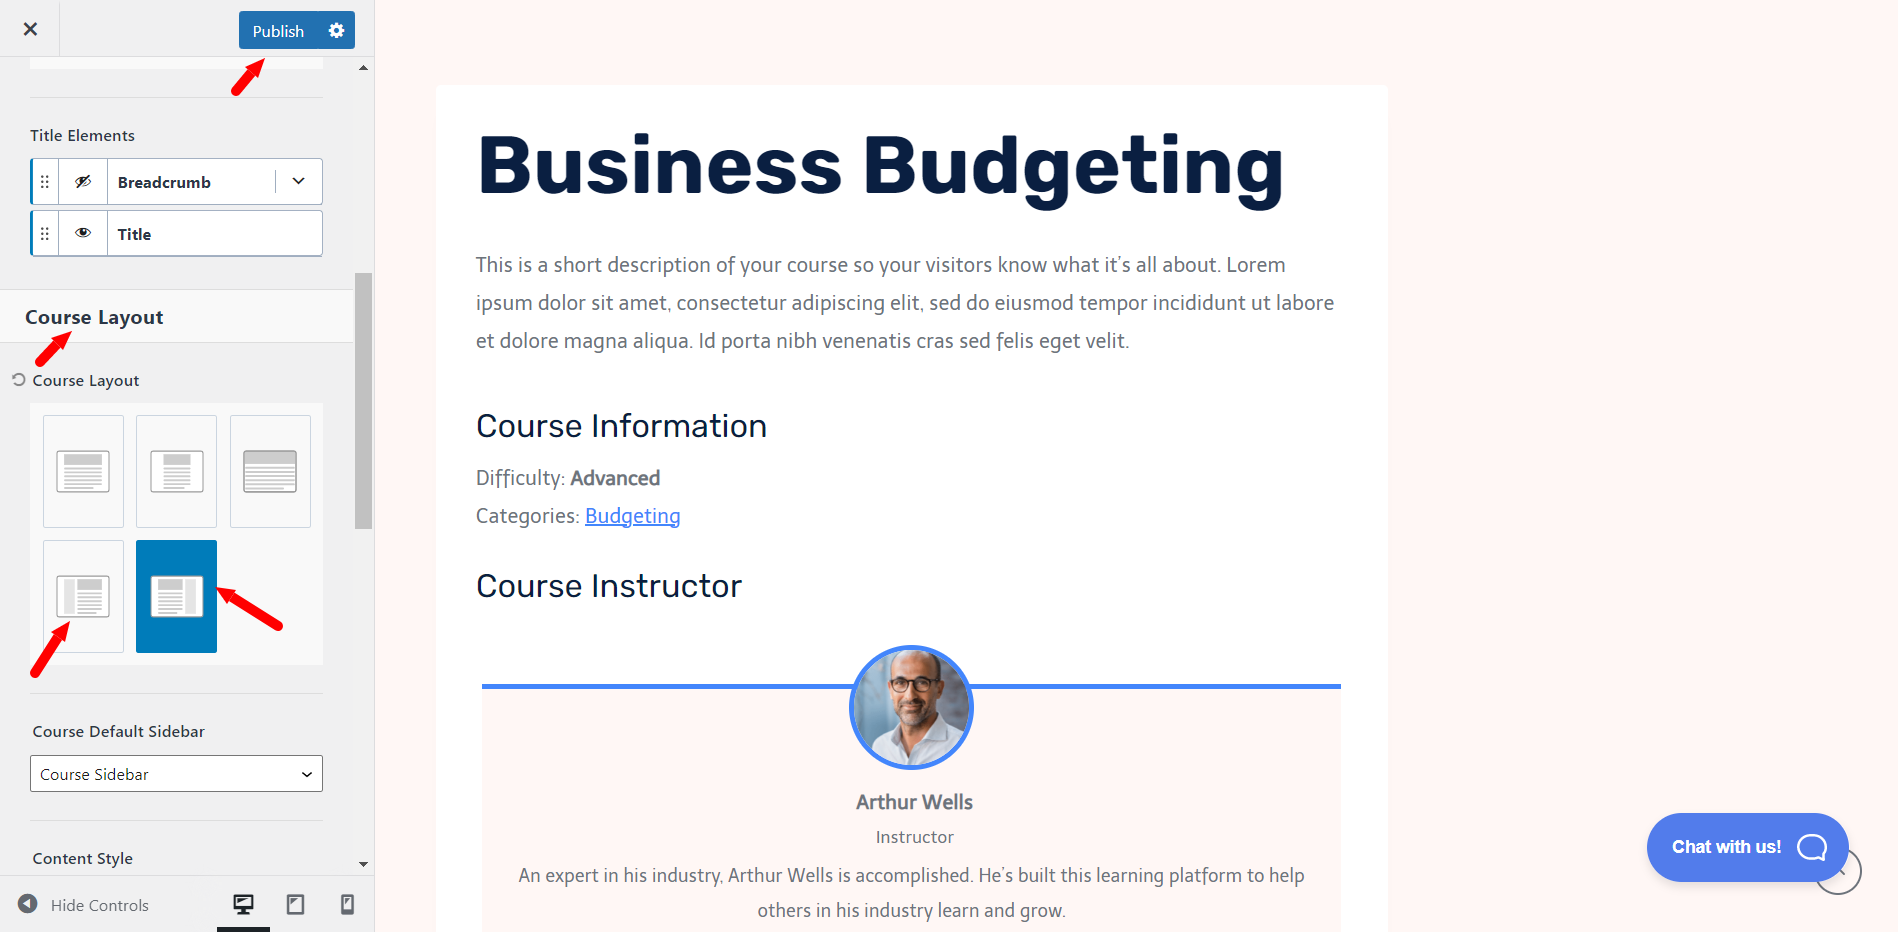
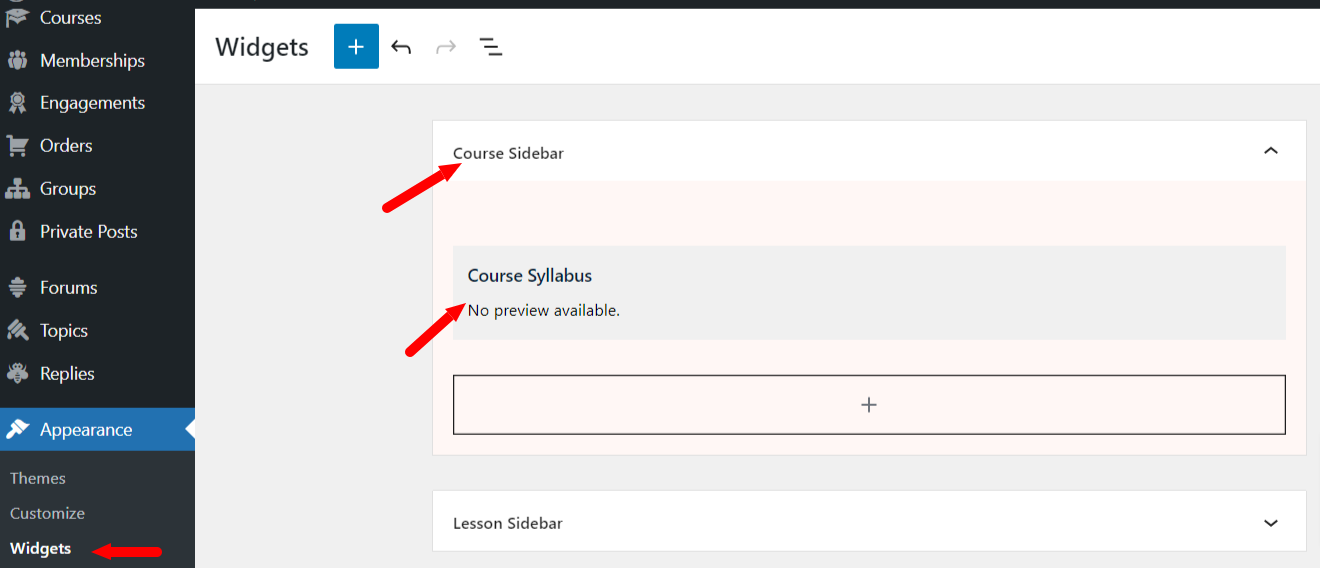
You can follow the same process for the lesson sidebar as well. Now, you have to add the sidebar widget to your course and lesson.
Visit your WordPress Dashboard > Appearance > Widgets > add the Course Syllabus widgets to your course sidebar > Update.
Modify the Billing Information Form
You can modify your billing and registration form with the LifterLMS Custom field add-on. You will get this add-on in our Universe Bundle and Infinity Bundle. Also, you can purchase our single LifterLMS Custom Fields add-on.
To modify your form, visit your WordPress Dashboard > LifterLMS > Forms > Click on Edit to that form you want to modify> Now add new field > Update.
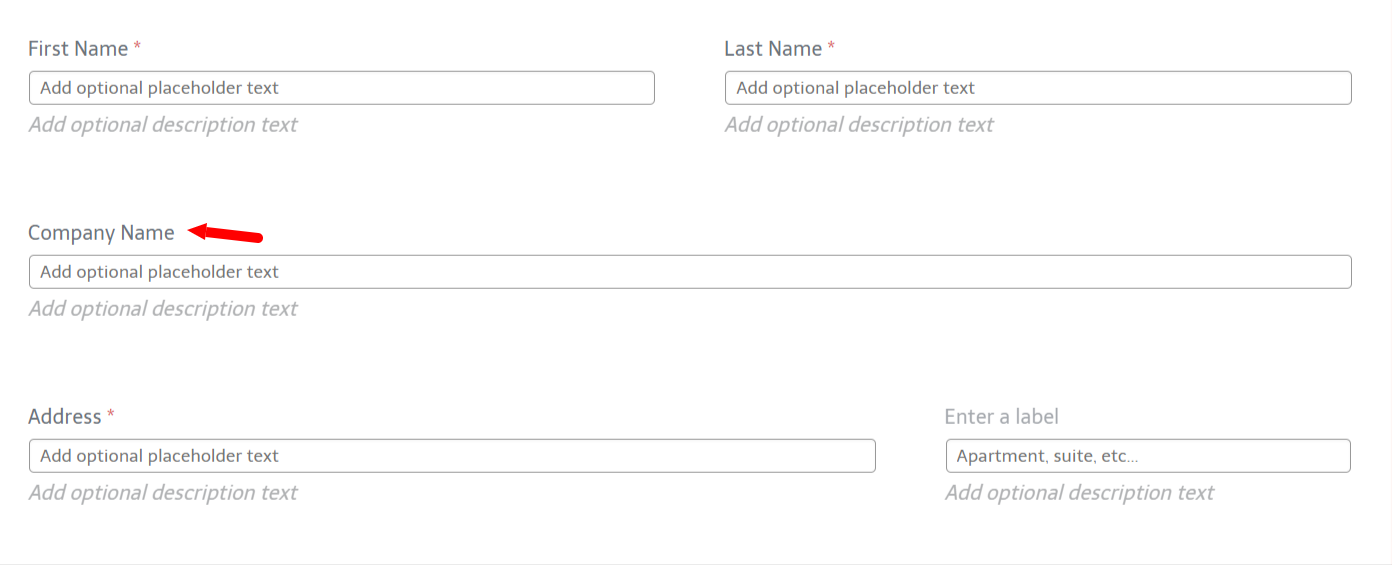
We have a detailed tutorial about LifterLMS Custom Fields, don’t forget to check that out.
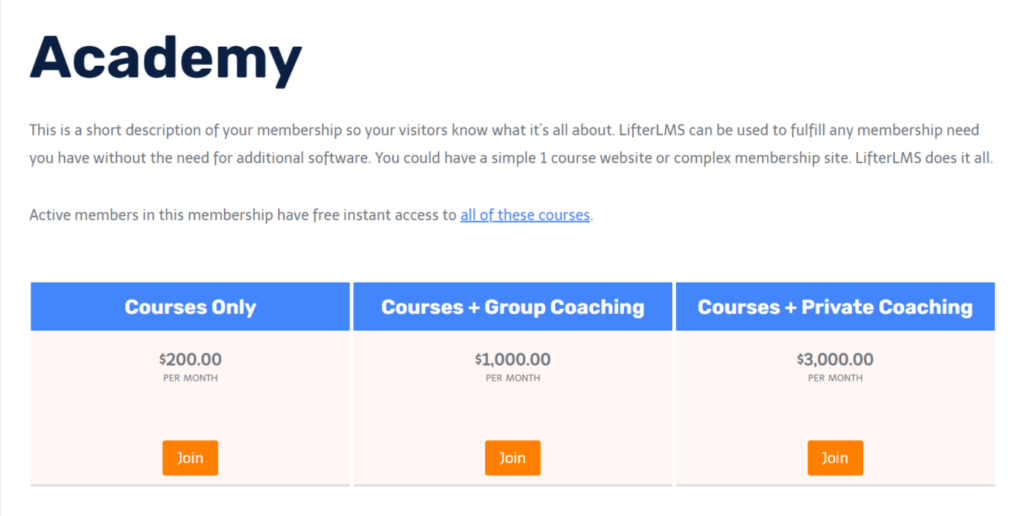
Step 5: Create Memberships
For creating memberships, visit your Dashboard > Memberships > Add Membership.
And now follow a similar process as creating a course. Fill in your membership title, price, and details, then click “Publish.
Step 7: Payments Method
LifterLMS has integration with Stripe, PayPal, Authorize.Net, and also WooCommerce. You can easily enable this payments integration with our bundle or using single LifterLMS Stripe Payments, LifterLMS PayPal Payments, LifterLMS Authorize.Net Payments and LifterLMS WooCommerce Integration.
To enable Stripe, PayPal, Authorize.Net Payments, first install the Stripe, PayPal, Authorize.Net extension > then install and activate the Stripe, PayPal, Authorize.Net LifterLMS integration > then visit your WordPress Dashboard > LifterLMS > Settings > Checkout > now click on your desire payments option to enable > Click on Enable Stripe option >Add your card details> Save Changes.
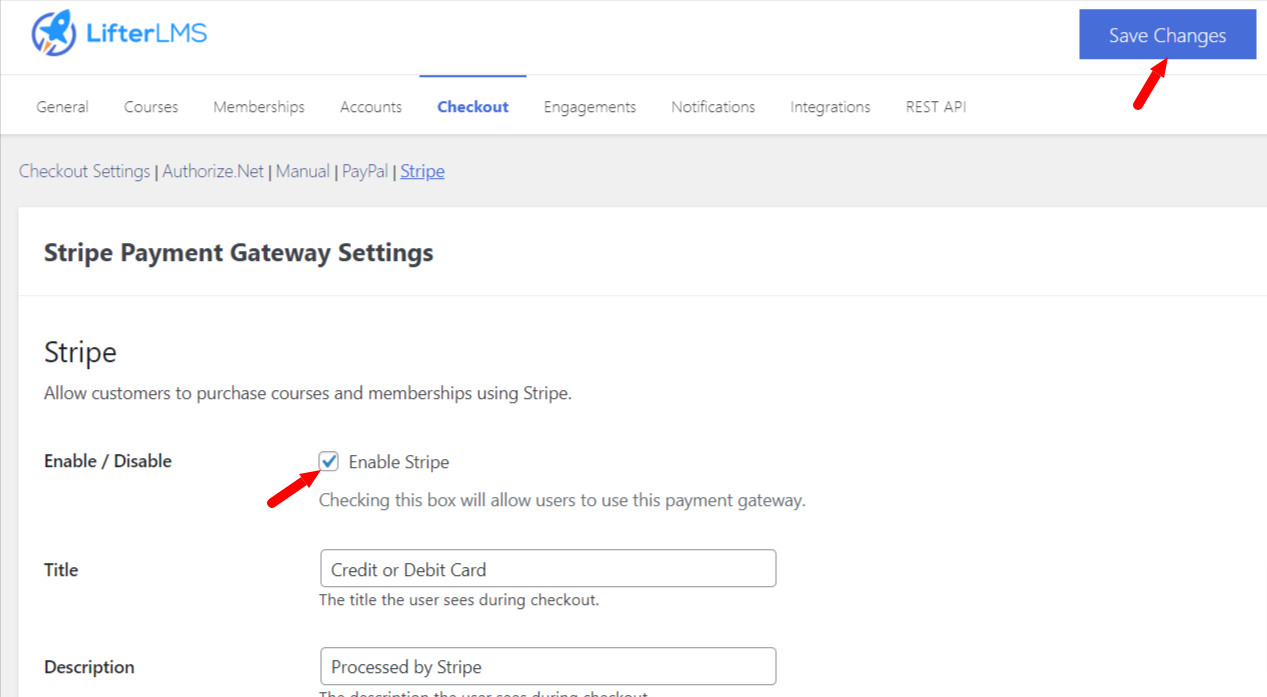
Follow the same process for all payments methods you wish to offer on your CEU website.
Congratulation on creating Continuing Education (CEU) Courses.

If you get stuck or have questions feel free to ask the community or contact the LifterLMS team for help. And if you are looking for tutorials about LifterLMS subscribe to our YouTube Channel.