Getting Started with the LifterLMS Events
The LifterLMS Events add-on lets you schedule and display live sessions directly inside your courses, lessons, and memberships.
Use it to add webinars, coaching calls, office hours, or in-person sessions to the learning experience, while keeping event details connected to the relevant course or membership content.
The Events add-on provides tools to help you manage live sessions effortlessly. Here are the core features you gain access to when you install the plugin:
- Organize Events: You can connect an event directly to a specific course, lesson, or membership. This keeps your live sessions organized and tied to your curriculum.
- Dynamic Visibility: You can protect your event details from public view. Only students who enroll in your linked course or membership can view the physical address or virtual meeting link.
- Direct Zoom Integration: You can connect your LMS directly to your Zoom account. When you turn this feature on, the system automatically generates a unique Zoom meeting URL and password every time you create a new event.
- Flexible Display Options: You can display your upcoming schedule on any page of your website. The plugin provides a dedicated WordPress block, a standard shortcode, and widgets for popular page builders like Elementor and Beaver Builder.
- Customizable Formatting: You have full control over how dates and times appear to your users. You can adjust the timezone settings and format the layout to match your local region perfectly.
This guide walks you through installing the add-on, creating your first event, linking it to your LMS content, and displaying upcoming sessions for your students.
You can easily install the events add-on directly from your WordPress dashboard. Follow these steps to get started.
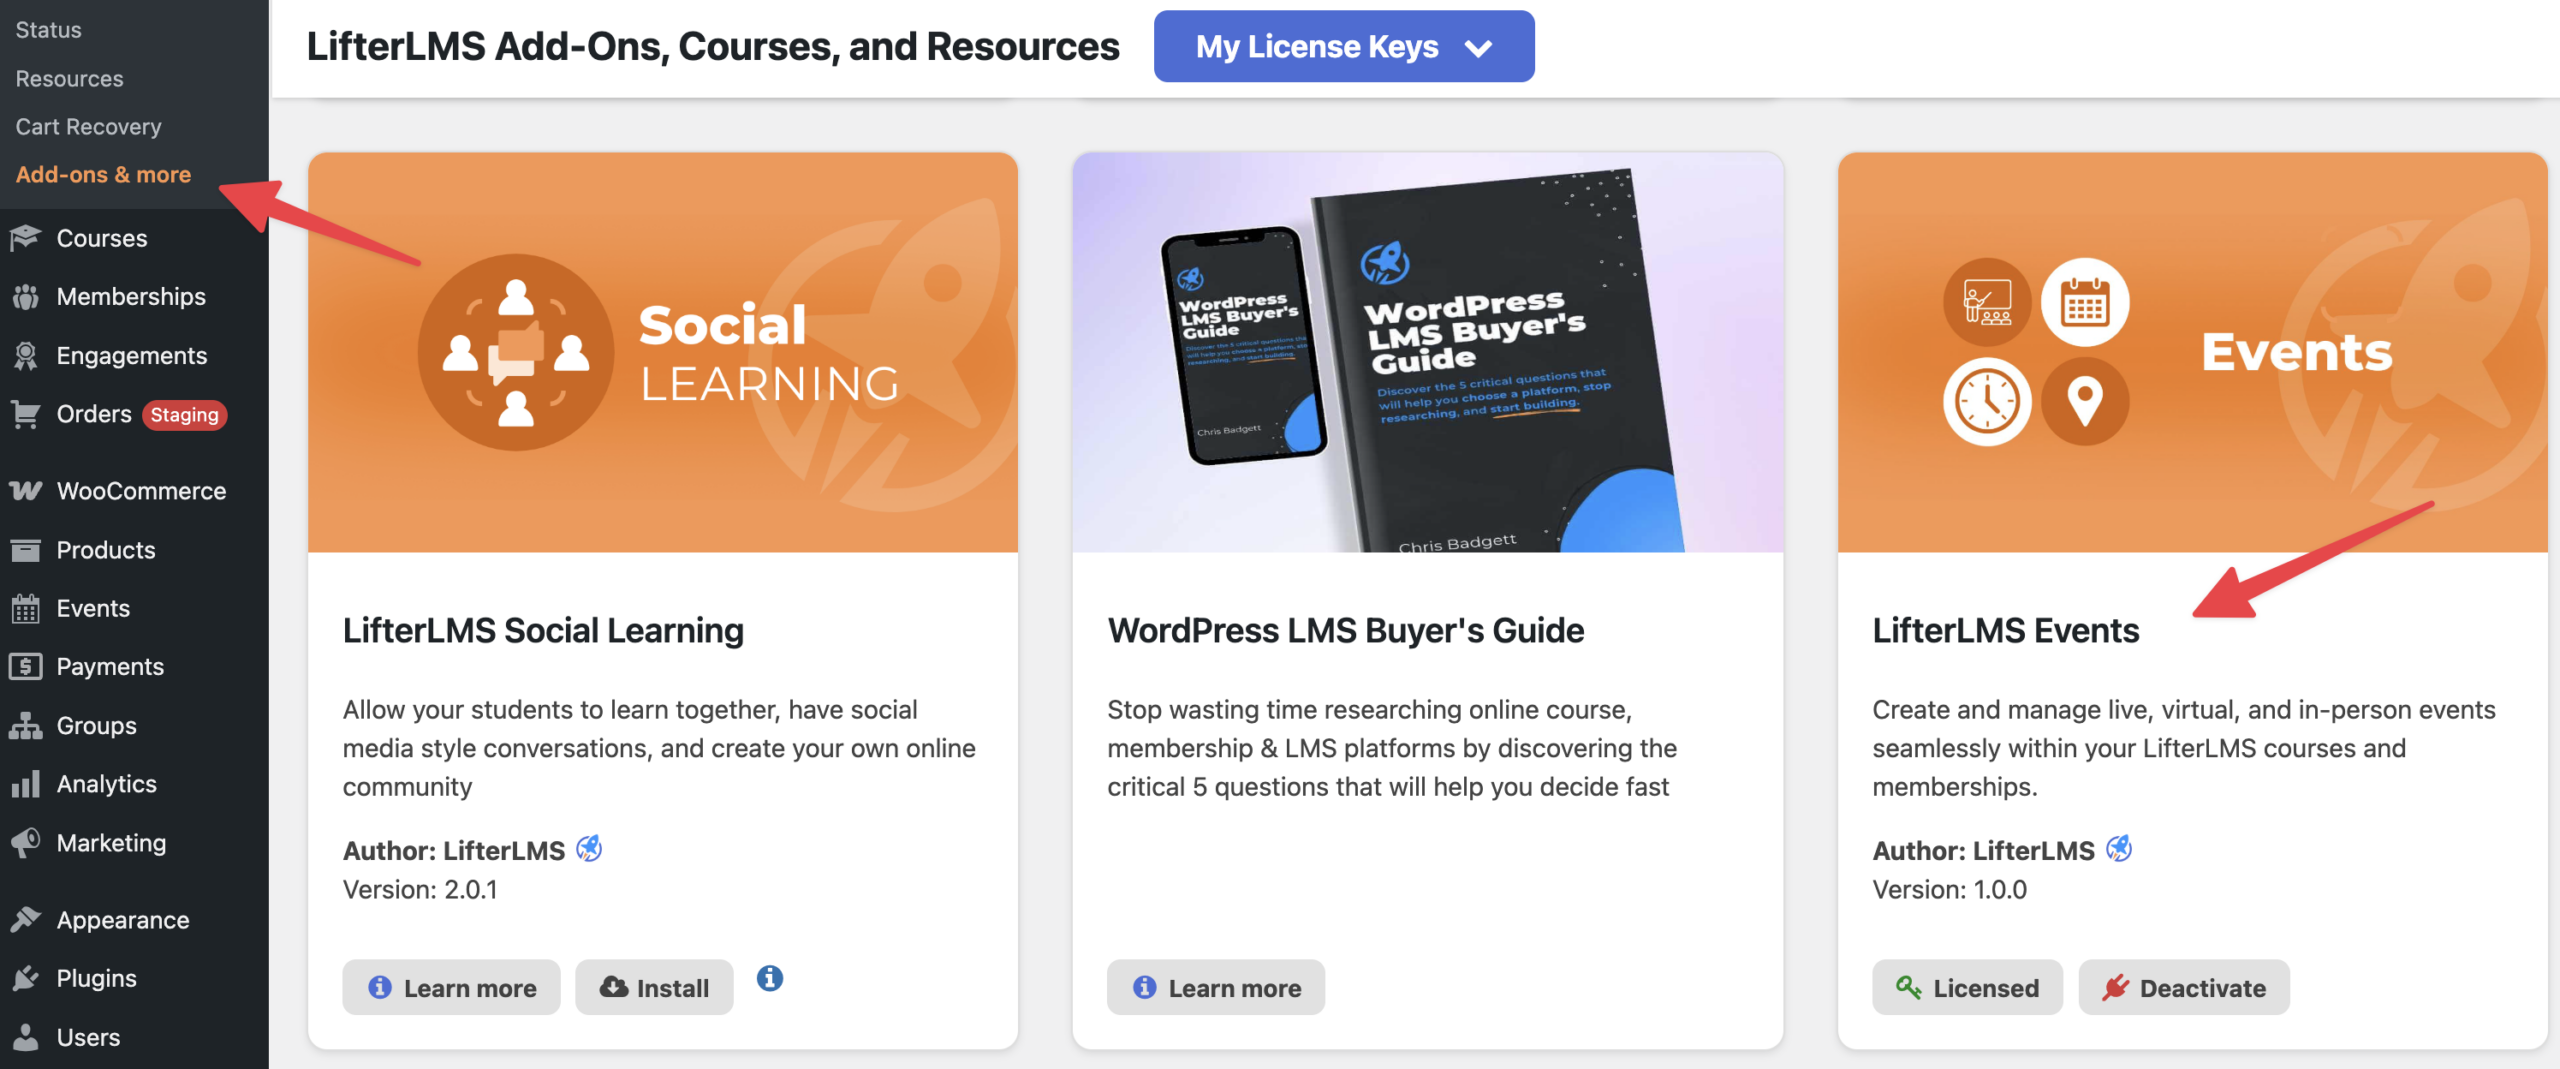
- Navigate to LifterLMS > Add-ons & More in WordPress.
- Click on the “All” tab to view the complete list of available extensions.
- Scroll down till you find the ” LifterLMS Events” add-on.
- Click the Install button located below the LifterLMS Events plugin.
- After installation, click the Activate button to enable it.
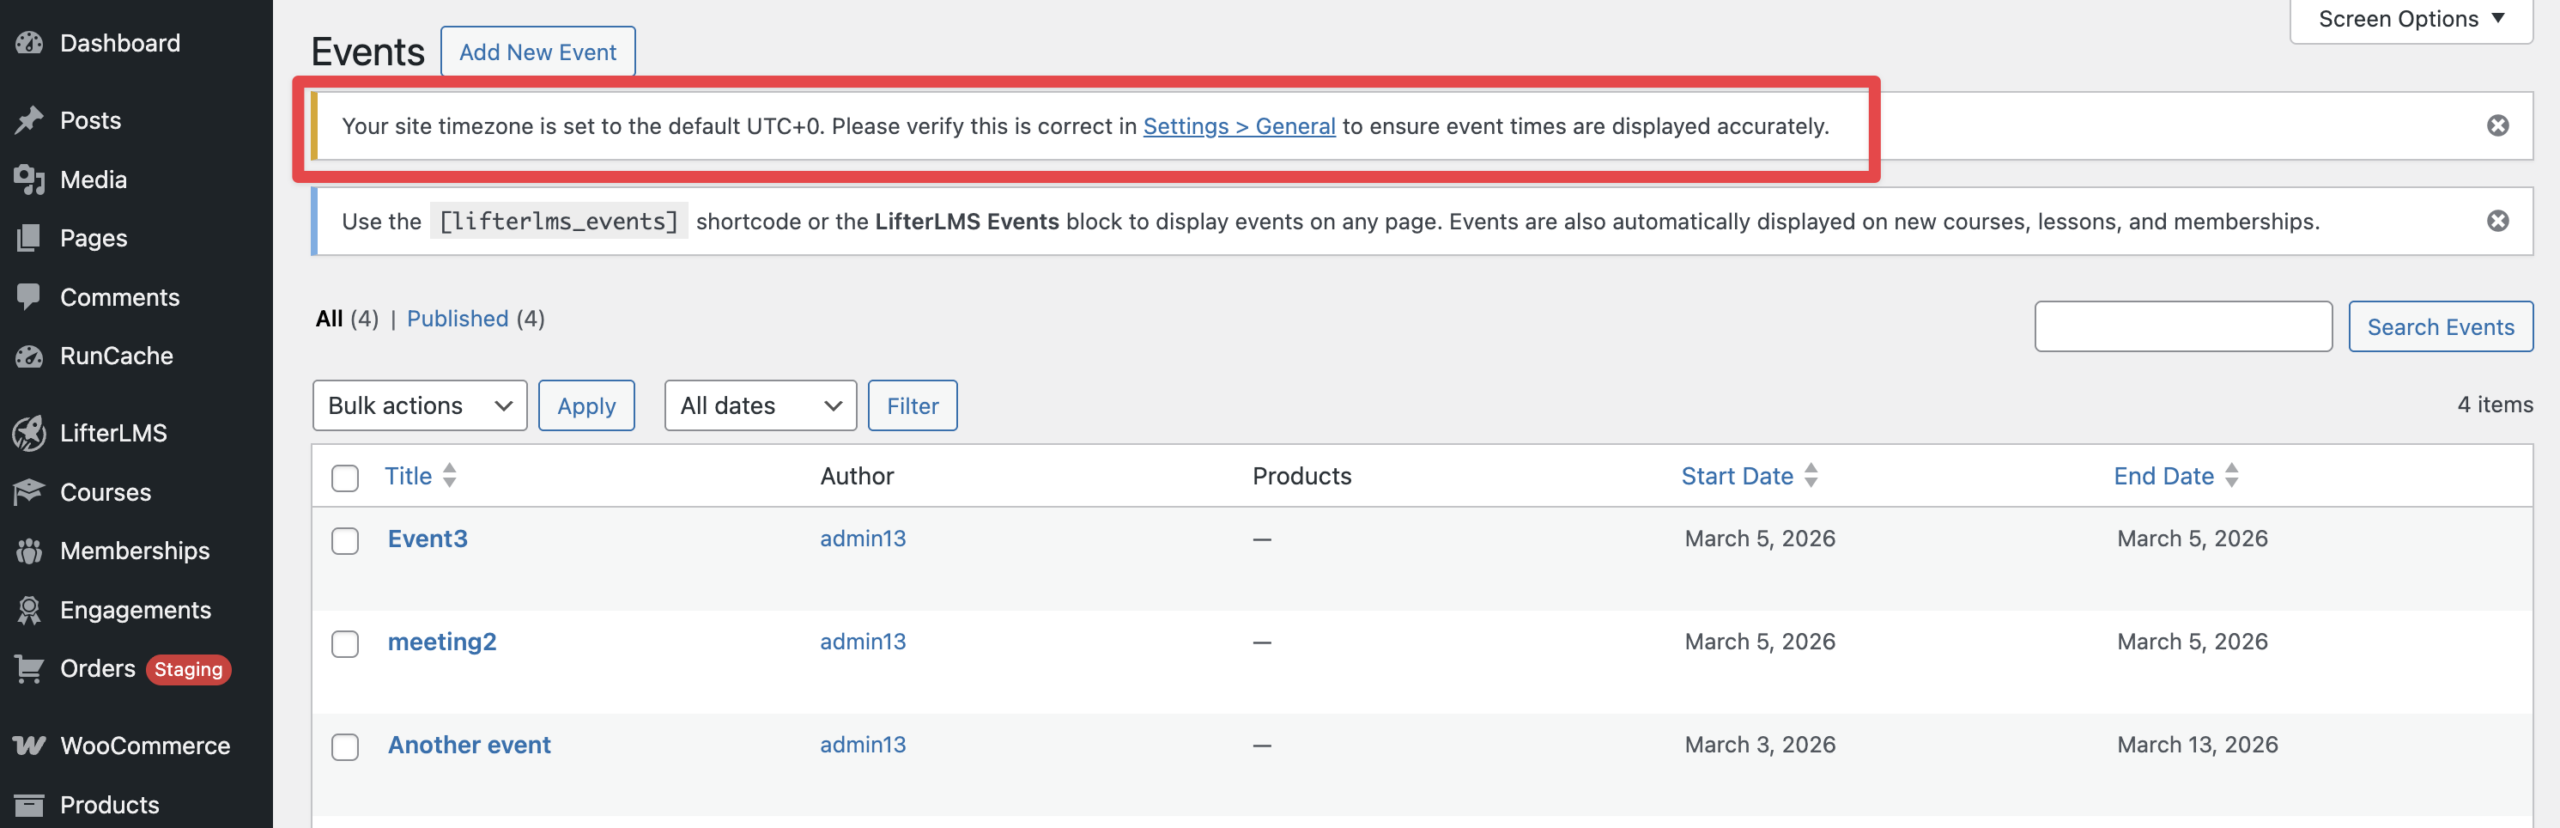
Once you activate the plugin, the Events feature will automatically display on your new courses, lessons, and memberships. You will also gain access to new blocks, widgets, and shortcodes to display event lists anywhere on your website.
If your WordPress site uses the default UTC+0 setting, the LifterLMS Events add-on will display a notice at the top of your screen. You need to change this setting to your local time zone so your live event times display accurately for your students.
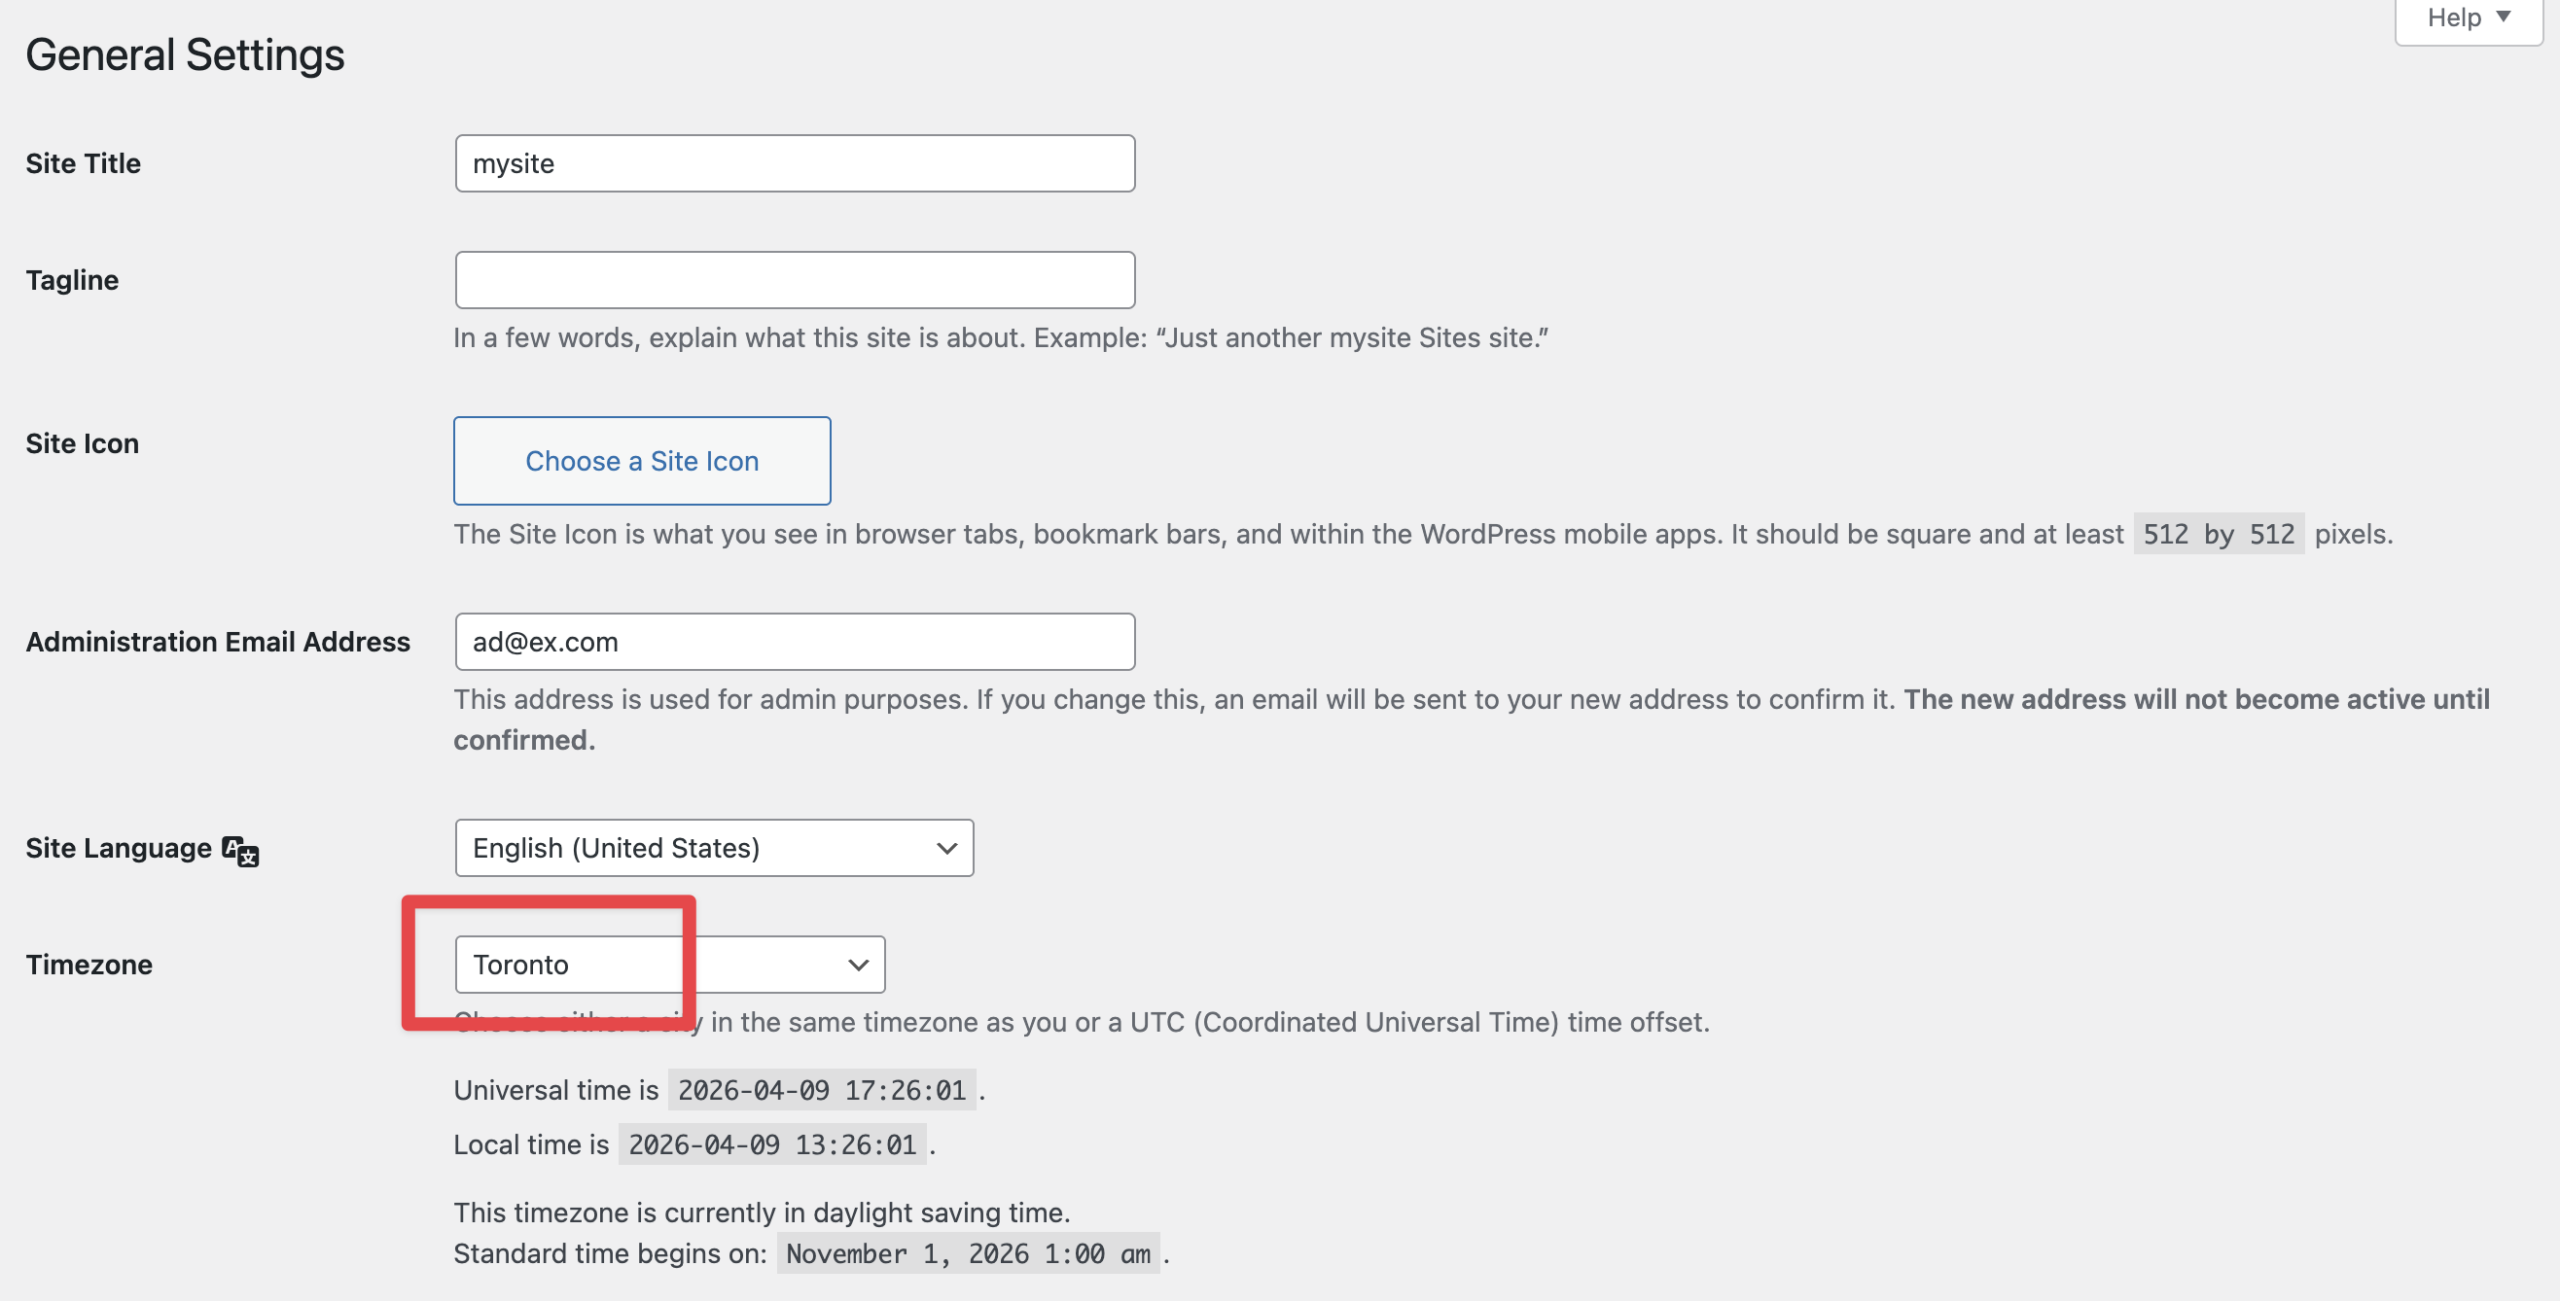
- Navigate to Settings > General in your WordPress dashboard.
- Scroll down the page until you locate the “Timezone” section.
- Click on the dropdown menu next to “Timezone”.
- Select your local city or region to replace the default UTC+0 setting.
- Scroll to the very bottom of the page.
- Click the Save Changes button.
You have complete control over how the dates and times appear on your event pages. You will use standard PHP date formatting characters to create your preferred layout.
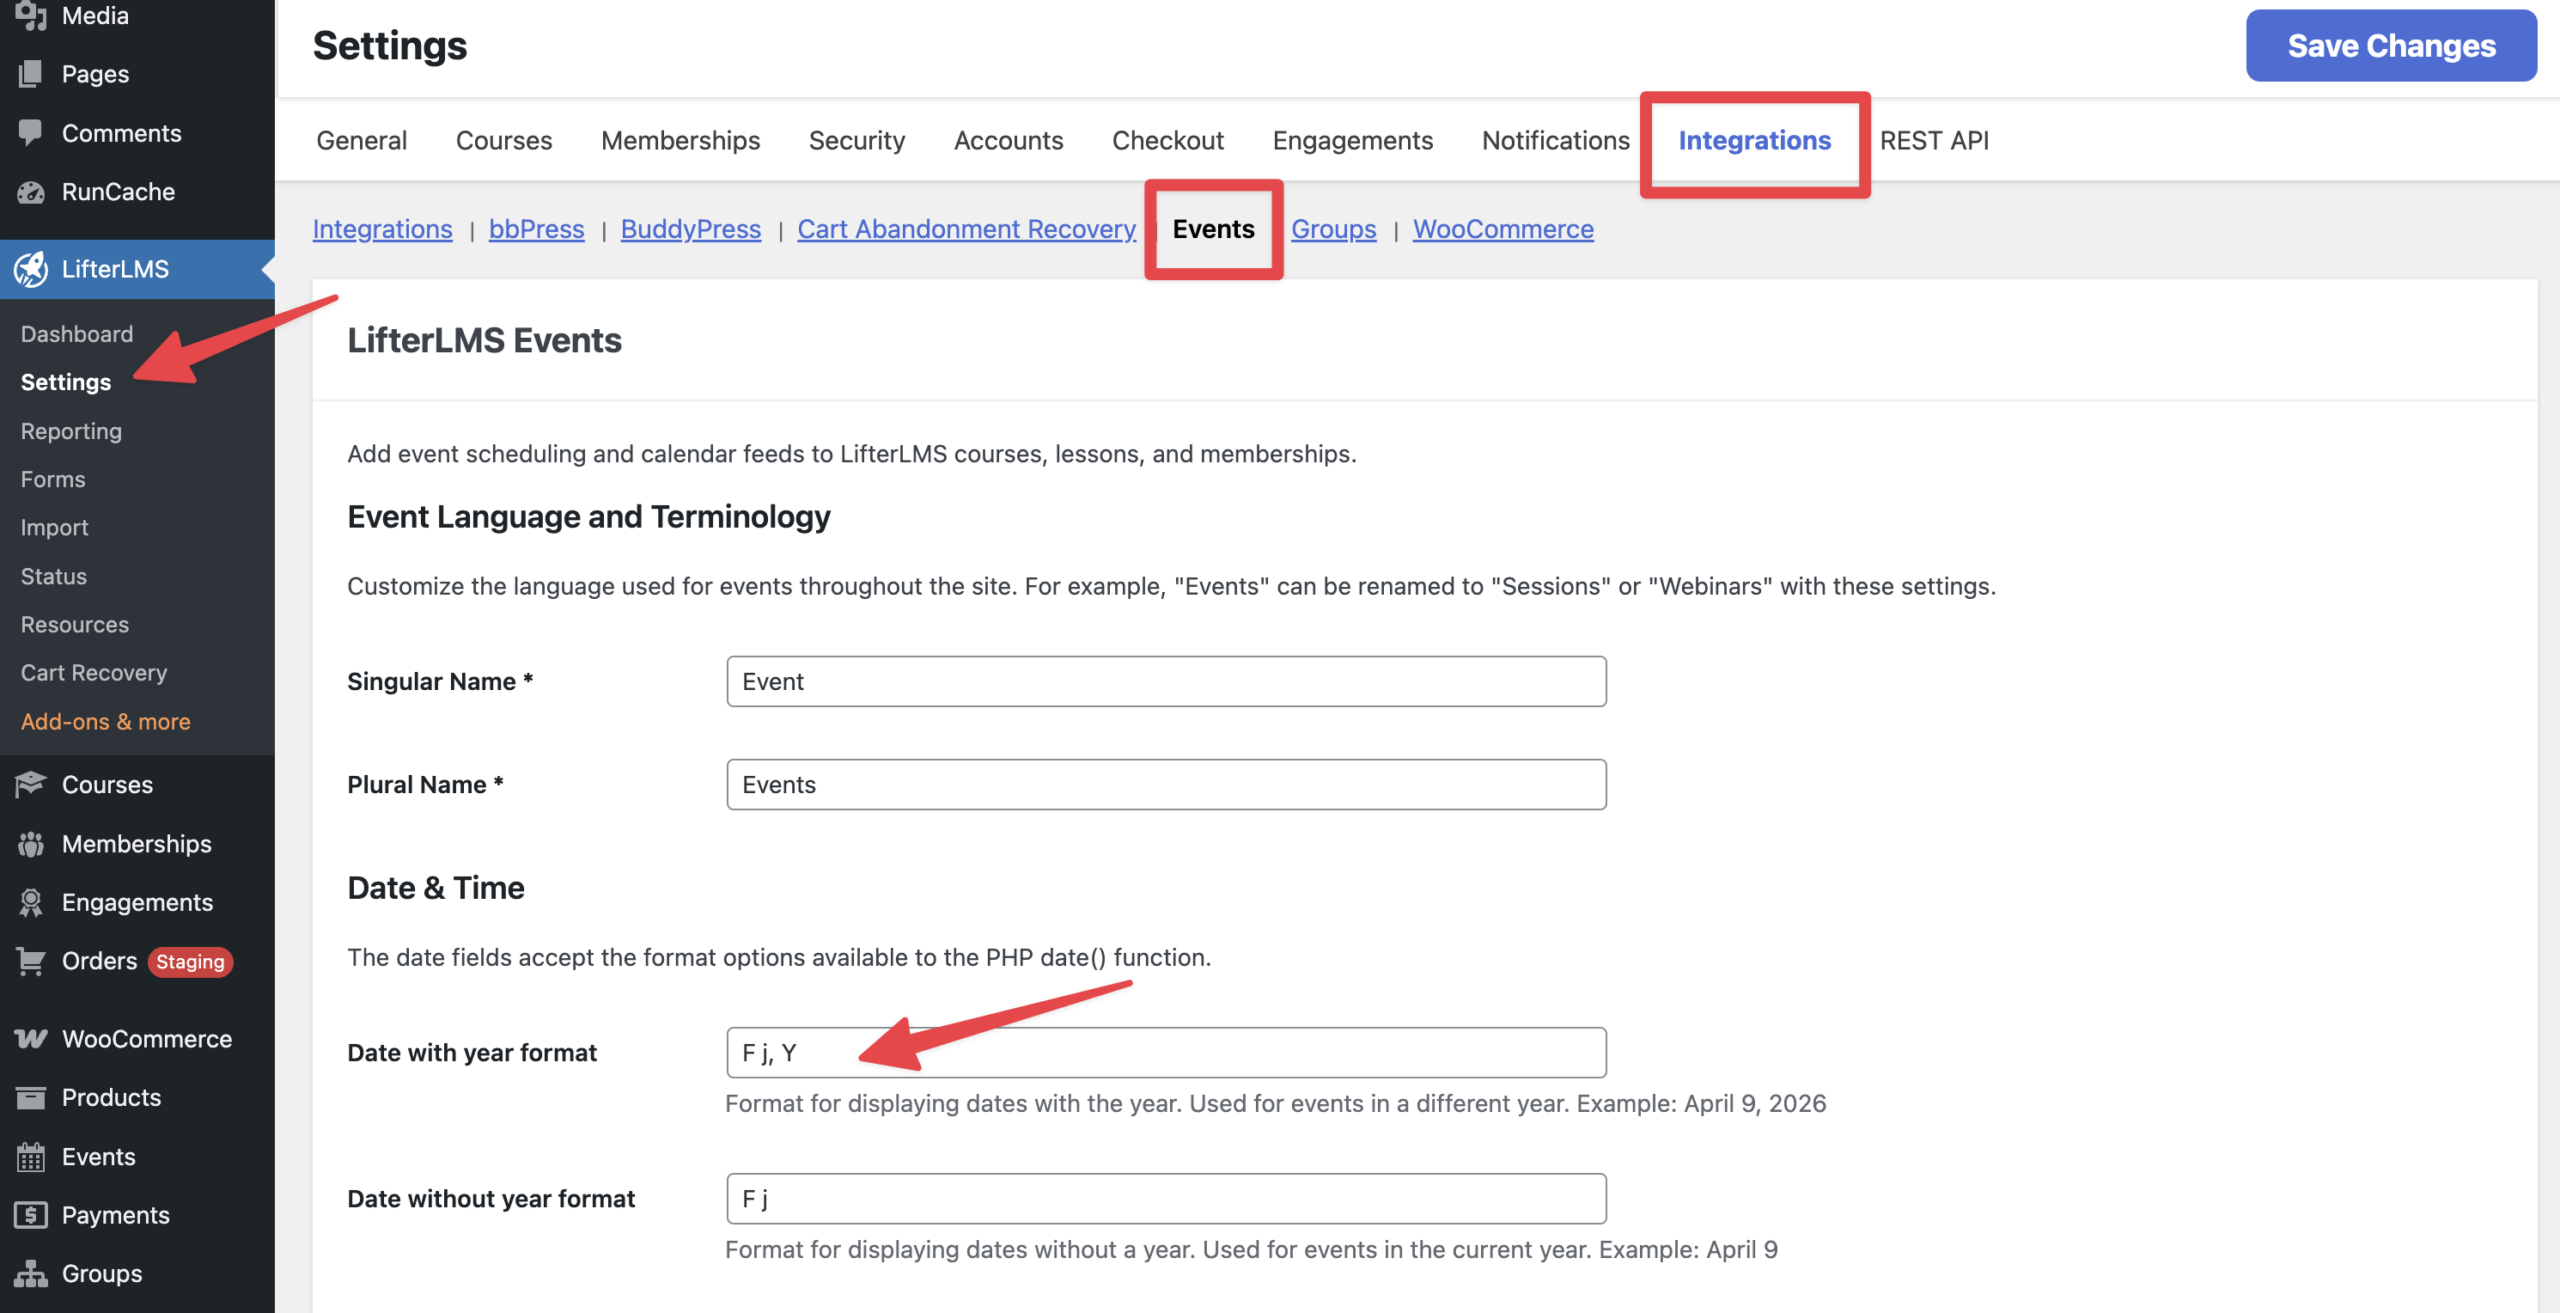
- Navigate to LifterLMS > Settings > Integrations in your WordPress dashboard.
- Click on the “Events” link to open your specific event settings.
- Locate the “Date with year format” and “Date without year format” boxes.
- Type your preferred PHP formatting characters into the boxes. For example, you can type “F j” to display the full month name and the day of the month.
- Visit the official PHP date format documentation to view a complete list of characters you can use.
- Click the Save Changes button to apply your layout.
You might want to call your live sessions something other than “Events”. You can easily rename this label across your entire website and update the URL that students use to access their schedule.
- Navigate back to LifterLMS > Settings > Integrations and click on “Events” if you are not already there.
- Scroll down to find the event terminology setting.
- Delete the word “Events” and replace it with a new term, like “Conferences”.
- Click the Save Changes button at the bottom of the screen.
Your entire LMS will now refer to your live sessions using your new custom vocabulary.


