How to Set Up the Zoom Integration for Events
Integrating Zoom with your WordPress LMS makes it incredibly easy to host live webinars, coaching calls, and virtual classes. The LifterLMS Events add-on allows you to connect your platform directly to your Zoom account.
This guide shows you how to create a Server-to-Server OAuth app inside your Zoom developer account. Once connected, your WordPress site can automatically generate unique meeting links for your live sessions.
To connect the two platforms, you must first create a private app inside your Zoom account to generate connection credentials.
- Open a new tab in your web browser and go to marketplace.zoom.us.
- Sign in using your Zoom admin account credentials.
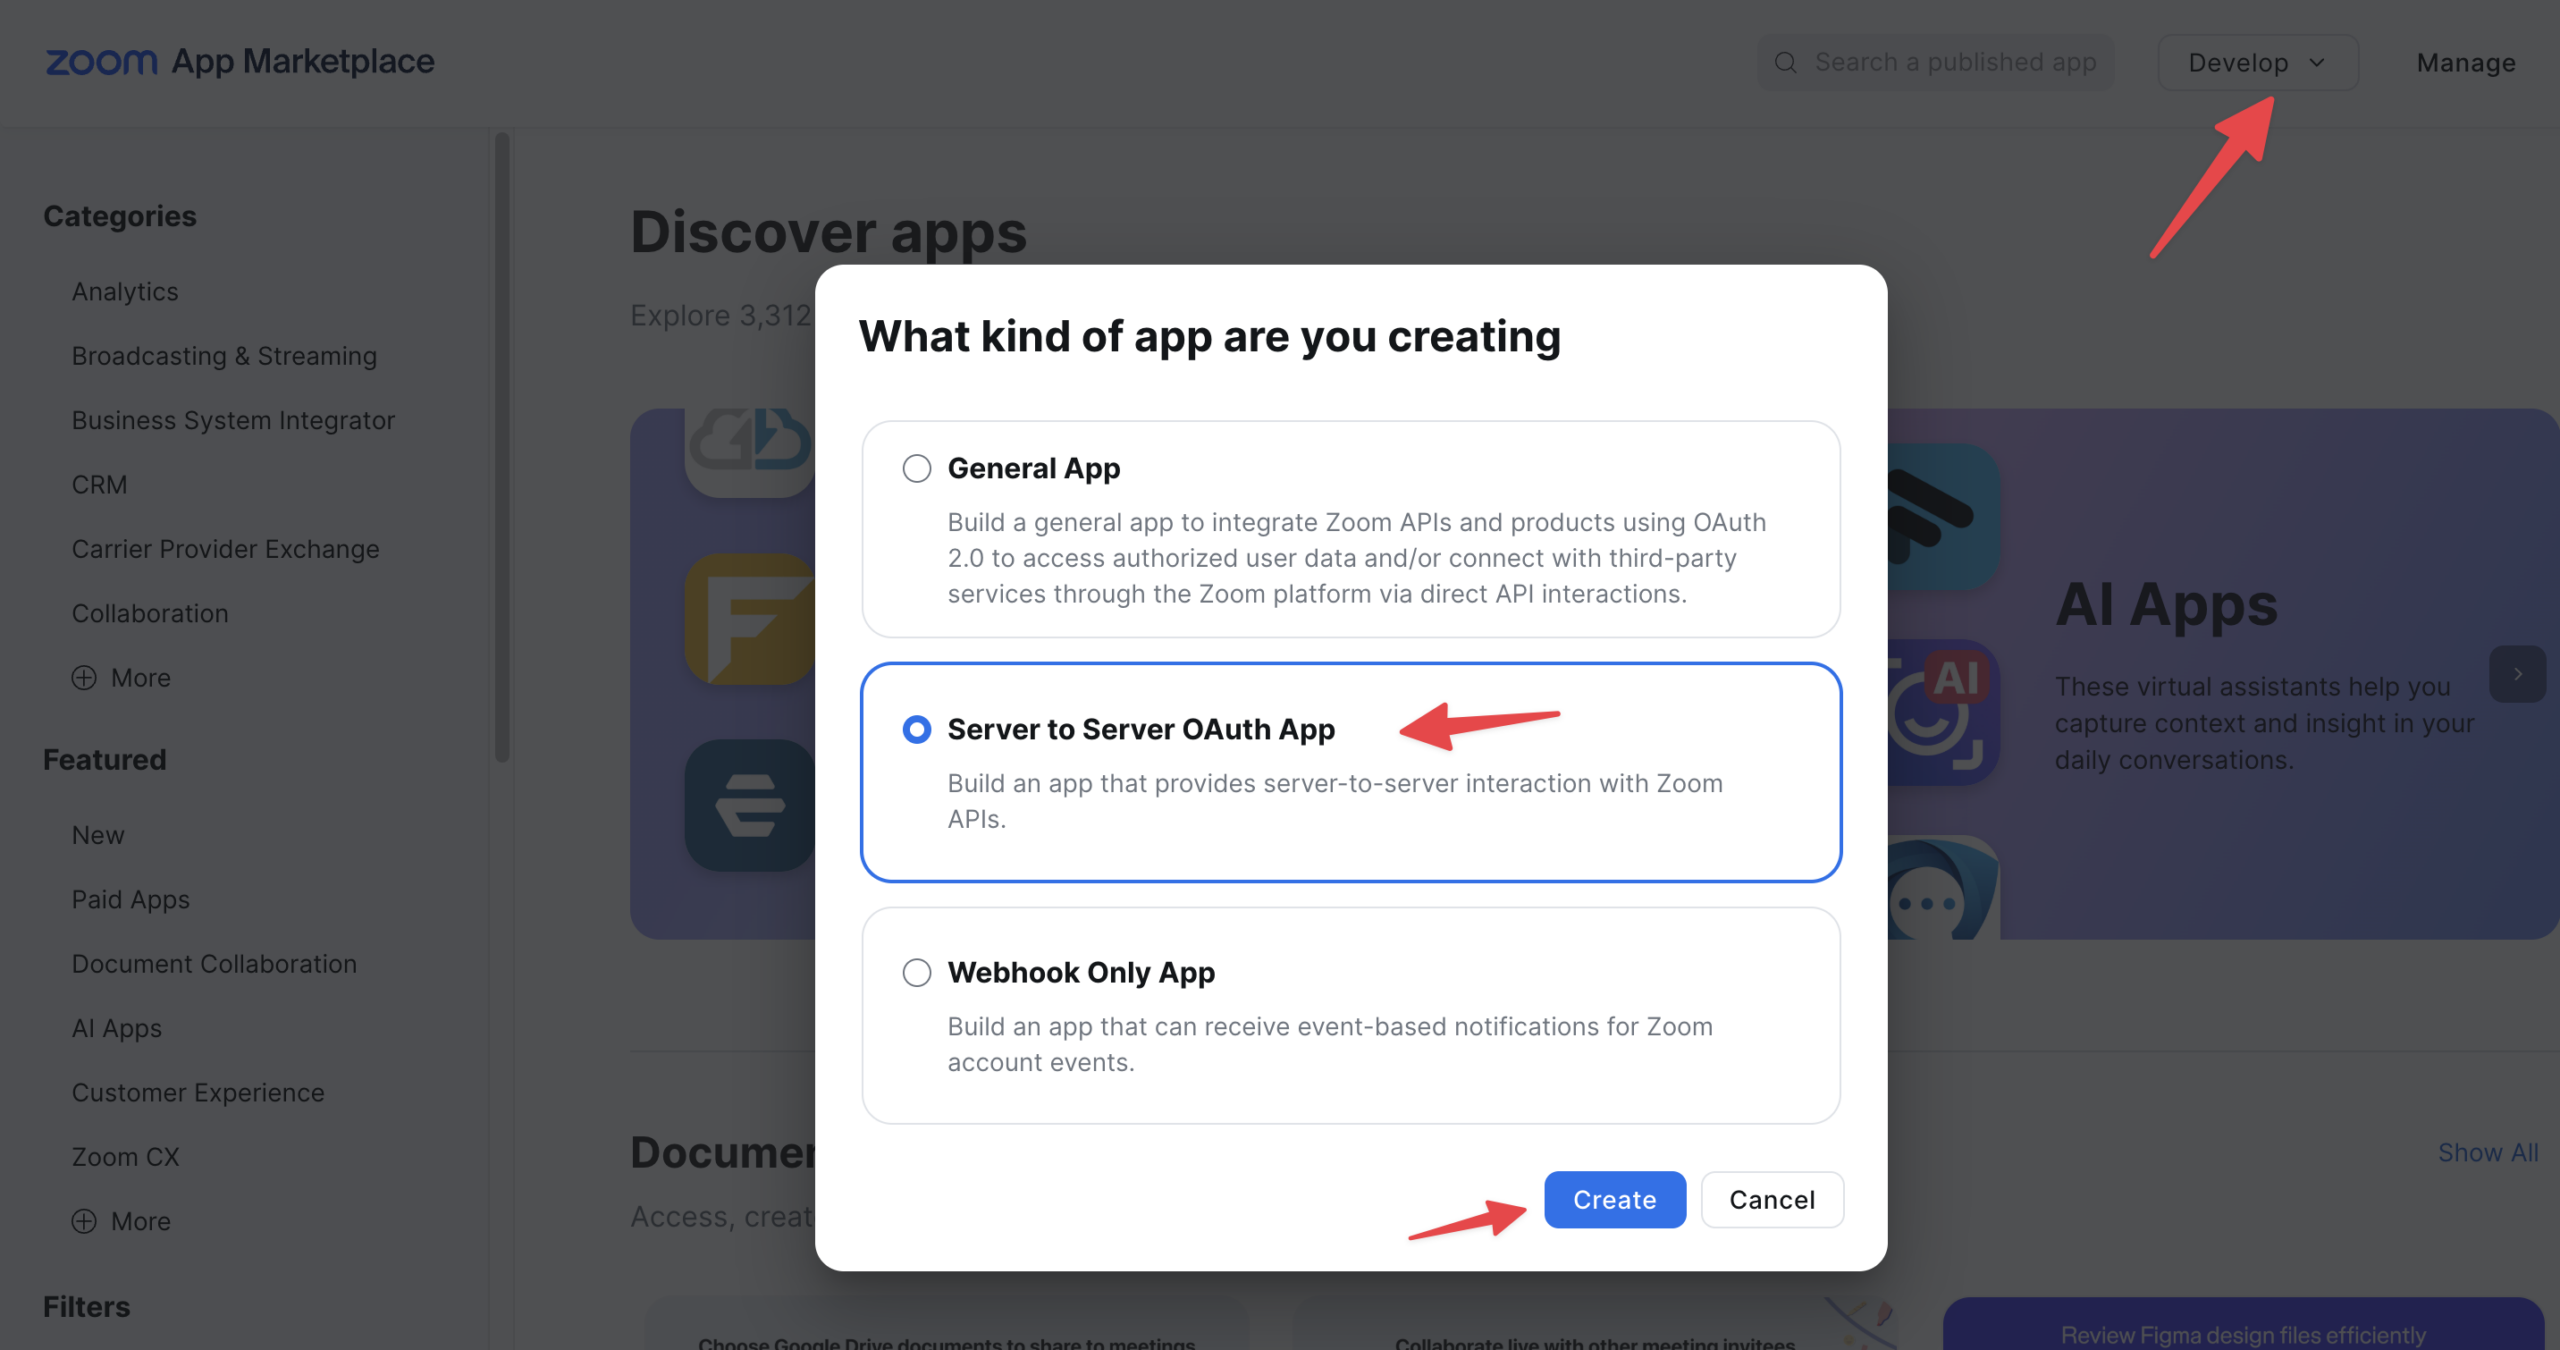
- Click on the “Develop” dropdown menu located in the top right corner of the screen.
- Click on Build App.
- Look for the “Server-to-Server OAuth” app type.
- Click the Create button.
- Type a name for your app into the box, such as “LifterLMS Events”.
- Click the Create button to continue.
- Fill out any required contact details on the “Information” tab.
Your new app needs permission to create meetings on your behalf. You can grant these permissions by adding “Scopes” to the app.
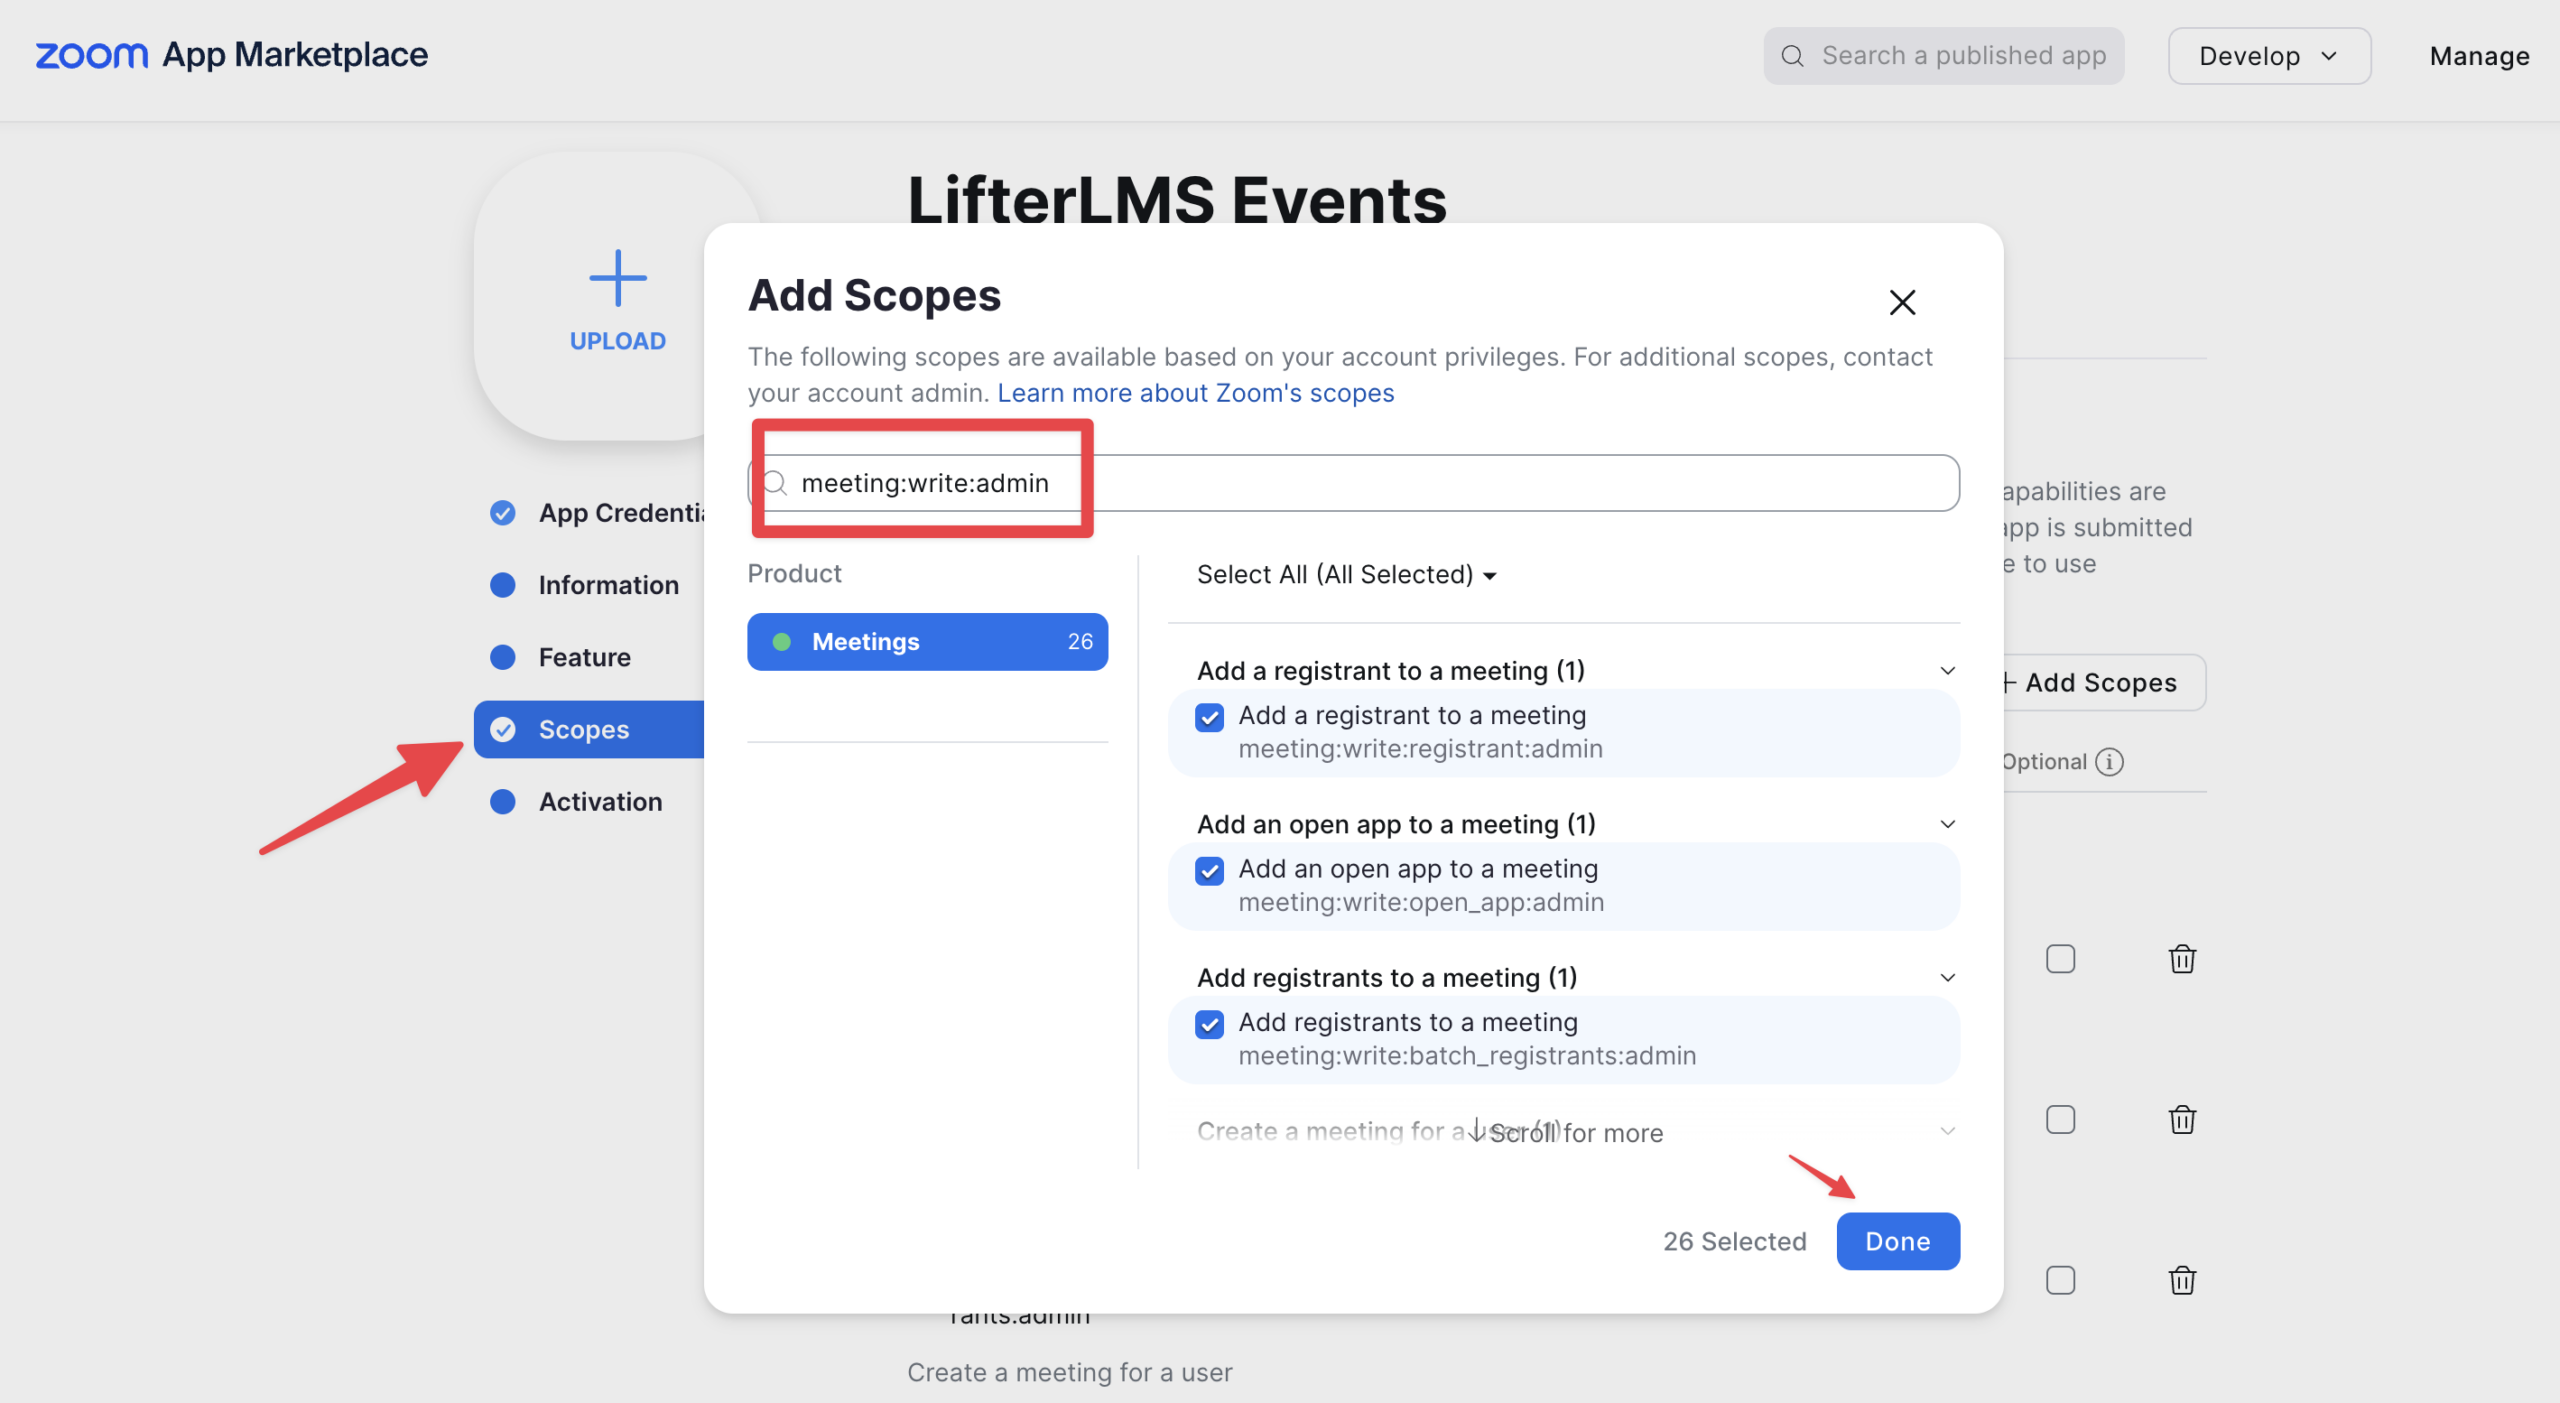
- Click on the “Scopes” tab on the left side of your Zoom app dashboard.
- Click the + Add Scopes button.
- Type “meeting:write:admin” into the search bar at the top of the pop-up window.
- Click the dropdown menu under the search bar, then choose “Select All” to check all related permissions.
- Click the Done button to save your selections.
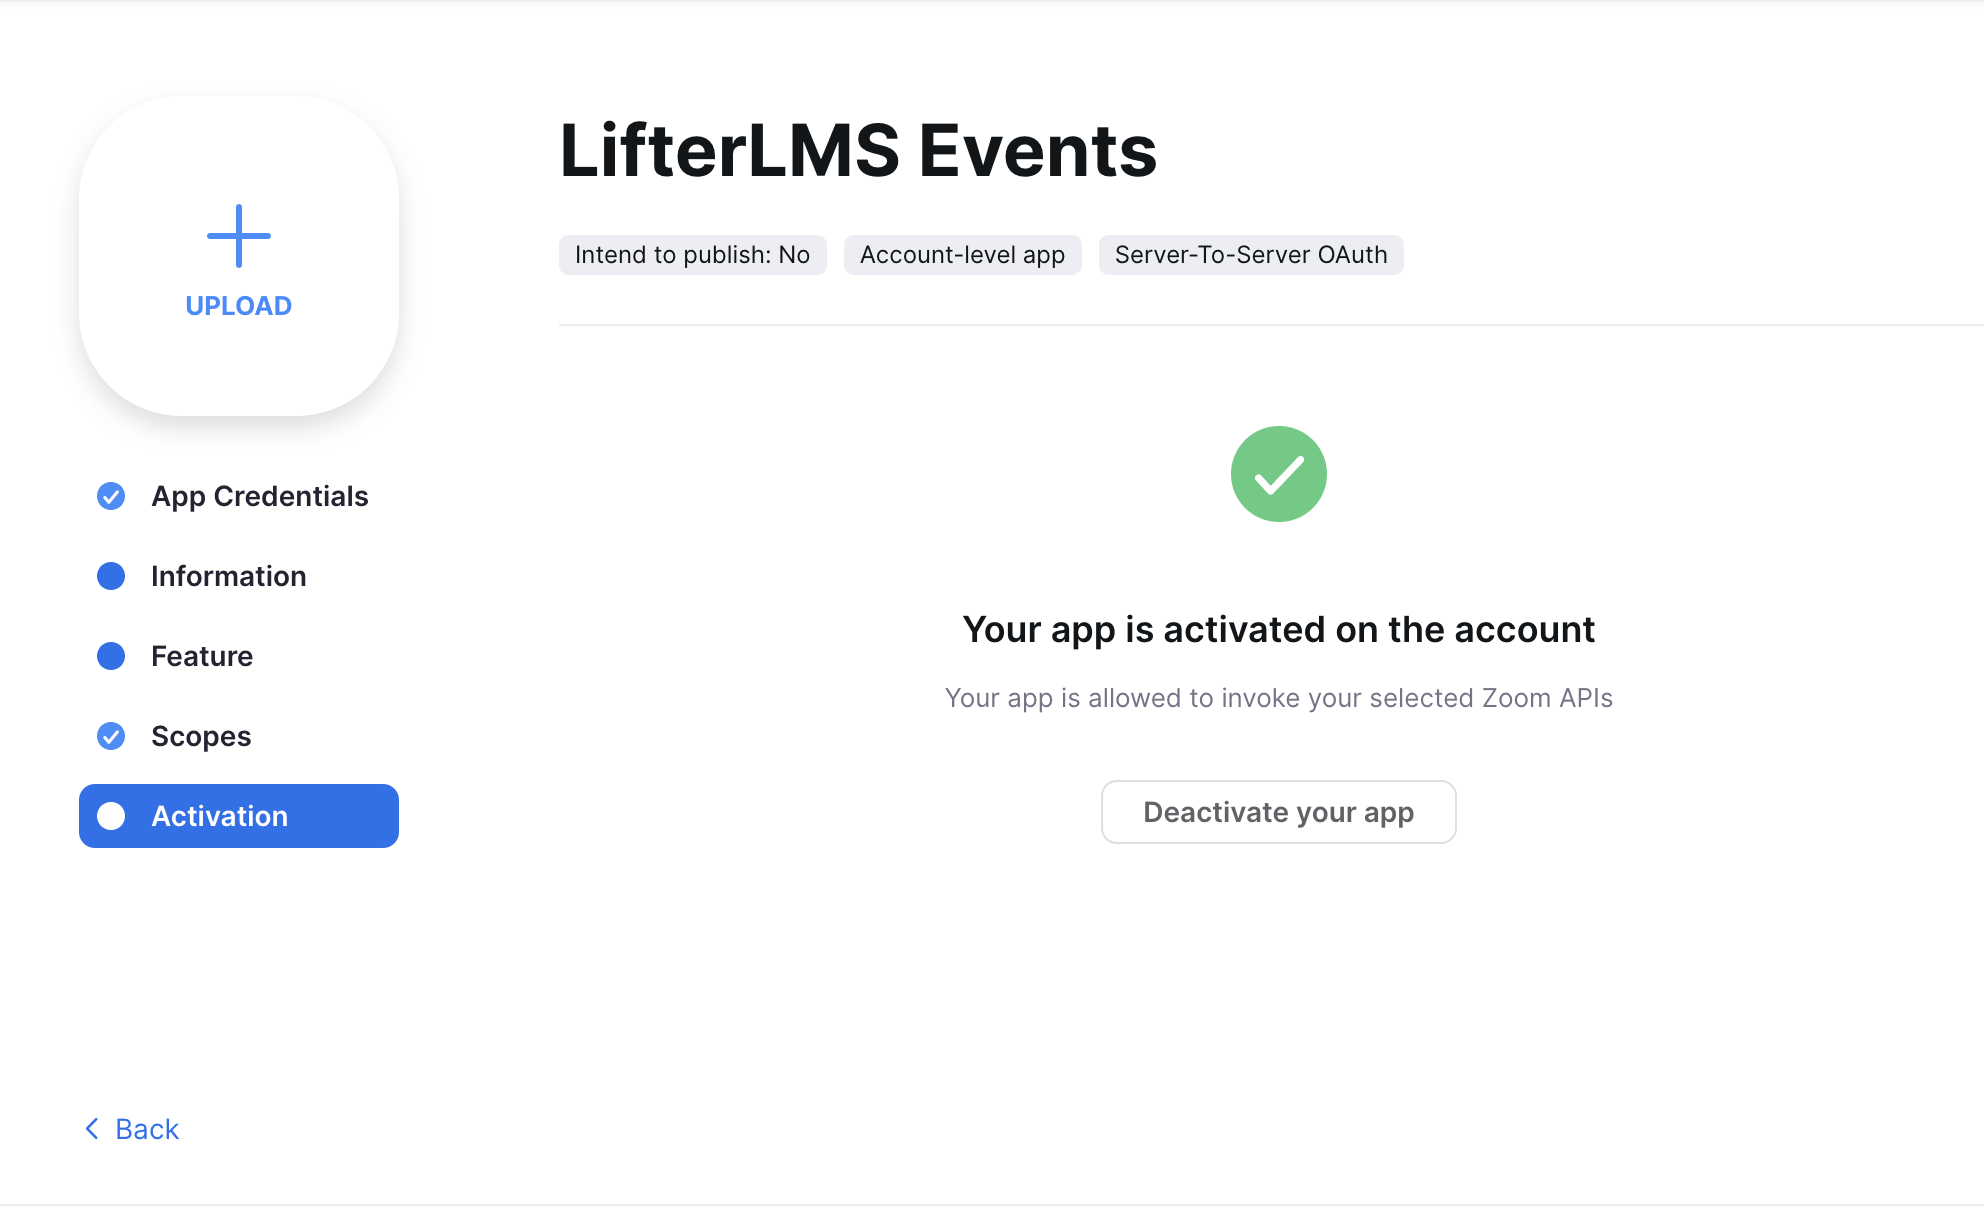
- Click on the “Activation” tab on the left side of your screen.
- Click the Activate button to turn your app on. You do not need to publish this app to the public Zoom marketplace for it to work correctly.
Now that your app is active, you need to copy your credentials over to your WordPress website to authorize the connection.
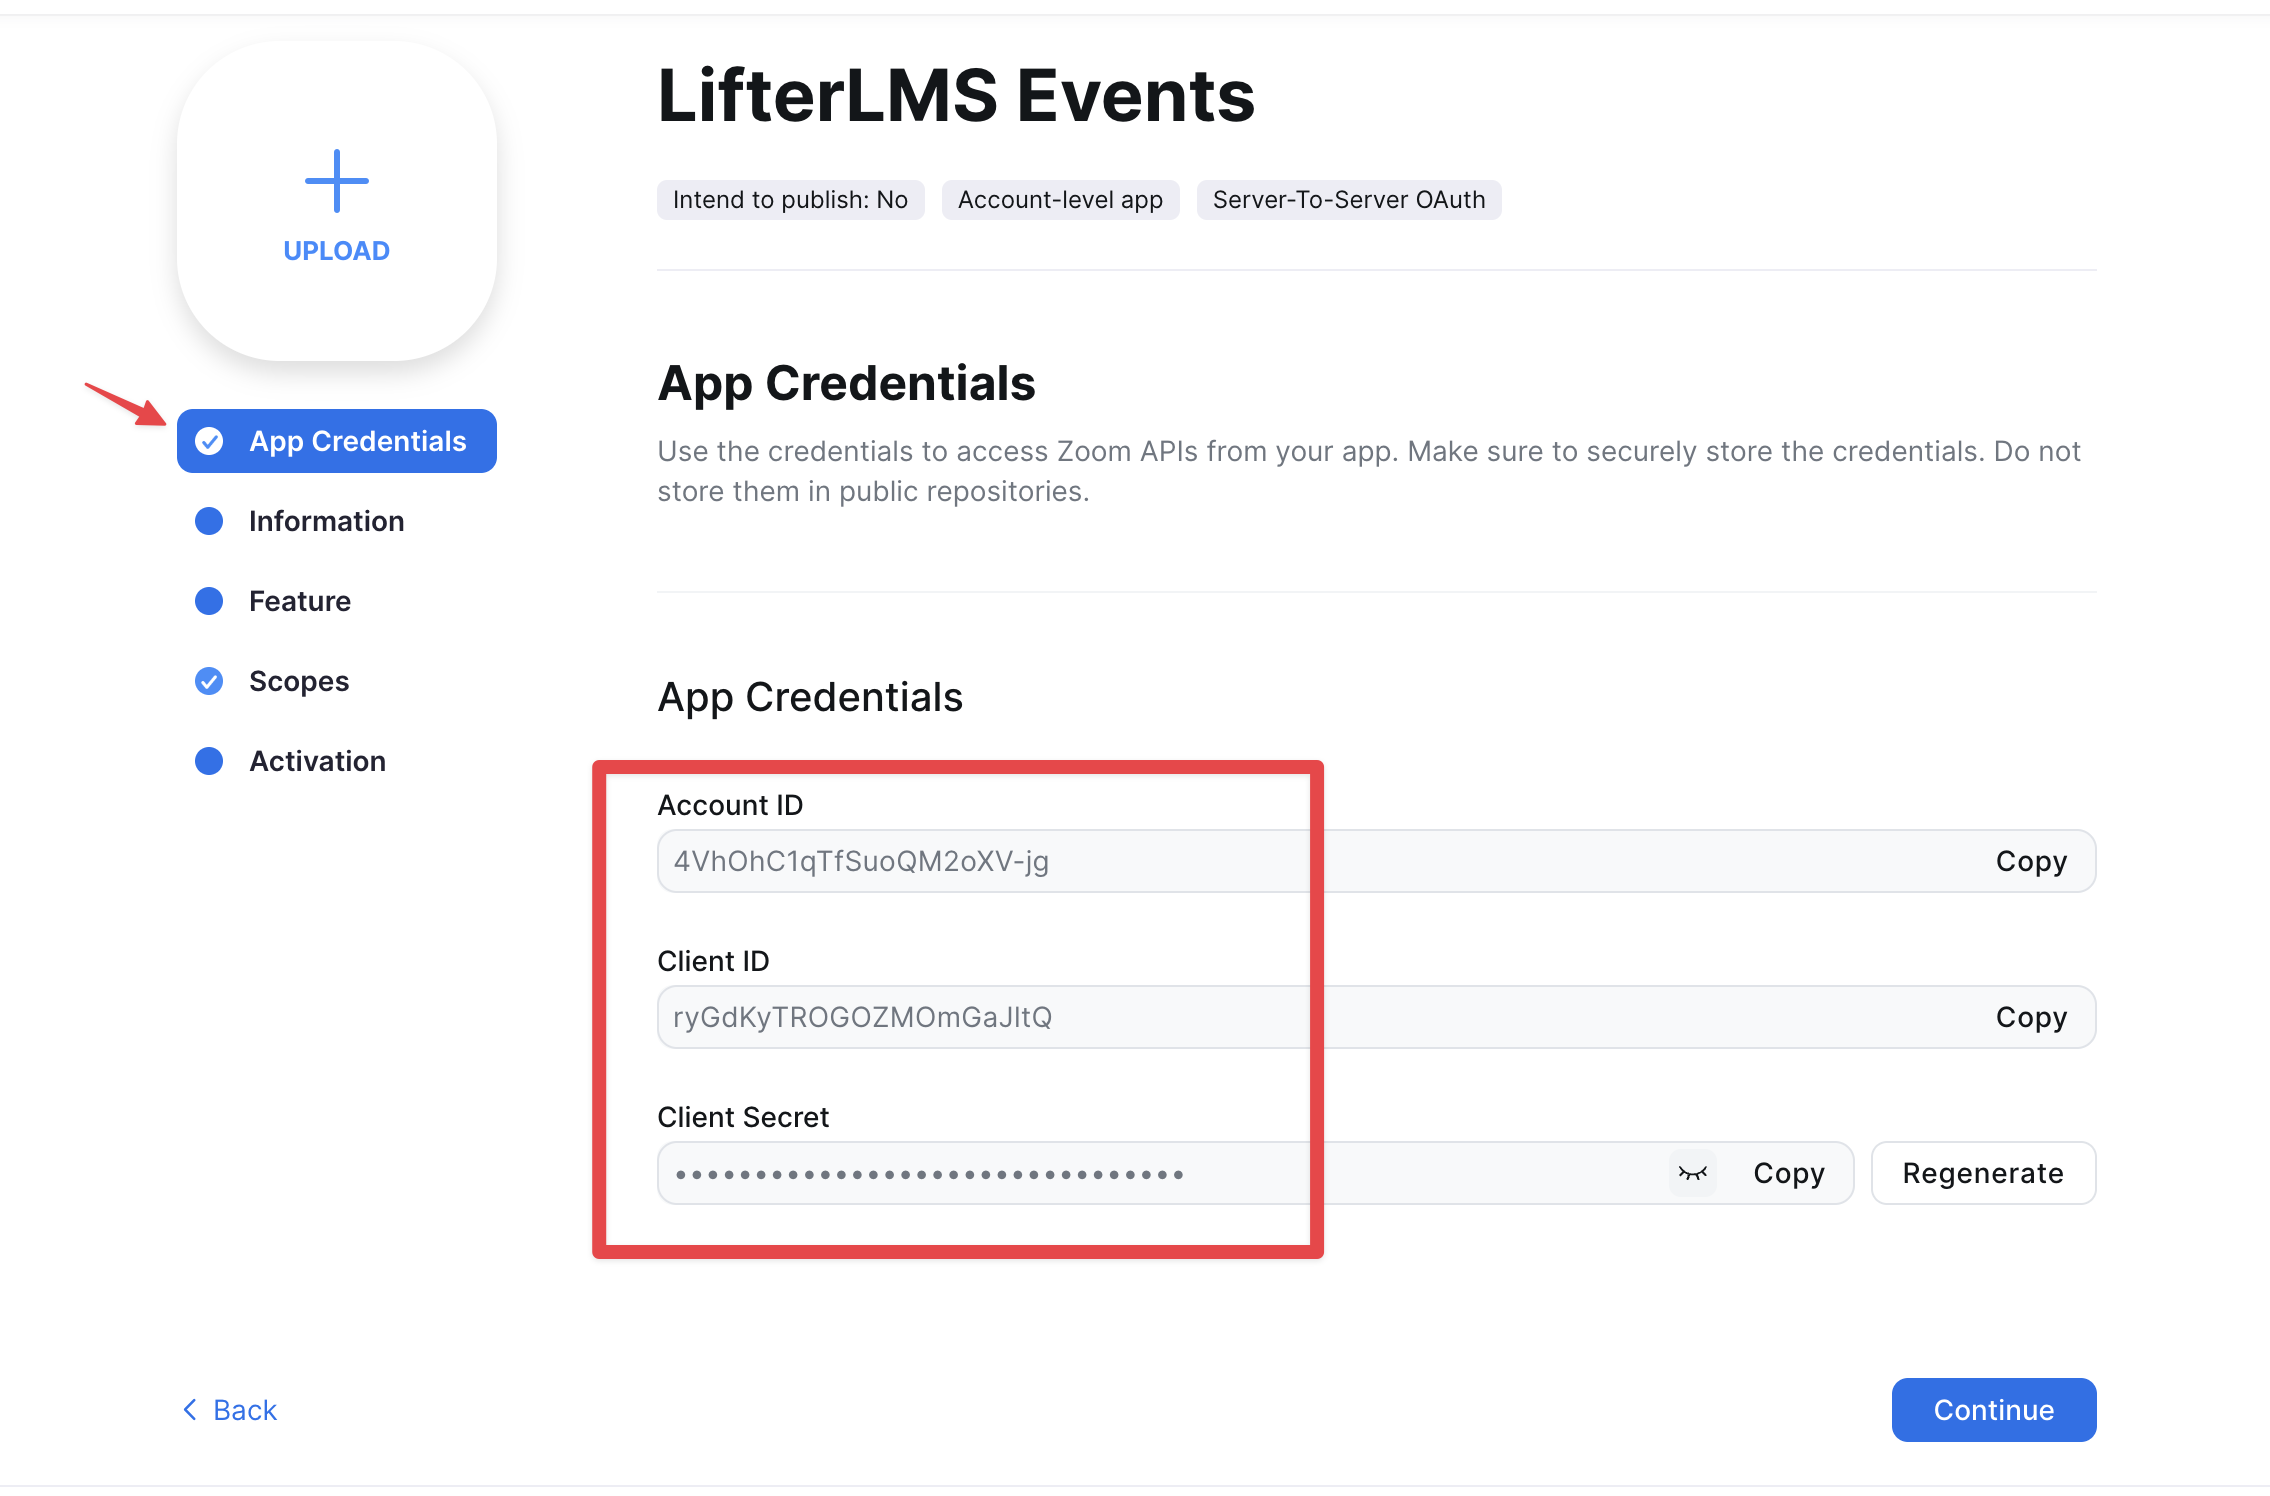
- Click on the “App Credentials” tab inside your Zoom developer account.
- Keep this tab open so you can easily copy your details.
- Open a new browser tab and log in to your WordPress dashboard.
- Navigate to LifterLMS > Settings in your left-hand menu.
- Click on the “Integrations” tab at the top of the screen.
- Click on the “Events” link to open your specific event settings.
- Scroll down the page until you find the “Zoom Connection” section.
- Copy your “Account ID”, “Client ID”, and “Client Secret” from your Zoom tab.
- Paste each code into the corresponding boxes in your LifterLMS settings.
- Click the Save Changes button.
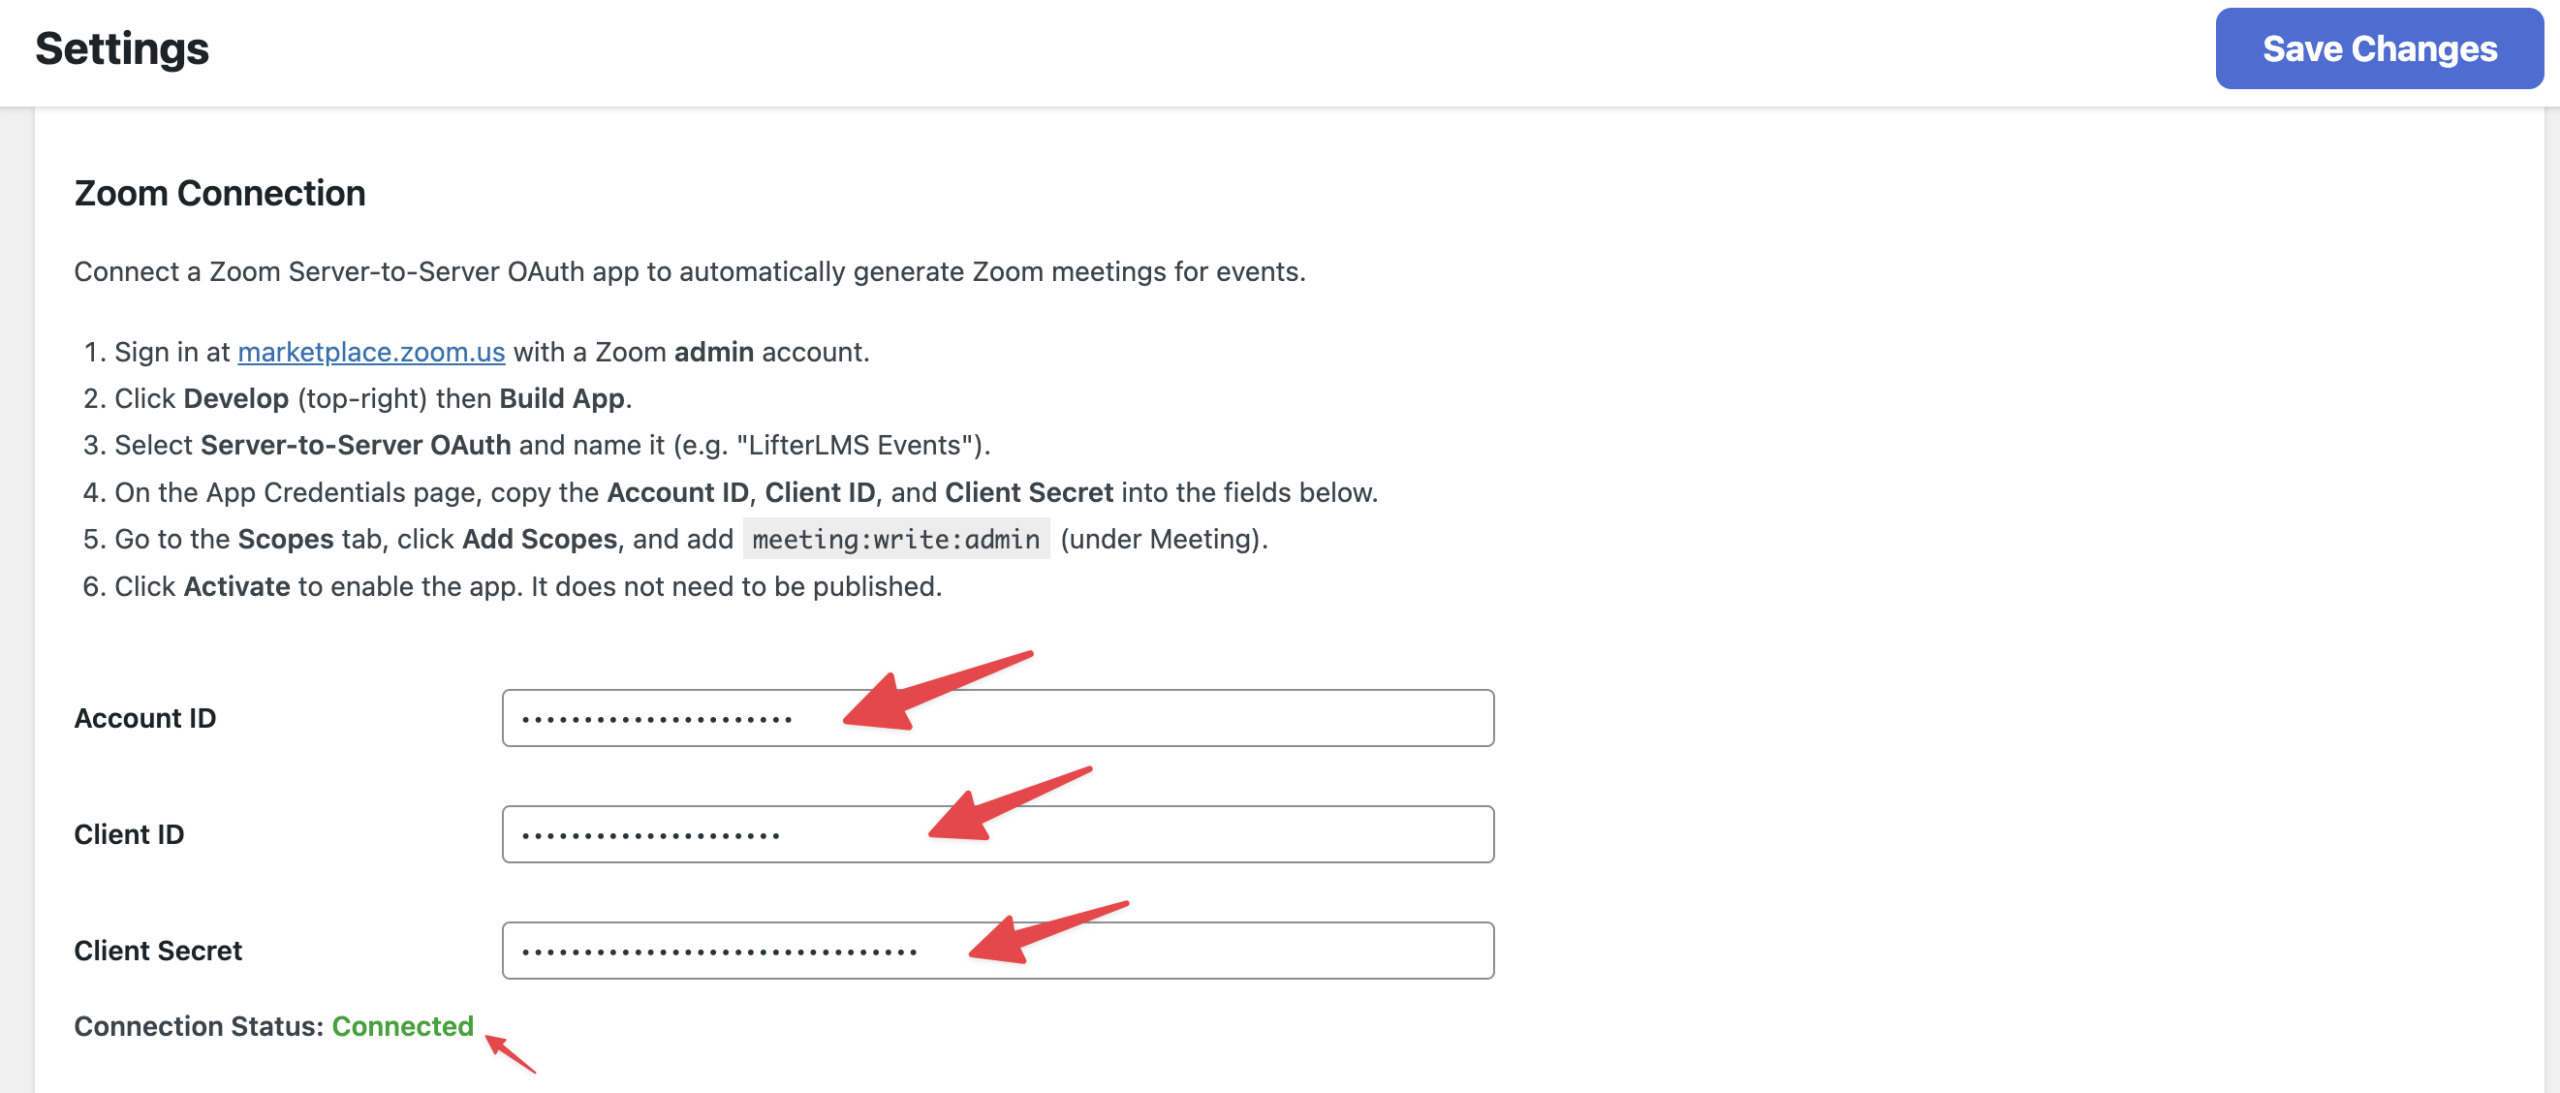
Once the page reloads, you will see a green “Connected” status message appear at the bottom of the section.
Now that your accounts are successfully connected, you can generate meeting links directly from the event builder.
- Navigate to Events > Add New Event in your WordPress dashboard to create a new session.
- Scroll down the page to the “Online Meeting” section.
- Click the checkbox next to “Generate Online Meeting”.
- Click the “Provider” dropdown menu and select “Zoom”.
- Type a secure word into the “Password” box.
- Check the boxes for your preferred meeting options, such as “Mute participants upon entry” or “Enable waiting room”.
- Click the Publish button to save your event.

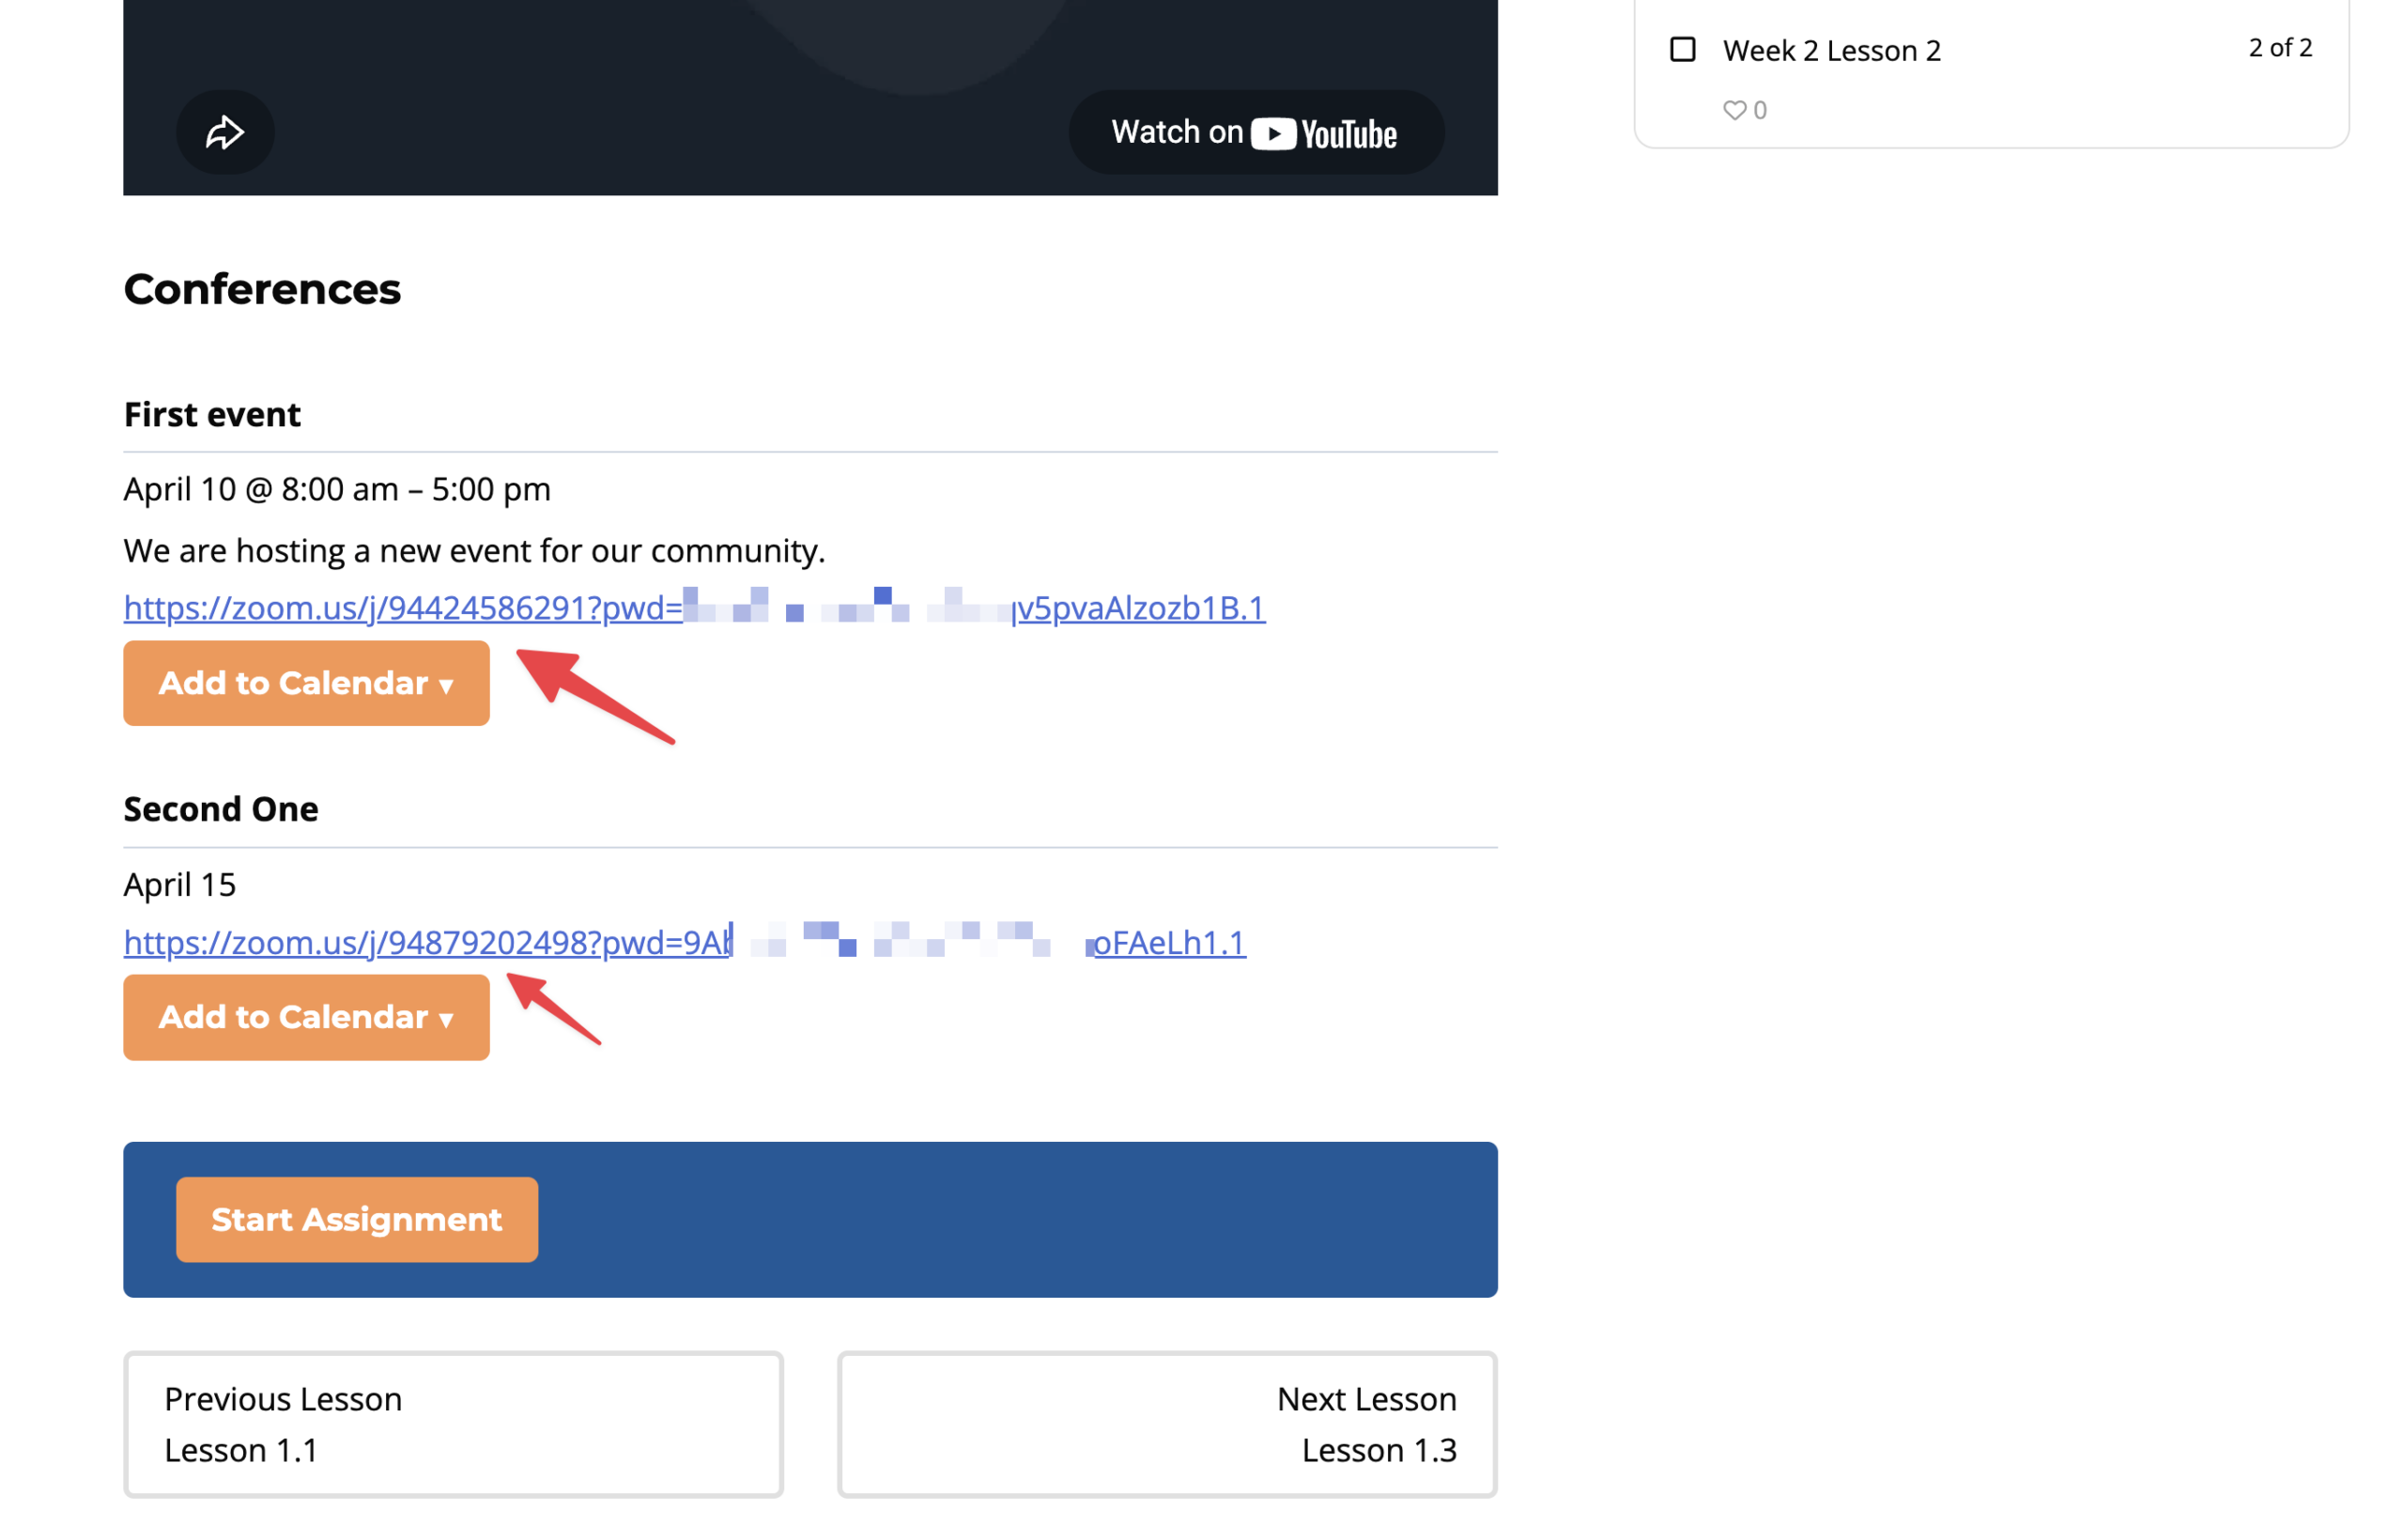
When you publish the event, the integration automatically talks to Zoom and creates a brand new meeting room for you. It then grabs the unique meeting URL and inserts it directly into the event “Location” field. Enrolled students will see this link as a clickable button on the front end of your website, allowing them to join your live session effortlessly.