How do I use the LifterLMS conditional Sign In and Sign Out menu items in Full Site Editing?
When creating a navigation menu using a full site editing (FSE) theme like Sky Pilot, you can add both the LifterLMS “Sign In” and “Sign Out” links to your menu.
Based on the user either being logged in or logged out, only the correct link will display.
Logged in users will only see the “Sign Out” menu item.
Logged out users will only see the “Sign In” menu item.
When logged in users click “Sign In” they will be directed to the LifterLMS login form. Once logged in, they will be redirected to their student dashboard logged in view.
If you are using an older “classic” theme that does not support full site editing, refer to our article on adding sign in / out links for classic themes.
-
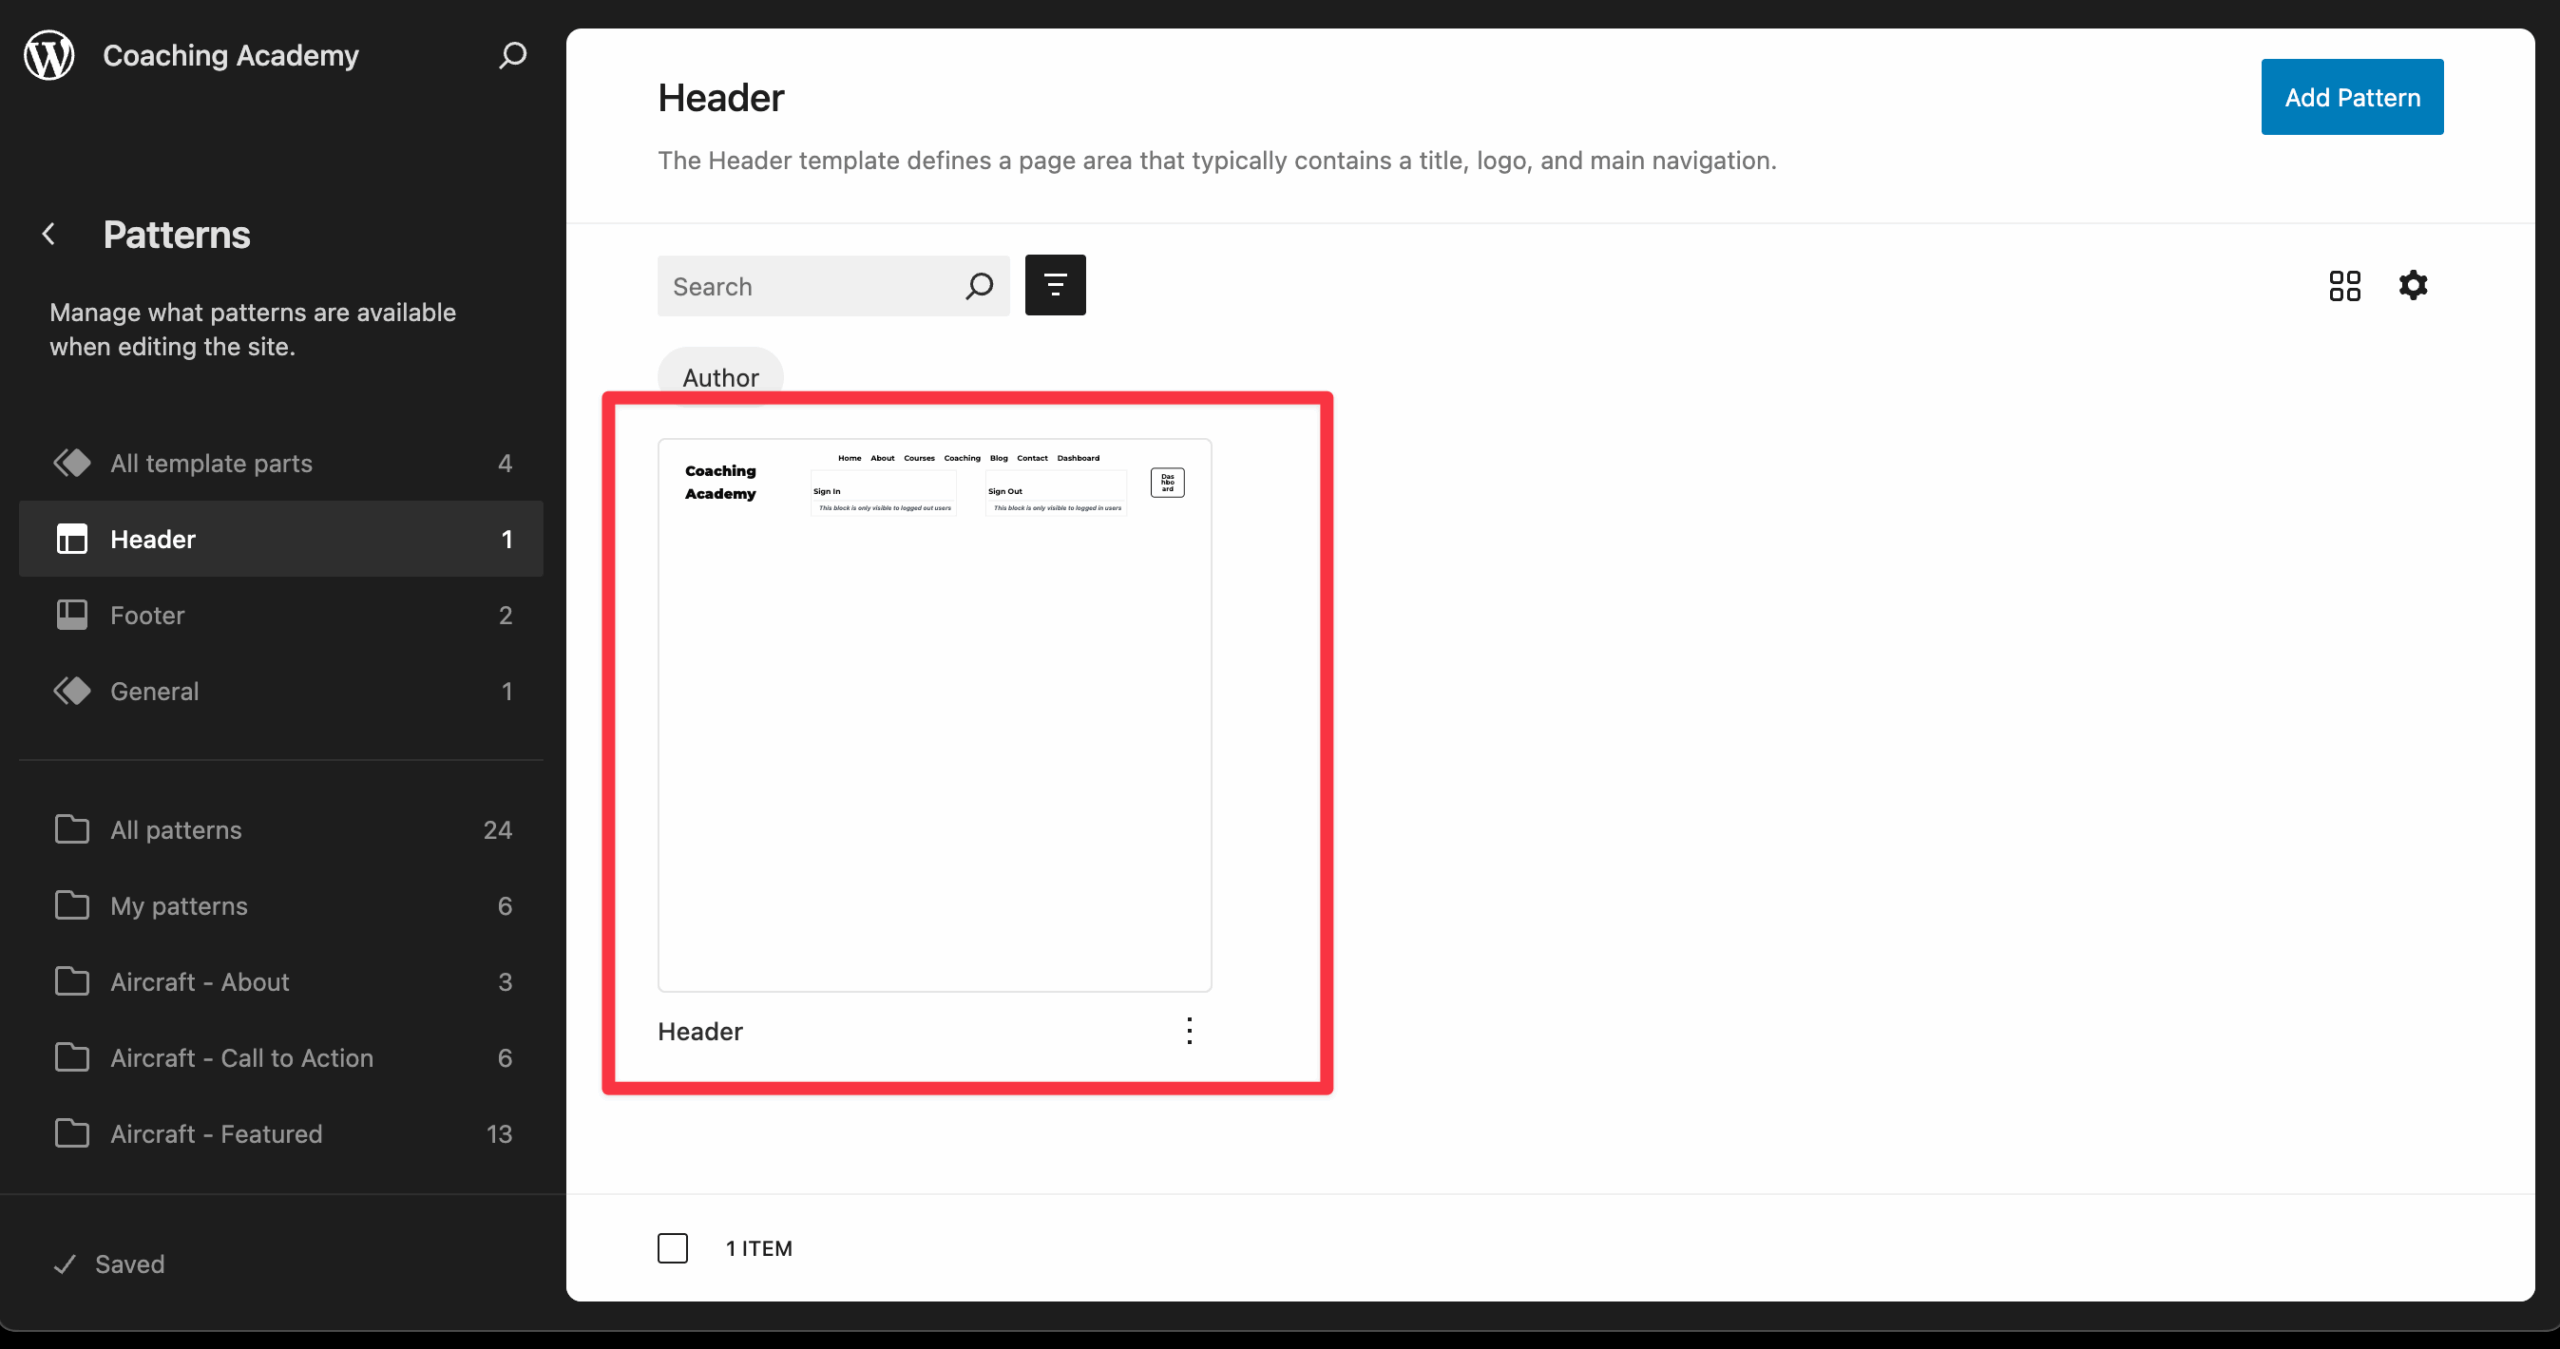
From the WordPress dashboard, navigate to Appearance > Editor > Patterns > Header.
-
Click on the “Header” pattern.
From the Header pattern:
-
Open the block navigator in the top-left corner.
-
Open the “Group” block.
-
Open the nested “Row” block.
-
Open the nested “Navigation” block.
-
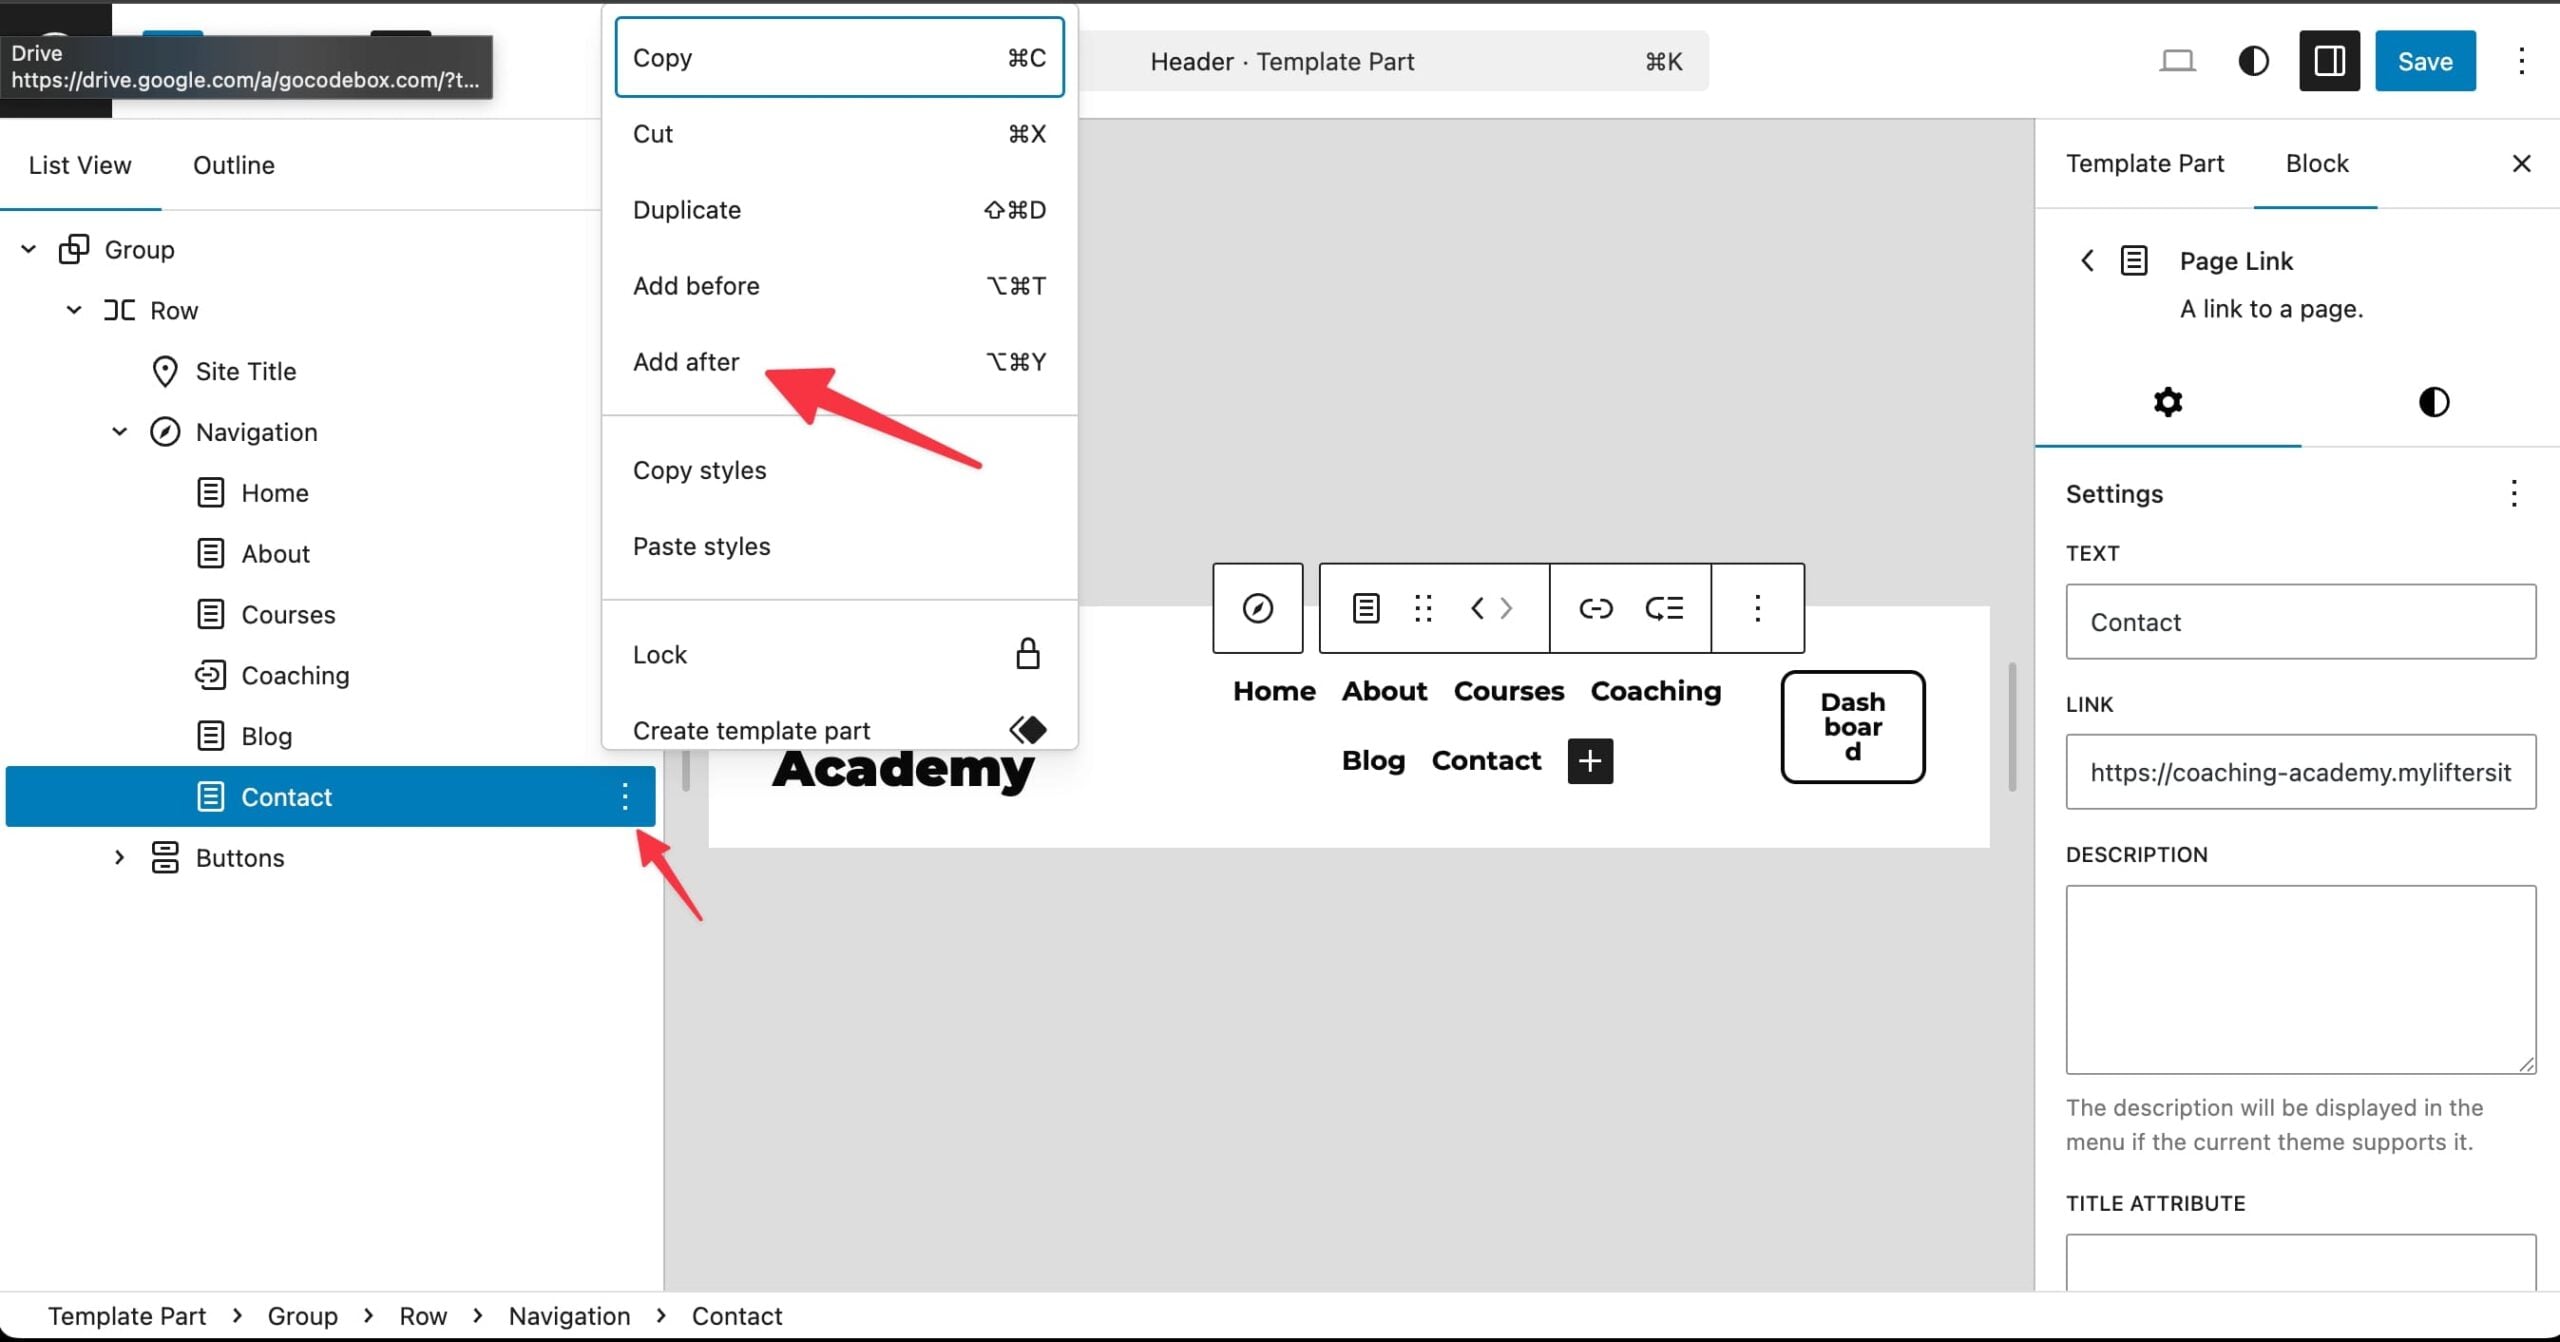
Click on a navigation item and then click on the three dots for more options.
-
Click “Add After” or “Add Before” to insert a new menu item.
-
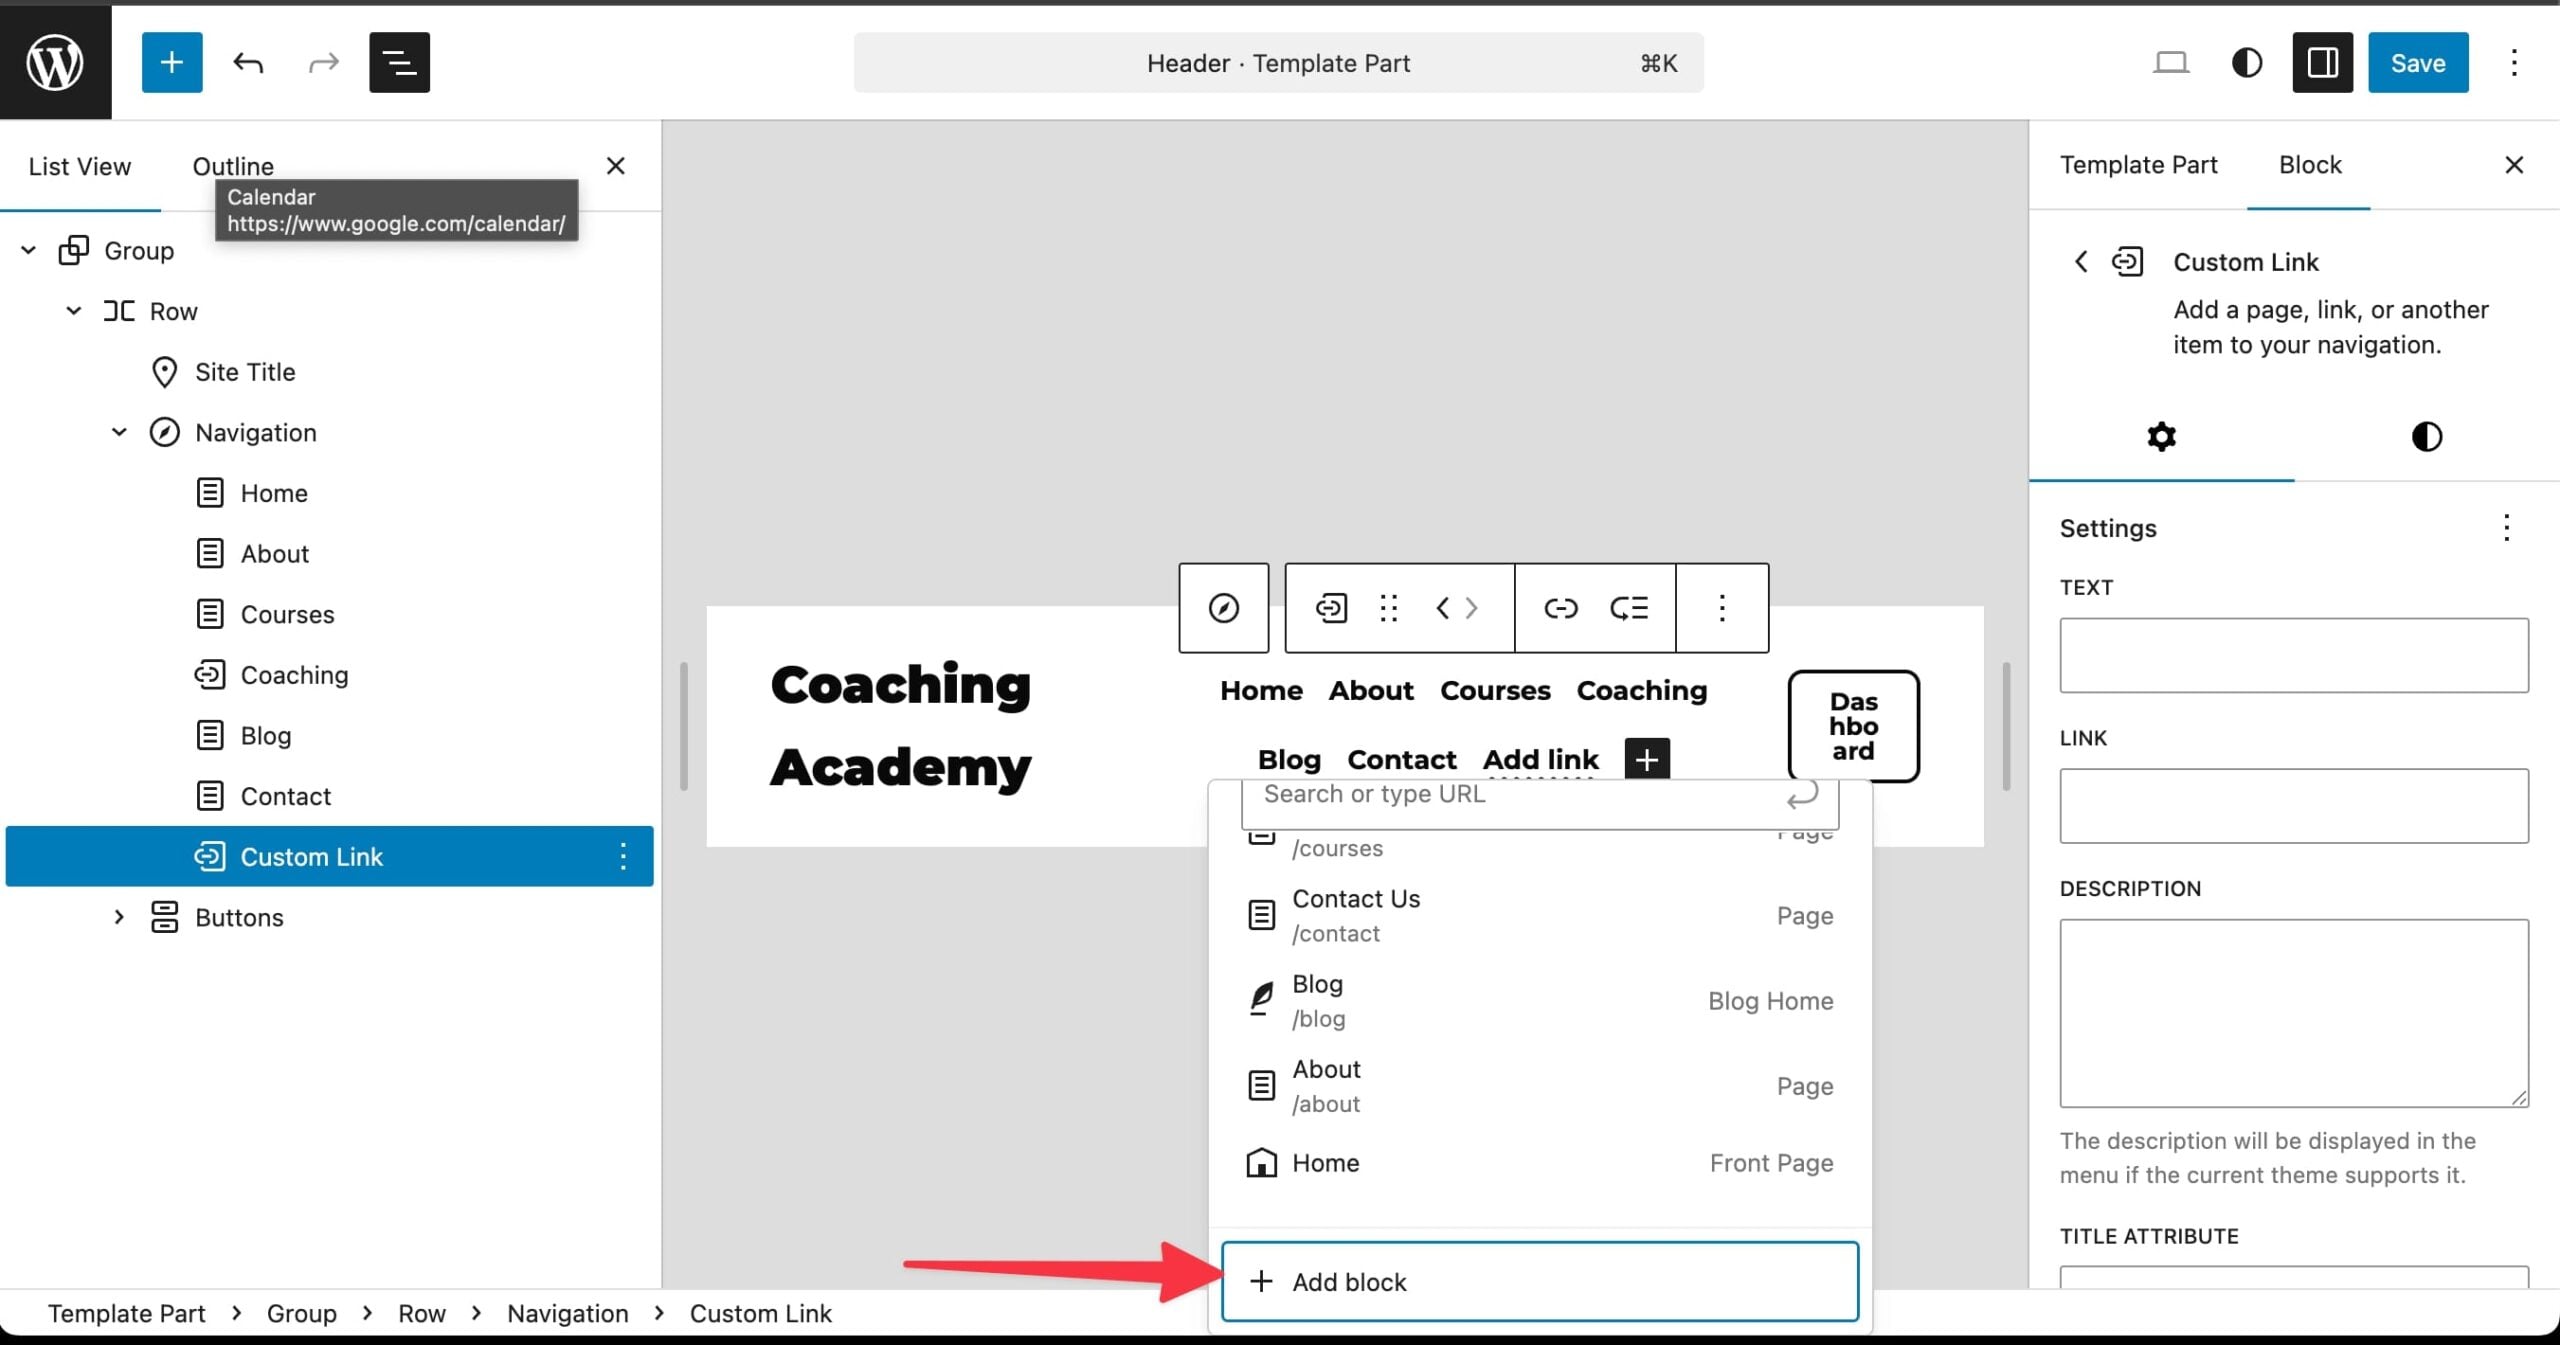
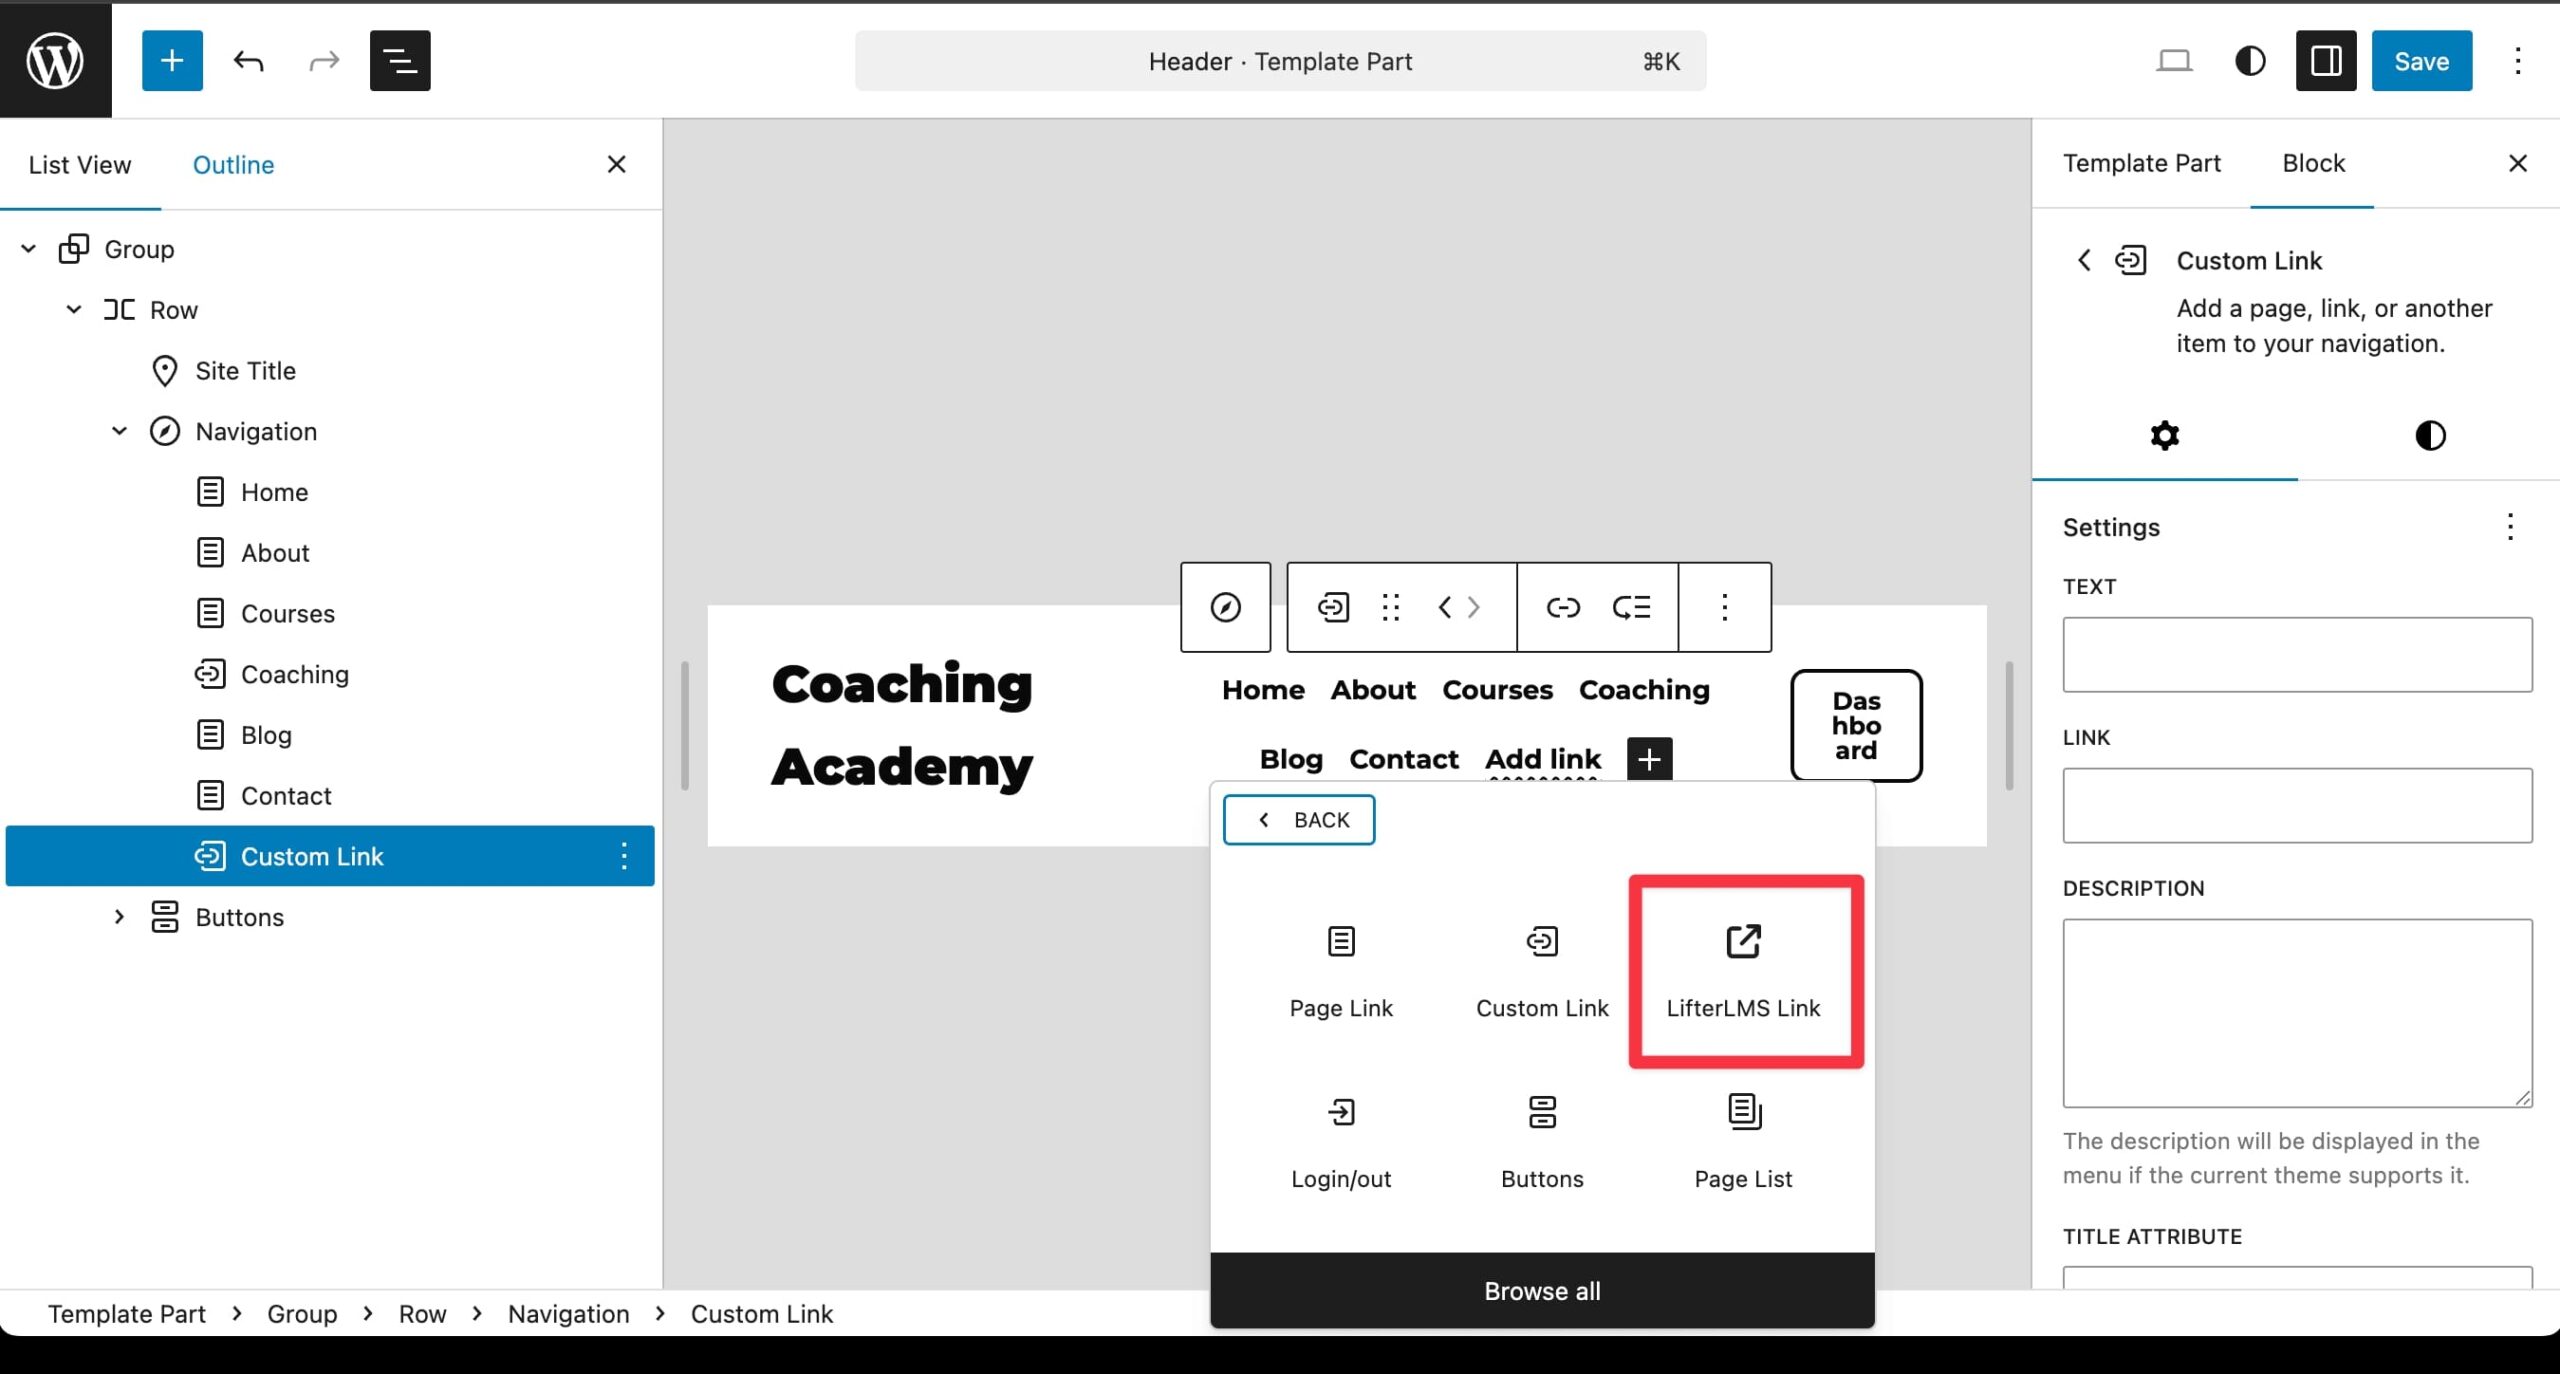
Click Add Block.
-
Click LifterLMS Link.
-
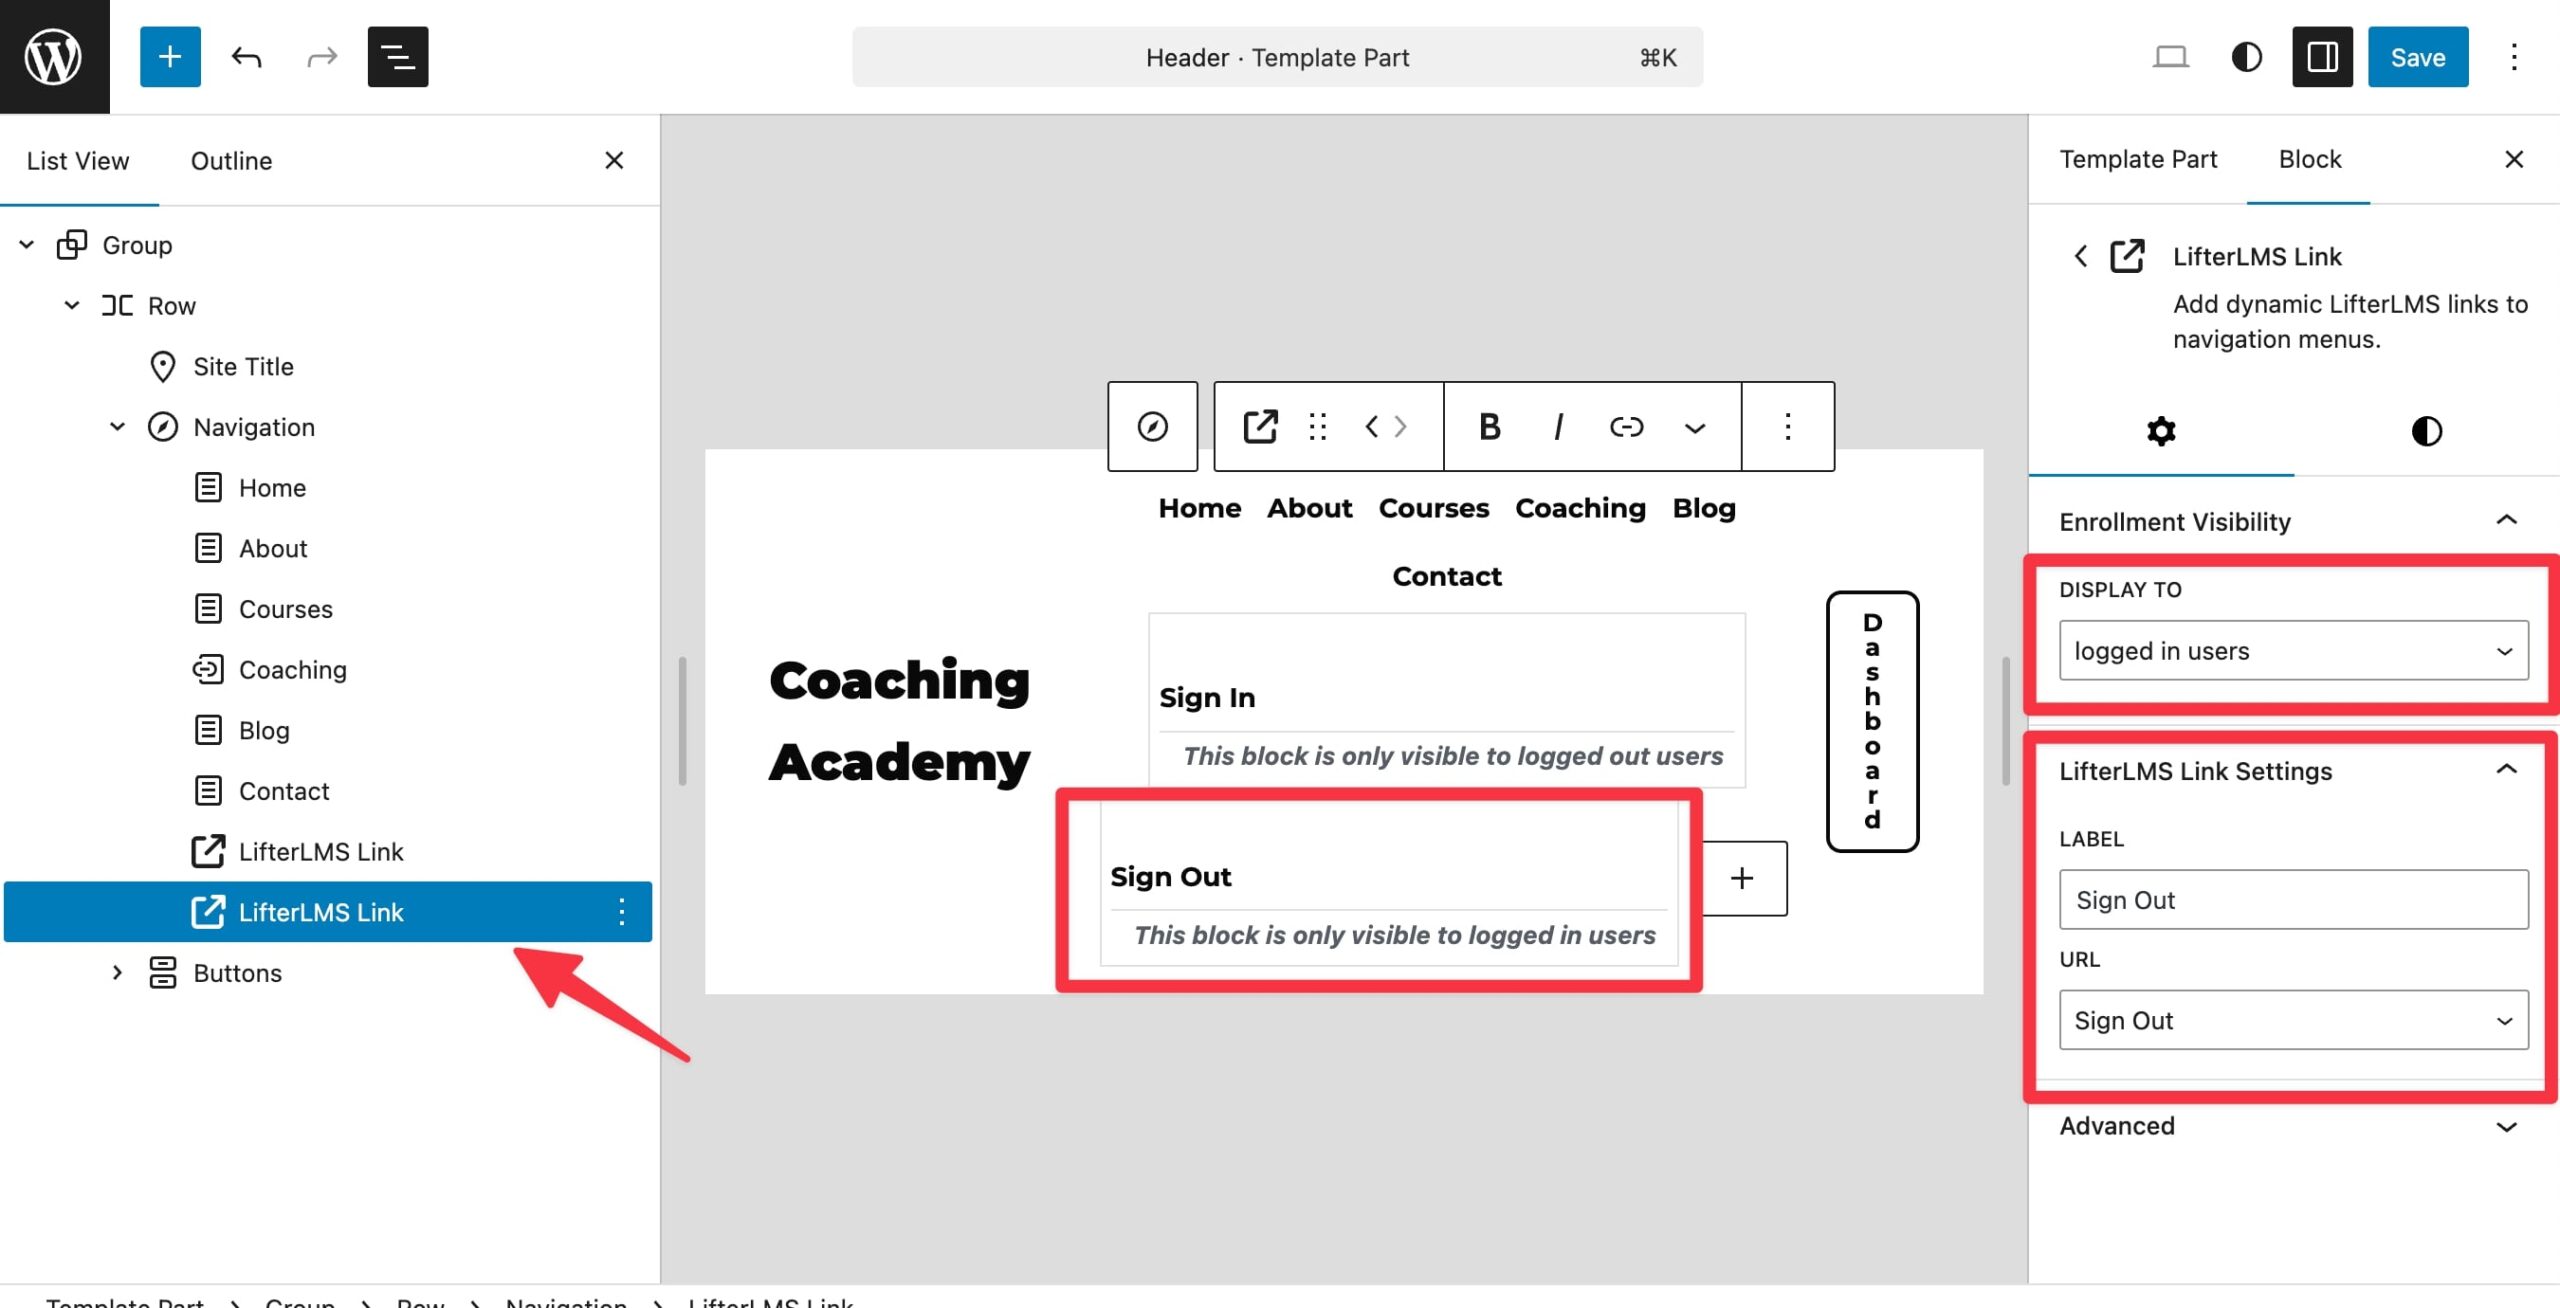
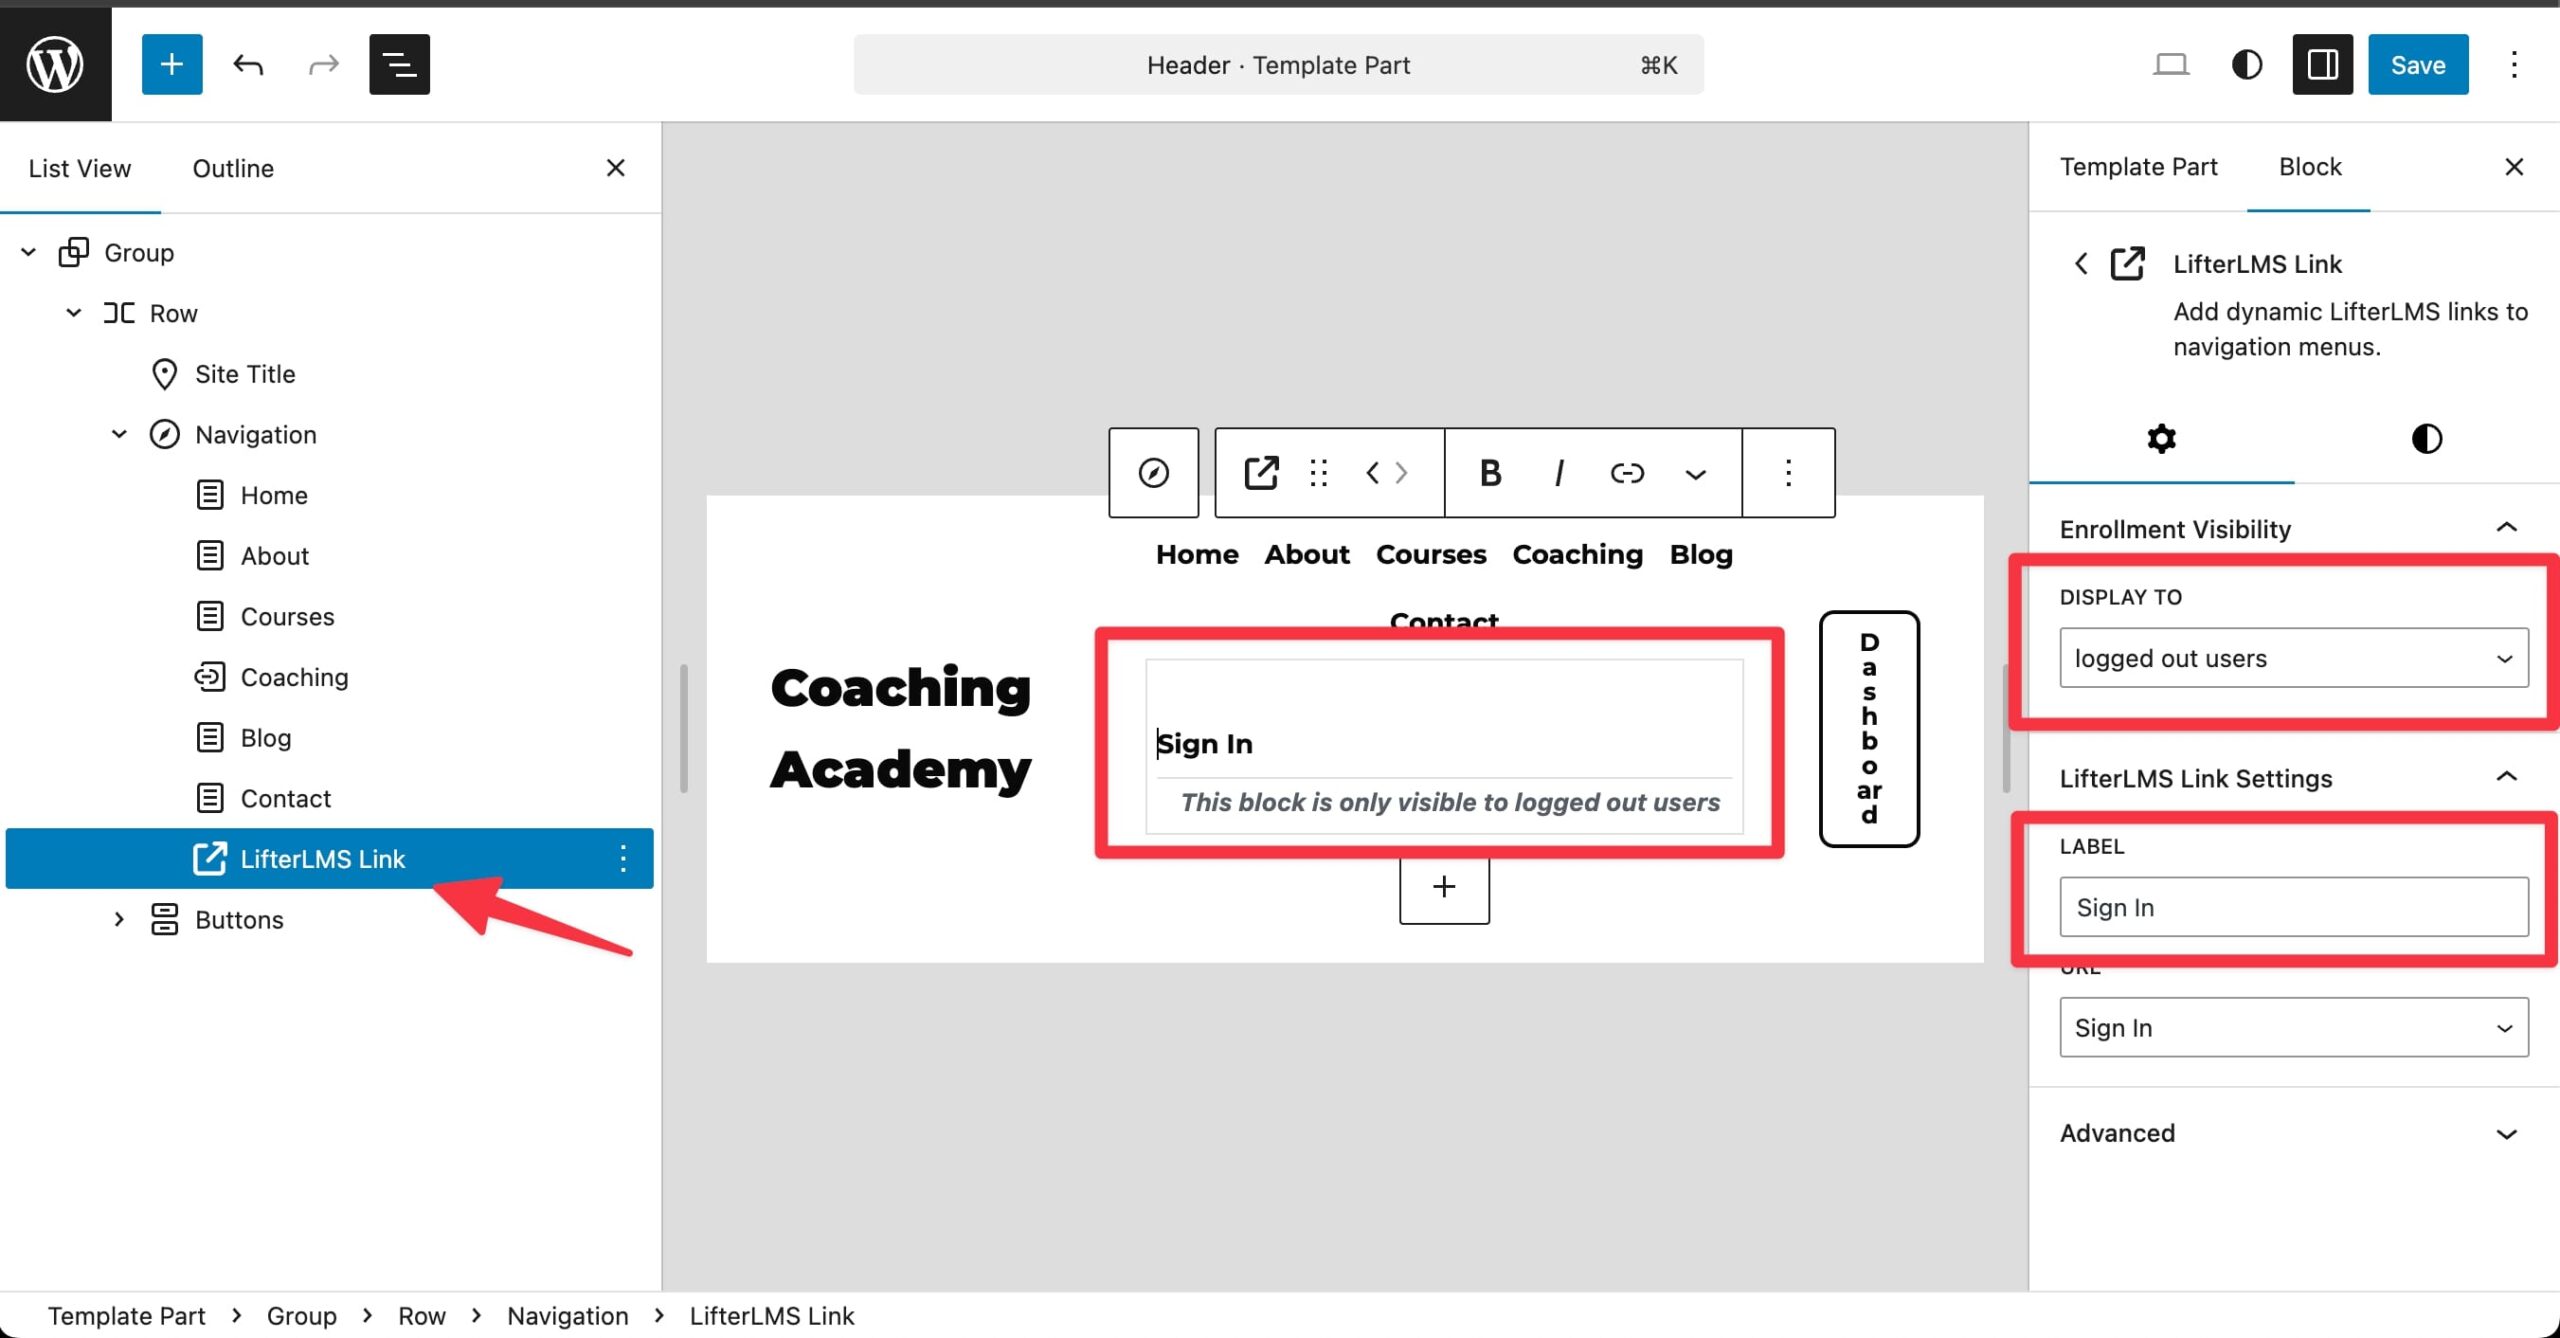
Look for “LifterLMS Link Settings” on the right side in the block settings.
-
Under “URL“, select “Sign In” from the dropdown list.
-
Under “Enrollment Visibility“, click the dropdown under “Display To” and select “Logged Out Users.”
-
Click Save in the top-right corner.
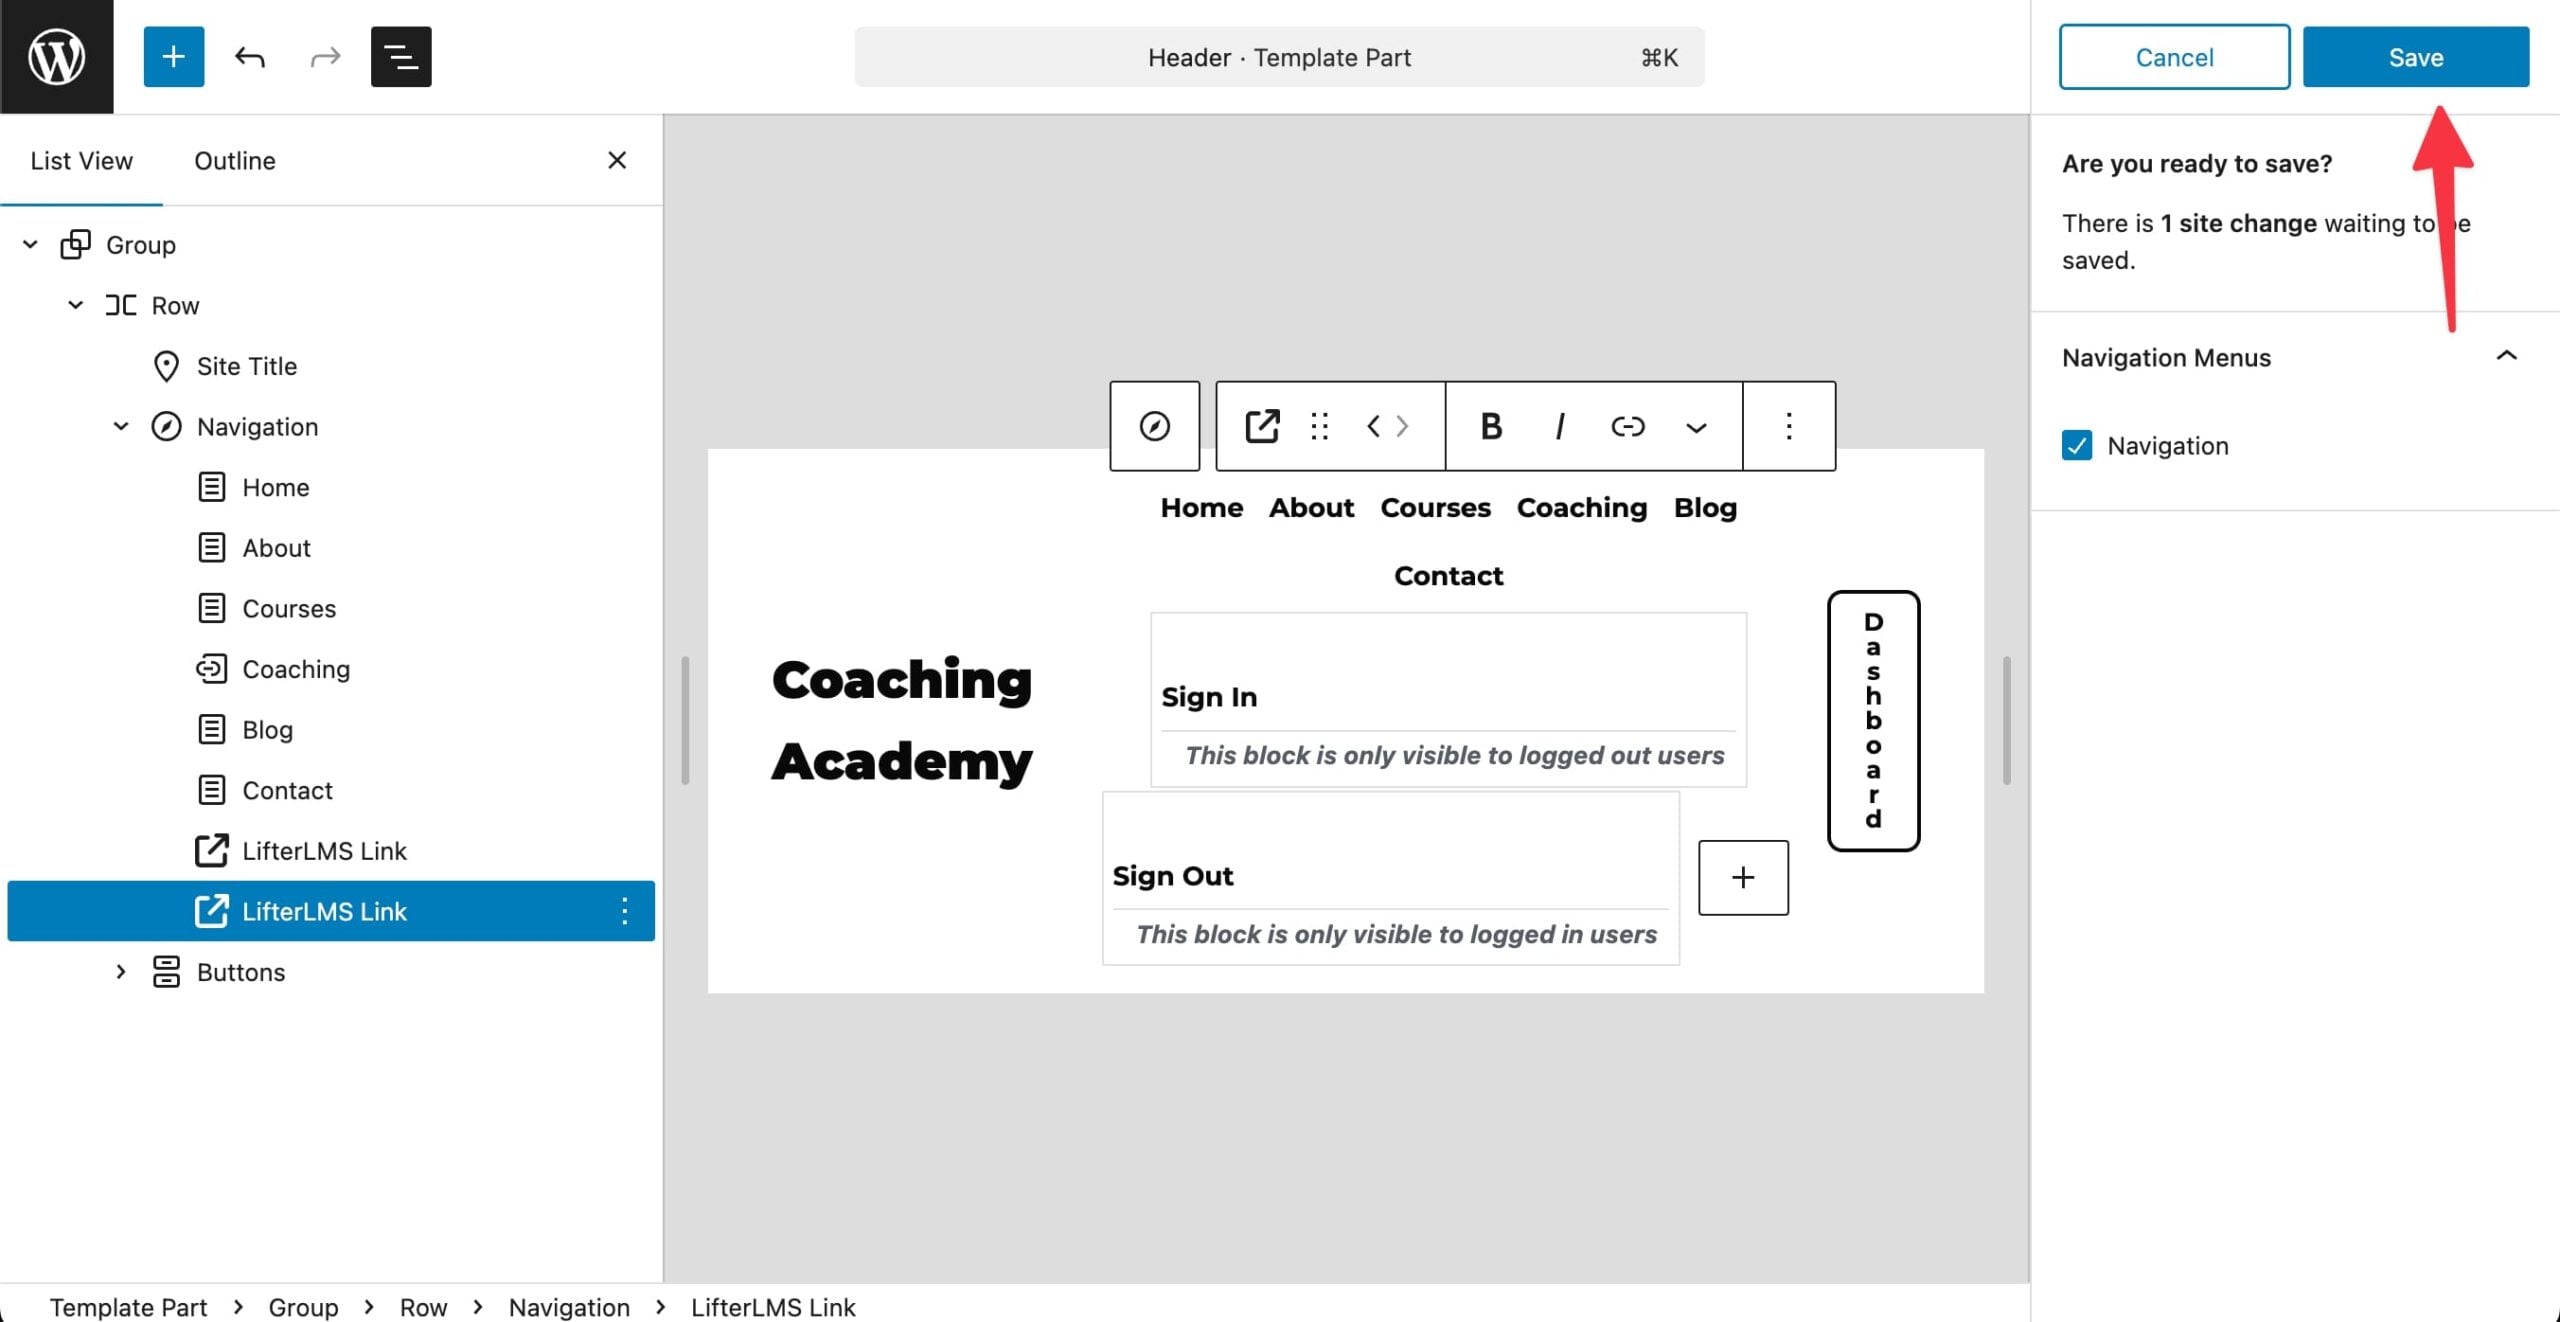
Repeat the above steps to also add a “Sign Out” menu item as a “LifterLMS Link.”
Except for the “Sign Out” menu item, set the enrollment visibility to “Logged In Users.”