How to Use Paddle with LifterLMS (Merchant of Record Setup via WooCommerce)
A Merchant of Record (MoR) is a legal entity that sells goods or services to an end customer on behalf of your business. Using an MoR, such as Paddle, is a popular strategy for course creators who want to offload the complexity of global tax compliance, including handling EU VAT or US Sales Tax.
Because LifterLMS does not have a direct, native integration with Paddle, you must use WooCommerce as the bridge to connect the two.
This guide outlines how to set up this “bridge” using the LifterLMS WooCommerce integration.
When you use standard payment gateways such as Stripe or PayPal directly within LifterLMS, you are the merchant of record. This means you are liable to calculate, collect, and remit taxes in every jurisdiction where you have students.
An MoR such as Paddle:
- Acts as the reseller of your digital goods.
- Automatically calculates and adds the correct tax (VAT/GST) to the checkout.
- Files and remits those taxes for you globally.
- Handles chargebacks and fraud protection.
To achieve this setup, you’ll need the following plugins active on your WordPress site:
- LifterLMS (Core plugin)
- WooCommerce
- LifterLMS WooCommerce Integration (Available in the Infinity Bundle or as a single add-on)
- A “Paddle for WooCommerce” Plugin (There are several third-party options available in the WordPress repository or from premium developers, as WooCommerce does not include Paddle by default).
1. Configure WooCommerce and Paddle
Before connecting to LifterLMS, ensure your eCommerce engine is working.
- In your WordPress dashboard, install the “Paddle for WooCommerce” payment gateway plugin.
- Navigate to WooCommerce > Settings.
- Click the “Payments” tab, locate “Paddle” in the list of gateways, and enable it.
- Click Manage or Setup next to Paddle to configure it.
- In your Paddle dashboard, click on the three-dot icon next to your name. This will open a new modal that displays your Vendor ID.

- After this, locate your API key and Client-side token in your Paddle dashboard under Developer Tools > Authentication.
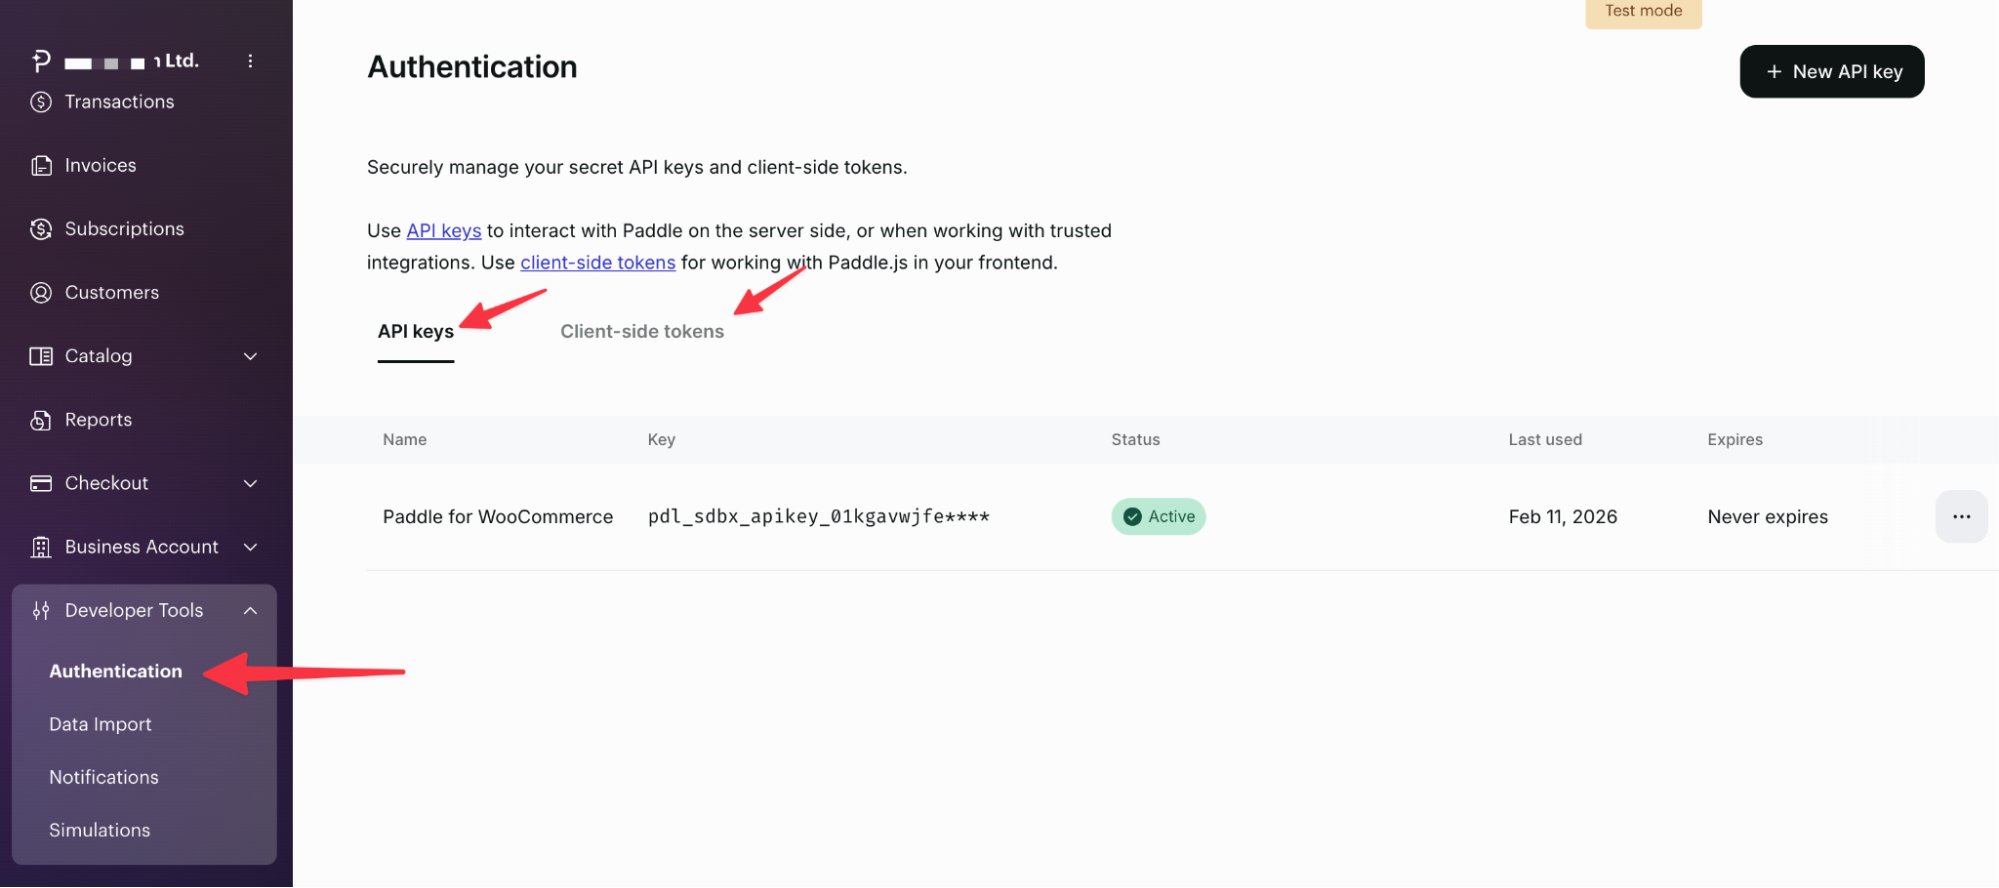
- Next, you need to configure the Notification channel by creating a new webhook URL. On this screen, paste the URL from your WordPress dashboard (see the next step) and copy the API key displayed in the Stripe Dashboard.

- After obtaining all the credentials, enter the Vendor ID, API key, Client-side token, and Notification secret key in the provided fields. On this screen, you will also find the URL that you need to configure the webhook in step 7. Don’t forget to hit Save after configuring the necessary settings. After saving the settings, click “Check Paddle Connection” to verify it is working correctly.
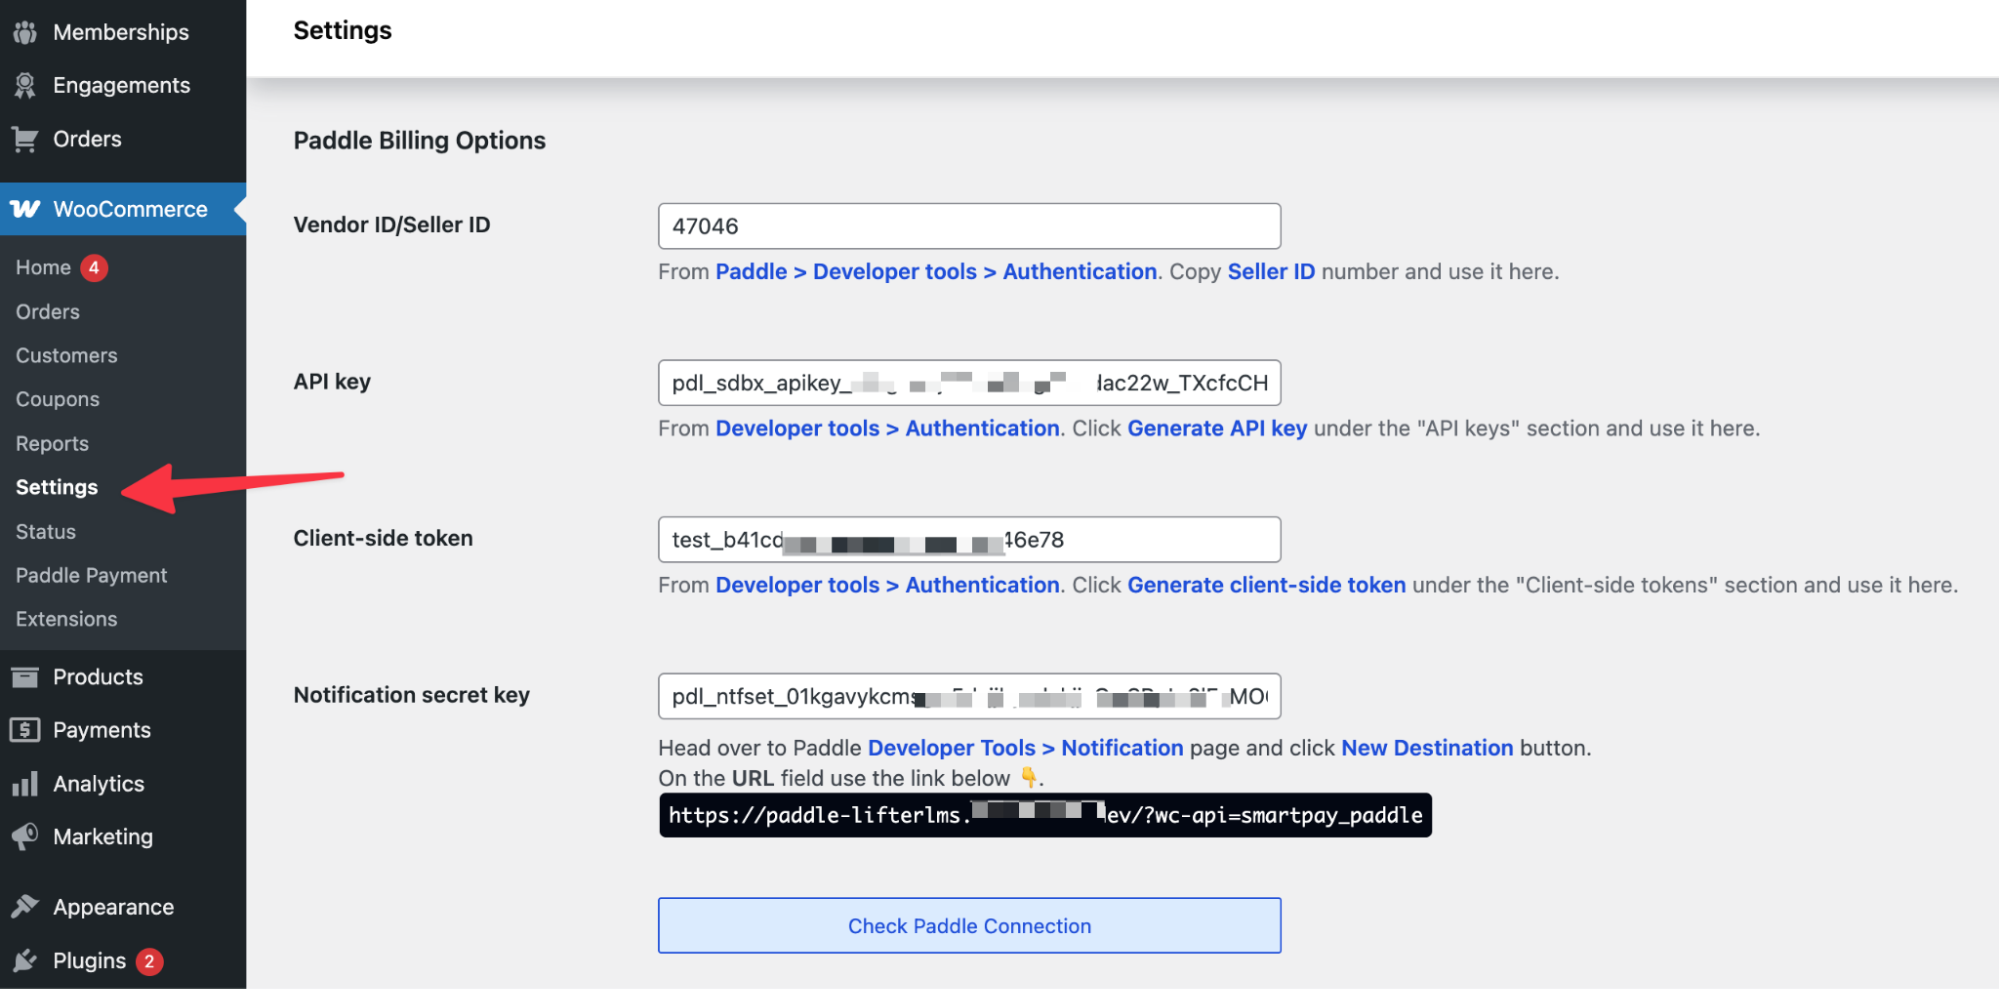
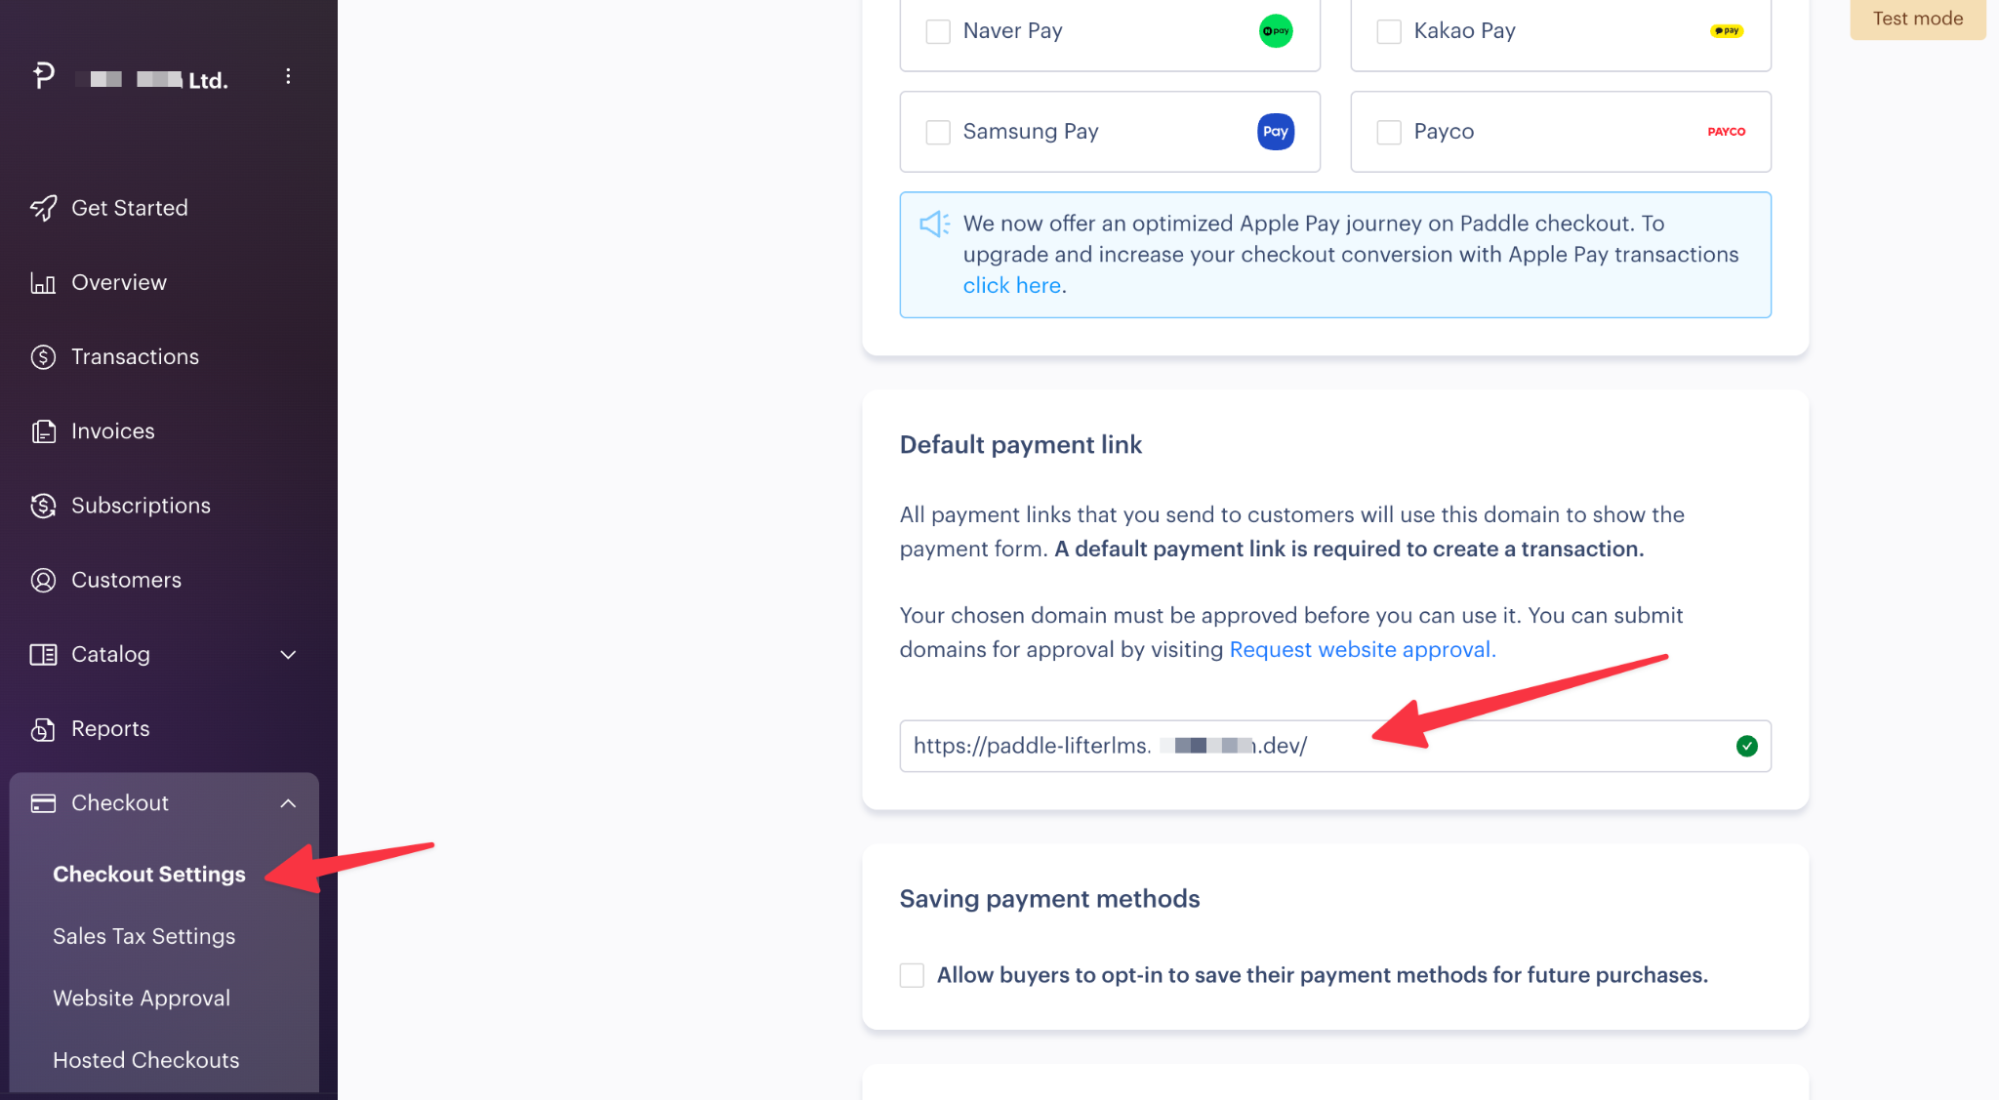
- Finally, navigate to Checkout > Checkout Settings in your Paddle dashboard, then enter the URL of your website’s homepage in the Default payment link field. After this, click the Save button.
Paddle supports subscriptions. Ensure your “Paddle for WooCommerce” plugin specifically supports WooCommerce Subscriptions if you plan to sell recurring course memberships.
2. Enable the LifterLMS WooCommerce Integration
Now you must tell LifterLMS to stop handling payments and hand them off to WooCommerce.
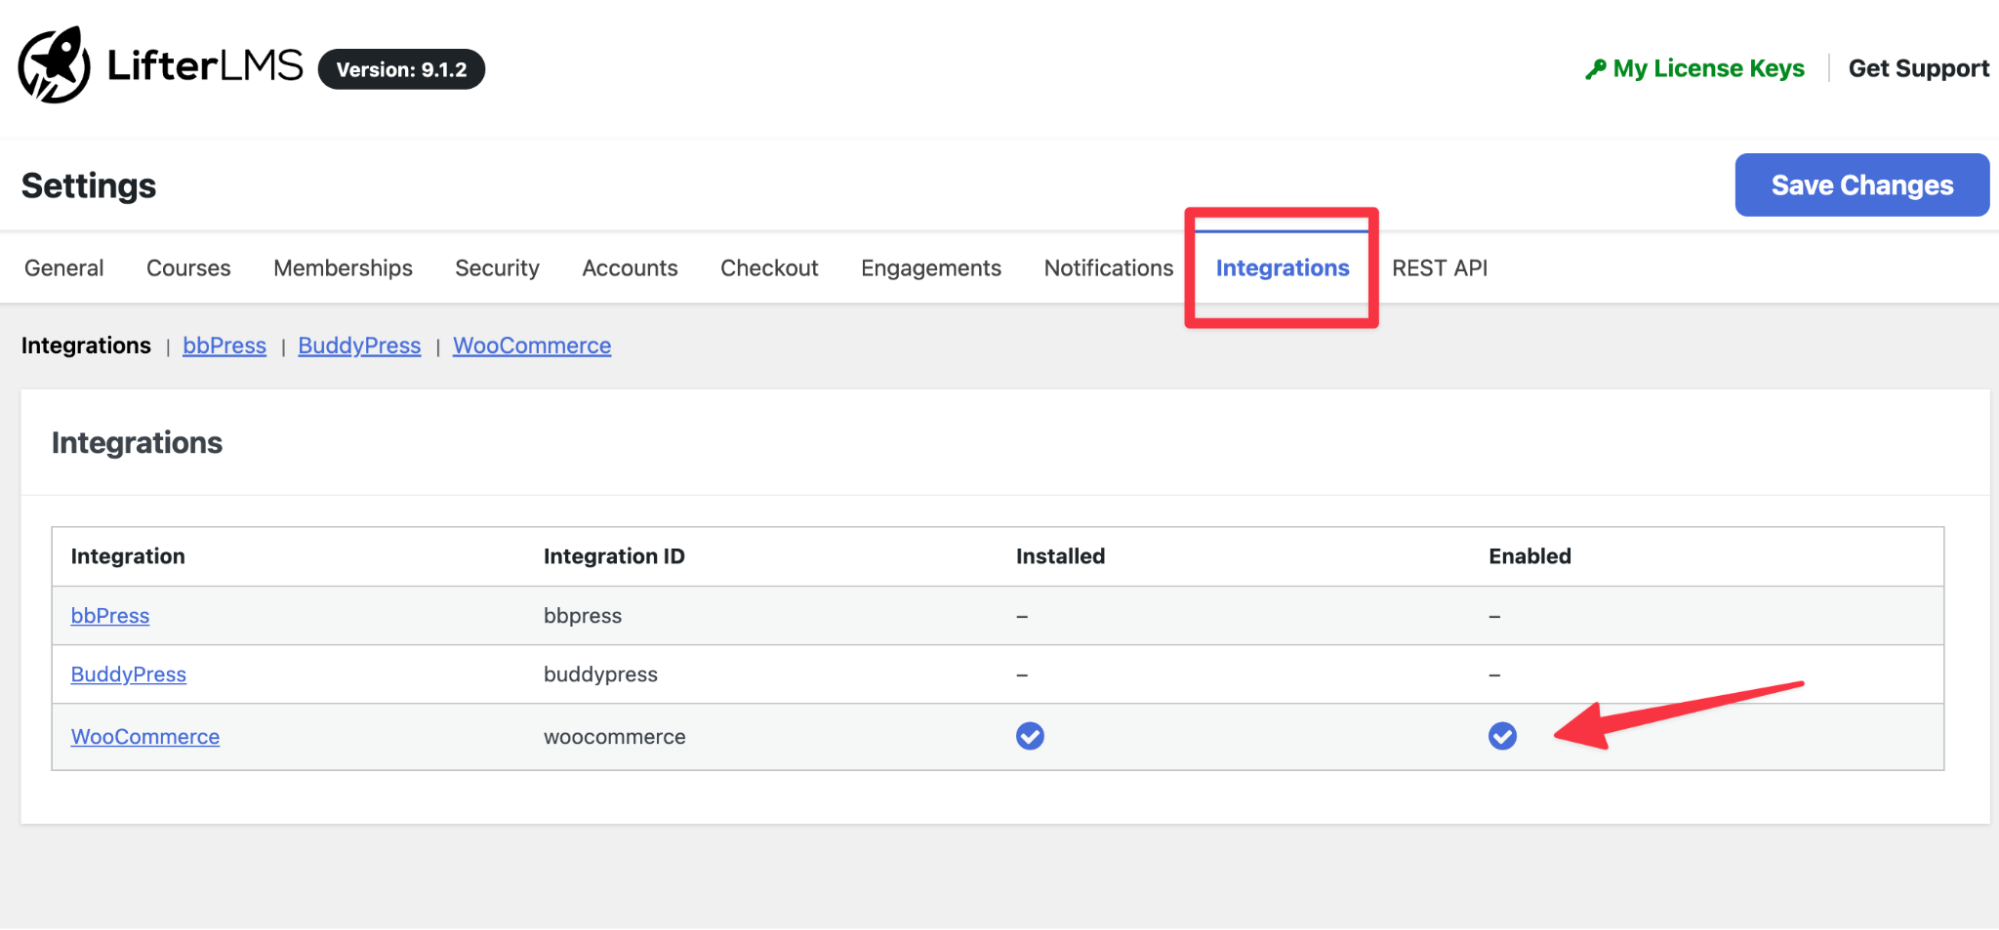
- Navigate to LifterLMS > Settings.
- Click on the “Integrations” tab.
- Click on “WooCommerce” in the sub-menu.
- Check the box to enable the integration.
- Click Save Changes.
3. Link Your Course to a WooCommerce Product
With the bridge active, LifterLMS courses are now purchased via WooCommerce products.
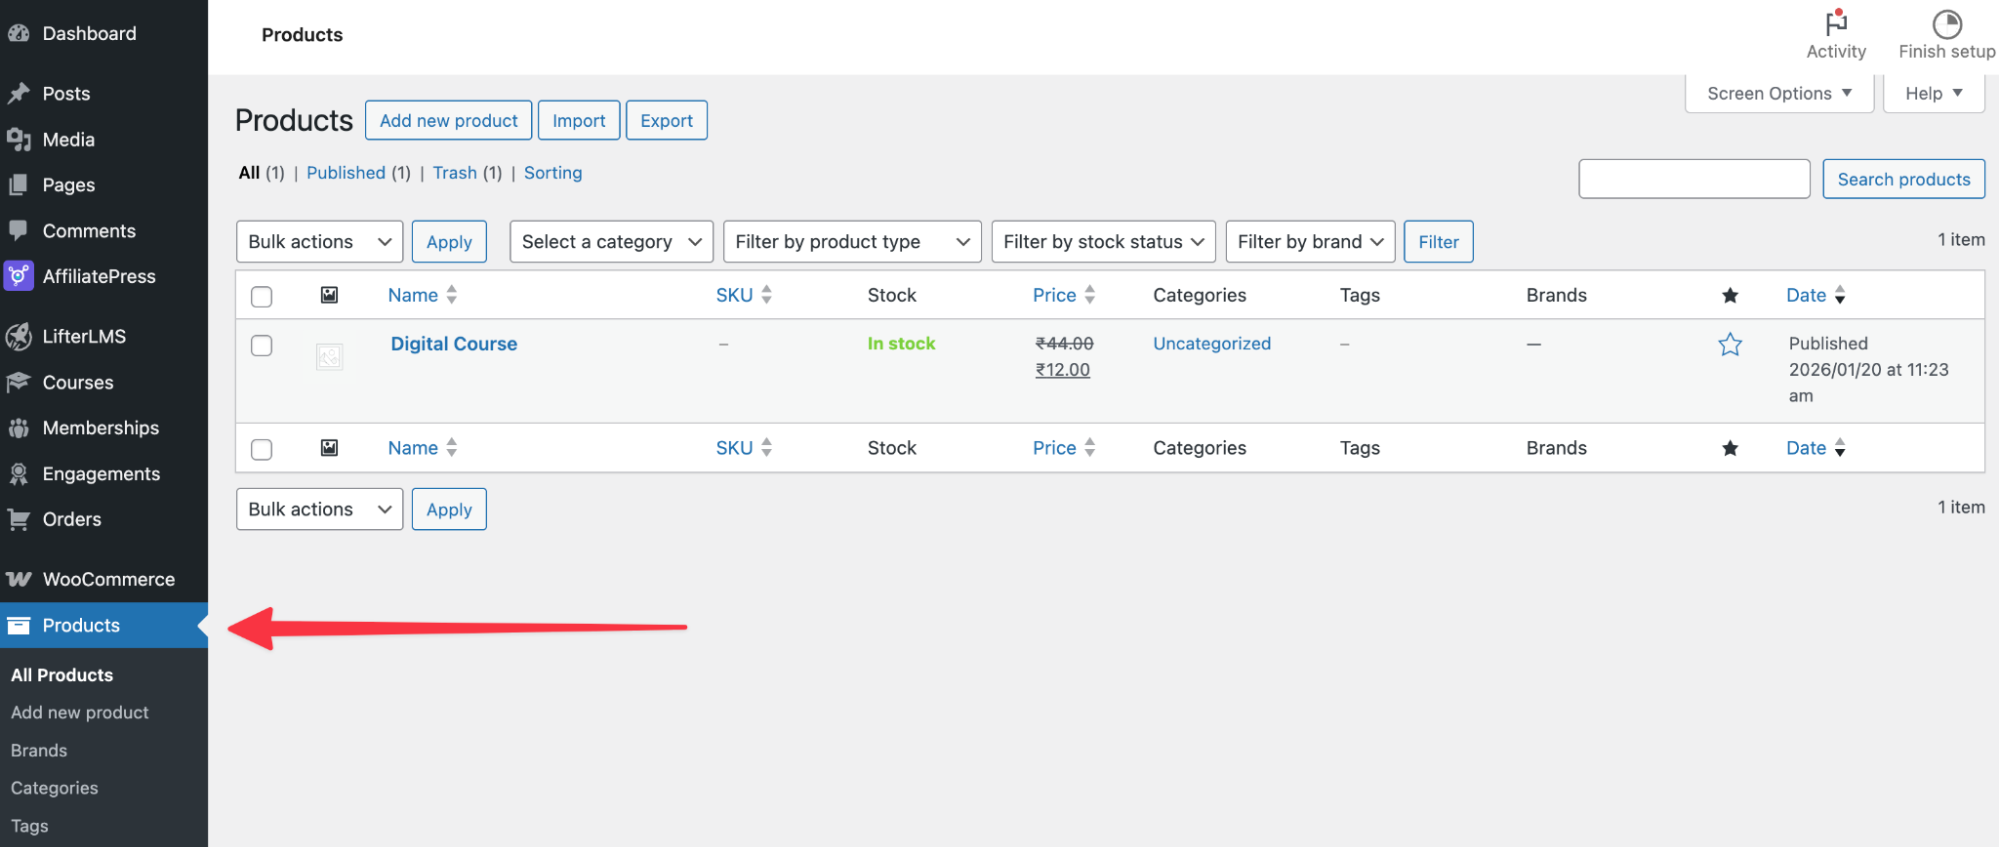
- Create a new virtual product in WooCommerce (Products > Add New).
- Set the price and title for your course.
- Mark the product as Virtual and Downloadable in the Product Data box.
- Navigate to the Inventory tab in the Product Data box, and under Sold individually, select the Limit purchases to 1 item per order option.
- Unlike standard setups, you don’t need to configure complex redirections. However, you must associate this product with the course.
- Go to LifterLMS > Courses and click on your specific course.
- Scroll down to “Access Plans“, then click “Add New“.
- Set the plan title (e.g., “Buy via WooCommerce”).
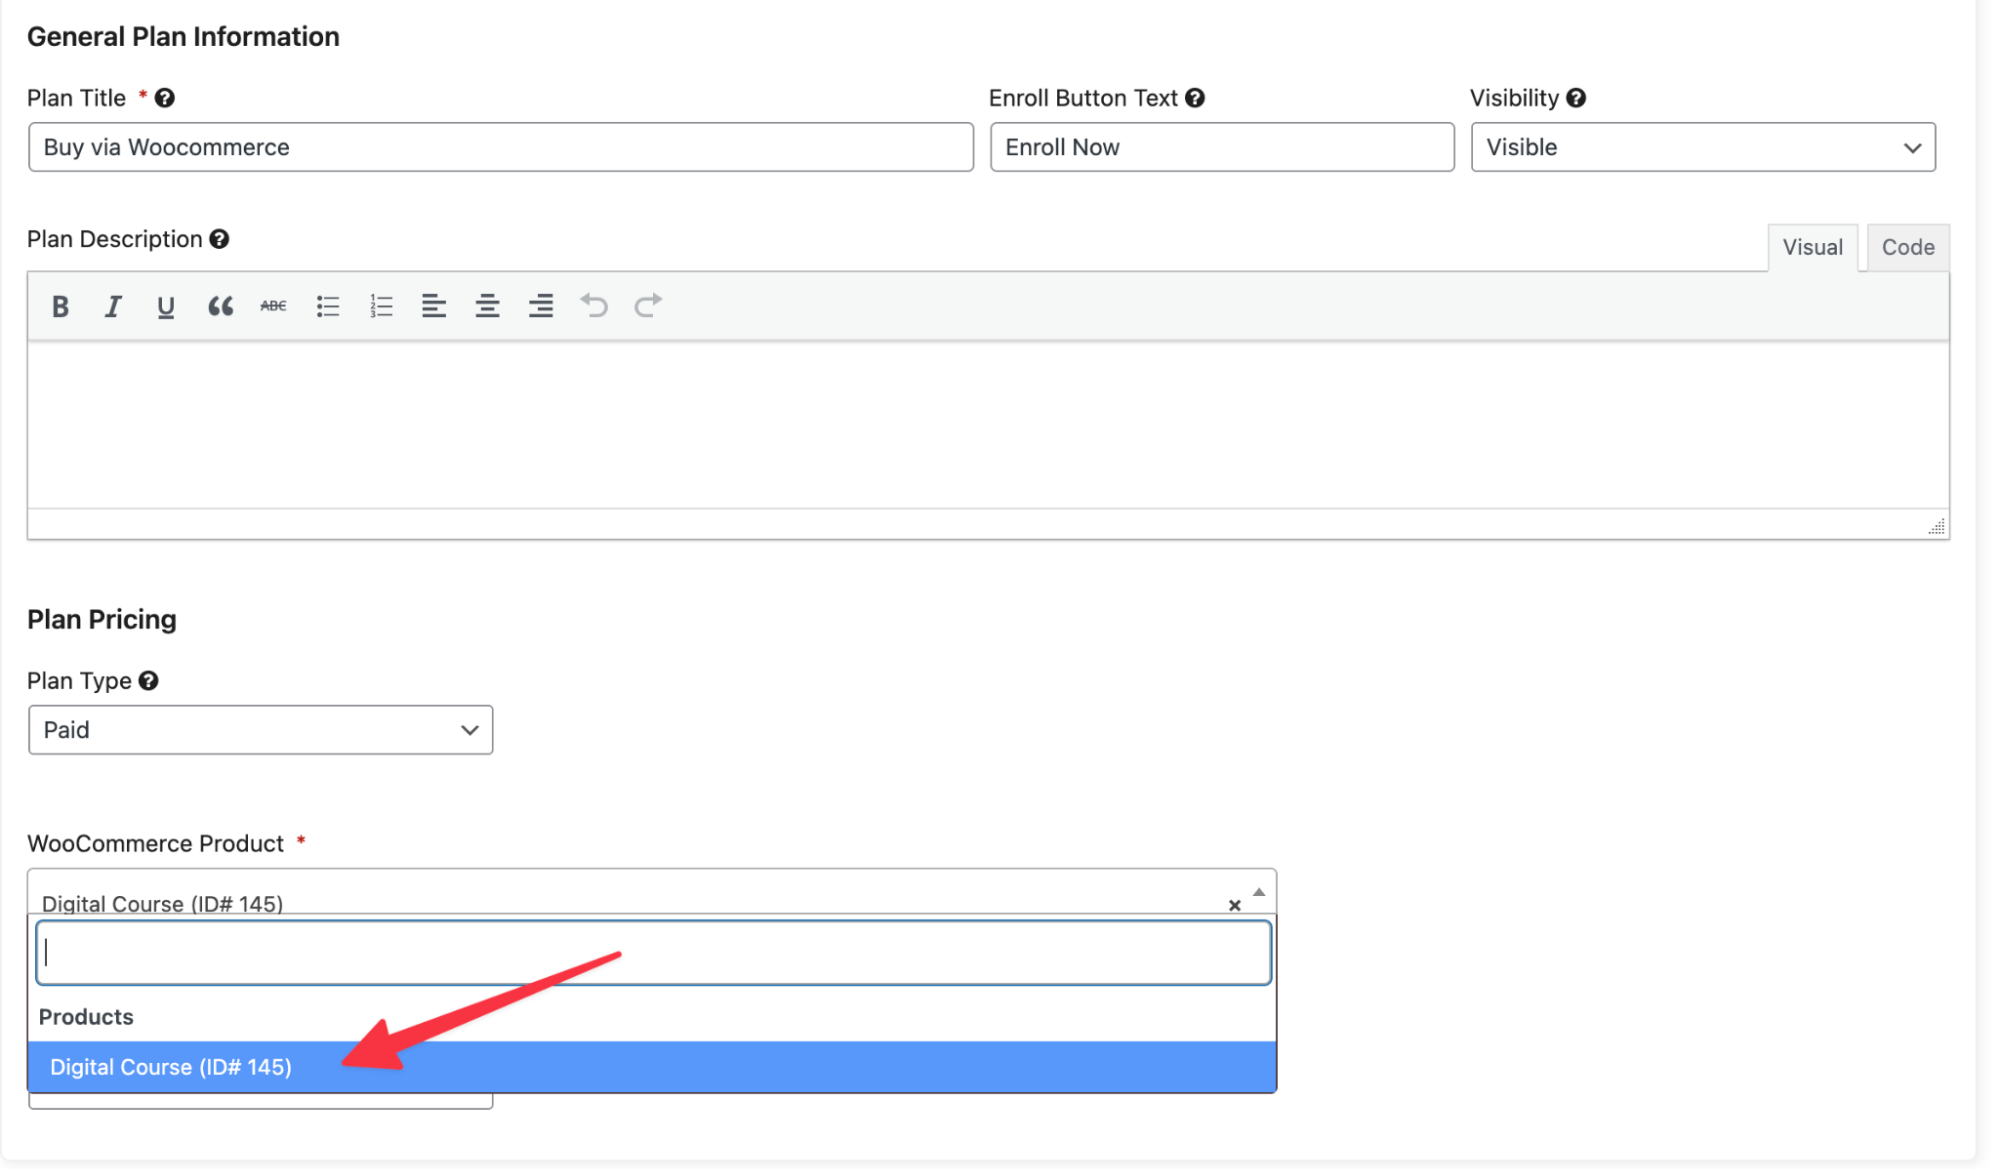
- This setup requires the user to purchase the WooCommerce product, which then triggers enrollment.
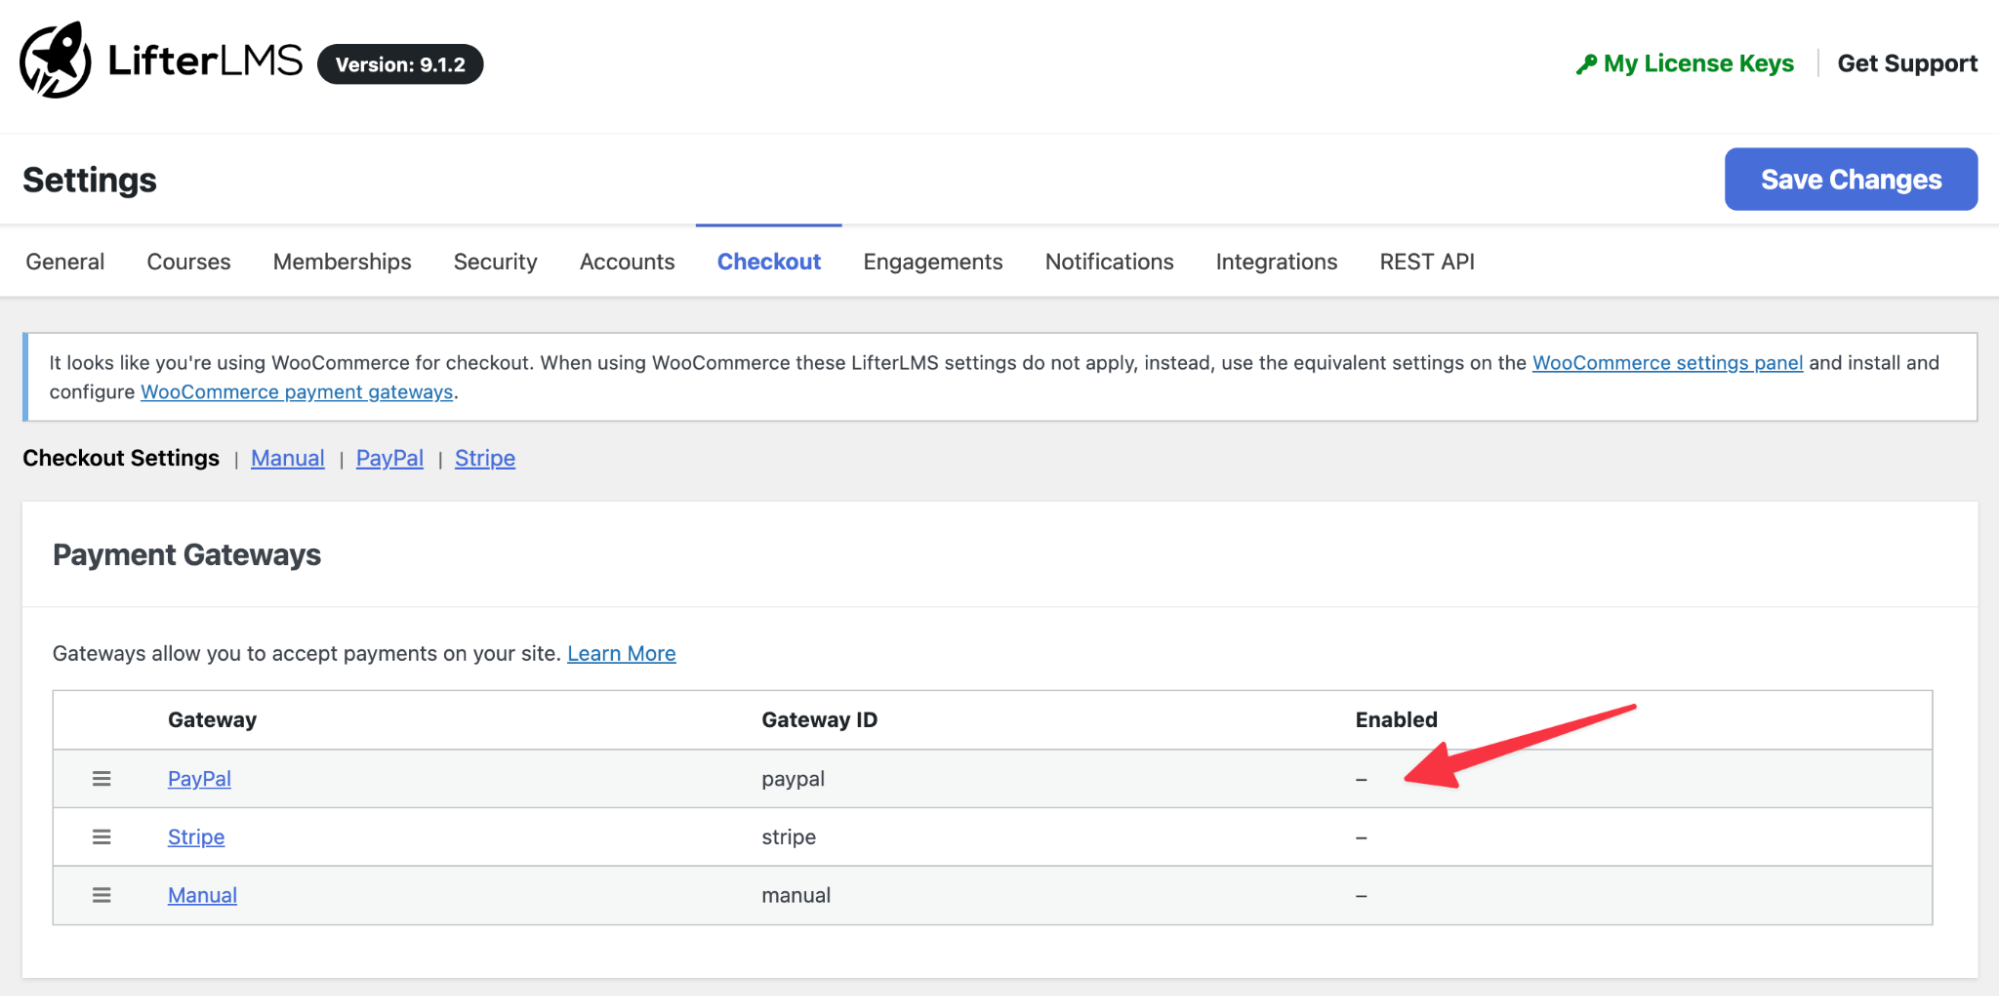
4. Disable Native LifterLMS Gateways
To prevent students from bypassing Paddle, you should disable the default LifterLMS payment options.
- Navigate to LifterLMS > Settings > Checkout.
- Ensure “Manual”, “Stripe”, and “PayPal” are unchecked (disabled).
- Click Save Changes.
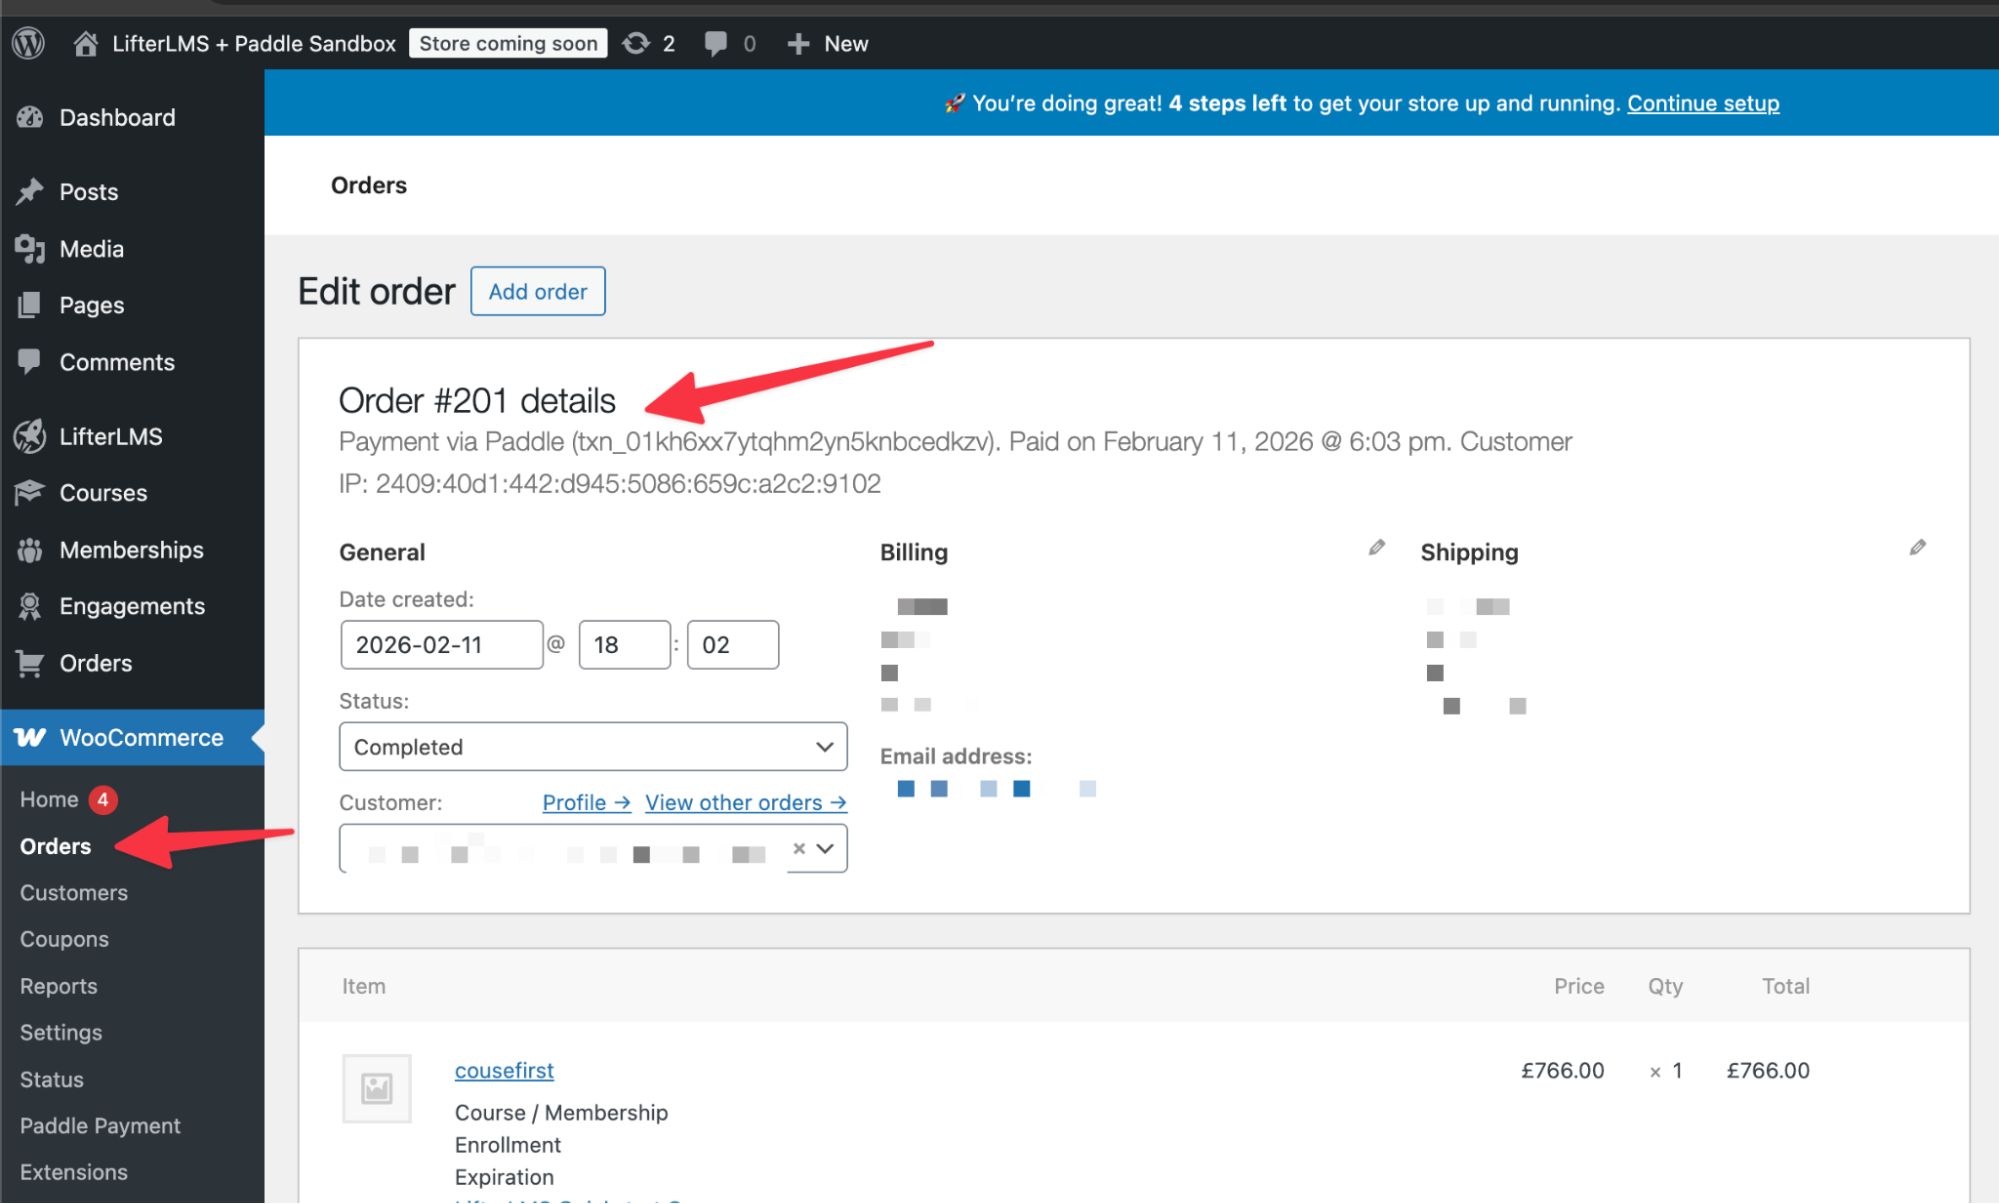
Now, when a student clicks “Take Course” or attempts to purchase an access plan, they will be redirected to the WooCommerce checkout flow, where Paddle handles payment and tax calculation.
When a WooCommerce payment for the associated product is marked as Complete (which Paddle does automatically upon successful checkout), the student will be automatically enrolled in the LifterLMS course. You can verify the payment status in your WordPress dashboard under WooCommerce > Orders.