How to Drip Course Content by Section in LifterLMS
Dripping course content allows course creators to structure their programs into weekly modules or specific sections.
For example, you might run a “4-Week Transformation” course where you want “Week 1” content to be available immediately, but “Week 2” content to remain locked until the second week begins.
This prevents students from feeling overwhelmed and keeps your cohort moving through the material at the same pace.
In LifterLMS, you have complete flexibility to determine exactly when content becomes available.
The best way to drip a full section is to set all lessons within that section to release at the same time. This gives you precise control over your course schedule.
This guide covers two methods to achieve this:
- Custom Lesson Drip (Best for weekly releases or specific dates).
- Global Course Drip (Best for simple, automated intervals).
This method is ideal if you want to release a specific group of lessons (a section) on a specific day. You can simply assign the same drip setting to every lesson in that section. Even if your section has many lessons, this process is fast and ensures the entire section unlocks simultaneously for the student.
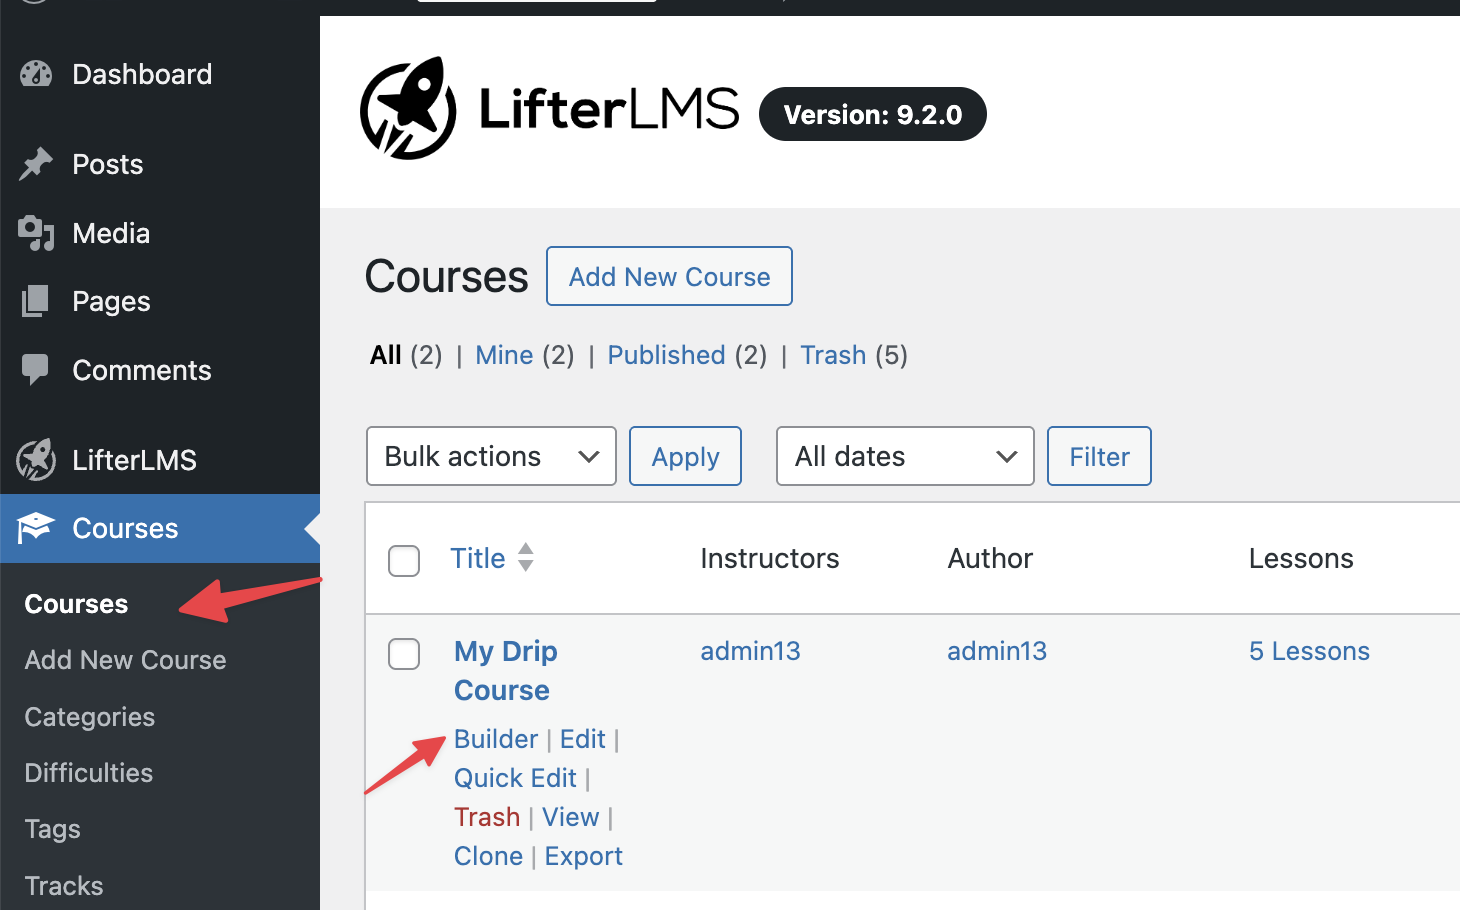
Step 1: Open the Course Builder
- Navigate to Courses > Courses in your WordPress dashboard.
- Hover over the course you want to edit.
- Click Builder.
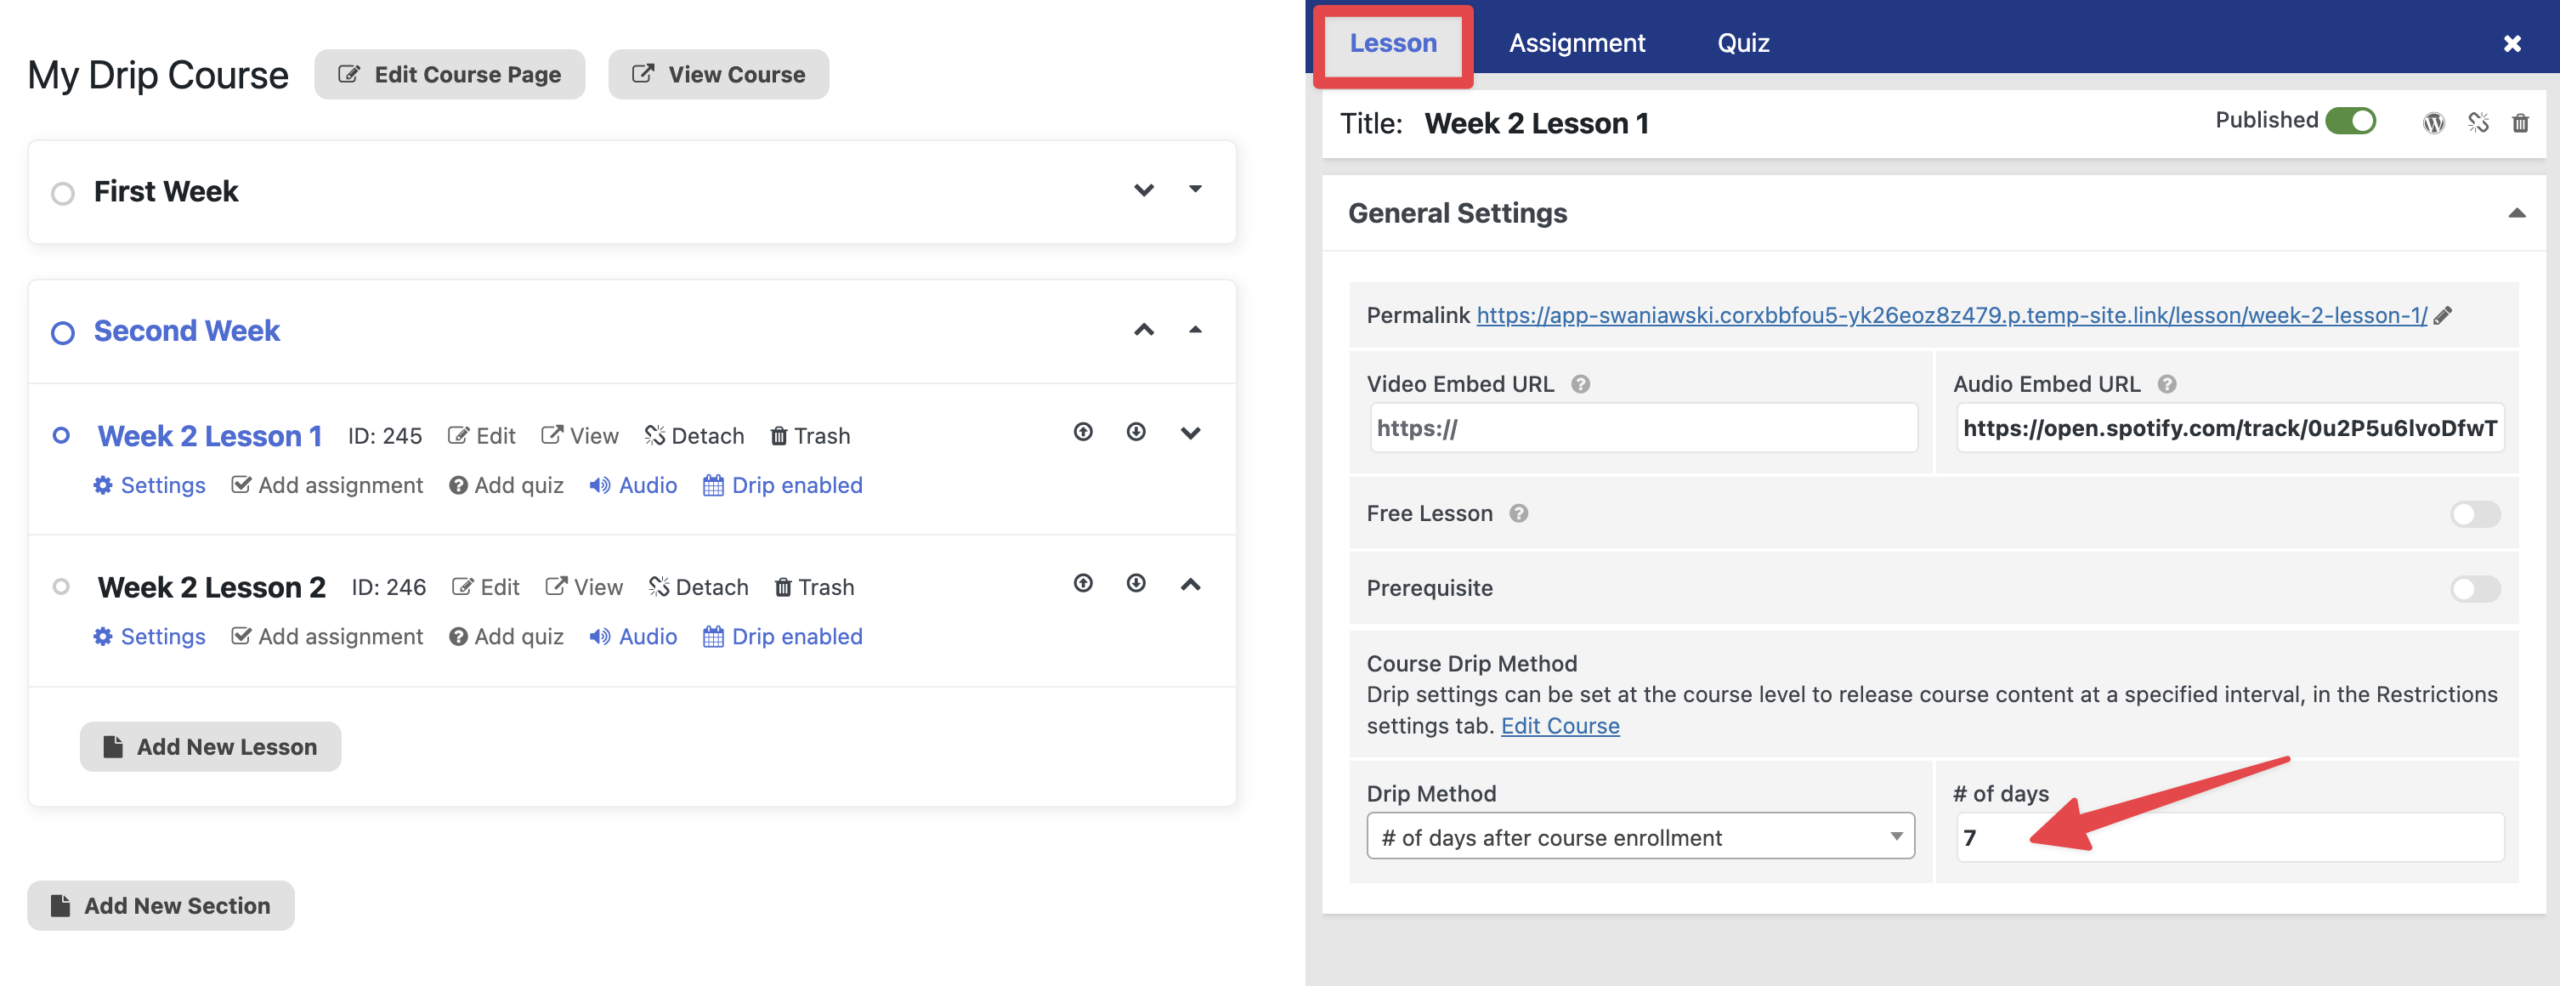
Step 2: Configure the First Lesson in the Section
Let’s assume you want “Section 2” to release 7 days after the student enrolls.
- Locate the section you wish to drip (e.g., “Week 2”).
- Click the first lesson in that section to view the settings.
- Look for the “Drip Method” settings in the lesson configuration area.
- Select one of the following options from the dropdown menu:
- “On a specific date”: Choose this for a fixed-date course (e.g., a cohort starting September 1st). You will then select the exact calendar date and time.
- “Number of days after course enrollment”: Choose this for “evergreen” courses where students start at different times.
- Enter your value. For this example, select “Number of days after course enrollment” and enter “7” for the days.
Step 3: Apply to the Remaining Lessons in the Section
- Open the settings for the next lesson in the same section.
- Apply the exact same setting (e.g., 7 days after enrollment).
- Repeat this for all lessons in that section.
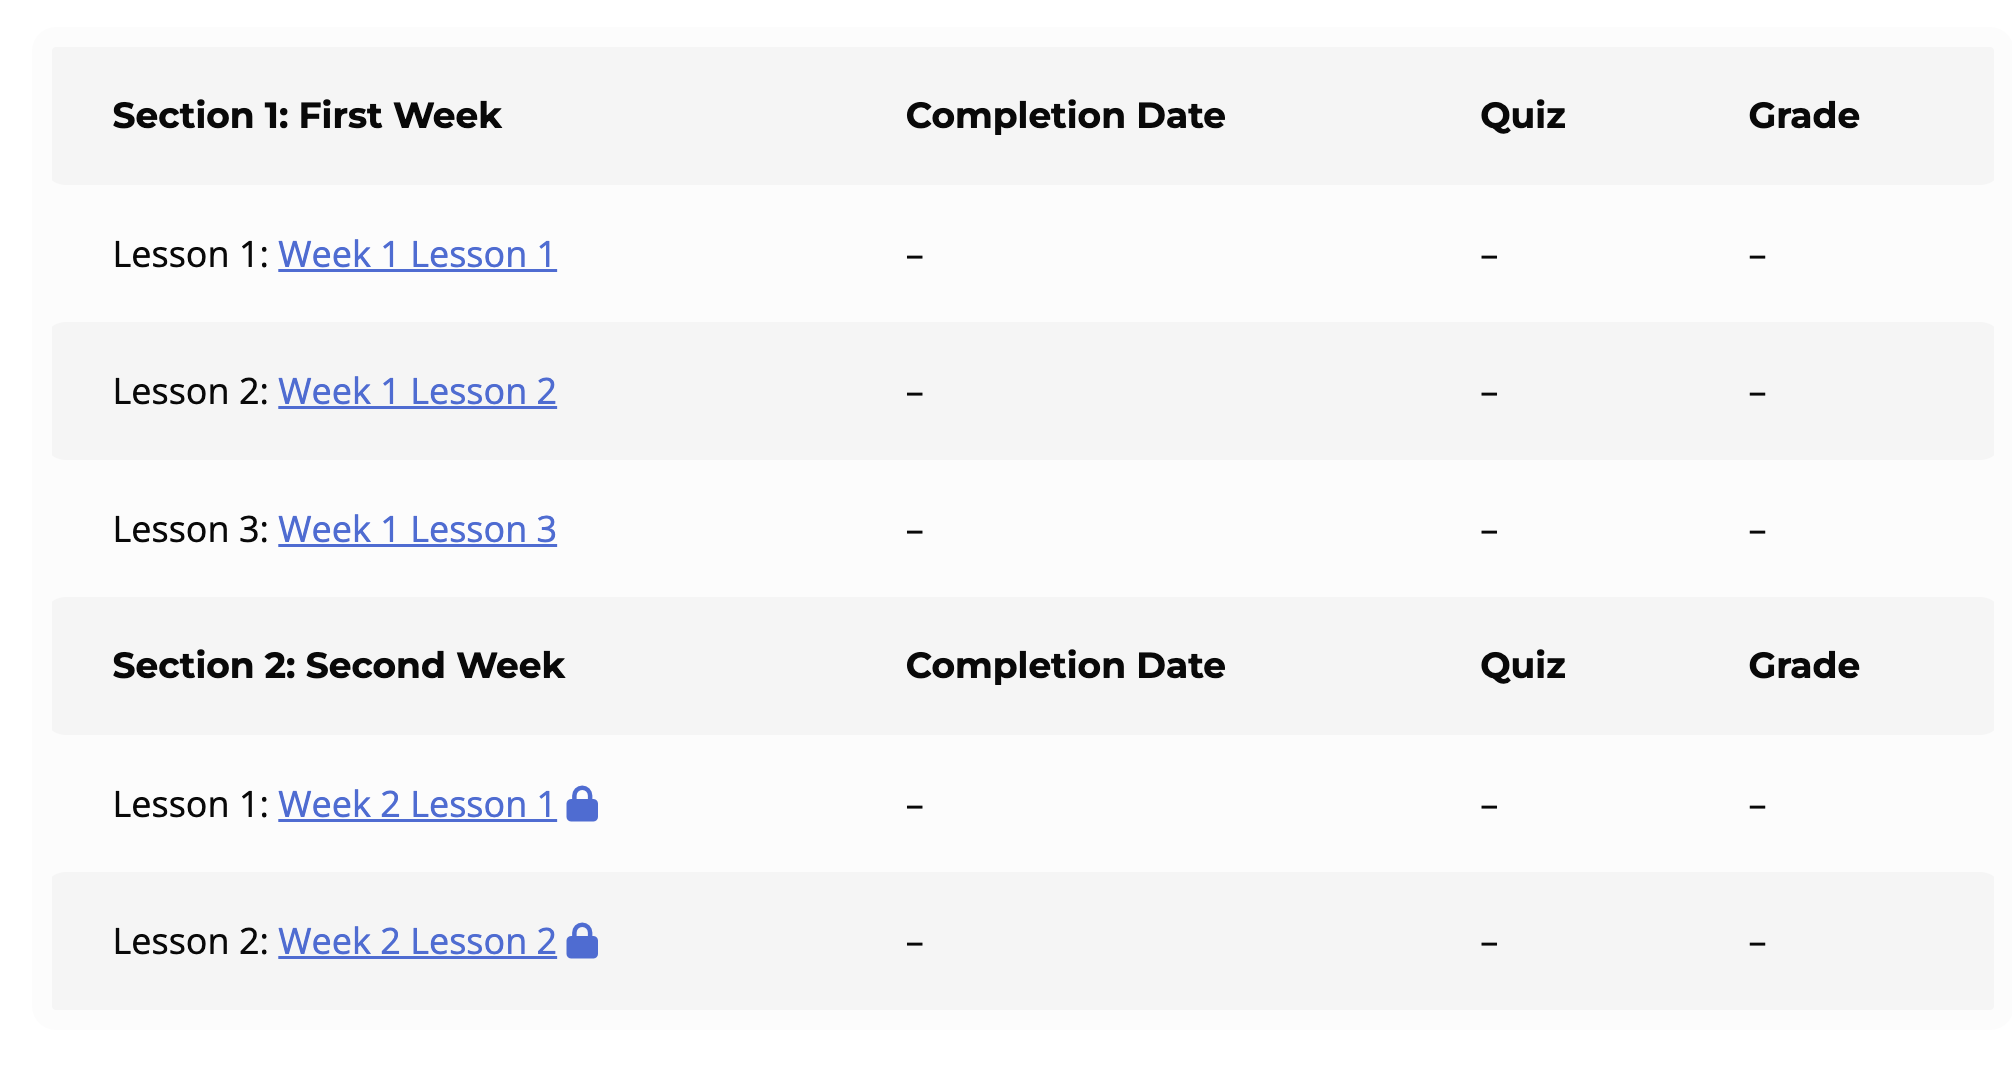
- Click Save Changes or Update to save your course structure.
- After you save the changes, the students will see a lock icon next to the lessons that aren’t available to them.
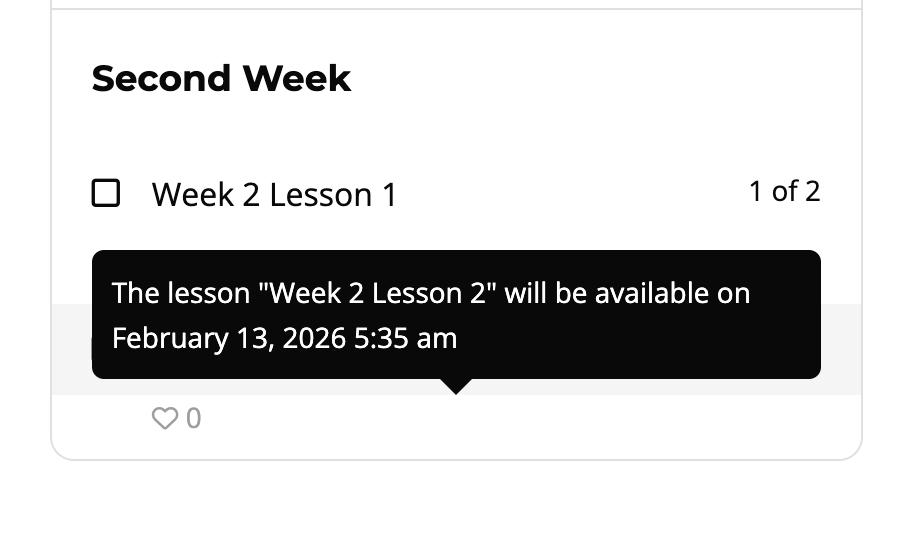
If a student hovers over the lesson title in the navigation bar, they will also see the exact date and time when this lesson will be accessible. In this example, when a student reaches the 7-day mark, the entire “Week 2” section of lessons will unlock for them at once. You can repeat this logic for “Week 3” (set to 14 days), “Week 4” (set to 21 days), and so on.
If your course follows a very strict mathematical pattern (for example, releasing one new lesson every couple of days regardless of sections), you can use the Global Drip settings. This sets a rule for the whole course at once.
- Navigate to Courses > Courses.
- Click on the title of the course you wish to edit (do not click Builder).

- Scroll down to the “Course Options” area and click the Restrictions tab.
- Locate the “Enable Lesson Drip” setting and toggle it to the on position.
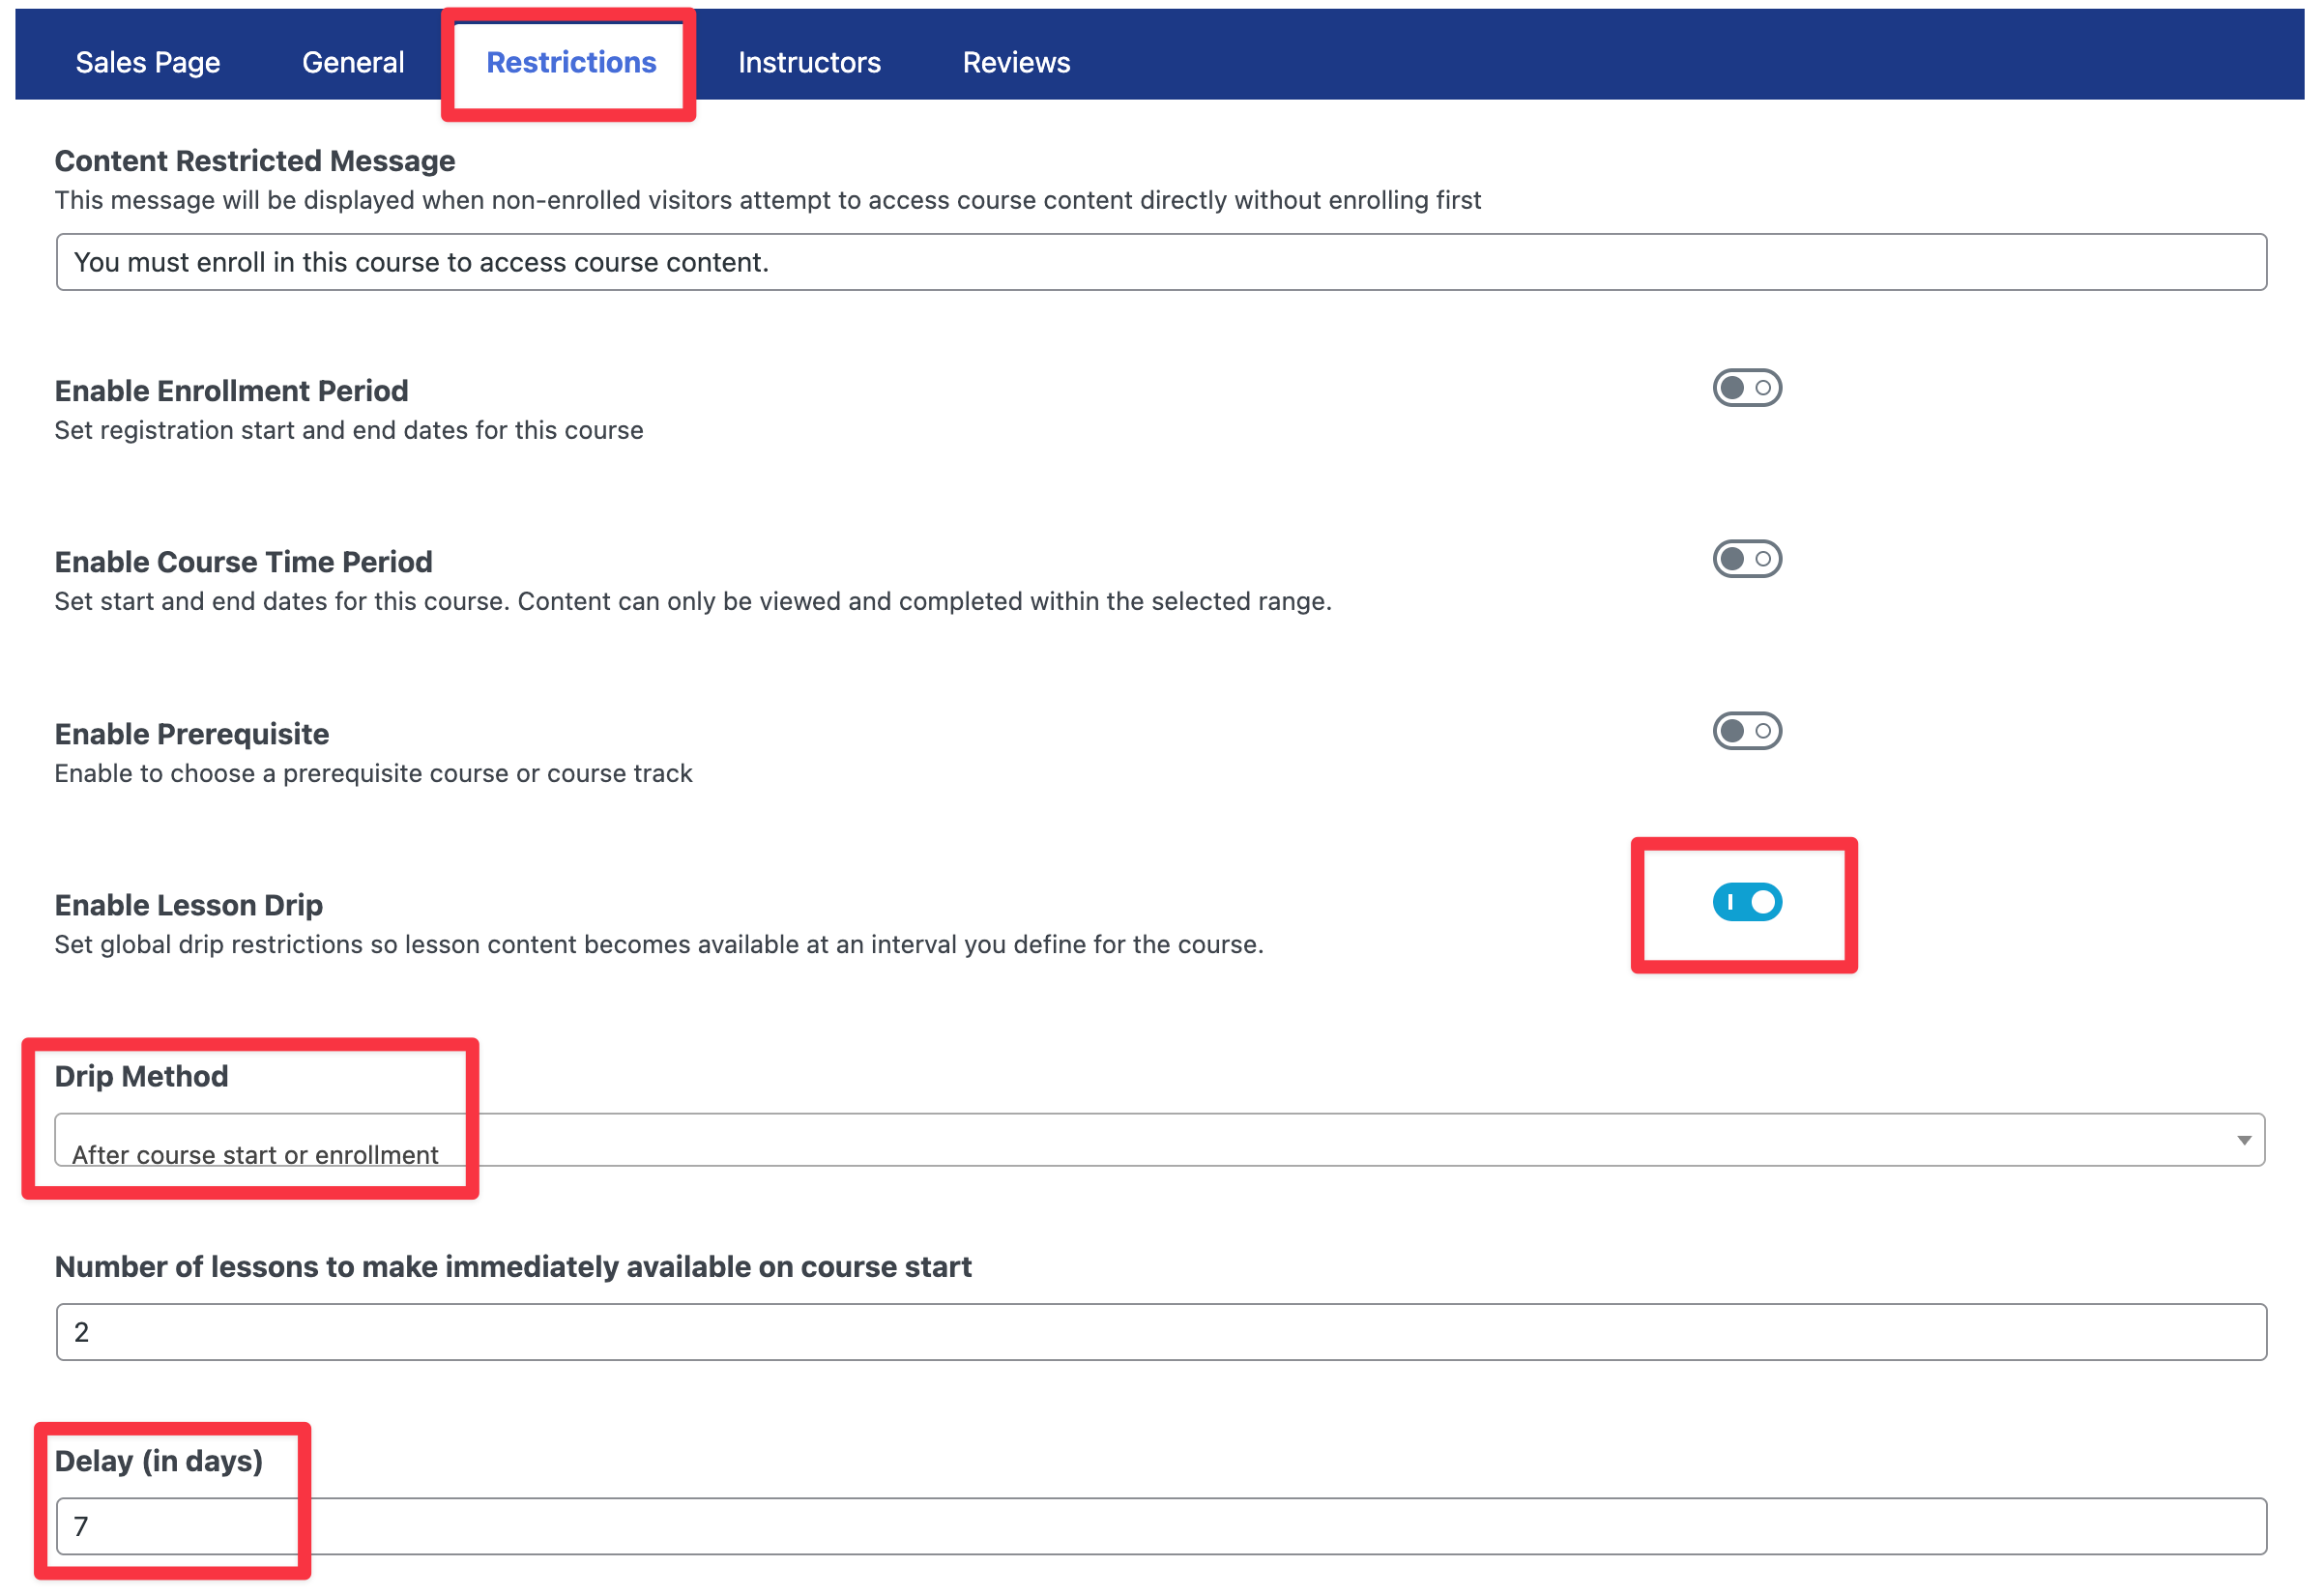
- Configure the global settings:
- “Drip Method”: Choose “After course enrollment.”
- “Number of lessons…”: Enter the number of lessons available immediately when the student starts (usually “1” or however many lessons are in your first section).
- “Delay (in days)”: Enter the number of days to wait before unlocking the next lesson.
- Click Update on the course page to save your changes.
Note: This global method applies to all lessons sequentially. For most “Weekly Release” structures, Method 1 is recommended because it gives you the freedom to decide exactly which lessons belong to which week.


