
LifterLMS Name Your Price Add-On
Education can change lives, but fixed prices can sometimes prevent learners from accessing courses and memberships. Nonprofit organizations, charities, educators, and other course creators may use flexible pricing to serve people with different budgets.
The Name Your Price add-on for LifterLMS allows you to accept flexible payments.
This setup lets learners choose how much they pay for a course or membership within the limits you set. This model is often called “pay-what-you-can” or “sliding-scale” pricing. Learners who want to support your work can choose to pay more, while those with limited budgets can select a lower amount.
This guide explains how to create and manage Name Your Price access plans for LifterLMS courses and memberships.
Name Your Price works with access plans that use the native LifterLMS checkout.
Keep the following limitations in mind:
- Name Your Price access plans cannot use sale pricing.
- Coupons cannot be applied to Name Your Price access plans.
- The add-on does not provide automatic currency conversion, regional pricing, or location-based price adjustments.
- WooCommerce checkout is not supported. WooCommerce-based sites require a separate compatible pricing solution.
- Paid transactions require an active LifterLMS payment gateway.
The product specification states that Name Your Price does not support WooCommerce checkout, sale pricing, coupons, or automatic regional pricing.
You can install the Name Your Price add-on directly from your WordPress dashboard. Follow these steps to get started.
- Navigate to LifterLMS > Add-ons & More in the sidebar menu.
- Click on the All tab near the top of the page to view all available add-ons.
- Find the LifterLMS Name Your Price add-on and click the Install button.
- Click the Activate button once the installation process completes to enable the feature on your website.
You can add a Name Your Price access plan to a course or membership.
- In your WordPress dashboard, go to Courses > Courses or Memberships > Memberships.
- Select the course or membership you want to edit.
- Find the “Access Plans” section below the main editor.
- Select Add New Plan.
- Select Name Your Price.
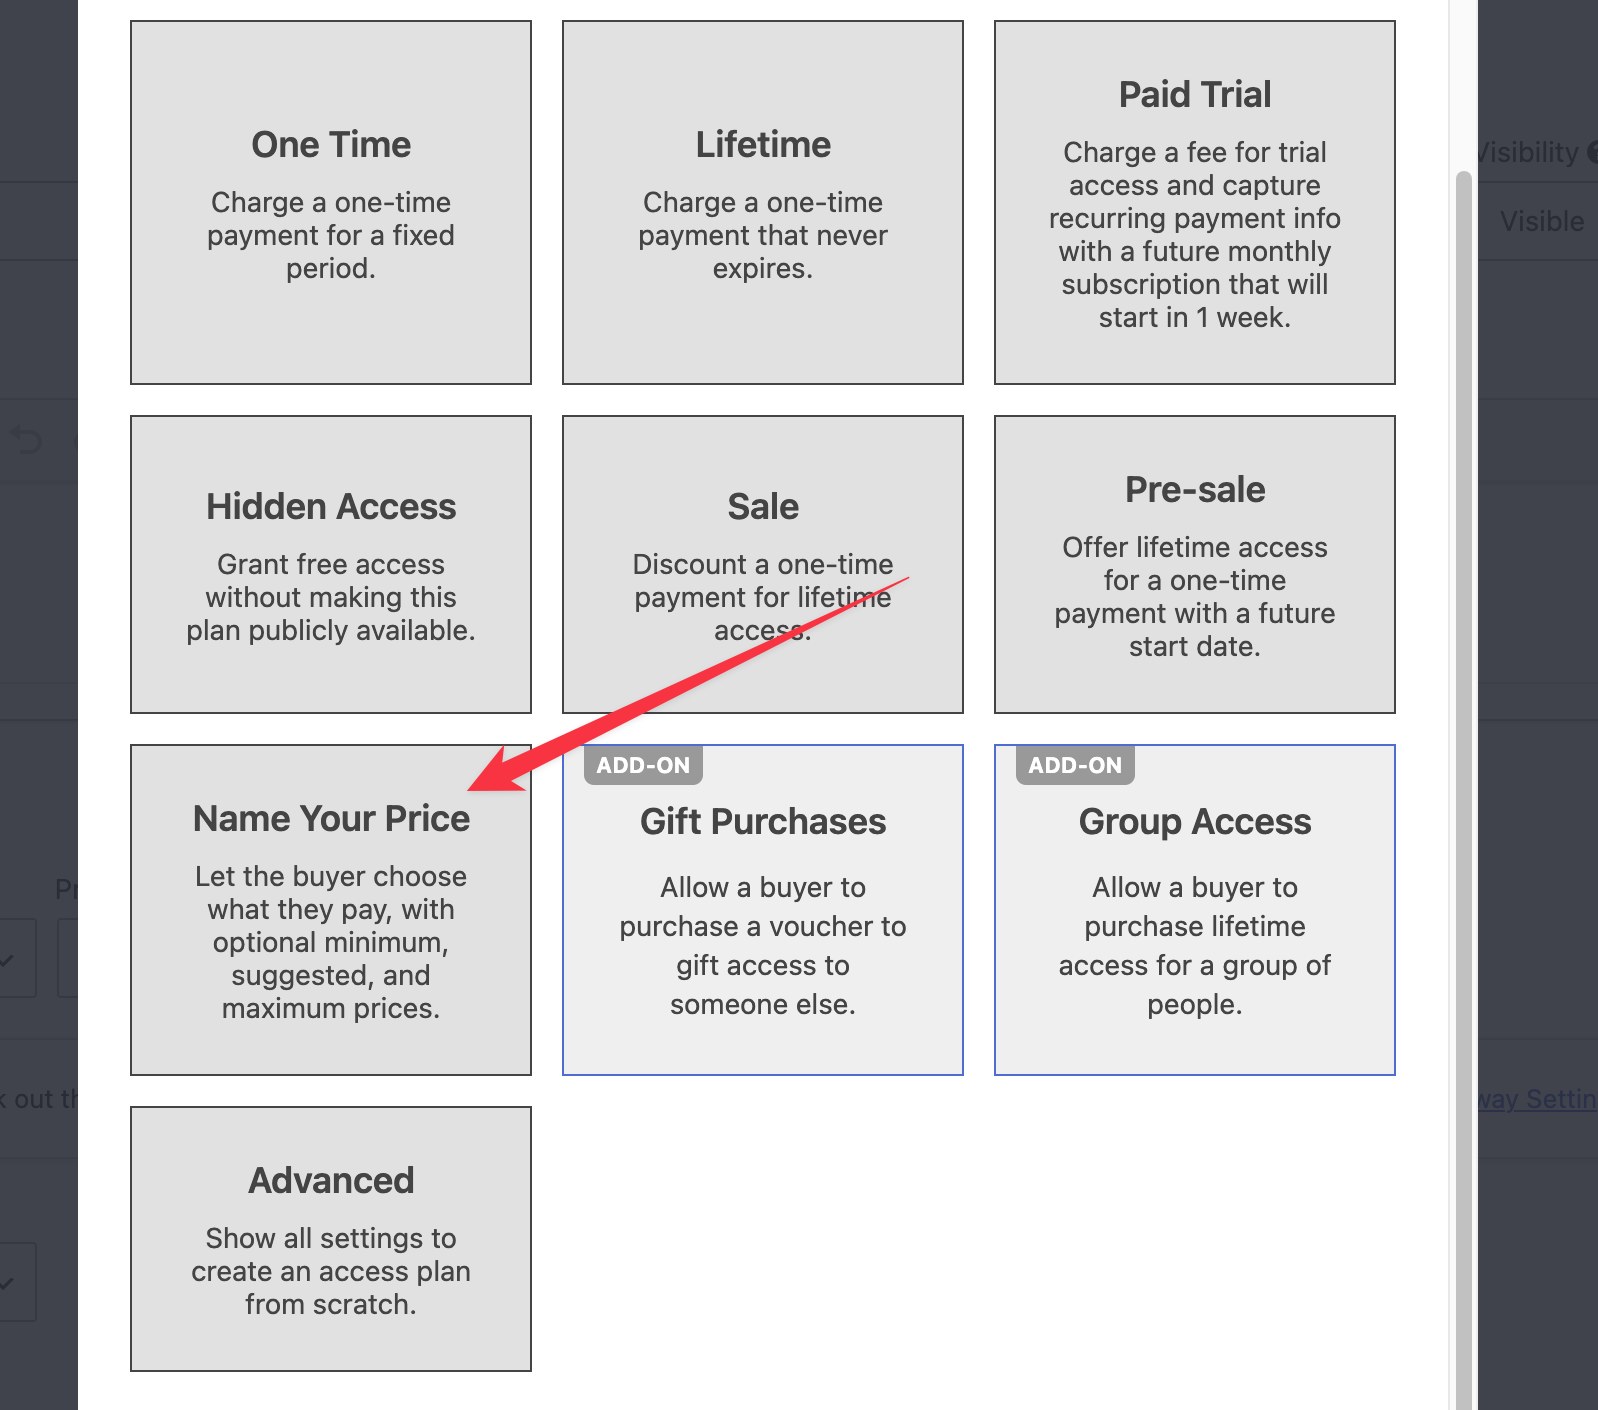
Configure the Access Plan
After creating the access plan, configure its display, pricing, billing, and expiration settings.
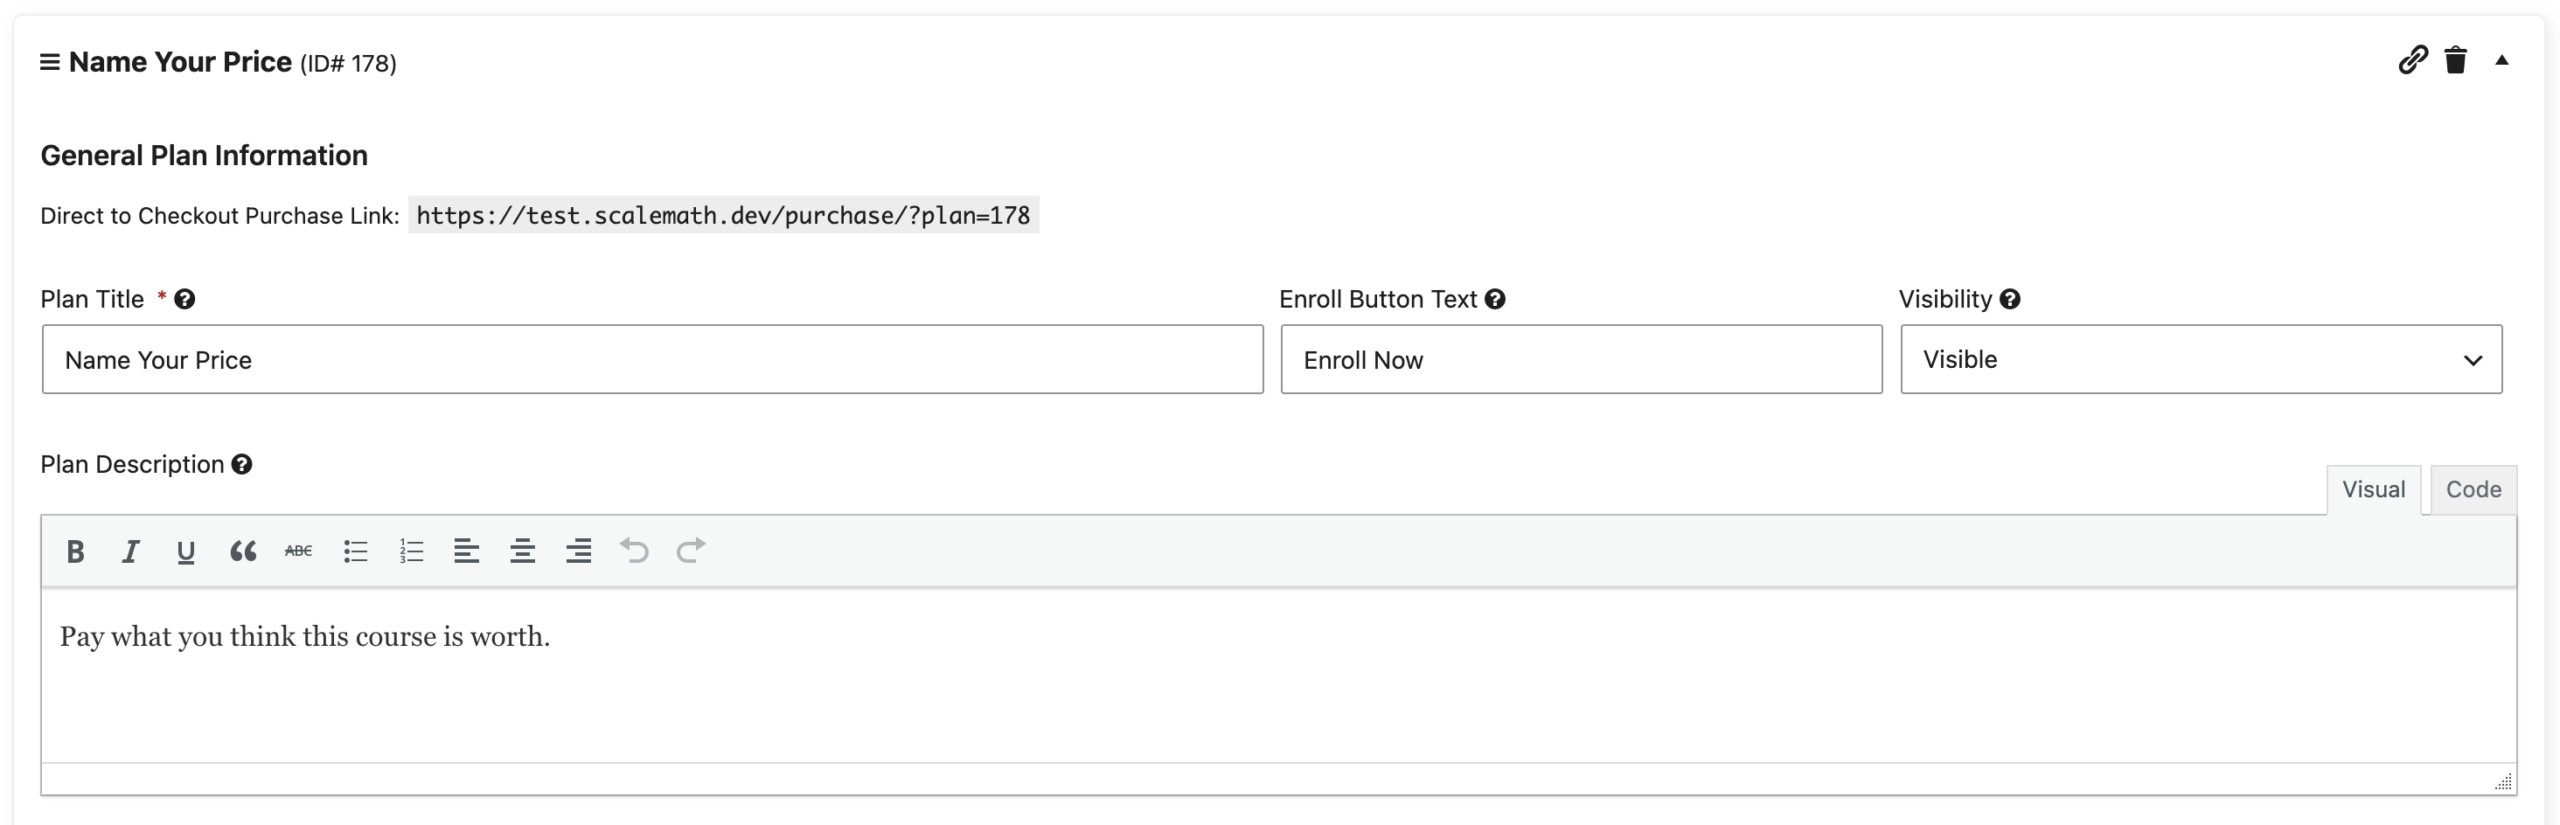
General Plan Information
- Plan Title: Enter a name for this access plan. Learners will see this title at the top of the pricing box on your course page. For example, you can write “Community Contribution” or “Pay What You Can”.
- Enroll Button Text: Enter the text you want to display on the checkout button. If you leave this blank, the system will use the default “Enroll” text. You can change this to “Choose My Price” or “Support Our Mission”.
- Visibility: Select how this plan appears to visitors.
- Visible: The plan displays normally in your course pricing table.
- Hidden: The plan remains active but does not appear in the course or membership pricing table. You can share the plan’s direct checkout link with selected learners.
- Featured: The plan displays a highlighted border to draw attention.
- Plan Description: Explain what the access plan includes and why learners can choose their price. You might describe the course or membership benefits, explain how the suggested price was chosen, or state how higher contributions support your work.
Plan Pricing
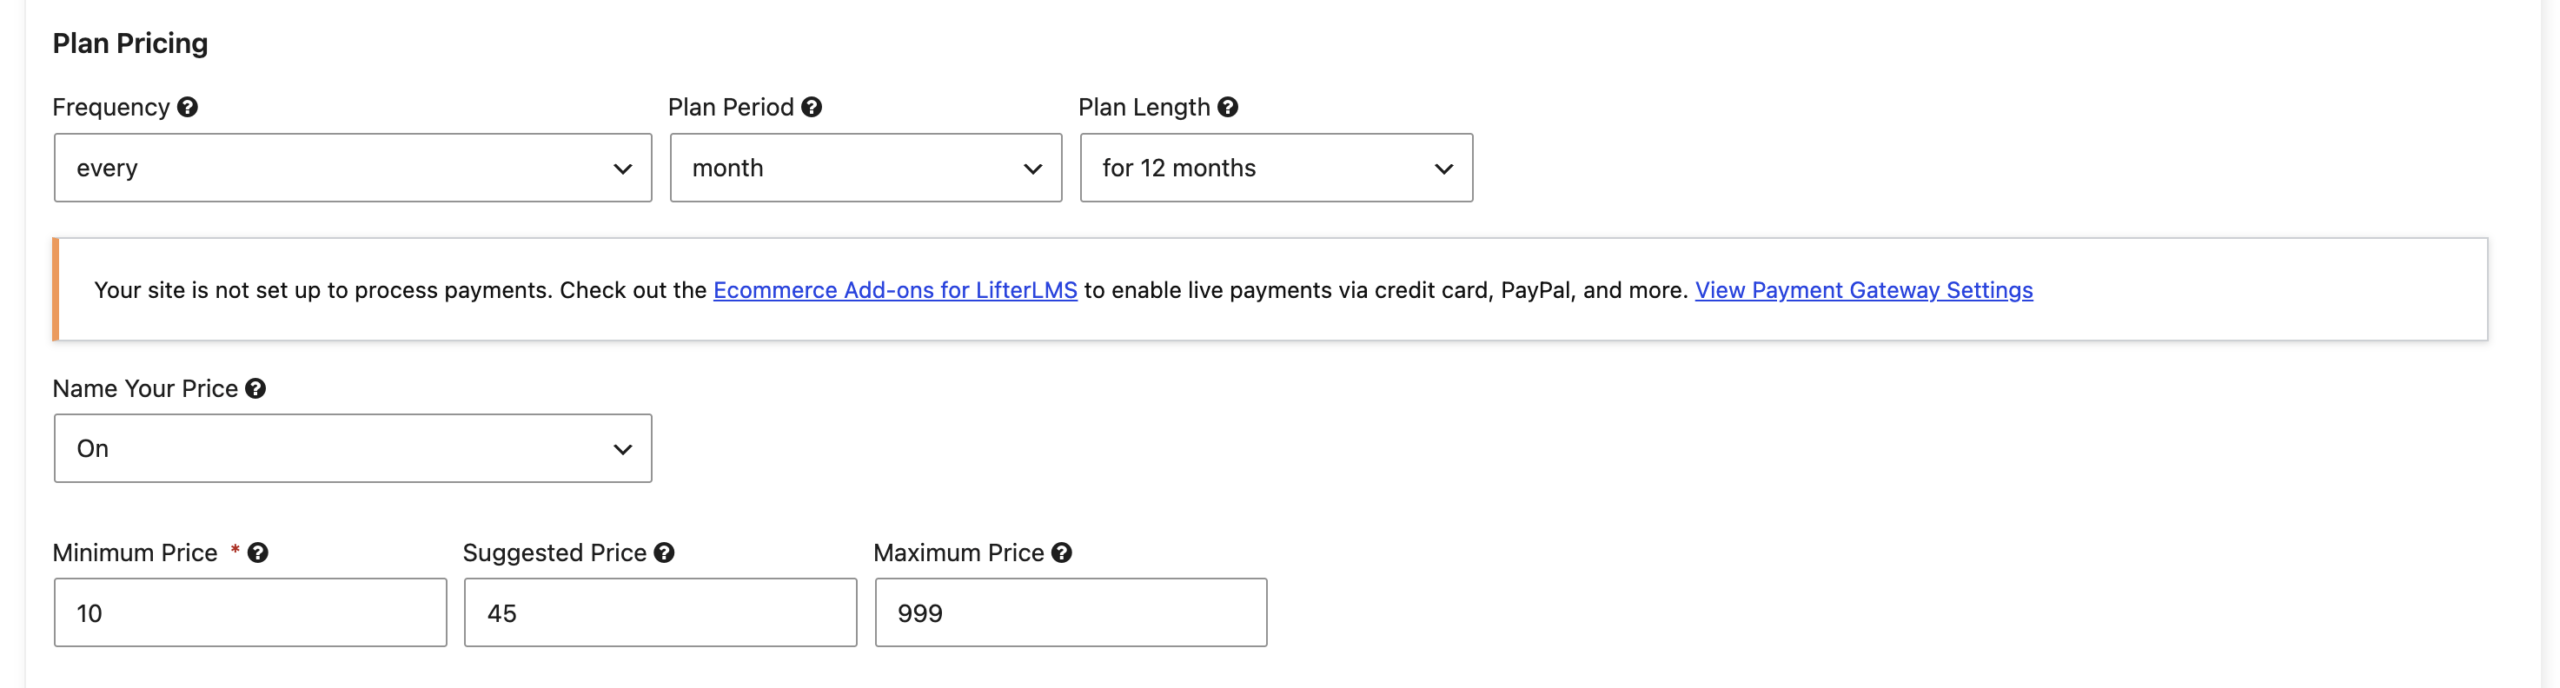
- Frequency: Choose how often the system charges the learner. You can select “one-time payment” or set a recurring schedule, such as “every month”.
- Name Your Price: Click this toggle to switch the setting to “On”. This action activates the flexible pricing fields for this plan.
- Minimum Price: Enter the lowest amount you will accept in your site’s configured currency. Enter 0 if you want to allow learners to enroll without paying. A minimum price is required when Name Your Price is enabled.
- Suggested Price: Enter the amount that should appear in the price field by default. This gives learners a reference point while still allowing them to choose another amount within the permitted range. Leave the field empty if you do not want to provide a suggested price.
- Maximum Price: Enter the highest amount a learner can pay in your site’s configured currency. Leave this field empty if you do not want to set an upper limit.
Expiration Settings
Access Expiration: Specify how long the learner retains access to the course content after enrollment.
- Lifetime Access: The learner retains access indefinitely. For recurring access plans, access still depends on the subscription remaining active.
- Expires after: Access ends after a set number of days, weeks, months, or years.
- Expires on: Access ends on a specific calendar date that you choose.

Save the Access Plan
When you have finished configuring the plan, select Save All Plans to apply your changes.
When the course or membership and its access plan are published, the “Name Your Price” card displays a field in which learners can enter their chosen amount.
The card displays the minimum price and, when one has been configured, the suggested price. If the plan is marked as “Featured”, a banner appears above the card to draw attention to it.
Learners can enter their chosen amount in the “Name Your Price” field. The price shown at the top of the card then updates to match their selection. They can then click the Enroll Now button to check out.
The amount must meet the minimum price and cannot exceed the maximum price when one has been set. If the entered amount falls outside the permitted range, the learner must correct it before continuing to checkout.
If the minimum price is 0 and the learner enters 0, LifterLMS treats the transaction as a free enrollment. The learner won’t need to select a payment gateway.
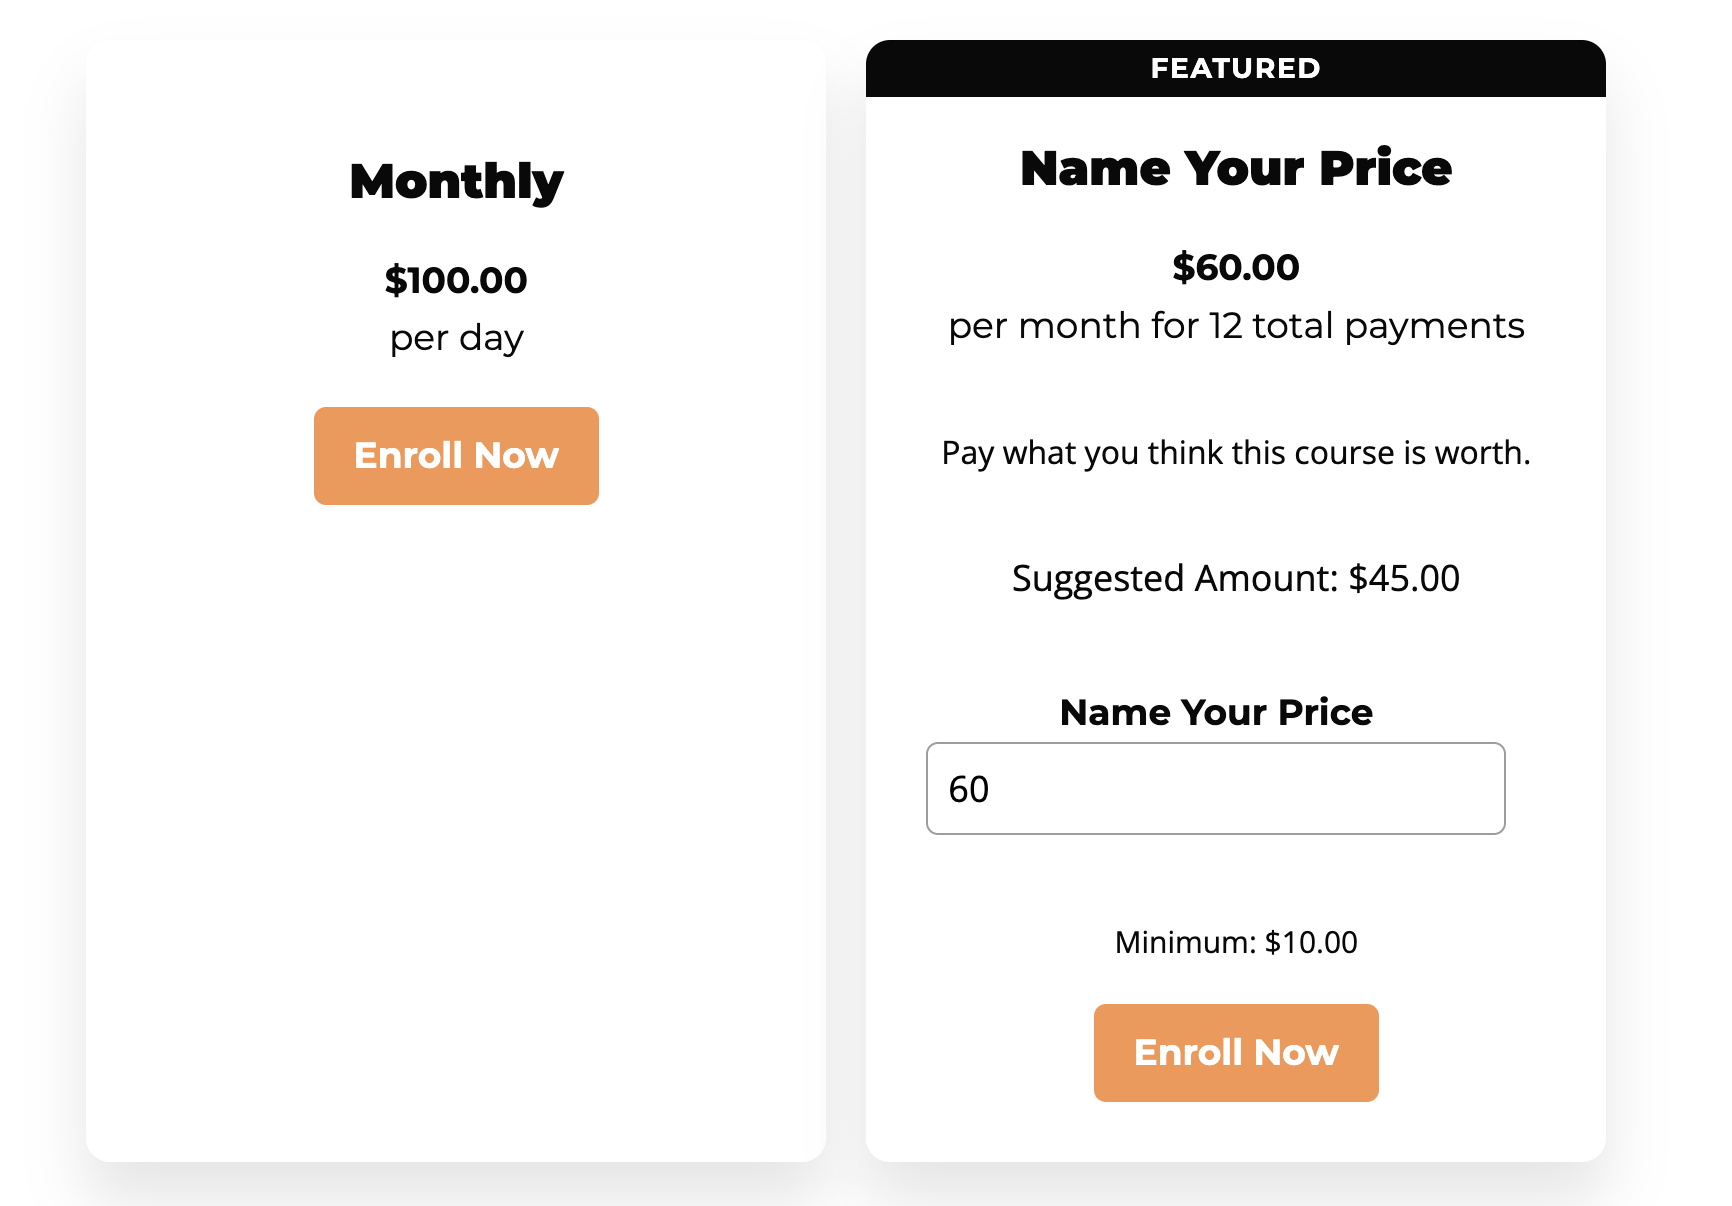
If you configure the access plan with recurring billing, the learner’s chosen amount becomes the recurring payment amount. A supported payment gateway then charges that amount according to the billing schedule you set.
Name Your Price Limitations
Name Your Price access plans cannot be combined with sale pricing or coupons.
The add-on works with the native LifterLMS checkout and does not apply to purchases completed through WooCommerce. It also doesn’t convert currencies or automatically adjust prices based on the learner’s location.