How to Use LifterLMS User Information Shortcodes
With the release of LifterLMS version 5.0 you now have the option to add in user meta shortcodes anywhere you’d like on your WordPress site (on pages, in certificates, in emails, etc.)
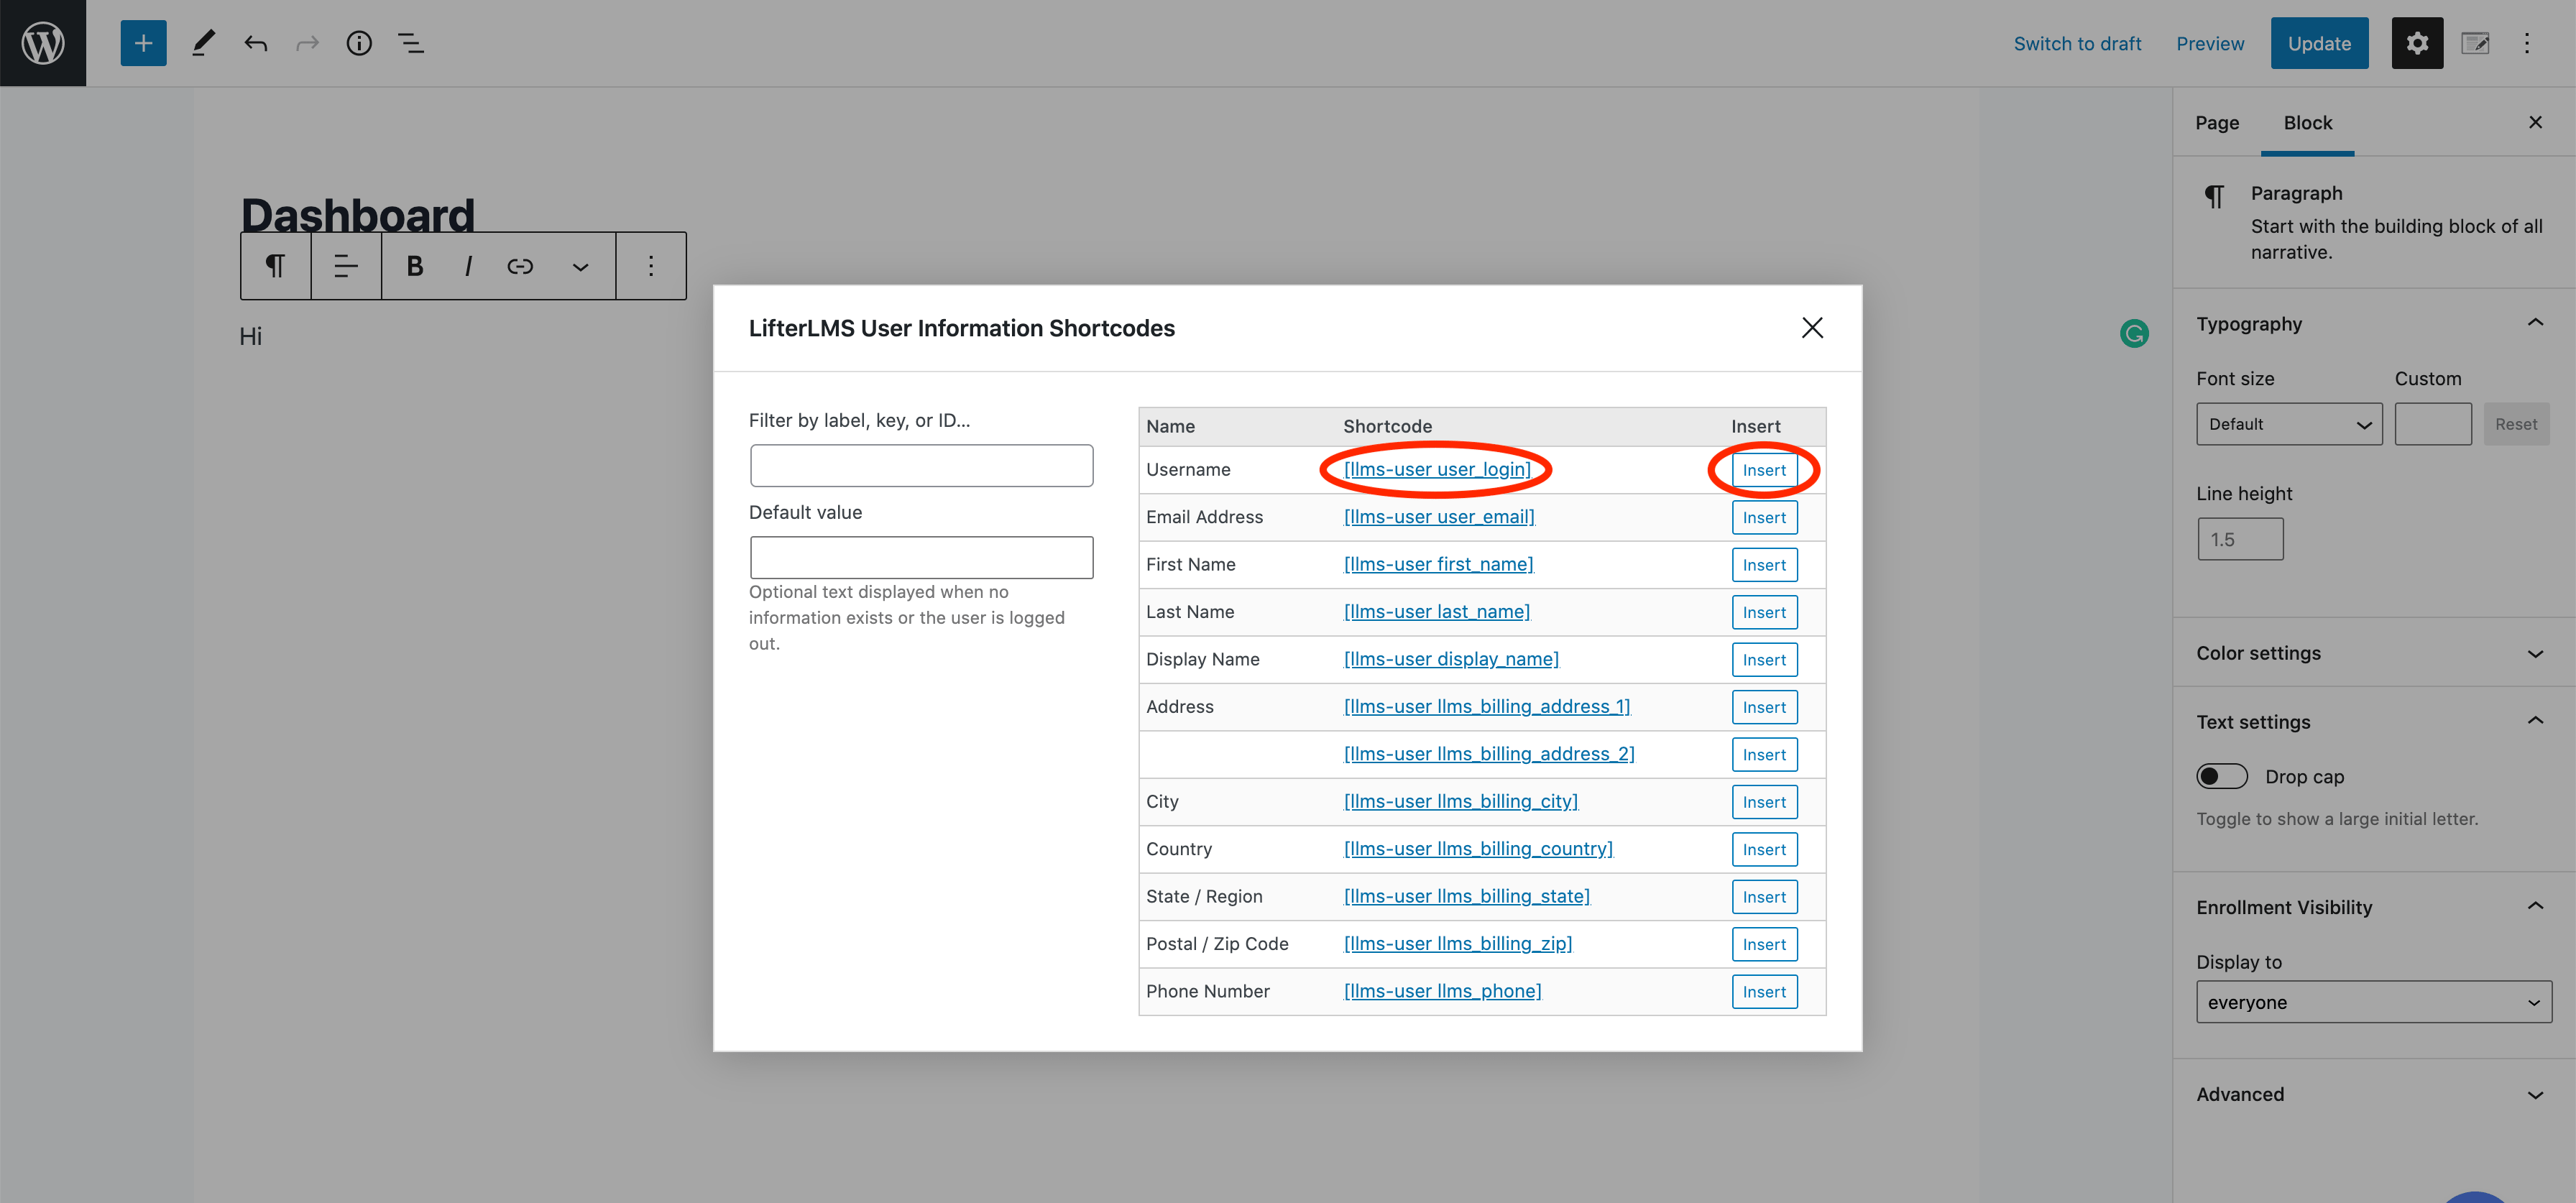
- Username: [llms-user user_login]
- Email Address: [llms-user user_email]
- First Name: [llms-user first_name]
- Last Name: [llms-user last_name]
- Display Name: [llms-user display_name]
- Address (Address Line 1): [llms-user llms_billing_address_1]
- Address (Address Line 2): [llms-user llms_billing_address_2]
- City: [llms-user llms_billing_city]
- Country: [llms-user llms_billing_country]
- State / Region: [llms-user llms_billing_state]
- Postal / Zip Code: [llms-user llms_billing_zip]
- Phone Number: [llms-user llms_phone]
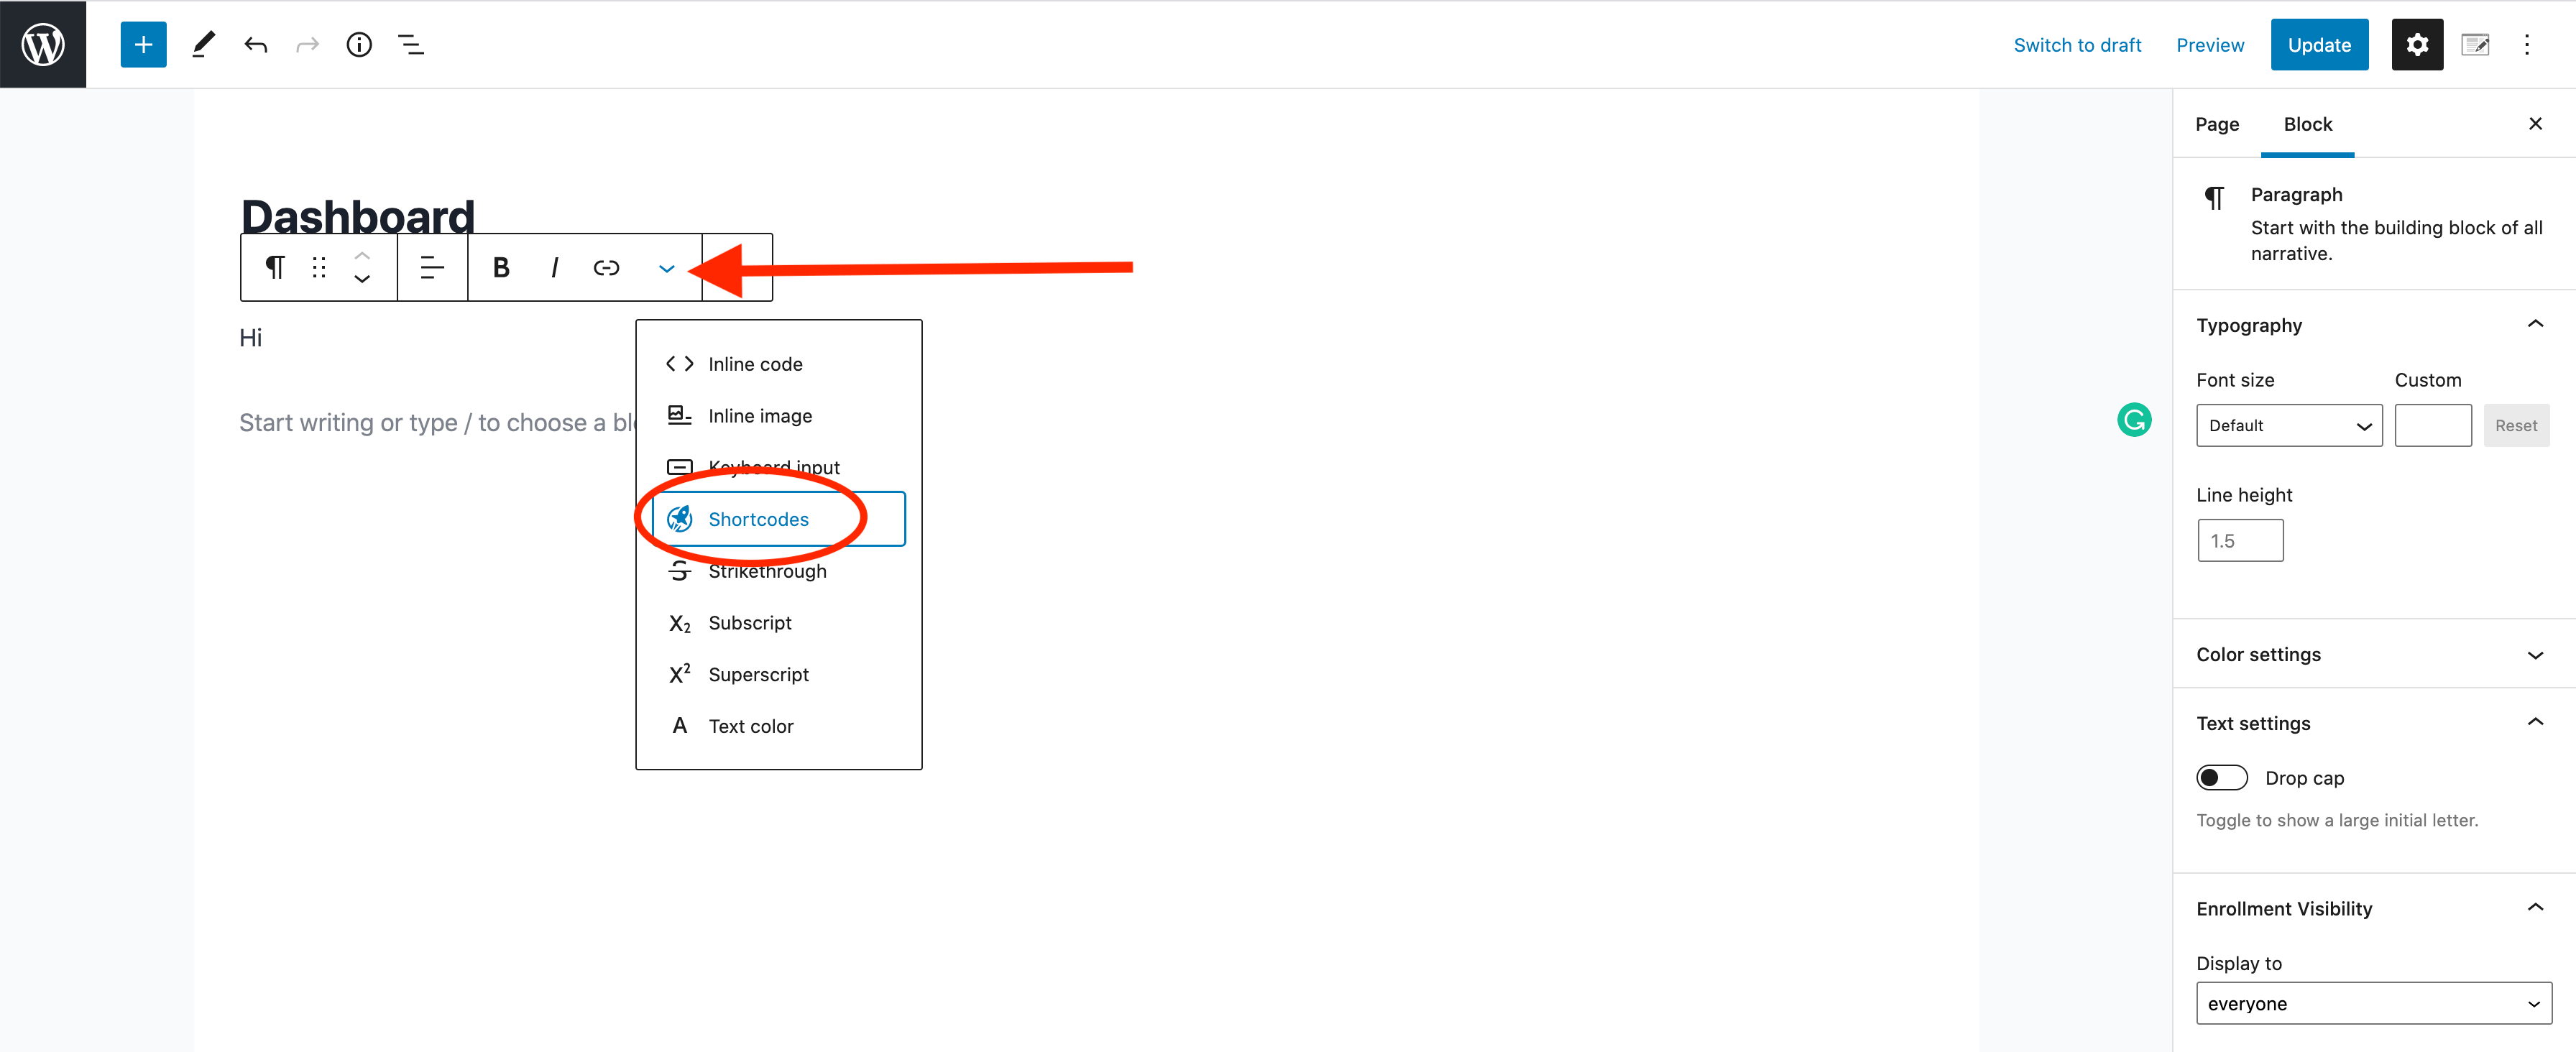
When typing in the WordPress editor on a Paragraph or Heading block, you have an option to add in user information shortcodes by clicking the small down arrow on the settings for that block, then select the ‘Shortcodes‘ option.
That will pop up a window where you can copy your shortcodes or click ‘Insert‘ to add the shortcode directly to your page where you are typing.
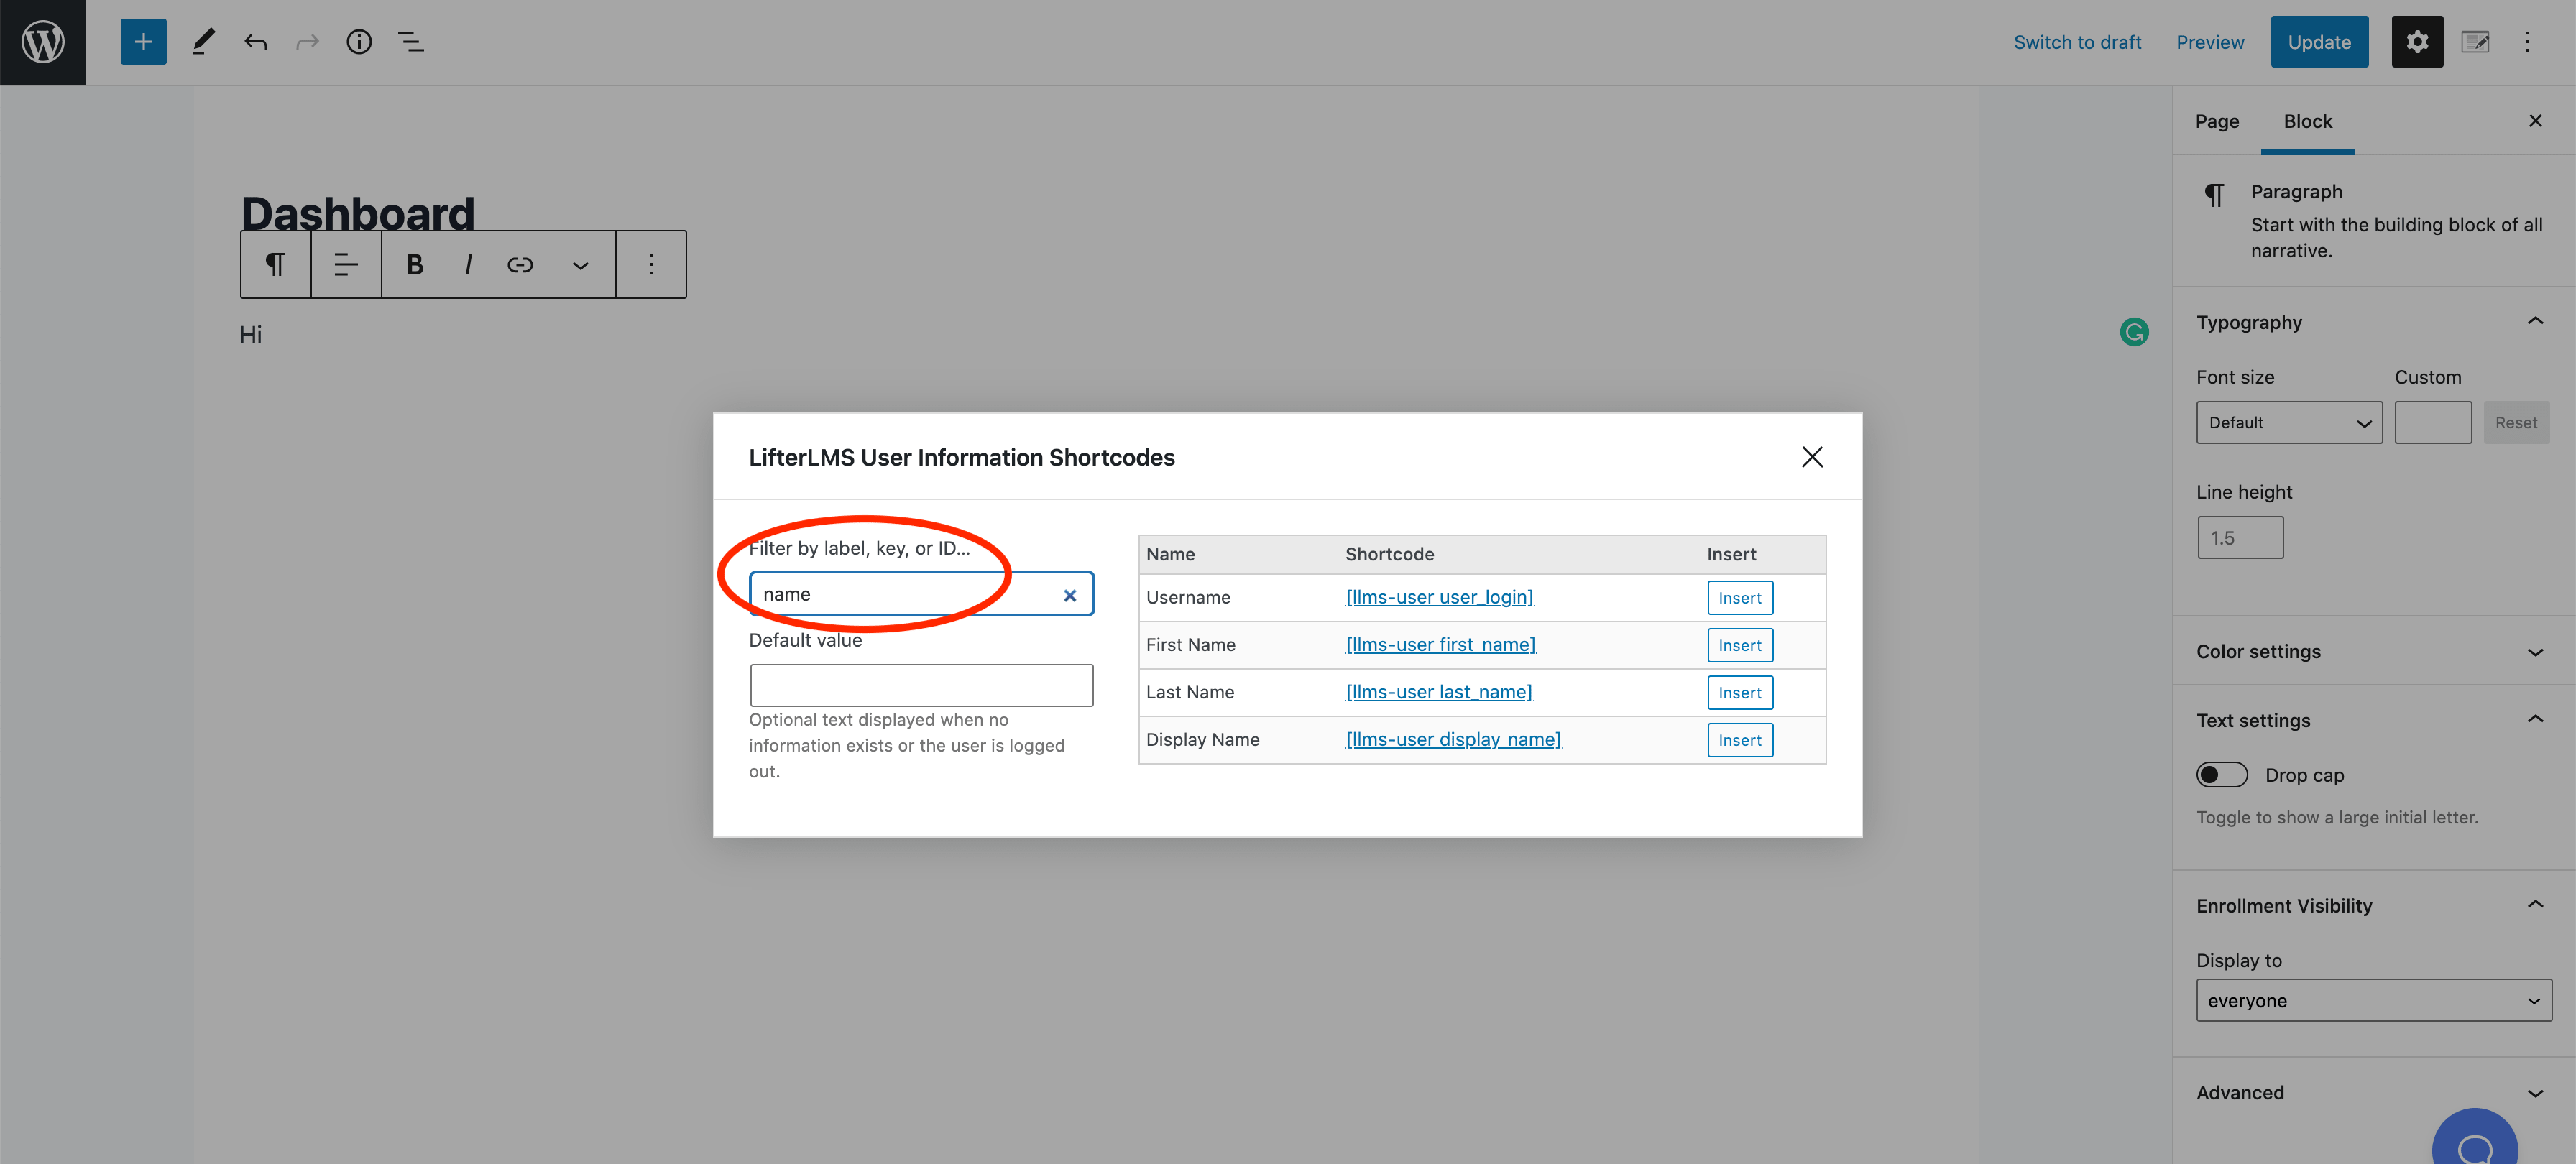
If you’re using a setup involving LifterLMS Custom Fields and you have many shortcodes, you can use the filter option in the upper left-hand corner to filter for specific shortcode keywords (this is designed for power users who create a bunch of custom shortcodes).
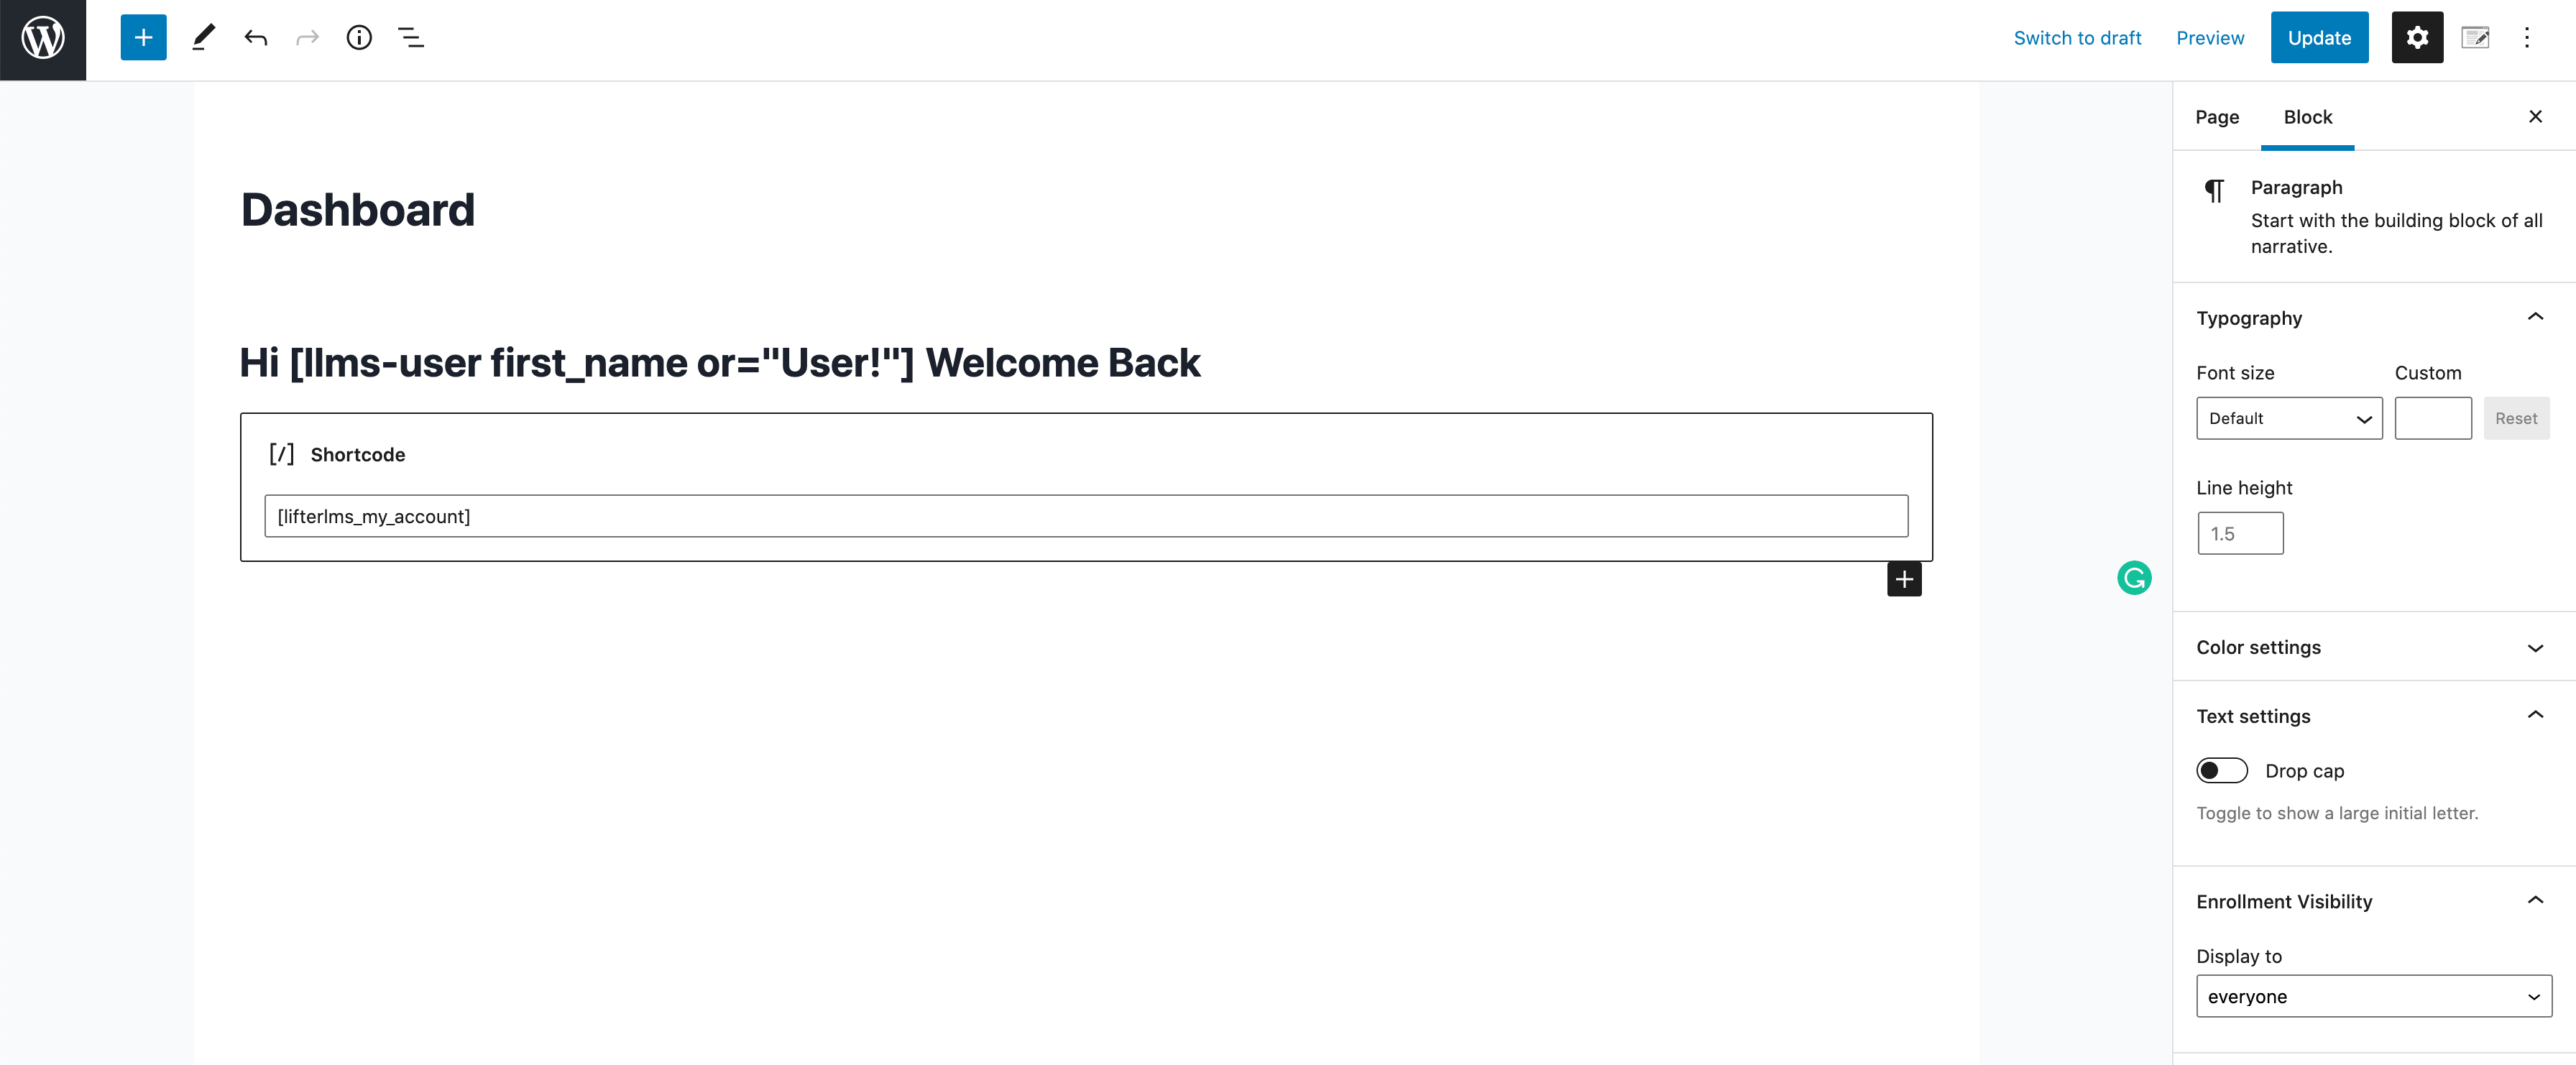
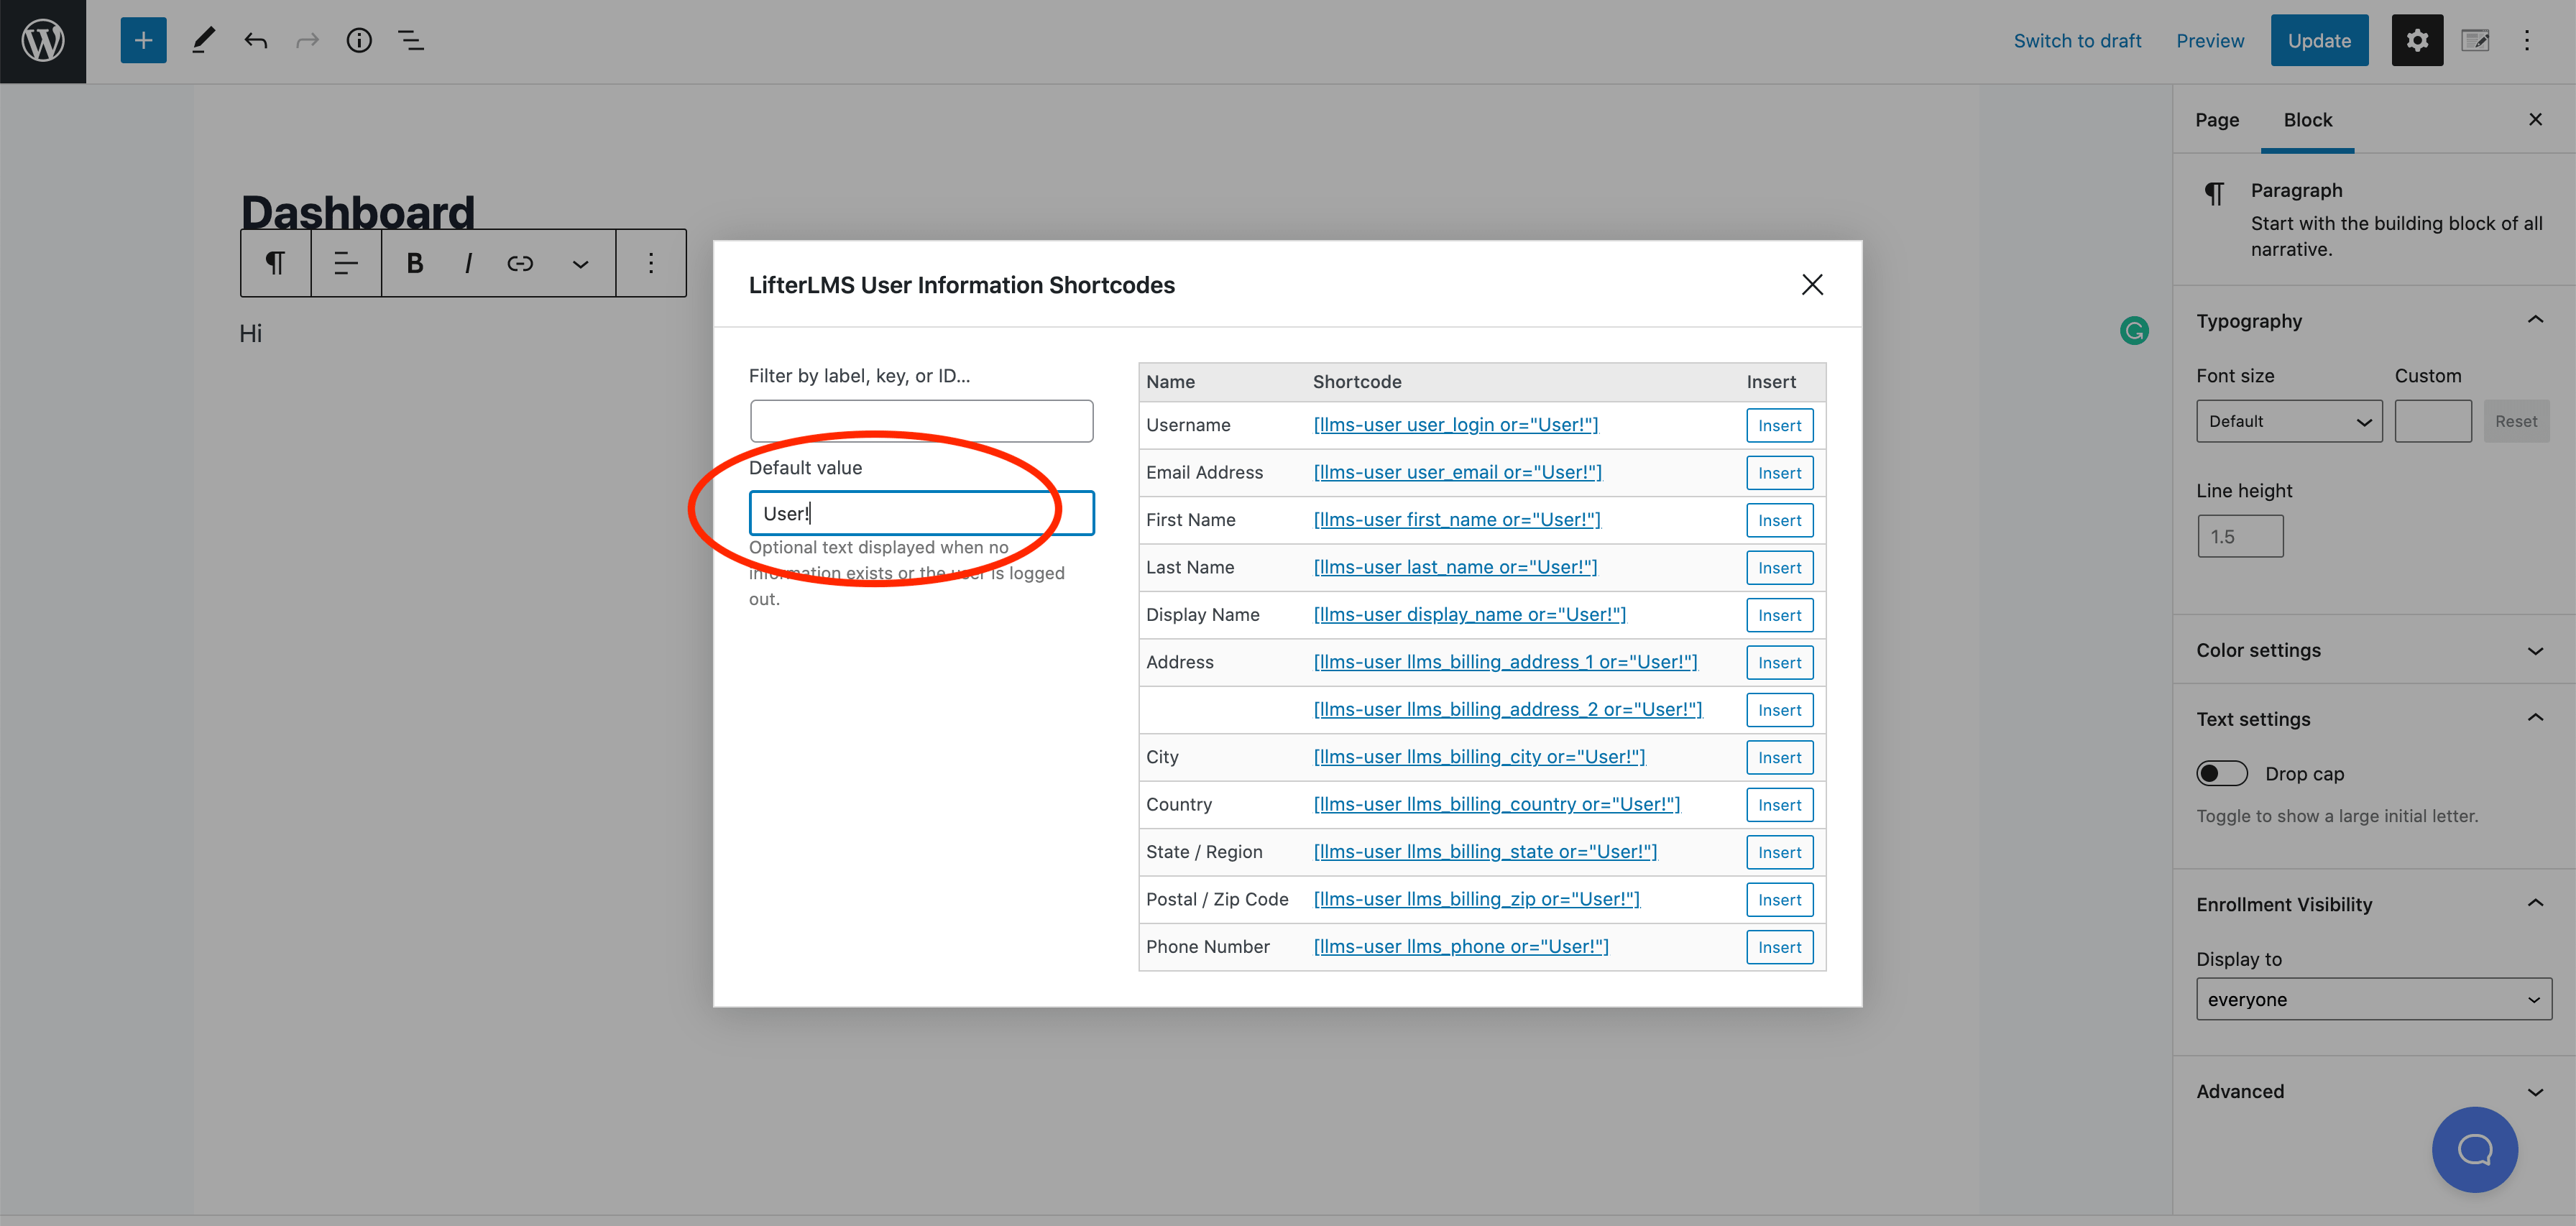
You can also use the ‘Default value‘ box to type in a value you’d like to display if the user is logged out or doesn’t have that specific field filled out. (you may say Hi First Name!, but if they don’t have a First Name, we’ll default to Hi User! or Hi Friend!)
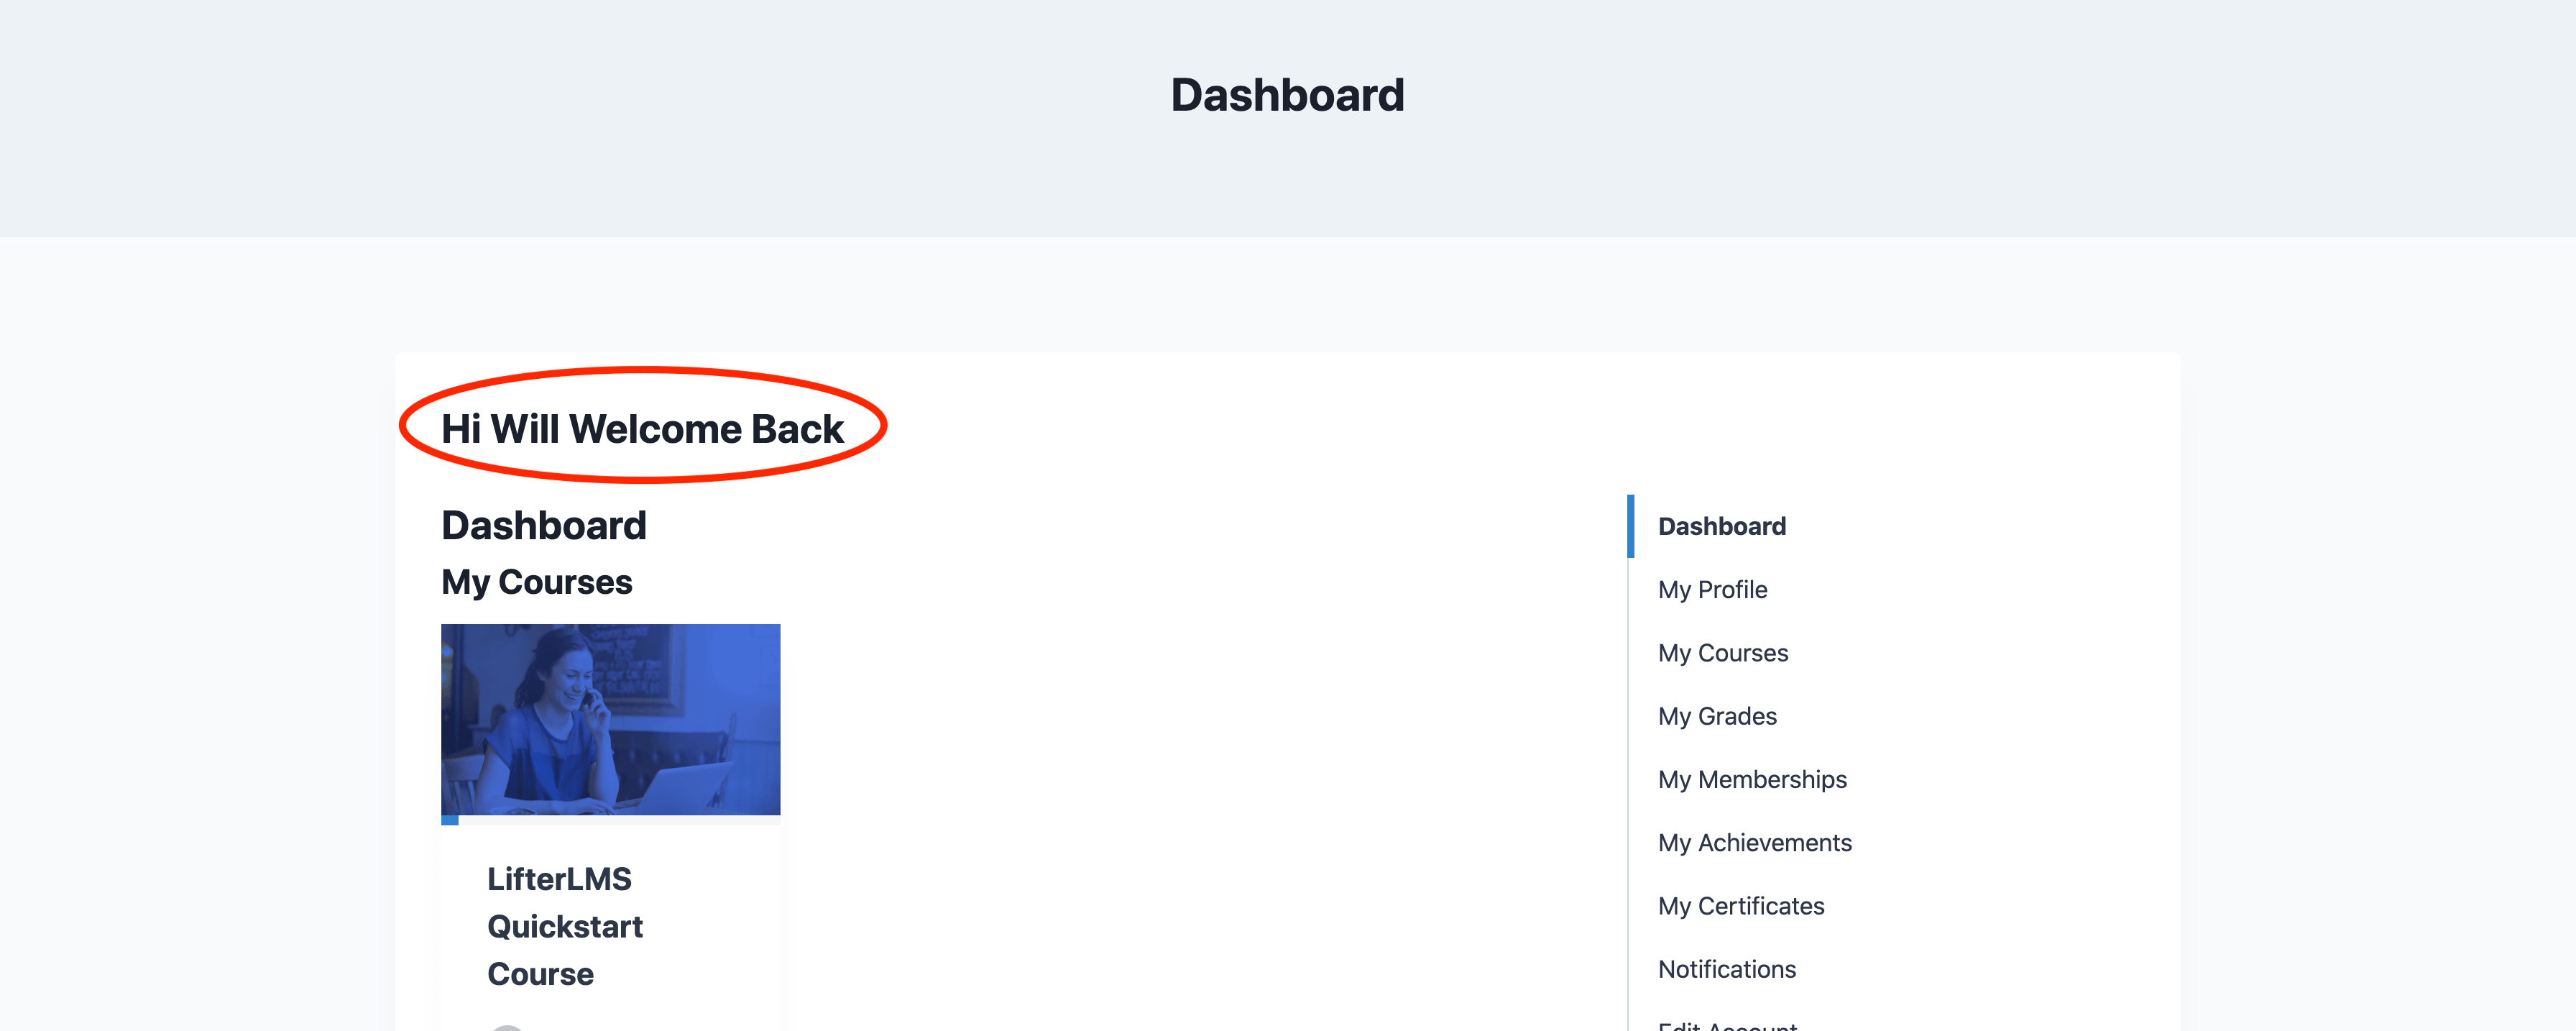
A simple example of shortcodes in use is to welcome the students to the dashboard area and add some personalization with a shortcode to add in their first name.
