How to Create a Sub-Lesson Hierarchy in LifterLMS
To help you organize your content, it’s helpful to understand the standard LifterLMS structure.
LifterLMS courses follow a strict hierarchy where lessons reside directly within a course. You cannot place a lesson inside another lesson.
If you need to display a hierarchical structure for your content, you can use one of the following two workarounds:
You can use a naming convention for your lesson titles to show a hierarchy to your students.
- Go to Courses in your WordPress dashboard.
- Click the Builder button for the course you want to edit
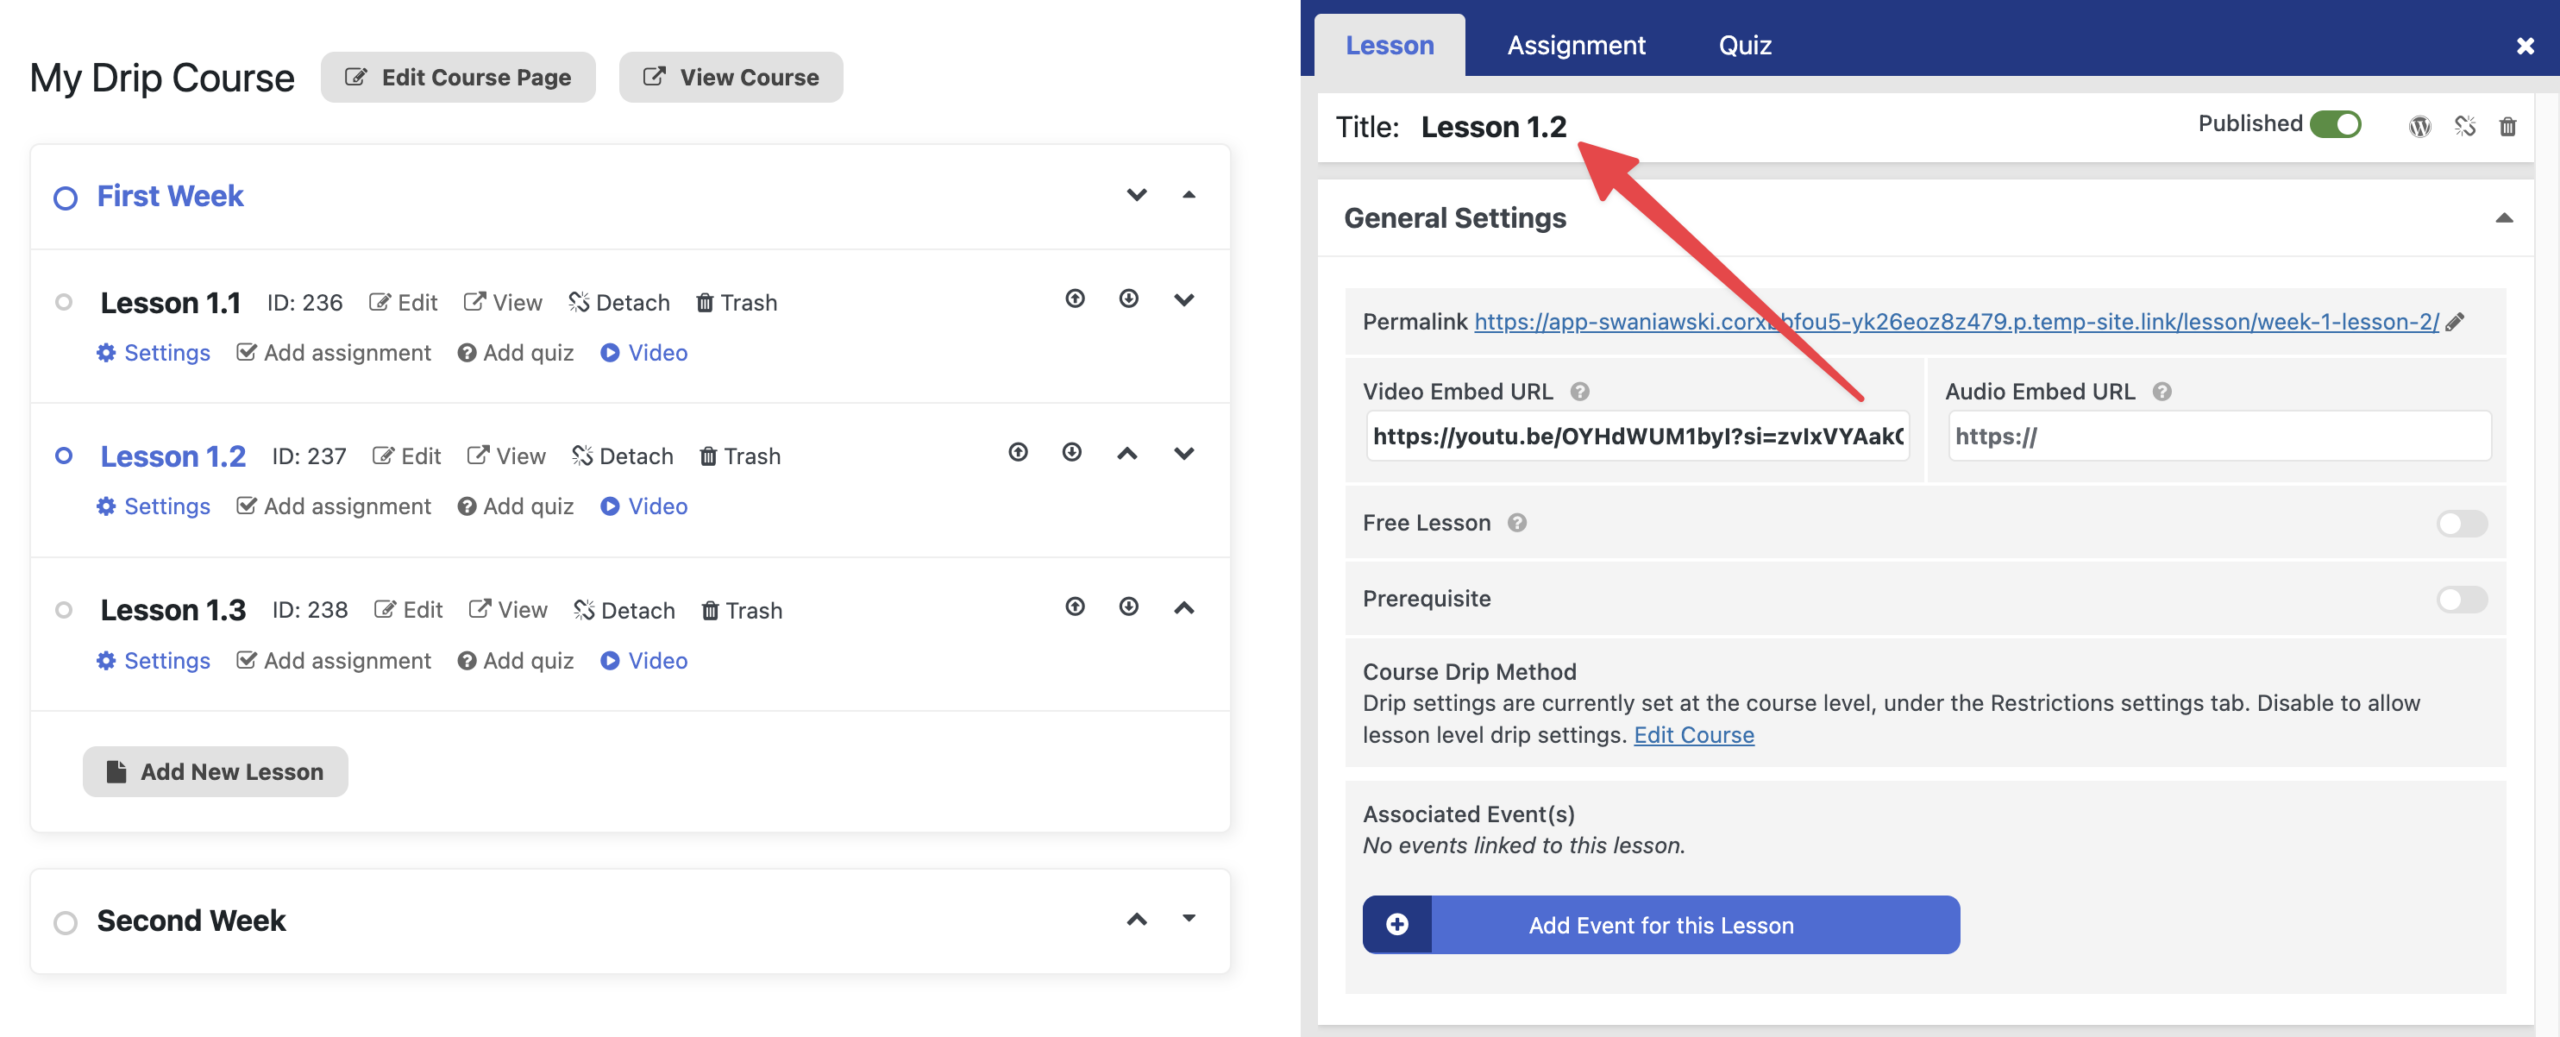
- Click on the lesson you want to rename.
- Update the “Lesson Title” field.
- Use a numbered system, such as naming the parent “Lesson 1” and the child lessons “Lesson 1.1” and “Lesson 1.2”.
- Click Update to save your changes.
This clearly indicates to the student which lessons belong together in a specific module or sub-group.
If you want to keep a large amount of content within one single lesson but break it up into smaller, manageable sections, you can use the WordPress block editor.
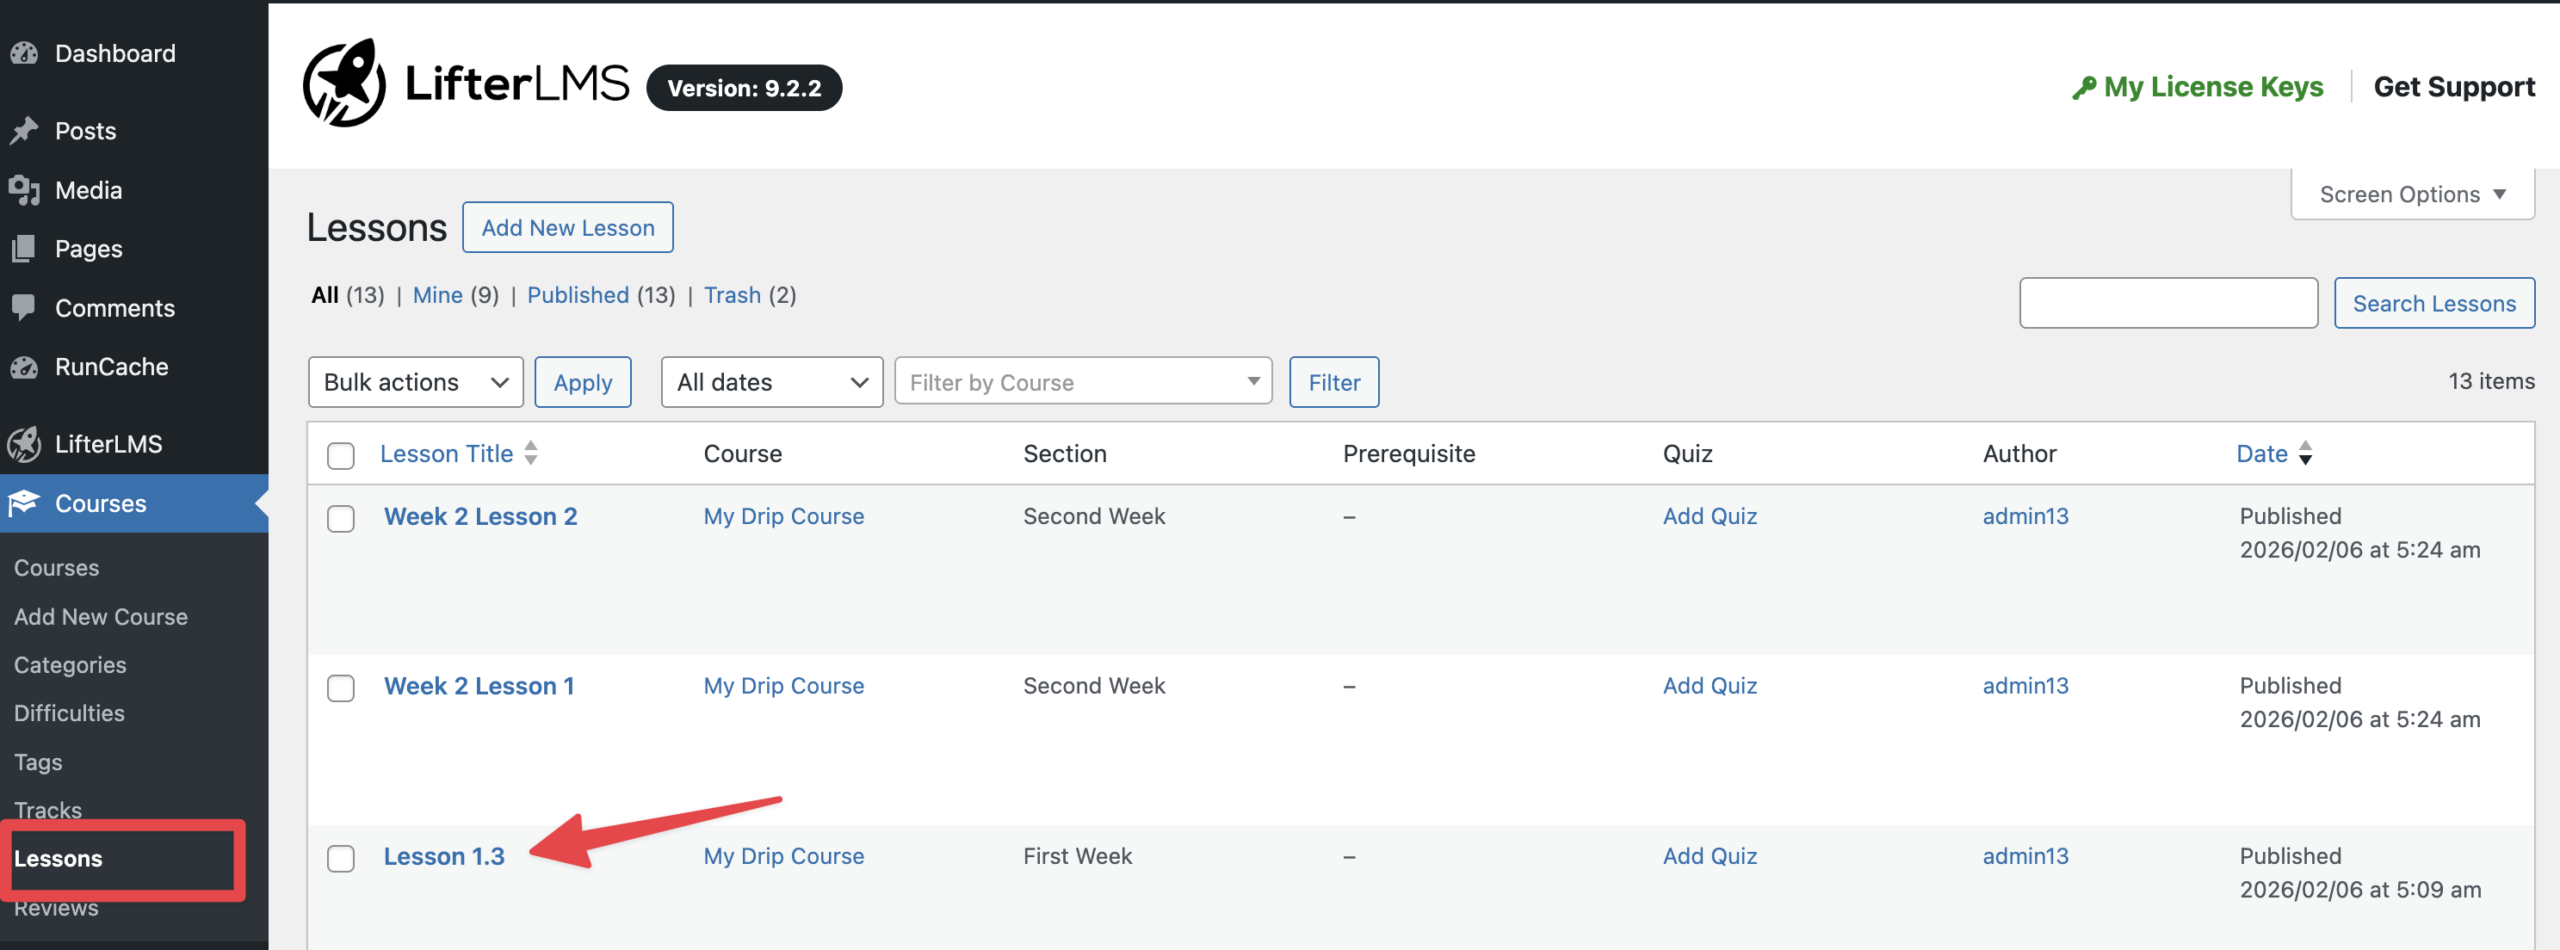
- Go to Courses > Lessons in your WordPress dashboard
- Select the lesson you want to edit.
- Click on the lesson where you want to add sub-sections.
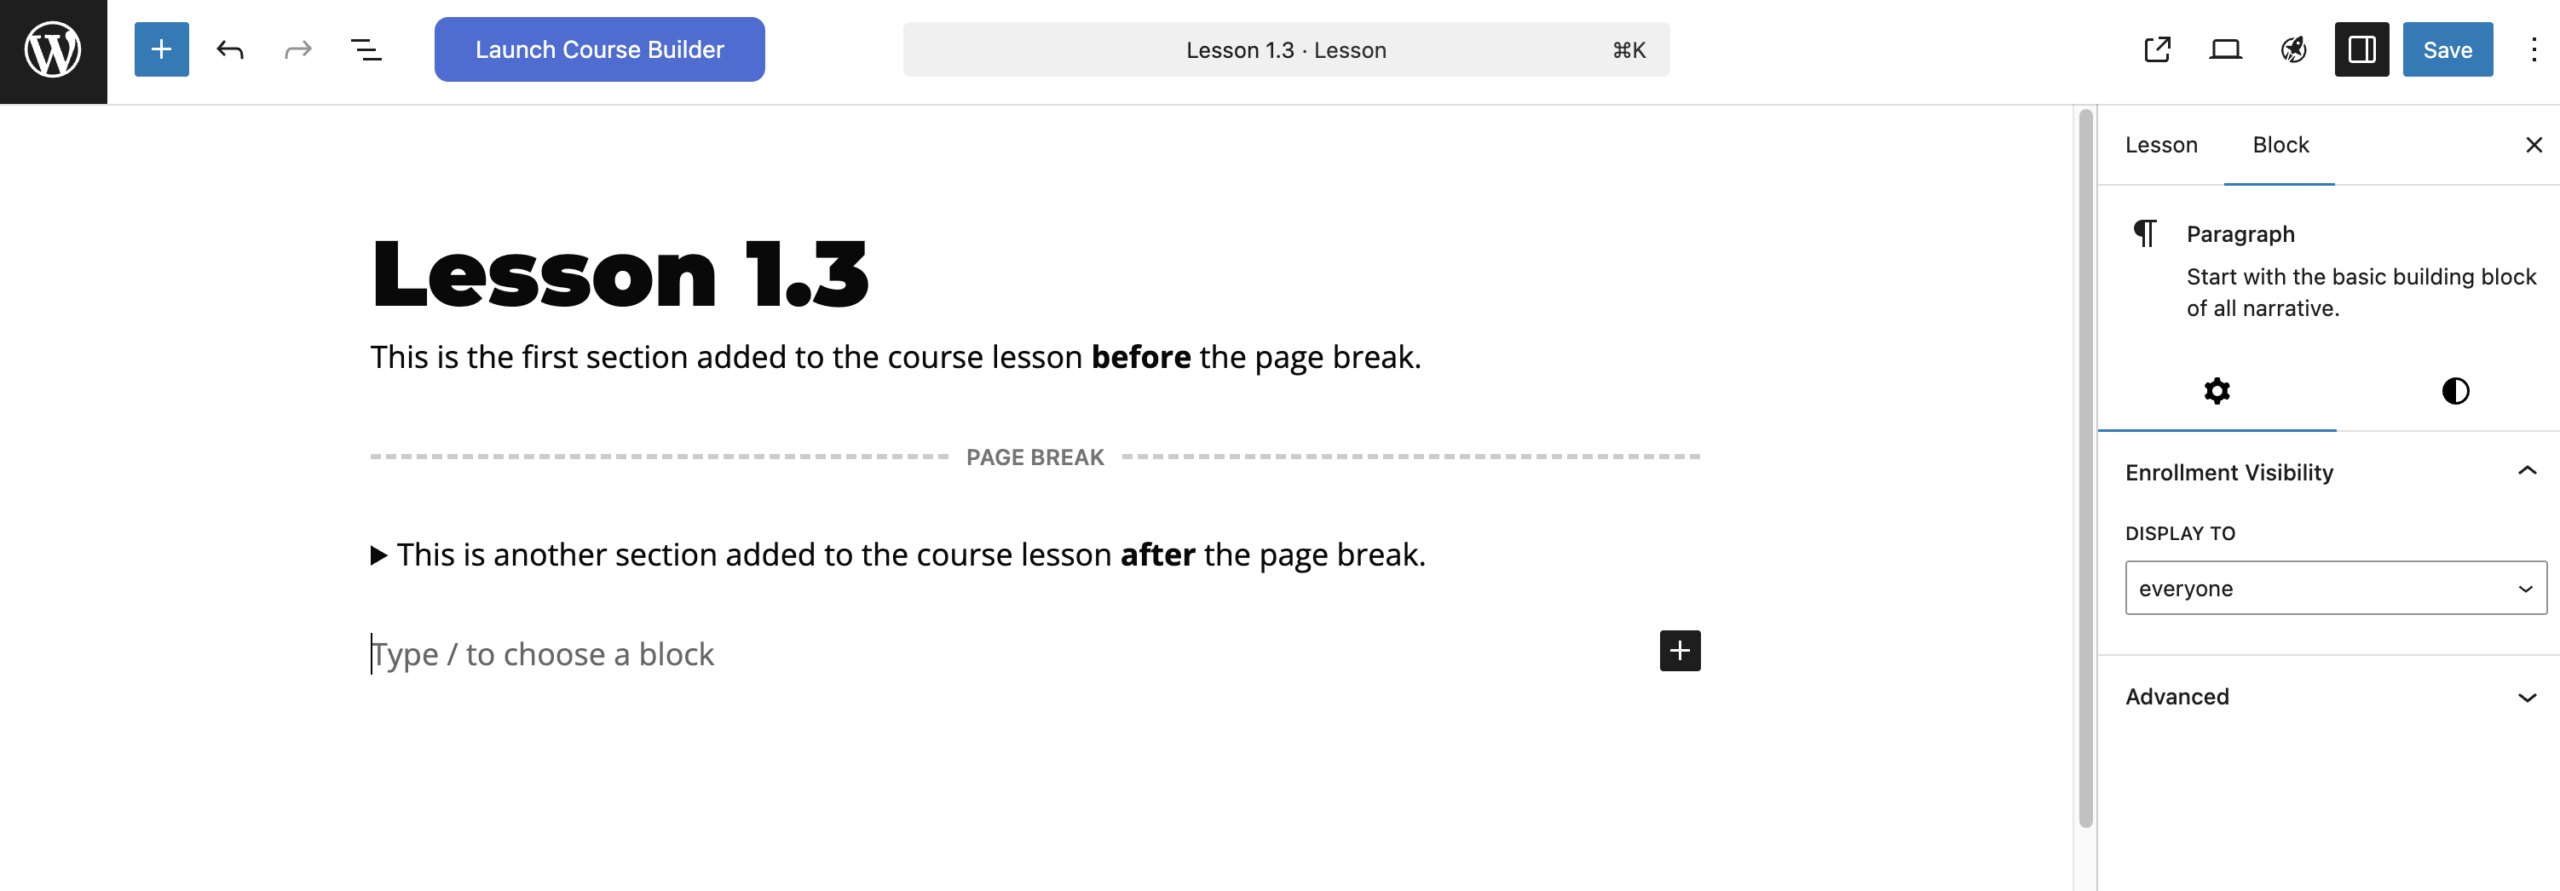
- Click the + icon to add a new block.
- Search for and select the “Page Break” block.
- Place this block wherever you want to divide your content.
- Click Update to save your lesson.
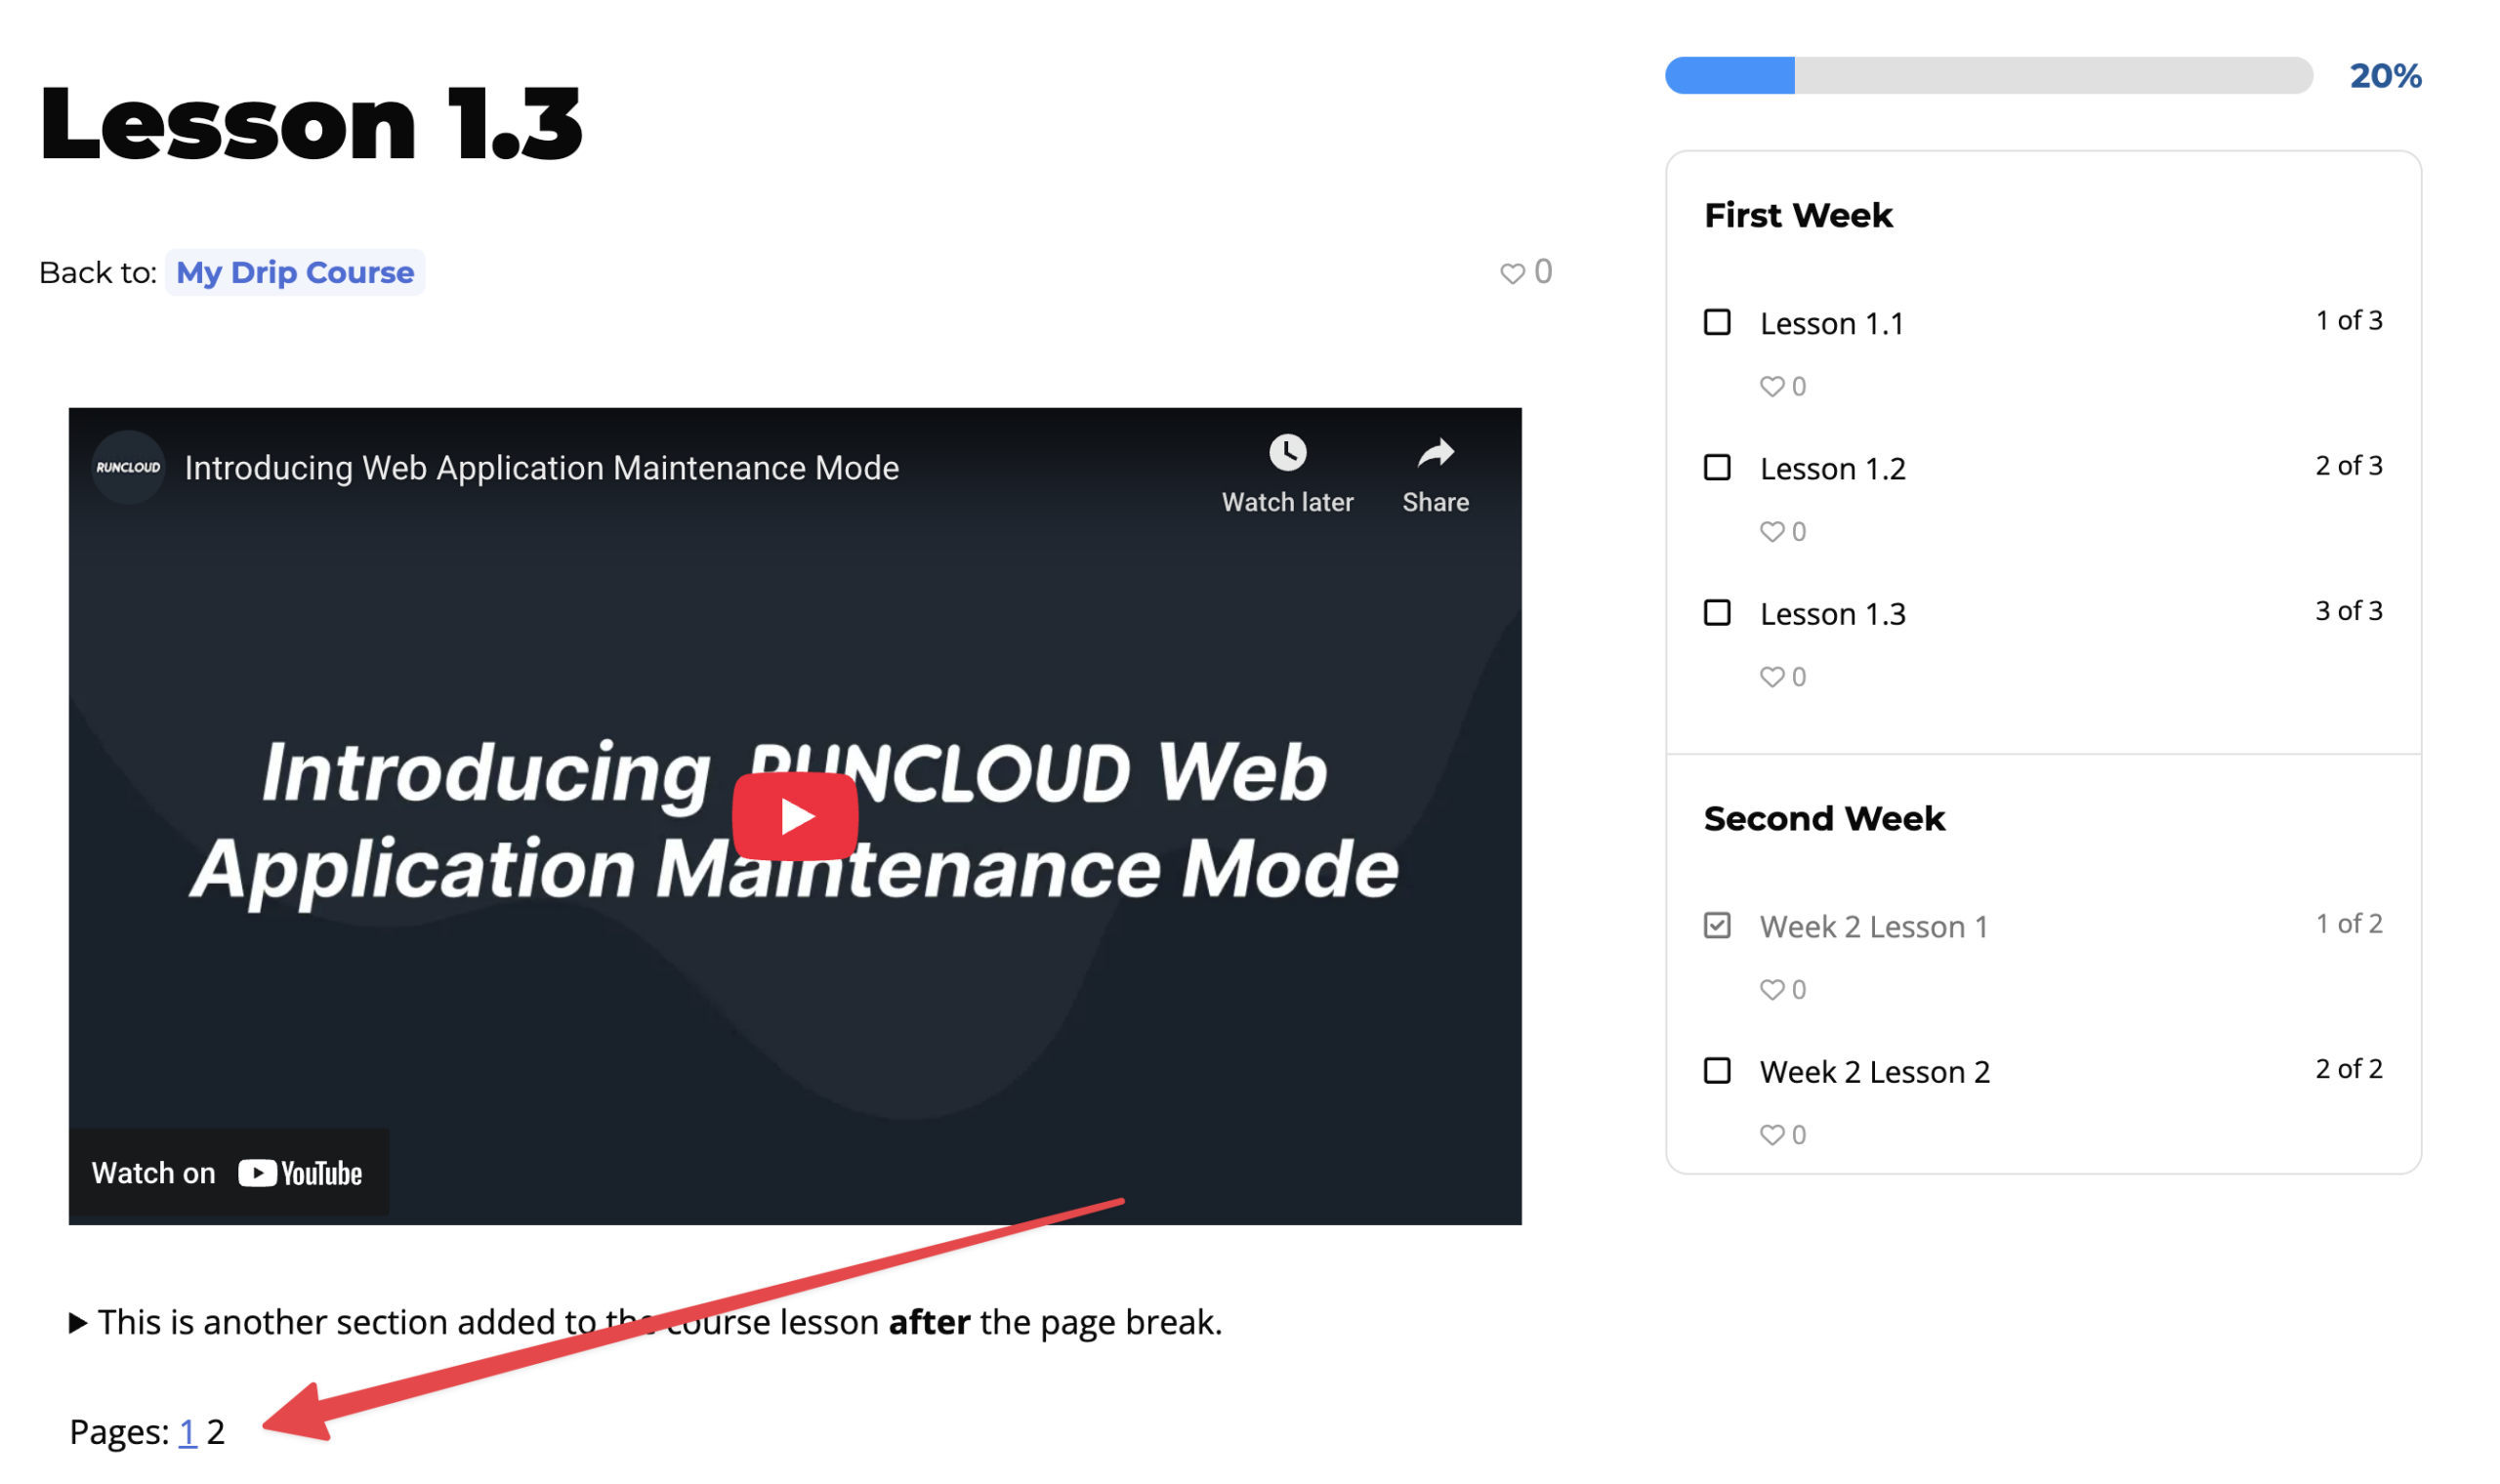
When a student views this lesson, LifterLMS will automatically create a paginated view, allowing the student to navigate through different sub-pages within that single lesson.