How do I create audio lessons in LifterLMS?
Audio changes how your course is experienced.
It gives students another way to learn when they can’t read or watch. It works well for language training, guided lessons, and long-form explanations that benefit from listening.
LifterLMS lets you add audio directly to any lesson using a simple embed field. You can host files on your own site or use external platforms, depending on your setup.
This guide shows both approaches, with clear steps for adding audio to your lessons and choosing the right hosting option for your course.
You can upload audio files, like MP3s, directly to your WordPress site. Please note that hosting audio on your own site means each student stream uses your server resources, which can slow your site or increase hosting costs as your course grows.
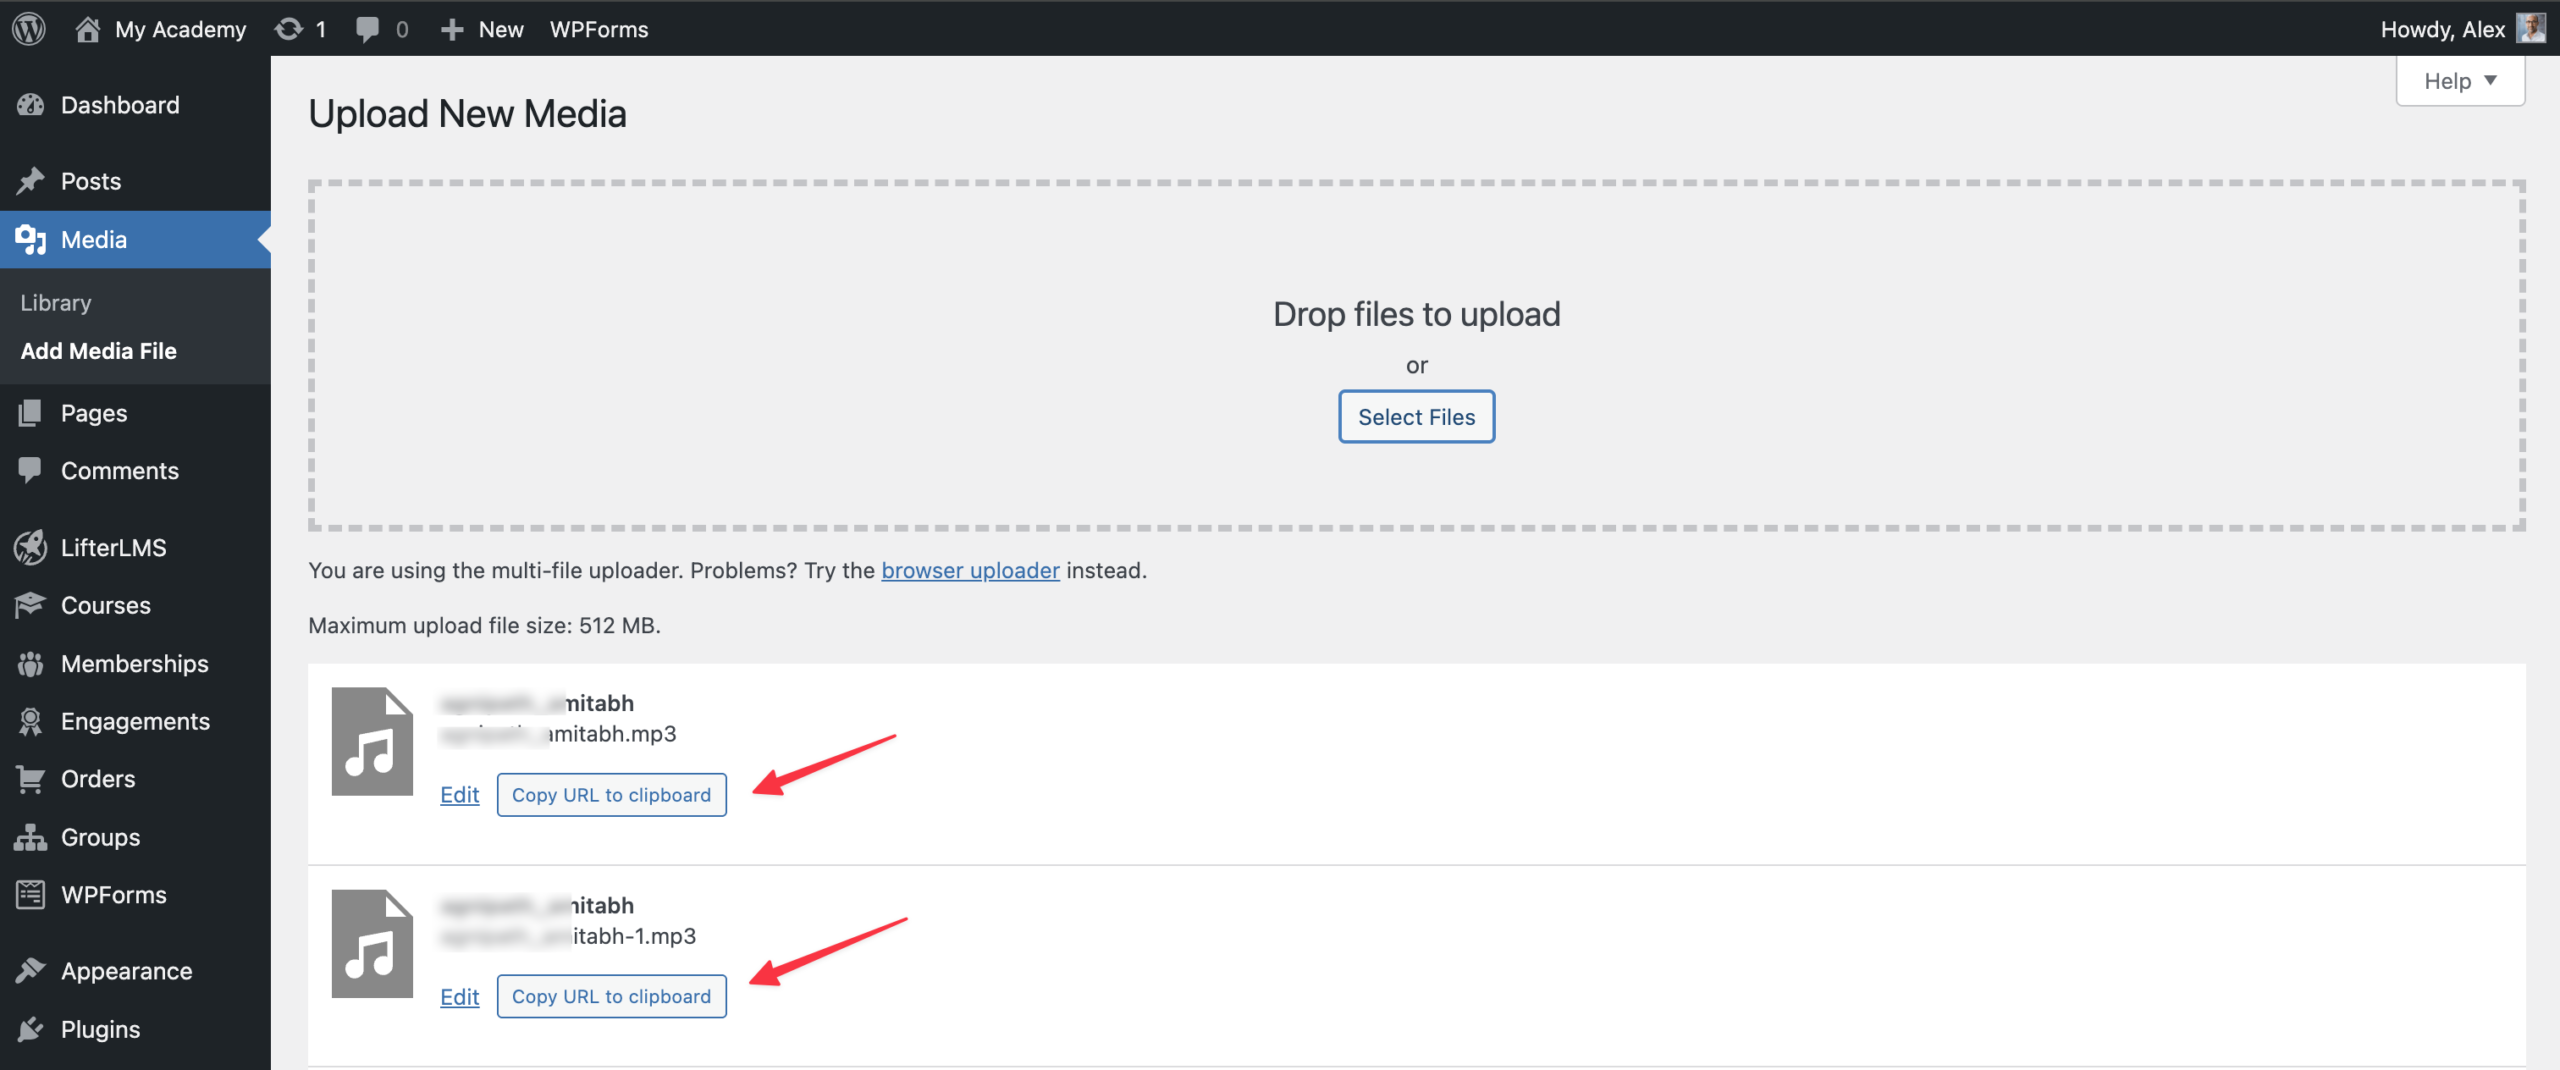
- Navigate to Media > Add New in your WordPress dashboard.
- Upload your audio file. Once it appears in the Media Library, click it to open the file details panel.
- Copy the file URL. You will use this as the audio source inside your lesson.
- Navigate to LifterLMS > Courses.
- Open the course you want to add the audio to.
- Click the Course Builder button or edit a specific lesson.
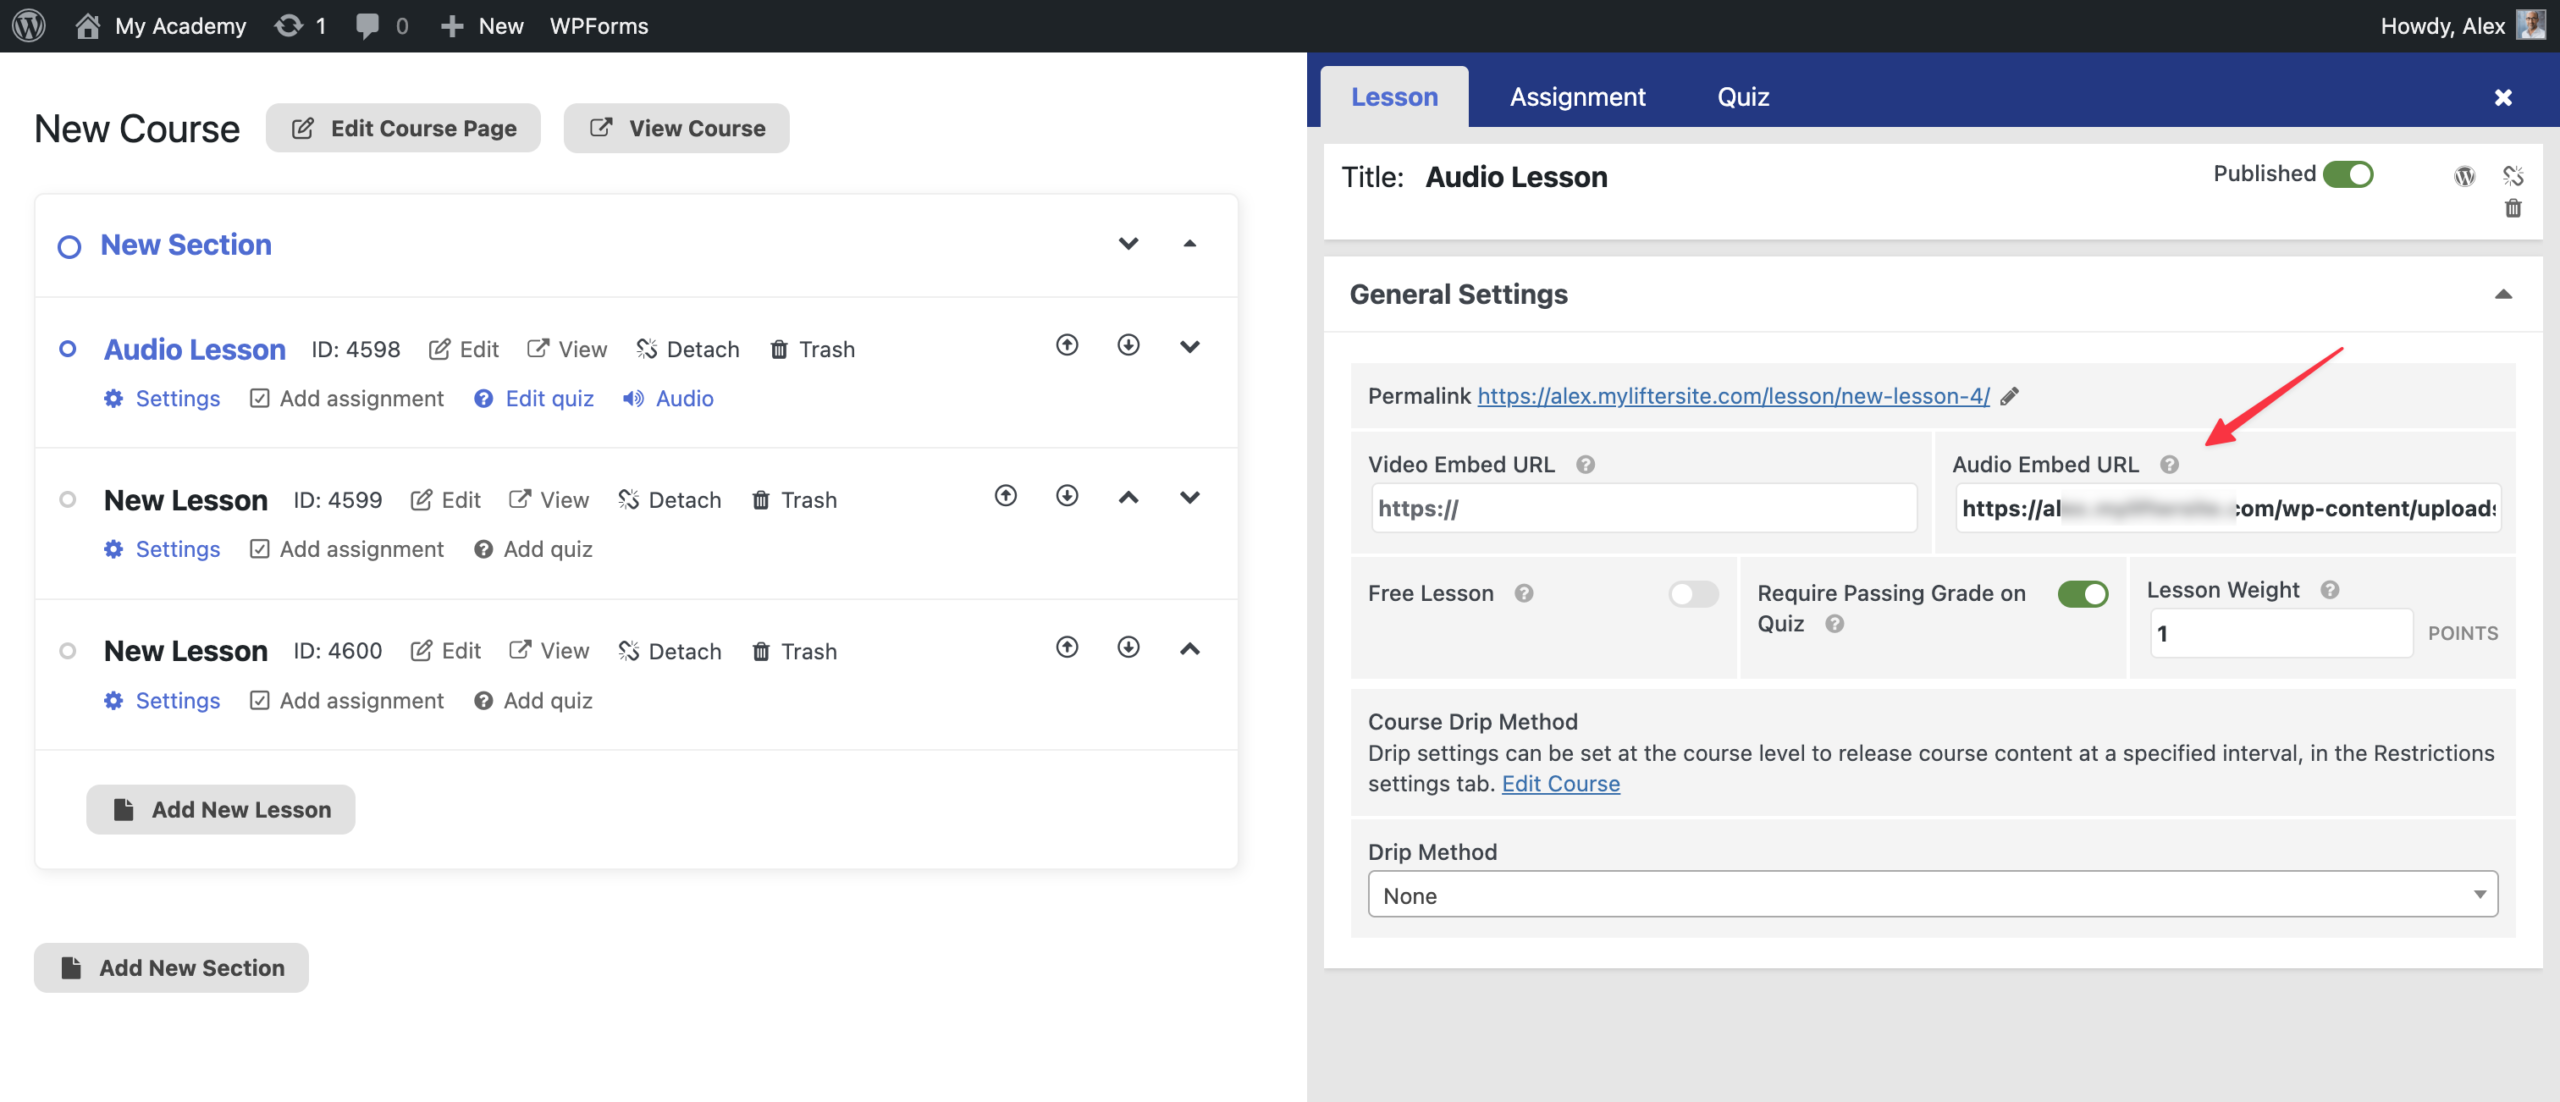
- Scroll to the “General Settings” section and find the “Audio Embed URL” field.
- Paste the copied URL into the “Audio Embed URL” field.
- Click the Save button.
After saving, the audio player will appear in your lesson and be available to students.
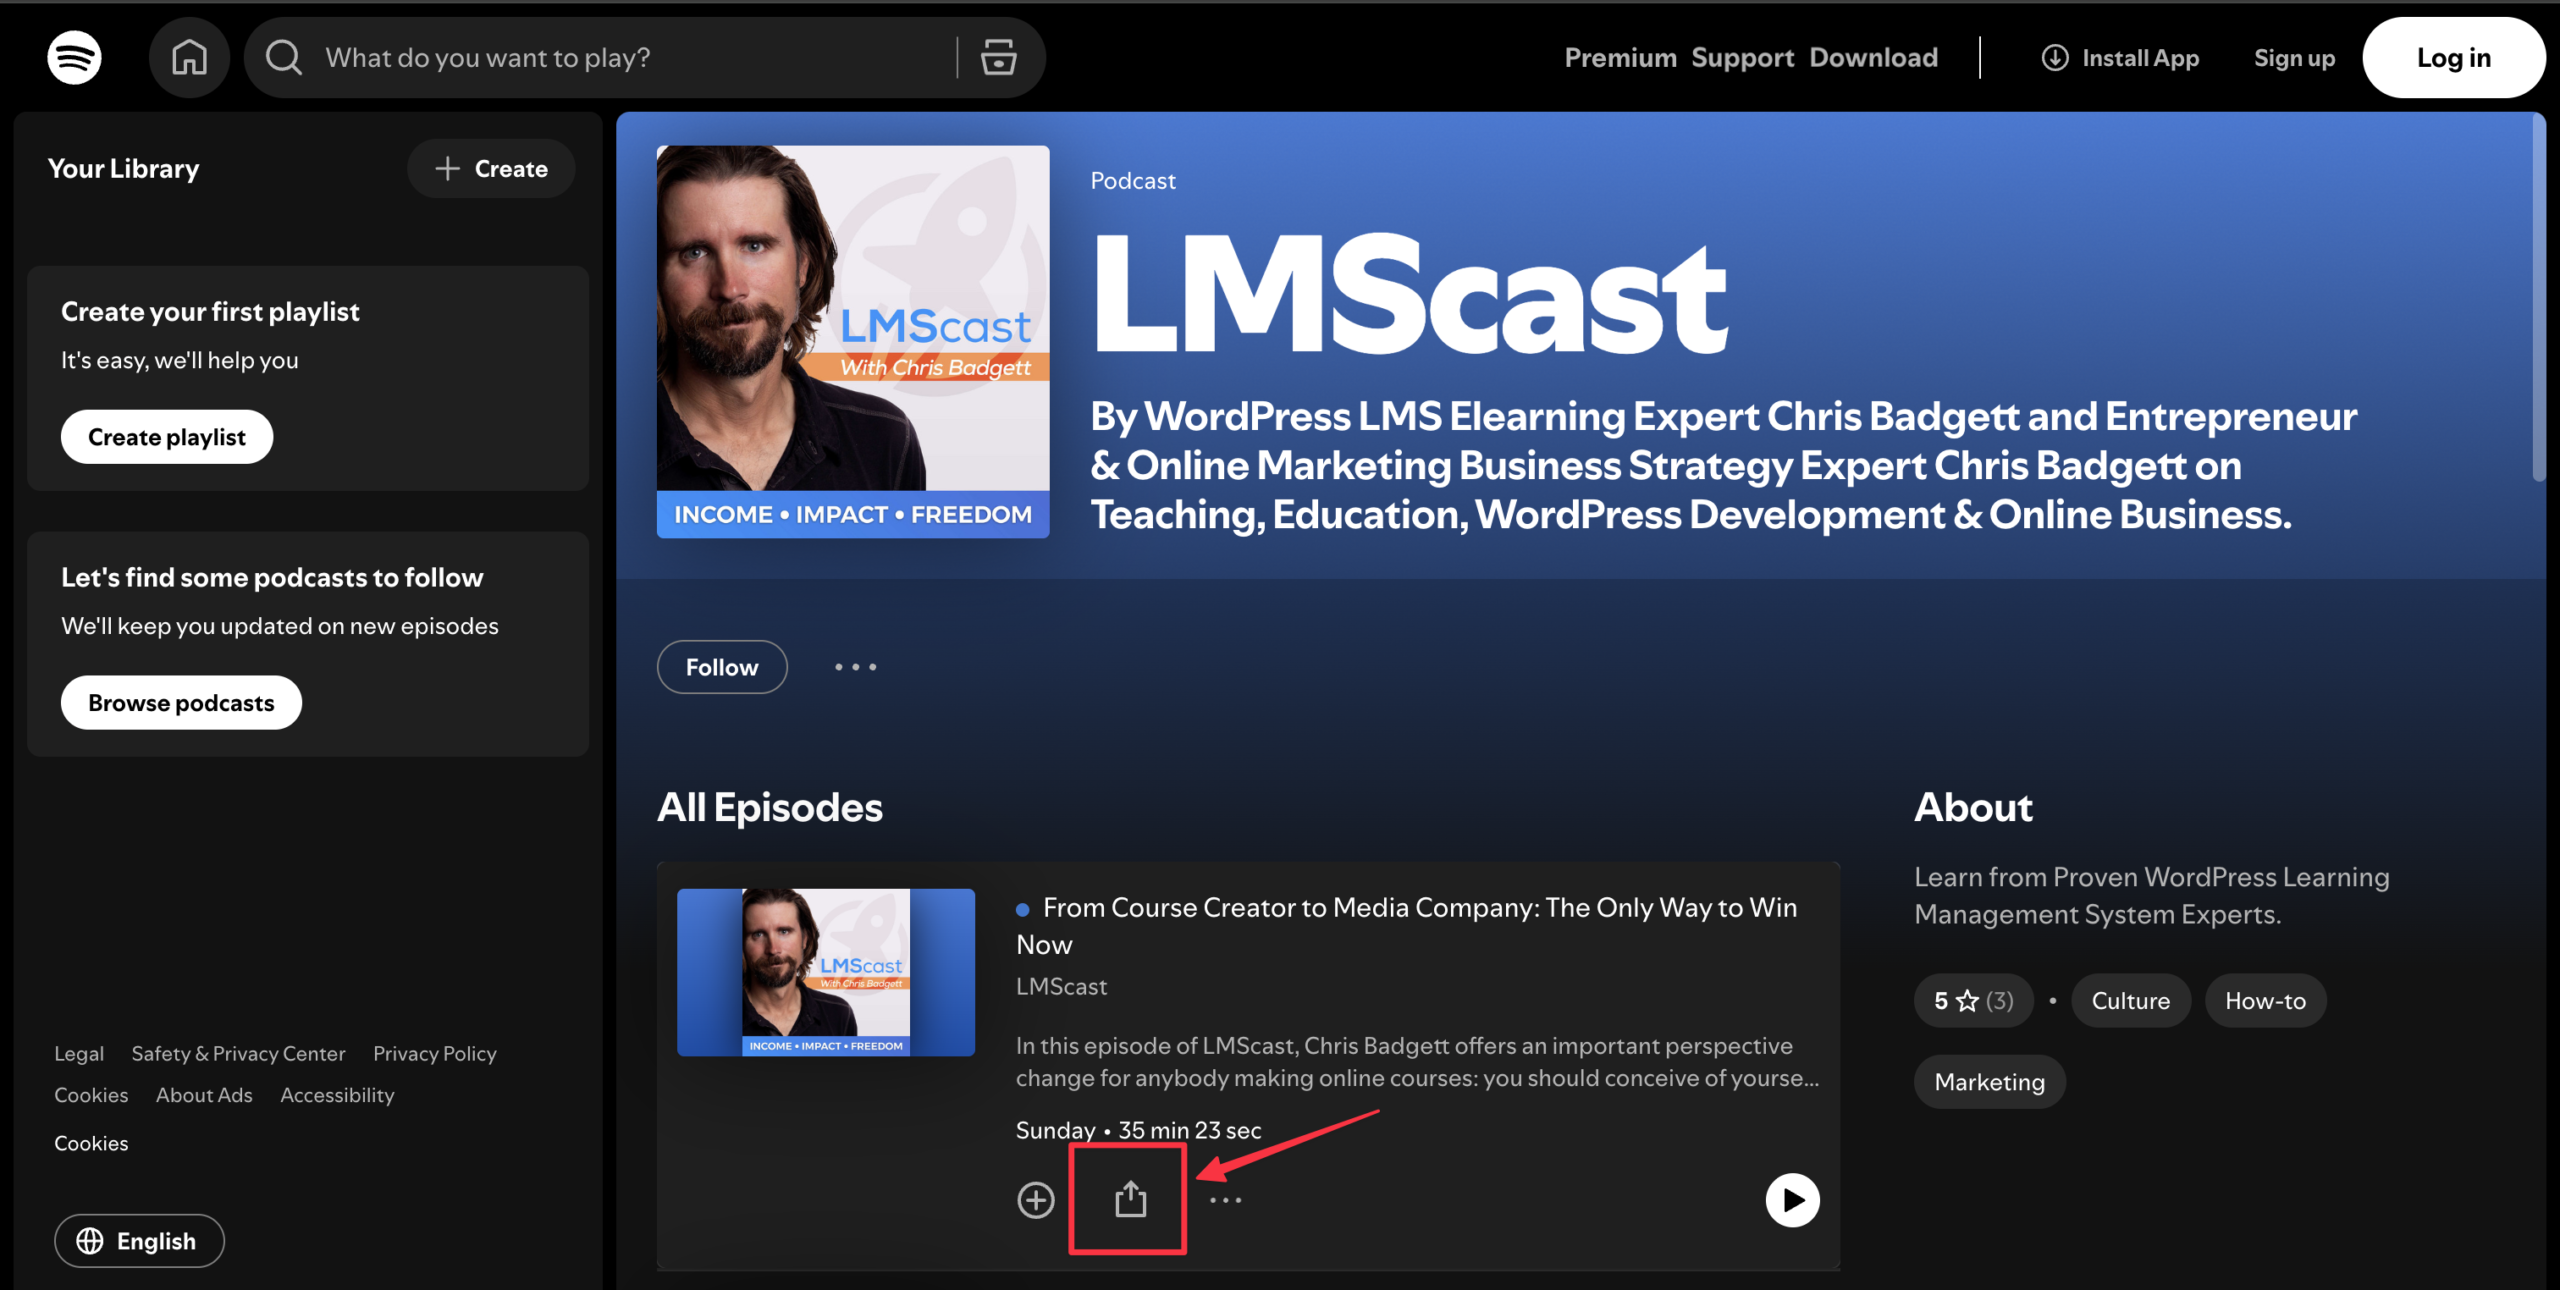
Using a third-party host keeps your site lightweight. The audio is streamed from an external platform, reducing load on your server. You can host your audio files on platforms like SoundCloud or Spotify.
- Upload your audio track to a third-party platform like SoundCloud.
- Copy the web address URL for that specific track. Make sure the URL is the direct link to the track. Remove any extra parameters, such as tracking codes added after a question mark (
?).
- Navigate to LifterLMS > Courses on your WordPress dashboard.
- Open the course and select the lesson you want to edit.
- Locate the “General Settings” section and find the “Audio Embed URL” field.
- Paste the clean URL into the field.
- Click the Save button.
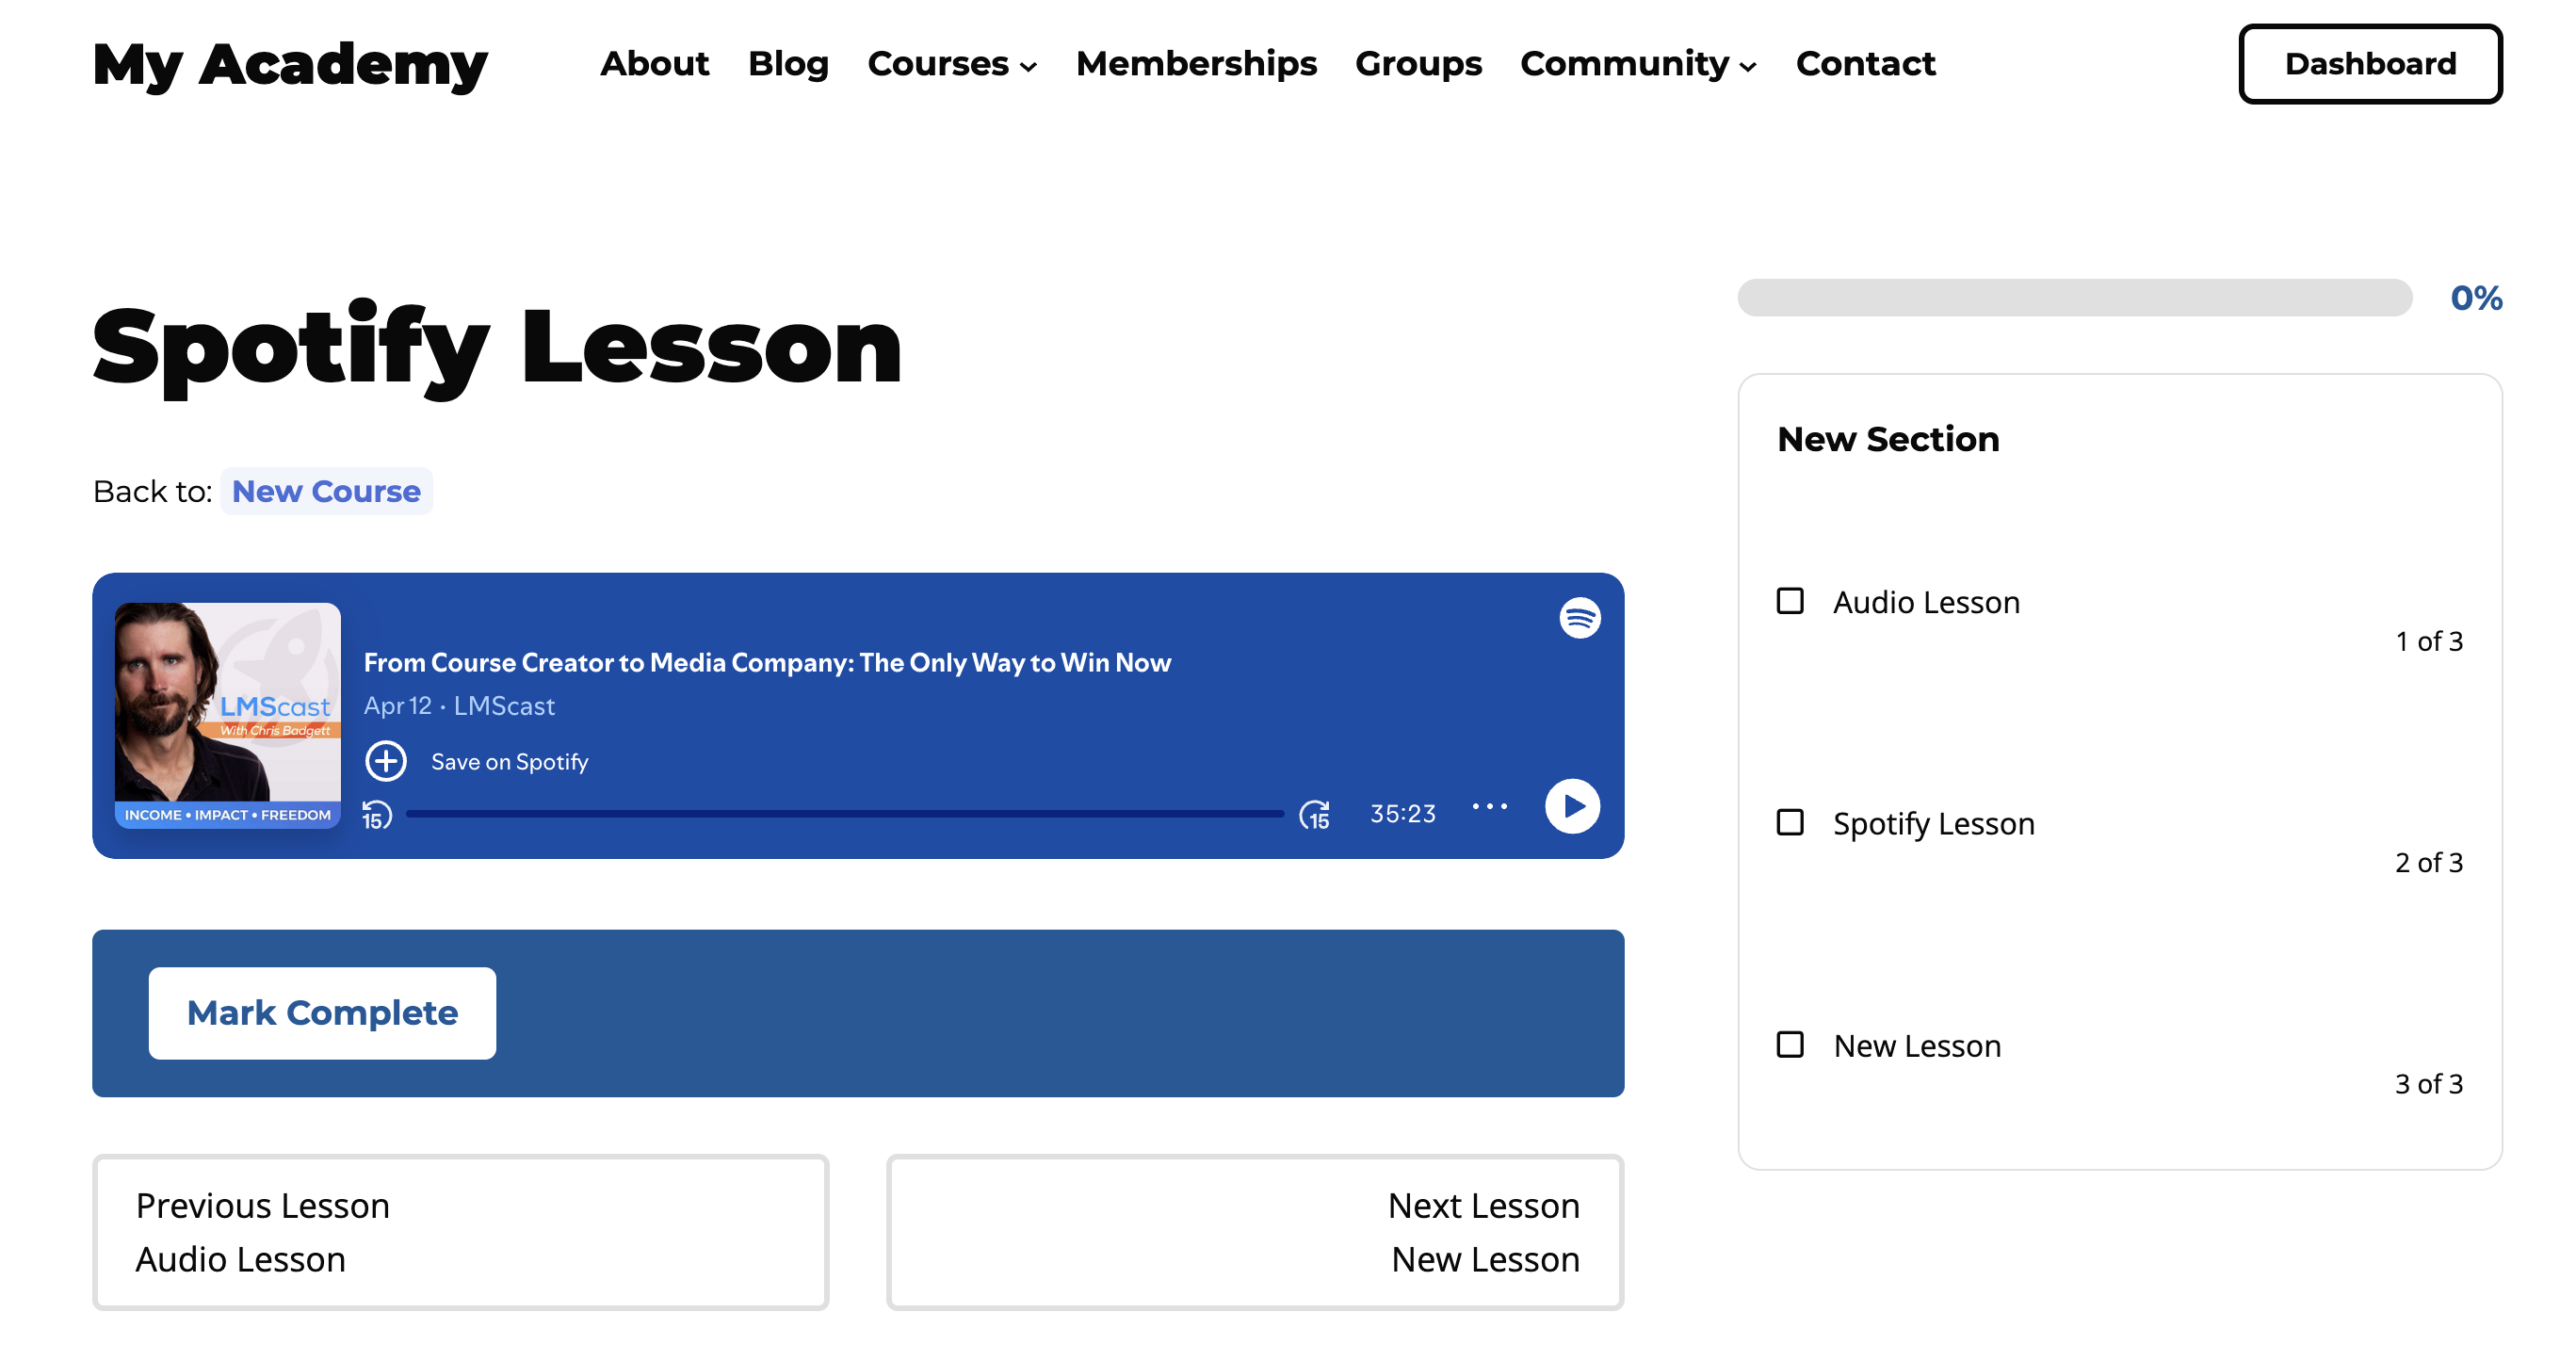
After saving, the audio player will appear in your lesson and be available to students.
We recommend choosing your audio host based on how much control you need over the student experience. If you want a quick, free setup, SoundCloud is an excellent choice and is directly supported by LifterLMS.
However, if you want to ensure students listen to the entire track before completing a lesson, we suggest converting your audio to a video with a still image. This allows you to use the “Advanced Video” settings to track progress and prevent skipping.
While you can host files on your own WordPress site, we usually advise against this for files longer than a few minutes. Large files can slow down your website and may exceed the upload limits set by your hosting provider.
The table below compares the most common ways to host audio for your LMS.
| Hosting Option | Benefits | Drawbacks |
|---|---|---|
| SoundCloud or Spotify | These services are easy to use, and LifterLMS supports their URLs natively in the “Audio Embed URL” field. | Free versions may show ads or related tracks from other creators. |
| WordPress Media Library | You have total control over the file and do not need any outside accounts. | Large files can make your website slow or cause your server to crash during high traffic. |
| Video Hosting (Vimeo/Wistia) | You can use “Advanced Video” features to track student progress and prevent skipping. | You must convert your audio to a video format, such as an MP4, before you upload it. |
| Amazon S3 | Highly stable and capable of handling thousands of listeners simultaneously. | More technical to set up, and generally isn’t suitable for small creators. |
| Libsyn | Easily integrates with other podcasting and hosting platforms. | More technical to set up and requires a monthly fee. |
Watch a full walkthrough of the process:


