Getting Started with LifterLMS Cart Abandonment Recovery
Every LMS site loses potential enrollments at checkout.
A learner gets close to joining your course, but leaves before completing payment. Without a way to follow up, that enrollment and the revenue tied to it are usually lost.
The LifterLMS Cart Abandonment Recovery add-on helps you bring those learners back.
It captures contact details during checkout and automatically sends timed reminder emails that encourage students to return and complete their purchase.
In this guide, we’ll walk you through how to enable the Cart Abandonment Recovery add-on, control when reminder emails are sent, offer recovery discounts, customize the email content, and track how much revenue your recovery campaigns generate.
Follow these steps to install and activate the add-on on your WordPress site.
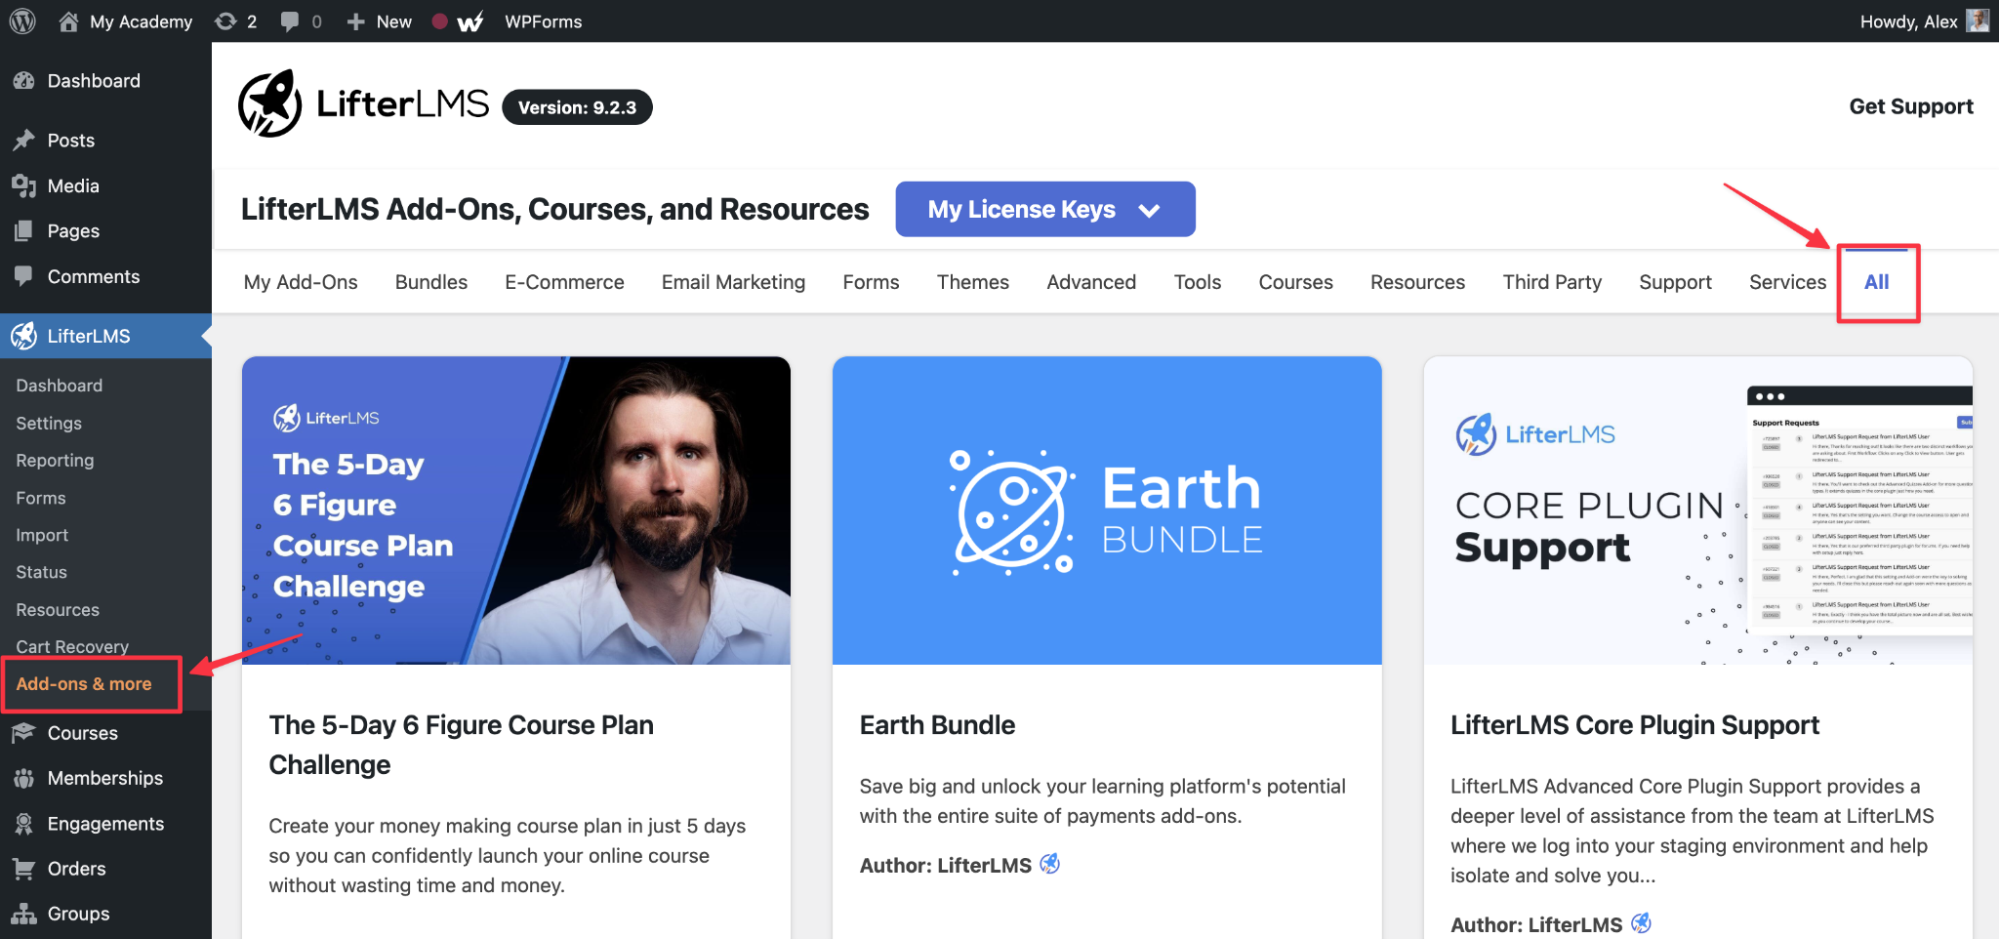
- Log in to your WordPress dashboard and navigate to LifterLMS > Add-ons & More.
- Click on the “All” tab at the top of the screen to view all available extensions.
- Scroll down until you see the “Cart Abandonment” add-on.
- Click the Install button on the add-on card.
- Click the Activate button once the installation is complete.
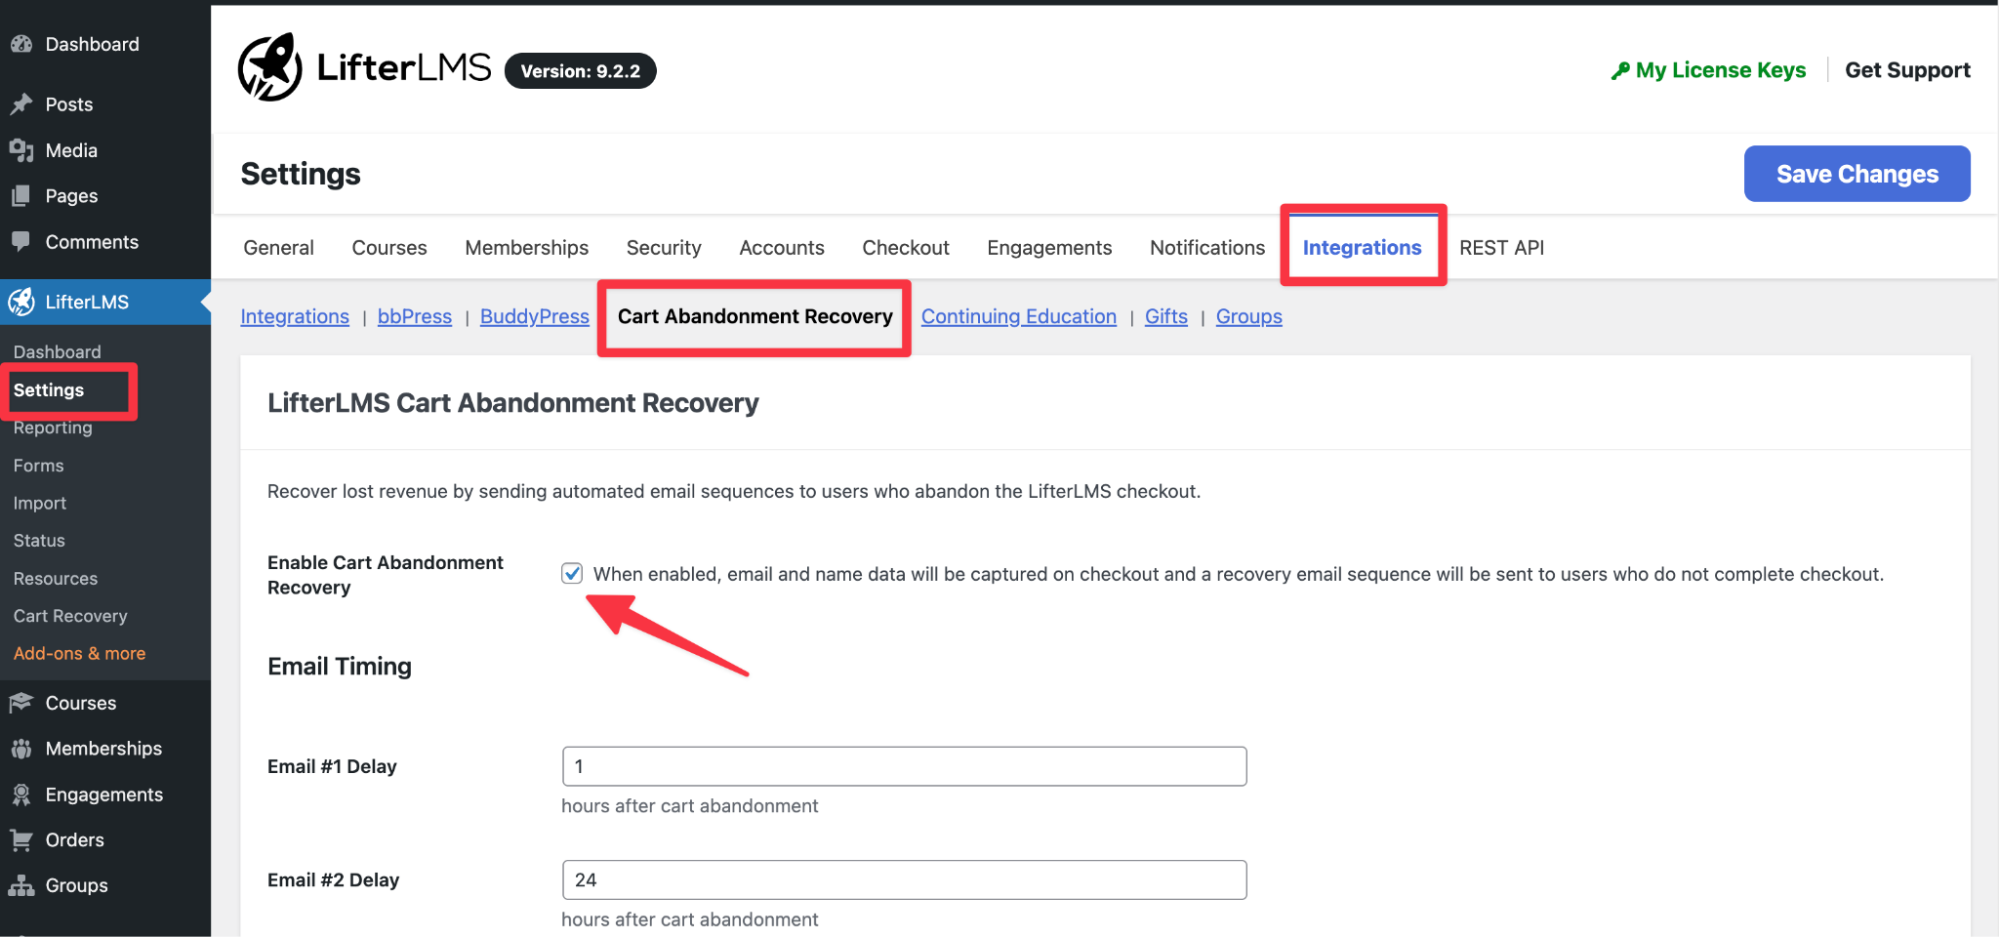
You can use the Cart Abandonment Recovery feature to capture the contact details of potential students who fail to complete their purchases. This allows you to follow up with them later. Follow these steps to manage this setting:
- Navigate to LifterLMS > Settings in your WordPress dashboard.
- Click the “Integrations” tab.
- Locate the “Enable Cart Abandonment Recovery” section.
- Check the box to enable the feature, or uncheck it to disable it.
- Click the Save Changes button to apply your settings.
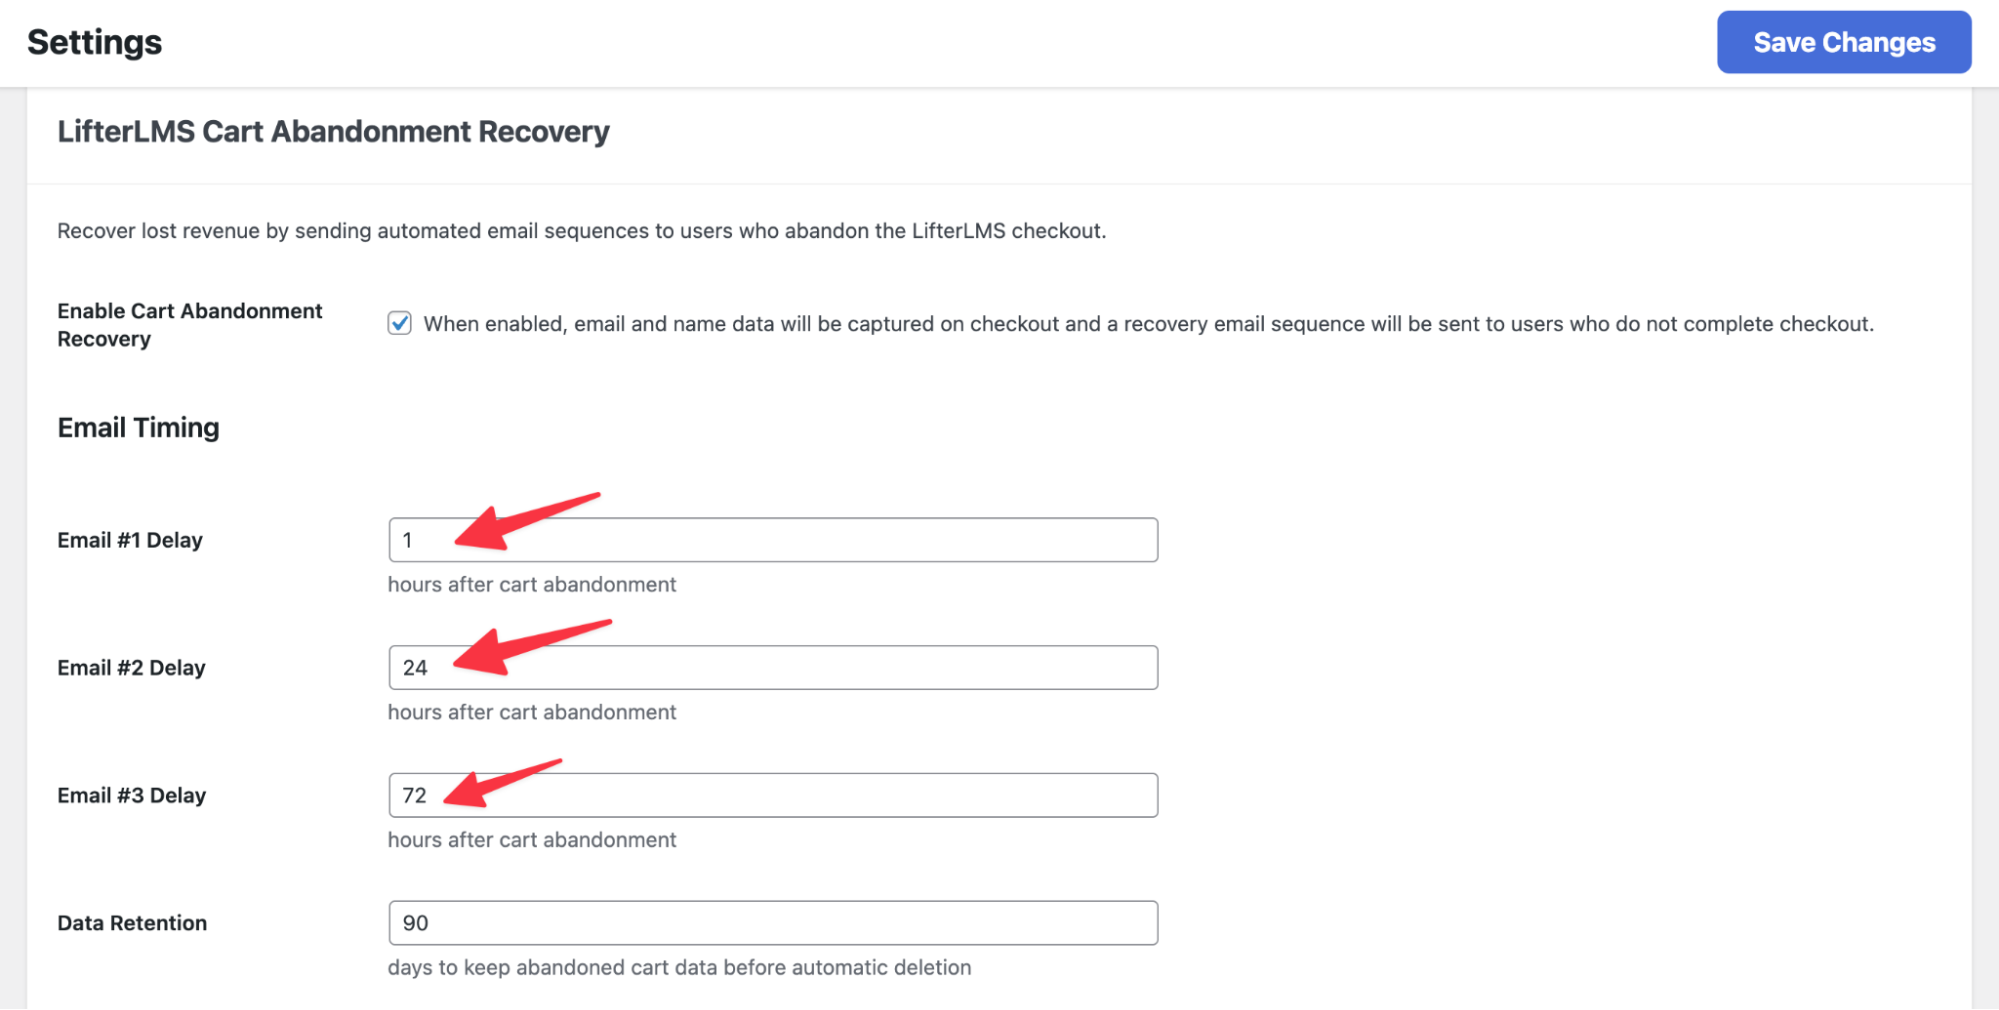
You can send up to three recovery emails at key points after a learner abandons checkout. Set the timing for each message to create an effective follow-up sequence, from the initial reminder through to a final recovery offer.
- Find the “Email Timing” section within the recovery settings.
- Enter the number of hours for “Email #1 Delay” to send the first reminder.
- Enter the number of hours for “Email #2 Delay” for the second reminder.
- Enter the number of hours for “Email #3 Delay” for the final reminder.
- Click Save Changes.
The default settings of 1, 24, and 72 hours are recommended for most LMS websites.
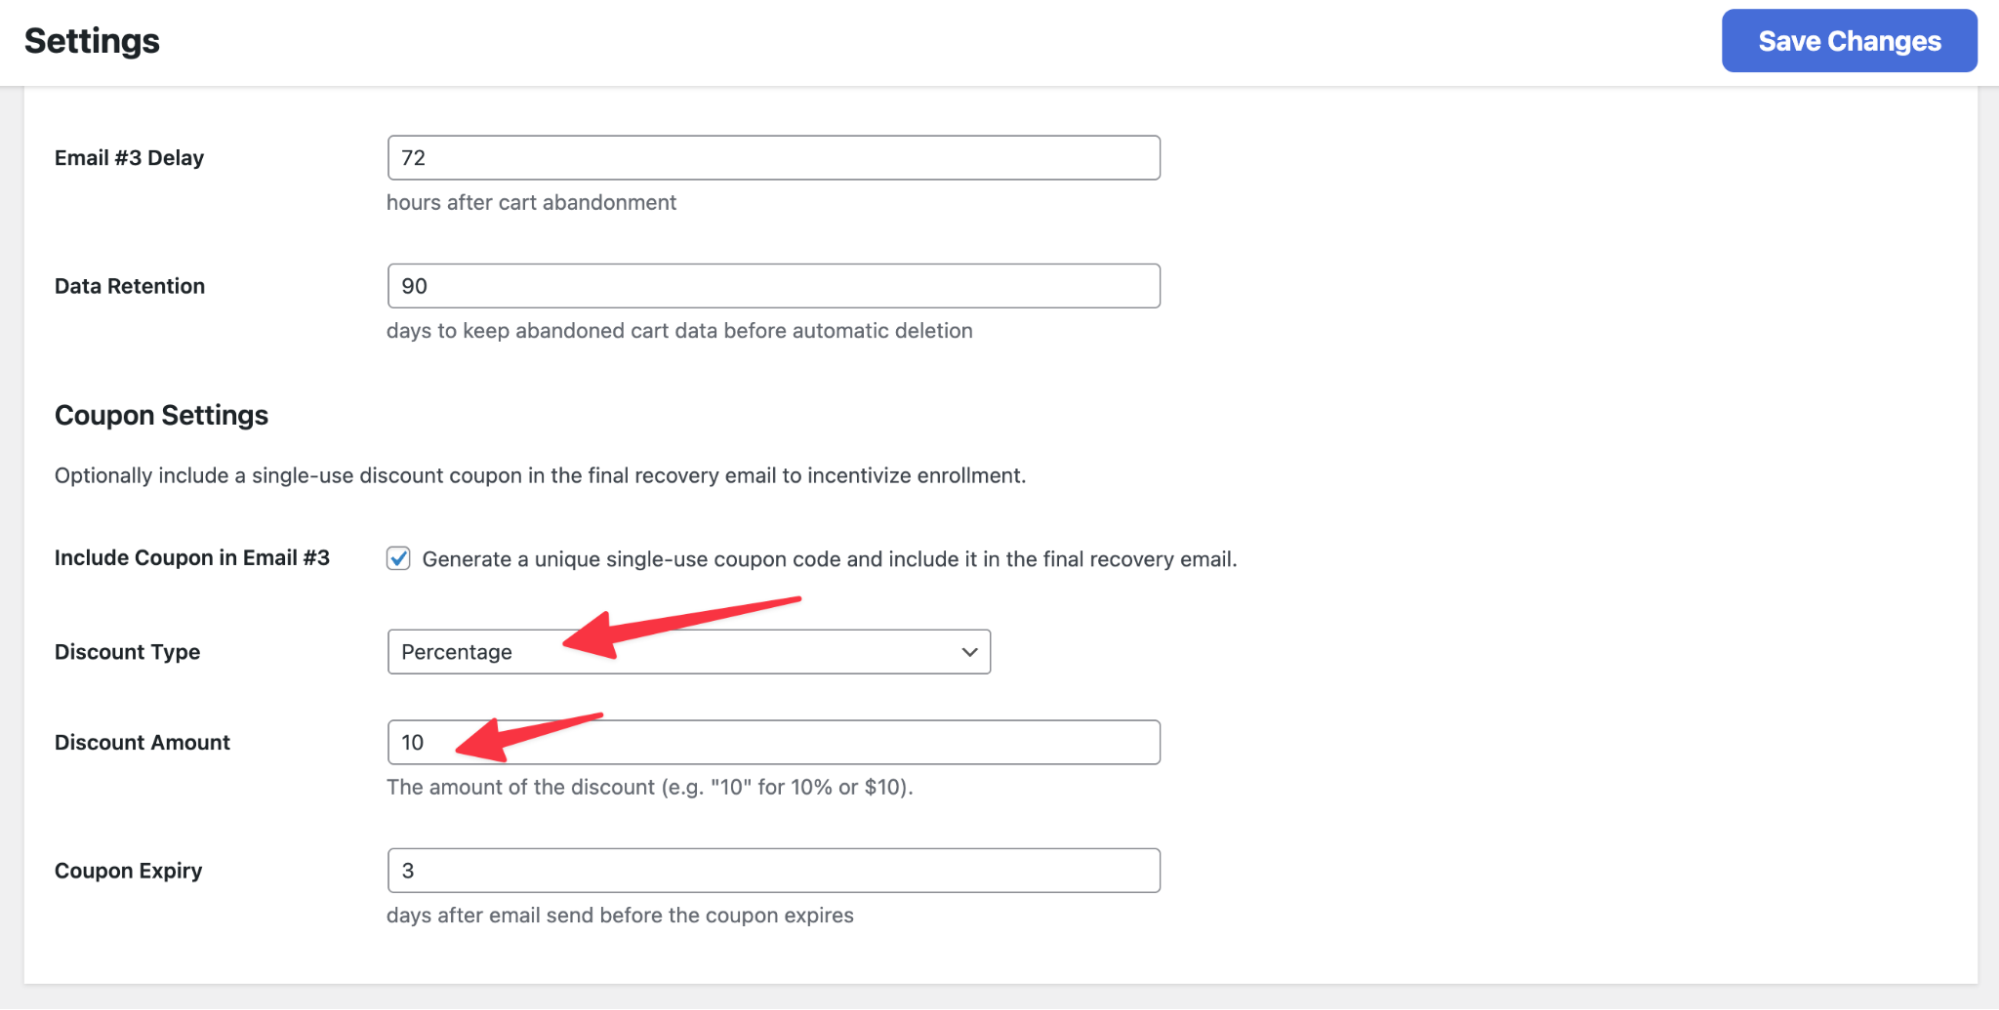
For learners who need an extra nudge, you can include a discount in the final recovery email. LifterLMS automatically generates a unique, one-time-use coupon code for each learner.
- Find the “Coupon Settings” section.
- Check the box for “Include Coupon in Email #3.”
- Select a “Discount Type” of either “Percentage” or “Flat Value.”
- Enter your “Discount Amount” in the text field.
- Enter a number for “Coupon Expiry” to set how many days the code remains valid.
- Click Save Changes.
Note: The LifterLMS Cart Abandonment Recovery plugin will mark a cart as recovered even if the user applies the email coupon using a different email address. This ensures you accurately track conversions triggered by your follow-up sequence, regardless of which email the customer uses at checkout.
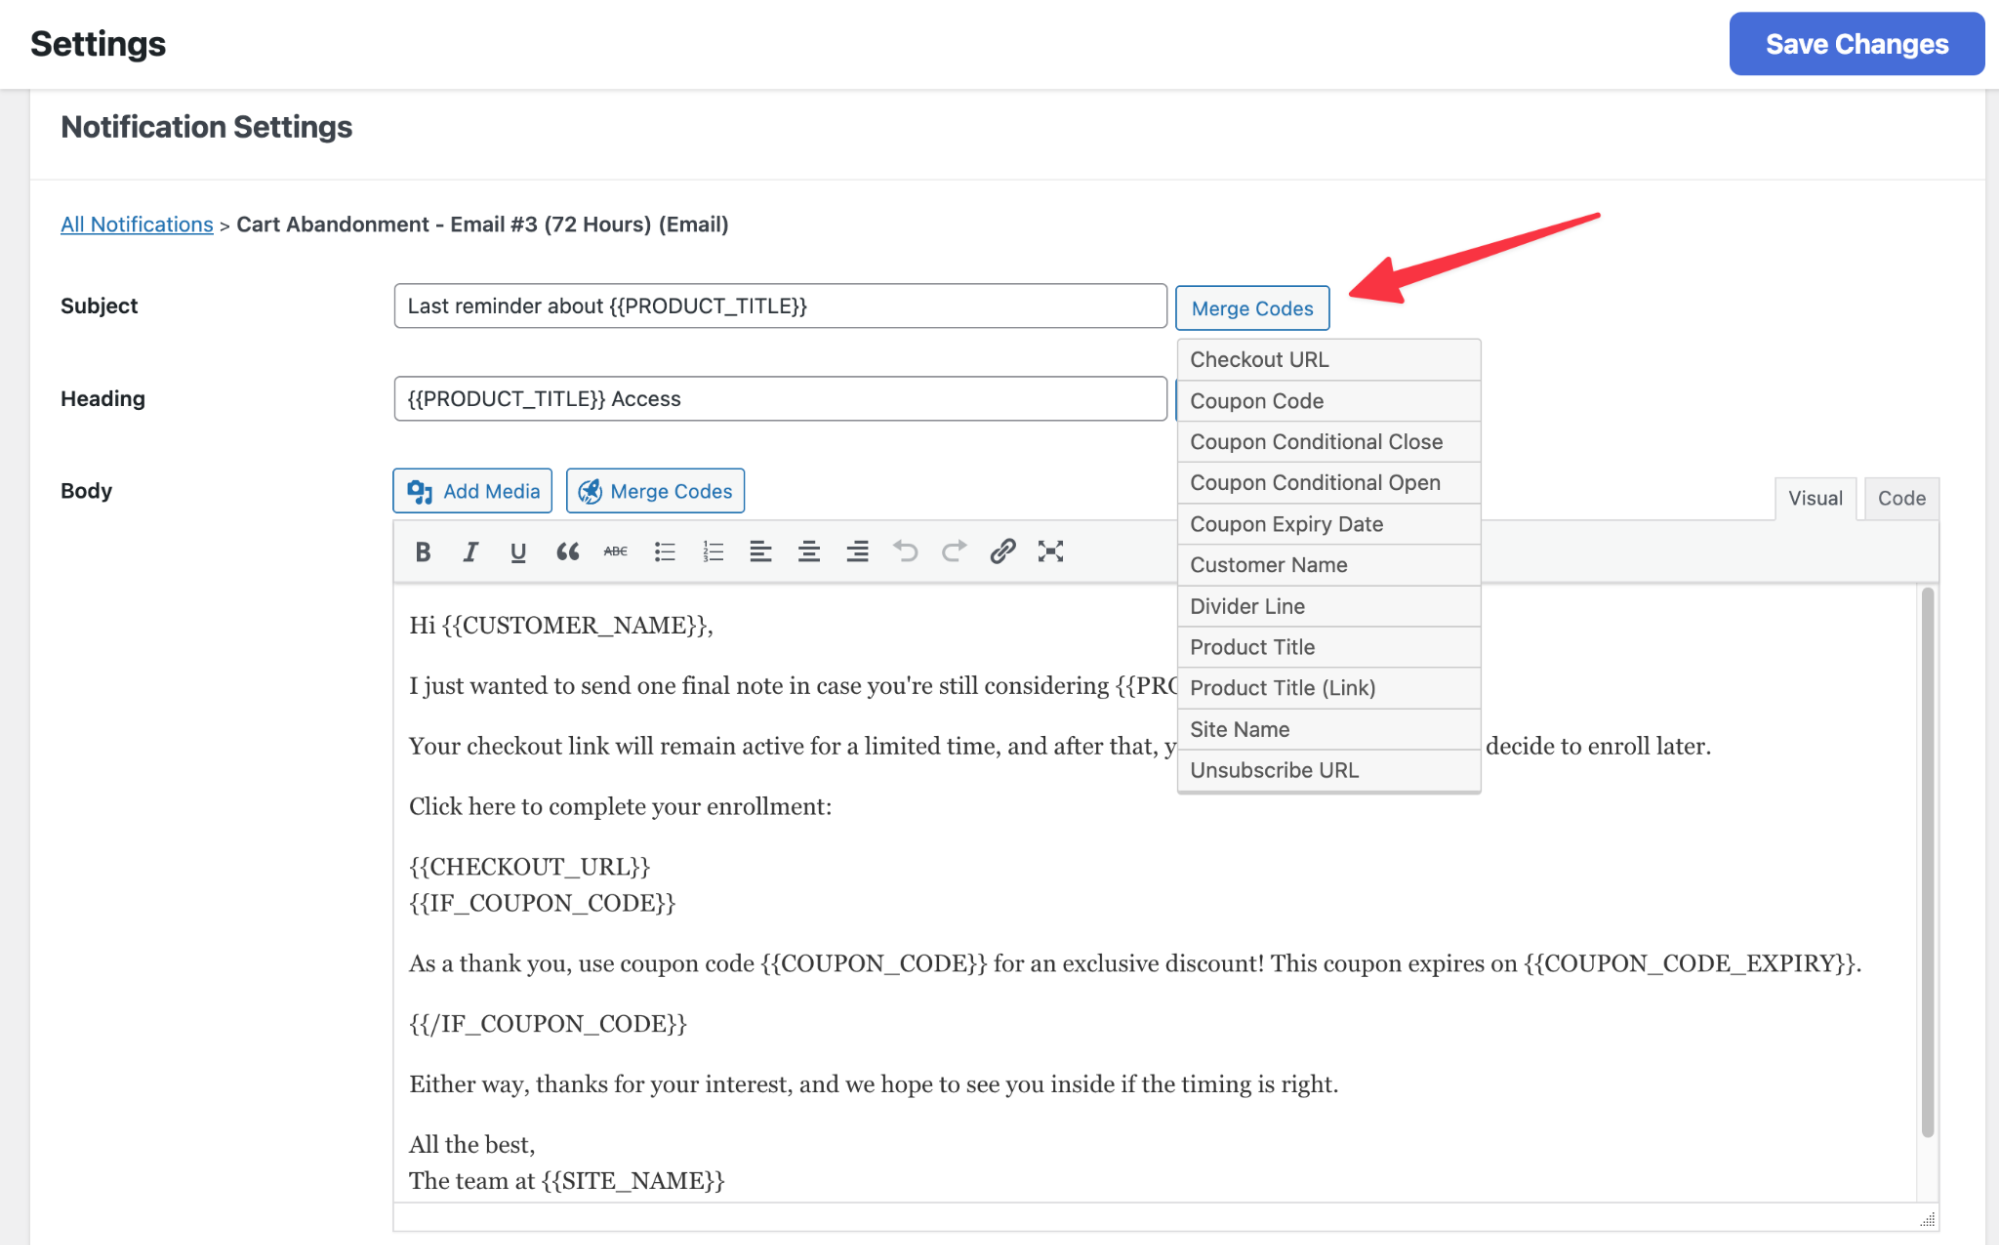
Customize each recovery email so the messaging matches your brand voice and feels consistent with the rest of the learner experience
- Navigate to LifterLMS > Settings > Notifications.
- In the “Notifications” list, click “Cart Abandonment – Email #1,” “Cart Abandonment – Email #2,” or “Cart Abandonment – Email #3.”
- Edit the “Subject” and “Heading” fields to your preference.
- Update the text in the “Body” section.
- Use the Merge Codes button to insert dynamic information, such as the customer name or the course title.
- Click Save Changes.
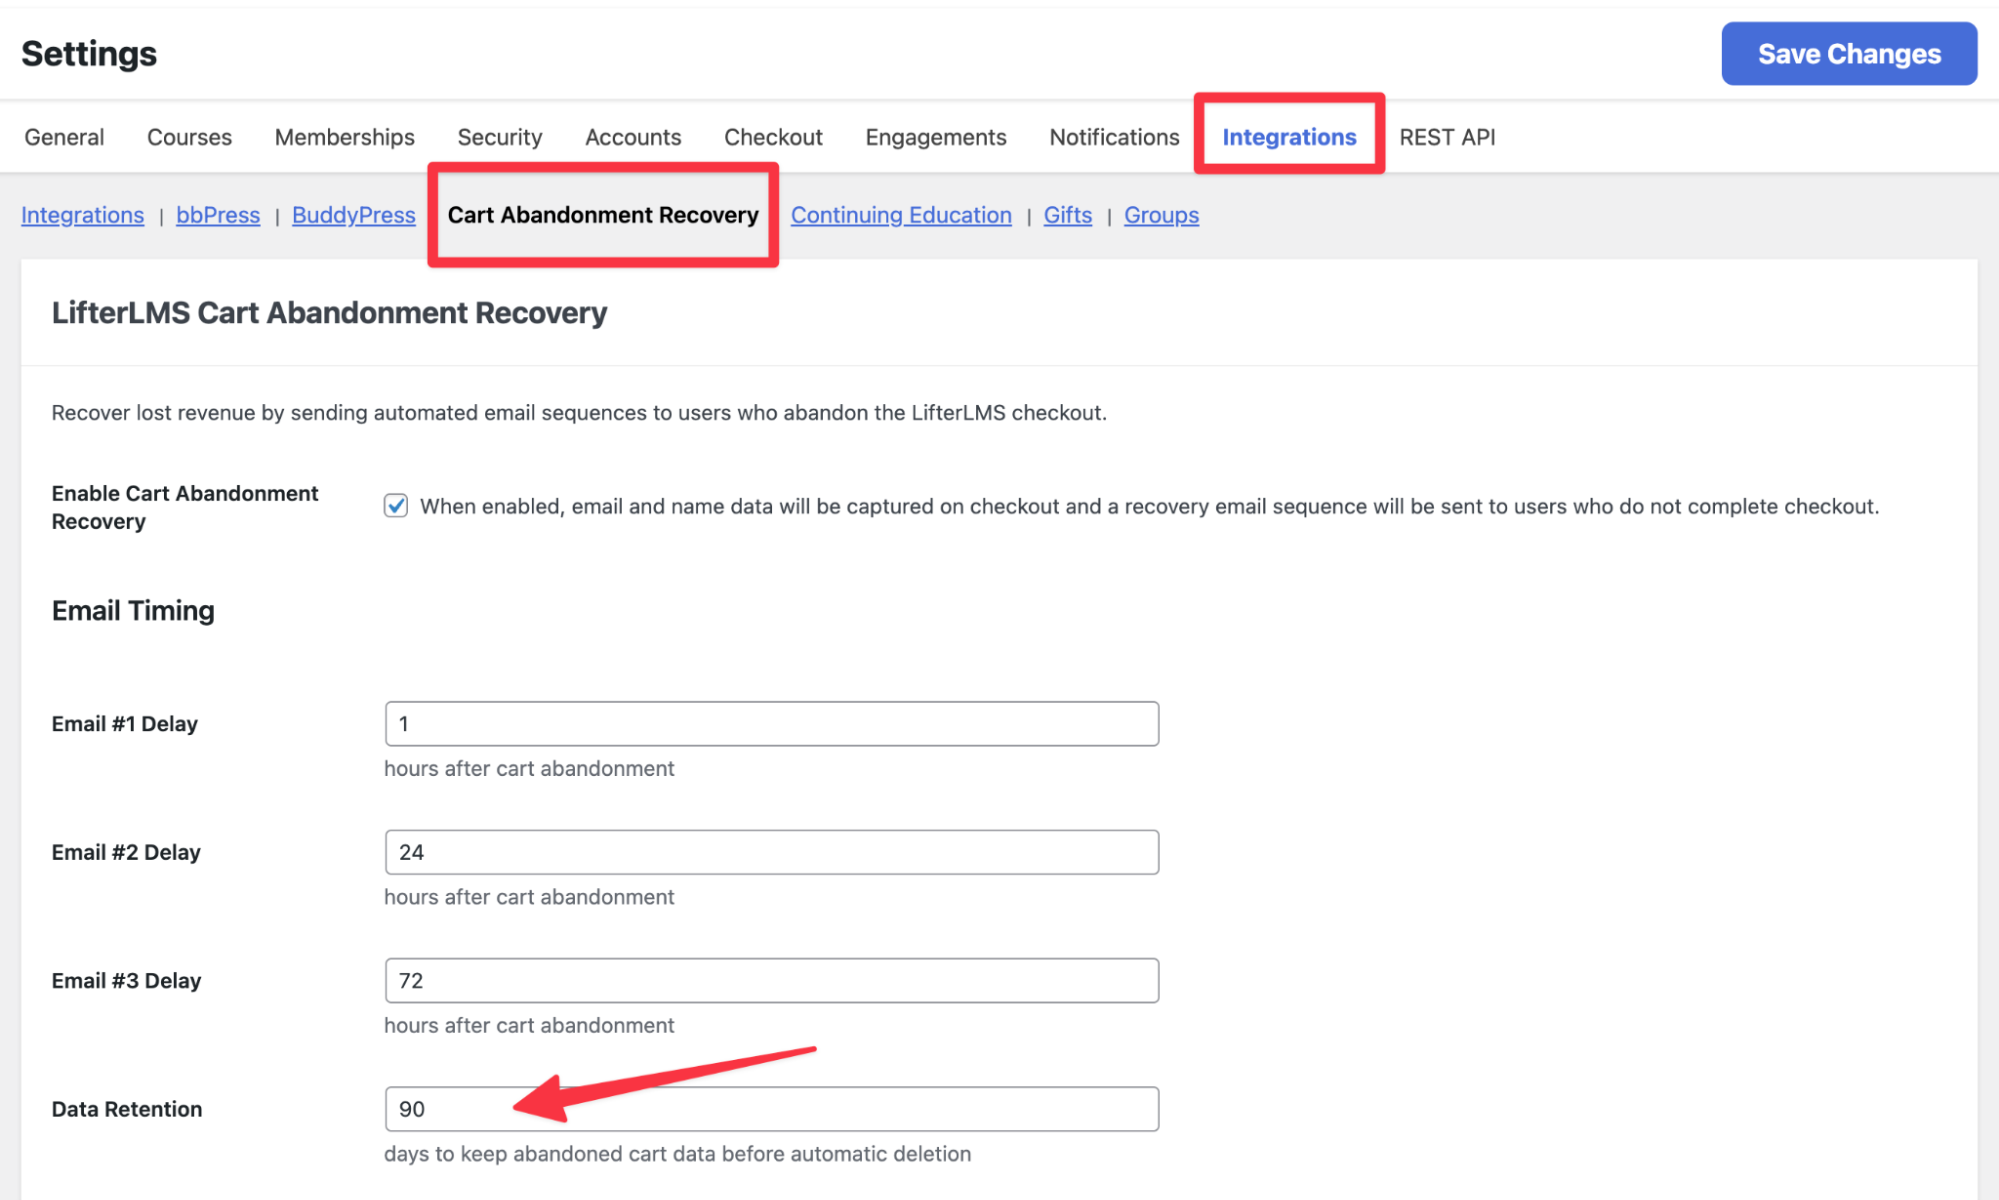
LifterLMS stores contact details for incomplete checkouts. Choose how long this recovery data remains on your server before it is automatically removed.
- Navigate to LifterLMS > Settings > Integrations, then find the “Data Retention” setting.
- Enter the number of days you wish to keep the abandoned cart data.
- Click Save Changes.
Old recovery data is automatically deleted after the number of days you specify, helping keep your database clean and supporting privacy best practices.
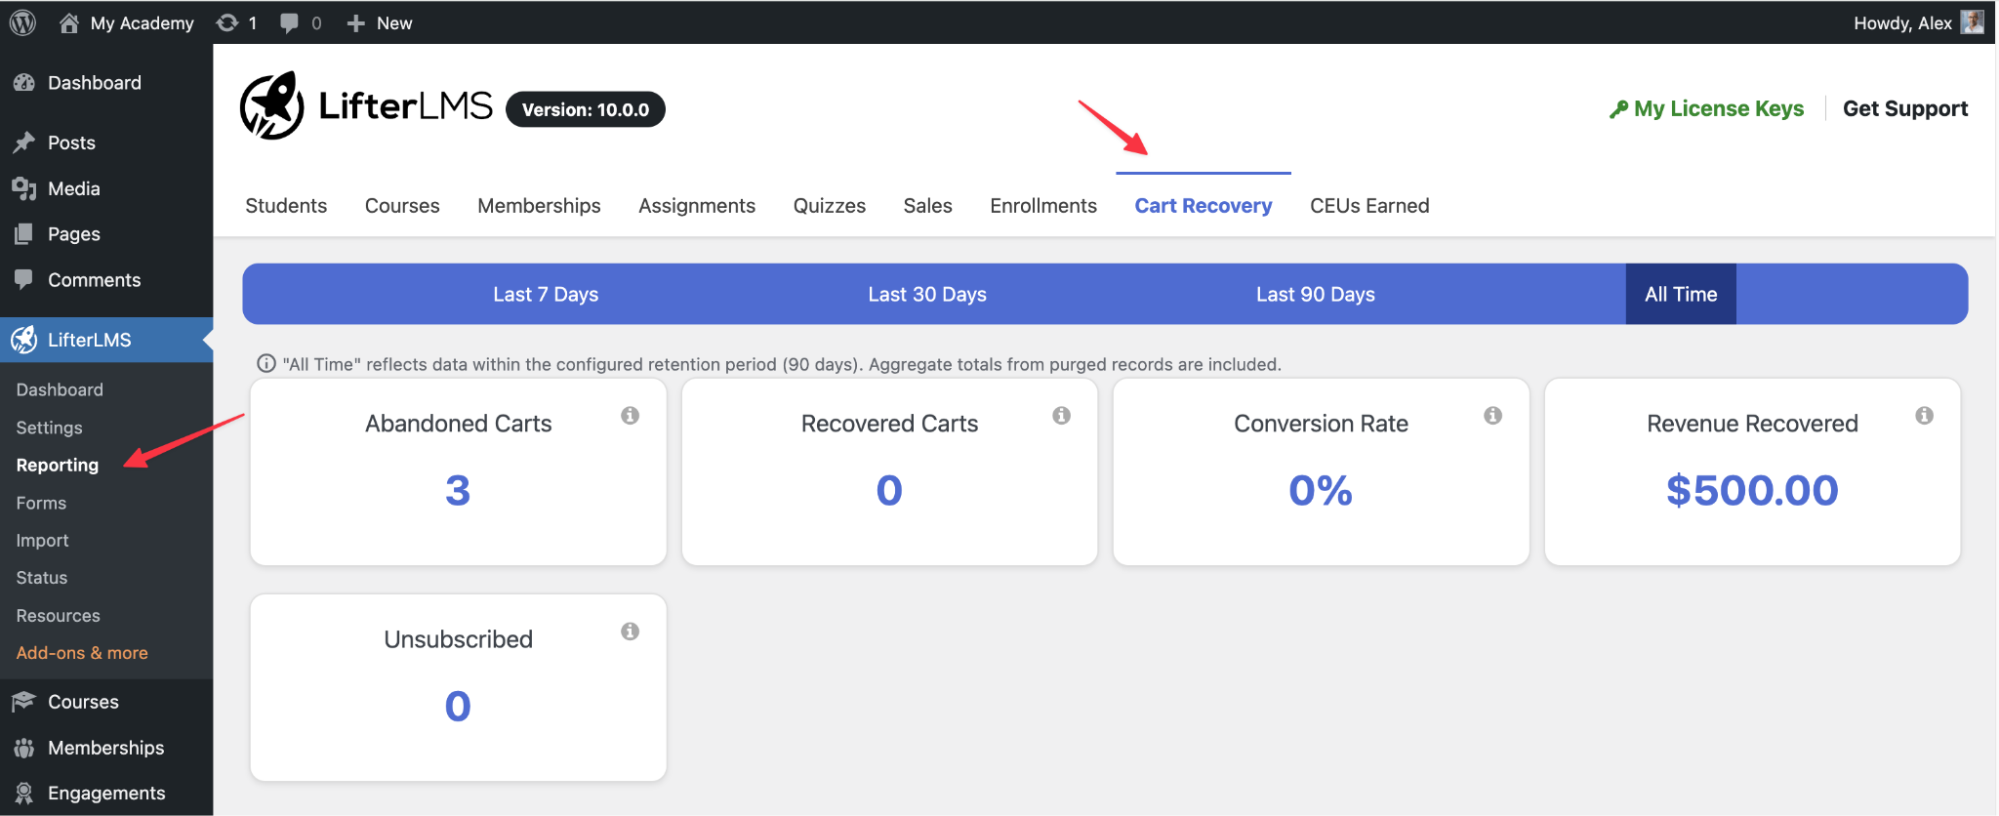
Once recovery emails are running, use the reporting dashboard to measure how much revenue you are reclaiming and how effectively your follow-up sequence is converting learners.
- Navigate to LifterLMS > Reporting > Cart Recovery.
- Review the “Revenue Recovered” stat to see how much money the add-on has earned.
- Check the “Conversion Rate” to see the percentage of learners who eventually completed their purchase.