FAQ: How to Send an Email When a Student Enrolls in a Specific Course
This guide explains how to use merge codes in email notifications and shortcodes in engagements within LifterLMS. These tools enable you to personalize content dynamically and enhance the user experience.
How to Use Merge Codes in Email Notifications
Follow these steps to add merge codes in email notifications:
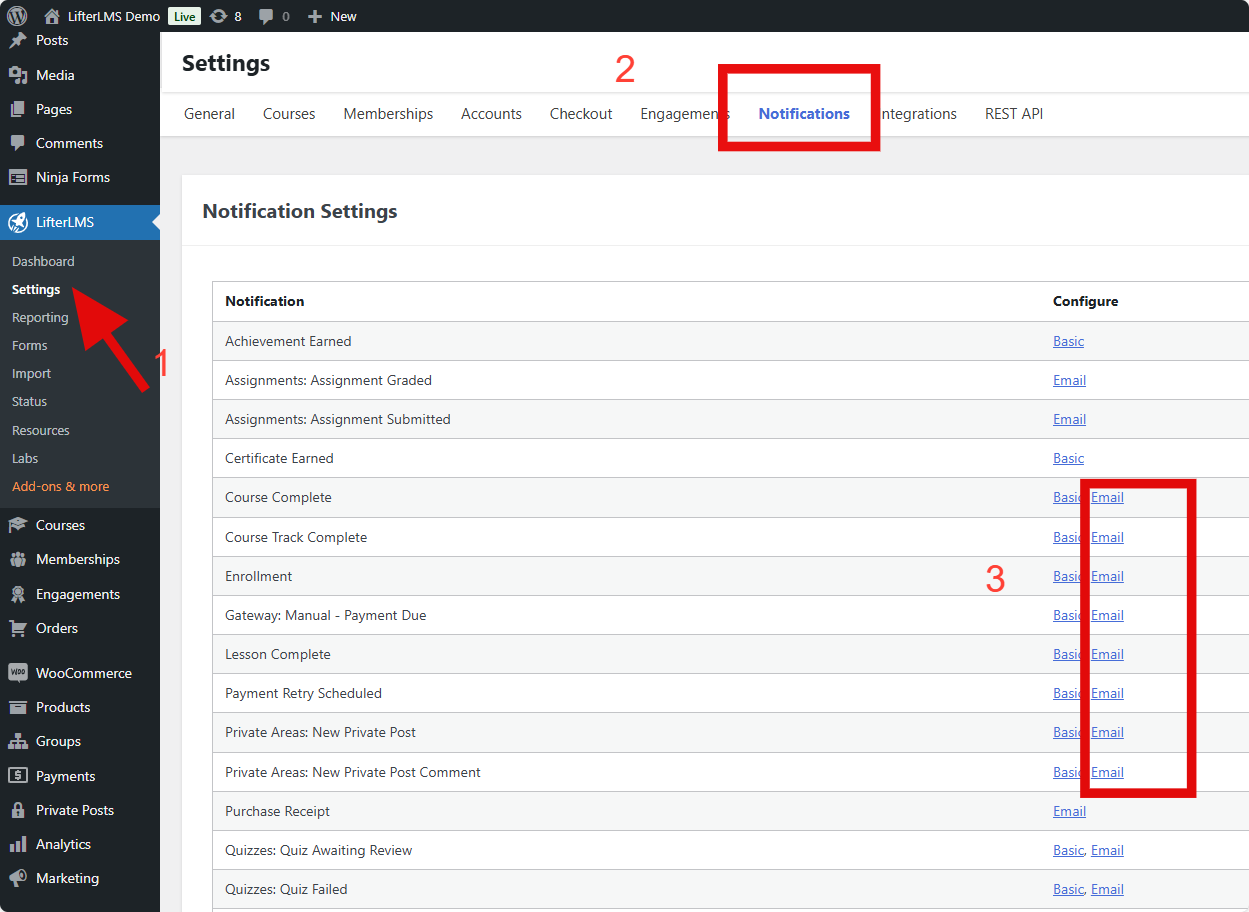
1) Access Notification Settings:
- Go to your WordPress Dashboard > LifterLMS > Settings > Notifications.
2) Select the desired notification type and click on Email (notifications marked as “Email”).
3. Insert Merge Codes:
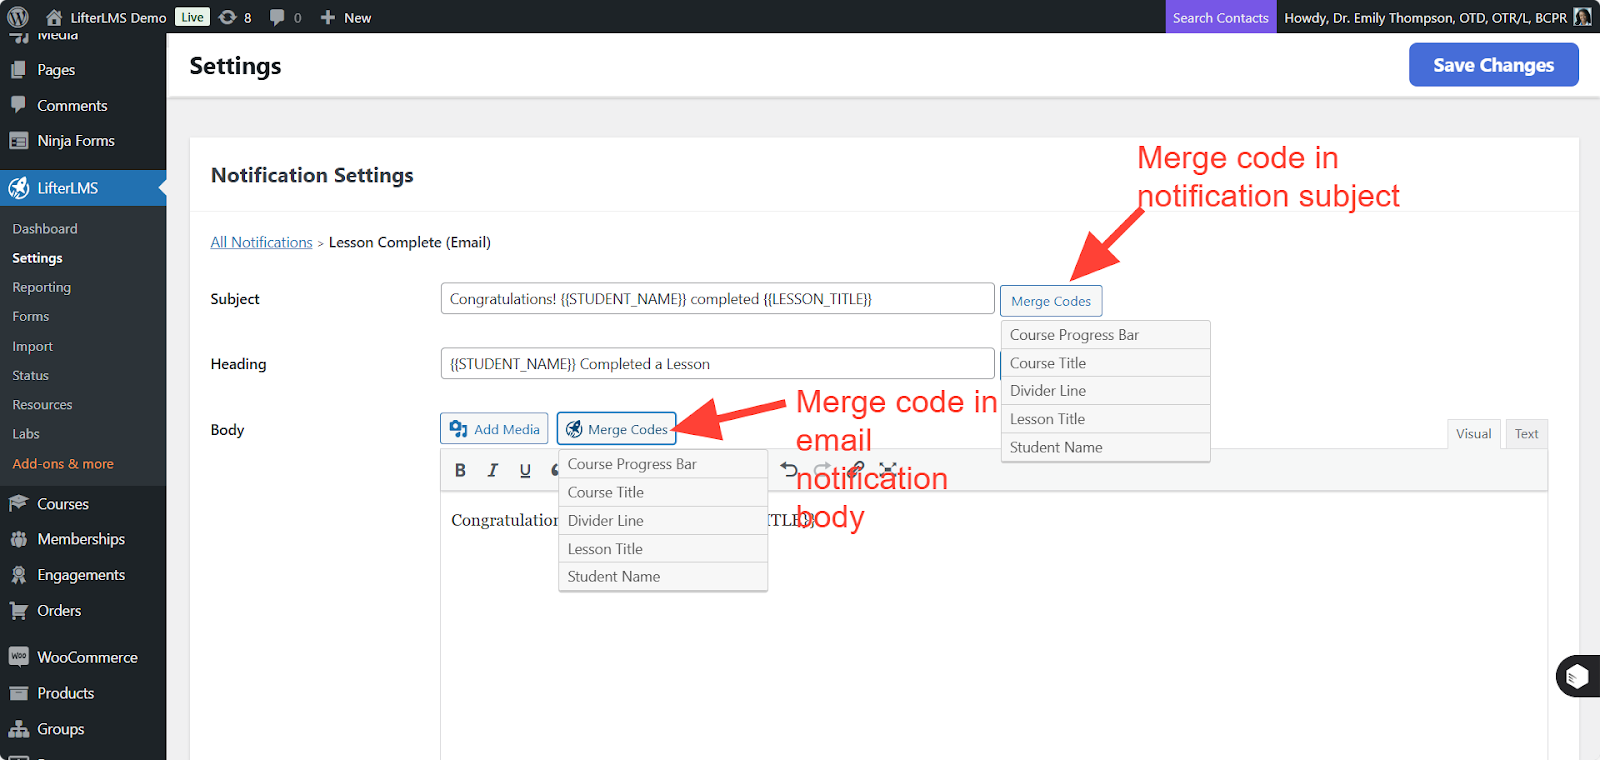
- Open the email editor.
- In the email body, add your content and insert merge codes.
For example: Hi {{STUDENT_NAME}}, Welcome to the course!
- Click on the Merge Code option.
Select a Specific Merge Code:
Choose the desired merge code. For example:
- {{STUDENT_NAME}}: Displays the student’s name.
- {{LESSON}}: Displays the lesson name.
Merge codes can also be added in the “Subject” and “Heading” fields.
Save Changes:
- Click Save Changes after modifying the email content.
Note: LifterLMS includes a default email body. You can modify it based on your requirements.
To create a custom email template with merge codes, follow these steps:
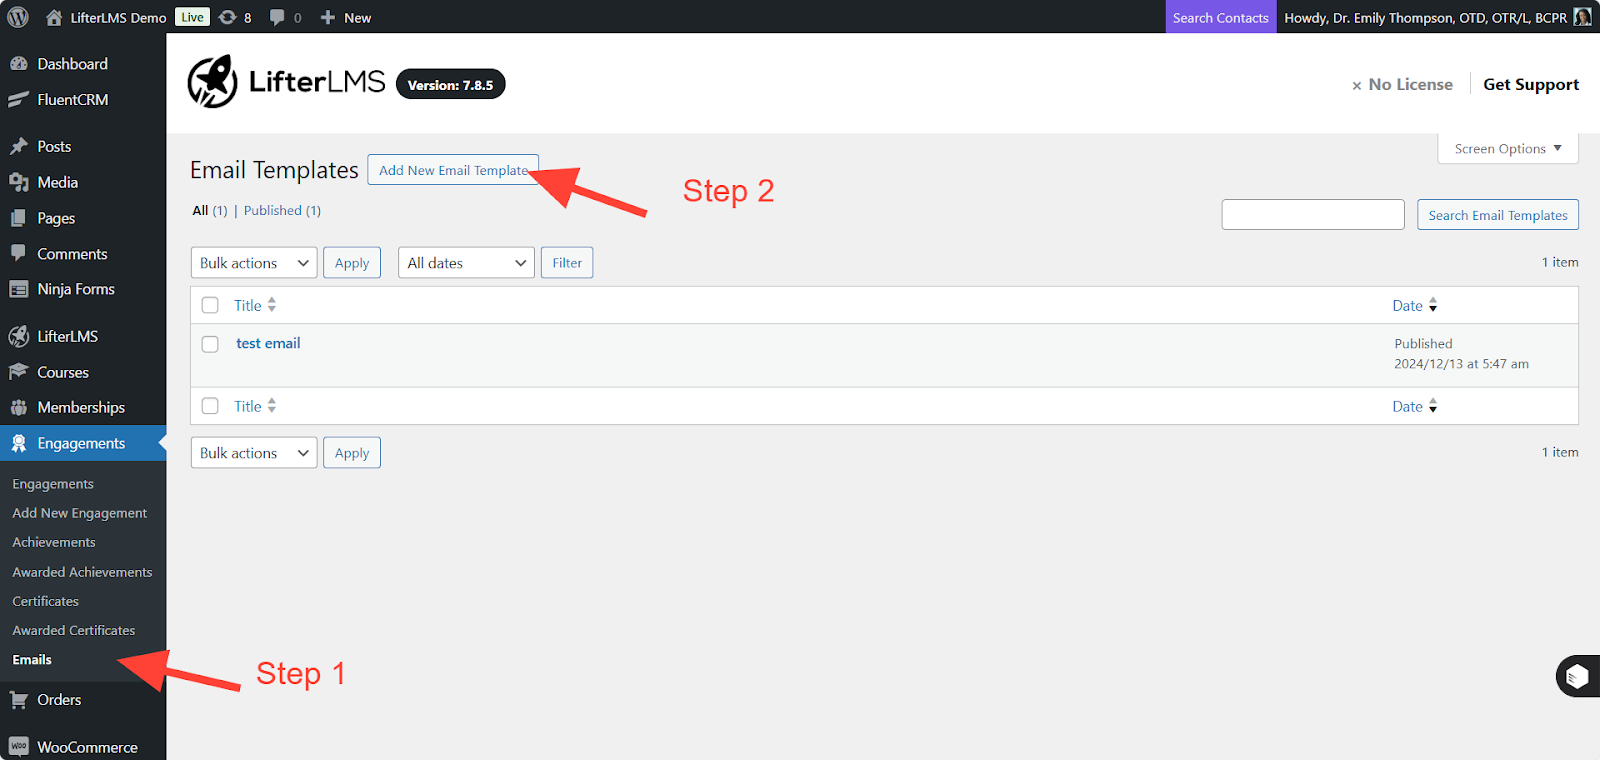
1. Navigate to Email Templates:
- Go to your WordPress Dashboard > LifterLMS > Engagement > Emails.
- Click Add Email Template to create a new custom email.
2. Insert Merge Codes:
- Add a title for your email template.
- In the email body, add your content and insert merge codes.
- Click on the Merge Code option.
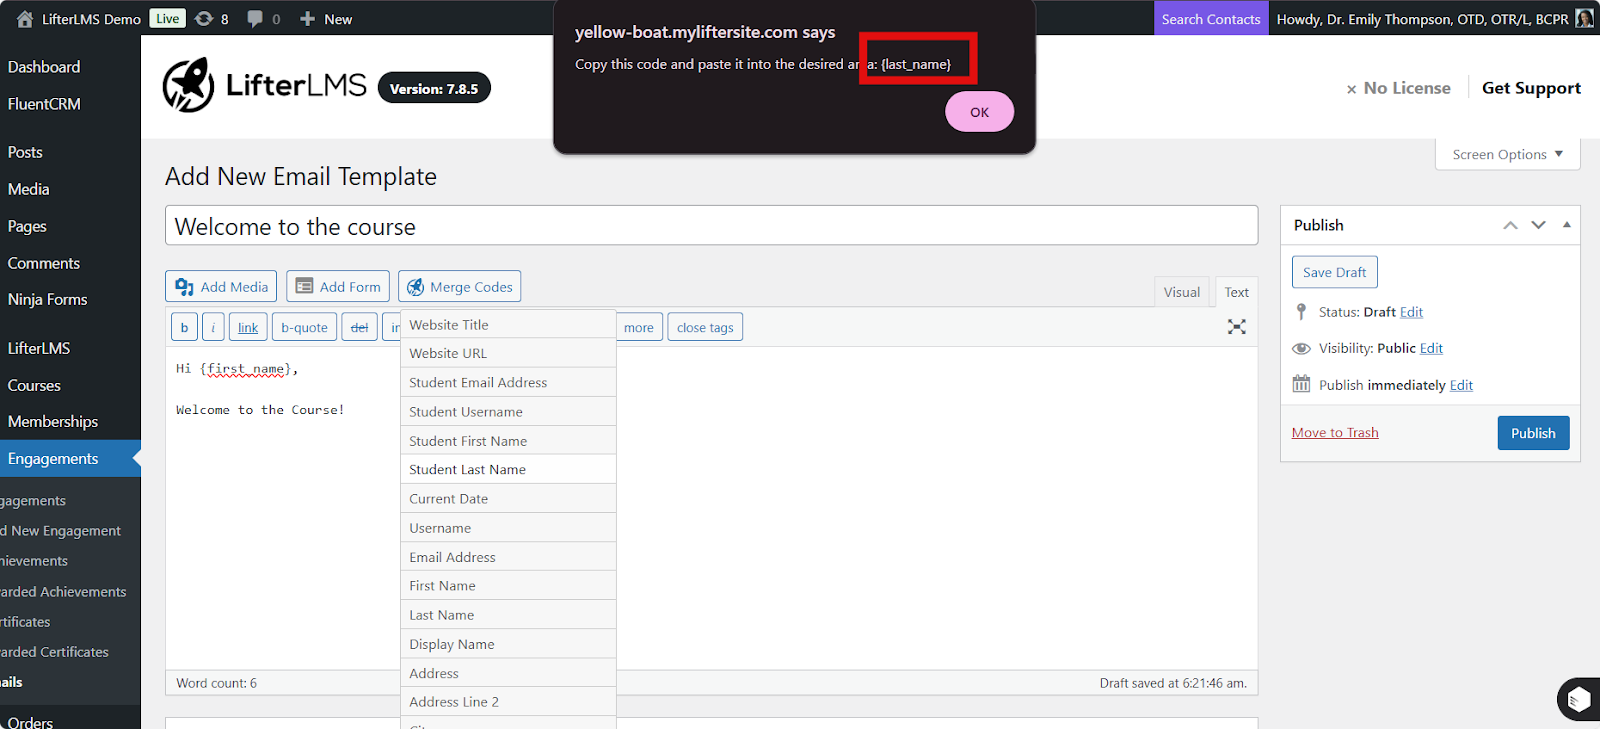
3. Copy and Paste Merge Codes:
- Select a specific merge code. For example: {first_name} or {last_name}.
- A pop-up will appear saying: “Copy this code and paste it into the desired area: {desired_merge_code}.”
- Copy the code and paste it into the email body.
4. Add Additional Details:
- Add an email heading, subject, and other relevant details.
5. Publish:
- Click Publish to save your email template.
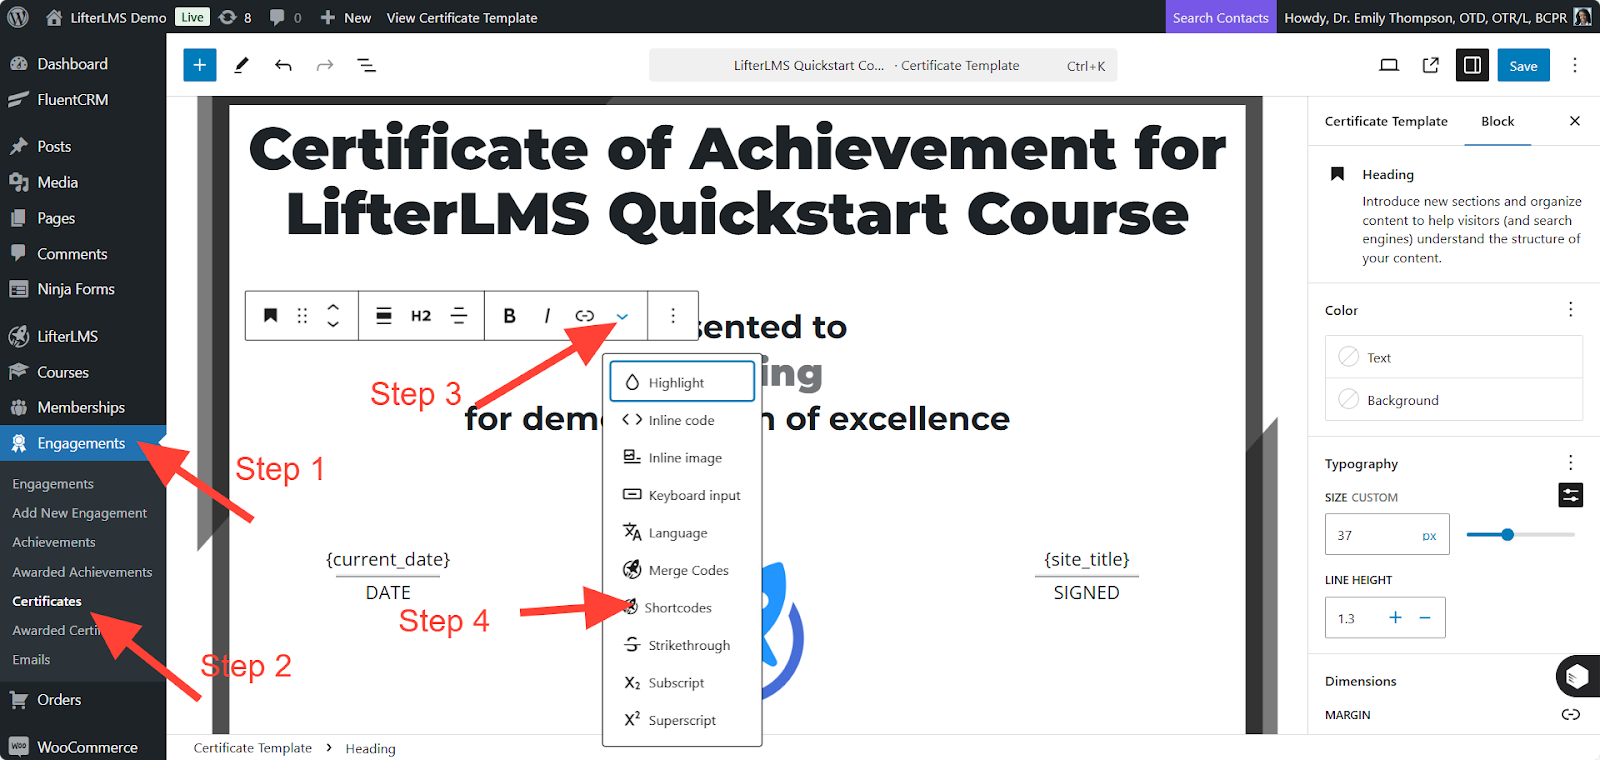
Shortcodes can only be used in Certificates under Engagements. Follow these steps:
1. Create an Engagement:
- Go to LifterLMS > Engagements.
- Select the engagement type (e.g., Certificate)
2.Insert Shortcodes:
In the content editor of the Certificate, add shortcodes to display dynamic information.
Examples:
- [llms-user first_name]: Displays the student’s first name.
- [llms-user user_email]: Displays the student’s email address.
Note: Various types of shortcodes are available for Certificates. Refer to the LifterLMS Shortcodes Guide for more options.
3. Save Changes:
- Once you’ve customized the certificate content, click Save Changes.


