How to Create an Email Engagement
Video Tutorial:
This documentation will explain how to create an LMS email engagement in LifterLMS.
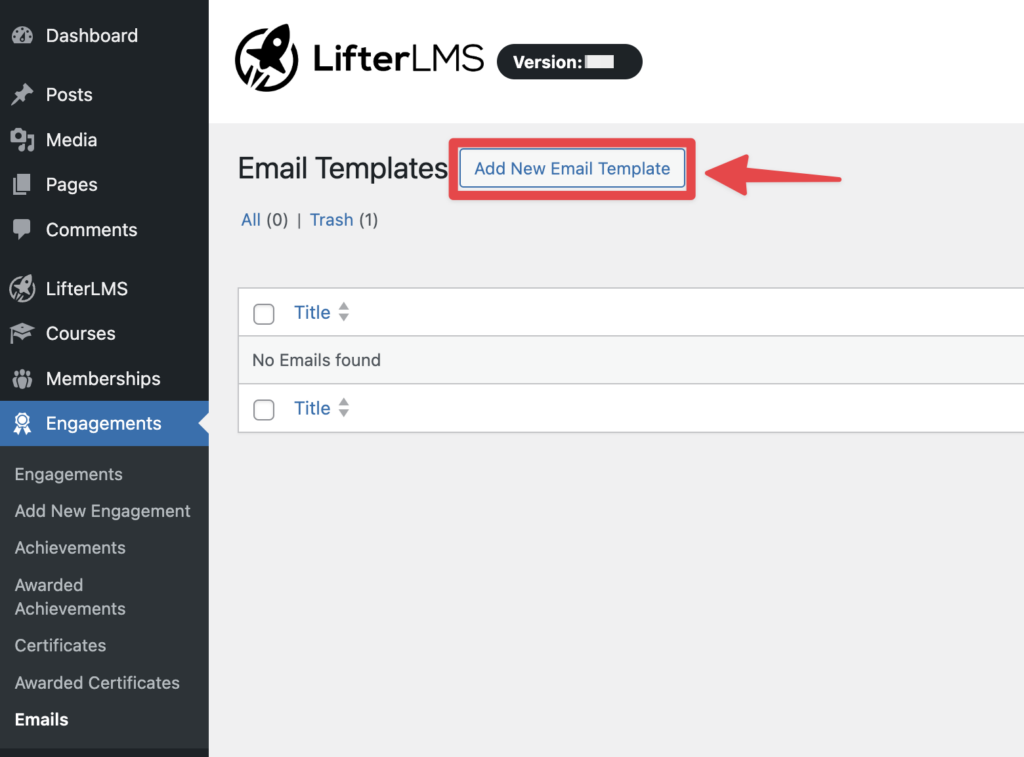
Step 1. In your WordPress admin, go to Engagements > Emails, then click Add New Email Template
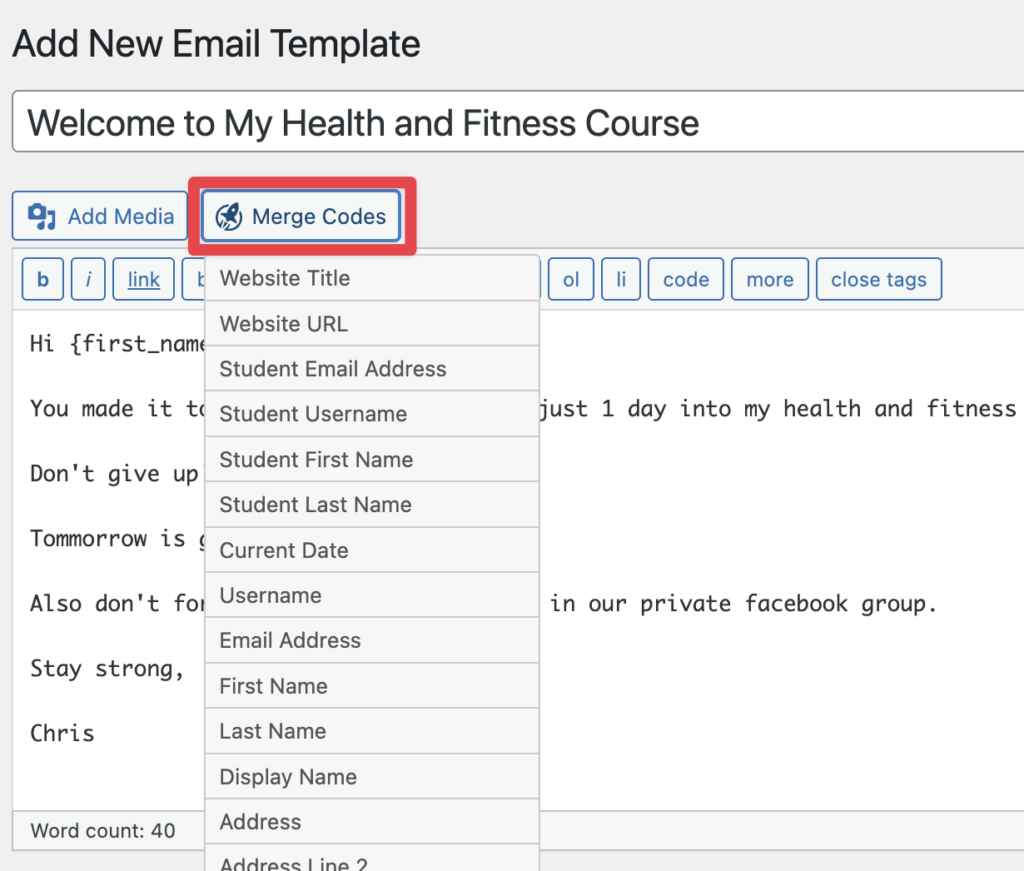
Step 2. Enter a name for your email (for internal use) and fill in the content of your email in the text editor box.
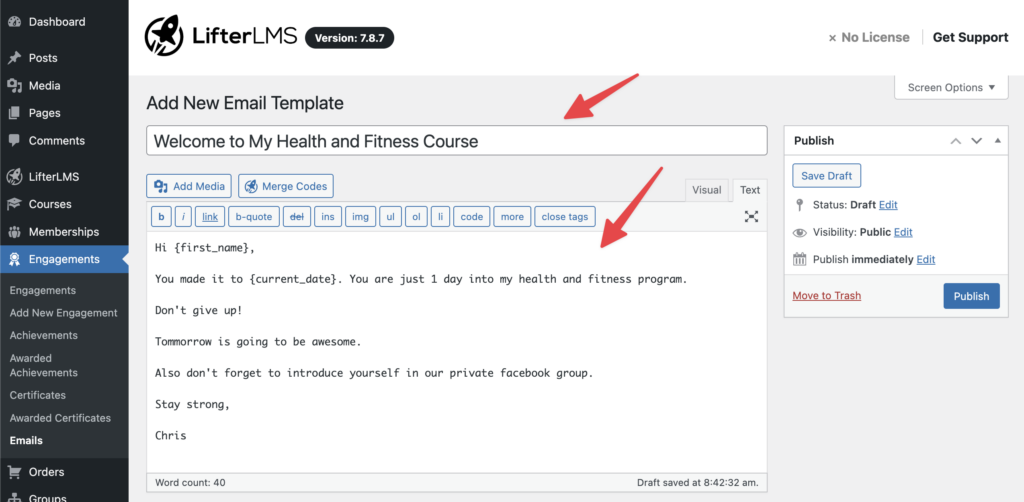
Note that you can click on the Merge Codes button to insert placeholders for values in the text editor field. These merge codes will be replaced with the actual values when the email is sent.
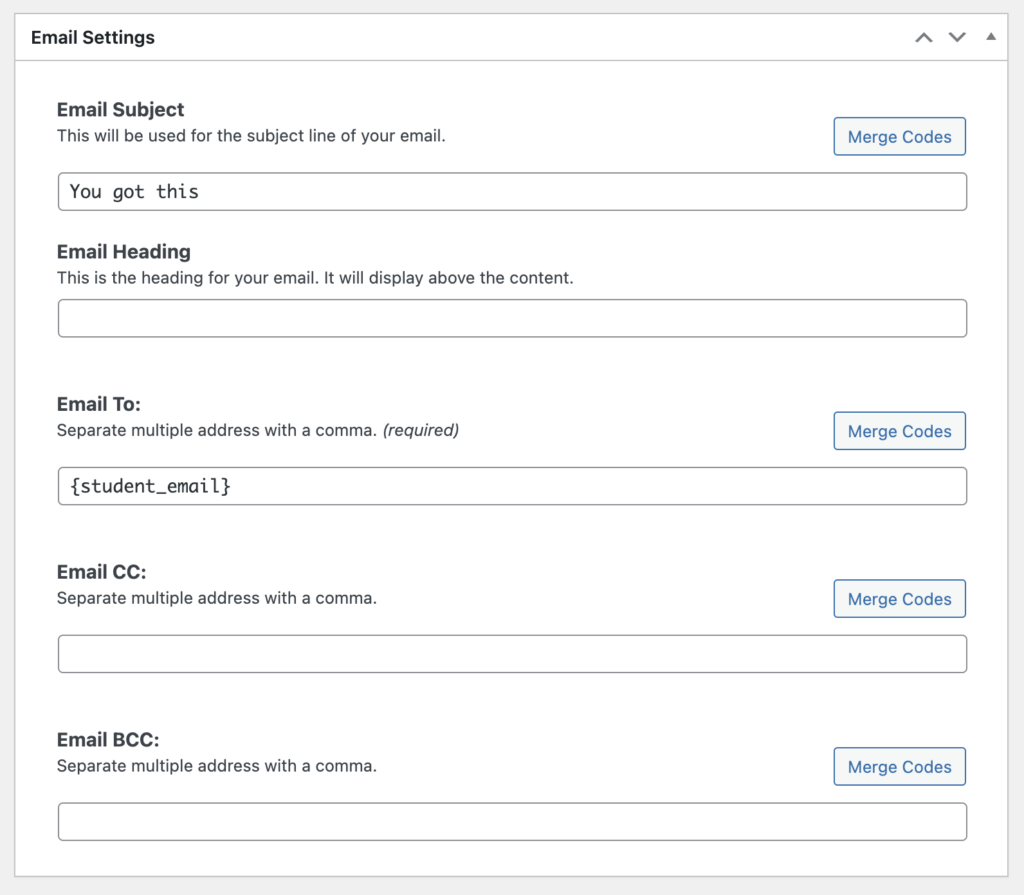
Step 3. Enter a subject for the email along with any other settings you’d like (such as carbon copying someone on the email)
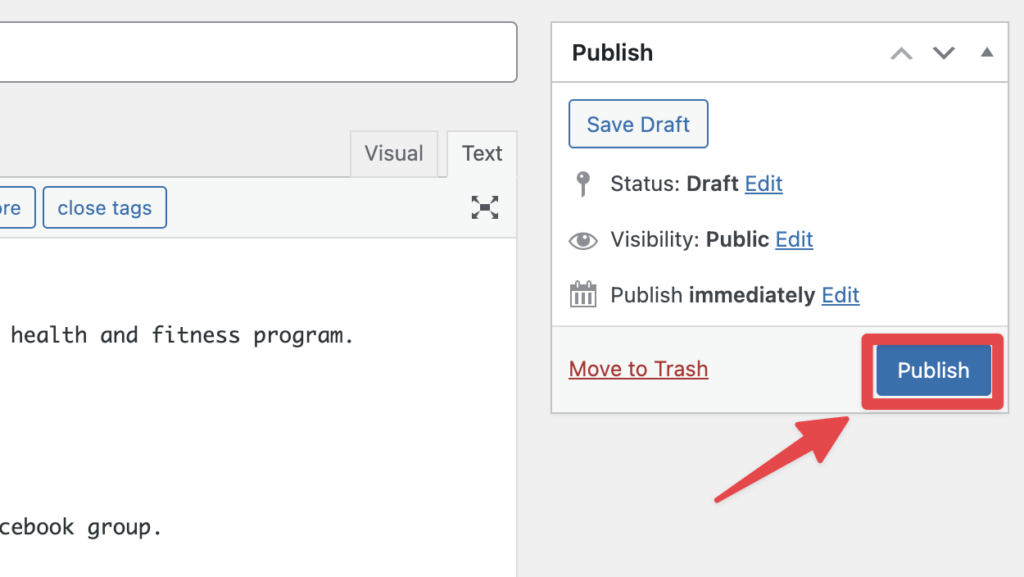
Step 4. Click Publish
Step 5. Next, you will need to add an engagement. Go to Engagements > Add New Engagement
Step 6. Enter an internal title for your engagement. Select a trigger for your engagement such as “Student enrolls in a course.” For the Engagement Type select “Send an email” and then select the email template you just created. You can also select an engagement delay if you don’t want your email sent immediately.
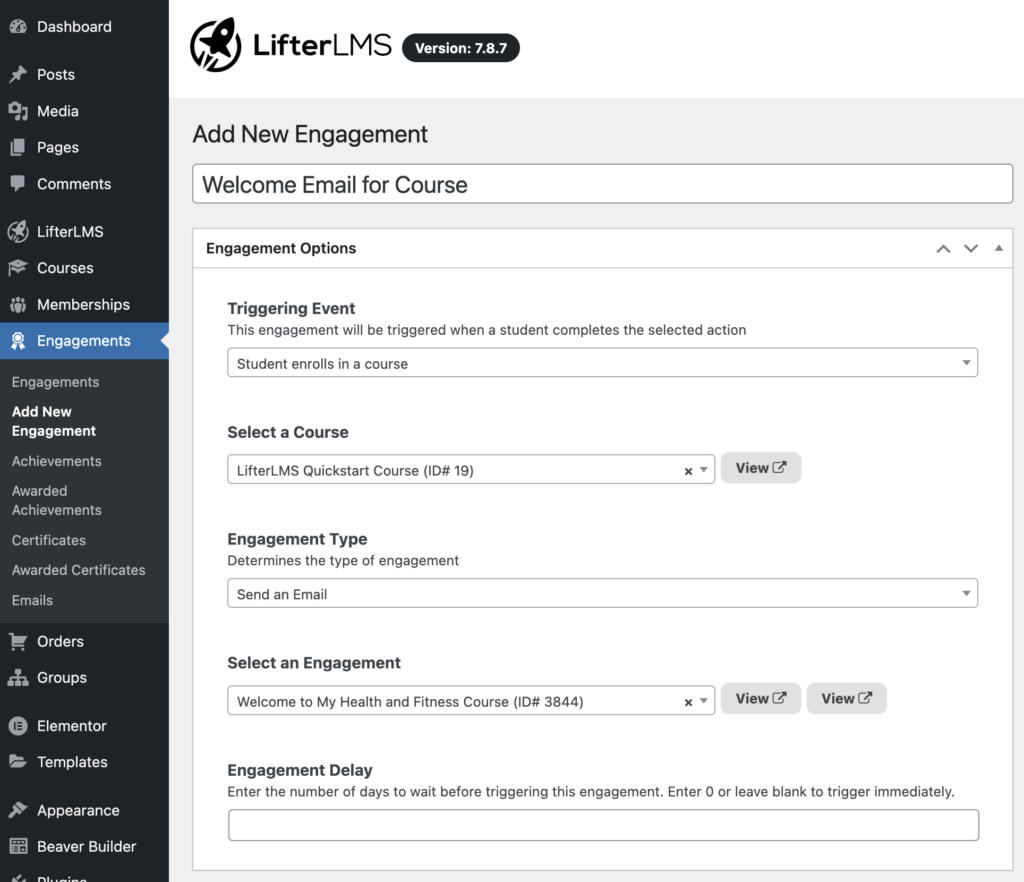
Step 7. Click Publish when you are done.
That’s it! Now your email will send when the engagement trigger happens.
Be sure to read our guide on understanding and fixing email issues in LifterLMS to ensure these emails are received by your students.