If you sell online courses, chances are that you have downloadable documents and resources to go with them. You can easily make these available to your students by using LifterLMS with the Document Library Pro plugin by Barn2. This easy-to-use WordPress plugin lets you list documents or other resources on your online course and lesson pages.
In this tutorial, we’ll show you step-by-step how to list documents and resources in your online courses using Document Library Pro.
Why You Should List Resources in your Online Courses
As an online course instructor, there are plenty of reasons why you should list documents, resources, and other downloadable files in your online courses.
- Provide further learning opportunities for students. You can provide learners with further learning opportunities either at the start or end of each lesson.
- Offer bonus learning material. You might consider offering students dedicated material for further reading at the end of the course. This could also be an introduction to other online courses you offer.
- Engage learners. You can create worksheets to go with your online courses to enhance the learning experience.
Depending on the type of online course you’ve created, you can create different types of documents and resources to go with it. Some of the most popular types of resources that you might consider listing in your online course lessons include:
- Downloadable handouts
- Worksheets
- Links to useful websites
- Templates
- Checklists
The Document Library Pro plugin makes it easy to add documents and resources to WordPress and display them on the front-end in a neat and organized way.
How to List Documents in your Online Courses
Here, we’ll show you step-by-step how to list documents and resources in your online course. For this tutorial, you’ll need LifterLMS and the Document Library Pro plugin.
Step #1: Install LifterLMS
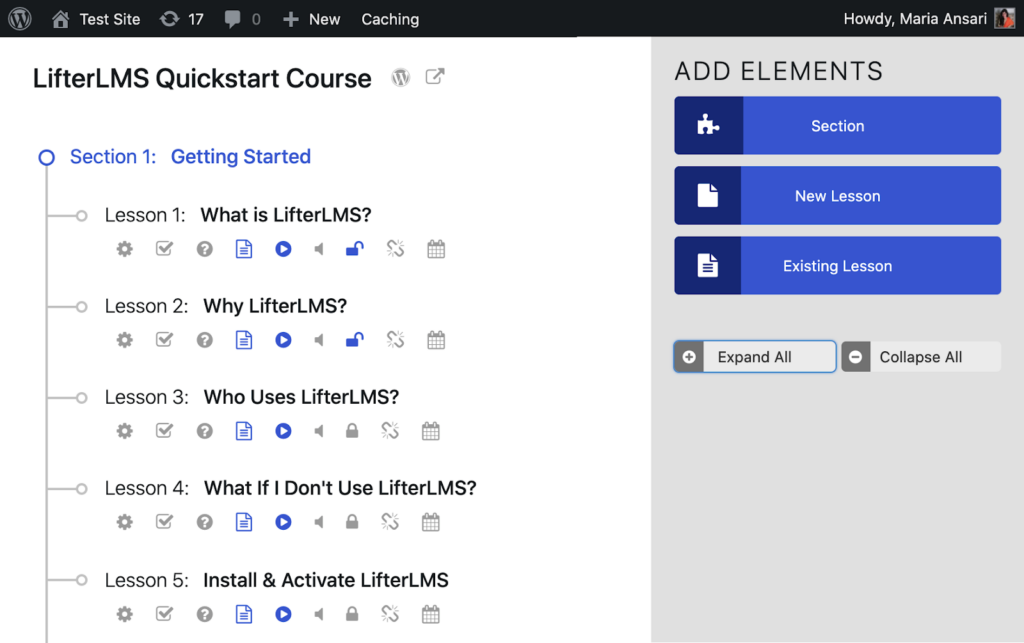
Install LifterLMS on your WordPress website if you haven’t done so already. Once that’s done, create a course and add some lessons to it. You can do this using LifterLMS’ course builder. It might look something like this:
If you’re adding resources to an existing online course, you can skip this step.
Step #2: Install the Document Library Pro Plugin
Get the Document Library Pro plugin and install it on your WordPress website. You’ll receive the plugin files along with a license key in a confirmation email.
The first thing you need to do is activate your license key and configure the plugin’s settings. To do this, head over to Documents → Settings from the WordPress admin panel and click on the General tab.
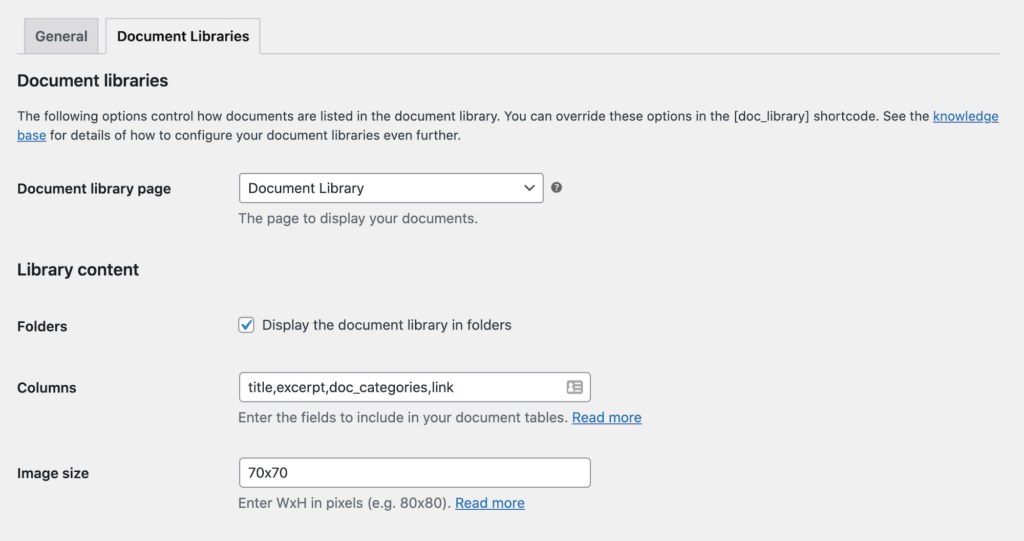
From the same screen, click on the Document Libraries tab. You can choose which columns to include in the lists of resources on the front-end. You can also decide whether you want to display download buttons or file type icons for each resource.
Enable the ‘Folders’ option if you plan to list documents from more than one category at a time, or if you want students to have to click on a folder icon in order to view the list of resources. If you disable folders then the resources will be listed as a single table on the course or lesson page, instead of within a collapsible folder.
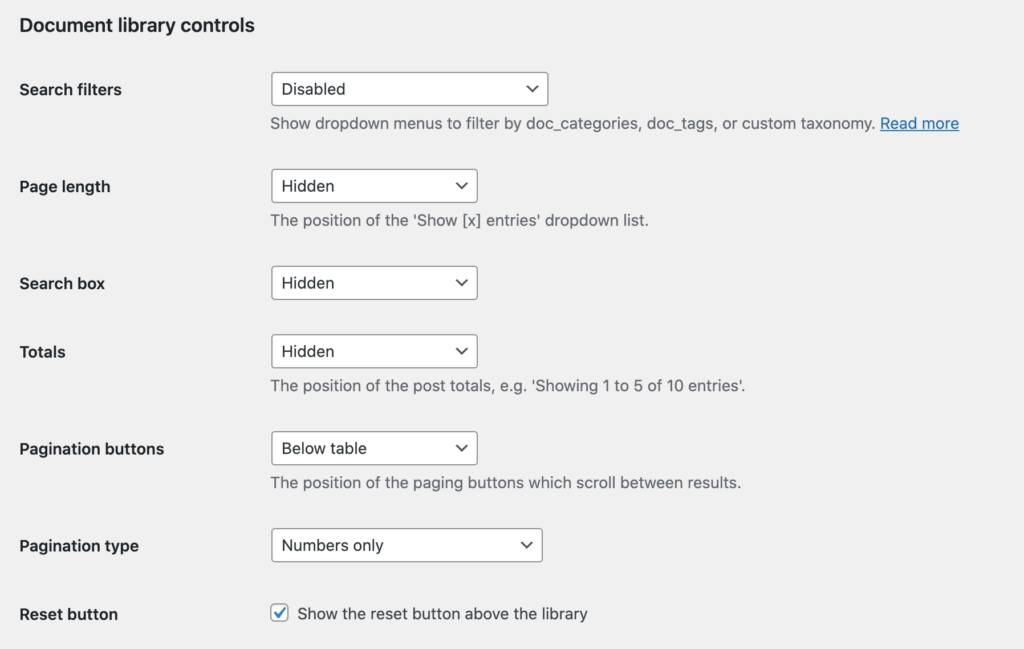
Generally speaking, it’s a good idea to disable elements such as the search box, filters, and the total number of documents if you’re only listing a few resources in each table.
All of these options can be controlled centrally on the settings page or in the shortcode that you use to list resources in each course or lesson. You can use the shortcode options to enable certain features on some pages and not others. For example, you might want a simple list of resources on individual lesson pages, while providing a central resource library with search box and filter dropdowns on the main course page.
Step #3: Create Categories for Documents and Resources
Go to Documents → Categories from the dashboard and create a category for each lesson where you plan to list resources. This will help you keep documents and resources organized on the back-end.
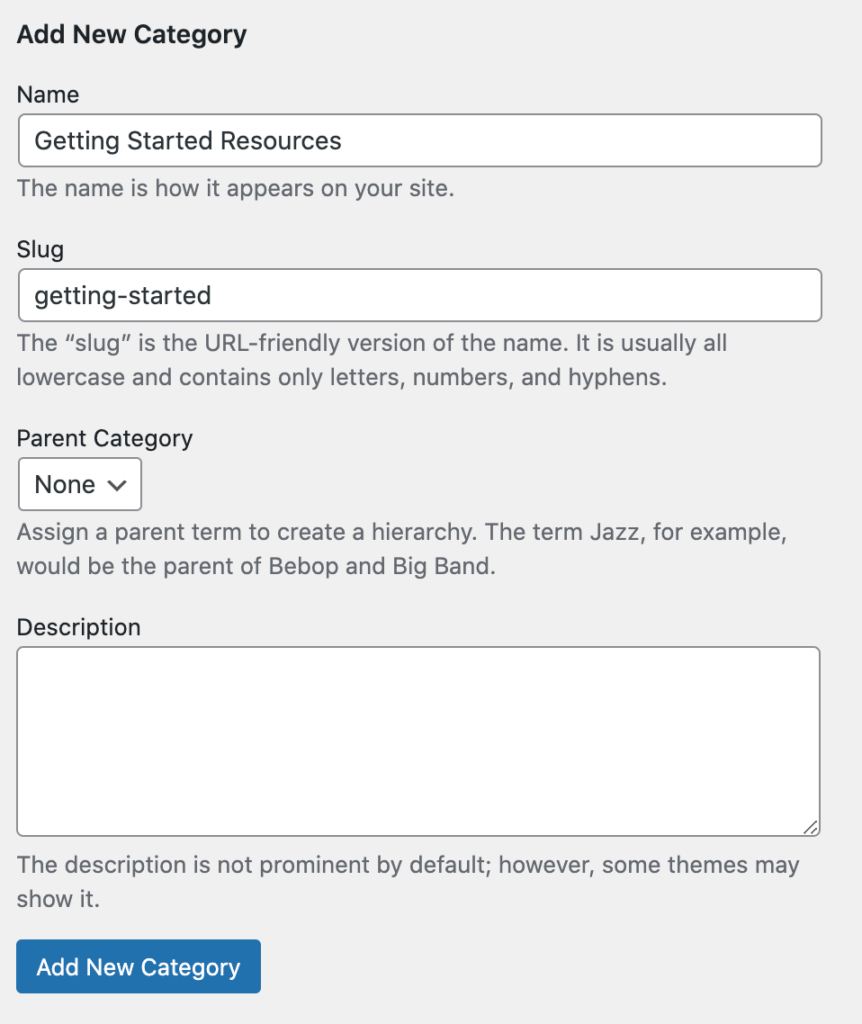
The categories you create will work like folders. So, for example, if you want to add resources to the first lesson in your online course, you could call it something like Getting Started Resources. This category of resources might contain a document with links to useful pages and websites and a downloadable checklist or roadmap for learners.
Similarly, if you’re compiling resources for learners to check out after they’ve completed your online course, then you can add it to the last lesson and call it something like The Next Steps.
Alternatively, you can create a category for each course, with sub-categories for each lesson. This makes it easy to list different resources on each lesson.
The Document Library Pro plugin comes with tags as well as categories, so you can also tag different resources with information such as their topic or lesson.
There are lots of ways to structure your resources, so do whatever works best for your WordPress LMS site.
Step #4: Add Documents and Resources to your Online Course
If you want to add lots of documents to your online course, you can go to Documents → Import and add resources in bulk. Otherwise, navigate to Documents → Add New and add them one at a time the same way you would add a page or post in WordPress.
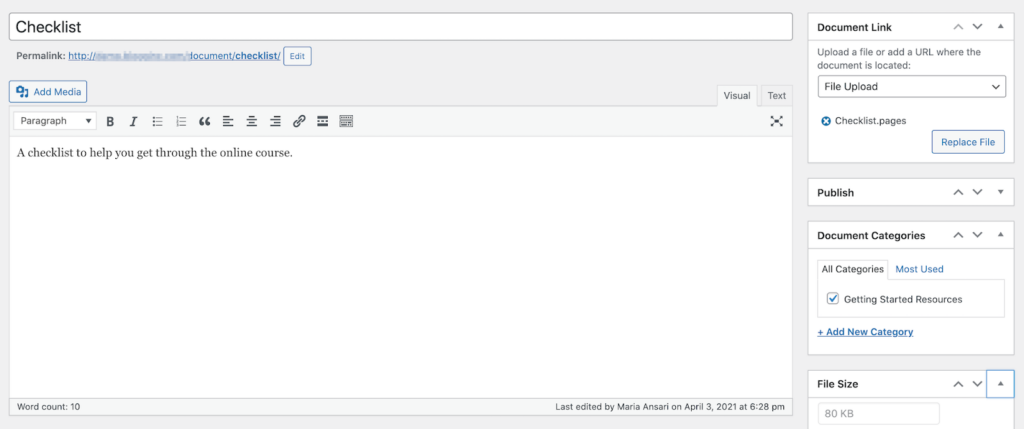
Start by entering a title for the document and a description. Next, add the actual document or file using the Document Link metabox either by uploading it or entering a URL where students can access it from. Once that’s done, add an excerpt, set the document category, and file size. The Document Library Pro plugin also lets you set a featured image. Click the Publish button to continue.
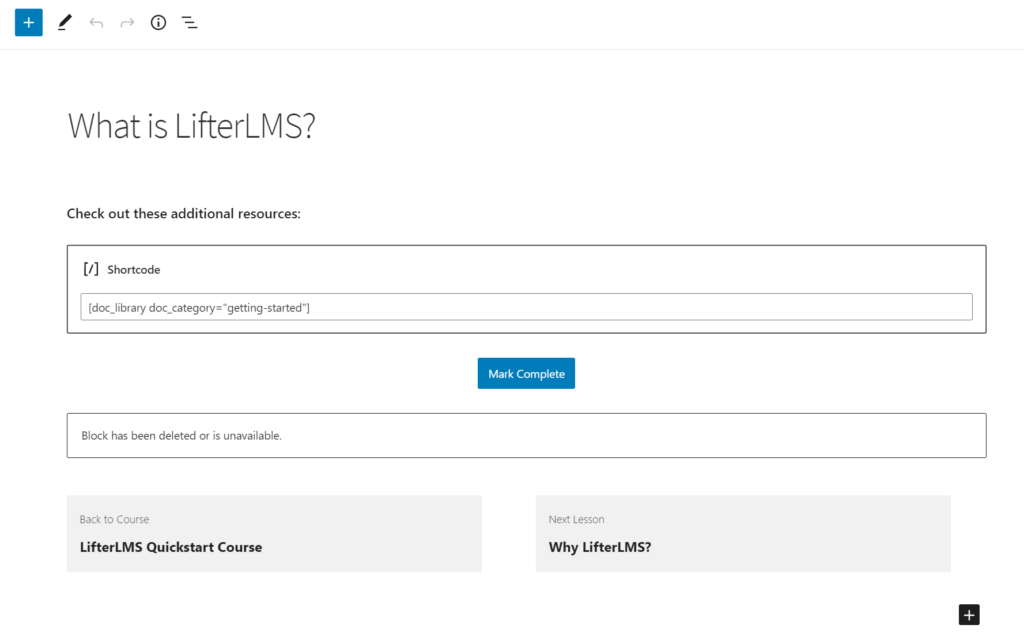
Once you’ve added documents and resources to your WordPress website, you can start listing them on course and lesson pages. Edit the LifterLMS course or lesson that you want to add the documents and resources to. Use the [doc_library doc_category=”category-slug”] shortcode to list the documents from a specific category. Simply replace category-slug with the category you’d like to add to the lesson.
It’ll look something like this on the back-end:
You can also check out the documentation for a full list of shortcode options.
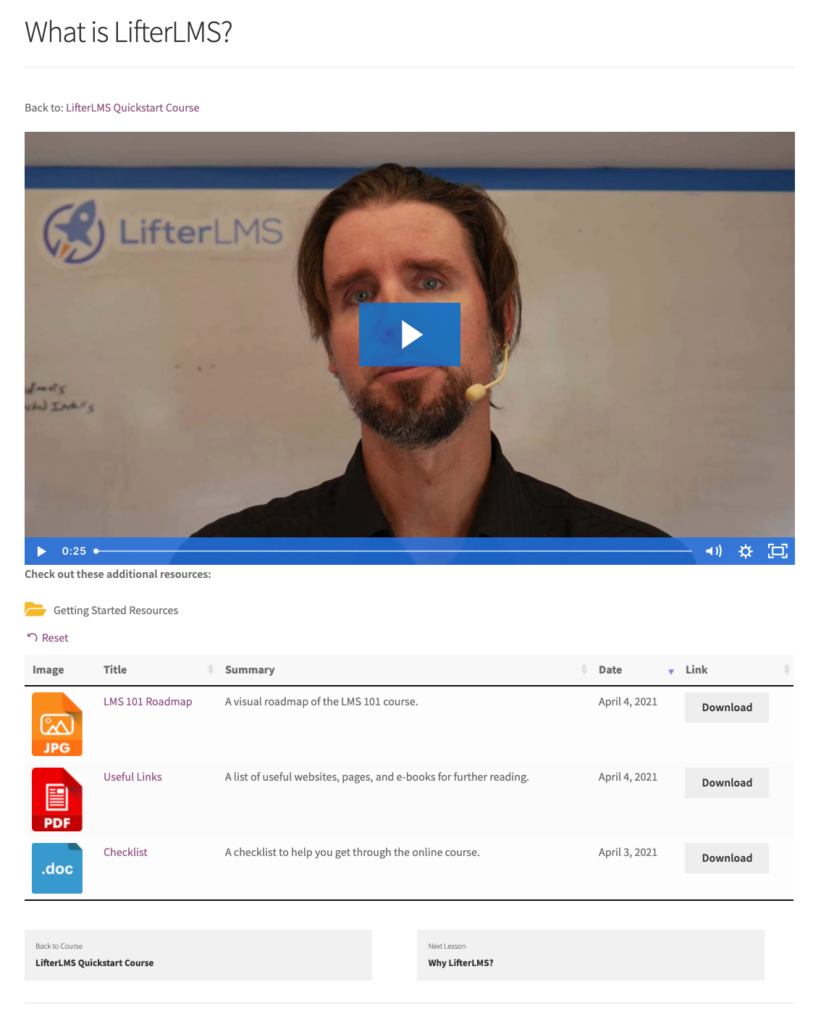
And, if you preview the lesson on the front-end, it will look something like this:
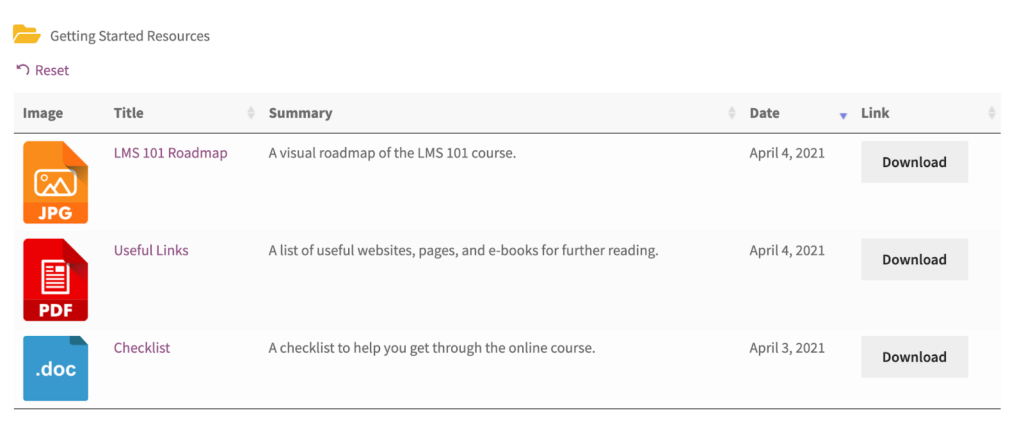
We’ve decided to display the document’s image, title, excerpt, date, and download button in this list of course resources. To do this, we entered image, title, excerpt, date, link in the Columns field on the plugin settings page.
The full lesson page will look something like this:
Add Resources to your Lessons Today!
The Document Library Pro plugin makes it easy for online course creators to add documents and resources to lessons. The best part is that the plugin integrates seamlessly with LifterLMS, which means you can add resources to your online courses in a few simple steps.
You can upload documents in bulk or one at a time. Document Library Pro lets you display different tables for each lesson. This way, you can make it easy for learners to access the correct resources for each lesson and still be able to drip feed content.
To learn more about the Document Library Pro plugin, you can take a free online course (created using LifterLMS) on how to build a document library from start to finish!
Ready to start adding documents and resources to your online courses? Get Document Library Pro today!