How to Connect LifterLMS to Your CRM
Connecting your LifterLMS to a Customer Relationship Management (CRM) platform is a powerful way to automate your marketing and student engagement. By linking these tools, you can:
- Automatically add new students to your email lists.
- Apply tags in your CRM when a student enrolls in or completes a course.
- Unlock or restrict content based on CRM tags.
- Send personalized emails based on student progress.
While LifterLMS offers direct integrations for services like Mailchimp and ConvertKit, it is also possible to connect to advanced CRMs through a dedicated “connector” plugin. You can also add CRM functionality directly to your WordPress website with the Groundhogg plugin or FluentCRM.
We recommend two primary solutions for this: WP Fusion and FuseWP.
WP Fusion offers a deep integration with LifterLMS, which allows you to sync contacts and control access to course content based on tags in your CRM.
How to Connect LifterLMS with WP Fusion
- Install and activate the WP Fusion plugin.
- Navigate to Settings > WP Fusion.
- From the “Select Your CRM” dropdown, choose your CRM provider.
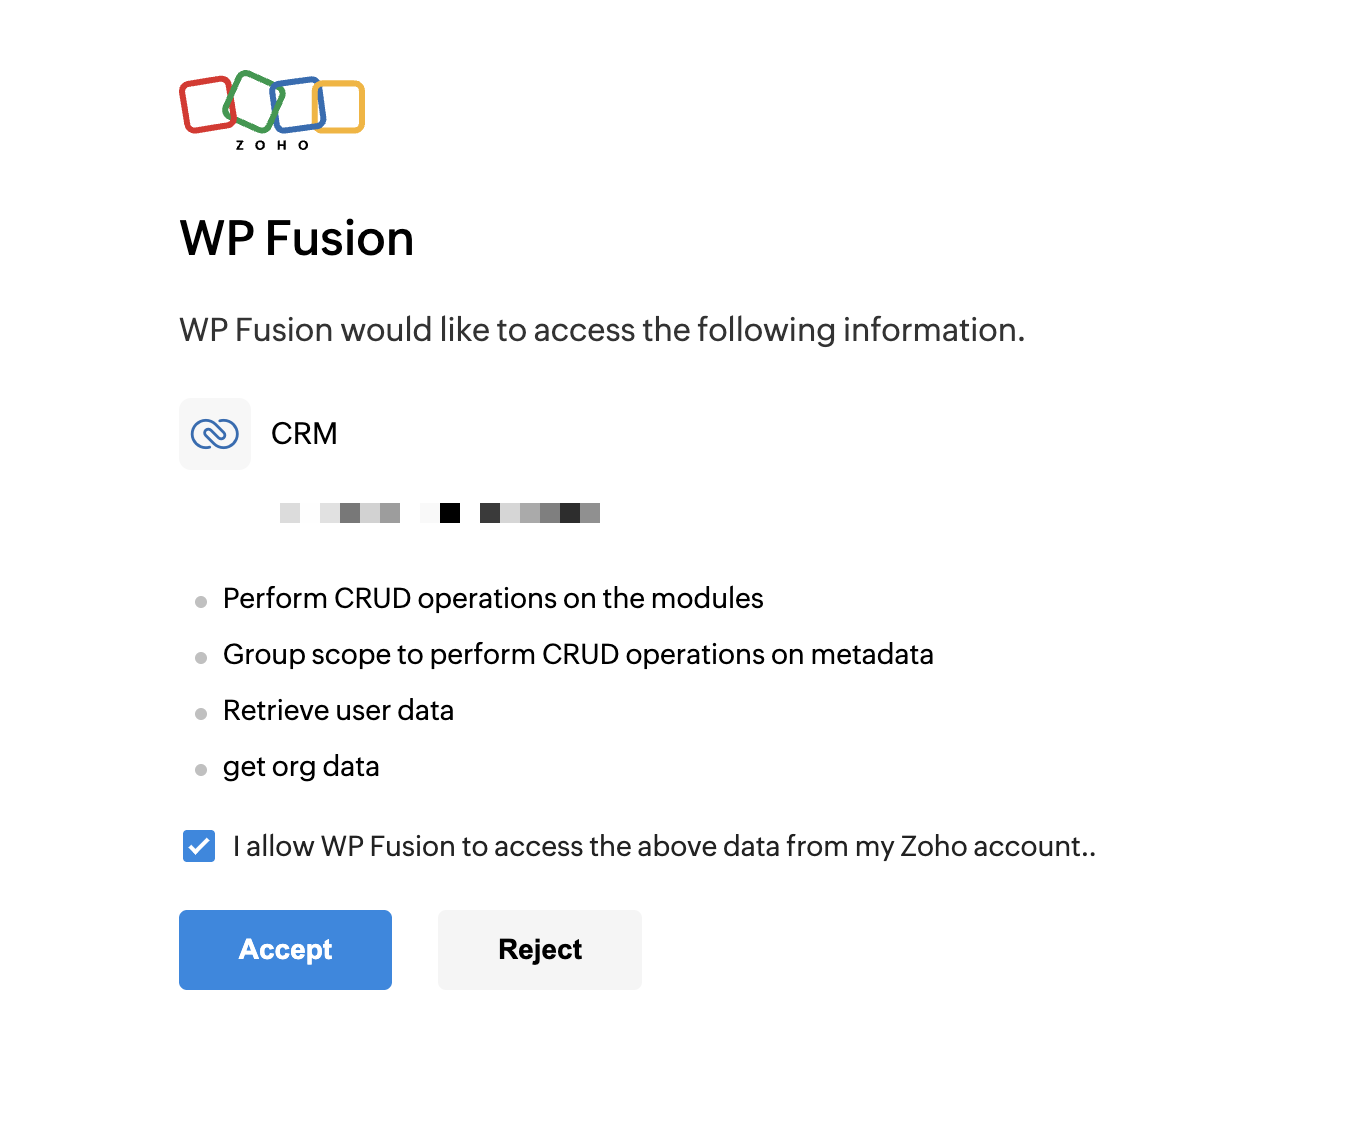
- Follow the prompts to authorize the connection with your CRM. The exact steps will vary depending on the CRM, but they usually involve either entering an API key from your CRM’s settings or authenticating via OAuth.
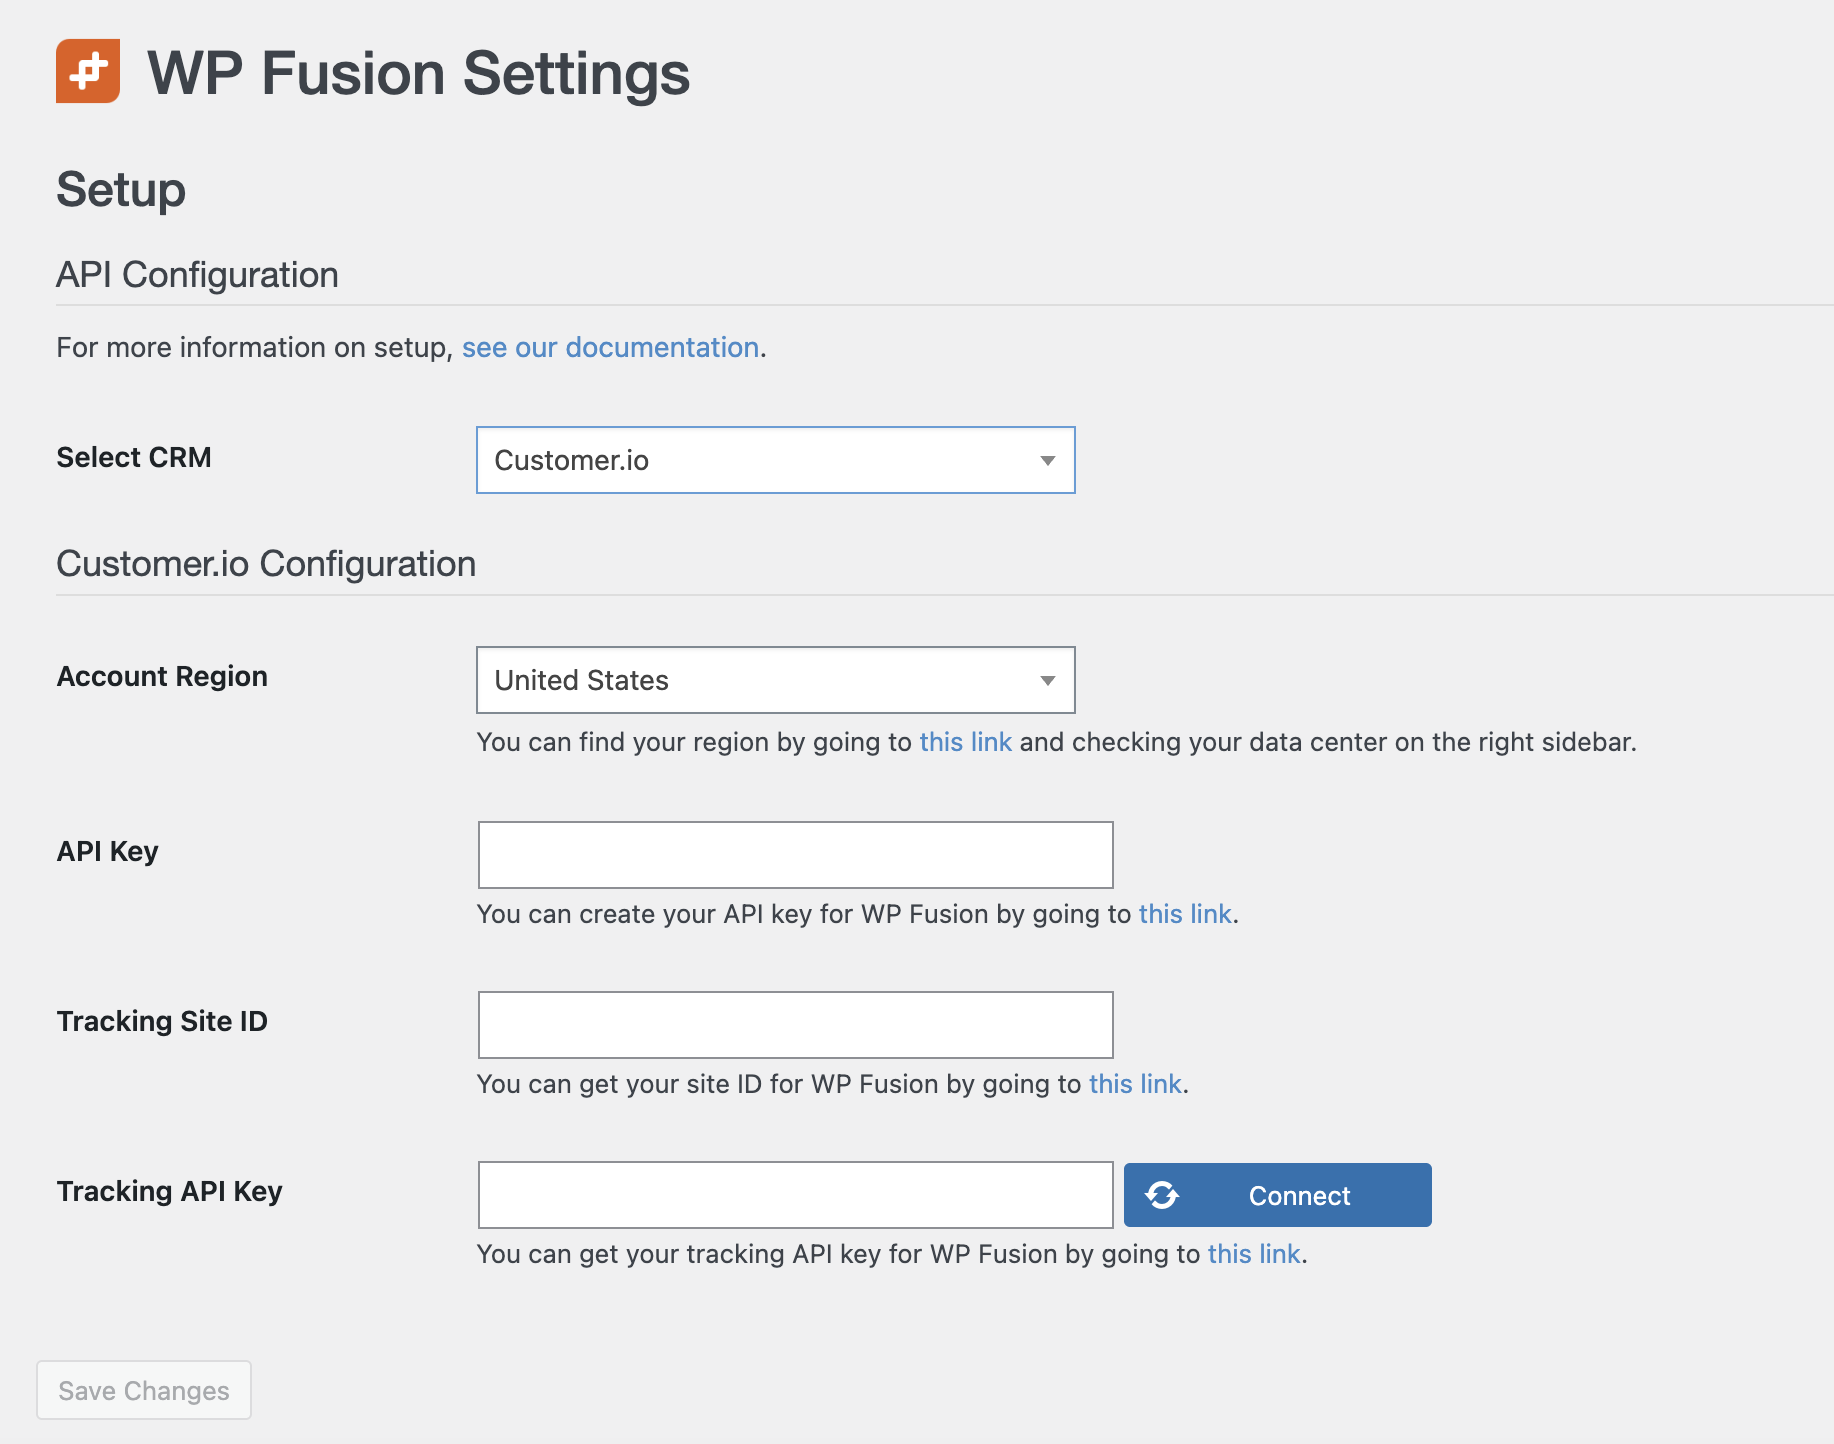
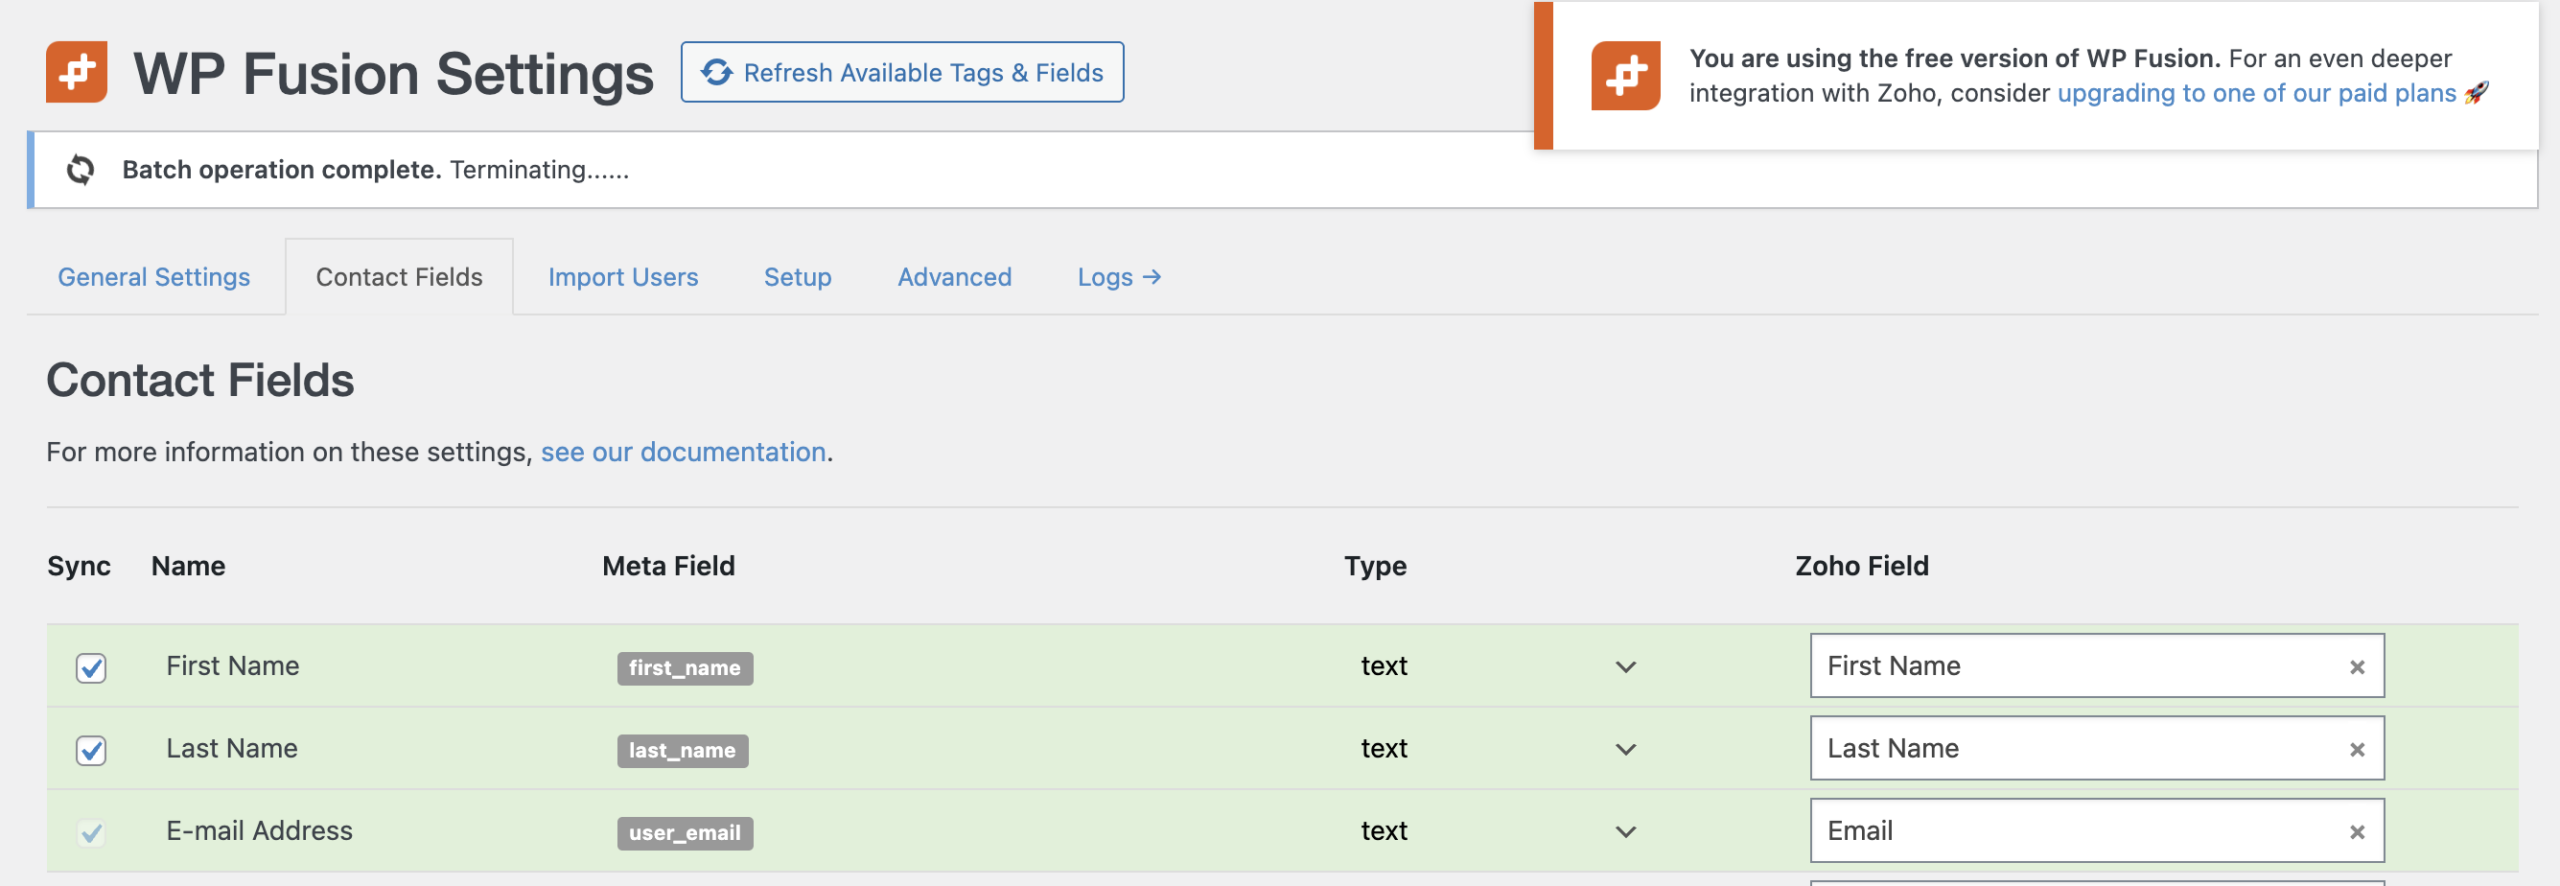
- After connecting the CRM, you can navigate to the Contact Fields tab to map your LifterLMS user data (such as First Name, Last Name, Email) to your CRM fields.
Controlling Access and Automating Tags with WP Fusion
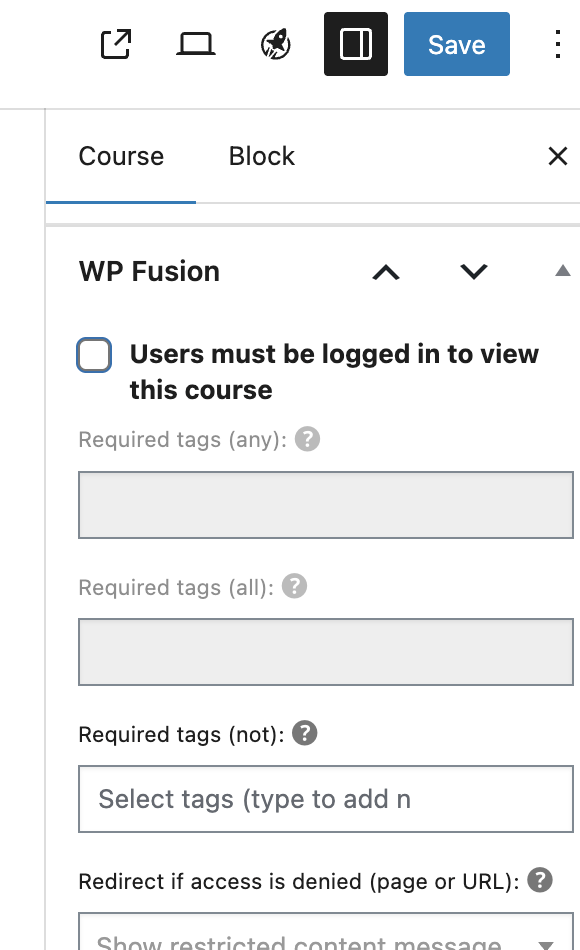
WP Fusion adds a settings panel to your course editor. This panel allows you to restrict access to content based on tags in your CRM and trigger automation when a user simply views the page.
- Navigate to LifterLMS > Courses (or Memberships) and click Edit on the content you wish to protect or automate.
- Locate the WP Fusion settings panel found in the right-hand sidebar of the WordPress editor.
- Check the box for “Users must be logged in to view this course” to ensure only authenticated users can see the content.
- Configure the specific access rules for the content using the three tag fields:
- Select tags in “Required tags (any)” if the user only needs one of the listed tags to gain access.
- Select tags in “Required tags (all)” if the user must have every tag listed to view the content.
- Select tags in “Required tags (not)” to block access for users who have specific tags (such as a “Refunded” or “Delinquent” tag).
- In the “Redirect if access is denied” field, enter the ID or URL of the page to which unauthorized users should be redirected (such as a sales page).
- Check “Refresh tags if access is denied” to have WP Fusion re-check the CRM for updated tags immediately when a user hits a restriction.
- To manage tags simply because a user looked at the page, select tags in the “Apply tags on view” or “Remove tags on view” fields.
- If necessary, enter a number in “Delay (in ms) before applying/removing tags” to set a timer before the view-based tags are triggered.
- Click Update or Publish to save your changes.
FuseWP is a streamlined solution designed primarily for marketing automation and data synchronization. While it does not offer the advanced content restriction features found in WP Fusion, it is an excellent tool for ensuring your LifterLMS students are automatically added to your CRM, correctly tagged, and kept up to date.
How to Connect Using FuseWP
- Install and activate the FuseWP plugin.
- Navigate to FuseWP > Settings, then click the Integrations tab.
- Select your CRM from the list (e.g., ActiveCampaign, Brevo, etc.).
- Click the Connect button and follow the authorization prompts (or enter your API keys).
- Navigate to FuseWP > User Sync and click Add New.
- Under “Source,” select the LifterLMS Course or Membership that you want to track.
- Select the Action you want to take when a user interacts with the selected course or membership (e.g., “Add a tag,” “Remove a tag,” “Subscribe to a list,” “Update a contact field”).
- Choose the Audience (e.g., a specific tag or list in your CRM) to which the rule applies.
- Specify the User Role in WordPress (e.g., “Student,” “Admin,” “Any”) for the rule to trigger.
- Optionally, you can map specific data, such as the enrollment date, in the “Map Custom Fields” section. This method allows you to map any standard or custom WordPress user field to the target system.
- After configuring the rule, you can save the settings to start the user sync. For more details, refer to the official FuseWP documentation.
Note: Long-time LifterLMS users may remember a native “LifterLMS Infusionsoft” extension. That extension was sunset in 2016 and is no longer supported.


