How to Use the LifterLMS Events Block
The LifterLMS Events add-on makes it simple to display your upcoming schedule across your website. Whether you use the default WordPress block editor or a third-party page builder, you have flexible tools to showcase your live sessions to your students.
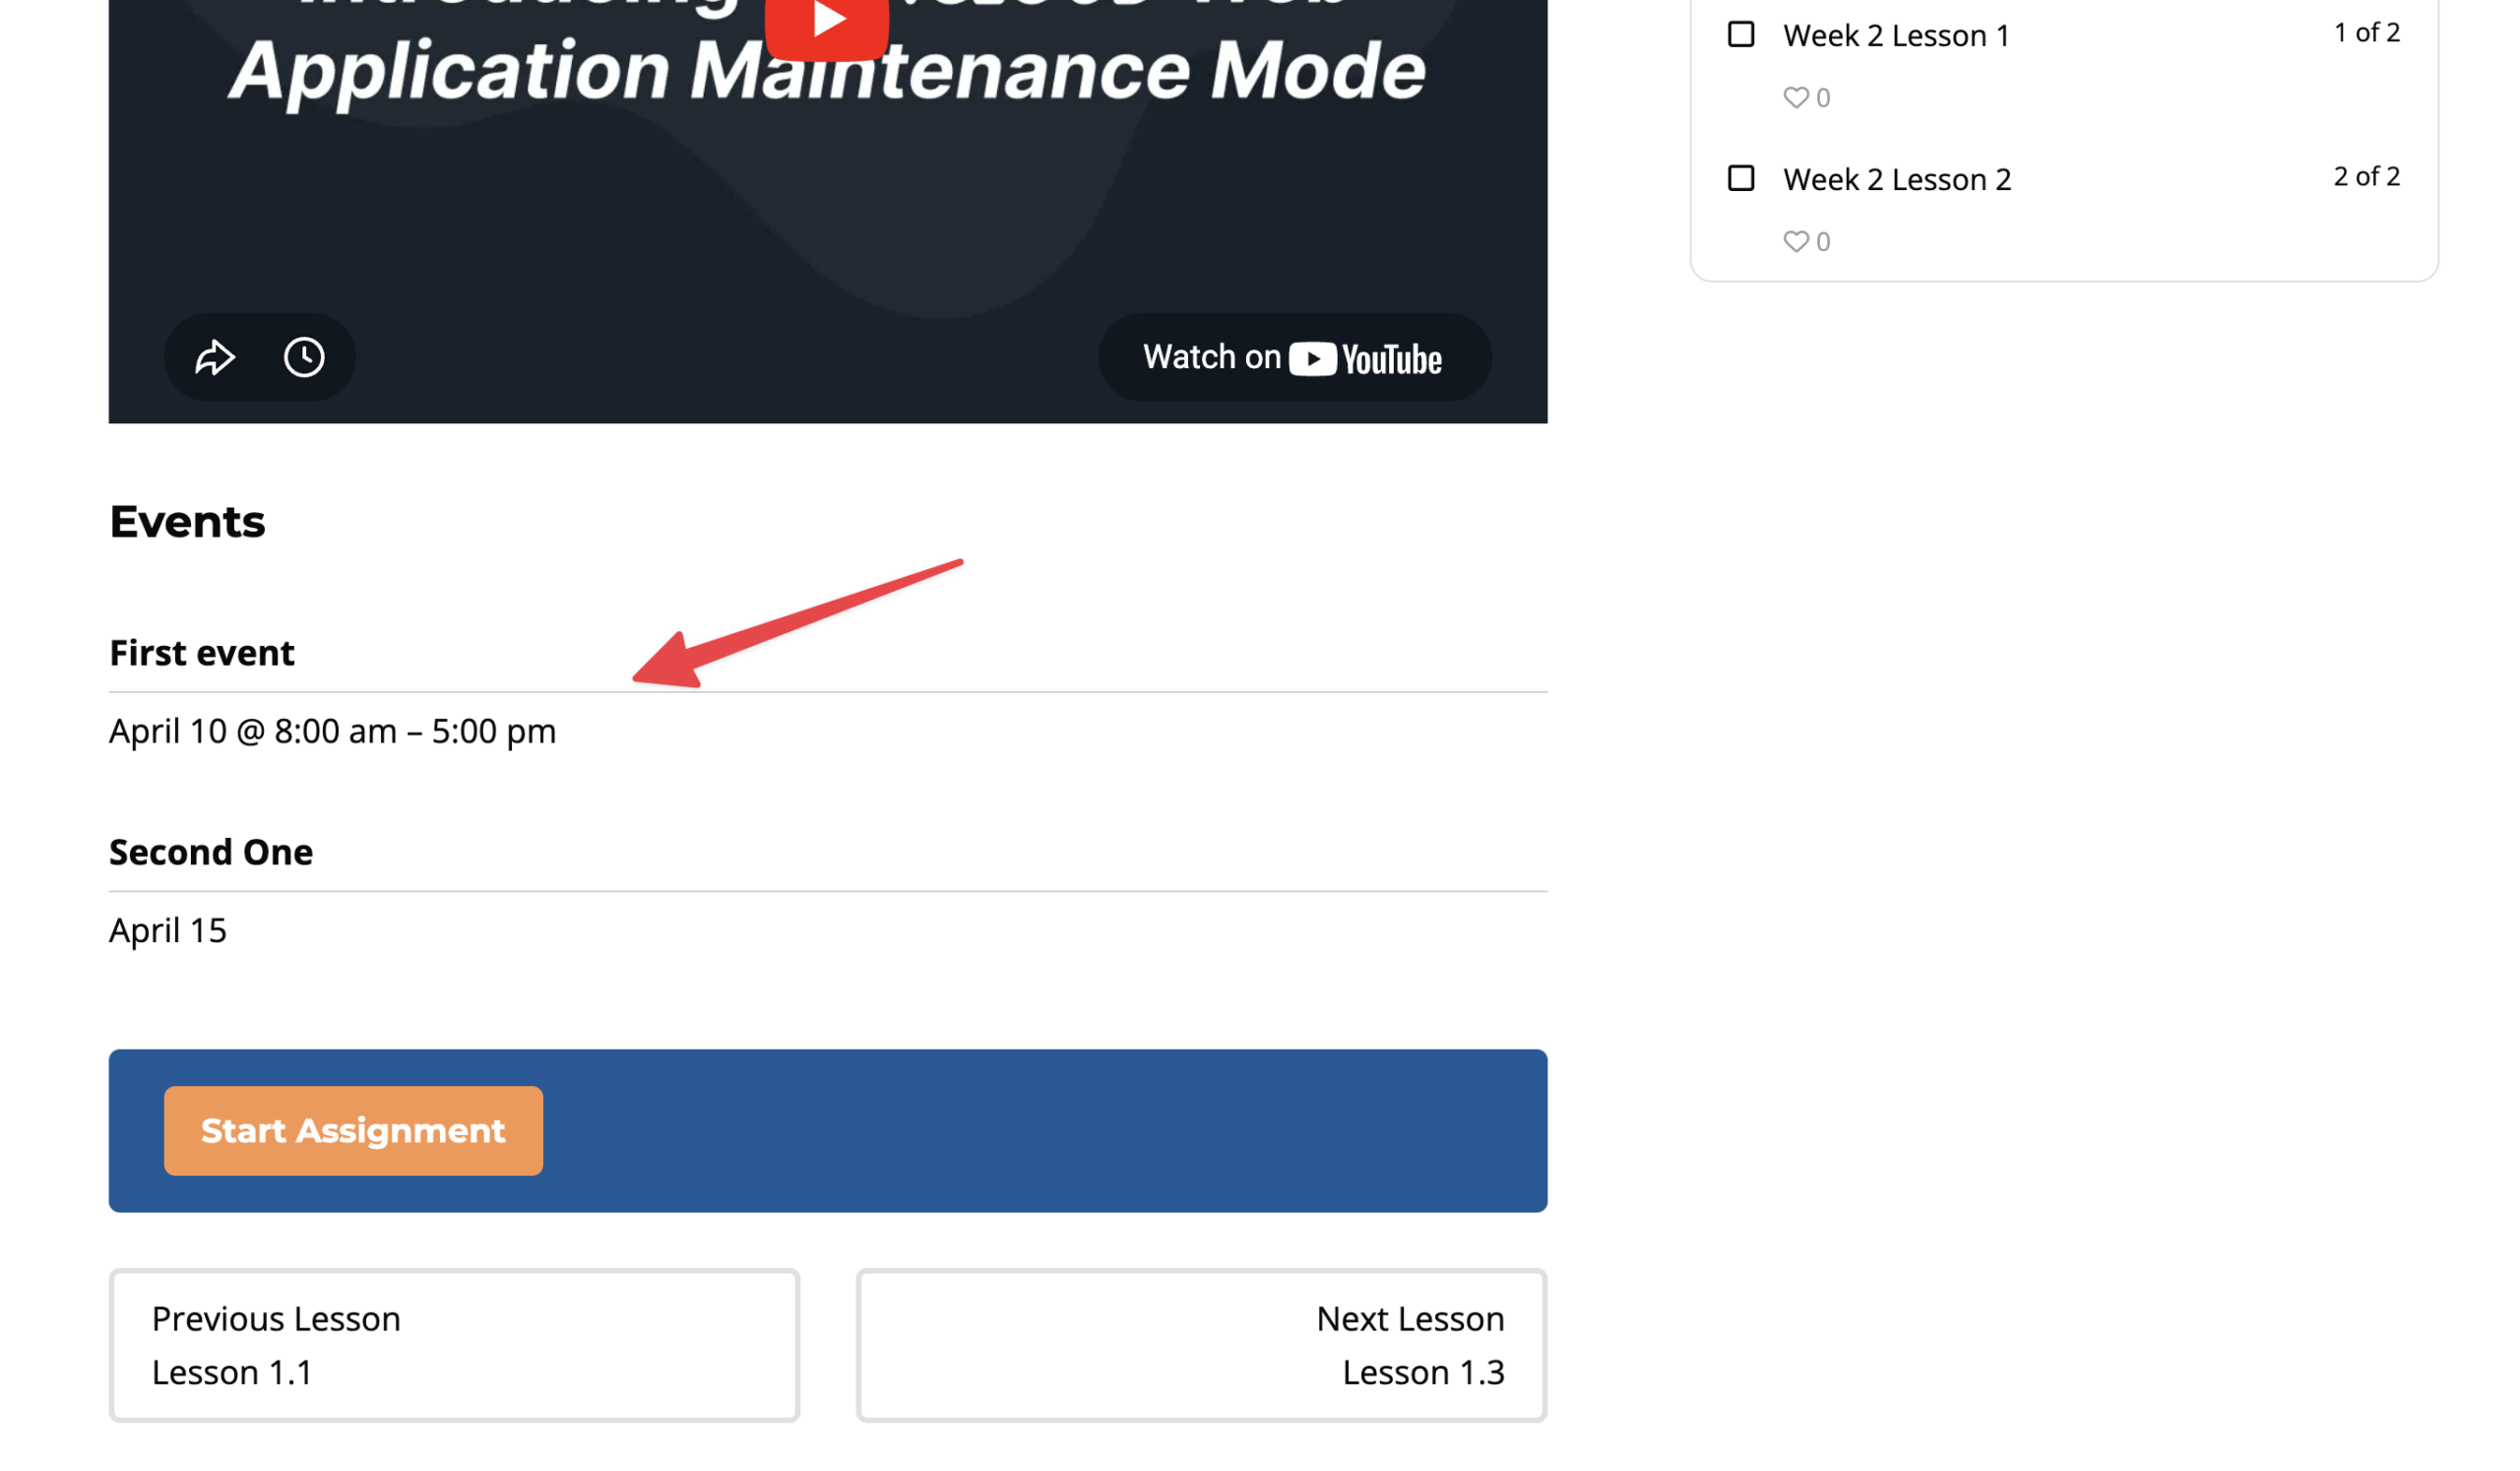
When you create a new course, lesson, or membership, the system automatically inserts the “LifterLMS Events” block at the bottom of the content area. You do not need to do any extra work to display your schedule on these new educational products. The block will automatically list any upcoming events that you linked to that specific course or membership.
You might want to create a dedicated calendar page that lives outside of your course curriculum. To display your schedule on a standard, non-course page, you can use the built-in WordPress block or a simple shortcode.
- Navigate to Pages > Add New Page in your WordPress dashboard.
- Click the + button in the editor to add a new block.
- Type “LifterLMS Events” into the search bar.
- Click on the “LifterLMS Events” block to insert it into your layout.
- Alternatively, you can type the [lifterlms_events] shortcode directly into a standard paragraph block to achieve the exact same result.
- Click the Publish or Update button to save your page.
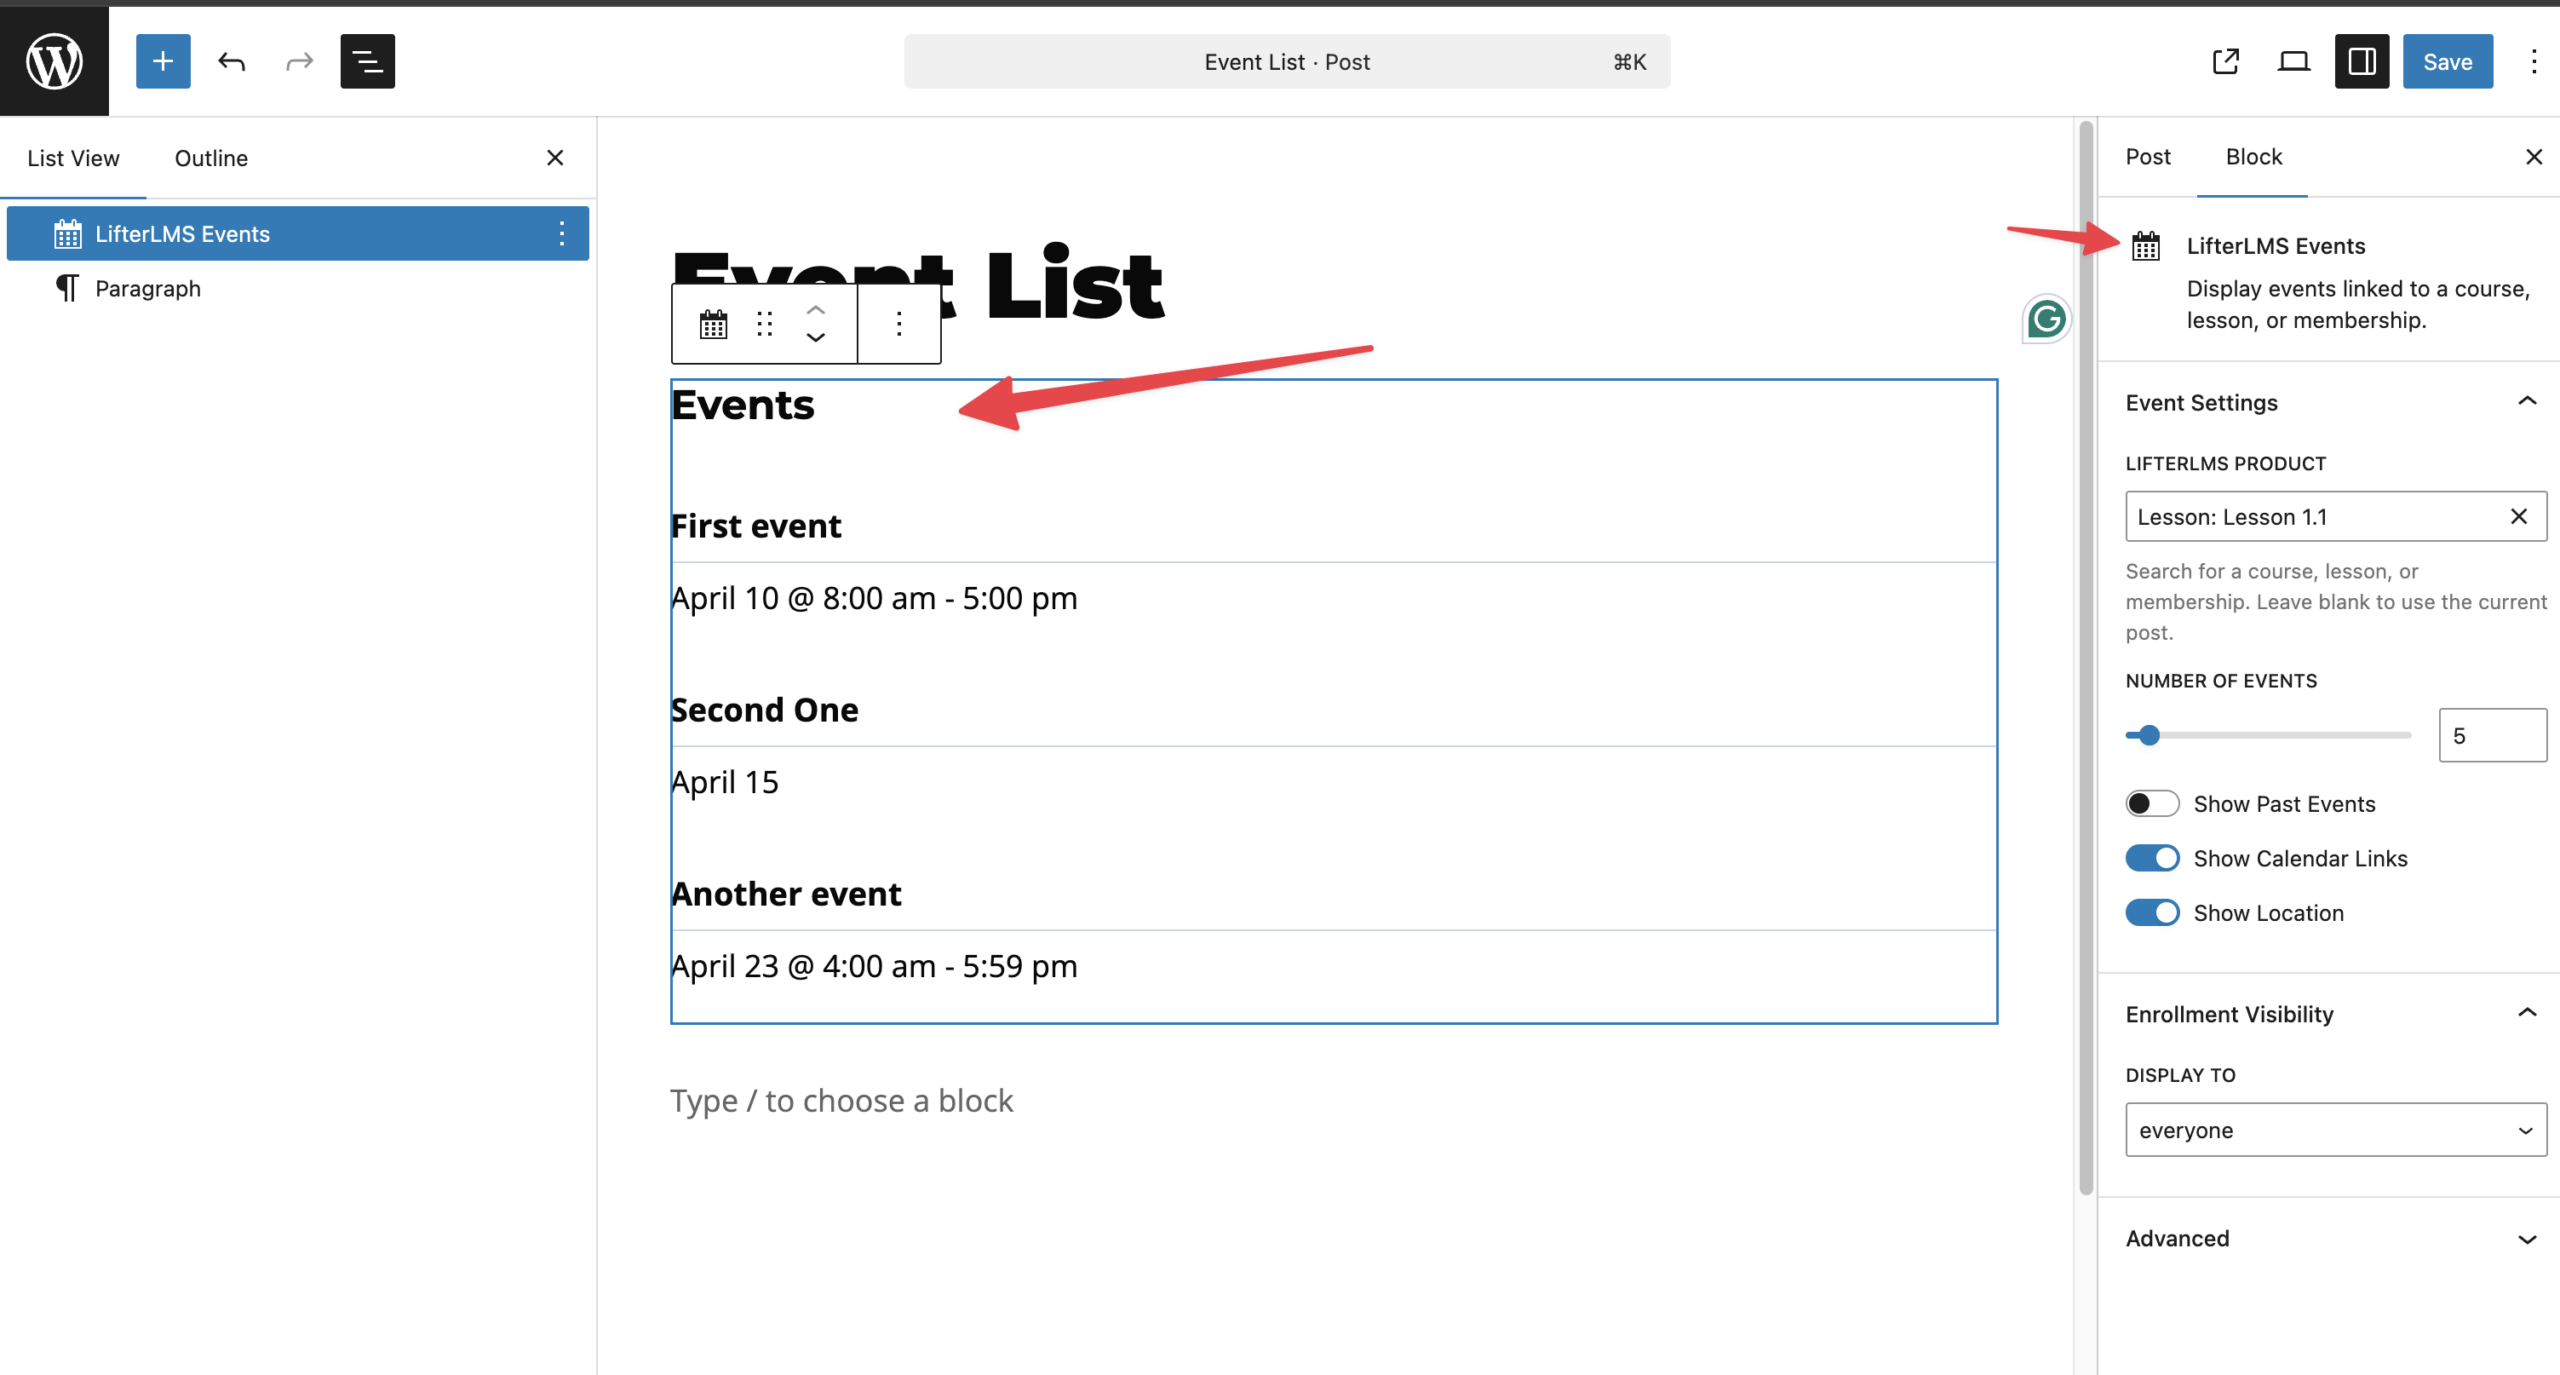
Once you add the block to your page, you can customize exactly what information appears. Click on the block in your editor to view the settings menu on the right side of your screen. You will find several options to configure your display.
- Product: This dropdown menu lets you target which events appear on the page. You can select a specific course, lesson, or membership. If you place the block on a course page, you can leave this set to “Current Post”.
- Number of Events: Enter a number to limit the number of upcoming sessions that appear on your list.
- Show Past Events: You can toggle this switch on to display an archive of events that have already happened.
- Show Calendar Links: You can toggle this switch on to provide a dropdown menu for your enrolled students. This allows them to easily subscribe to the feed using Google Calendar, iCalendar, or Outlook.
- Show Location: Toggle this switch to display the physical address or the virtual meeting URL. Please note that even if you turn this on, the system will securely hide the location from any visitors who are not actively enrolled in the linked product.
When you place the “LifterLMS Events” block on a page, you can control exactly who sees it on the front end of your website. The “Enrollment Visibility” setting lets you hide or show your upcoming schedule based on a visitor’s relationship with your LMS.
Follow these steps to restrict who can view your event list.
- Click on the event block inside your WordPress editor to open the settings panel on the right side of your screen.
- Scroll down the panel until you locate the “Enrollment Visibility” section.
- Click on the dropdown menu located under the “DISPLAY TO” heading.
- Select the specific group of users you want to target.
- Click the Publish or Update button at the top of your page to save your settings.
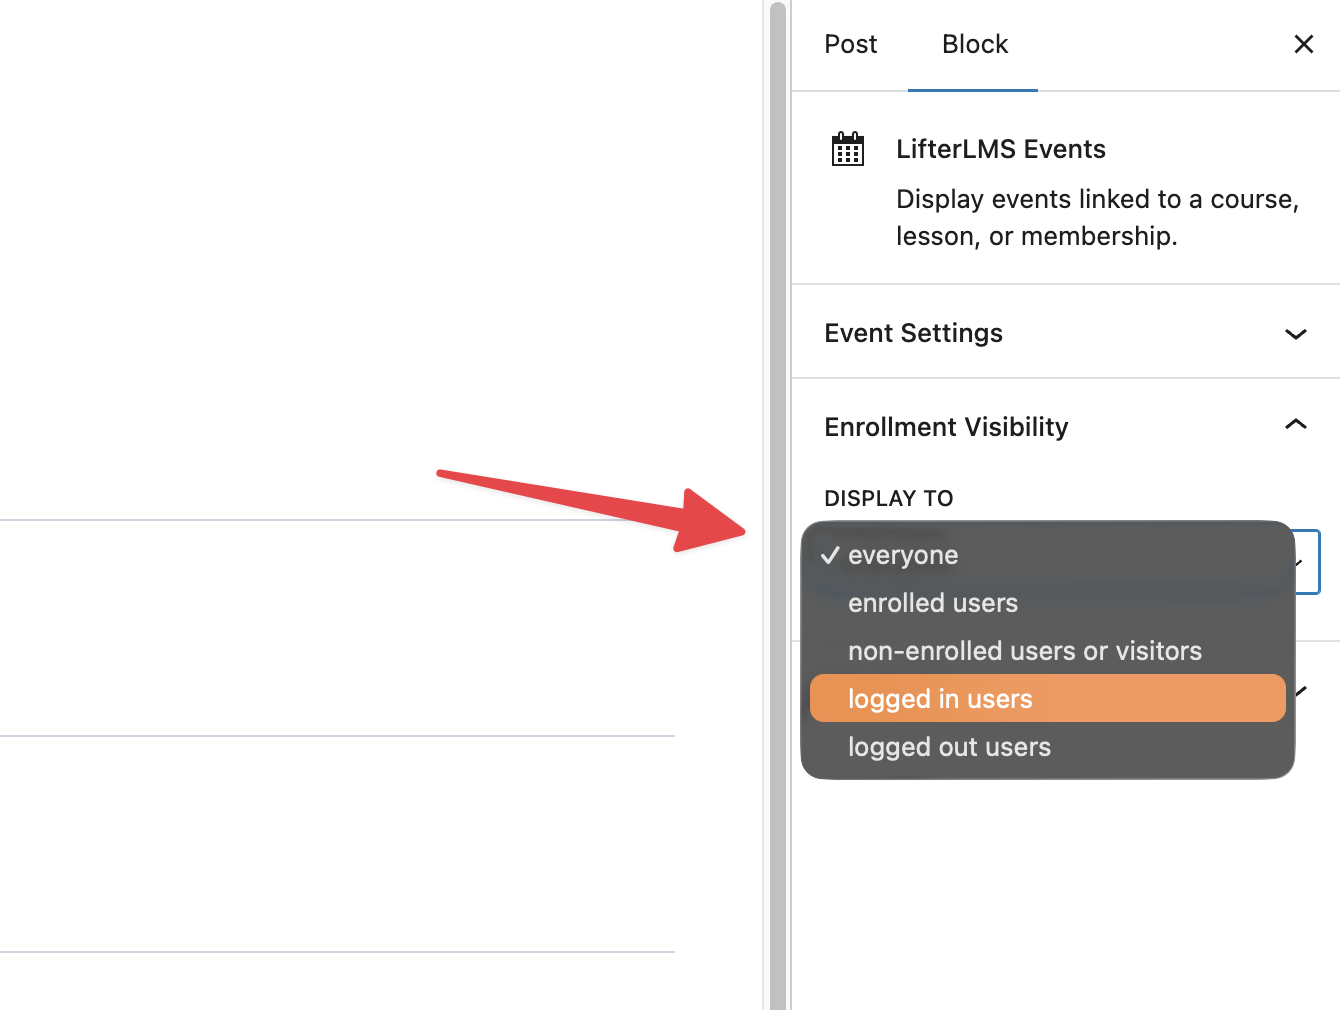
You have five different options to choose from inside this dropdown menu. Here is what each option does:
- Everyone: Select this option to display your event block to all website visitors, regardless of whether they have an account or not.
- Enrolled users: Select this option to hide the block from the general public. The events will only appear for students who have successfully purchased or joined your associated course or membership.
- Non-enrolled users or visitors: Select this option to show the block only to people who have not yet joined your product. This is an excellent marketing strategy to tease your upcoming live coaching calls to potential buyers.
- Logged-in users: Select this option to show the block to anyone who currently has an active, signed-in account on your website.
- Logged out users: Select this option to display the block only to public visitors who are not signed in to your website.
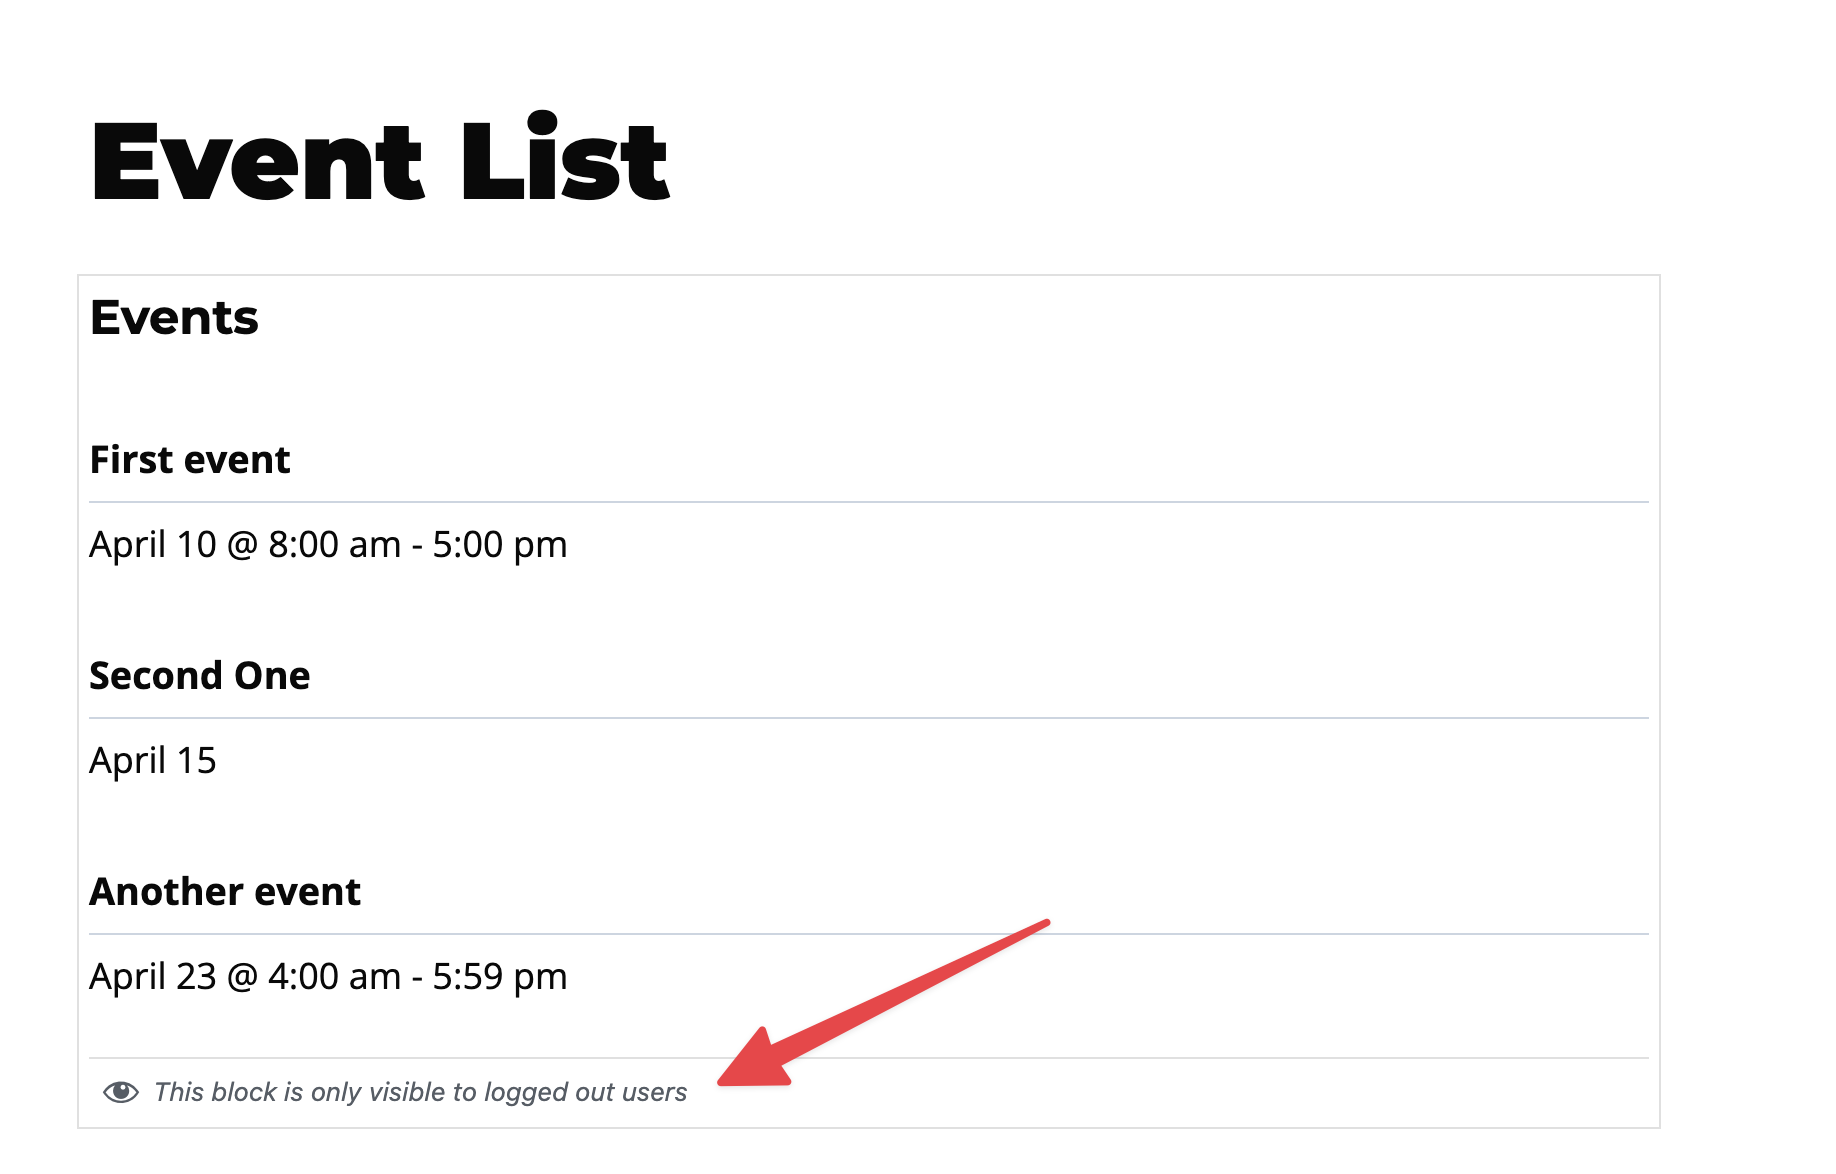
After you update the visibility of your event block, you will see a label under it which will describe who can view this event.


