How to Create and Manage Events in LifterLMS
Adding a new event to your LifterLMS site takes only a few minutes. The event builder works very much like a standard WordPress post, but includes specific fields to connect your live session directly to your educational products.
Follow these steps to create a new event, configure your meeting location, and link it to your curriculum.
- Navigate to Events > Add New Event in your left-hand WordPress menu.
- Type a clear name for your session into the main title box at the top of the page.
- Select your “Start” and “End” dates and times using the provided calendar and clock fields.
- Check the “All Day Event” box if your session does not have a specific start and end time.
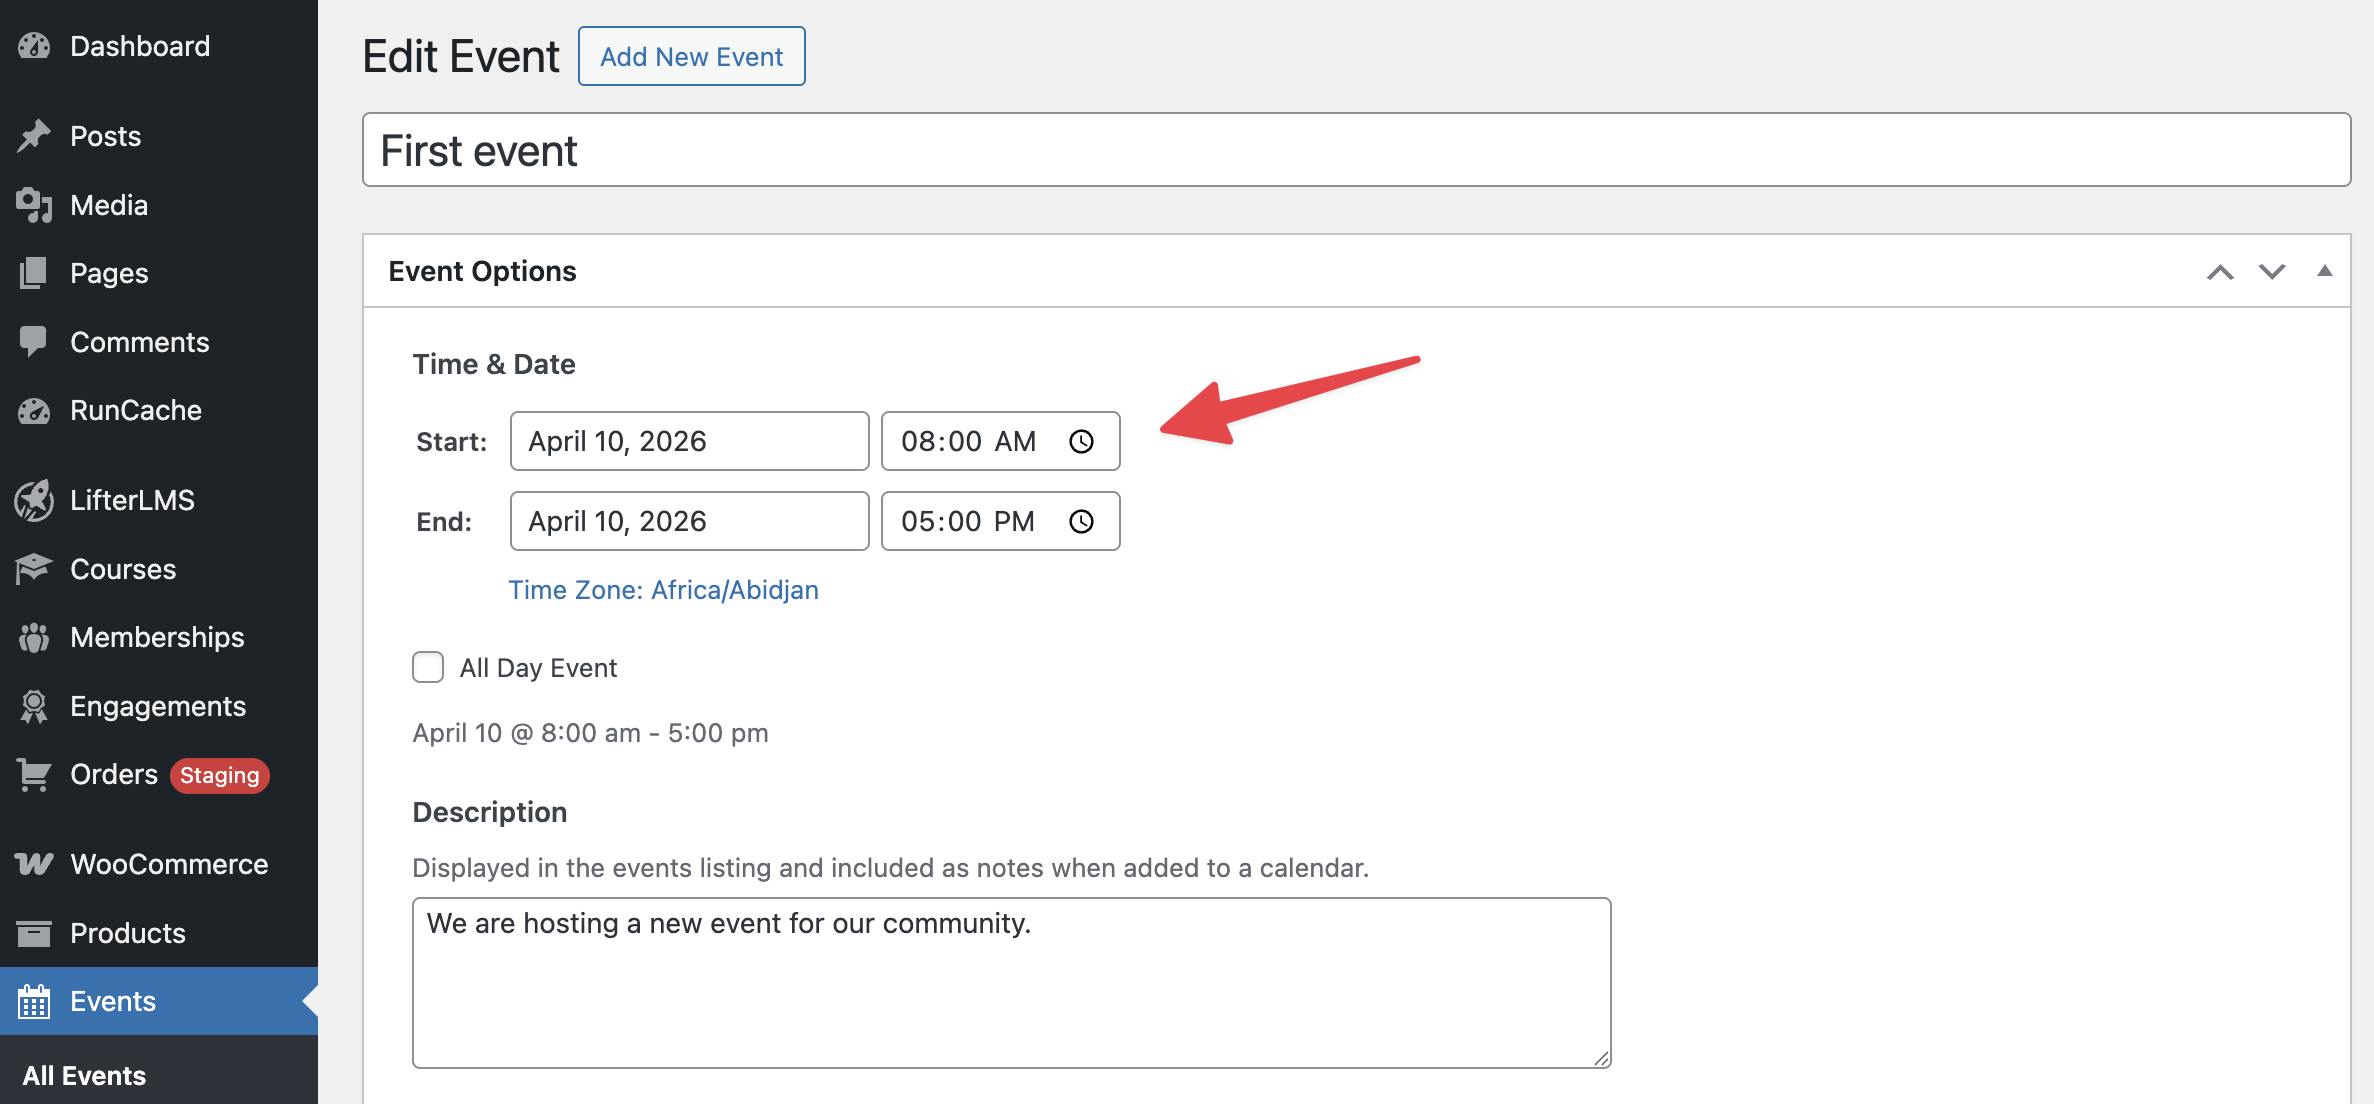
- Scroll down to the “Description” box and type in your session details. The system preserves your custom line spacing, so your paragraphs and lists will display exactly as you format them here. This text appears in the main event listing and serves as the notes when a student adds the event to their personal calendar.
- Scroll down to the “Location” box.
- Type a physical address if you are hosting an in-person event, or paste a web link if you are hosting a virtual meeting. Any website URL you type into this box automatically transforms into a clickable link for your students on the front end of your website.
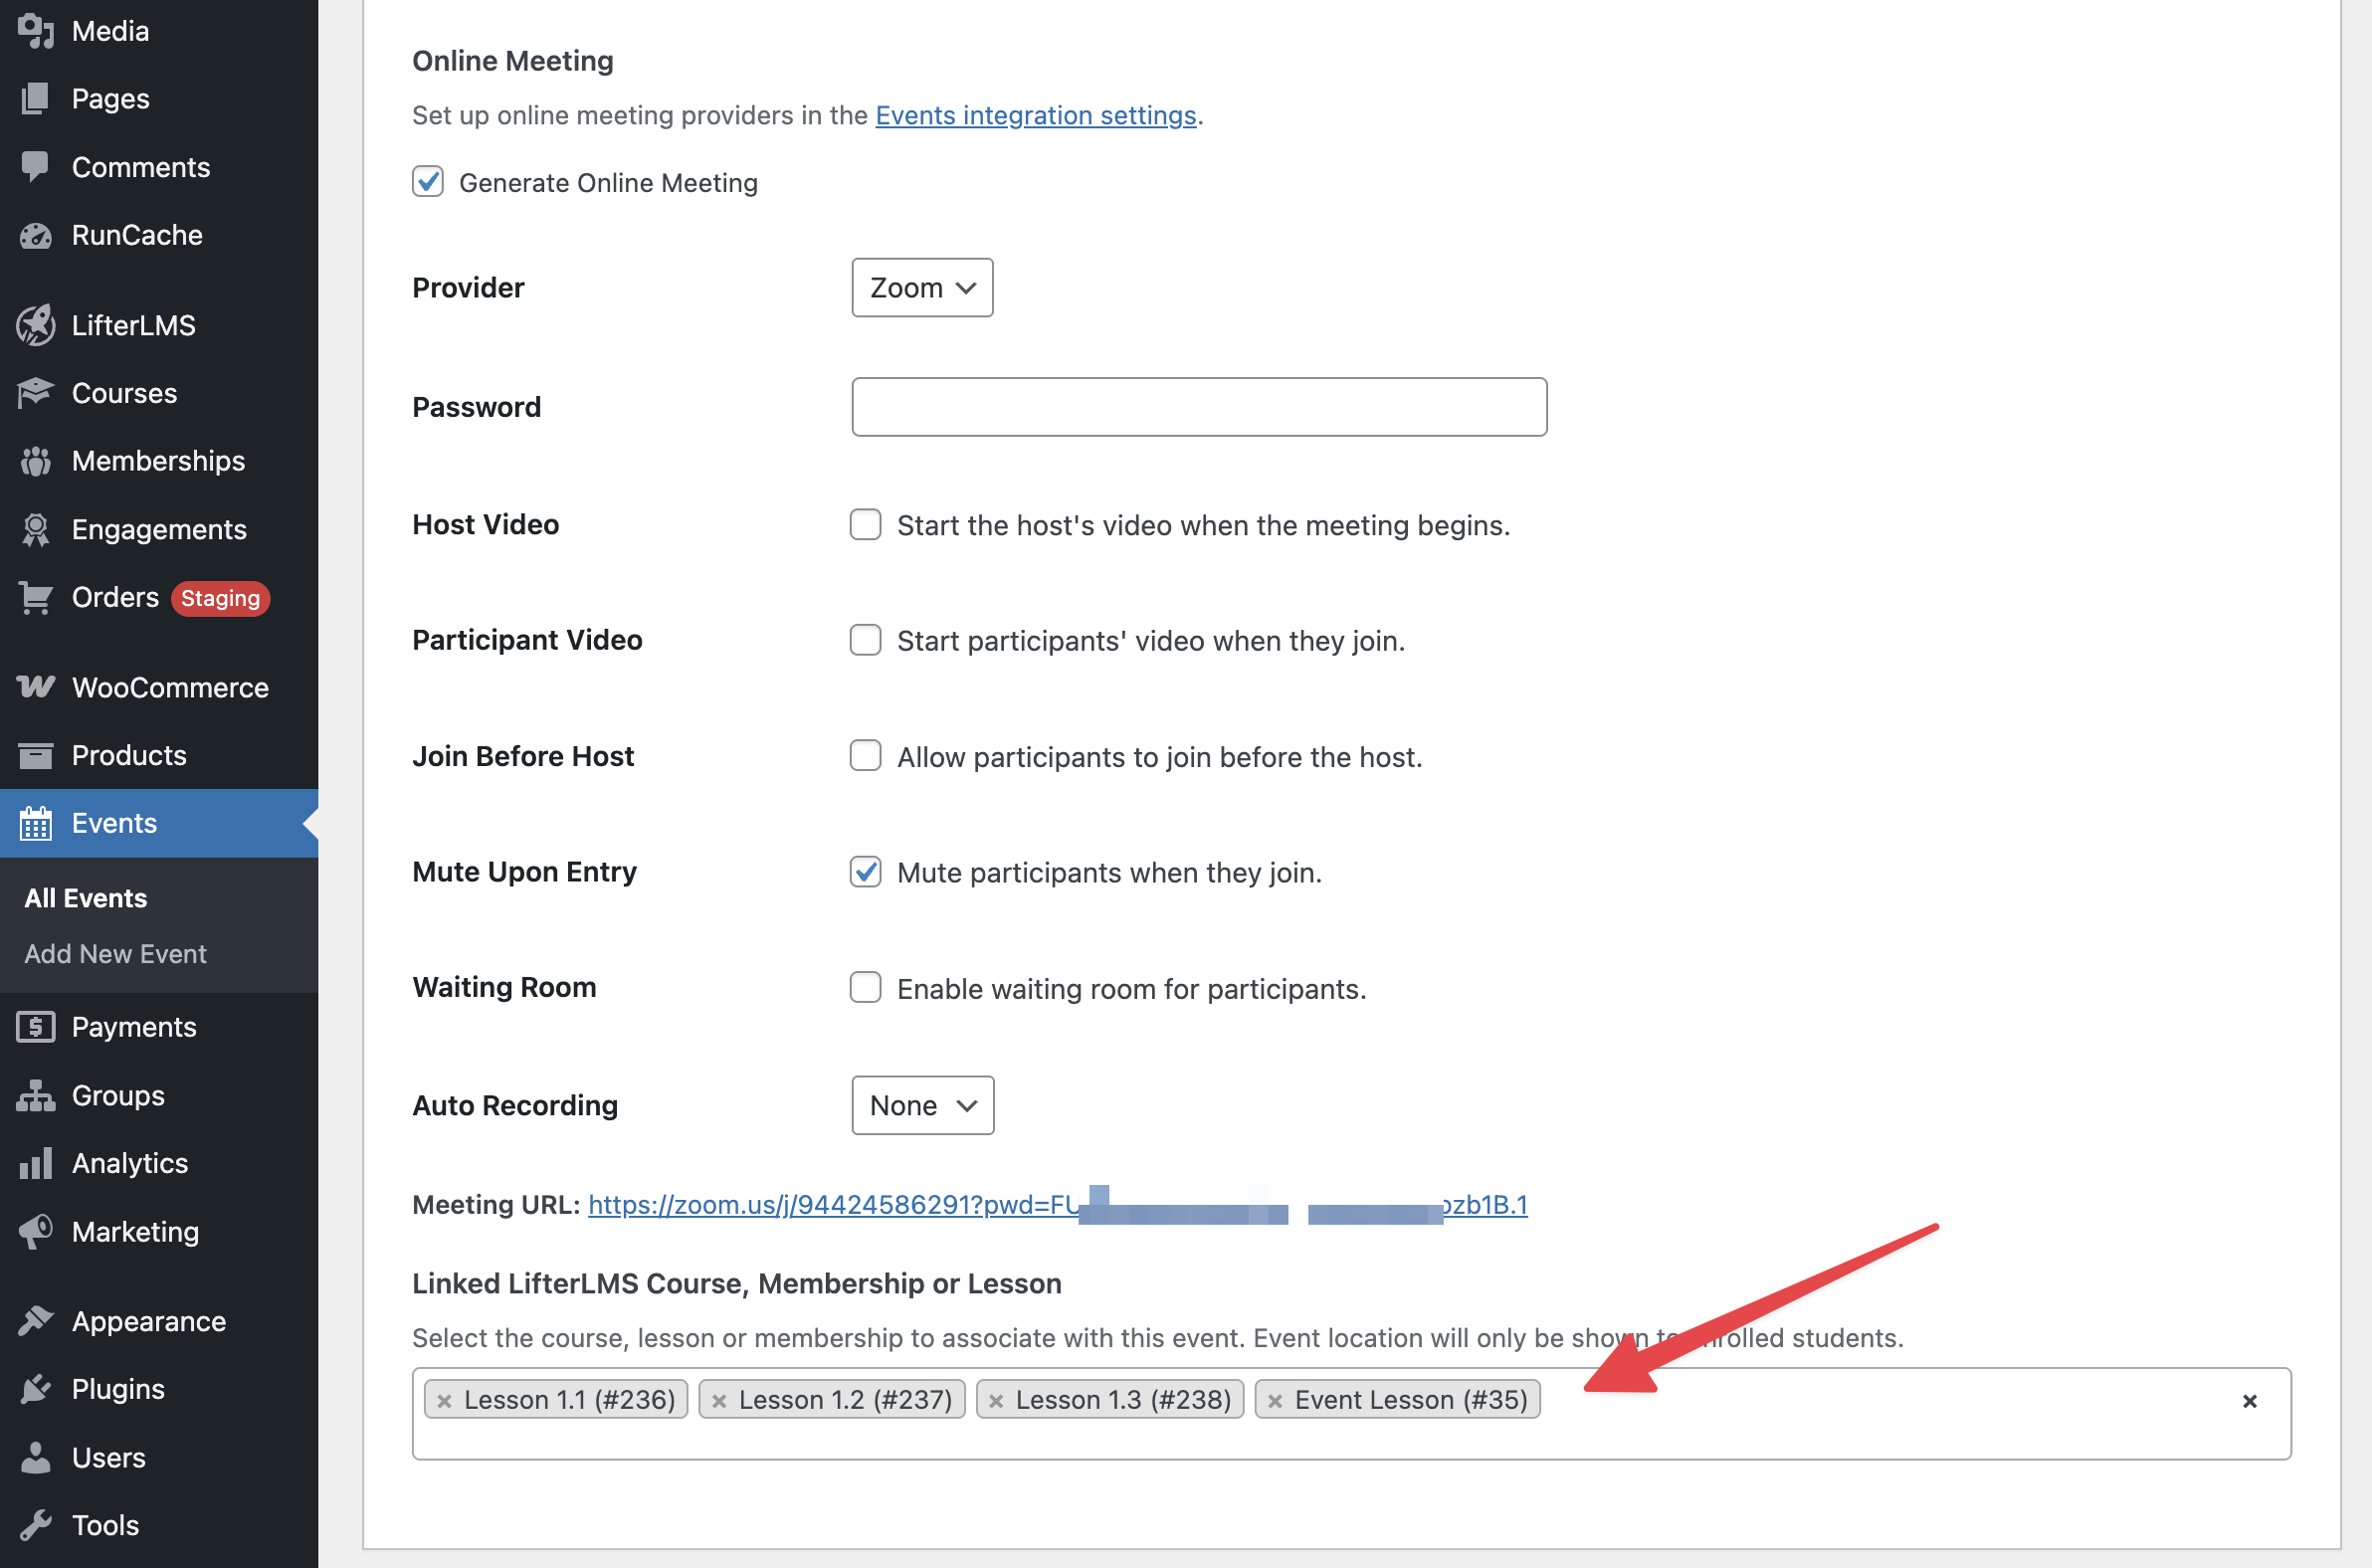
- Locate the “Online Meeting” section just below the description if you prefer to use the direct Zoom integration.
- Check the “Generate Online Meeting” box and select “Zoom” as your provider. The system will automatically generate a unique Zoom meeting URL and place it into your “Location” box when you save the page.
- Scroll to the very bottom of the page to find the “Linked LifterLMS Product” section.
- Click inside the search box and select the specific course, lesson, or membership you want to associate with this event.
- Click the Publish or Update button on the right side of your screen to save your work.