Getting Started with LifterLMS Continuing Education
The Continuing Education Add-On allows you to assign, track, and manage Continuing Education Units (CEUs) for your courses.
You can define global CEU settings, award CEUs automatically when students complete courses, set expiry rules, and include CE information on certificates and reports.
Prerequisites: The LifterLMS core plugin.
To install the LifterLMS Continuing Education add-on:
- Log in to the admin panel of your WordPress site
- Go to Plugins > Add New Plugin
- Click Upload Plugin
- On the “Add Plugins” page, click Choose File
- Navigate to where the Continuing Education Add-On zip file is located on your computer, and select the zip file.
- Once the file has been chosen, click Install Now
- When the plugin installation is complete, click Activate this plugin
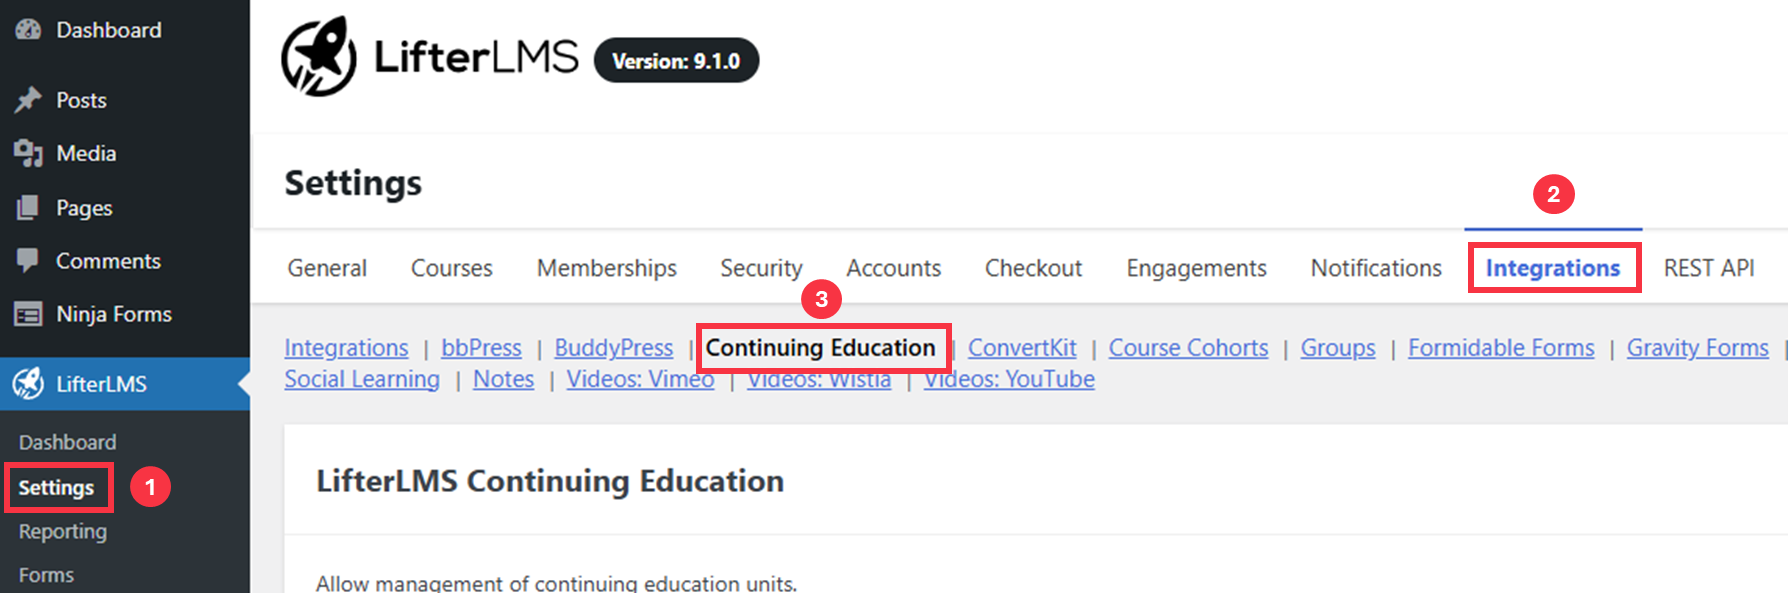
- From the WordPress admin dashboard, go to LifterLMS > Settings.
- Click the “Integrations” tab.
- Select “Continuing Education”.
Continuing Education Language
You can customize how CEUs are labeled across your site.
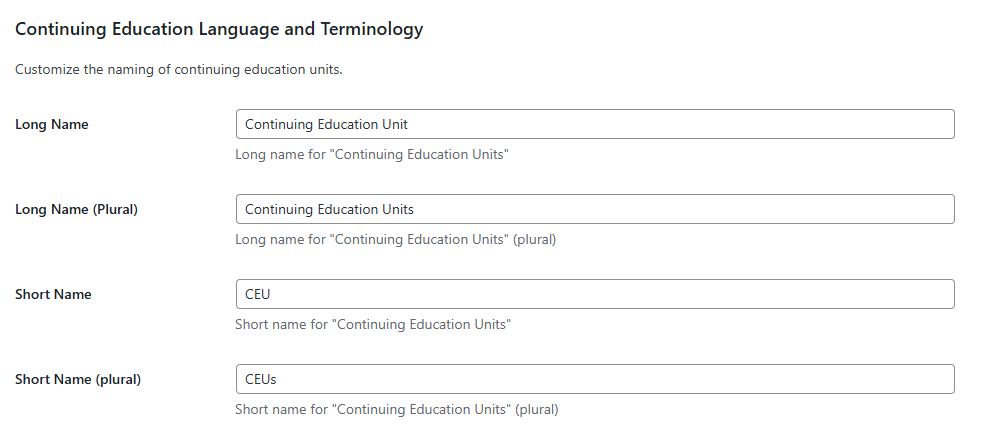
- On the “Continuing Education Settings” page, locate the “Continuing Education Language” section.
- Enter your preferred terms:
- Long Name – for example, “Continuing Education Unit”
- Long Name (Plural) – for example, “Continuing Education Units”
- Short Name – for example, “CEU”
- Short Name (Plural) – for example, “CEUs”
These terms are automatically updated wherever CEUs are displayed.
CEU Expiration
You can set when CEUs expire after being earned.
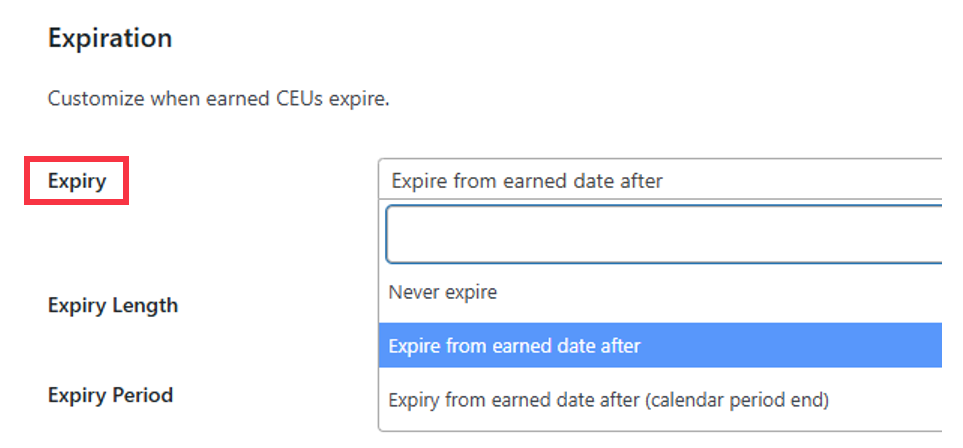
- Locate the “CEU Expiration” section on the same page.
- Choose an “Expiry” option:
- Never expire
- Expire from earned date after
- Expire from earned date after (calendar period end)
- Define the “Expiry Length” (for example, 1) and the “Expiry Period” (Days, Months, or Years).
After setting up global options, you can assign CEUs to each course individually.
- Navigate to Courses > All Courses.
- Edit the course you want to assign CEUs to.
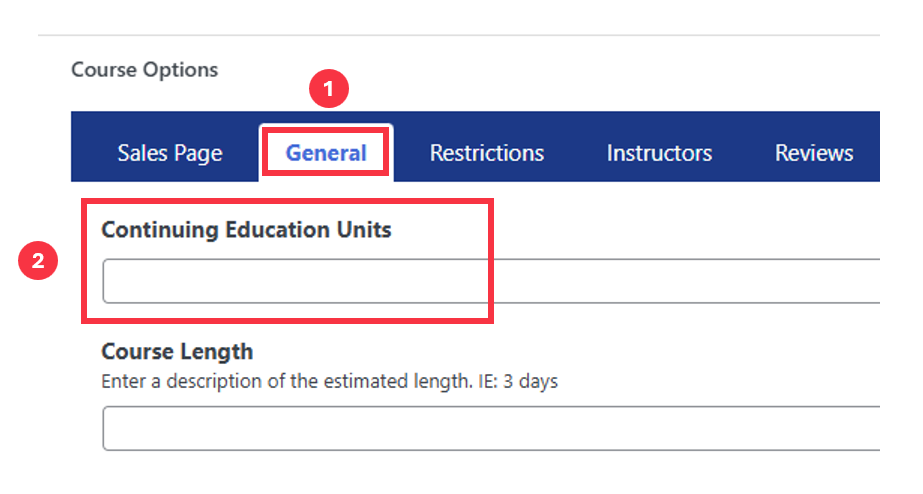
- In the course editor, open the “General” tab.
- Locate the “Continuing Education Units” field.
- Enter the number of CEUs this course awards (for example, 5).
- Click Update to save changes.
The CEU value appears automatically on:
- The course information block
- Course archive tiles
- Certificates (if merge codes are added)
Administrators can view all earned CEUs in one place.
- From the WordPress admin dashboard, go to LifterLMS > Reporting.
- Select the “CEUs Earned” tab.
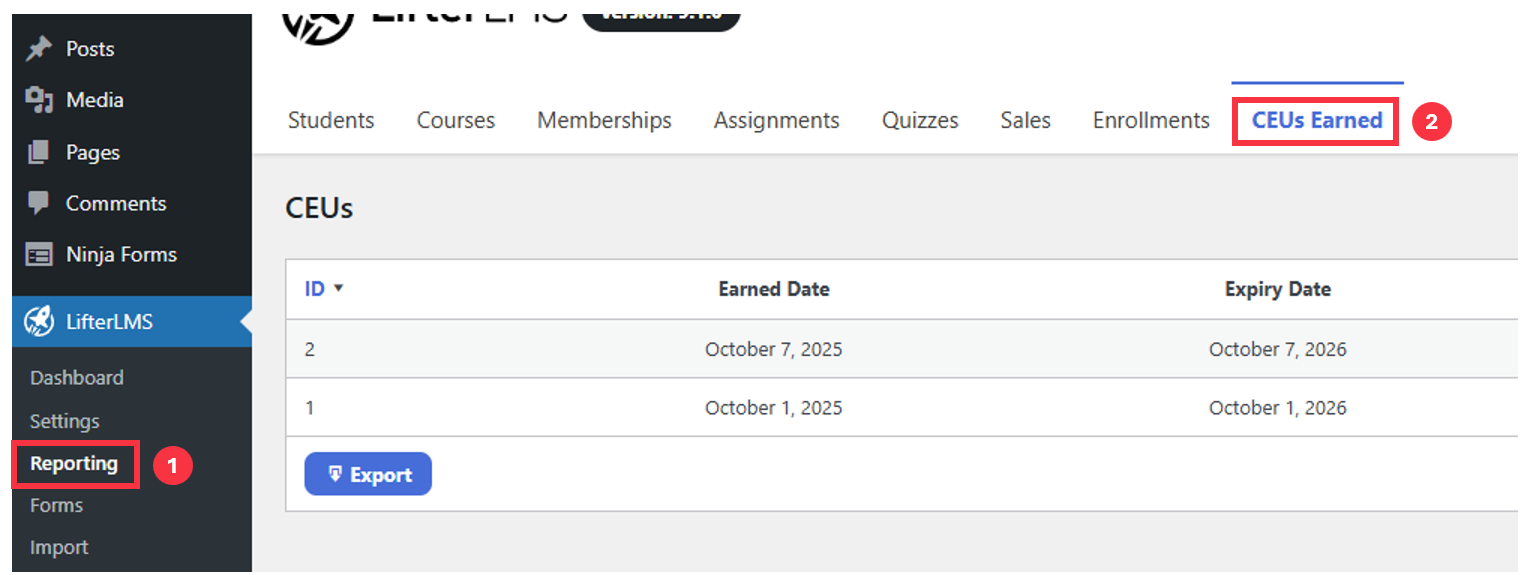
Each entry includes:
- ID
- Earned Date
- Expiry Date
- Student (linked to the learner’s profile)
Click Export to download a CSV copy of the report.
Certificates can include CE information using merge codes.
- Go to LifterLMS > Engagements > Certificates.
- Edit an existing certificate or create a new one.
- Insert merge codes for CE data where desired.
| Merge Code | Description |
| {ce_units} | Displays the number of CE units earned. |
| {ce_expiry_date} | Displays the expiry date of the CEUs. |
Example placement:
Certificate of Completion

Awarded to [llms-user display_name]

for completing [course title] worth {ce_units} CEUs.

Expires: {ce_expiry_date}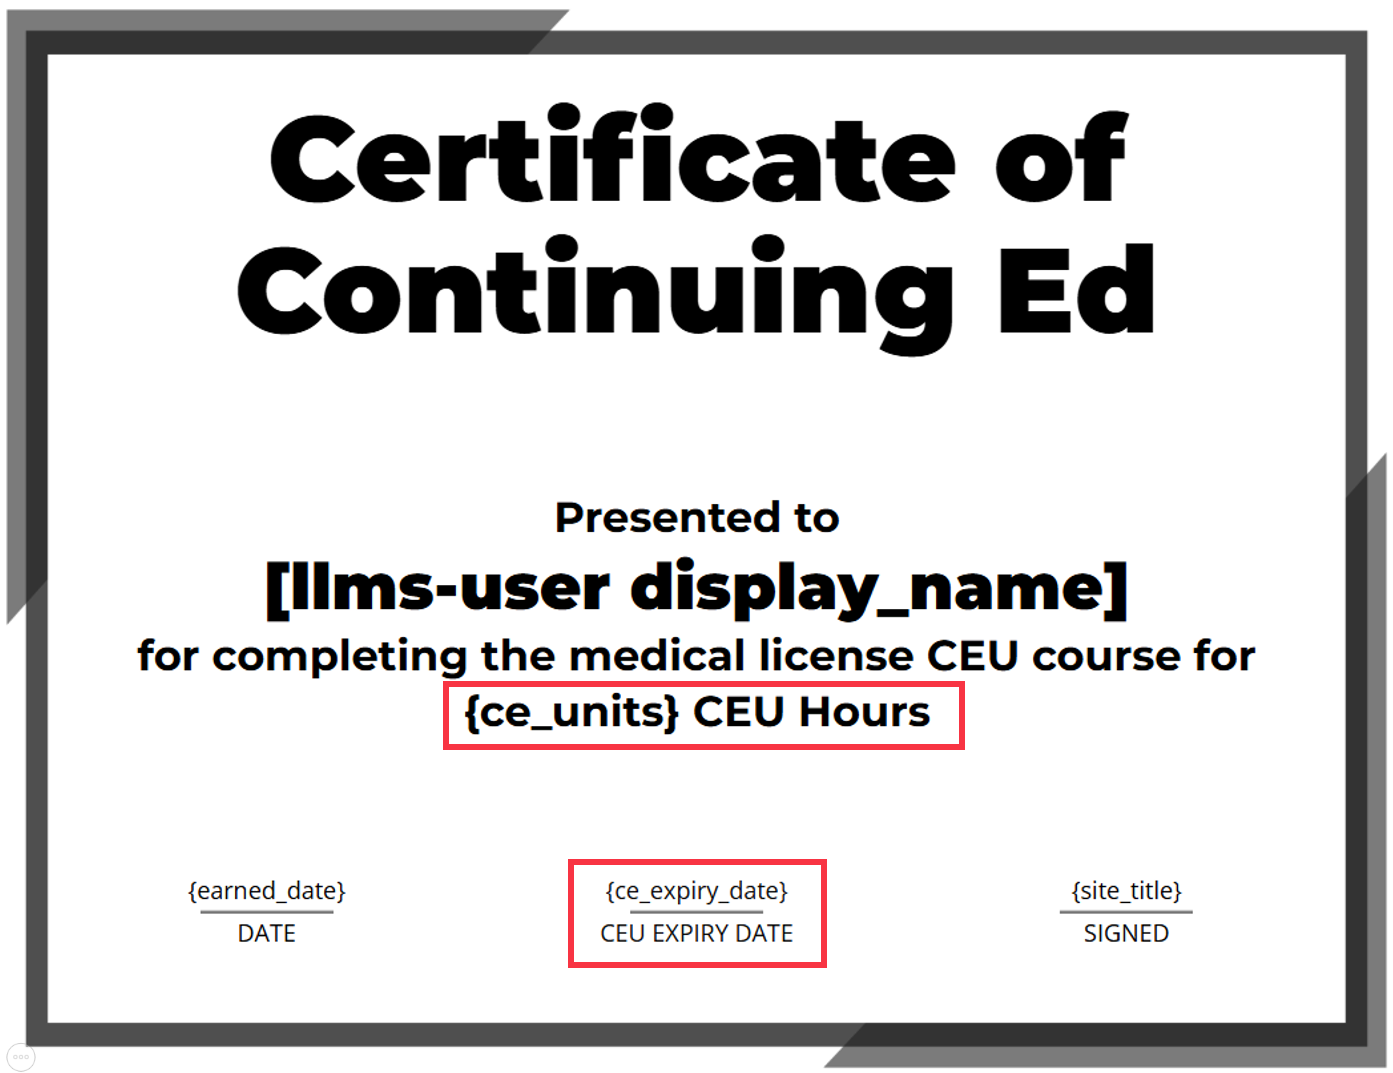
If these codes are not yet visible in your version, they will appear in a future update.
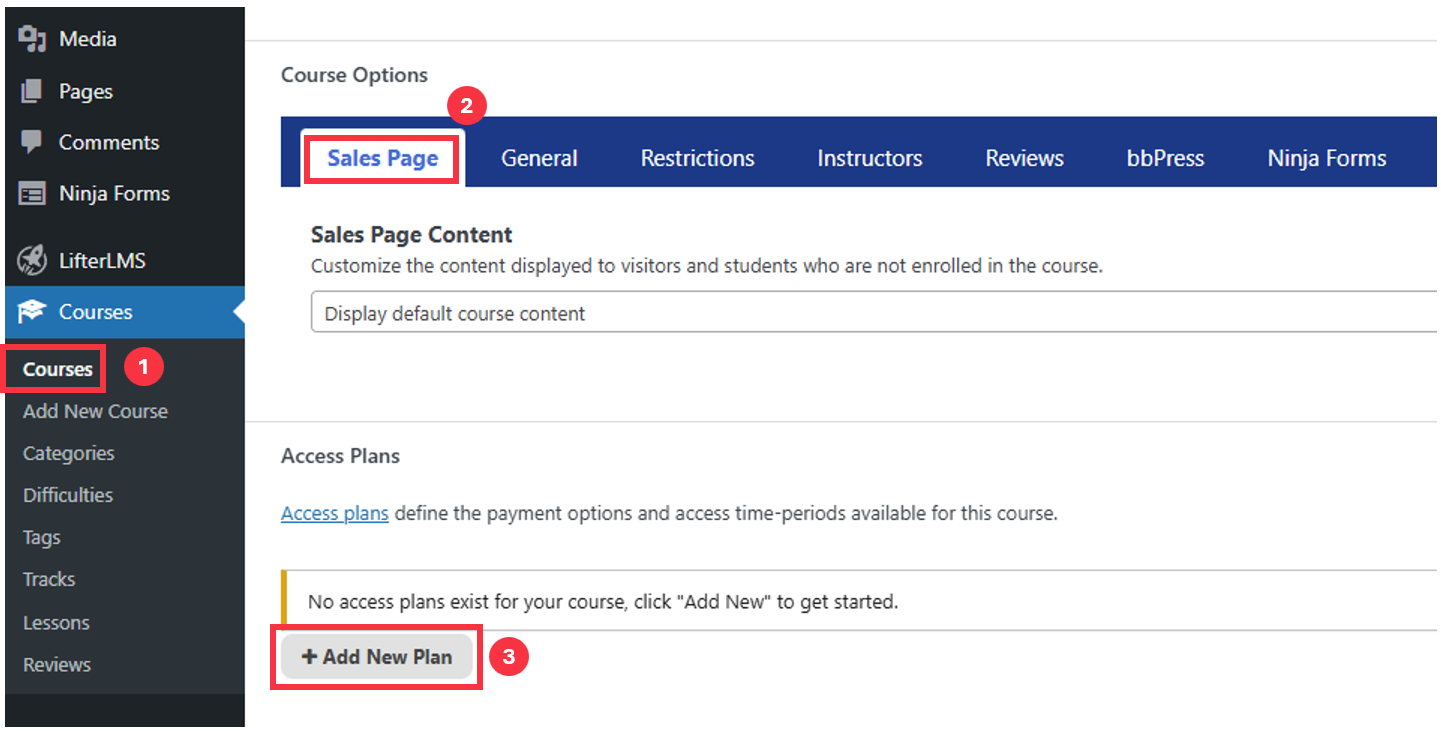
Access Plans control how students enrol, purchase, and retain access to a course.
- From Courses > All Courses, click Edit on a course.
- Scroll down to the “Sales Page” tab.
- Locate the “Access Plans” section.
- Click + Add New Plan.
- Choose a plan type (for example, One Time, Monthly, or Annual).
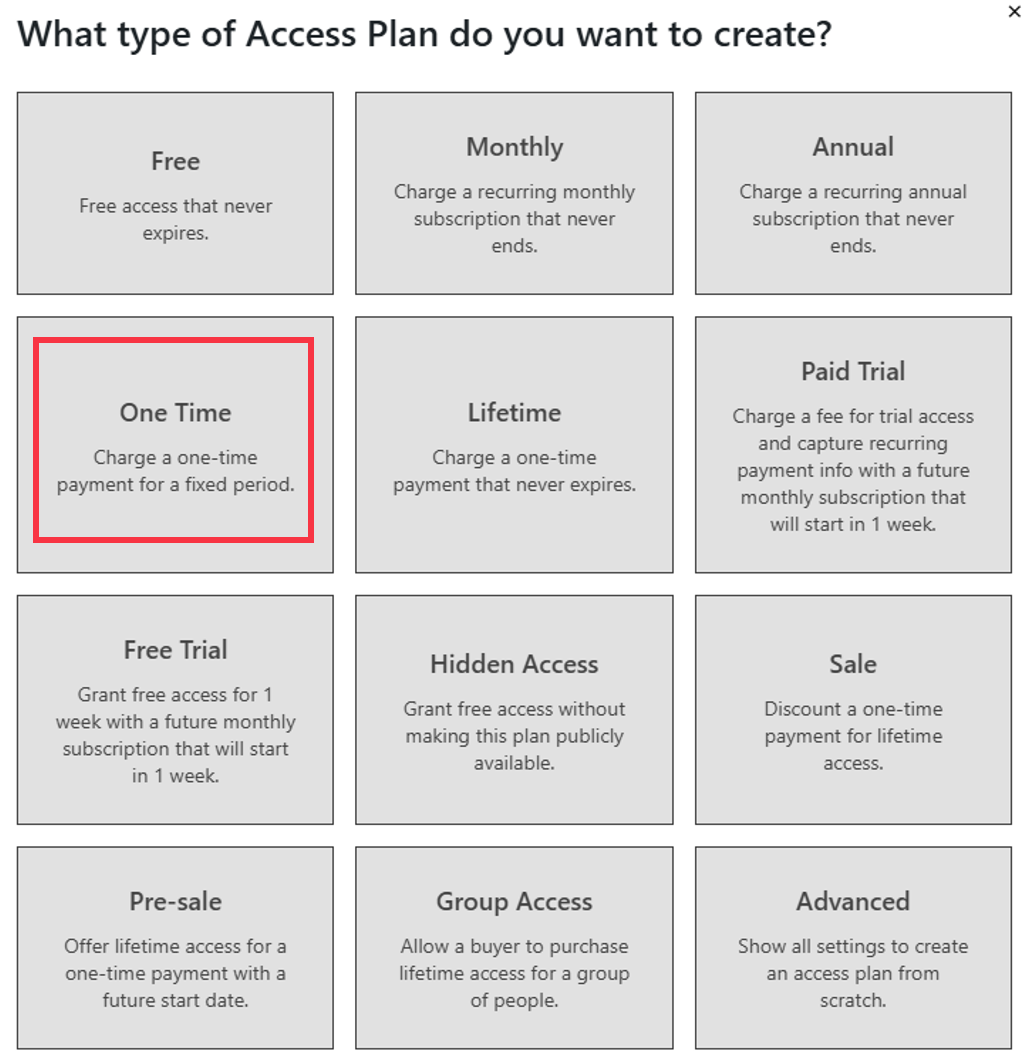
- Configure the plan details:
- Plan Title
- Enroll Button Text
- Price and Frequency
- Access Expiration (for example, “Expires after 1 year”)
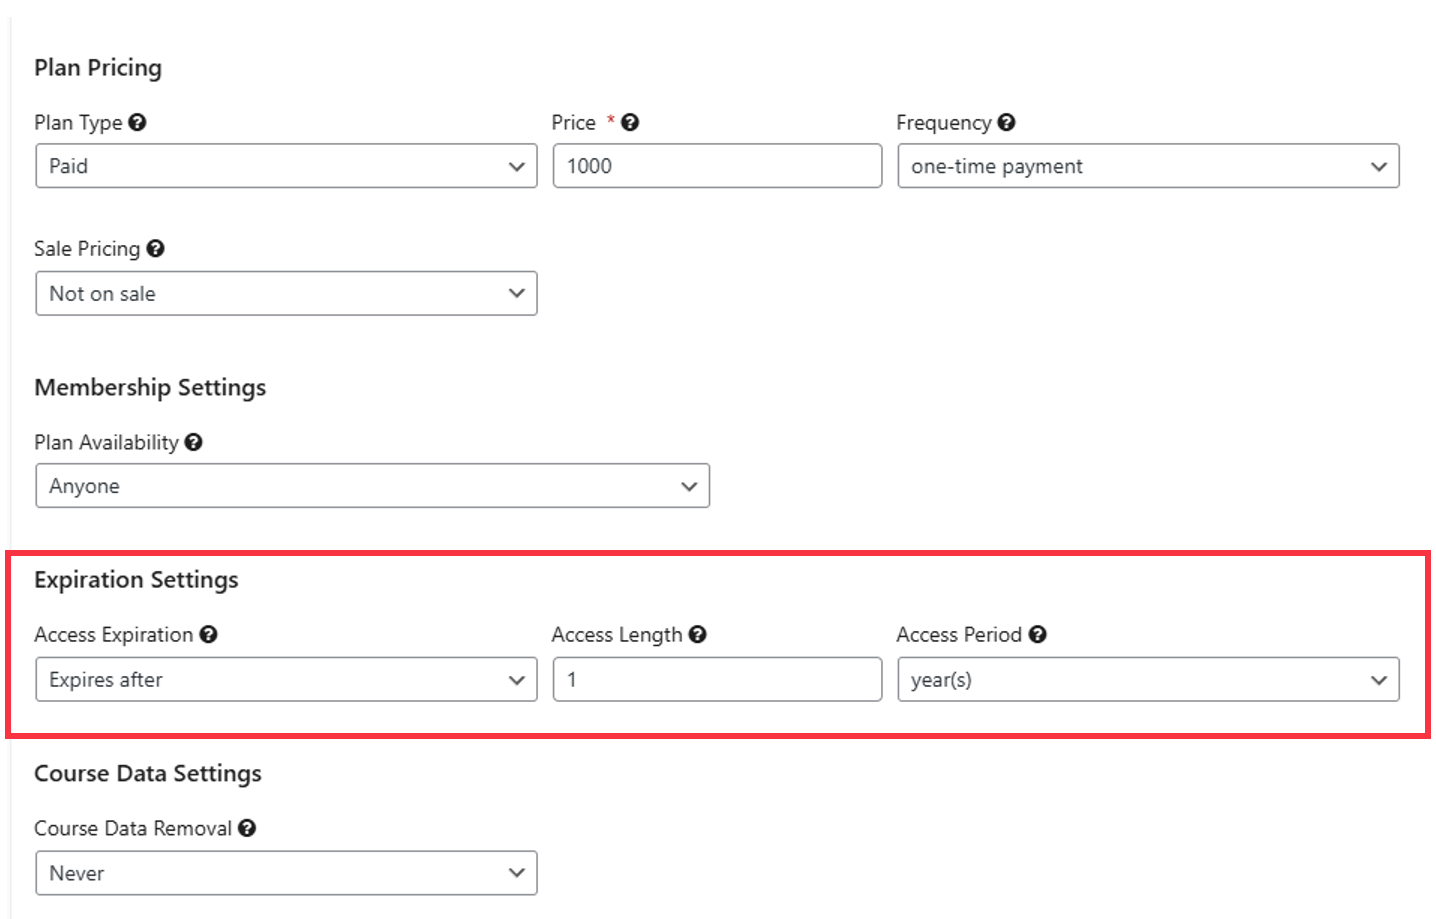
- Course Data Settings (choose whether to delete course data after expiry)

- Click Save All Plans when finished.
(Integration with CE renewal workflows and automated data resets will be added in a future update.)
Why don’t CEUs display on my course page?
Confirm a numeric value is entered in the “Continuing Education Units” field under the course’s General tab.
How can I change the CEU label?
Go to LifterLMS > Settings > Integrations > Continuing Education and adjust the naming fields.
Why can’t I see the CE merge codes in certificates?
These codes will be visible in an upcoming version of the add-on.
Can I export all CEUs earned by my students?
Yes. Use the Export option on the LifterLMS > Reporting > CEUs Earned tab.
- Expanded expiry configuration options.
- Automated CE renewal notifications.
- Learner dashboard summary of earned CEUs.
- Additional reporting filters.


