Locating Authorize.NET API Credentials
This guide will help you integrate your API credentials for the LifterLMS Authorize.Net Payment Gateway. Integrating these credentials enables your WordPress website to securely process real-time credit card transactions from students.
If you’re currently testing your setup, then you can also use the Authorize.Net Sandbox credentials on your WordPress staging environment. The sandbox environment allows you to simulate transactions without any financial risk or the exchange of real money.
If you’re working on the production WordPress site, follow the steps below to connect your Authorize.Net account to your WordPress website and begin accepting payments.
Locating Your API Credentials
You need Live API credentials from your Authorize.Net account to process real payments on your website.
- Open your web browser and visit https://account.authorize.net/.
- Log in to your live Authorize.Net account.
- Navigate to Account > Settings, then click the “API Credentials & Keys” link.
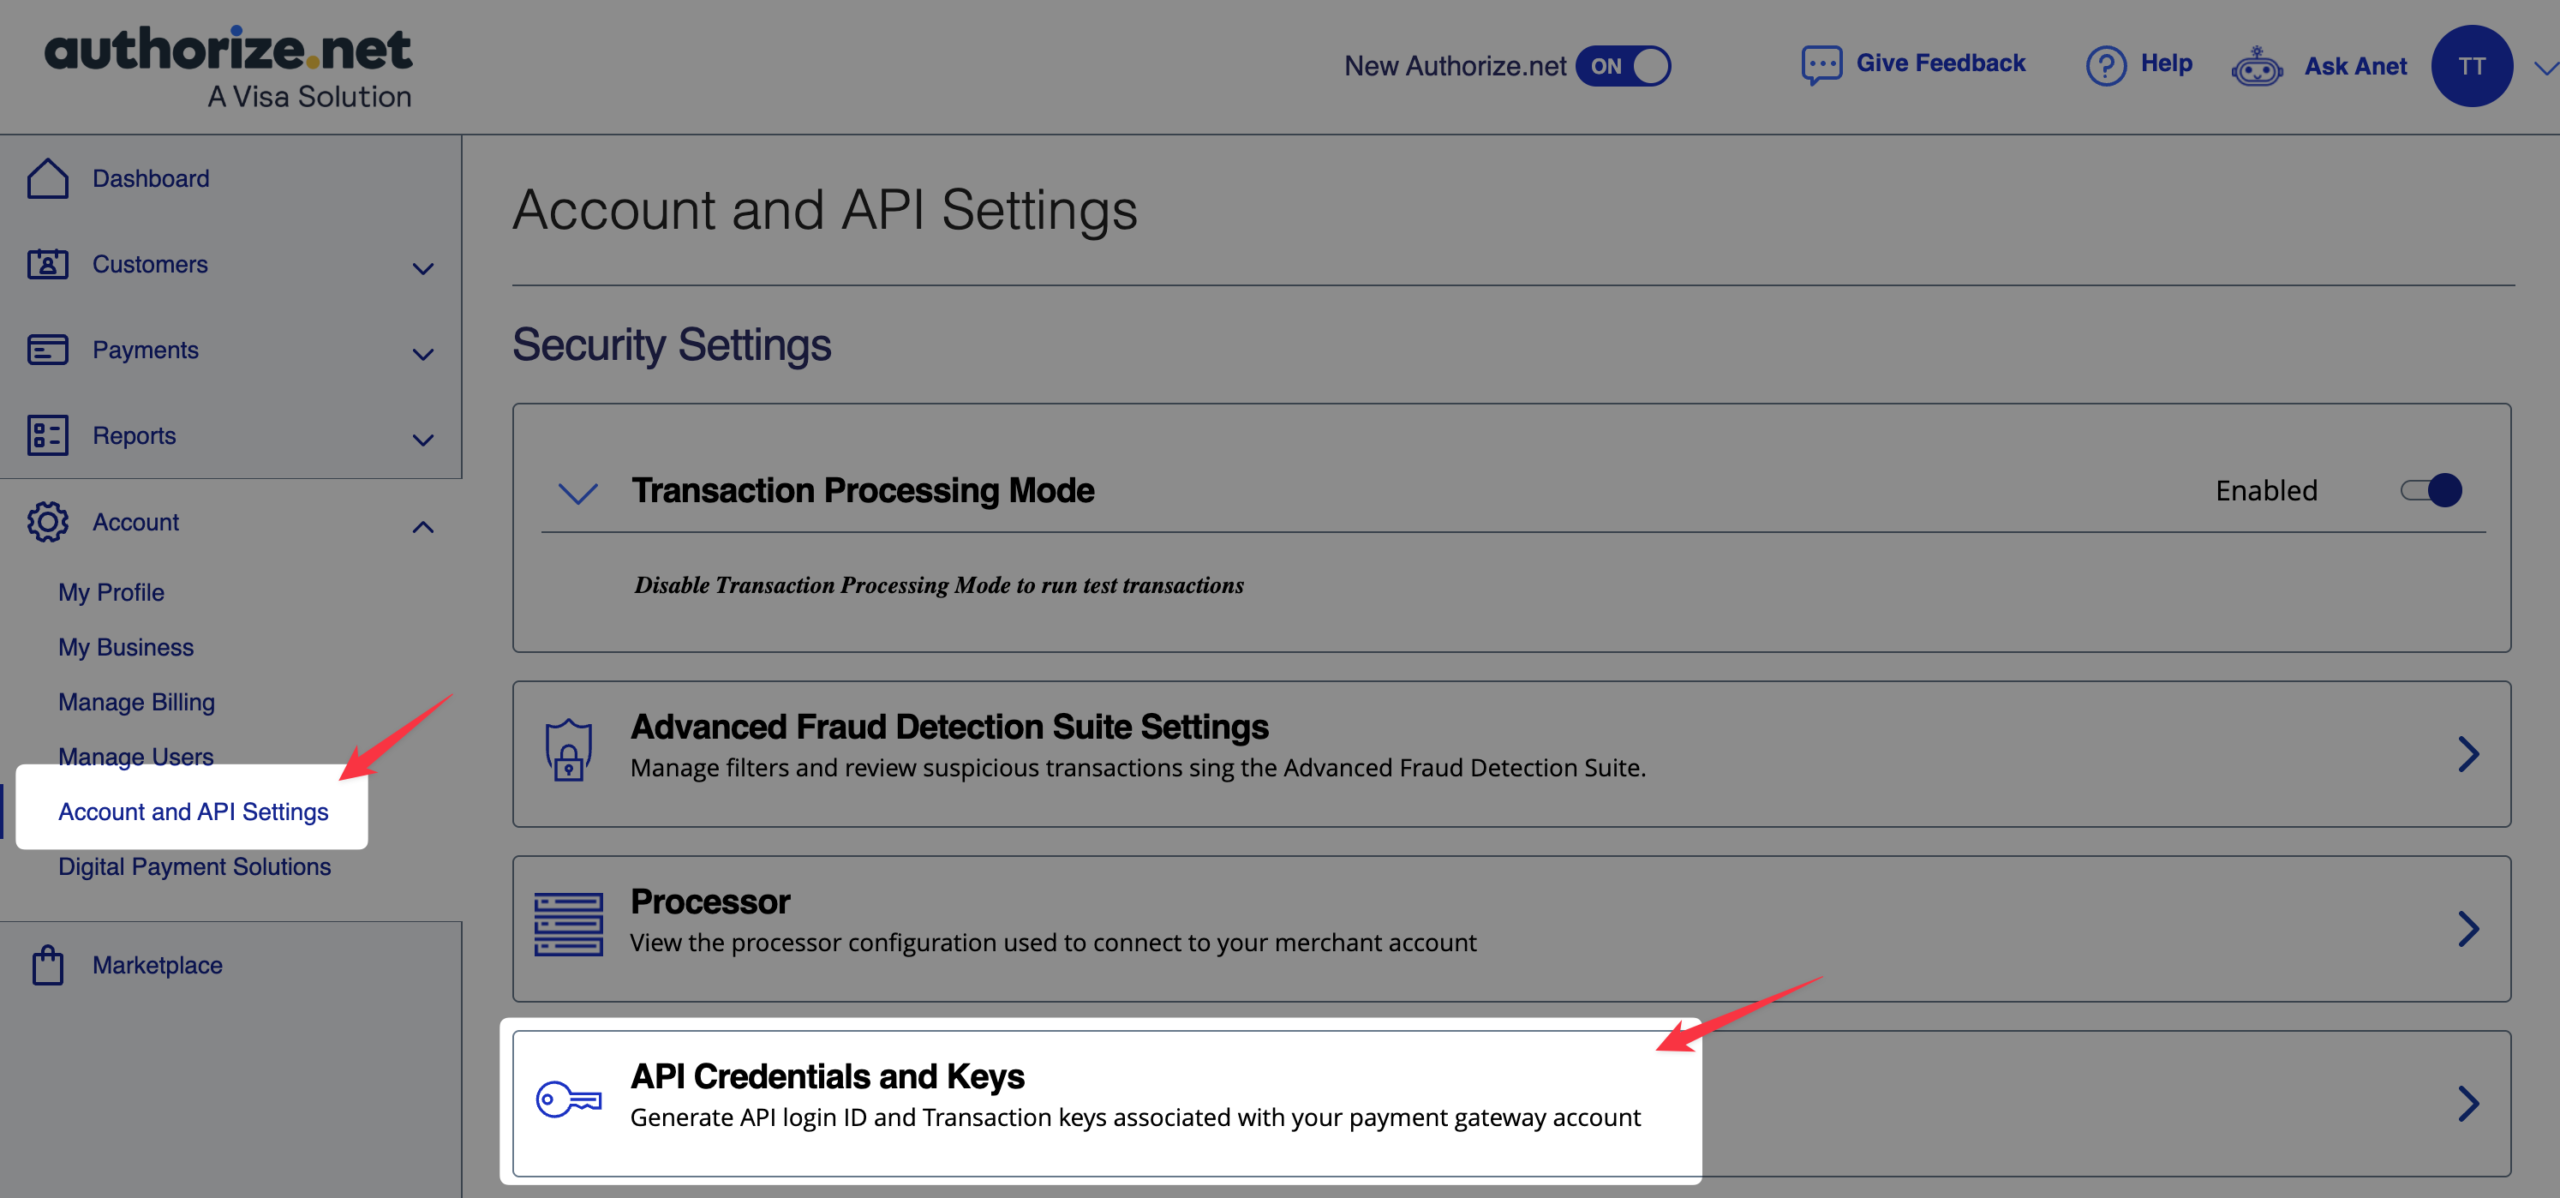
- Locate your “API Login ID” on this screen.
- Copy your “API Login ID” so you can paste it into the LifterLMS settings later.
Generating Your Transaction Key
Next, you need to generate a key that authorizes transactions between your website and your payment gateway.
- Still on the “API Credentials & Keys” screen, scroll down to the Transaction Key section.
- Click the “Generate new transaction key” button.
- Click the Submit button.
- Copy your new transaction key from the confirmation screen.
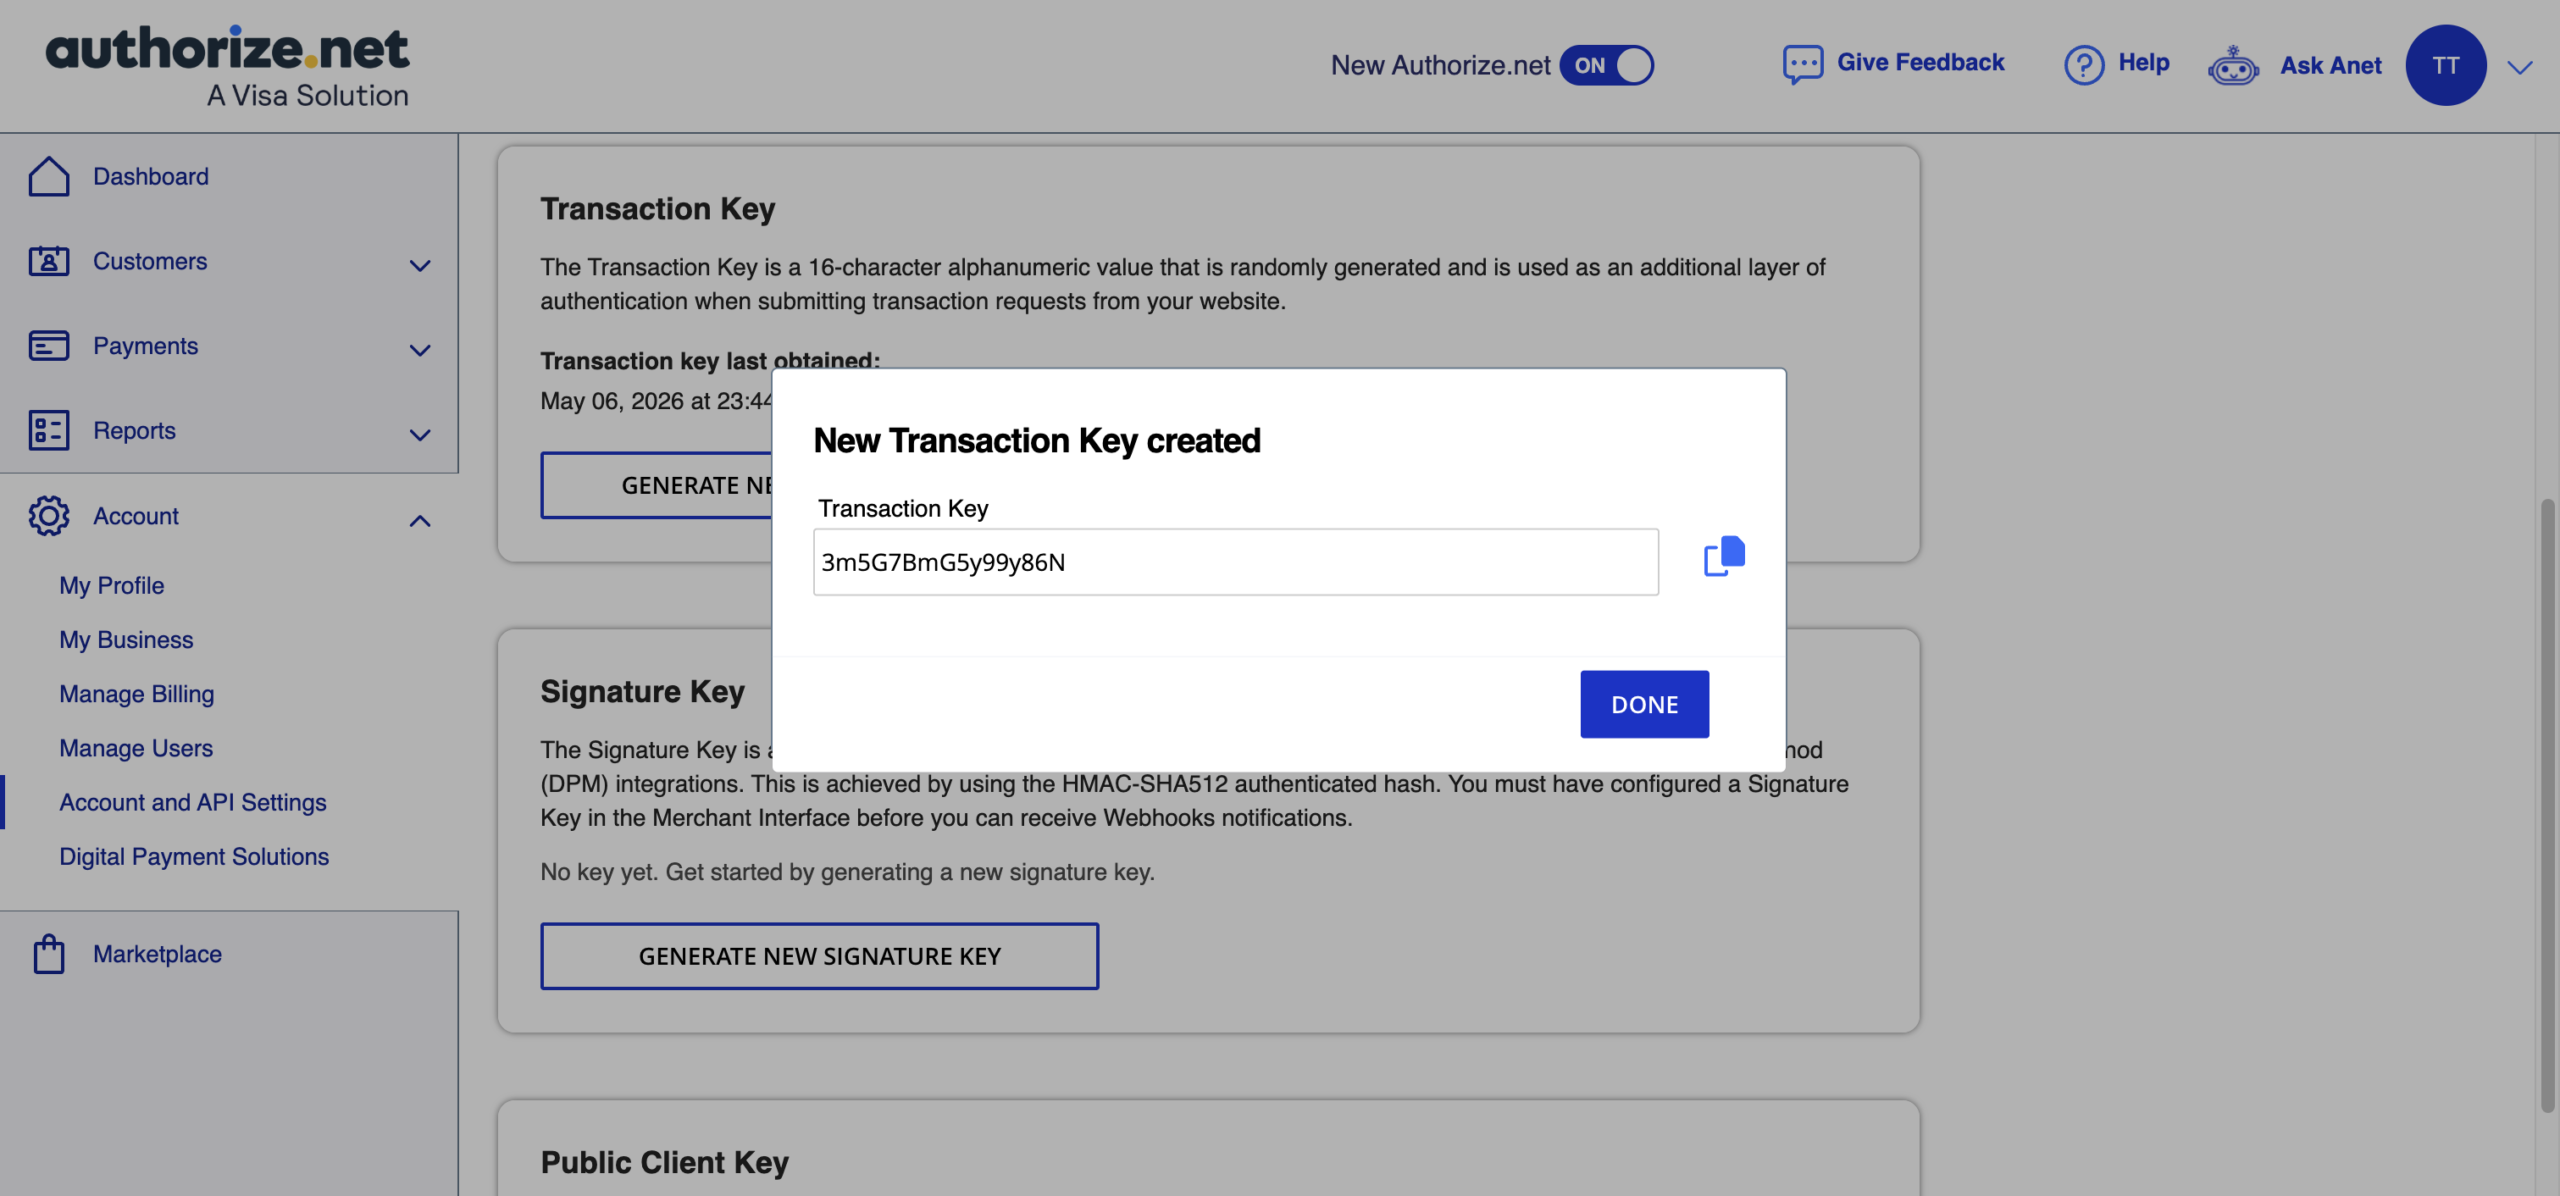
Warning: Authorize.Net displays your transaction key only once for security purposes. Please copy it immediately. If you lose this key, you must repeat the previous steps to generate a new one.
Generating Your Public Client Key
You need one additional key to complete your live setup.
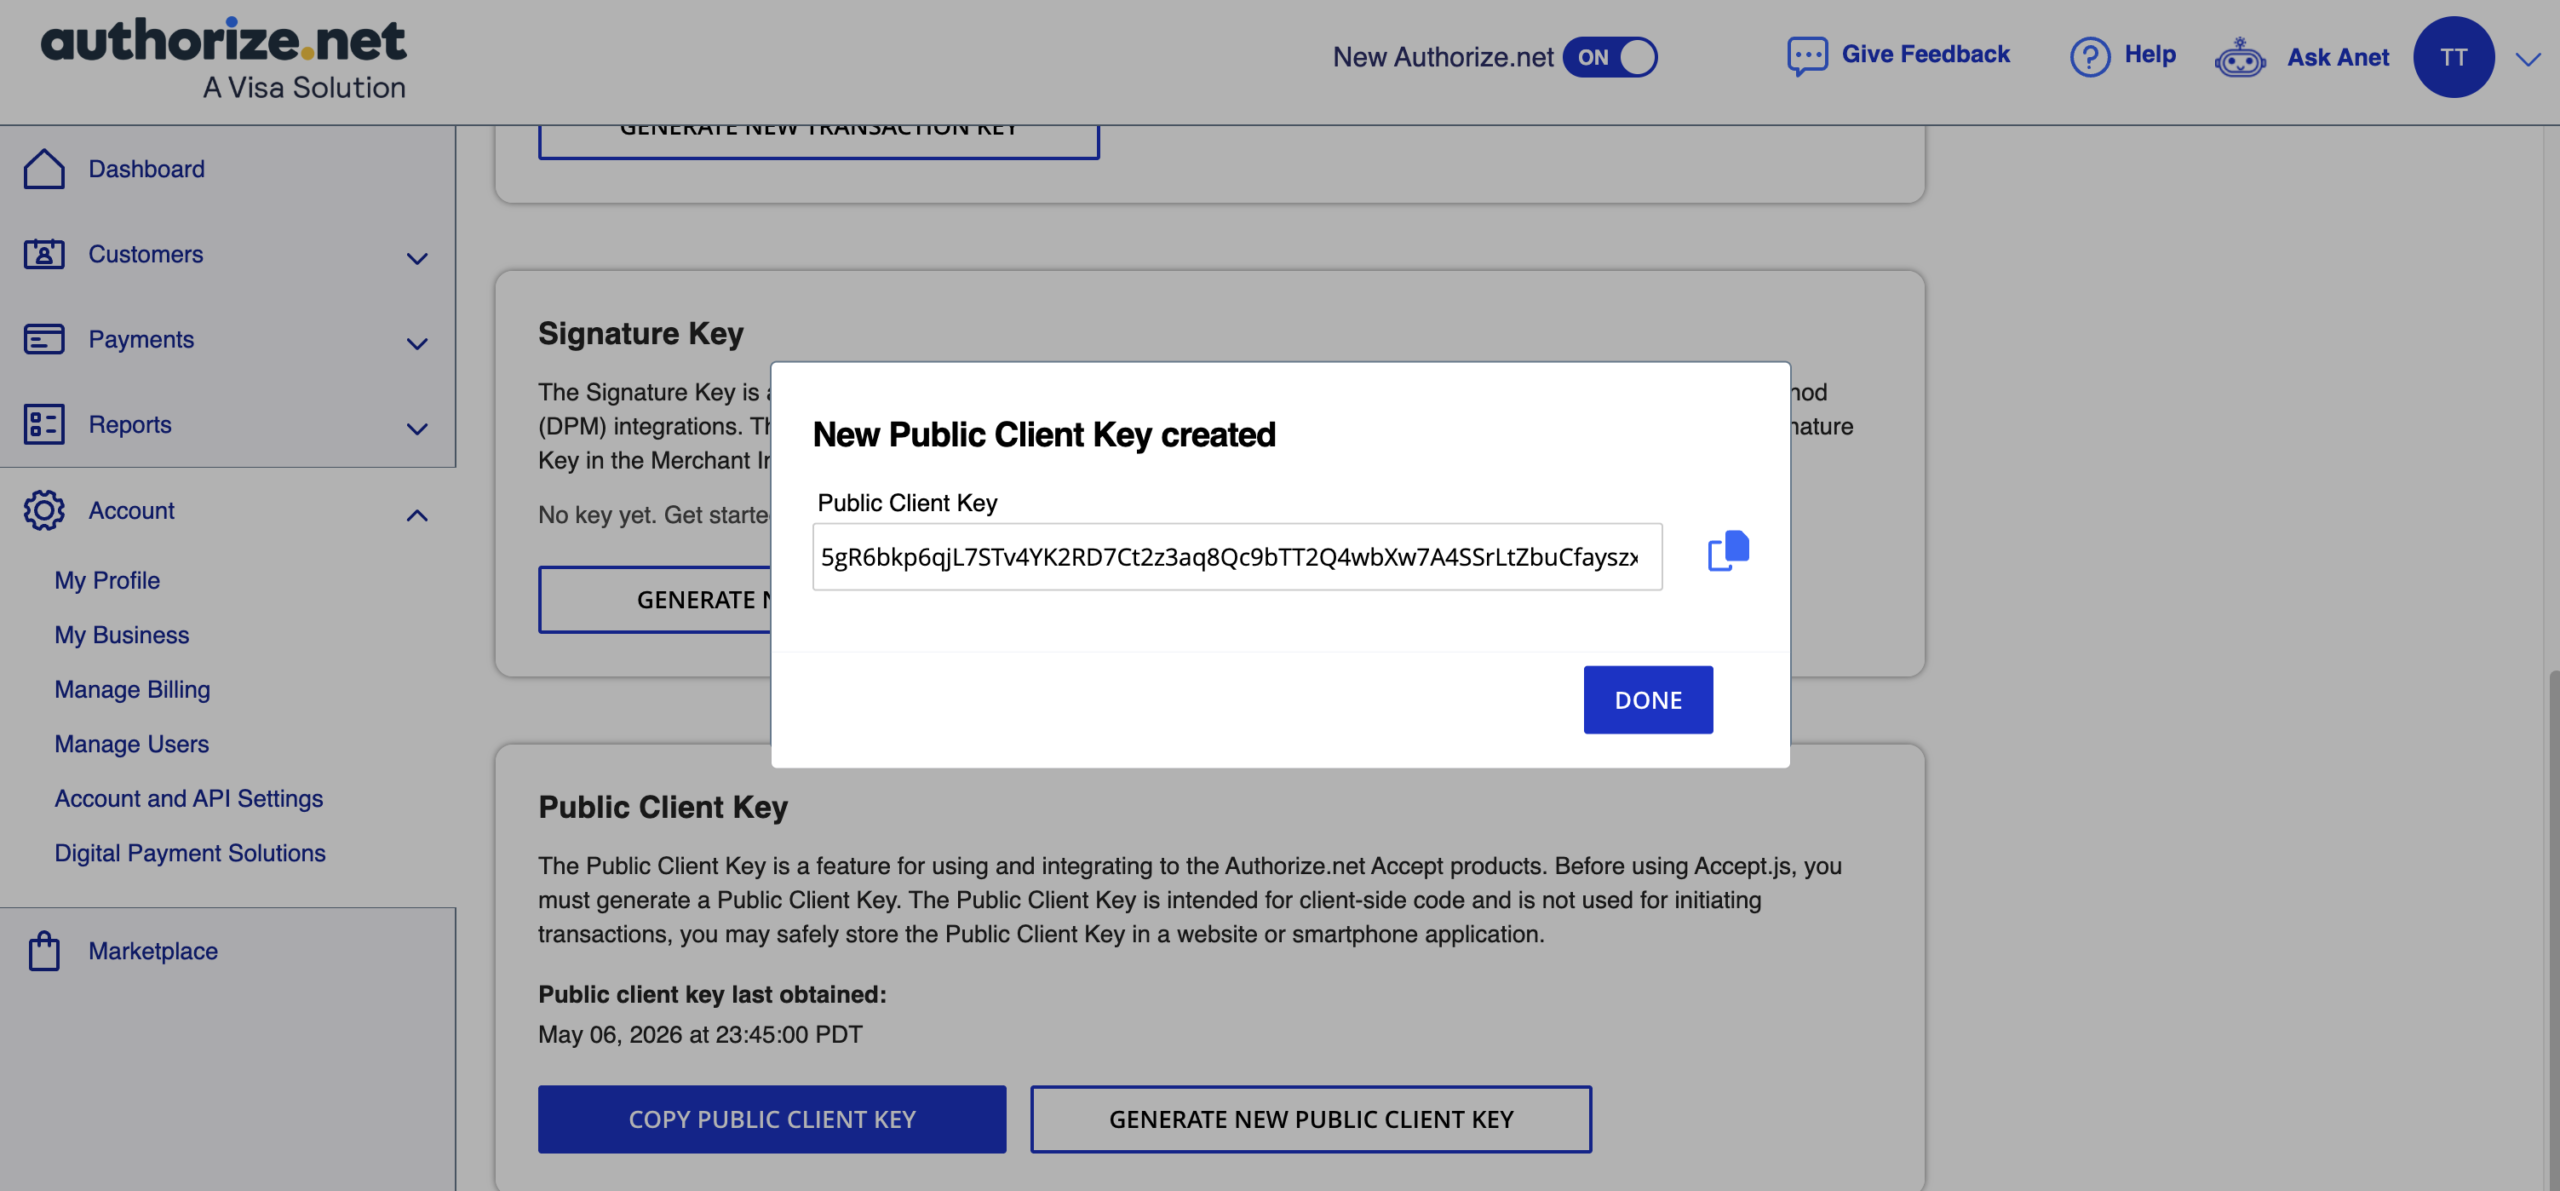
- On the same page, scroll down to the “Public Client Key” section.
- Copy your existing client key, or generate a new one.
Adding Credentials to LifterLMS
Now that you have gathered all of your keys, you need to add them to your website.
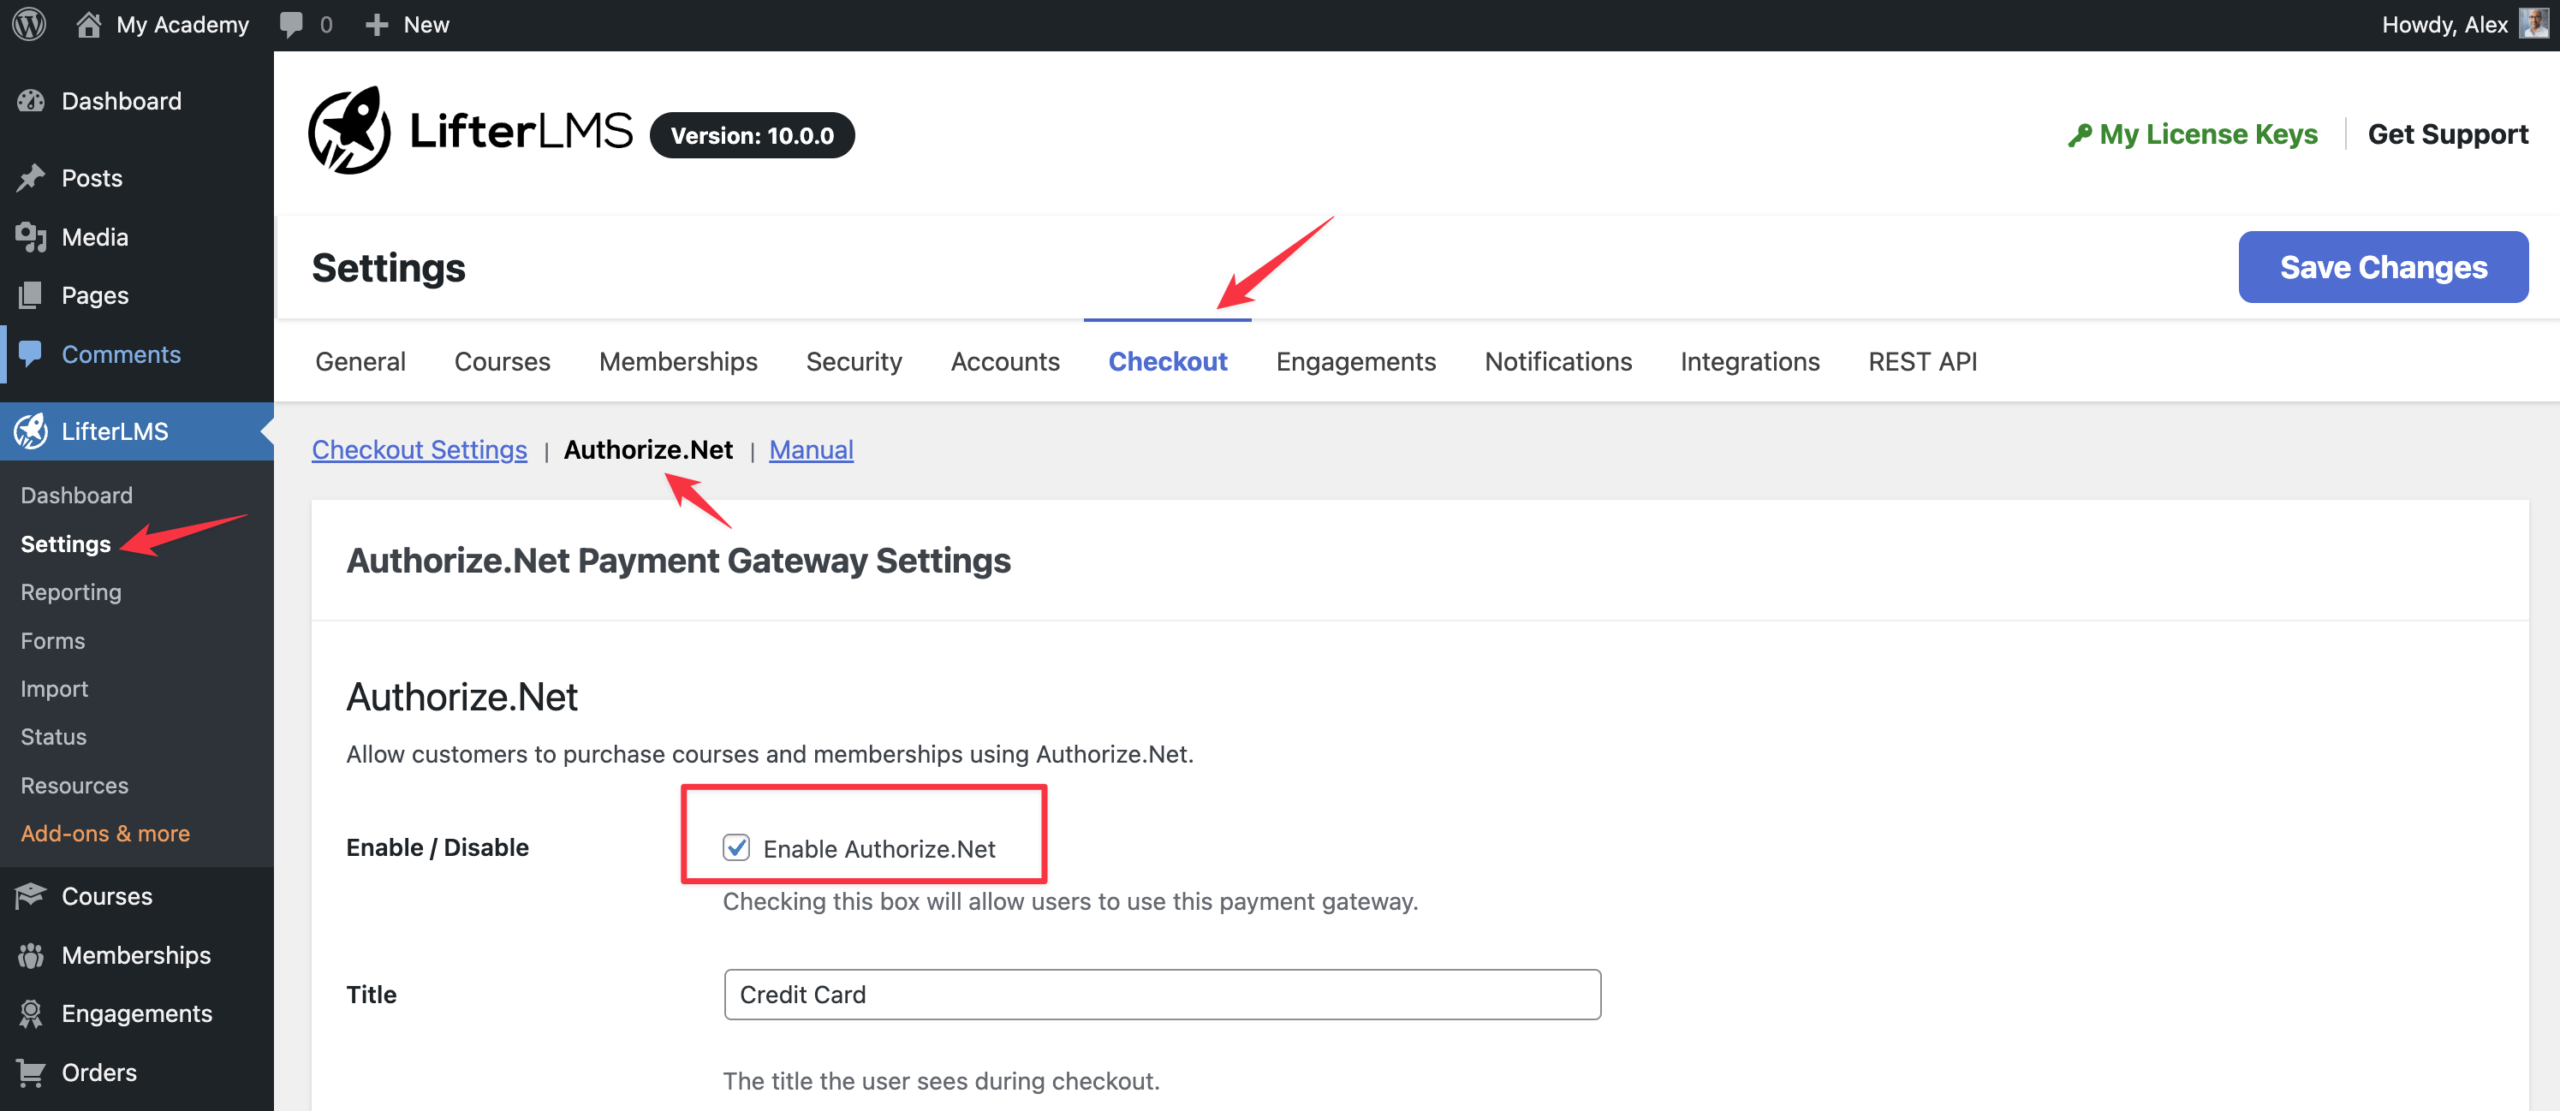
- Open your WordPress dashboard and navigate to LifterLMS > Settings > Checkout.
- Select “Authorize.Net” from your list of payment gateways.
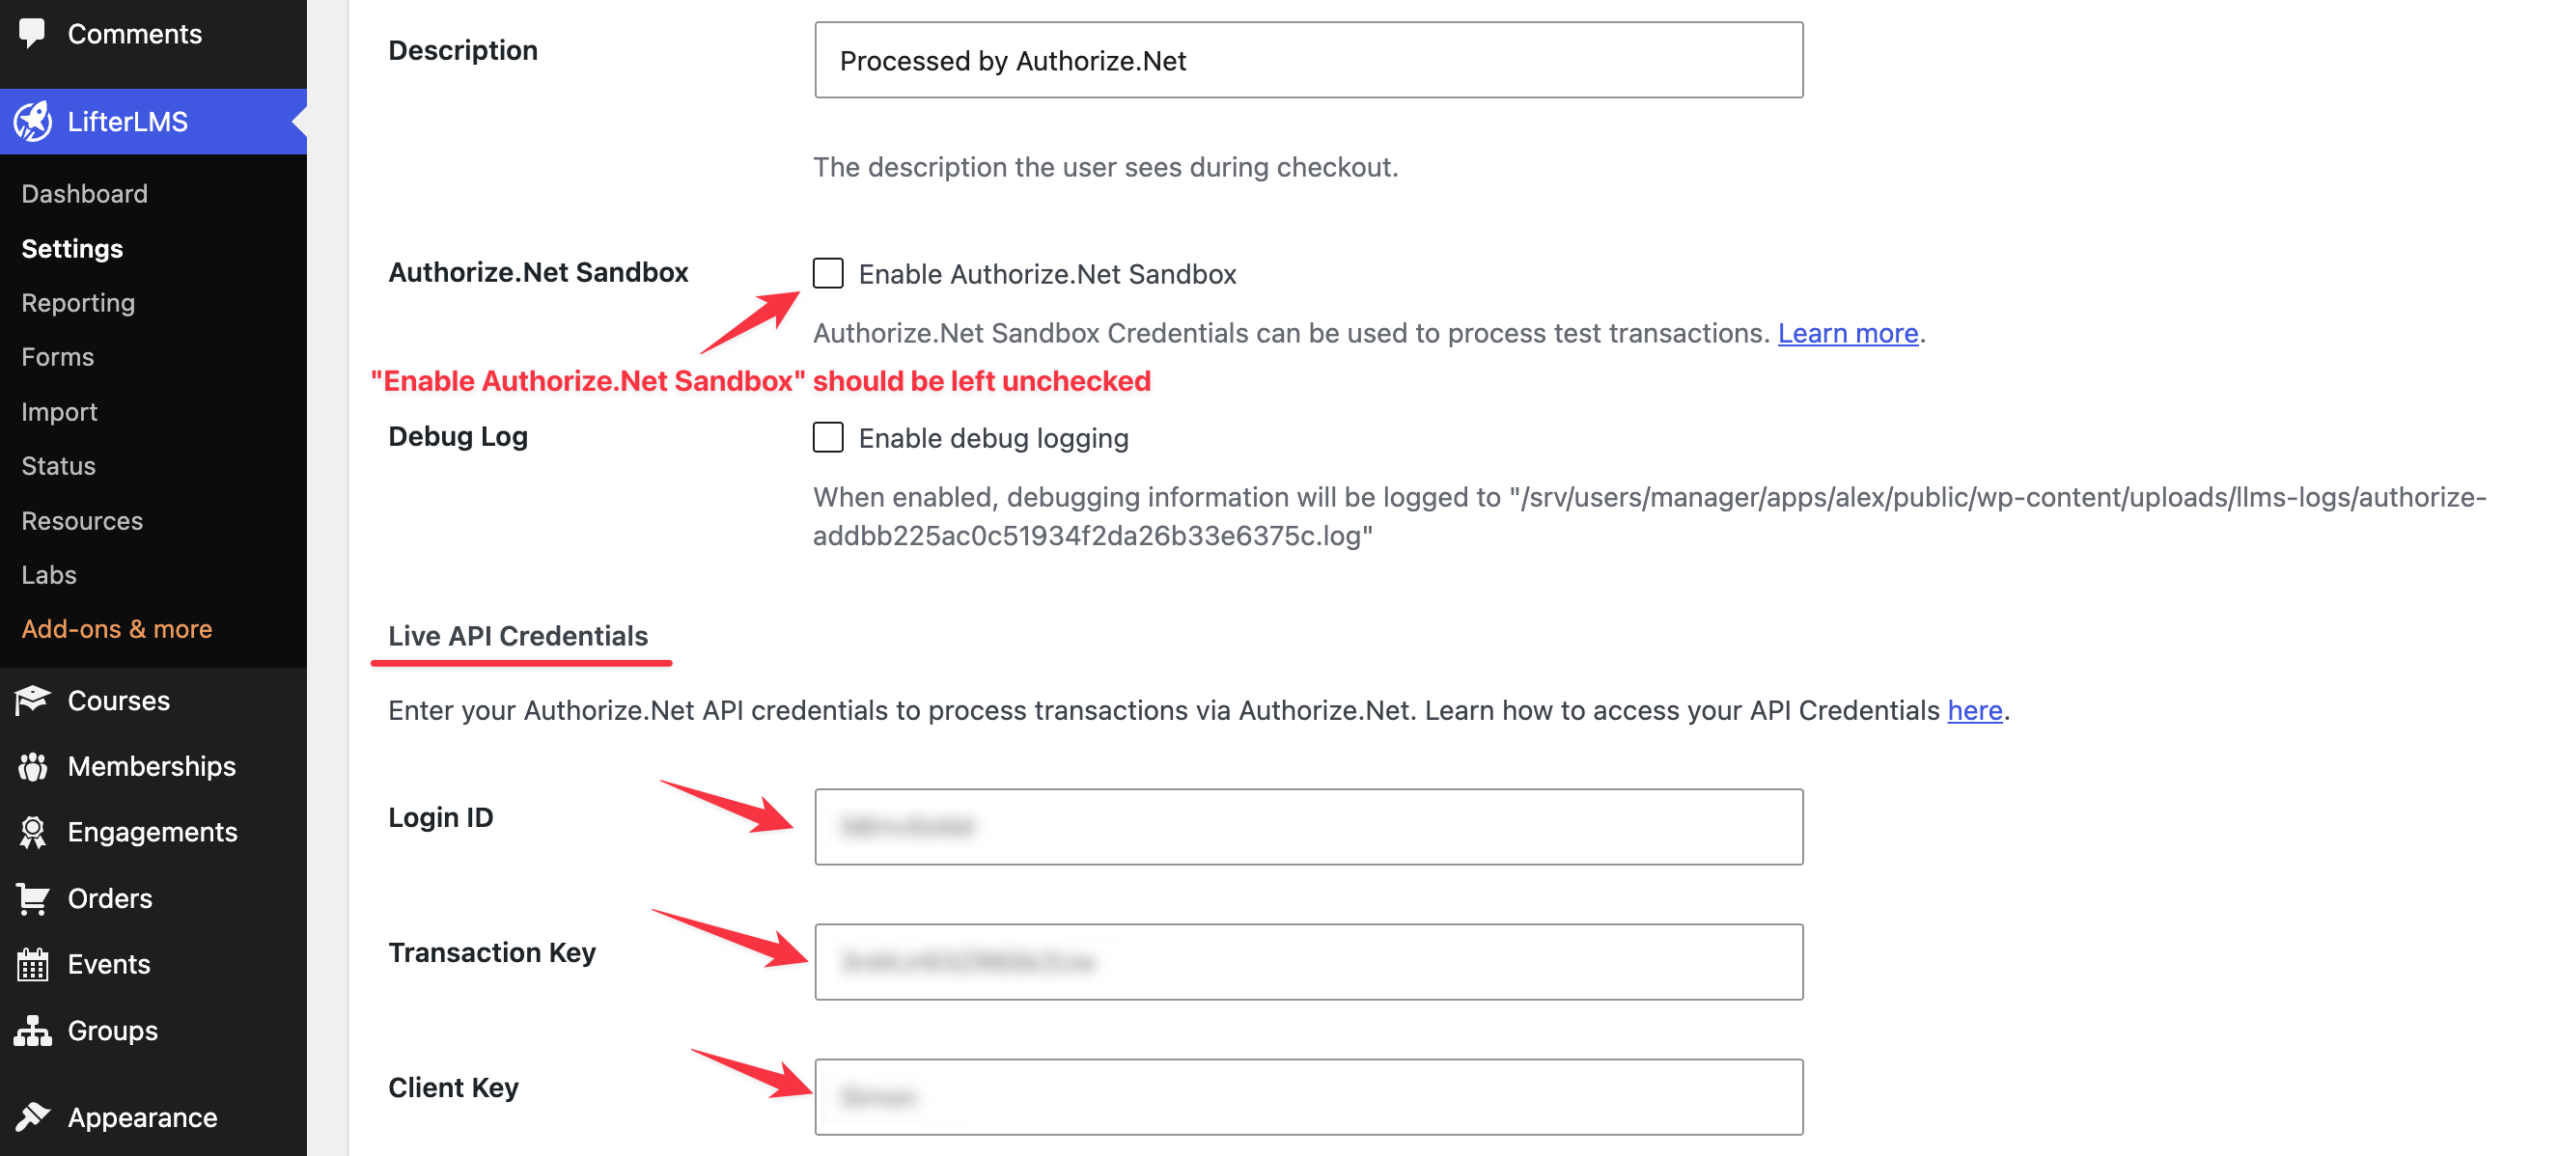
- On this screen, make sure the checkbox next to “Enable Authorize.Net” is checked, and the checkbox next to “Enable Authorize.Net Sandbox” is unchecked.
- Scroll down to the Live API Credentials section and paste your API Login ID, Transaction Key, and Public Client Key into their respective fields. (Note: the “Authorize.Net Sandbox” option should be left unchecked.)
- Click the Save Changes button.
A sandbox environment lets you test the LifterLMS Authorize.Net Payment Gateway using a simulated payment environment where no real money changes hands. This allows you to experience how Authorize.Net works in a realistic setting, verify your configuration, and test checkout behavior before going live.
WARNING: NEVER enable the staging/sandbox payment gateway on your live site. Students will be able to purchase courses without submitting any payment. The staging/sandbox mode is strictly intended for internal environments or dedicated staging sites to safely test themes, plugins, and webhook functionality using simulated, fake transaction data.
Creating a Sandbox Account
You’ll need to create an Authorize.Net developer account before you can begin testing.
- Open your web browser and visit https://developer.authorize.net/hello_world/sandbox.html
- Fill out the form provided on the page to create your free sandbox account.
- Log in to your new sandbox account at https://sandbox.authorize.net/
Enabling the Sandbox in LifterLMS
The process for obtaining sandbox keys is identical to that in production environments. Please read the section “Locating Your API Credentials” to generate your sandbox keys. After obtaining your keys, add them to your website and activate testing mode.
- Open your WordPress dashboard and navigate to LifterLMS > Settings > Checkout.
- Select “Authorize.Net” from your list of payment gateways.
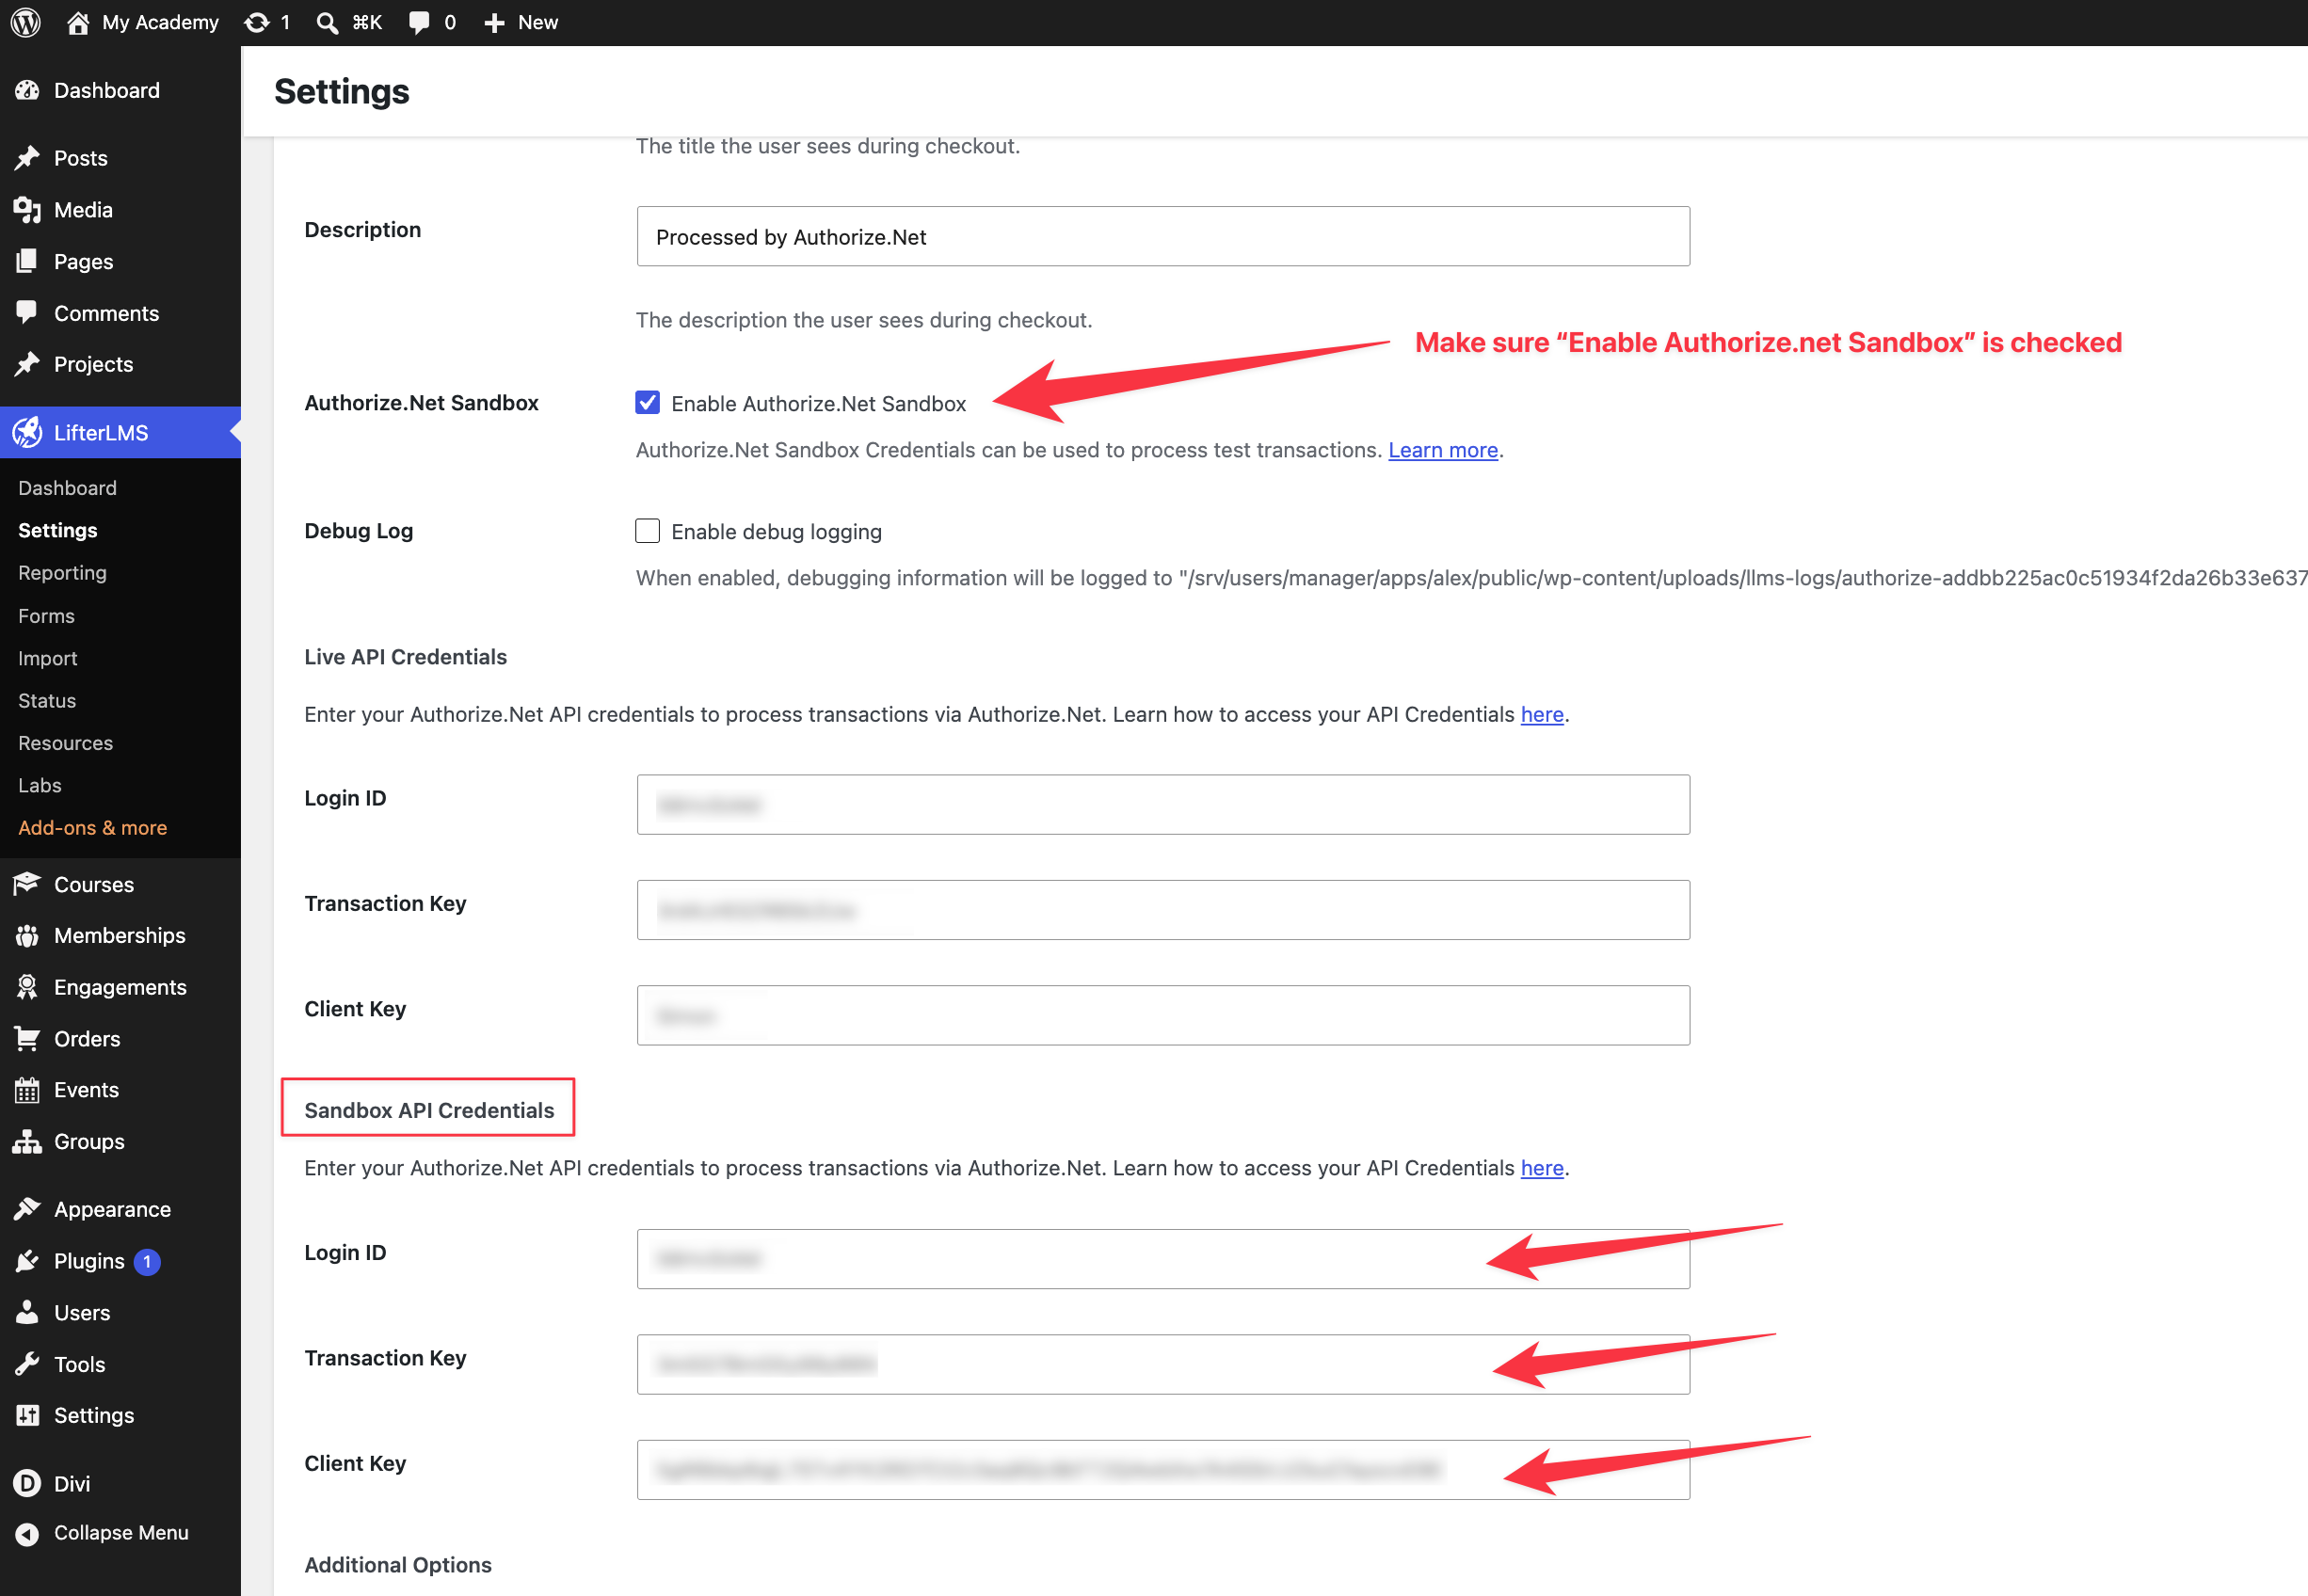
- On this screen, make sure to check the box next to “Enable Authorize.Net”.
- Next, scroll down and check the box next to the “Enable Authorize.Net Sandbox” option.
- After that, scroll down to the Sandbox API Credentials section and paste your API Login ID, Transaction Key, and Public Client Key into their respective fields.
- Click the Save Changes button to activate this payment gateway.
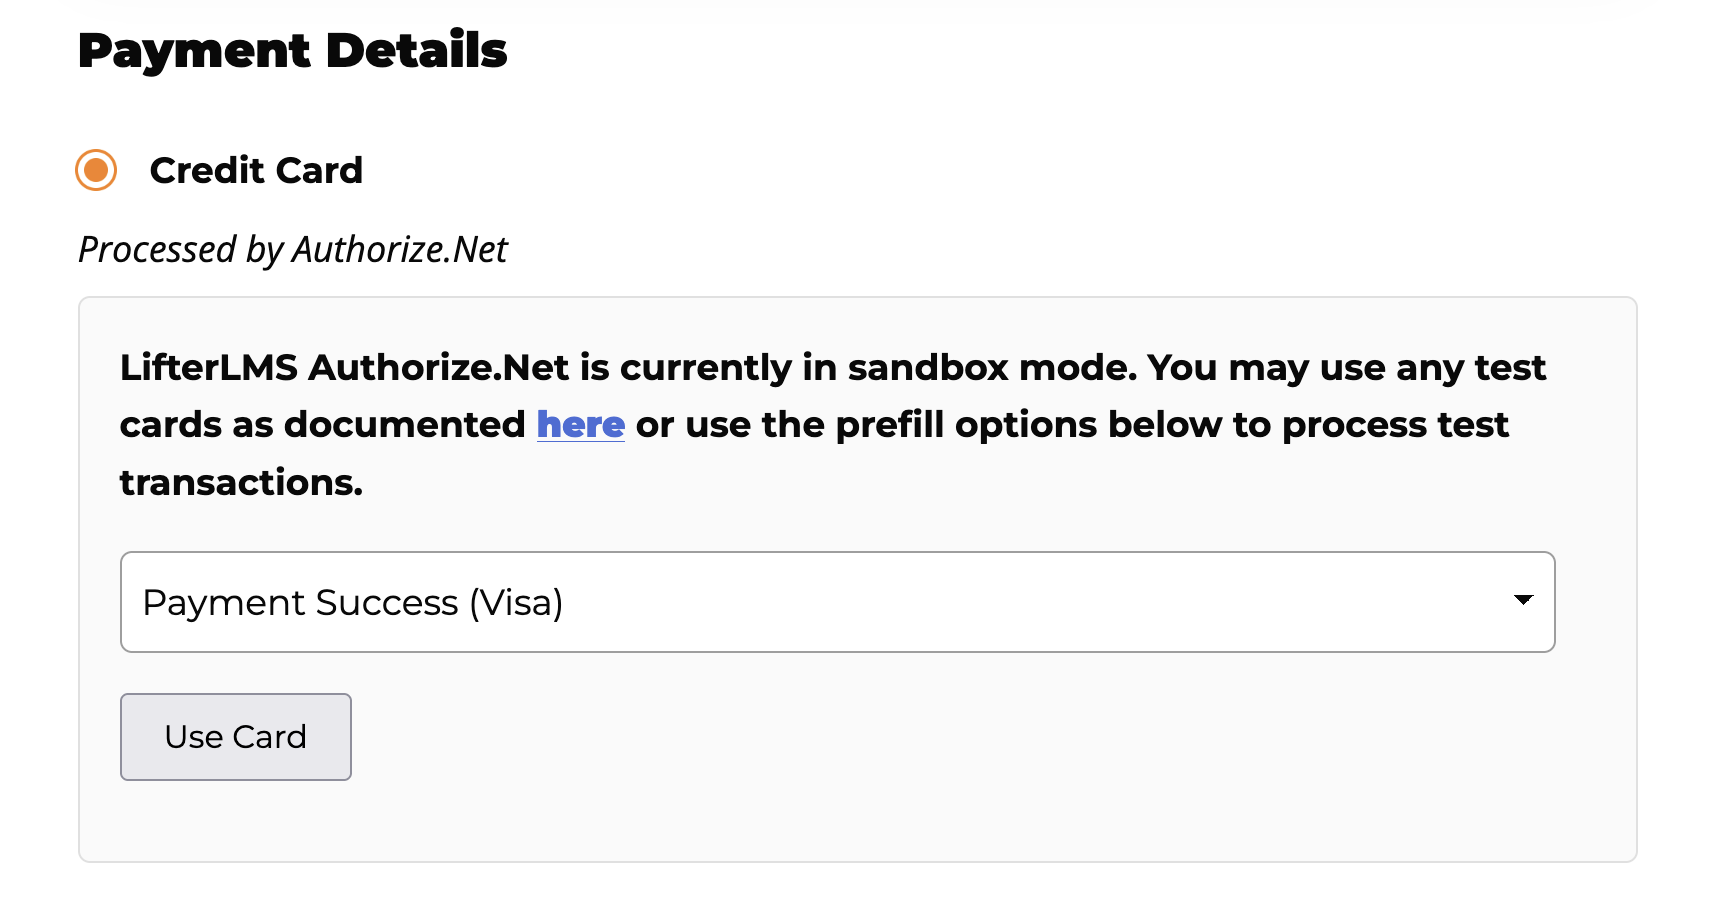
After enabling the sandbox payment gateway, you will see a “test card” modal on the LifterLMS checkout page. Here, you can click the “Use Card” button to complete the transaction with test cards.
For more information on testing different payment scenarios, we highly recommend the official Authorize.Net testing guide.
After your integration is complete and students start purchasing your courses, you can review your real transaction records inside your Authorize.Net dashboard.
- Log in to your live Authorize.Net account.
- Navigate to Payments > Manage Transactions
- Review your incoming transactions and payment history on this screen.


