SSL and HTTPS
SSL (Secure Socket Layer) is a protocol used on the web for encrypting data sent from a visitors browser to the server or from the server to a browser.
It also authenticates your website to that visitors know your identity has been verified.
HTTPS is HTTP with SSL.
SSL allows you to safely accept and transmit sensitive data between your website and your visitors. This data includes information such as passwords and billing or credit card information.
To use SSL on your website, you need to buy an SSL Certificate.
Many web hosts provide easy, one-click SSL installation. SSL certificates range in price depending on their features and the seller.
Once installed, you may visit your site at https://mywebsite.
In LifterLMS 3.0 and later, you can force SSL to be utilized on checkout pages.
You can enable this setting by visiting you WordPress admin panel and navigating to “LifterLMS -> Settings -> Checkout” and checking the “Force SSL” checkbox.
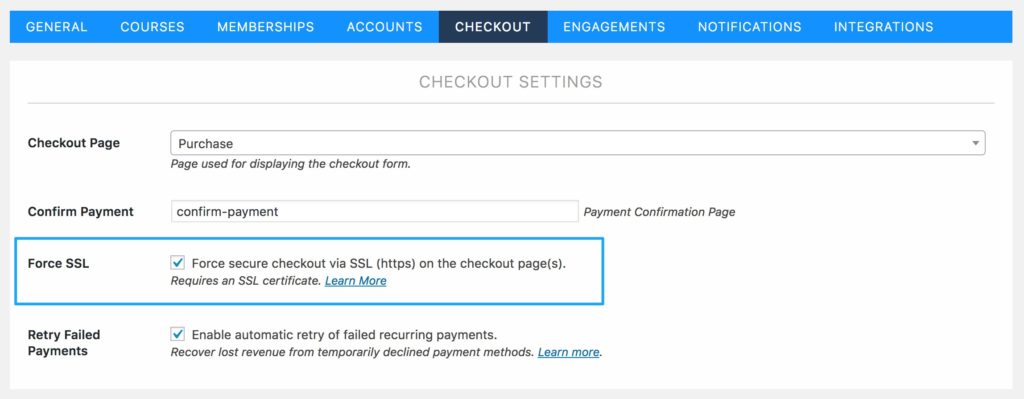
Once enabled, users visiting your LifterLMS Checkout Page will always be shown over HTTPS.
This setting is also useful when your WordPress Site Address (URL) if not https but you still want your checkout page to be SSL enabled.
LifterLMS uses the WordPress is_ssl() function to redirect non-secure pages. This can cause a redirect loop when you have another SSL plugin installed, such as WordPress HTTPS, trying to un-force the secure URL. Try removing the other plugin or turn off the Force SSL setting.
If your WordPress Site Address (URL), configured under WordPress Settings -> General is an https URL you should not use the Force SSL setting as this will cause a redirect loop.
These warnings may be displayed by your browser if content like stylesheets, javascript files, images, and videos are being served via http instead of https.
Most of these issues can be addressed by changing the urls in the WordPress editor or by utilizing relative URLs rather than direct URLs (“/wp-content/file” rather than http://mysite/wp-content/file).
You can also use a plugin like WordPress HTTPS to force URLs to be secured.
You can identify non-secure links using Firebug or Chrome’s developer tools. Look at the error console where you can find a list of non-secured resources.


