Getting Started with LifterLMS PayPal
To install LifterLMS PayPal on your WordPress site:
- Ensure LifterLMS is installed, up to date, and activated.
- Download the LifterLMS PayPal plugin .zip file from your account downloads page.
- Navigate to your WordPress admin panel and install and activate the plugin.
To ensure you can receive support and automatic updates, enter your license key to register your site with the LifterLMS update servers.
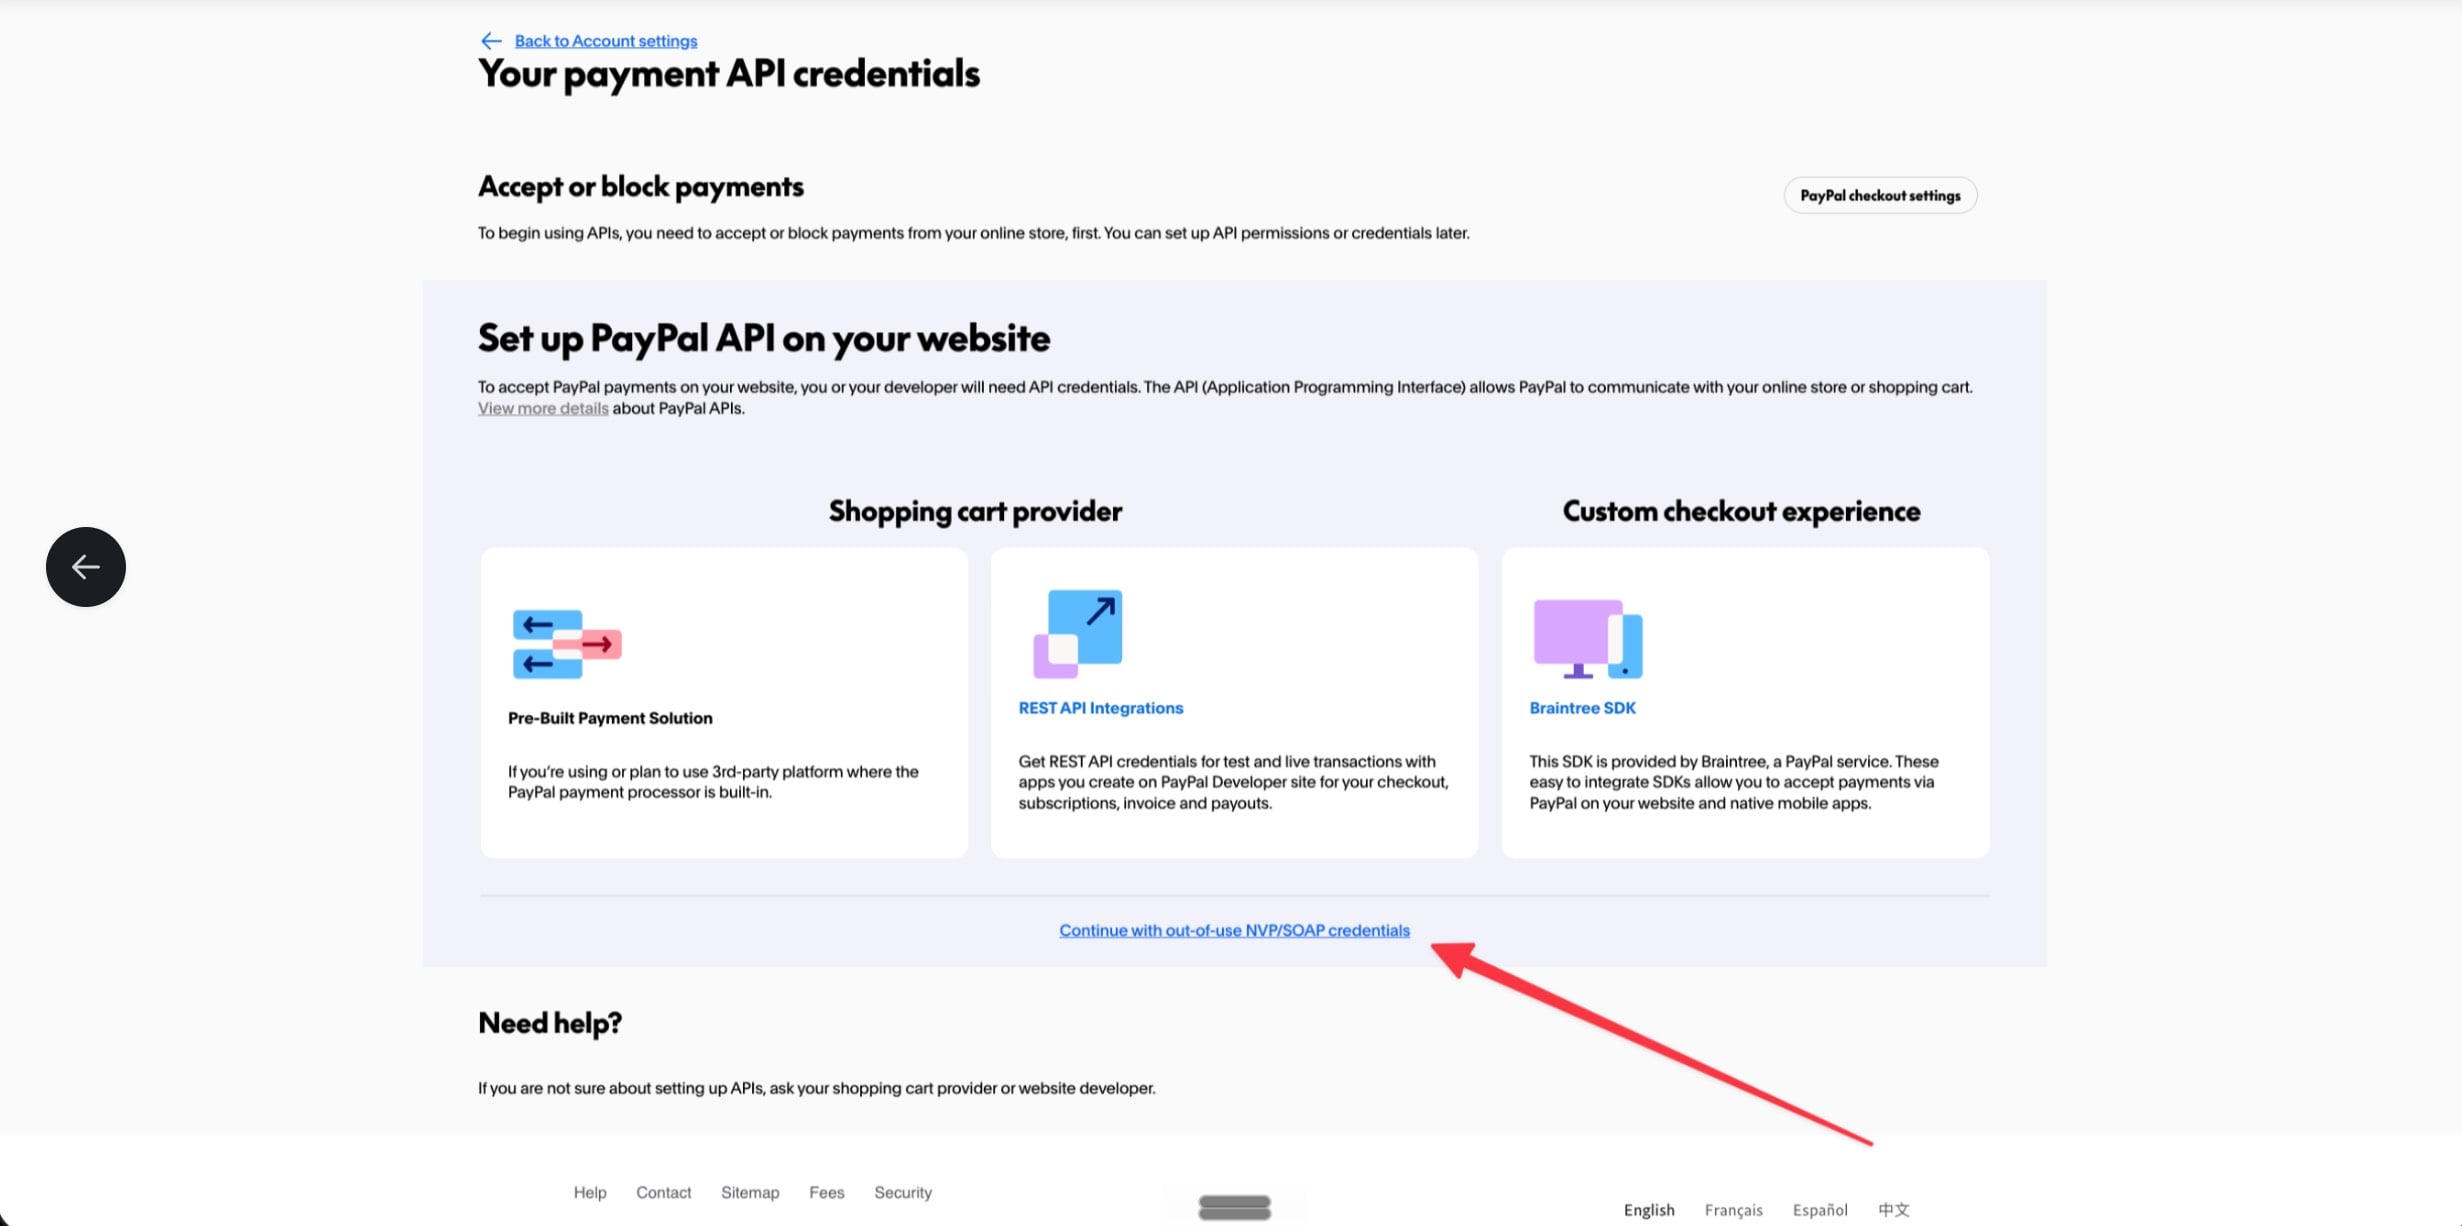
You will need to get your PayPal API keys to integrate LifterLMS. Follow these steps to get your API key:
- Log in to your PayPal account.
- Navigate to the API Access page to begin the process.
- Once the page loads, look for the link labeled “Continue with out-of-use NVP/SOAP credentials” at the bottom of the main setup box.
- Click this link to reveal the classic API signature, username, and password fields that our integration requires.
After that, you’ll need to enter your PayPal API credentials and then enable the PayPal gateway.
- Navigate to LifterLMS > Settings > Checkout
- Locate the PayPal settings area under “Payment Gateways”
- Enter your Live API Credentials obtained in the previous section.
- Check the box to Enable PayPal
- Click “Save Changes” at the bottom of the screen
This will save your API keys to your site’s WordPress database. If you’d prefer to use a more secure method, you may define your API credentials in your site’s wp-config.php file:
PayPal provides free sandbox accounts that allow you to test PayPal payments without having to use real money. To use the PayPal sandbox, ensure you use sandbox credentials and check the “Enable PayPal Sandbox” checkbox in your LifterLMS PayPal settings.
You can learn how to create and use sandbox credentials here.
By default, LifterLMS PayPal uses manual recurring payments, which require students to resubscribe when a payment is due.
To enable automatic recurring payments, your PayPal account must have Reference Transactions enabled. You can learn more about this and read the complete tutorial on enabling reference transactions for LifterLMS.


