How to edit Courses, Memberships and Lessons with Beaver Builder
With LifterLMS 8.0 or later, LifterLMS and Beaver Builder Pro or Lite are able to integrate seamlessly with each other.
The following features are enabled automatically:
- Editing Courses, Memberships and Lessons using Beaver Builder
- Adds LifterLMS-specific modules for course and lesson construction via Beaver Builder
- Adds row & module visibility settings to conditionally display elements based on course/membership enrollment status of the current visitor
- Adds a basic LifterLMS course template for quick course building with a layout similar to the standard LifterLMS course layout
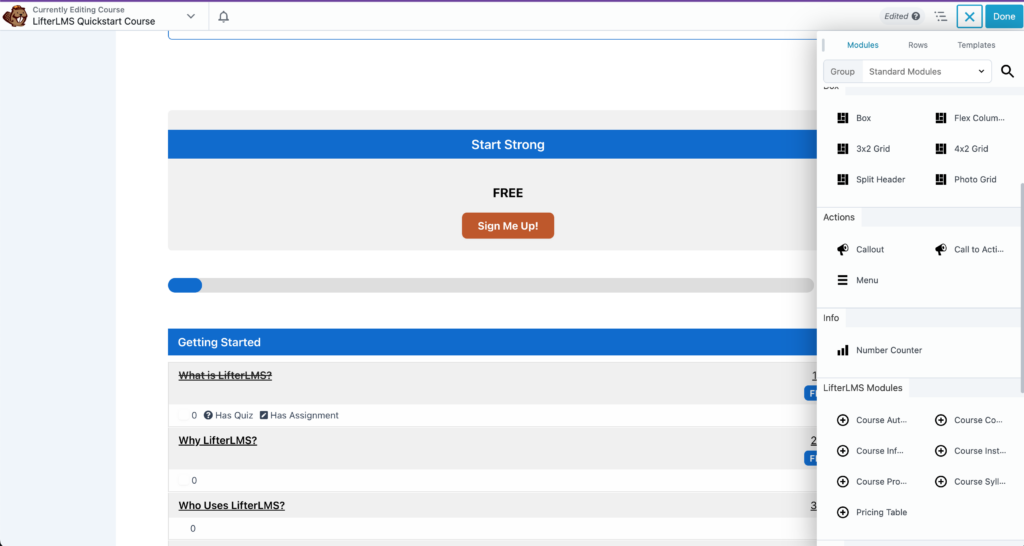
When editing a Course, Membership or Lesson with Beaver Builder, the following modules are available for use:
- Course Author: Displays the author information for the selected course. Information includes the author’s avatar, name, and, optionally, biography
- Course Continue Button: Displays a button linking to the next uncompleted lesson in the selected course. If the course is complete, displays “Course Complete” text
- Course Information: Displays course meta information (length, difficulty, tracks, categories, and tags).
- Course Instructors: Displays the instructor(s) for a course.
- Course Progress Bar: Displays the current student’s course progress in a visual progress bar
- Course Syllabus: Displays the course syllabus for the selected course
- Lesson Mark Complete Button: Displays the Mark Complete / Incomplete button for a lesson. If a quiz is attached to the lesson, will display a “Take Quiz” Button instead
- Pricing Table: Displays the pricing table (access plans) for a course or membership
- Membership Instructors: Displays the instructor(s) for the membership.
Note that some modules will not appear if they do not apply to the current page. For example, the “Lesson Mark Complete Button” can only be added to a Lesson.

New settings are added to all rows and modules in the page builder which allow you to determine whether or not the element is visible to a site visitor based on their enrollment in courses and / or memberships.
To customize these visibility settings, open the settings for any row or module and click the “Advanced” tab. In addition to the default Visibility options (Always, Logged Out, Logged In, and Never), this lab adds some additional options.
Visibility Options include:
- Enrolled Students: Displays element only to students enrolled in selected course(s) and/or membership(s)
- Non-Enrolled Students: Displays element only to students not enrolled in selected course(s) and/or membership(s)
In options include:
- Current Course / Membership:
- When Display To is “Enrolled” the element will be shown to a student enrolled in the current course or membership.
- When Display To is “Non-Enrolled” the element will be shown to a student only if they are not-enrolled in the current course or membership
- Note this can only be used on course or memberships. If used on a page, post, or other post type it will not work.
- Any Course(s) or Membership(s)
- When Display To is “Enrolled” the element will be shown to a student enrolled in at least one course or membership
- When Display To is “Non-Enrolled” the element will be shown to a student only if they are not-enrolled in any courses or membership.
- Specific Course(s) and/or Membership(s)
- When Display To is “Enrolled” the element will be shown to a student enrolled in any or all of the selected courses and/or memberships
- When Display To is “Non-Enrolled” the element will be shown to a student only if they are not-enrolled in any any or all of the selected courses and/or memberships.
When using visibility settings and module searching on a lesson, the course used will be whatever course the current lesson belongs to.
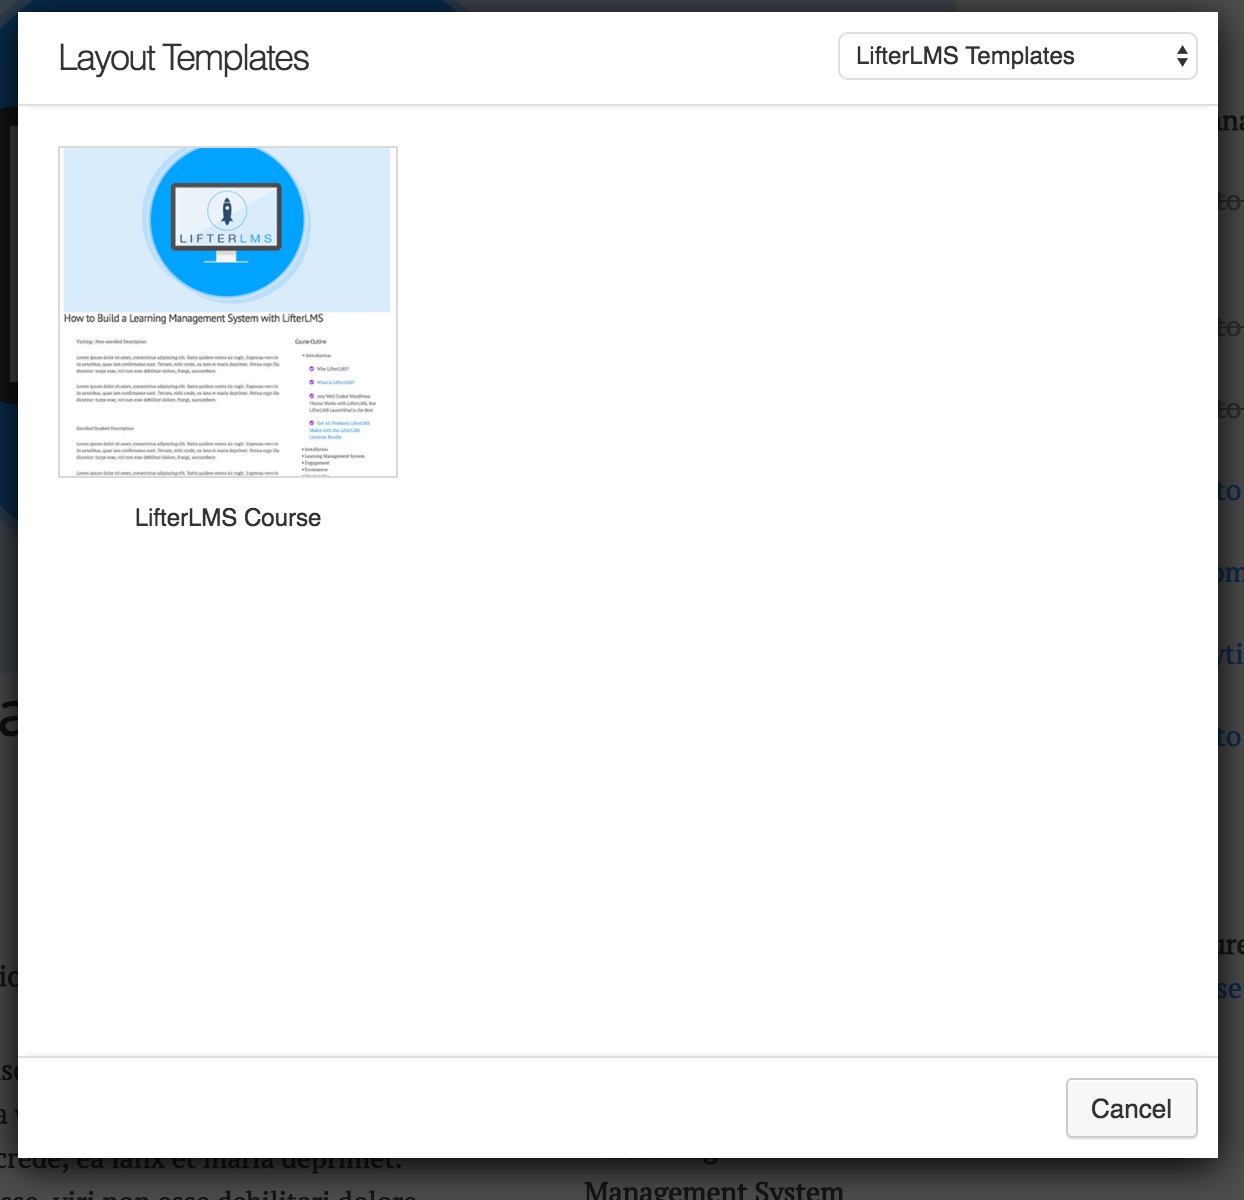
There is a prebuilt course template you can load into your courses to achieve a default layout very similar to the standard LifterLMS course layout. This layout can be found under “LifterLMS Templates” when you click the “Templates” button from within the builder.

Check out this blog post for more information about the LifterLMS Integration for Beaver Builder: http://blog.lifterlms.com/labs-beaver-builder/


