CSS Structure
Inside the assets/css directory are the various CSS files utilized by LifterLMS to add structure, layout, and styles to LifterLMS.
lifterlms.cssis responsible for most of the CSScertificates.cssis responsible for the CSS of Certificate permalinks
The minified (.min) versions of these files are the files actually loaded by LifterLMS. The unminified versions are included only to allow for human-readability.
If you intend to add custom CSS to your site, do not customize the content of these files directly, instead, add custom CSS via the Customizer.
The fastest way to override a default style in LifterLMS is to locate the CSS selector used by LifterLMS and then add custom rules to that same selector via the Customizer.
For this example, we’ll change the default color of a LifterLMS Button using CSS and Chrome Dev Tools but this can be used to locate a CSS selector for anything on your website!
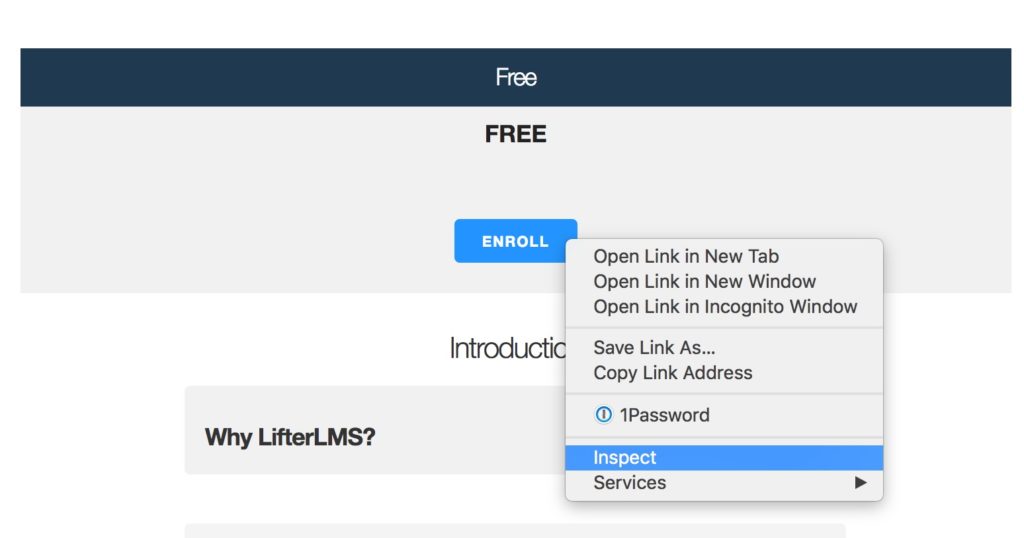
1. Open Chrome to the page where you want to customize something
2. Right click the element (the button) and select “Inspect” from the context menu
3. Dev tools will now open, revealing an overwhelming amount of information. Let’s walk through the important parts.
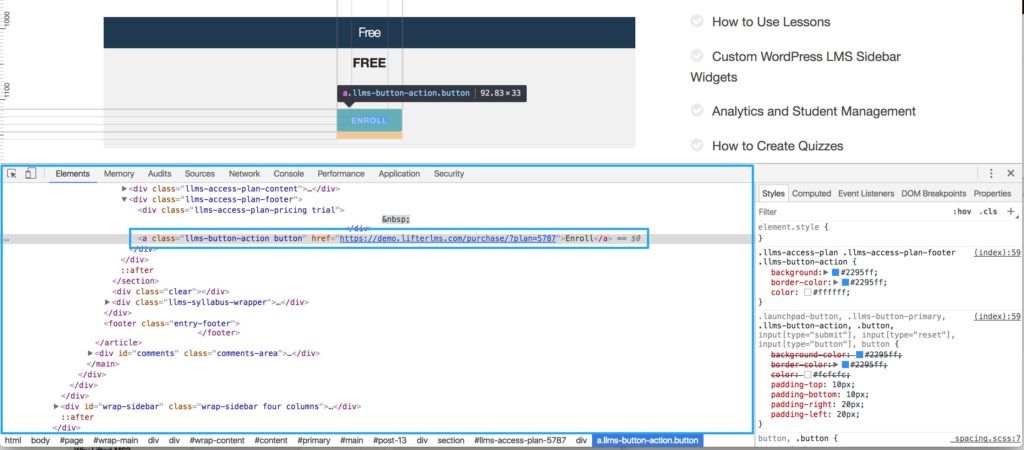
In the above image, the larger blue square highlights an interactive DOM (Document Object Model). The DOM is a representation of the rendered HTML of your website.
You can highlight any HTML element on your website in this area.
The inner square shows the button we’ve selected.
The right hand side of the dev tools window displays an interactive version of your site’s CSS.
After selecting an element, you can use the right-hand side to locate a selector for the element you’ve selected.
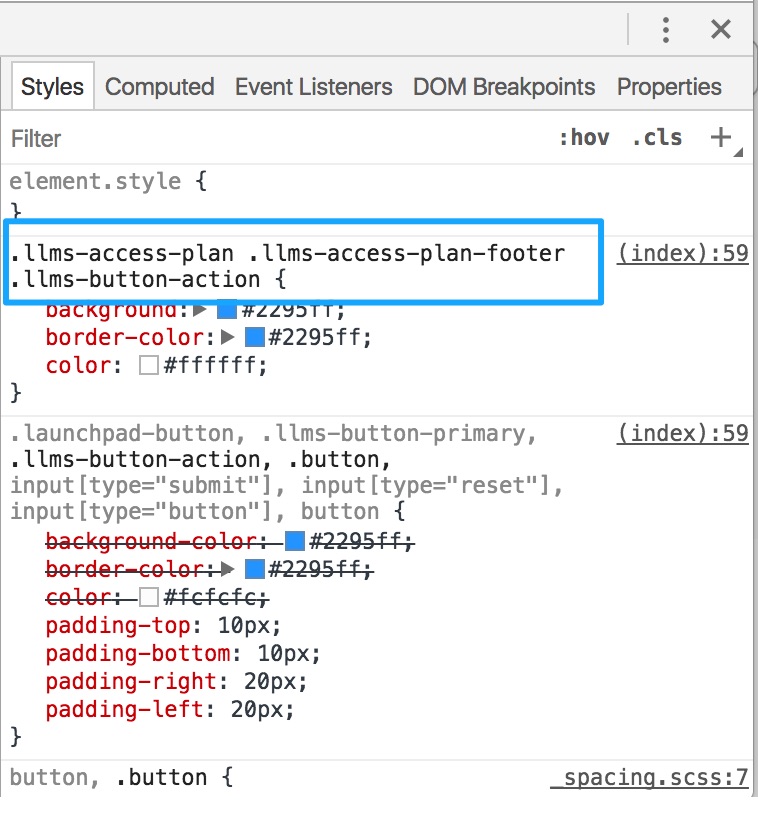
In this example, the selector .llms-access-plan .llms-access-plan-footer .llms-button-action can used to target the button we’re looking at.
If we wanted to change the background color of this button you could add the following CSS via the Customizer:
.llms-access-plan .llms-access-plan-footer .llms-button-action {

background-color: red;

background: red;

}
If you are using a modern block-based theme like Sky Pilot, you may notice that the standard WordPress “Customizer” is not available in the Appearance menu. In these themes, Custom CSS is added via the Site Editor.
Writing CSS can be extremely rewarding, once you get to know the general pattern of selecting an element and then styling that element.
Here’s a few commonly used CSS properties that you can use to style elements in your WordPress site.
- To change the font color of a selected item, use color. For example, color: white;, or
color: #fff;, orcolor: #ffffff;will all produce the same white color. - To change the background color of a selected item, use
background-color. For example,background-color: #000000;, orbackground-color: black;, etc. - To change the capitalization of text in a selected item, use
text-transform. For example,text-transform: capitalize;,text-transform: uppercase;, ortext-transform: lowercase;will change the capitalization. - To change the font size of a selected item, use
font-size. For example,font-size: 28px;will change the font size of the selected item. - To change the font family of text in a selected item, use
font-family. For example,font-family: "Gill Sans", sans-serif;,font-family: Georgia, serif;. - To add a border or modify an existing border of a selected item, use
border. For example,border: 1px solid #CCC;will add a thin light grey border to the selected item.
Custom CSS can be added to LifterLMS and WordPress using the options in this companion documentation.
If you are interested in learning more about writing your own CSS, we recommend this free 6-hour course from Code Academy.


