
Course Bundles with LifterLMS
LifterLMS provides powerful ways to sell your courses, but it’s important to know what kind of bundle you intend to sell.
Our native LifterLMS checkout system allows a student to purchase one item at a time because we do not use a traditional “cart” system. This distinction determines your approach to selling course bundles:
- Fixed Bundles (LifterLMS Memberships): If you want to sell a specific, pre-packaged group of courses together for one price, you can use our native LifterLMS Memberships feature.
- Custom/A la Carte Bundles (WooCommerce): If you want students to be able to pick any combination of courses and check out in a single transaction, you must use WooCommerce to provide a traditional “cart” experience.
If you want to sell a specific package of courses together for one price, you can create a course bundle using the LifterLMS Membership feature. This is the simplest option if you don’t need the flexibility of a cart system.
When a student buys the LifterLMS membership, they gain access to all the courses included in that bundle. You can set up this bundle in two different ways: Auto-Enrollment or Members-Only Pricing.
Method 1: The Auto-Enrollment Bundle
This method automatically enrolls the student into every course in the bundle as soon as they purchase the membership.
- Navigate to Memberships in your WordPress dashboard, then click the Add New button.
- Type a title for your bundle into the title box.
- Scroll down to the “Membership Settings” section and click on the “Auto Enrollment” tab.
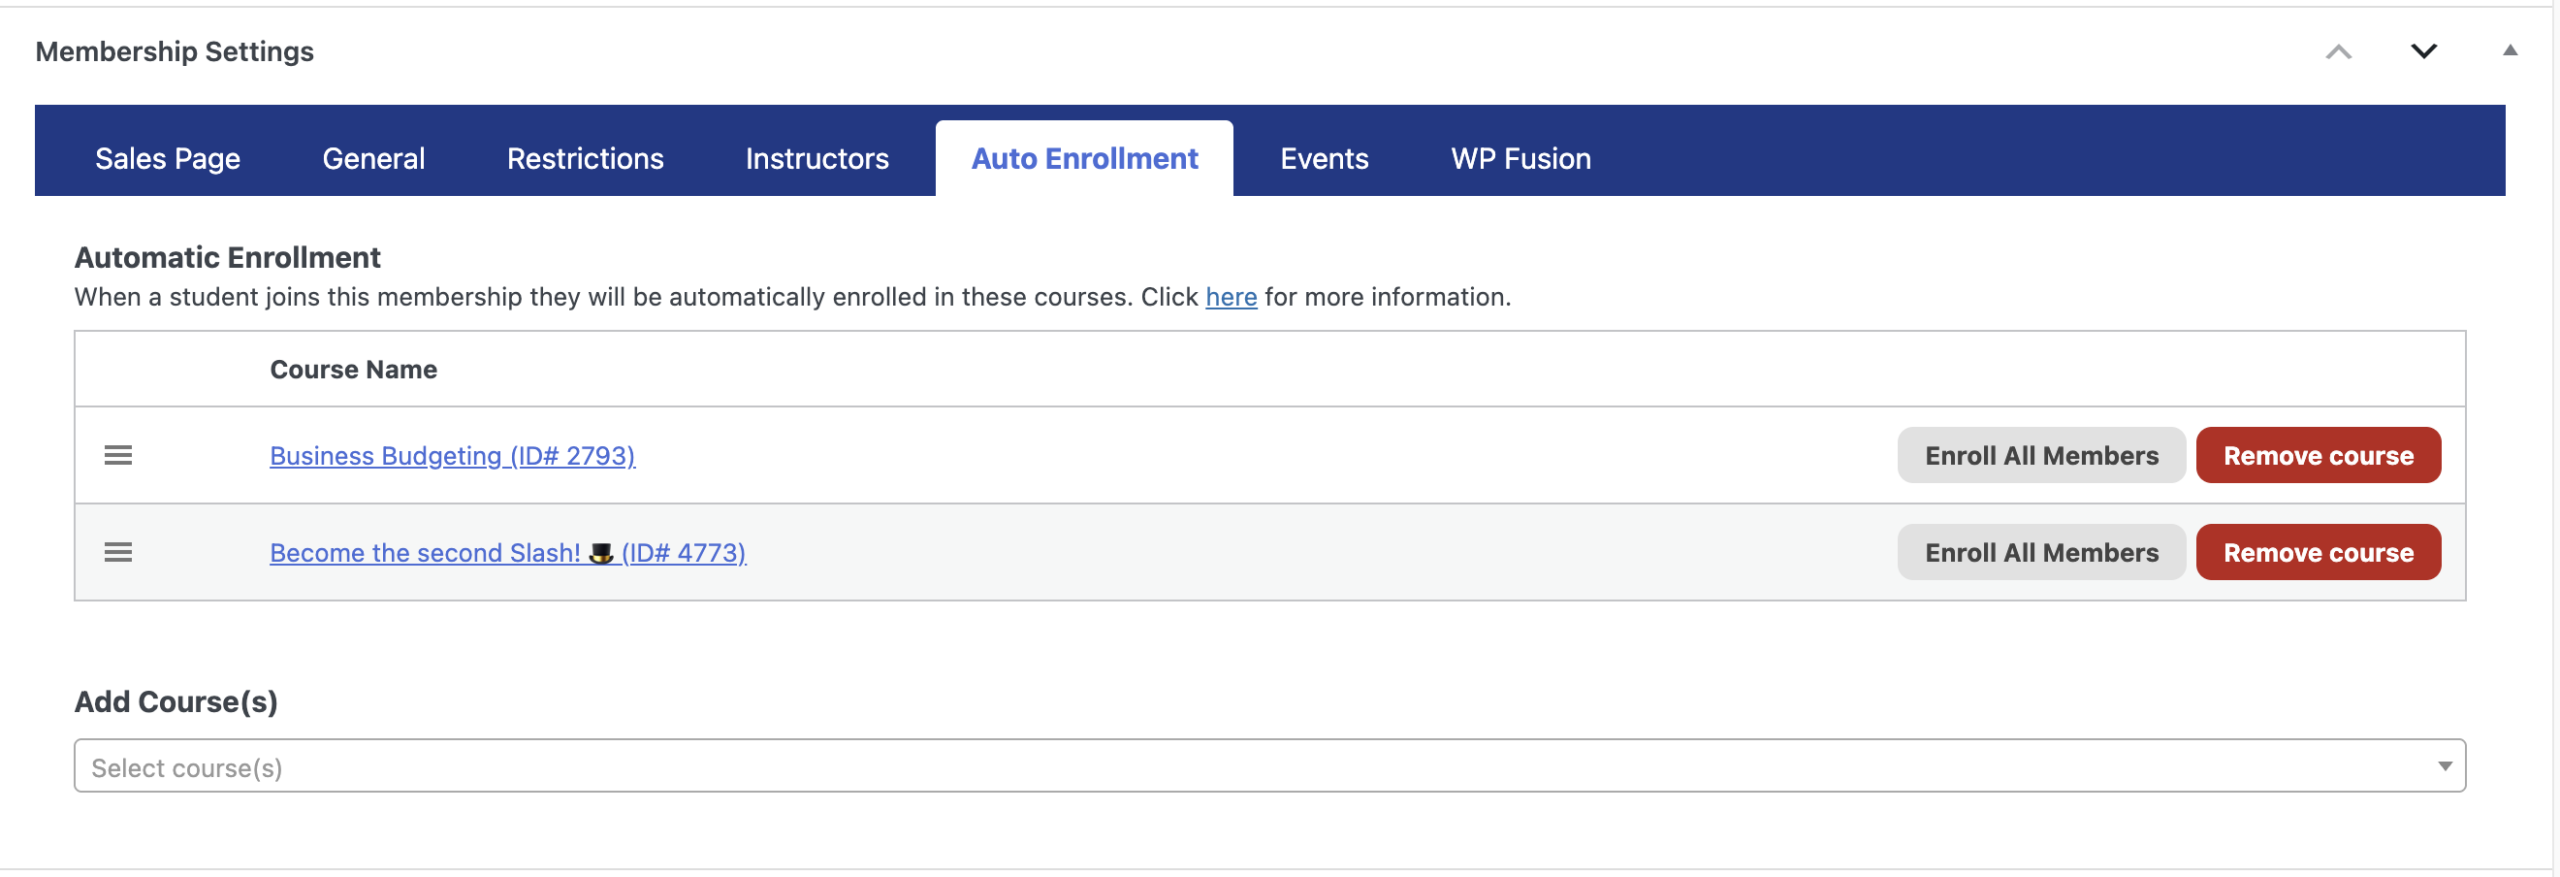
- Select the courses from the drop-down list to add them to the membership.
- Scroll down to the “Access Plans” section and click the Add New button to create a pricing plan for your bundle.
- Fill out your price and billing terms.
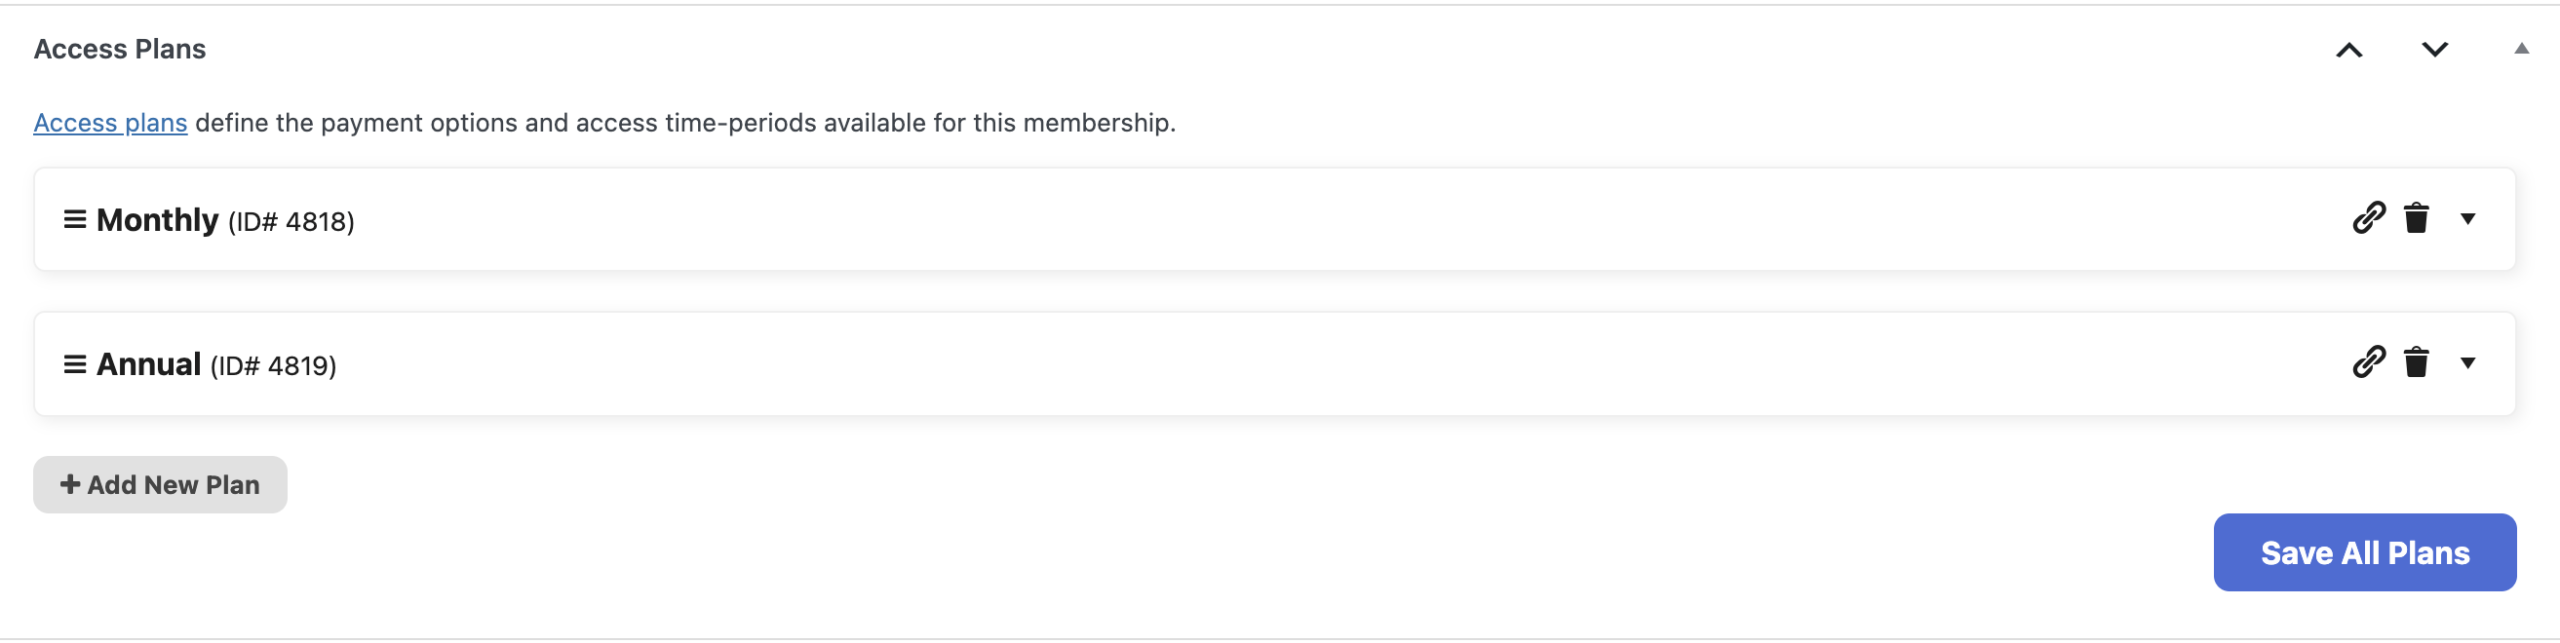
- Click the Save All Plans button to save your access plan.
- Click the Publish button at the top of the page to launch this membership.
Method 2: The Opt-In Bundle
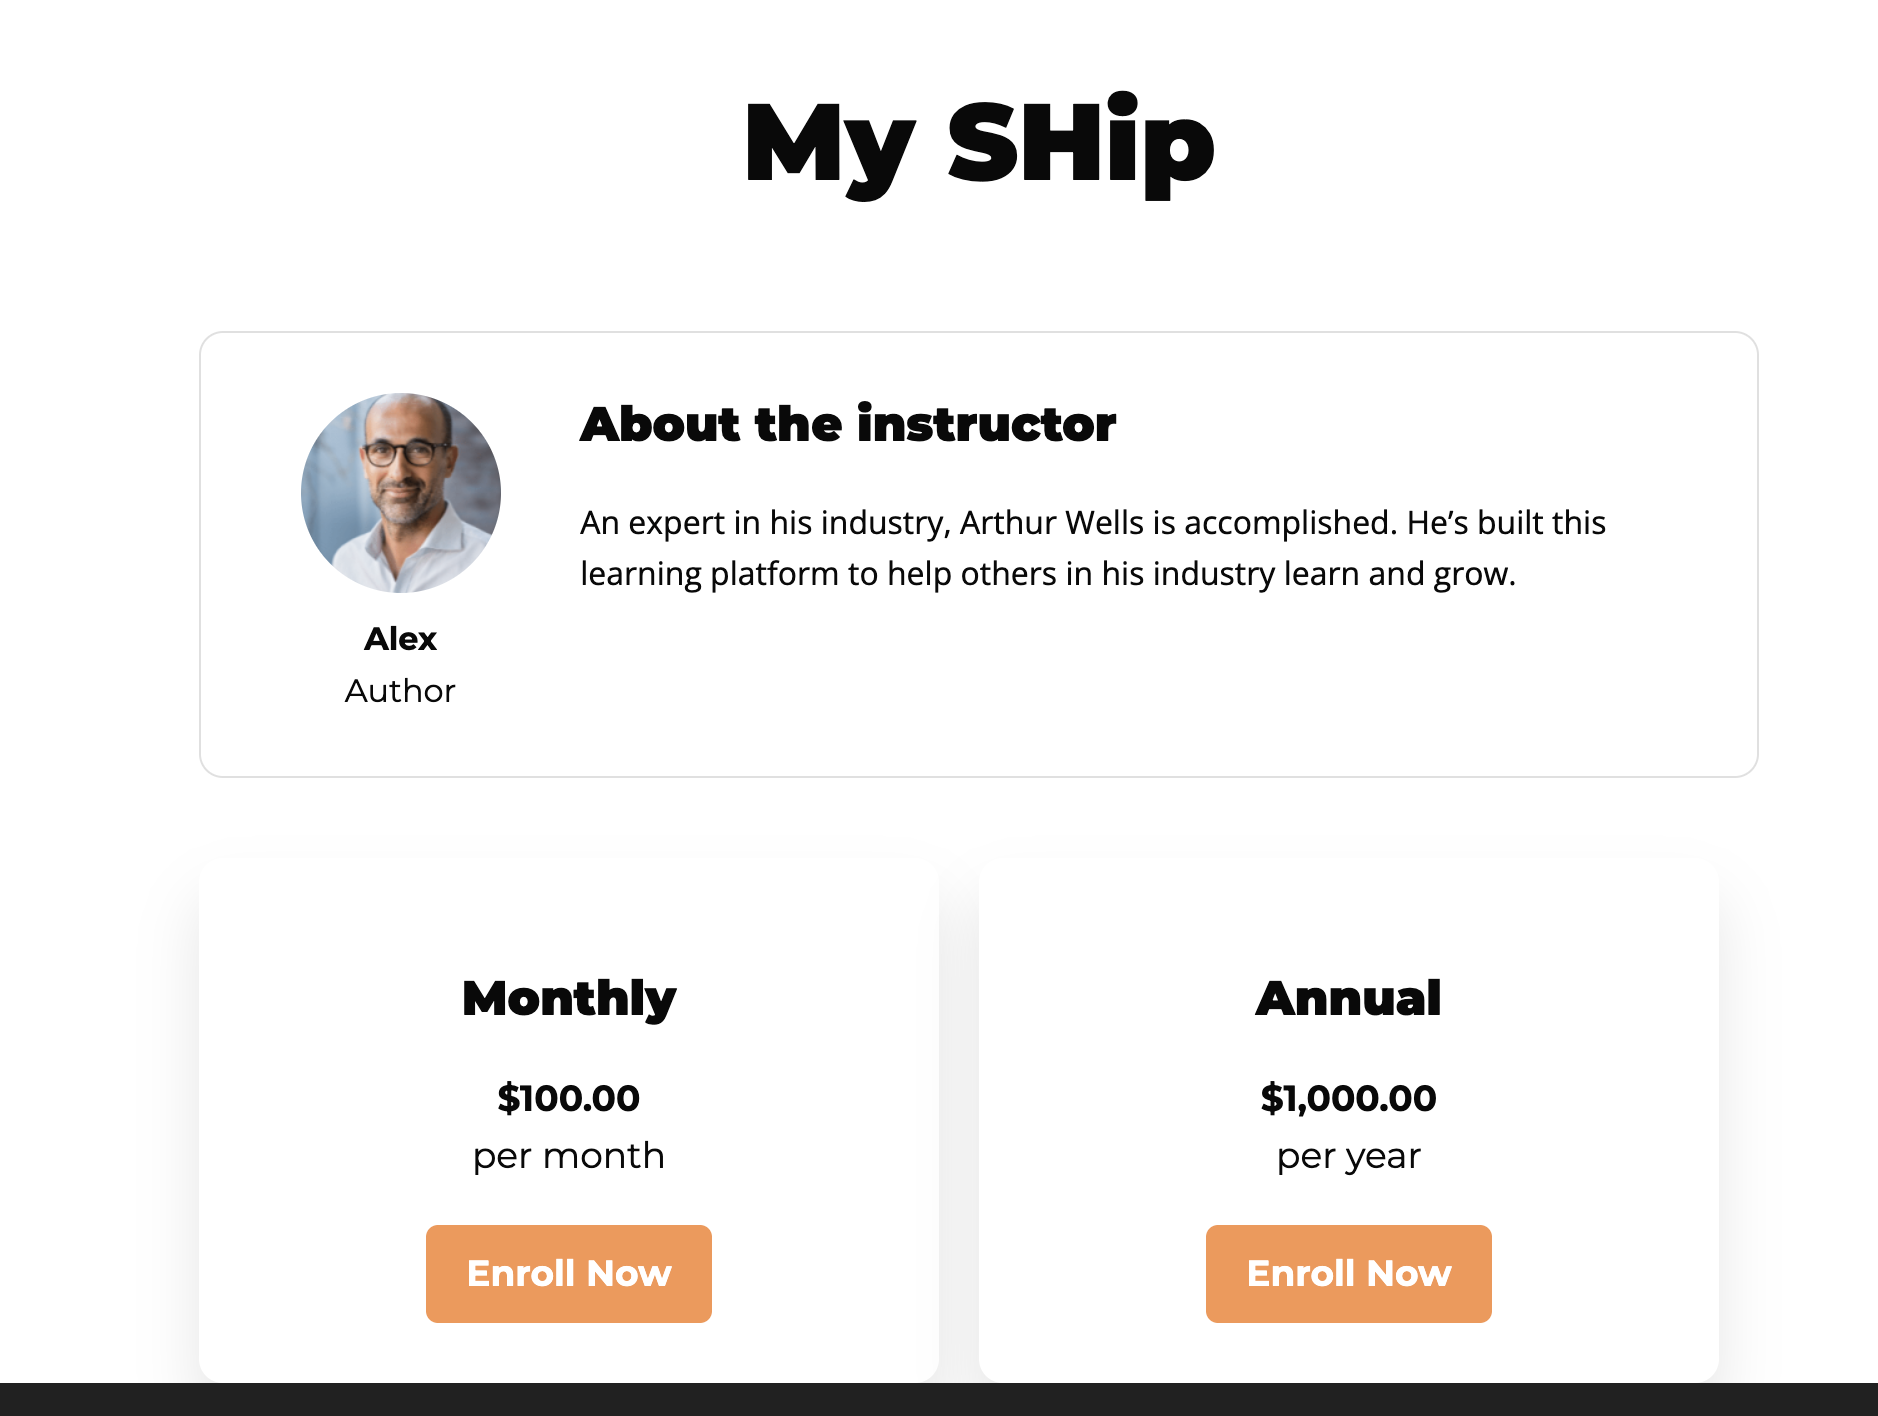
This method acts like a video streaming service. The student purchases the membership, but their dashboard doesn’t display all courses immediately. Instead, the student can enroll in the included courses for free when they are ready.
- Navigate to the Memberships menu and click the Add New button.
- Type a title for your bundle and scroll down to the “Access Plans” section and click the Add New button.
- Enter your pricing details for the membership bundle, then click Save.
- Click the Publish button at the top of the page to launch this membership.
- After launching your membership, you can add individual courses to this membership. Navigate to Courses > Courses on your WordPress dashboard.
- Click on a course that you want to include in your bundle.
- Scroll down to the “Access Plans” section.
- Click the Add New button to create a new access plan just for this course.
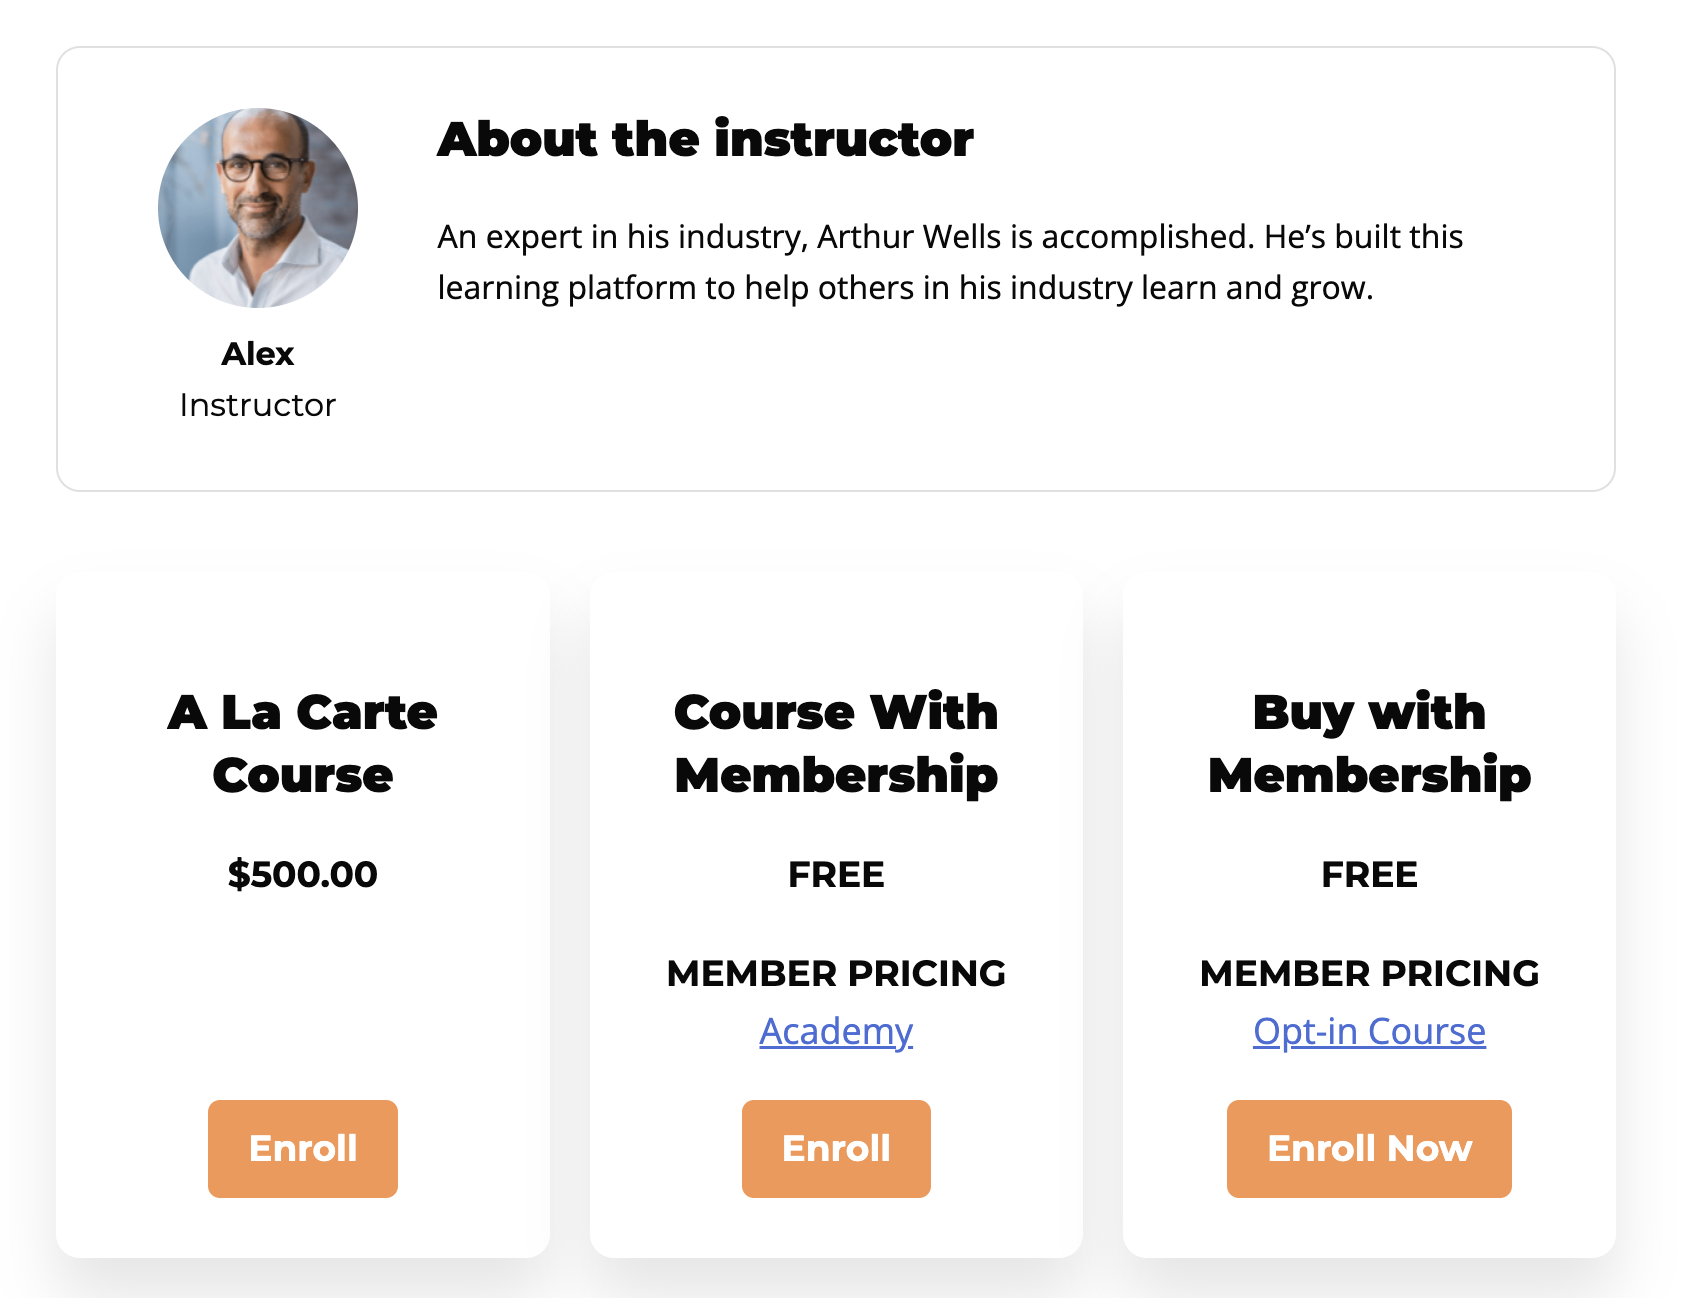
- Select the FREE plan and change the title to something more descriptive, such as “Buy with membership”.
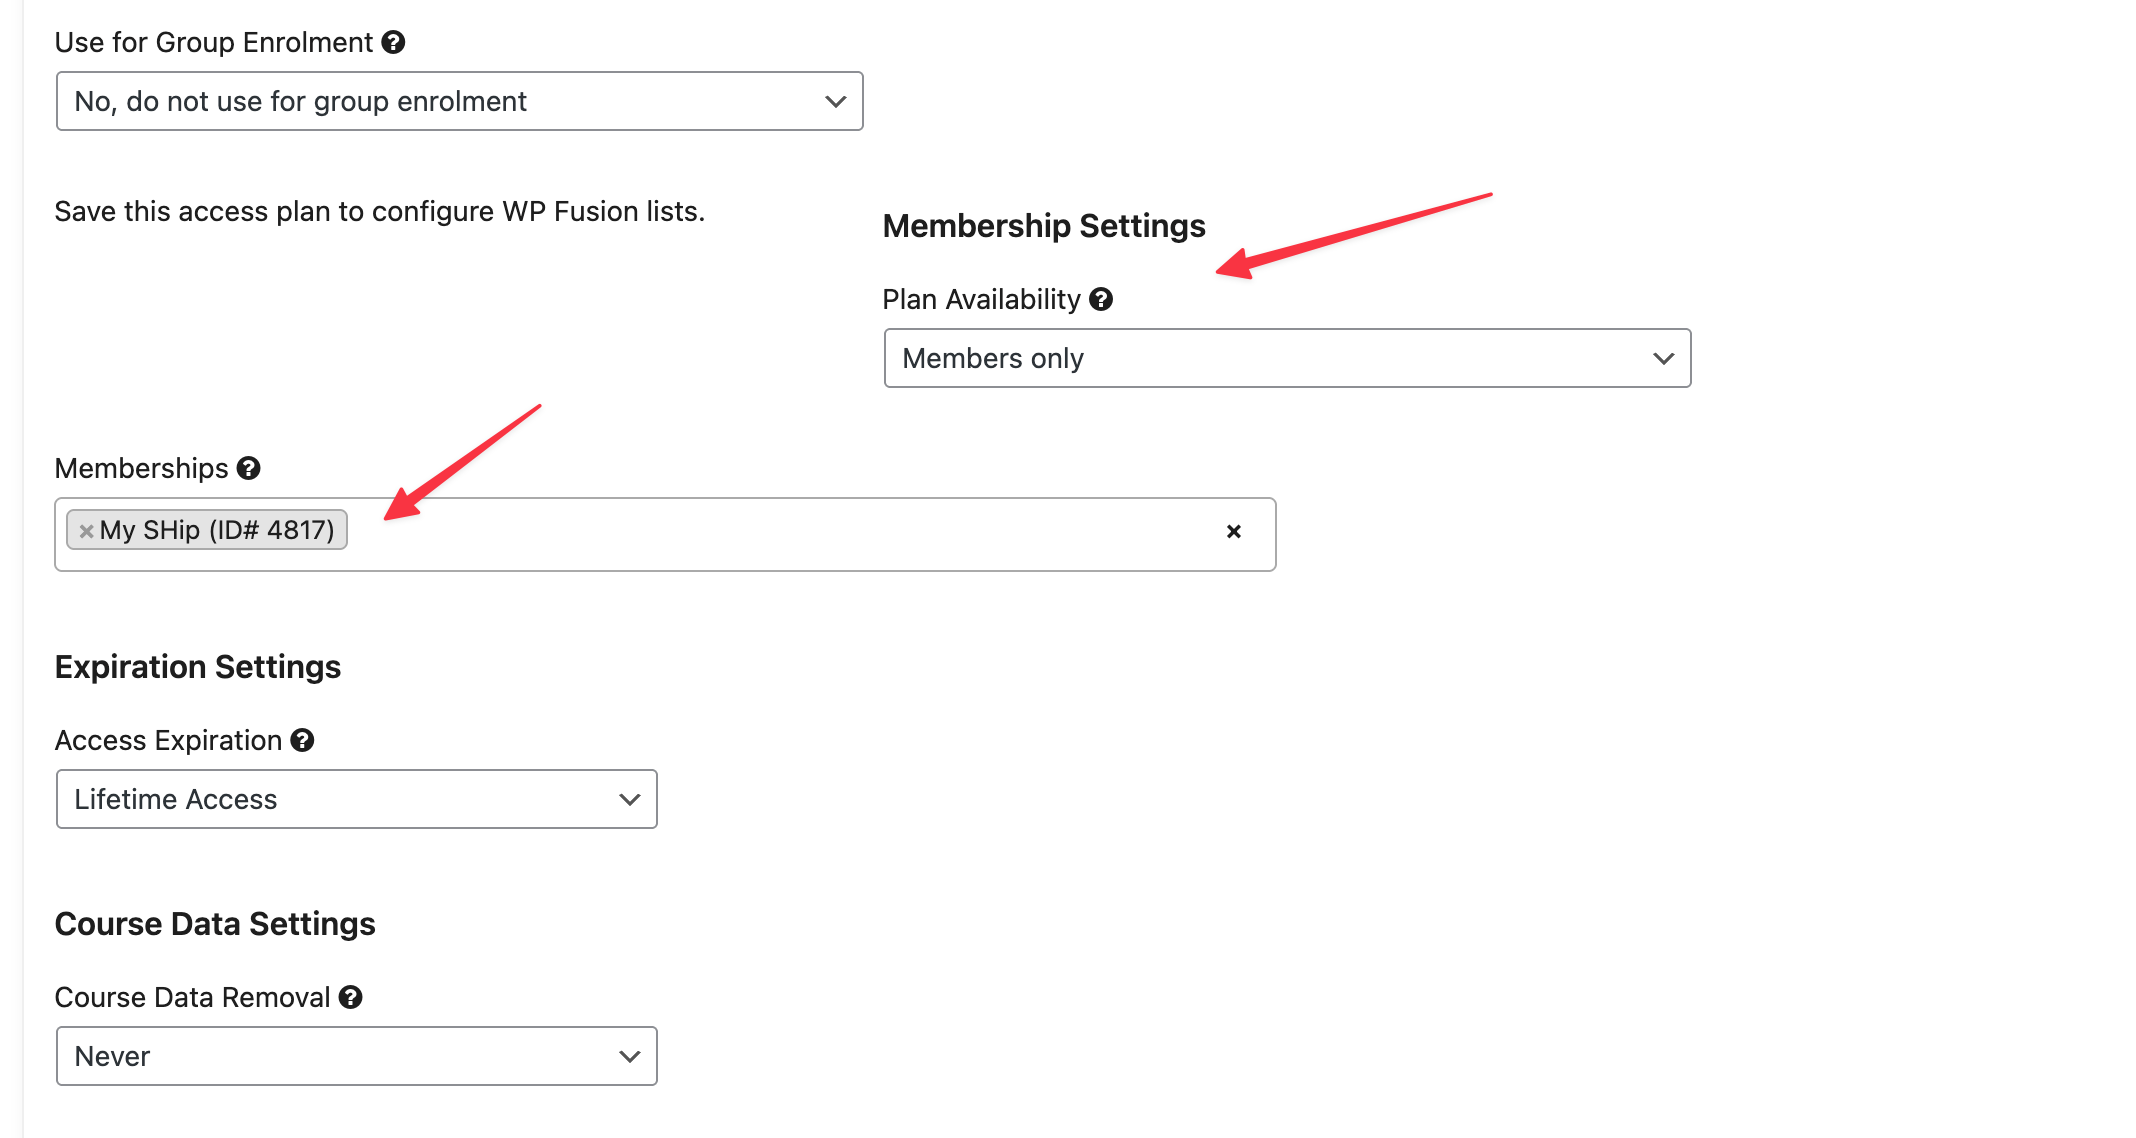
- Locate the “Plan Availability” drop-down menu and select “Members only”.
- Select one or more applicable memberships from the list.
- Click the Save button.
- Once you save the access plan, anyone who is currently a member of the specified membership(s) can enroll in this course without paying any additional fee.
- Click the Update button at the top of the course page.
- Repeat steps 5 through 13 for every course you want to include in the bundle.
If you want to provide a traditional e-commerce “cart” experience, i.e., allowing students to pick and choose any combination of courses for a single transaction, then WooCommerce is the perfect solution.
WooCommerce is an e-commerce platform that integrates seamlessly with LifterLMS, allowing customers to add multiple products to a “cart” and check out all at once.
WooCommerce provides robust tools for handling complex sales scenarios. If your business model includes selling multiple seats to a single buyer (e.g., corporate training) or if you want to offer automatic quantity discounts (like a $20 discount for buying 2 or more seats), WooCommerce is necessary. It handles complex transaction rules, cart discounts, and features like calendar-style booking options through its extensive array of add-on plugins.
If you don’t need automatic quantity discounts and just want to sell multiple seats in a single checkout, you can simply use the LifterLMS Groups add-on.